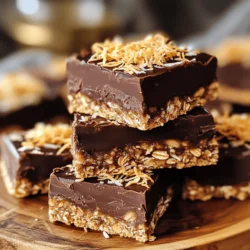
No-Bake Chocolate Coconut Bars
Indulge in a sweet treat with these No-Bake Chocolate Coconut Delight Bars! Made with wholesome ingredients like shredded coconut, rolled oats, and almond flour, these bars are deliciously creamy and easy to prepare. Just mix, chill, and enjoy! Perfect for a nutritious snack or a charming dessert, they are sure to please everyone.