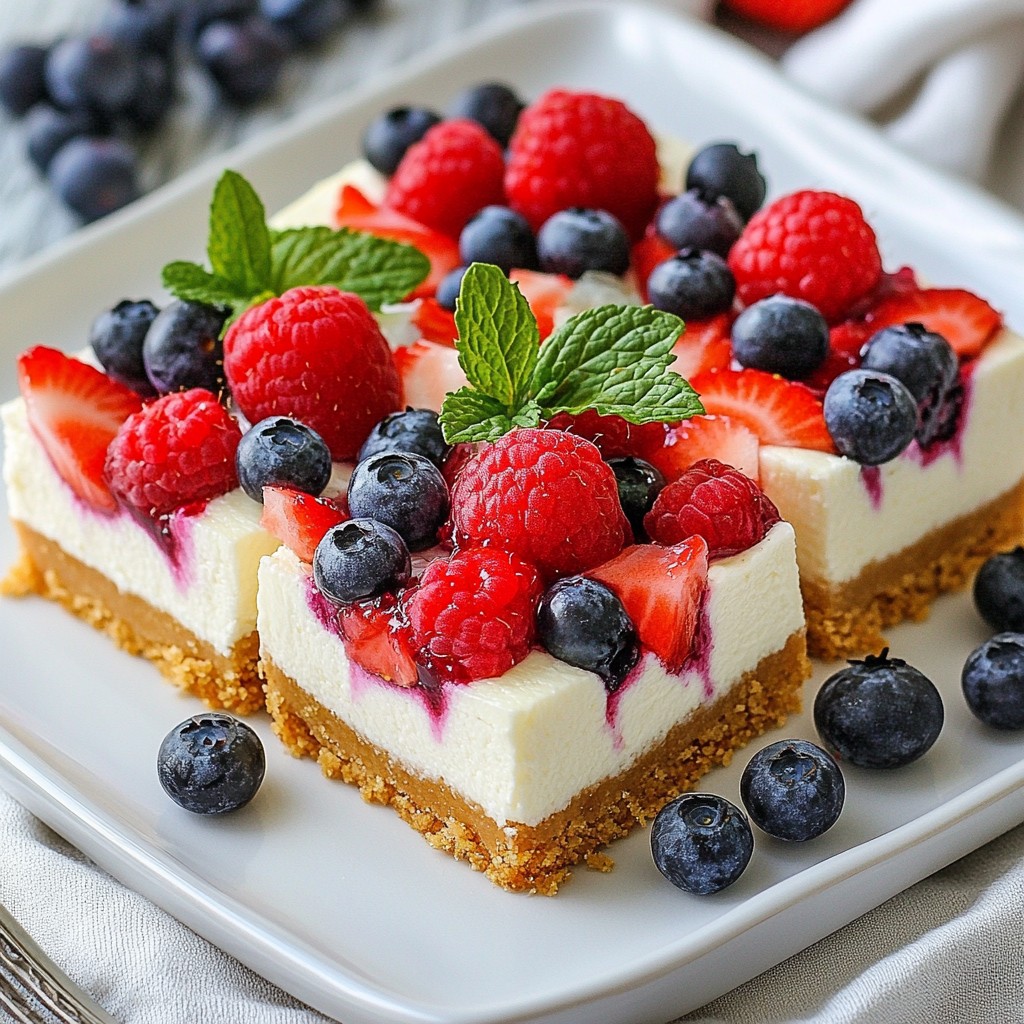
Get ready to impress your friends with my Triple Berry Cheesecake Bars! These bars are not only easy to make, but they’re also packed with flavor. The vibrant mix of berries creates a luscious treat that everyone will love. I’ll guide you through simple steps, tips, and tricks to ensure your dessert turns out perfect every time. Dive in to create a sweet masterpiece that will have your guests asking for seconds!
Why I Love This Recipe
- Decadent Flavor Combination: The blend of cream cheese and mixed berries creates a rich and tangy flavor that is irresistible.
- Easy to Prepare: With straightforward steps and minimal ingredients, these bars can be made quickly, perfect for any occasion.
- Perfect for Sharing: Cut them into bars for easy serving, making them great for gatherings or potlucks.
- Beautiful Presentation: The vibrant colors of the berries make these cheesecake bars visually stunning on any dessert table.
Ingredients
List of Essential Ingredients
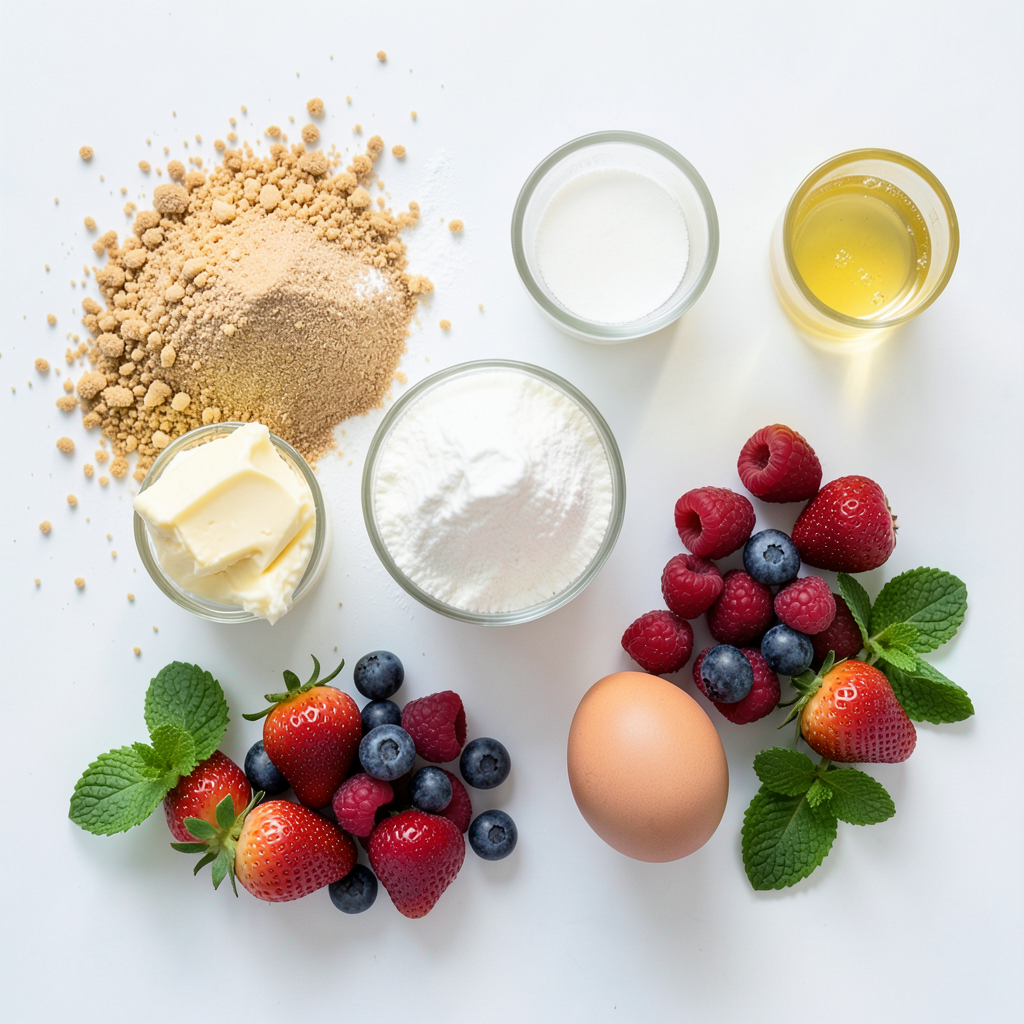
To make these tasty Triple Berry Cheesecake Bars, gather these must-have items:
- 1 ½ cups graham cracker crumbs
- ½ cup unsalted butter, melted
- 2 tablespoons granulated sugar
- 16 oz cream cheese, softened to room temperature
- 1 cup powdered sugar, sifted
- 1 teaspoon vanilla extract
- 2 large eggs, at room temperature
- 1 cup mixed berries (strawberries, blueberries, raspberries), fresh or thawed if frozen
- 2 tablespoons fresh lemon juice
These ingredients form the base of your creamy, fruity dessert. The graham cracker crumbs give a crunchy crust, while the cream cheese and berries create a rich filling.
Optional Garnishes
While the bars taste great on their own, some garnishes add a nice touch:
- Fresh mint leaves
- Honey drizzle
- Homemade berry sauce
These options can enhance the look and taste of your dessert. Mint adds freshness, while honey and berry sauce bring sweetness.
Best Types of Berries to Use
For the best flavor and color, I suggest using a mix of:
- Strawberries
- Blueberries
- Raspberries
These berries work well together and each brings its unique taste. You can also use frozen berries if fresh ones aren't available. Just thaw them and drain excess liquid before mixing into the batter.
Step-by-Step Instructions
Preparation Steps
First, you need to preheat the oven. Set it to 325°F (160°C). Next, prepare a 9x9 inch baking dish. You can grease it lightly or line it with parchment paper. This helps in removing the bars easily later.
Now, let’s make the crust. In a medium bowl, mix together the graham cracker crumbs, melted butter, and granulated sugar. Stir until all crumbs feel moist and look like wet sand. Press this mix firmly into the bottom of the baking dish. This creates a solid crust.
Baking Process
Now, we create the cheesecake filling. In a large bowl, beat the softened cream cheese with an electric mixer. Mix it for about 2-3 minutes until it is smooth and creamy. Slowly add in the sifted powdered sugar and vanilla extract. Beat until everything is fluffy and combined.
Next, add the eggs. Do this one at a time, mixing on low speed. Make sure not to overmix; this helps avoid cracks later. Now, gently fold in the mixed berries and lemon juice. Use a spatula and aim to keep the berries whole.
Carefully pour the cheesecake batter over the crust. Spread it evenly with a spatula, reaching all corners. Place the baking dish in the preheated oven. Bake for 30-35 minutes. The edges should be set, and the center will still jiggle slightly.
Cooling and Serving
Once baked, take the dish out of the oven. Let the cheesecake bars cool at room temperature for about 30 minutes. After that, cover and place them in the fridge. Chill for at least 2 hours. This helps them set nicely.
When ready to serve, lift the cheesecake out using the parchment paper. Slice it into bars for a clean look. You can arrange them on a platter. For a fun touch, add fresh mint leaves as a garnish. Enjoy your delicious triple berry cheesecake bars!
Tips & Tricks
Achieving the Perfect Texture
To get the best texture for your cheesecake bars, focus on your cream cheese. Make sure it is really soft. Leave it out of the fridge for about an hour before mixing. This helps it blend well. Mix it on low speed to keep air bubbles out. Air bubbles can cause cracks when it bakes. Aim for a smooth and creamy batter.
Common Mistakes to Avoid
One common mistake is overmixing the eggs. Add them one at a time, mixing just until blended. If you mix too much, your bars may crack. Another mistake is skipping the cooling step. Let them cool at room temp before refrigerating. This helps them set properly and makes cutting easier.
How to Store Leftovers
Store your cheesecake bars in an airtight container. Keep them in the fridge for up to five days. If you want to keep them longer, freeze them. Wrap each bar in plastic wrap and then foil. This keeps them fresh for up to three months. When ready to eat, thaw them in the fridge overnight.
Pro Tips
- Cool Completely: Allow the cheesecake bars to cool completely before refrigerating to prevent condensation, which can make the bars soggy.
- Use Room Temperature Ingredients: Ensure that cream cheese and eggs are at room temperature for a smoother batter and better incorporation.
- Don’t Overmix: Mix the batter just until combined after adding eggs to avoid incorporating too much air, which can lead to cracks during baking.
- Experiment with Berries: Feel free to use any combination of berries or even add a swirl of berry puree for added flavor and visual appeal.
Variations
Alternate Fruit Options
You can switch up the berries in this recipe. Try using peaches, mangoes, or cherries. Each fruit changes the flavor. You can mix and match for fun. Make a berry medley with two or three kinds. I love adding a splash of orange zest for a bright twist.
Gluten-Free Crust Suggestions
If you need a gluten-free option, use gluten-free graham crackers. You can crush them just like regular ones. Almond flour also works well. Just mix it with melted butter and sugar. This way, you keep the tasty crust without gluten.
Dairy-Free Version
For a dairy-free cheesecake, swap cream cheese with a nut-based option. Cashew cream is a great choice. Blend soaked cashews with a little lemon juice and maple syrup. You can also use coconut cream for a rich taste. Just remember to adjust the sugar to your liking!
Storage Info
How to Store Cheesecake Bars
To store your cheesecake bars, place them in an airtight container. This keeps them fresh and tasty. You can layer parchment paper between the bars to avoid sticking. Store them in the fridge for up to five days.
Freezing Instructions
To freeze your cheesecake bars, first let them cool completely. Then, slice them into bars. Wrap each bar tightly in plastic wrap. Place the wrapped bars in a freezer-safe container or bag. They can stay in the freezer for up to three months.
Shelf Life and Thawing
When you are ready to enjoy your frozen cheesecake bars, take them out of the freezer. Remove the plastic wrap and place them in the fridge to thaw overnight. You can also thaw them on the counter for about 30 minutes. Once thawed, they taste best within two days. Enjoy your delicious treat!
FAQs
Can I use frozen berries?
Yes, you can use frozen berries in these cheesecake bars. Just make sure to thaw them first. Drain any excess liquid to avoid a soggy filling. Frozen berries may also be softer, but they still taste great!
What can I substitute for cream cheese?
If you need a substitute for cream cheese, use Greek yogurt or ricotta cheese. Both options add creaminess. Keep in mind, the flavor may change a bit, but it will still be yummy!
How do I know when cheesecake bars are done?
Check the edges of the cheesecake bars. They should be set while the center has a slight jiggle. If the edges are golden, it’s time to take them out of the oven. Let them cool completely before slicing.
Can I make these cheesecake bars ahead of time?
Absolutely! You can make these bars a day before your event. Just store them in the fridge. They taste best after chilling for a few hours.
How do I store leftover cheesecake bars?
Store leftover cheesecake bars in an airtight container in the fridge. They will stay fresh for about 3 to 4 days.
Can I add more berries?
Yes, you can add more berries if you like. Just keep the total amount at one cup. This way, the bars stay firm and delicious.
Can I use a different type of crust?
Sure! You can use an Oreo crust or a nut crust if you prefer. Just follow the same steps to prepare it.
Is this recipe suitable for kids?
Yes! This recipe is easy and fun for kids to help with. They can mix the batter and add the berries. Just supervise during baking.
Can I change the flavor of the cheesecake?
You can change the flavor by adding lemon zest or a splash of almond extract. This gives a fun twist to the classic taste.
How can I make these bars gluten-free?
To make these bars gluten-free, use gluten-free graham crackers. Check the labels to be sure they meet your needs.
This article covered the key ingredients and steps for delicious cheesecake bars. You learned about essential ingredients, the baking process, and garnishes to enhance flavor. We discussed tips for a perfect texture and ways to avoid common mistakes. You now know how to store leftovers and experiment with variations, like gluten-free or dairy-free options. Remember to use fresh or frozen berries, and try substitutions if needed. Enjoy making your cheesecake bars and impressing your friends with your skills!