
Savory Summer Berry Peach Cheesecake Delight
Ready to impress your friends with a sweet treat? This Savory Summer Berry Peach Cheesecake Delight is the perfect dessert
Ready to impress your friends with a sweet treat? This Savory Summer Berry Peach Cheesecake Delight is the perfect dessert
![For this chocolate lasagna, you need the following ingredients: - 12 whole chocolate cookies (such as Oreos) - 2 tablespoons unsalted butter, melted - 1 cup cream cheese, softened to room temperature - 1 cup powdered sugar, sifted - 2 cups whipped cream (store-bought or homemade) - 1 cup chocolate pudding mix - 2 ¾ cups whole milk - 1 cup mini chocolate chips - 1 teaspoon pure vanilla extract - Cocoa powder or grated chocolate for garnish If you want to switch things up, you can use any chocolate cookies you like. For a lighter version, try using low-fat cream cheese or whipped topping. You can also swap whole milk for almond or oat milk if you need a dairy-free option. This recipe is all about making it your own while enjoying the rich flavors of chocolate. Remember, the Full Recipe can guide you through the steps to create this delicious dessert! To make a Chocolate Lasagna, follow these simple steps. Each step builds layers of flavor and texture. - Instructions for making the cookie crust: Start by crushing 12 chocolate cookies into fine crumbs. You can use a food processor for this. Mix the crumbs with 2 tablespoons of melted butter in a bowl. Press this mixture firmly into a 9x13 inch dish. This forms your crust. - Creating the cream cheese layer: In another bowl, combine 1 cup of softened cream cheese with 1 cup of sifted powdered sugar. Beat this mix with an electric mixer until smooth. Fold in 1 cup of whipped cream. Then, spread this creamy layer evenly over the cookie crust. - Whipping up the chocolate pudding layer: Take a separate mixing bowl and whisk together 1 cup of chocolate pudding mix with 2 ¾ cups of whole milk. Keep whisking for about 2-3 minutes. This will thicken the mixture. Let it sit for a couple of minutes to set. - Assembling the lasagna layers: Pour the thickened chocolate pudding over the cream cheese layer. Use a spatula to spread it evenly. Sprinkle 1 cup of mini chocolate chips on top for extra flavor. - Chilling and preparing for serving: Add the final dollop of whipped cream over the pudding layer. Spread it out evenly to cover everything. Cover the dish with plastic wrap and chill it in the refrigerator for at least 4 hours. For best results, let it chill overnight. When ready, dust the top with cocoa powder or chocolate shavings before serving. Enjoy each layer of this delicious Chocolate Lasagna! You can find the Full Recipe for more detailed steps and tips. - Avoiding Common Pitfalls: To prevent a soggy crust, ensure you press the cookie mixture firmly. If the cream cheese layer is lumpy, make sure your cream cheese is at room temperature. This helps it mix smoothly. - Achieving the Best Flavor: Use high-quality chocolate cookies for a richer taste. For extra flavor in the cream cheese layer, try adding a splash of your favorite liqueur or a bit of lemon zest. This adds a nice twist. - Recommended Kitchen Tools: An electric mixer is key for making the cream cheese layer smooth. A food processor makes crushing cookies easy. A 9x13 inch dish is perfect for layering. Have a spatula handy to spread layers evenly. These tips will help you create a beautiful and delicious chocolate lasagna. For the full recipe, check out the complete instructions above. Enjoy your dessert! {{image_4}} You can easily customize your chocolate lasagna to fit your taste. Here are some fun ideas: - Using different chocolate cookie brands: While Oreos work great, try other chocolate cookies. Brands like Famous Amos or even homemade chocolate cookies can add a unique twist. Each cookie brings its flavor and texture, making the crust special. - Adding flavors or ingredients to the cream cheese layer: To make the cream cheese layer pop, add flavors like almond extract or a bit of orange zest. You can also mix in some crushed cookies or a spoonful of peanut butter for a tasty surprise. - Suggested toppings or garnishes: Get creative with your toppings! You can add fresh fruit like strawberries or raspberries. Chopped nuts or a drizzle of caramel sauce also work well. For a fun look, sprinkle mini chocolate chips or shaved chocolate on top. These variations make your chocolate lasagna truly yours! If you're looking for a full recipe, check out the link above. To keep your chocolate lasagna fresh, follow these simple steps: - Refrigerating Leftovers: Always cover the dish with plastic wrap or a lid. This helps prevent the layers from drying out. Place the lasagna in the fridge. It stays fresh for about 3 to 5 days. - Freezing Options: If you want to keep it longer, you can freeze the lasagna. Cut it into squares and wrap each piece in plastic wrap. Then, place them in a freezer-safe bag. It can last for up to 2 months in the freezer. - Shelf Life Tips: For the best taste, enjoy your lasagna within a few days. If it's frozen, thaw it overnight in the fridge before serving. This keeps the texture nice and creamy. By following these tips, you can savor every bite of your delicious chocolate lasagna later. For the full recipe, check out the detailed instructions above. Can I make this dessert ahead of time? Yes, you can make this dessert a day in advance. It actually tastes better when the flavors mix overnight. Just keep it covered in the fridge until you are ready to serve. What can I substitute for whipped cream? If you need a substitute for whipped cream, try using Greek yogurt or cool whip. You can also make your own by whipping heavy cream with a bit of sugar. Is it possible to make a healthier version of this recipe? Yes, you can make a healthier chocolate lasagna. Use low-fat cream cheese and sugar-free pudding mix. You can also swap regular cookies for whole-grain ones. How long does the chocolate lasagna need to chill? Chill the chocolate lasagna for at least four hours. For the best taste, let it sit overnight. This allows all the layers to set well. Can I use different types of milk in the pudding? Absolutely! You can use almond milk, soy milk, or oat milk instead of whole milk. Just make sure to choose a flavor that you enjoy, as it will affect the taste. For the complete recipe, check out the [Full Recipe]. You learned how to make a delicious chocolate lasagna. We covered ingredients, steps, and tips to help you succeed. Remember to customize it with your favorite flavors. Proper storage keeps it fresh for later enjoyment. With this recipe, you can impress friends and family. Enjoy your time in the kitchen, and have fun experimenting with different ideas!](https://recipetorch.com/wp-content/uploads/2025/04/35bf601f-0711-483c-9ceb-ad539f0d9d05.webp)
If you’re looking for a dessert that wows without the hassle, you’ve come to the right place! This easy Chocolate
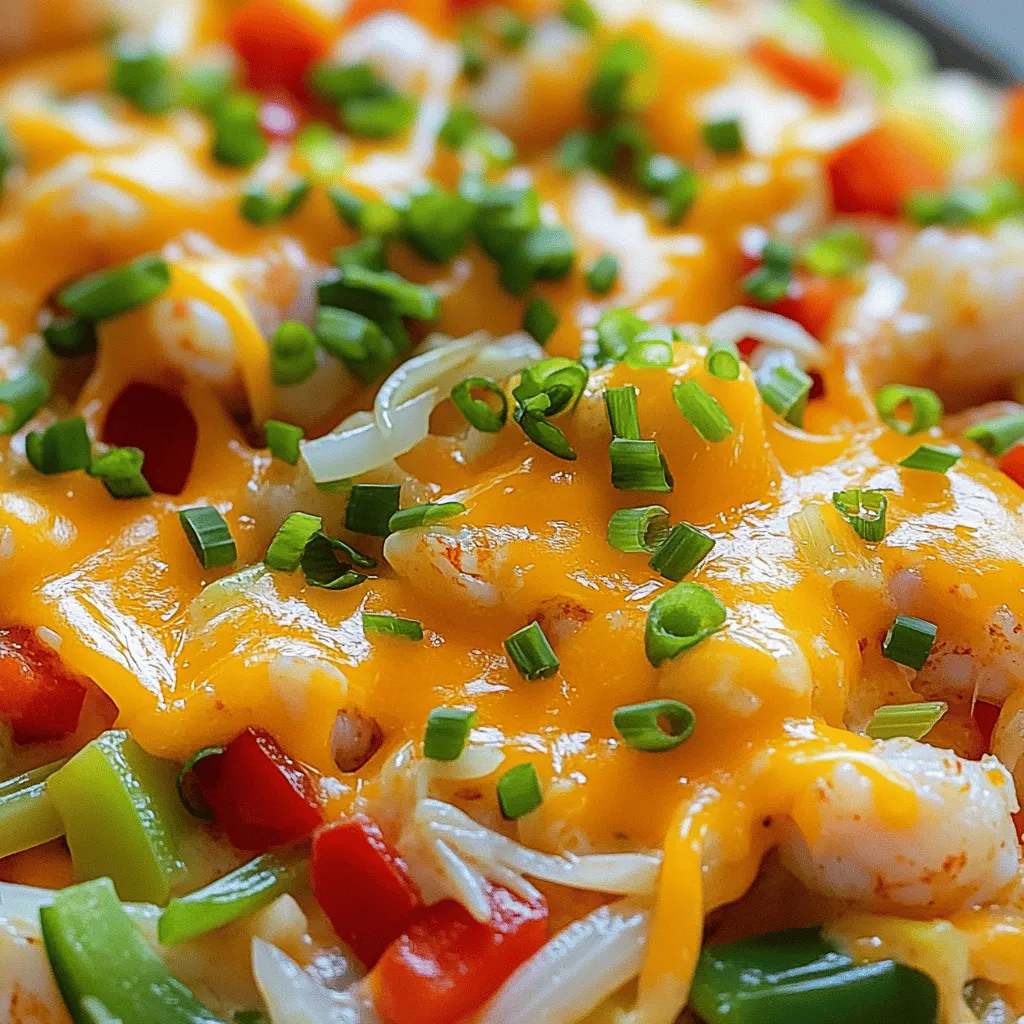
If you crave a dish that bursts with flavor and warmth, look no further than Louisiana Crawfish Casserole. This comfort
![- 4 boneless, skinless chicken thighs - 4 medium-sized potatoes, cut into 1-inch cubes - 1/2 cup freshly grated Parmesan cheese - 4 cloves of garlic, minced - 2 tablespoons extra virgin olive oil - 1 teaspoon dried oregano - 1 teaspoon dried thyme - 1 teaspoon garlic powder - Salt and freshly ground black pepper, to taste - Fresh parsley, chopped, for garnish Gathering these ingredients is simple. Start with boneless chicken thighs, as they cook evenly and stay juicy. Use medium-sized potatoes and cut them into 1-inch cubes. This size ensures they cook at the same rate as the chicken. Freshly grated Parmesan cheese adds a rich, savory flavor that makes every bite delightful. Next, for the seasoning, you need fresh garlic. Minced garlic brings a strong aroma that enhances the dish. Combine this with extra virgin olive oil to help the spices stick. Dried oregano and thyme add warmth and earthiness. Garlic powder gives an extra punch of garlic flavor. Don’t forget to season with salt and pepper to taste! Finally, fresh parsley is a must for garnish. It adds a bright touch and a hint of freshness. These ingredients make your Garlic Parmesan Chicken and Potatoes a true delight. For the full recipe, check the details above. - Preheat the oven to 425°F (220°C). This step warms the oven and helps cook the food evenly. - Marinate the chicken with the seasoning mixture. In a bowl, mix olive oil, minced garlic, oregano, thyme, garlic powder, salt, and pepper. Toss the chicken thighs in this mix. Let them sit for 15 minutes to soak up the flavors. - Season the potatoes and arrange them on a baking sheet. Cut the potatoes into 1-inch cubes. In a bowl, drizzle olive oil over them, then add salt, pepper, and garlic powder. Toss well to coat. - Bake the chicken and potatoes, then add Parmesan cheese. Place the marinated chicken in the center of a lined baking sheet. Spread the seasoned potatoes around the chicken. Bake for 25 minutes until cooked through. Remove the sheet and sprinkle grated Parmesan over both the chicken and potatoes. - To garnish before serving, chop fresh parsley. Sprinkle it over the dish for a fresh look. - For perfect doneness, check the chicken’s internal temperature; it should be 165°F (74°C). The potatoes should be golden and crispy on the edges. For more detailed cooking steps, check out the Full Recipe. How to achieve crispy potatoes To get crispy potatoes, cut them into even pieces. This helps them cook at the same rate. Toss them with olive oil, salt, and pepper. Make sure they are well coated. Spread them out on the baking sheet. Avoid crowding them, as this traps steam. Bake them until golden brown. Ensuring juicy chicken For juicy chicken, use thighs instead of breasts. They have more fat, which keeps them moist. Marinate the chicken for at least 15 minutes. This helps the flavors soak in. Cook it at a high temperature to seal in the juices. Use a meat thermometer to check if it’s done. Aim for 165°F (74°C) for safe eating. Additional herbs and spices to consider You can add more flavor with herbs like rosemary or basil. A sprinkle of paprika gives a nice kick. For a zestier taste, try adding lemon zest or juice. Mix and match to find your favorite blend. Suggestions for homemade marinades For a quick marinade, mix olive oil, lemon juice, and honey. You can add mustard or soy sauce for depth. Let the chicken soak in the marinade for a few hours. This will enhance its flavor and tenderness. For an easy option, use yogurt to marinate. It adds creaminess and helps keep the chicken juicy. Don't forget to check out the Full Recipe for detailed instructions! {{image_4}} If you want to mix things up, try different cuts of chicken. Chicken breasts are a lean choice, while drumsticks add extra flavor. You can also use bone-in pieces for a juicier result. Just adjust your cooking time. For the potatoes, feel free to swap in other veggies. Sweet potatoes bring a nice sweetness. Cauliflower can be a great low-carb option. Just cut them into similar-sized pieces for even cooking. Changing the cheese can add a new taste. Mozzarella gives a gooey, stretchy texture. Feta adds a tangy kick. You can also use cheddar for a sharper flavor. Adding spices is a fun way to get creative. Try smoked paprika for a smoky touch. A dash of cayenne pepper adds heat. For a twist, drizzle your favorite sauce before serving. BBQ sauce or balsamic glaze can make the meal even more exciting. For the full recipe, check out the link! To store leftovers in the fridge, let the chicken and potatoes cool down first. Use an airtight container to keep them fresh. You can store them for up to three days. This helps maintain the taste and texture. If you want to keep them longer, freezing is a great option. Place the chicken and potatoes in freezer bags. Remove as much air as possible before sealing. They can last up to three months in the freezer. When you’re ready to eat, thaw them in the fridge overnight. Reheat in the oven at 350°F (175°C) until warm. This keeps the chicken juicy and the potatoes crispy. Enjoy your meal again just like the first time with these smart storage tips! For the full recipe, check it out [Full Recipe]. How long to cook chicken thighs? Cook boneless chicken thighs for about 25-30 minutes at 425°F (220°C). Use a meat thermometer to ensure they reach 165°F (74°C). This will make them safe to eat and keep them juicy. Can I use bone-in chicken instead of boneless? Yes, you can use bone-in chicken. The cooking time will be longer, about 35-40 minutes. Bone-in chicken adds flavor but check the temperature to keep it safe. What to serve with Garlic Parmesan Chicken and Potatoes? I love to serve this dish with a side salad or some roasted vegetables. They offer a fresh taste and balance the meal well. Garlic bread is also a favorite for dipping in the juices. Suitable side dishes and drinks Pair this meal with a light white wine, like Sauvignon Blanc. It complements the garlic and cheese. For sides, steamed green beans or a mixed greens salad work great. They add color and crunch to your plate. Is this recipe gluten-free? Yes, this recipe is gluten-free. It uses no wheat or gluten-containing products. Always check your seasonings to ensure they are gluten-free. How to make it low-carb or keto-friendly? To make this dish low-carb, swap the potatoes with cauliflower. Cauliflower roasts well and tastes great with garlic and cheese. You can also reduce the amount of Parmesan for fewer carbs. This recipe for Garlic Parmesan Chicken and Potatoes gives you a tasty meal with simple steps. You learned about key ingredients, easy cooking techniques, and how to store leftovers. The tips for crispy potatoes and juicy chicken will help you succeed every time. Remember, you can mix it up with different herbs, spices, and cheeses to keep meals exciting. This dish meets various dietary needs, so everyone can enjoy it. Try out these ideas and make your next dinner something special!](https://recipetorch.com/wp-content/uploads/2025/04/10a8645e-3d51-40f3-88cb-fe9113b340b5.webp)
Are you ready to enjoy a mouthwatering meal that’s simple to make? My Garlic Parmesan Chicken and Potatoes are perfect

Ready to spice up your dinner routine? In this article, I’ll guide you through making Peruvian Grilled Chicken with Green
![To make crispy honey garlic salmon bites, gather these key ingredients: - 1 lb fresh salmon fillet, skin removed and cut into bite-sized cubes - 1/4 cup all-purpose flour - 1/4 cup cornmeal - 1/2 teaspoon garlic powder - 1/2 teaspoon onion powder - 1/2 teaspoon paprika - Salt and freshly ground black pepper, to taste - 2 tablespoons vegetable oil (for frying) - 1/4 cup honey - 3 tablespoons low-sodium soy sauce - 2 cloves garlic, minced - 1 teaspoon fresh ginger, grated - 1 tablespoon sesame seeds (optional for garnish) - 2 green onions, finely chopped (optional for garnish) You will need some basic tools to cook these bites perfectly: - A large mixing bowl for coating the salmon - A spacious skillet for frying - A spatula for flipping the salmon - A small saucepan for the honey garlic sauce - Paper towels for draining excess oil When choosing salmon, look for bright, firm fillets. A few tips can help you select the best: - Check for a fresh ocean smell, not a fishy one. - The flesh should be shiny and moist, not dull. - Avoid any fillets with brown spots or discoloration. - If possible, buy wild-caught salmon for better flavor and quality. By choosing the right ingredients and tools, you set your dish up for success. For the full recipe, check out the details above to start cooking! First, gather your ingredients. You will need fresh salmon, flour, cornmeal, and spices. In a large bowl, mix the flour, cornmeal, garlic powder, onion powder, paprika, salt, and pepper. Stir until well mixed. Next, add the salmon cubes to the bowl. Toss them gently so each piece gets a nice coating. This coating helps the salmon stay crisp when frying. Heat your skillet over medium-high heat and add the vegetable oil. Wait until the oil shimmers. Now, carefully place the salmon bites in a single layer. Make sure they are not crowded. Fry them for about 2-3 minutes on each side. You want them crispy and golden brown. Once they are done, take them out and let them rest on paper towels. This step helps absorb excess oil. In a small saucepan, combine honey, low-sodium soy sauce, minced garlic, and grated ginger. Heat this mixture over medium heat. Stir occasionally for about 3-5 minutes. You want the sauce to thicken a bit and shine. When it’s ready, take it off the heat. Now, add the crispy salmon bites back into the skillet. Drizzle the honey garlic sauce over them. Toss gently until every bite is coated well. For the full recipe, check out the details above. To get the best texture, focus on the coating. Use both flour and cornmeal. This mix gives a nice crunch. Make sure to coat each salmon piece well. Toss them in the flour mix lightly. This helps create that crispy outer layer. Fry in hot oil to seal in moisture. Keep the salmon bites spaced out in the pan. This allows them to fry evenly. Flip them gently to ensure even cooking. Many cooks miss out on using fresh ginger. It adds a bright and zesty taste. Also, consider using low-sodium soy sauce. This option keeps the dish flavorful without too much salt. Don’t forget sesame seeds and green onions for garnish. They add visual appeal and extra flavor. These small touches can elevate your dish. Serve these salmon bites hot for the best taste. Pair them with steamed rice or a fresh salad. A squeeze of lime can add a tangy kick. You can also serve them with a dipping sauce like sweet chili. This adds layers of flavor and excitement. For a party, arrange them on a platter. This makes them easy to grab and enjoy. For the full recipe, check the [Full Recipe] link. {{image_4}} You can switch some ingredients to suit your taste. For the salmon, use trout or even chicken. If you're gluten-free, substitute all-purpose flour with almond flour. Instead of soy sauce, try tamari for a gluten-free option. For a spicy kick, add chili flakes to the honey garlic sauce. You can also use maple syrup instead of honey for a different sweetness. If you prefer baking, preheat your oven to 400°F (200°C). Place your coated salmon on a baking sheet lined with parchment paper. Bake for about 15-20 minutes, flipping halfway through. This method keeps the salmon moist while giving it a nice crisp. For grilling, marinate your salmon bites in the honey garlic sauce before cooking. Grill them over medium heat for about 3-4 minutes on each side. Grilling adds a smoky flavor that pairs well with the sweet glaze. To create a salmon salad, start with the crispy honey garlic salmon bites. Chop them into smaller pieces and toss them with mixed greens. Add sliced cucumbers, cherry tomatoes, and avocado for freshness. Drizzle with a light dressing made from the leftover honey garlic sauce mixed with olive oil. This transforms your dish into a light meal perfect for lunch or dinner. Try this twist to enjoy the flavors in a new way. For detailed steps, check out the Full Recipe. To keep your crispy honey garlic salmon bites fresh, store them in an airtight container. Make sure to let them cool down first. Keep them in the fridge for up to three days. This way, you can enjoy them later without losing flavor. If you plan to eat them within a couple of days, they will taste just as good as when you first made them. When it’s time to eat your leftovers, reheating is key. Use a skillet over medium heat to warm them up. This method keeps them crispy. Avoid using the microwave, as it can make them soggy. Heat for about 3-5 minutes, flipping them gently. You’ll get that delightful crunch back, just like fresh out of the pan. If you have extra salmon bites, freezing is a great option. Place them in a single layer on a baking sheet. Freeze them for about an hour. Once frozen, transfer them to a freezer bag. Remove as much air as possible. They can last in the freezer for up to three months. When you're ready to eat, thaw them in the fridge overnight before reheating. Enjoy your delicious bites even after some time! You can easily make these salmon bites gluten-free. Use gluten-free flour instead of all-purpose flour. Cornmeal is already gluten-free, so you can keep that. Make sure the soy sauce is gluten-free as well. Many brands offer gluten-free soy sauce. This way, you can enjoy the same crispy, tasty bites without any gluten. Many sides go well with crispy honey garlic salmon bites. Here are some of my favorites: - Steamed broccoli - Garlic mashed potatoes - Rice or quinoa salad - Roasted asparagus - Cucumber salad These sides balance the sweet and savory flavors of the salmon bites. They also add color and nutrition to your meal. Leftovers of crispy honey garlic salmon bites can last for about three days in the fridge. Store them in an airtight container to keep them fresh. When you're ready to eat, reheat them in a skillet for the best taste. This will help keep them crispy. Enjoy these bites again without losing any flavor! In this blog post, we explored making crispy honey garlic salmon bites. We covered ingredients, essential tools, and tips for selecting fresh salmon. You learned step-by-step instructions for preparing and frying the salmon and making a tasty sauce. I shared tips for the best texture and overlooked ingredients. We also discussed variations, storage info, and answered common questions. Now, you have the skills to create delicious salmon bites. Enjoy experimenting with flavors and impressing friends and family!](https://recipetorch.com/wp-content/uploads/2025/04/fd86471e-1d9f-4349-af5b-f8235ece68c6.webp)
If you crave a tasty snack that’s easy to make, you’re in for a treat! These Crispy Honey Garlic Salmon
![- 4 boneless, skinless chicken breasts - 1 cup jalapeno chips, finely crushed (can substitute with other spicy chips if desired) - 1/2 cup all-purpose flour - 2 large eggs - 1/4 cup buttermilk (or regular milk for a milder option) The chicken breasts are the star of this dish. They should be fresh and ready for a crunchy coat. I love using jalapeno chips for that spicy kick, but you can swap them out for any chips you like. Just make sure they are crunchy! - 1 teaspoon garlic powder - 1 teaspoon onion powder - 1/2 teaspoon smoked paprika - Salt and pepper to taste Seasoning is key. Garlic and onion powder add depth. Smoked paprika brings a warm flavor. Don’t forget the salt and pepper to enhance the taste! - Olive oil spray - Parchment paper Parchment paper is a game-changer. It keeps the chicken from sticking and makes clean-up easy. I also use olive oil spray on top of the chicken. It helps the crust get crispy and golden. For the full recipe, you can check out the complete instructions. Enjoy making this dish! First, you need to preheat your oven to 400°F (200°C). This step ensures your chicken bakes evenly and gets crispy. While the oven heats, set up your kitchen. You will need a clean workspace and three bowls for the dredging station. In the first bowl, mix the flour, garlic powder, onion powder, smoked paprika, salt, and pepper. Stir it well to combine all the flavors. In the second bowl, crack the eggs and whisk them with buttermilk until smooth. The third bowl will hold your finely crushed jalapeno chips, ready for coating. Now, it’s time to coat the chicken. Take one chicken breast and dip it into the flour mixture. Make sure to shake off any extra flour. This helps the coating stick better. Next, dip the floured chicken into the egg mixture. Let the excess egg drip off before moving to the last step. Finally, roll the chicken in the crushed jalapeno chips. Press the chips down gently. This helps them stick to the chicken. A good coating gives you that tasty crunch we all love. Place the coated chicken breasts on a baking sheet lined with parchment paper. This keeps the chicken from sticking and makes clean-up easy. For extra crispiness, lightly spray the tops with olive oil spray. Now, bake the chicken in your preheated oven for 20-25 minutes. You want the chicken to reach an internal temperature of 165°F. The coating should turn a lovely golden brown. After baking, let the chicken rest for about 5 minutes. This helps keep the juices inside. Once rested, you can slice and serve your delicious jalapeno chip crusted chicken. For the full recipe, check the earlier section. To make your jalapeno chip crust super crispy, use olive oil spray. This spray adds a light coat of oil, which helps the chips brown nicely. Make sure to spray the chicken tops after coating them with the crushed chips. Baking works great for this recipe. It gives you that crunch without frying. If you choose to fry, keep an eye on the heat. Frying can make the chips too dark before the chicken cooks through. Letting the chicken rest is key. After baking, let it sit for about five minutes. This step lets the juices settle back in the meat. It keeps the chicken moist and flavorful. Cook the chicken to an internal temperature of 165°F. Use a meat thermometer to check. This ensures the chicken is safe to eat and not dry. For dips, spicy ranch dressing pairs well with this dish. Guacamole is also a tasty choice. Both add extra flavor and make for a fun meal. When serving, slice the chicken into strips. Present it on a rustic wooden board for a nice touch. Garnish with fresh cilantro for color and a fresh taste. This makes your dish look as good as it tastes. For the full recipe and more details, check out the [Full Recipe]. {{image_4}} You can change the flavor of your jalapeno chip crusted chicken easily. Try using different flavored chips like BBQ or ranch for a fun twist. Each chip adds its own unique taste. You might also add spices or herbs to the flour mix. A pinch of cayenne or a dash of dried oregano can make it special. Experiment and find what you love! If you want a lower-calorie version, use whole wheat flour instead of all-purpose flour. You can also swap buttermilk with low-fat milk or yogurt. This keeps the dish tasty but lighter. For gluten-free options, choose gluten-free flour and chips. This way, everyone can enjoy the crispy flavor burst! Scaling the recipe is simple! If you need more servings, just double or triple the ingredients. Make sure to adjust the cooking time too. Larger batches may need a few extra minutes in the oven. Always check for the chicken’s internal temperature, which should be 165°F. You’ll have delicious chicken that’s perfect for any gathering! To store your leftover jalapeno chip crusted chicken, let it cool first. Place the chicken in an airtight container. This helps keep it fresh. Make sure to eat it within three to four days. If you want to keep it longer, freezing is a better option. To maintain freshness, avoid leaving the chicken out for more than two hours. That can let bacteria grow. Wrap each piece with plastic wrap for extra protection if needed. You can freeze baked chicken strips for later. First, let the chicken cool completely. Then, wrap each piece in plastic wrap or foil. Place the wrapped chicken in a freezer-safe bag. Make sure to remove as much air as possible. This helps keep the chicken fresh. When you are ready to eat, thaw the chicken in the fridge overnight. For best quality, reheat in the oven at 350°F (175°C) until hot. This ensures the breading stays crispy. Jalapeno chip crusted chicken can last in the fridge for three to four days. If you freeze it, it can last for about two to three months. After that, the quality may drop. Look for signs of spoilage. If the chicken has an off smell or unusual color, it is best to throw it away. Always trust your senses when it comes to food safety. For the full recipe, check the main article. You can use other spicy chips like chili cheese or nacho cheese chips. Both add a nice kick. If you want a milder taste, try plain potato chips or tortilla chips. They will still give your chicken a crunchy coating. For a different texture, consider crushed cornflakes or panko breadcrumbs. They provide a great crunch and can be seasoned to your liking. Yes, you can prepare the chicken ahead. Coat the chicken and place it on a baking sheet. Cover it with plastic wrap and keep it in the fridge for up to 24 hours. This saves time on busy days. For best results, do not bake the chicken until you're ready to eat. It helps keep the coating crispy and fresh. The safest way is to check the internal temperature. Use a meat thermometer. The chicken should reach 165°F (75°C) for safe eating. You can also look for visual cues. The chicken should be golden brown and juices should run clear. If you cut into it, there should be no pink inside. Enjoy your crispy jalapeno chip crusted chicken! Check out the Full Recipe for more details. This blog post covers how to make crispy chicken strips using jalapeno chips. We explored the key ingredients like chicken, chips, and seasonings. You learned the steps for preparing, coating, and baking your chicken to perfection. I shared tips for keeping your chicken juicy and crispy, along with flavorful variations and storage advice. Remember, small changes can lead to big flavor shifts. Enjoy experimenting in the kitchen! Your delicious, crispy chicken awaits!](https://recipetorch.com/wp-content/uploads/2025/04/007f0560-a772-4b9e-93d5-efc3ac14949c.webp)
Are you ready to take your chicken game to the next level? Try my Jalapeno Chip Crusted Chicken for a
![- 2 tablespoons olive oil - 1 medium onion, finely chopped - 3 cloves garlic, minced - 1 can (28 oz) crushed tomatoes - 4 cups vegetable broth - 1 teaspoon dried basil - 1 teaspoon dried oregano - 1/2 teaspoon red pepper flakes (optional) - 9 oz cheese tortellini (fresh or frozen) - 1 cup heavy cream - Salt to taste - Freshly ground black pepper to taste - Fresh basil leaves To make this creamy tomato tortellini soup, you need fresh and simple ingredients. The base starts with olive oil, onion, and garlic. These create a great flavor. Next, add crushed tomatoes and vegetable broth. Together, they create a rich, comforting base. For seasonings, dried basil and oregano bring a classic taste. If you like spice, toss in red pepper flakes. They add warmth without overpowering the soup. The key components are cheese tortellini and heavy cream. The tortellini provides a delicious bite, while the cream gives the soup its creamy texture. Don’t forget to season with salt and black pepper to bring everything together. For a bright finish, fresh basil leaves work wonders. They add a pop of color and flavor. You can find the full recipe above for exact measurements and steps. Enjoy creating this cozy dish! First, I heat 2 tablespoons of olive oil in a large pot over medium heat. I add 1 medium onion, finely chopped, and cook it for about 4-5 minutes. The onion should look soft and clear. Next, I stir in 3 cloves of minced garlic. I let it cook for 1 minute, just until it releases its lovely smell. Now, I pour in 1 can of crushed tomatoes and 4 cups of vegetable broth. I stir well to mix everything. This step helps create a nice, smooth base for the soup. Next, I sprinkle in 1 teaspoon of dried basil and 1 teaspoon of dried oregano. If I want some heat, I add 1/2 teaspoon of red pepper flakes. I bring this mix to a gentle simmer for about 5 minutes. This allows all the flavors to blend together. Then, I add 9 ounces of cheese tortellini to the pot. I cook it according to the package instructions. This typically takes about 5-7 minutes. The tortellini will float when it's ready. Once the tortellini is cooked, I lower the heat and stir in 1 cup of heavy cream. I let the soup warm through but avoid boiling it. After that, I taste and add salt and freshly ground black pepper to my liking. For a great look, I ladle the soup into shallow bowls. I top each bowl with fresh basil leaves and a sprinkle of Parmesan cheese. This adds a nice touch. I like to serve it with crusty bread for a filling meal. For the full recipe, check the details above. You can easily make this soup fit your needs. If you want a dairy-free option, use coconut milk instead of heavy cream. It gives a nice creaminess without dairy. For pasta, choose gluten-free tortellini or any small pasta. You can even use fresh pasta for a softer bite. Want to enhance the flavor? Try adding a splash of balsamic vinegar or a bit of lemon juice. These will brighten the soup. If you like spice, increase red pepper flakes. You can also add a pinch of smoked paprika for a smoky twist. Don’t be afraid to taste as you go! Short on time? Use pre-cooked tortellini. Just add it to the soup to warm it through. Canned tomatoes can also save you some prep time. They are just as tasty and make your life easier. This way, you can enjoy your creamy tomato tortellini soup in no time! For the full recipe, check the [Full Recipe] section. {{image_4}} You can make this soup even better by adding vegetables. Spinach, kale, and bell peppers are great choices. Just chop them up and add them to the pot while cooking. They will cook down quickly and add color and nutrition. You can use fresh or frozen veggies. Both work well and help make your soup heartier and more filling. Want to turn this soup into a meal? You can add protein! Cooked chicken, sausage, or beans work best. Simply shred the chicken or slice the sausage and stir it in. If you choose beans, use canned ones for ease. They add creaminess and fiber, making your soup more satisfying. You can change the taste of your soup by tweaking the spices. Try adding Italian herbs like thyme and parsley for a classic touch. If you like heat, add more red pepper flakes or some diced jalapeños. You can also add a splash of balsamic vinegar for a tangy twist. Each variation makes the soup unique and fun to explore. For the full recipe, check out Creamy Tomato Tortellini Soup! To keep your creamy tomato tortellini soup fresh, store it in an airtight container. Let the soup cool to room temperature before sealing it. Place it in the fridge within two hours of cooking. The soup stays good for about 3-4 days. When you reheat, heat it on the stove over low heat. Stir it often to keep it smooth and creamy. If you want to freeze soup, let it cool completely. Pour it into freezer-safe containers, leaving some space at the top for expansion. Seal tightly and label it with the date. You can freeze the soup for up to 3 months. To reheat, thaw it overnight in the fridge. Heat gently on the stove, stirring to maintain creaminess. For best taste and quality, consume your soup within 3-4 days when refrigerated. If frozen, use it within 3 months. Always check for any off smells or changes in color before eating. Following these best practices helps you enjoy every delicious bite of your creamy tomato tortellini soup! You can find the full recipe at the beginning of this article. Yes, you can make this soup ahead of time. Prepare the soup, but skip adding the cream and tortellini. Store the soup in the fridge for up to three days. When you are ready to eat, heat it on the stove. Add the cream and tortellini, and cook until the pasta is tender. This keeps the tortellini from getting mushy. You can use milk or coconut milk for a lighter soup. If you want a dairy-free option, try almond milk or cashew cream. Both will add creaminess without the dairy. Each option changes the taste slightly, so choose what you like best. If you want a thicker soup, there are a few ways to do this. You can blend a small amount of the soup and stir it back in. This gives a creamy texture. Another option is to add a cornstarch slurry. Mix one tablespoon of cornstarch with two tablespoons of cold water. Stir this into the soup and cook until it thickens. This soup pairs well with crusty bread or a fresh salad. A simple green salad with lemon vinaigrette adds a nice touch. You can also serve it with garlic bread for a hearty meal. For extra flavor, top each bowl with grated Parmesan cheese. Check out the Full Recipe for more ideas! In this blog post, we explored a creamy tomato tortellini soup from start to finish. We covered key ingredients like olive oil, garlic, and cheese tortellini, plus essential spices. I shared step-by-step instructions for making this comforting dish and offered tips for flavoring and ingredient swaps. You can even add extra veggies or protein for variety. Final thoughts: This soup is a fun and easy dish to make. Enjoy experimenting with flavors and sharing it with loved ones.](https://recipetorch.com/wp-content/uploads/2025/04/7e196d06-1add-41d5-bf6e-84f512670fc3.webp)
Looking for a warm and cozy dish? This Creamy Tomato Tortellini Soup is your answer! With rich flavors and simple
![- 3 pounds ripe tomatoes (mix of colors) - 1 medium onion - 4 cloves garlic - 2 tablespoons extra virgin olive oil - 1 teaspoon sea salt - 1/2 teaspoon black pepper - 1 teaspoon dried oregano - 1 teaspoon dried basil - 1 tablespoon balsamic vinegar To make a great roasted tomato sauce, you need fresh ingredients. Start with 3 pounds of ripe tomatoes. Use a mix of colors for a bright sauce. Choose a medium onion and four cloves of garlic. The onion adds sweetness, while garlic gives depth. Next, gather your seasonings. You will need two tablespoons of extra virgin olive oil to help the veggies roast nicely. Sea salt and black pepper bring out the flavors. For a twist, you can add dried oregano and dried basil. They add a lovely aroma and taste. Balsamic vinegar is optional but gives a hint of sweetness. You can find the full recipe to guide you through each step. Enjoy crafting this simple yet flavorful sauce! First, preheat your oven to 400°F (200°C). This step is key for getting that perfect roast. Next, line a large baking sheet with parchment paper. This makes cleanup easy and helps the veggies roast well. Now, take your ripe tomatoes and cut them in half. Place them cut side up on the baking sheet. Surround the tomatoes with the quartered onion and unpeeled garlic cloves. This mix of veggies adds great flavor to the sauce. Drizzle the extra virgin olive oil over all of them. Then, sprinkle sea salt, black pepper, dried oregano, and dried basil. Make sure everything is well-seasoned. Put the baking sheet in the oven and roast for about 35-40 minutes. Keep an eye on them. You want the tomatoes to look caramelized and the onions to be soft and golden. This roasting time really brings out the flavors. When the veggies are done roasting, carefully remove the baking sheet from the oven. Let them cool for a few minutes. Squeeze the soft garlic out of its skin and add it to a blender with the roasted tomatoes and onions. If you want a hint of sweetness, add balsamic vinegar here. Blend everything until you reach your desired consistency. Some like it smooth, while others prefer it chunky. Taste your sauce and adjust the seasoning if needed. You can add more salt, pepper, or herbs to make it just right. How to select ripe tomatoes Choose tomatoes that feel heavy and have a nice smell. Look for vibrant colors like red, yellow, or orange. The skin should be smooth and free of blemishes. Ripe tomatoes will have a slight give when you press them gently. Signals of doneness when roasting Watch for the tomatoes getting soft and caramelized edges. The onions should turn golden and sweet. The garlic will soften and can easily be squeezed from its skin. These signs mean your sauce will have deep flavor. Pairing with pasta, pizza, and grilled meats This roasted tomato sauce is very versatile. Toss it with your favorite pasta for a quick meal. Use it as a base for homemade pizza, spreading it on the dough. Drizzle over grilled meats for added flavor. Presentation tips with olive oil and basil Serve the sauce warm. Drizzle a little extra virgin olive oil on top. Add fresh basil leaves for a pop of color and flavor. This simple touch makes the dish look elegant. Experimenting with herbs and spices Feel free to try different herbs and spices in your sauce. Add thyme, rosemary, or even a pinch of red pepper flakes. Each choice will give your sauce a unique twist. Using fresh versus dried herbs Fresh herbs pack a lot of flavor, but dried herbs are more convenient. If you use fresh herbs, add them at the end of cooking. If you prefer dried, add them during roasting for deeper flavor. For the full recipe, check out the [Full Recipe]. {{image_4}} You can make roasted tomato sauce even better with some simple tweaks. Each variation adds a new twist to the classic recipe. Fresh herbs like thyme or rosemary bring bright notes. Just chop them up, and stir them in after blending. If you like heat, try adding red pepper flakes. They add spice and warmth to your sauce. Tomatoes can be tart, but you can balance that. A little sugar or honey can cut the acidity. Just sprinkle some in while blending. If you want more depth, adjust the balsamic vinegar. A bit more can add sweetness and richness. Do you prefer a chunky sauce? Leave some bits of tomato in when blending. If you want a smooth sauce, blend it longer. For soups or stews, thicken the sauce by simmering it. This way, it becomes rich and hearty. These variations let you personalize your sauce. Enjoy exploring flavors and textures in your homemade roasted tomato sauce! For the full recipe, check out the details above. Store your homemade roasted tomato sauce in airtight containers. This keeps it fresh and tasty. In the fridge, it lasts about one week. Make sure it cools down before sealing. Freezing is a great way to save your sauce. Use freezer-safe containers or bags. Leave some space for expansion. When you're ready to use it, just take it out and thaw it in the fridge overnight. You can also warm it gently on the stove. You can create many meals with leftover sauce. Mix it into pasta for a quick dinner. Use it as a base for pizza or a dip for bread. You could even add it to soups for extra flavor. The options are endless! For more ideas, check out the [Full Recipe]. Homemade roasted tomato sauce lasts about one week in the fridge. Store it in an airtight container. For longer storage, freeze it. In the freezer, it stays good for about six months. Just make sure to use freezer-safe containers. Label them with the date for easy tracking. Yes, you can use canned tomatoes. They save time and are great when fresh tomatoes are out of season. Canned tomatoes are usually ripe and ready to use. However, they may have a different flavor. Fresh tomatoes give a brighter taste. If you use canned tomatoes, choose whole or diced varieties for the best texture. Roasted tomato sauce works well in many dishes. Use it as a pasta sauce, or on pizza. It also makes a tasty base for soups and stews. You can even spoon it over grilled meats or veggies. Try it with rice or quinoa for a filling meal. Yes, you can can roasted tomato sauce. Start by sterilizing your jars and lids. Fill them with hot sauce, leaving some space at the top. Seal the jars and process them in a water bath for safety. This method keeps the sauce good for up to a year. Always check seals before using. To make the sauce spicier, add red pepper flakes during roasting. You can also blend in fresh or dried chili peppers. For a smoky heat, try chipotle peppers. Start with a small amount, then taste. Adjust to your preference for the right kick. This blog post explained how to make delicious roasted tomato sauce. We discussed ingredients, steps, tips, and storage. Now you know how to choose ripe tomatoes and roast them to perfection. You can experiment with herbs and spices for extra flavor. Enjoy this sauce with pasta or grilled meats. Leftovers can create quick meals. By following these steps, you’ll master the art of homemade tomato sauce. Keep experimenting and enjoy your cooking journey!](https://recipetorch.com/wp-content/uploads/2025/04/5953d51e-1ab3-4437-befe-82dbd481e965.webp)
Ready to dive into a world of flavor? This Homemade Roasted Tomato Sauce is both simple and delicious. With just

Summer is here, and it’s time to enjoy fresh, tasty snacks that won’t sabotage your goals. In this post, I’ll
