Skip to content
DisclaimerTerms Of UseGDPR PolicyCookie Policy

recipetorch

  • Home
  • Drinks
  • Appetizers
  • Dinner
  • Dessert
  • About
  • Contact
  • Privacy Policy
DisclaimerTerms Of UseGDPR PolicyCookie Policy

NO-ING-IMG

To make these tasty apple butter oatmeal cream pies, you need the following ingredients: - 1 ½ cups rolled oats - 1 cup all-purpose flour - 1 teaspoon baking soda - ½ teaspoon ground cinnamon - ¼ teaspoon ground nutmeg - ½ teaspoon salt - ½ cup unsalted butter, softened to room temperature - ½ cup packed brown sugar - ¼ cup granulated sugar - 1 large egg - 1 teaspoon pure vanilla extract - ¾ cup apple butter - 1 cup cream cheese, softened - 1 cup powdered sugar - 1 teaspoon pure vanilla extract (for cream filling) Each ingredient plays a key role in the recipe. Here are some tips for measurements and possible substitutions: - Rolled oats: Use quick oats if you need a faster option, but rolled oats work best for texture. - All-purpose flour: You can swap this with whole wheat flour for a nuttier flavor. - Baking soda: This helps the cookies rise. Do not replace it with baking powder; they are not the same. - Spices: Feel free to adjust the cinnamon and nutmeg to your taste. Use fresh spices for the best flavor. - Butter: If you want a dairy-free option, try using coconut oil instead of butter. Choosing the right ingredients makes a big difference. Here’s how to select the best ones: - Oats: Look for organic rolled oats without added sugars or flavors. - Apple butter: Choose a brand with no added sugars or preservatives. Homemade apple butter is even better. - Butter: Use unsalted butter for better control of the salt flavor. - Cream cheese: Opt for full-fat cream cheese for a rich and creamy filling. Check the expiration date for freshness. - Spices: Buy whole spices and grind them as needed for the best taste. These tips will ensure your apple butter oatmeal cream pies are delicious and full of flavor. Enjoy making this delightful treat! To start, preheat your oven to 350°F (175°C). Line two baking sheets with parchment paper. This helps the cookies not stick. Gather all your ingredients to make the process smooth. 1. In a medium bowl, mix together: - 1 ½ cups rolled oats - 1 cup all-purpose flour - 1 teaspoon baking soda - ½ teaspoon ground cinnamon - ¼ teaspoon ground nutmeg - ½ teaspoon salt Whisk until well combined, then set aside. 2. In a large bowl, cream together: - ½ cup unsalted butter, softened - ½ cup packed brown sugar - ¼ cup granulated sugar Beat this mixture on medium speed for about 2-3 minutes. It should look light and fluffy. 3. Add: - 1 large egg - 1 teaspoon pure vanilla extract Mix until smooth. 4. Gradually stir in the dry oat mixture. Use a spatula and mix gently. Avoid overmixing to keep the cookies soft. 5. Fold in: - ¾ cup apple butter This adds a tasty apple flavor to your dough. 6. Drop spoonfuls of dough onto the prepared sheets. Leave space between each dollop, as they will spread while baking. 7. Bake for 10-12 minutes. The edges should be golden and the tops set. Let them cool for 5 minutes on the sheet, then transfer to a wire rack to cool completely. 8. For the cream filling, beat together: - 1 cup cream cheese, softened - 1 cup powdered sugar Mix until smooth, then add 1 teaspoon pure vanilla extract and mix again. 9. Once cooled, pair the cookies by size. Spread cream filling on one cookie’s flat side. Top with another cookie to make a sandwich. 10. Continue this until all cookies are filled. - Use room temperature ingredients for better mixing. - Don’t overbake; keep an eye on the cookies. - Let them cool fully before adding the cream filling. This prevents melting. Enjoy making these tasty treats! When making these apple butter oatmeal cream pies, avoid overmixing your dough. Overmixing makes the cookies tough. Keep an eye on the baking time. If you bake them too long, they turn hard. Aim for cookies that are lightly golden on the edges but still soft in the center. Also, don’t skip the cooling step. Allowing the cookies to cool properly helps them hold their shape and flavor. To keep your cream pies fresh, store them in an airtight container. This helps maintain their soft texture. Place parchment paper between layers if stacking them. They can last for about three days at room temperature. For longer storage, refrigerate them. In the fridge, they stay fresh for up to a week. You can add more flavor to your pies. Try mixing in chopped nuts or dried fruit into the dough. Adding a hint of ginger or cloves can also give a warm taste. For a creamier filling, use mascarpone cheese instead of cream cheese. This change makes the filling rich and smooth. If you want a little crunch, sprinkle some cinnamon sugar on top before baking. {{image_4}} You can change the cream filling to mix things up. Try using chocolate ganache for a rich twist. You can also use flavored cream cheese, like strawberry or pumpkin, for a fun taste. Nut butters, like almond or peanut, can add a unique flavor. You can even use whipped cream for a lighter option. Each choice brings a new delight to your apple butter oatmeal cream pies. To add more warmth, try adding spices like ginger or cloves. You can also boost flavor with a splash of maple extract or almond extract. These small changes can give your pies a fresh twist that excites the taste buds. Don't forget about adding orange or lemon zest for a bright touch. Each of these options enhances the overall flavor profile. If you need gluten-free pies, swap all-purpose flour for a gluten-free blend. Make sure it works well in cookies. For a vegan version, replace butter with coconut oil and use a flax egg instead of a regular egg. Cream cheese can be swapped for a vegan cream cheese option. These changes keep the pies delicious while meeting dietary needs. Enjoy your tasty variations! To keep your Apple Butter Oatmeal Cream Pies fresh, store them in an airtight container. This will help prevent them from getting dry or stale. Place parchment paper between layers to avoid sticking. Keep them at room temperature if you plan to eat them in a few days. For longer storage, the fridge is a good choice. If you want to save some for later, freezing works great. First, wrap each pie in plastic wrap. Then, place them in a freezer-safe bag or container. They can last up to three months in the freezer. When you're ready to eat, just thaw them in the fridge overnight. For a warm treat, you can reheat the pies. Place them on a baking sheet and warm them in a 350°F (175°C) oven for about 5-7 minutes. You can also use a microwave for 10-15 seconds. Enjoy that soft and gooey cream filling again! To make apple butter from scratch, start with fresh apples. Core and chop about 6-8 medium apples. Place them in a slow cooker with 1 cup of sugar, 1 teaspoon of cinnamon, and a pinch of salt. Cook on low for 8-10 hours until the apples are soft. Blend the mixture until smooth. Cook uncovered for another hour to thicken. You can enjoy this apple butter warm or store it in jars. Yes, using store-bought apple butter is a great option. It saves time and still gives your cookies a nice apple flavor. Choose a brand that uses real ingredients. Look for apple butter with no added preservatives. This option works well if you want to skip the cooking step. You’ll know the cookies are done when the edges are light golden brown. The tops should look set and not shiny. A good test is to touch the cookie lightly. If it springs back, it’s ready. Let them cool on the sheet for a few minutes before transferring them. For this recipe, rolled oats work best. They give the cookies a great texture. You can also use quick oats if you prefer. Avoid instant oats, as they may make the cookies too mushy. Rolled oats will keep a nice chewiness in the final treat. In this post, we explored the key ingredients for perfect cookies and pies, from measurements to quality selection. I shared step-by-step baking instructions and tips to help you avoid common mistakes. We also discussed various recipes, options for storage, and answers to your most pressing questions. Baking can be simple and fun. With a few thoughtful choices, you can make your treats shine. Each idea adds flavor and joy to your kitchen. Enjoy creating delicious cookies and pies that everyone loves!

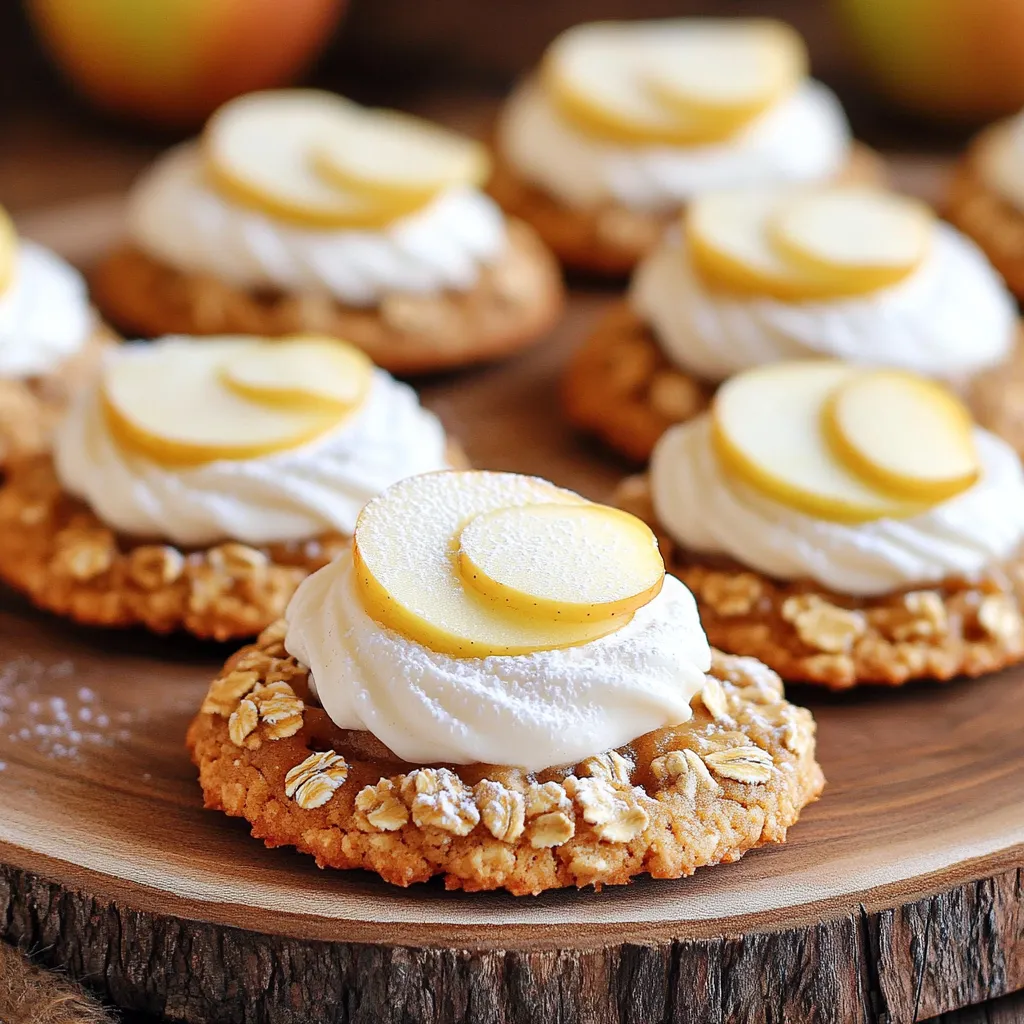
Delicious Apple Butter Oatmeal Cream Pies Recipe

Get ready to delight your taste buds with my super easy Apple Butter Oatmeal Cream Pies recipe! These cookies blend

To make delicious Air Fryer Garlic Parmesan Wings, you will need a few simple ingredients. Here’s what you need: - 2 pounds chicken wings - 1 tablespoon olive oil - 1 teaspoon garlic powder - 1 teaspoon onion powder - 1 teaspoon smoked paprika - 1 teaspoon salt - 1/2 teaspoon freshly ground black pepper - 1/4 cup freshly grated Parmesan cheese - 2 tablespoons fresh parsley, finely chopped - Optional: 1 teaspoon red pepper flakes for an extra kick These ingredients bring out the best flavors in your wings. The olive oil helps the spices stick and gives them a nice crisp. The garlic and onion powders add great depth. Smoked paprika brings that lovely smoky flavor. Salt and pepper enhance all the tastes. The Parmesan cheese gives a rich, creamy touch. Finally, parsley adds a fresh pop of color. If you want a bit of heat, the red pepper flakes are a great choice. Start by drying the chicken wings with paper towels. This step is key for crispiness. Moisture makes wings soggy. Remove all excess moisture to ensure a crunchy texture. Next, place the dried wings in a large bowl. Drizzle olive oil over them. Add garlic powder, onion powder, smoked paprika, salt, and black pepper. For extra heat, toss in red pepper flakes. Mix well so every wing gets an even coat. Now, preheat your air fryer to 400°F (200°C) for about 5 minutes. This helps the wings cook right away. Once heated, lay the wings in a single layer in the basket. Cook them for 25 to 30 minutes. Halfway through, flip or shake the wings. This keeps them crispy on all sides. To get that perfect crispy texture, start by drying your chicken wings. Use paper towels to remove all moisture. This step is key for that crunch you want. Next, coat the wings with olive oil and seasonings. The oil helps the skin crisp up nicely. Cook your wings at a high temperature, 400°F (200°C). This heat allows the wings to cook quickly and evenly. Preheat your air fryer for about 5 minutes. This way, the wings begin to cook right away, sealing in the juices. Presentation is important. Serve your crispy wings on a large, nice platter. You can add extra grated Parmesan on the side. This way, guests can add more cheese if they want. Garnish with fresh parsley for a pop of color. For dipping sauces, ranch and blue cheese work great. They add a creamy touch to the crispy wings. You can also try spicy sauces for extra flavor. If you make more wings, avoid overcrowding the basket. Cook in smaller batches to ensure even cooking. This helps all the wings get that crispy finish. When cooking larger quantities, keep the cooked wings warm in the oven at a low heat. This keeps them hot while you finish the rest. {{image_4}} You can change up the taste of your wings easily. Try using different spice blends. For a smoky flavor, mix in some chipotle powder. If you like a sweet twist, add brown sugar and chili powder. You can also use lemon pepper for a zesty kick. After cooking, drizzle your favorite sauce on top. BBQ sauce or buffalo sauce works great! If you want a lighter dish, swap out the olive oil for a low-calorie spray. You can also use skinless chicken wings. This change cuts fat and calories. For a gluten-free option, check the seasoning labels. Many spices are gluten-free, but some blends may not be. Kids may not like strong flavors. Make a milder version by skipping the red pepper flakes. You can also coat the wings lightly in just garlic powder and Parmesan. This simple taste often wins over picky eaters. Serve with a side of ranch or honey mustard for dipping. - Refrigerating leftover wings: Let the wings cool first. Place them in an airtight container. Store them in the fridge for up to three days. This keeps them fresh and tasty. - Freezing for later use: Wrap the wings in plastic wrap. Then, put them in a freezer bag or container. They can last up to three months in the freezer. This is great for saving some for later. - Best methods for reheating: The air fryer works best for reheating wings. Preheat it to 400°F (200°C). Place the wings in the basket and heat for about 5-7 minutes. This makes them crispy again. - Maintaining crispiness: Avoid the microwave. It makes wings soggy. If you use the oven, set it to 375°F (190°C). Bake for about 10-15 minutes. This keeps the wings nice and crispy. You can make Air Fryer Garlic Parmesan Wings from frozen wings. First, don't thaw them. Preheat your air fryer to 400°F (200°C). Place the frozen wings in the basket, making sure not to crowd them. Cook them for about 30-35 minutes. Shake the basket halfway through to ensure even cooking. After they are cooked, follow the same steps to season and add Parmesan. If your wings aren’t crispy, check a few things. Ensure you dried the wings well before seasoning. Moisture can prevent crispiness. Use a little more olive oil when coating the wings. Also, make sure you do not crowd the basket. Cooking in batches helps them crisp up better. Lastly, you can increase the cooking time by a few minutes if needed. Yes, you can use other chicken parts. Drumsticks and thighs work well too. Just adjust the cooking time. Drumsticks may need more time, while smaller pieces like chicken tenders will cook faster. Make sure to check the internal temperature to ensure they are safe to eat. To check if the wings are fully cooked, use a meat thermometer. The internal temperature should reach 165°F (74°C). If you don't have a thermometer, cut into a wing. The meat should be white, and the juices should run clear. If there is any pink, cook them a bit longer. Now you know how to make tasty air fryer chicken wings. We covered the key ingredients, preparation steps, and how to get those wings crispy. Remember to try different flavors and tips for serving. Always think about storage for leftovers too. With these steps, you can serve great wings for any occasion. Enjoy your cooking and impress your friends and family with these easy recipes!

Air Fryer Garlic Parmesan Wings Crispy Delight Recipe

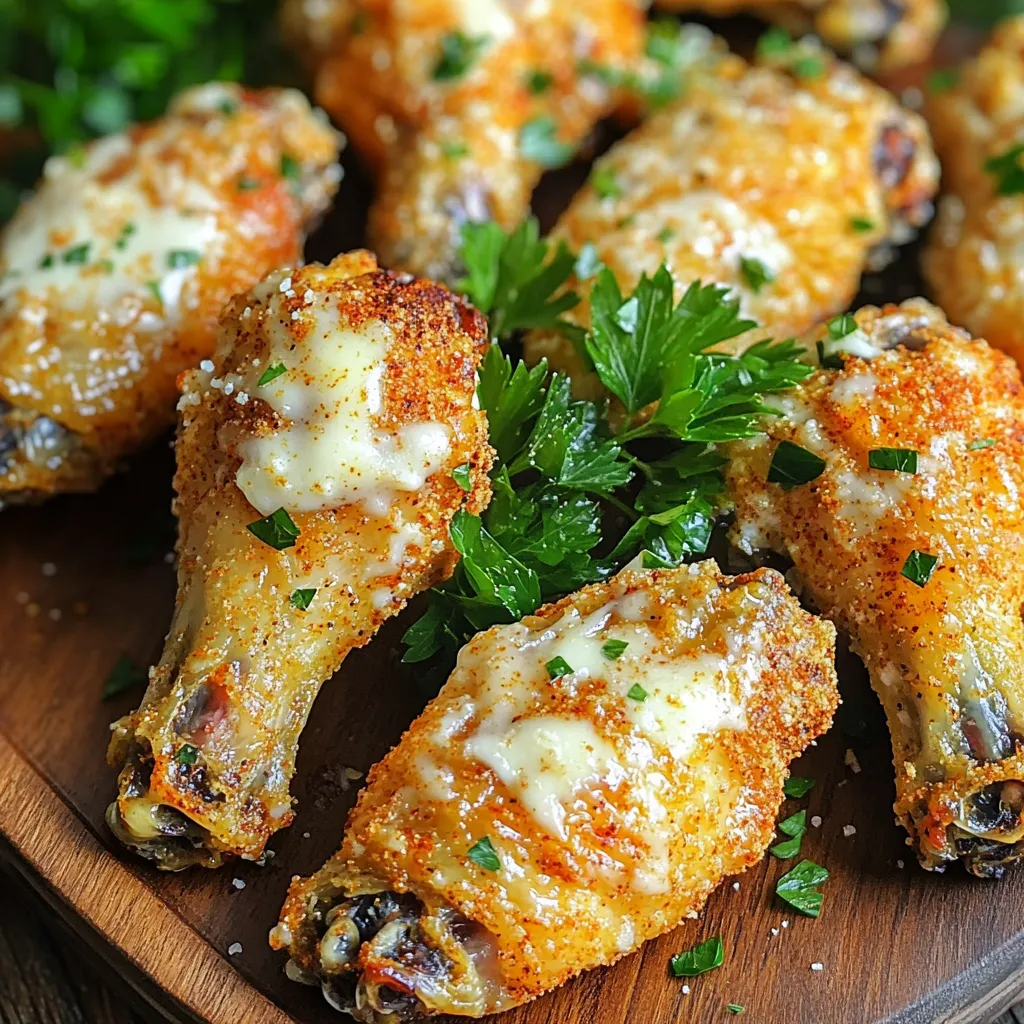
Craving something crispy and delicious? Let me introduce you to Air Fryer Garlic Parmesan Wings! These tasty wings are easy

- 2 cups rolled oats - 1 cup natural peanut butter - 1/2 cup honey or maple syrup - 1/4 cup unsweetened cocoa powder - 1/2 teaspoon vanilla extract - 1/4 teaspoon salt - 1/2 cup dark chocolate chips (dairy-free option) - 1/4 cup chopped nuts (almonds, sunflower seeds) - Flaky sea salt for topping To create these no bake chocolate peanut butter oat bars, gather your core ingredients first. The rolled oats give the bars their base and texture. Natural peanut butter adds creaminess and flavor. Use honey or maple syrup for sweetness. Unsweetened cocoa powder provides the rich chocolate taste. Vanilla extract boosts the flavor, while salt enhances all the ingredients. Finally, dark chocolate chips add bursts of chocolatey goodness. You can also personalize your bars with optional add-ins. Chopped nuts or seeds give a nice crunch. A sprinkle of flaky sea salt on top adds a gourmet touch. These ingredients are easy to find and make the recipe fun. Feel free to mix and match based on your taste or what you have at home. Gather everything, and you're ready to make a delicious snack! - Preparation time: 15 minutes - Total time: 1 hour 15 minutes (includes chilling) First, take a large mixing bowl. Add 2 cups of rolled oats, 1/4 cup of cocoa powder, and 1/4 teaspoon of salt. Stir well until all the dry ingredients blend together nicely. This step sets the base for our delicious bars. Next, grab a microwave-safe bowl. Combine 1 cup of natural peanut butter and 1/2 cup of honey or maple syrup. Microwave this mix for about 30 seconds. Remove it and stir until smooth. This creates a sweet and creamy blend that adds flavor and texture. Now, pour the melted peanut butter and honey into the bowl with oats and cocoa. Don’t forget to add 1/2 teaspoon of vanilla extract. Mix everything together well until it forms a thick and slightly sticky mixture. This means all the ingredients are nicely combined. Take an 8x8 inch square baking dish and line it with parchment paper. Make sure some paper hangs over the edges for easy removal. Transfer your mixture into the dish. Use a spatula or your hands to press it down firmly. This will help shape the bars and keep them together. Cover the baking dish with plastic wrap or a lid. Place it in the fridge for at least 1 hour. This step is important so the bars can set and hold their shape. After chilling, lift the bars out using the parchment overhang. Cut into squares or rectangles based on your preference. Enjoy your tasty creation! You can change the amount of honey or maple syrup to fit your taste. If you like it sweeter, add more. If you want less sweetness, reduce it. This flexibility lets you make the bars just right for you. Press the mixture firmly into the dish. This step is key. If you pack it tightly, your bars will hold together better. Use your hands or a spatula to flatten it evenly. A good press means no crumbling when you cut the bars. Store your bars in an airtight container in the fridge. This keeps them fresh for up to a week. If you have extras, try freezing them for later. Just remember to wrap them well to avoid freezer burn. Enjoy them chilled or at room temperature! {{image_4}} You can easily change the flavor of these bars. Try using different nut butters, like almond or cashew. They will add a unique taste and a new twist. You can also mix in dried fruits such as cranberries or raisins for a fruity burst. These additions bring color and extra nutrients. If you want to switch things up, consider using white chocolate chips or carob chips. Each option offers a different taste and sweetness level. White chocolate adds creaminess, while carob chips bring a more earthy flavor. Experimenting with these options makes each batch special. You can make these bars vegan-friendly with simple swaps. Use maple syrup instead of honey for sweetness. For the chocolate, choose dairy-free chocolate to keep it plant-based. These changes make the bars suitable for a wider audience without losing that delicious flavor. To keep your no bake chocolate peanut butter oat bars fresh, store them in an airtight container in the refrigerator. This helps maintain their flavor and texture. Avoid leaving them out at room temperature, as they can become too soft and lose their shape. You can freeze these bars for longer shelf life. Cut them into squares before freezing. Wrap each piece in plastic wrap or foil. Place them in a freezer-safe bag or container. They can last for up to three months in the freezer. These bars last up to 1 week in the fridge. If you notice any changes in smell or texture, it’s best to toss them. Enjoy your bars as a quick snack or a healthy treat! Yes, you can use quick oats. They cook faster and can make your bars softer. Rolled oats give a chewier texture. Quick oats blend in easily but may not hold shape as well. If you want a firmer bar, stick with rolled oats. To cut the bars, first chill them well. Use a sharp knife for clean edges. Lifting the bars out with parchment helps. Start by cutting into squares or rectangles. For easier serving, cut smaller pieces. This way, everyone gets a tasty bite! If you have nut allergies, try sunflower seed butter. It has a similar taste and texture. You can also use soy nut butter or tahini. These options keep the bars creamy and delicious. Choose what works best for your needs! Absolutely! These bars are great for meal prep. Make a batch and store them in the fridge. They last up to a week. Just grab a bar for a quick snack or breakfast. This makes your week easier and more delicious! In this post, we explored how to make easy and tasty energy bars. We covered the key ingredients, from oats to cocoa powder, and shared step-by-step instructions. You learned tips to customize sweetness and ensure sturdy bars. You can also consider flavor variations and proper storage methods. Now, you have all the tools to create your own delicious energy bars at home. Enjoy creating your snacks and share them with friends!

No Bake Chocolate Peanut Butter Oat Bars Recipe

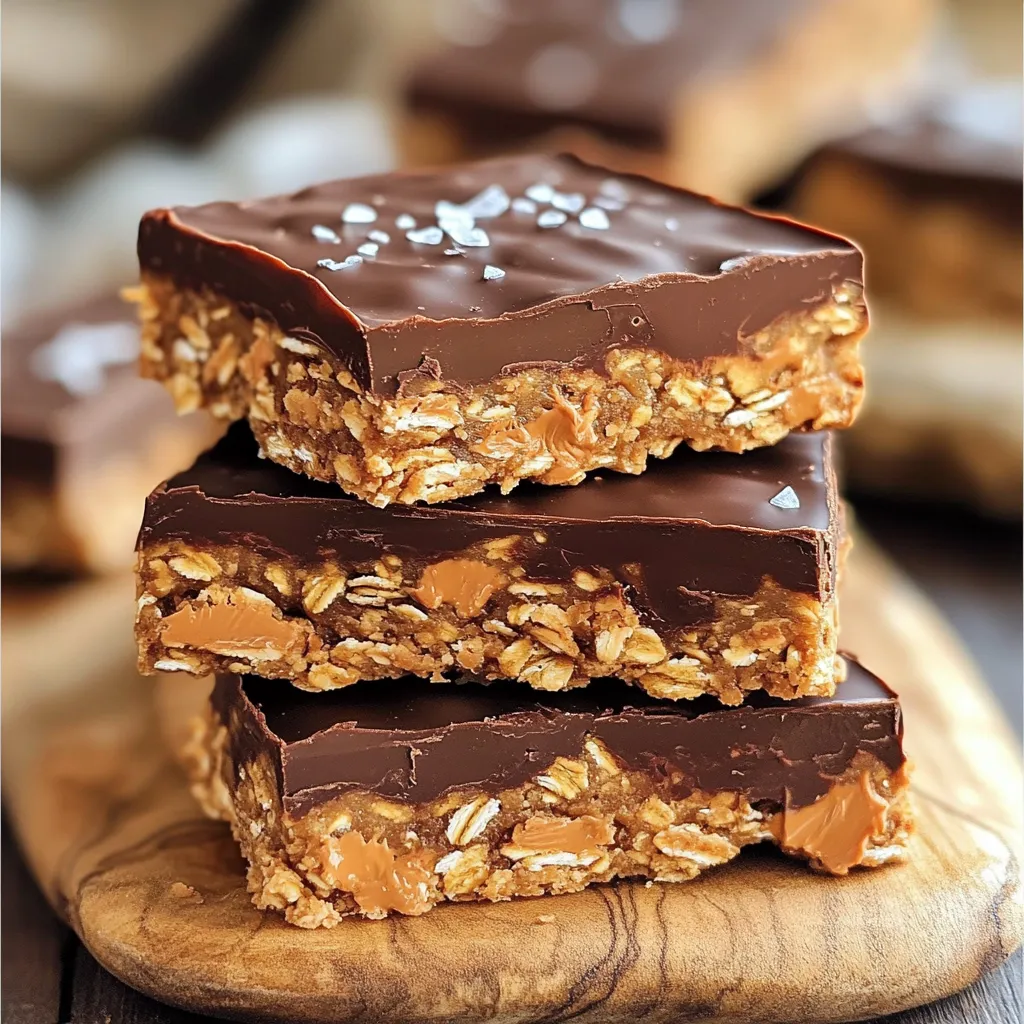
Craving a sweet snack that’s easy to make? Look no further! My No Bake Chocolate Peanut Butter Oat Bars are

- 1 lb shrimp, peeled and deveined - 2 cups cooked jasmine rice (preferably day-old for best texture) - 4 cloves garlic, finely minced - 2 tablespoons chili paste (adjust to your spice preference) - 2 tablespoons soy sauce - 1 tablespoon oyster sauce (optional for extra depth of flavor) - 1 cup mixed vegetables (such as carrots, peas, and corn) - 2 green onions, finely sliced - 2 large eggs, lightly beaten - 3 tablespoons vegetable oil (divided) - Salt and black pepper to taste Gather all these ingredients before you start. Fresh shrimp adds a nice touch. Day-old jasmine rice gives the best texture. This rice is less sticky, which helps in frying. You can use any mixed vegetables you like. Carrots, peas, and corn work great. Adjust the chili paste to your taste. If you like it spicy, add more. The oyster sauce is optional, but it adds great flavor. Make sure your garlic is minced well to bring out its flavor. This dish also needs green onions for a fresh crunch. Don't forget the eggs; they add richness. Finally, have your vegetable oil on hand for frying. With these ingredients ready, you're set to make a delicious meal. To start, I marinate the shrimp. I mix 1 pound of peeled and deveined shrimp with 2 tablespoons of chili paste. I also add a pinch of salt. I stir it well and let it sit for about 10 minutes. This helps the shrimp soak up all that yummy flavor. Next, I prepare the rice. I use about 2 cups of cooked jasmine rice, which is best if it's day-old. If I don’t have day-old rice, I spread freshly cooked rice on a baking sheet. I fluff it with a fork to cool it down and separate the grains. Now, let’s get cooking! - Sauté the Shrimp: I heat 1 tablespoon of vegetable oil in a large skillet over medium-high heat. I add the marinated shrimp and cook for 2-3 minutes. I stir occasionally until the shrimp turn pink and opaque. Once they are done, I set them aside on a plate. - Scramble the Eggs: In the same skillet, I add a splash more oil if needed. I pour in 2 beaten eggs and scramble them quickly. I cook them for about 1-2 minutes until just set. Then, I move the eggs to a separate plate. - Sauté the Vegetables: Next, I add the remaining oil to the skillet. I toss in 4 minced garlic cloves and sauté for about 30 seconds until fragrant. Then, I add 1 cup of mixed vegetables like carrots, peas, and corn. I stir-fry for about 3-4 minutes until they are tender but still crisp. - Combine All Ingredients: I add the cooled jasmine rice to the skillet, breaking up any clumps. I drizzle in 2 tablespoons of soy sauce, 1 tablespoon of oyster sauce if I want extra flavor, and the remaining chili paste. I stir everything together well. - Reintroduce Shrimp and Eggs: Finally, I fold the cooked shrimp and scrambled eggs back into the rice. I season with salt and black pepper to taste. I stir-fry everything for another 2-3 minutes until heated through. - Finish with Green Onions: To finish, I add 2 finely sliced green onions and mix well. This adds a nice crunch and fresh flavor to the dish. Now, your Chili Garlic Shrimp Fried Rice is ready to serve! - Adjust the chili paste to match your spice level. If you like it hot, add more! - Using day-old rice gives the best texture. It helps keep the rice fluffy and not sticky. - Sauté shrimp quickly over medium-high heat. This keeps them juicy and tender. - When scrambling eggs, use a gentle touch. Cook them just until set to keep them soft. - Serve the fried rice in bright bowls to make it pop. - Top with extra green onions and a sprinkle of sesame seeds for a nice touch. {{image_4}} You can switch up the shrimp for other proteins. Chicken or tofu work great here. Just cut them into small pieces and follow the same steps. You can also mix and match your veggies. Try bell peppers, broccoli, or snap peas for a fresh twist. Want more heat? Add extra chili paste or some red pepper flakes. If you like it milder, use less chili paste. You can also balance spice with a little sugar or honey. This can help tone down the heat while keeping the flavor. If you need gluten-free options, choose tamari instead of soy sauce. Make sure to check the labels. Some oyster sauces are gluten-free too. Always look for brands that cater to your dietary needs to enjoy this dish without worry. Store leftover chili garlic shrimp fried rice in an airtight container. Make sure it cools before sealing. This helps keep the rice fresh. You can keep it in the fridge for up to three days. If you plan to eat it later, label the container with the date. To reheat fried rice, use a skillet over medium heat. Add a splash of water or oil to keep it moist. Stir the rice often to prevent sticking. Heat until it is warm throughout. You can also use the microwave. Cover the rice with a damp paper towel and heat for one to two minutes. To freeze fried rice, let it cool completely first. Then, portion it into freezer-safe bags or containers. Remove as much air as possible to avoid freezer burn. You can freeze it for up to three months. To thaw, place it in the fridge overnight or use the microwave on defrost. Stir well before serving. Yes, you can use frozen shrimp. Just thaw them first. - Tips for using frozen shrimp: - Place the shrimp in cold water for about 15-20 minutes. - Drain and pat them dry before marinating. - Ensure they are peeled and deveined. You can easily make it vegetarian. - Substitute shrimp and adjust sauces: - Use tofu or tempeh instead of shrimp. - Replace soy sauce with a gluten-free option if needed. - Adjust the chili paste for extra flavor. The best rice for fried rice is jasmine rice. - Explanation of rice types: - Jasmine rice has a nice aroma and fluffy texture. - Day-old rice works best since it's less sticky. - Basmati rice is another option for a different flavor. Adding more heat is easy! - Additional methods for enhancing heat: - Increase the amount of chili paste in the recipe. - Try adding sliced fresh chili peppers. - A dash of hot sauce can also boost flavor. This recipe for shrimp fried rice covers all you need. You learn about ingredients, cooking steps, and storage tips. I explained how to make it taste great and look nice. You can also adjust spice levels and choose alternative ingredients. Try making this dish your own with different flavors. Enjoy the fun of cooking and share it with friends!

Chili Garlic Shrimp Fried Rice Quick and Tasty Recipe

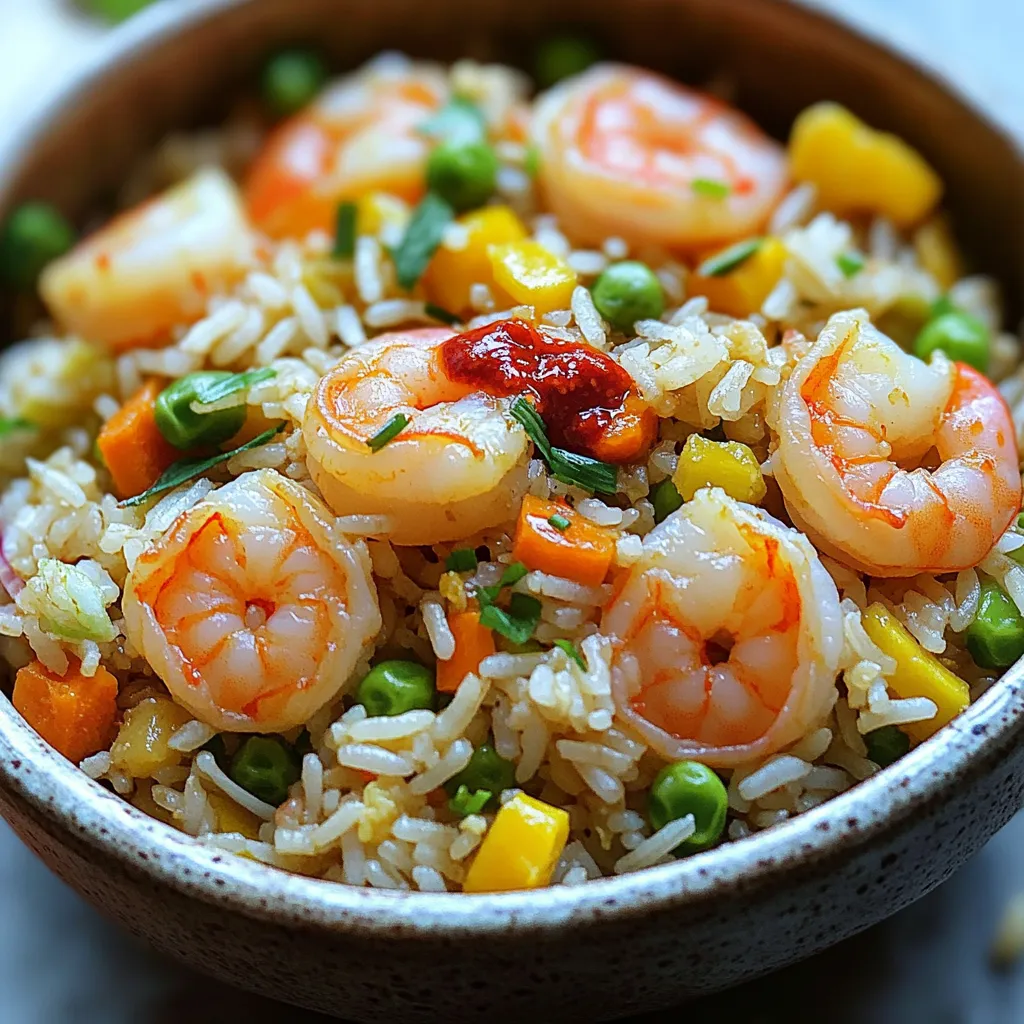
Are you ready to whip up a quick and tasty dinner? This Chili Garlic Shrimp Fried Rice recipe hits the

- Medium russet potatoes - Extra virgin olive oil - Ranch seasoning mix - Garlic powder - Onion powder - Salt and black pepper - Freshly grated Parmesan cheese - Fresh parsley The main ingredients create a solid base for our dish. Medium russet potatoes are perfect because they have a fluffy interior. Their skins get crispy, which gives great texture. Extra virgin olive oil adds a rich flavor and helps the spices stick. The ranch seasoning mix brings a tangy taste that pairs well with the potatoes. For spices, garlic powder and onion powder add depth. They make the wedges taste more savory. A sprinkle of salt and black pepper enhances all the flavors. When it comes to garnishing, freshly grated Parmesan cheese is key. It melts slightly and adds a salty richness. Lastly, fresh parsley gives a pop of color and freshness. This combination makes your potato wedges not just tasty but also beautiful. Enjoy the balance of flavors with every bite! Preheating the Air Fryer First, set your air fryer to 400°F (200°C). This helps achieve that nice, crispy texture. Preheat it for about 5 minutes. Washing and Cutting Potatoes into Wedges Grab four medium russet potatoes. Wash them well to remove dirt. Cut each potato into wedges. Aim for even sizes. This ensures they cook evenly. Coating the Wedges with Seasonings In a large mixing bowl, add the potato wedges. Pour in 3 tablespoons of extra virgin olive oil. Next, add 1 tablespoon of ranch seasoning mix, 1 teaspoon of garlic powder, 1 teaspoon of onion powder, and a sprinkle of salt and black pepper. Toss everything well. Make sure each wedge is coated fully. Incorporating Parmesan Cheese Now, add 1/2 cup of freshly grated Parmesan cheese. Toss the wedges again. This cheese adds flavor and helps create that golden crust you want. Arranging Wedges in the Air Fryer Carefully place the seasoned wedges in the air fryer basket. Arrange them in a single layer. Don't overcrowd the basket. This helps them cook crispy. Cooking Time and Temperature Cook the wedges for 15 to 18 minutes. Halfway through, shake the basket gently. This helps achieve even cooking. Look for a golden brown color on the wedges. When done, carefully take them out. Let them cool slightly before serving. Importance of Preheating Preheating your air fryer is key. Set it to 400°F (200°C) for about 5 minutes. This helps the wedges cook evenly and get crispy. Avoiding Overcrowding the Basket Do not crowd the basket with wedges. If you pile them up, they will steam instead of crisp. Cook in batches if needed. This ensures each wedge gets hot air all around it. Adjusting Seasonings to Taste Feel free to change the ranch seasoning. Add more or less based on your taste. You may also sprinkle in some extra garlic powder or herbs for more flavor. Recommended Dipping Sauces Serve with your favorite sauces. Ranch and garlic aioli are top picks. They pair perfectly with the crispy potato wedges and add a nice touch. Plating Ideas Serve the wedges on a large platter or in small bowls. This makes them easy to grab. A good presentation makes them more fun to eat. Accompanying Dishes Pair these wedges with burgers or grilled chicken. They make a great side dish to any meal. You can also enjoy them as a snack while watching a movie. {{image_4}} You can change up flavors using different seasoning mixes. For a spicy kick, try adding cayenne pepper or chili powder. This will give your potato wedges a nice heat. If you prefer herbs, mix in some dried rosemary or thyme. These herbs will add a fresh taste to your wedges that everyone will love. Cheese can change the taste of your potato wedges. Instead of Parmesan, use cheddar for a sharp flavor. Mozzarella can also work well if you want a melty texture. If you are dairy-free, look for plant-based cheese. These options can still give you that cheesy goodness. You can serve potato wedges in fun ways. Try making loaded wedges by adding toppings like sour cream, bacon, and green onions. This makes a hearty dish perfect for sharing. Another idea is to turn them into a wedge salad. Top the crispy wedges with salad greens, tomatoes, and your favorite dressing. This adds a fresh twist to your meal. After enjoying your Air Fryer Parmesan Ranch Potato Wedges, store any leftovers in the fridge. Place them in an airtight container. This keeps them fresh and tasty for up to three days. If you put them in a bag, squeeze out the air, and seal it tight. To bring back the crispiness, use your air fryer. Preheat it to 400°F (200°C) and cook the wedges for about 5 minutes. This method keeps them crispy and delicious. You can also use an oven. Set it to 400°F (200°C) for 10 minutes. Don’t use the microwave if you want crunch. It makes the wedges soft and soggy. To freeze your potato wedges, let them cool completely first. Then, place them in a single layer on a baking sheet. Freeze for about 2 hours. Once frozen, transfer them to a freezer bag. This way, they last for up to three months. When you're ready to enjoy them, take the wedges out. Thaw them in the fridge overnight. Preheat your air fryer to 400°F (200°C) and cook for 10-12 minutes. This makes them crispy again. For crispy potato wedges, set your air fryer to 400°F (200°C). Cook the wedges for 15 to 18 minutes. Shake the basket halfway through to help them cook evenly. You’ll know they are done when they turn golden brown and are crispy on the outside. Yes! While I love russet potatoes for their starchiness, you can also use Yukon gold or red potatoes. They will give your wedges a slightly different texture and taste. Just remember to wash and cut them into similar-sized wedges for even cooking. Ranch seasoning is a blend of herbs and spices. It usually includes buttermilk, garlic, onion, and dill. You can find it in stores or make your own at home. If you want a twist, try using taco seasoning or Italian herbs instead! Making air fryer potato wedges is simple and fun. We covered key ingredients, like russet potatoes, olive oil, and ranch seasoning. I shared step-by-step instructions that guide you through preparation and cooking. Remember, preheating the air fryer helps you get those crispy edges. You can customize flavors with different spices, cheeses, or even dipping sauces. Store any leftovers properly so you can enjoy them later. With these tips, you can impress anyone with your tasty potato wedges. Get cooking and enjoy every bite!

Air Fryer Parmesan Ranch Potato Wedges Delight

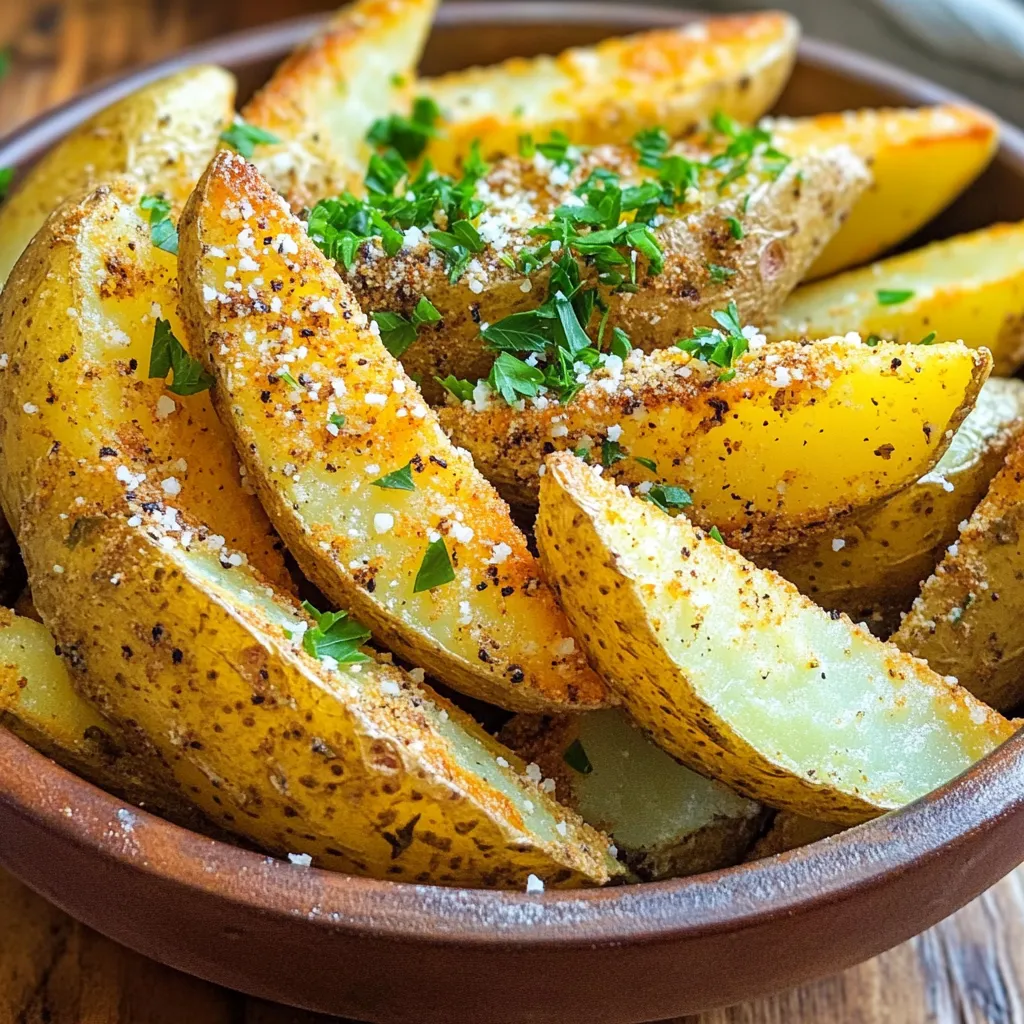
If you want a tasty snack or side dish, try my Air Fryer Parmesan Ranch Potato Wedges. These crispy wedges

- 8 oz rice noodles - 1 lb large shrimp, peeled and deveined - 1 cup broccoli florets - 1 cup snap peas, trimmed - 1 red bell pepper, thinly sliced - 2 green onions, chopped - 3 tablespoons teriyaki sauce - 1 tablespoon sesame oil - 1 tablespoon fresh ginger, grated - 1 garlic clove, minced - 1 tablespoon sesame seeds for garnish - Salt and pepper to taste Rice noodles cook fast. Check the package for the best cooking time. Shrimp gives great flavor. Make sure they are peeled and deveined. Fresh veggies add color and crunch. Broccoli, snap peas, and bell pepper work well together. Teriyaki sauce adds a sweet and savory taste. You can use store-bought or homemade. Sesame oil brings a nice nutty flavor. Use fresh ginger and garlic for the best taste. They boost the dish with their strong flavors. Each serving contains about 350 calories. You get protein from shrimp and vitamins from the veggies. This dish is low in fat and high in flavor. It is also a good source of fiber, thanks to the vegetables. The teriyaki sauce adds some sugar, so be mindful if you watch your sugar intake. Enjoy this meal as a fresh and healthy option! Cook the rice noodles according to the package directions. This usually takes about 5-7 minutes. Once they are soft, drain the noodles well. To avoid sticking, rinse them with cold water. Set the noodles aside for later use. In a large skillet or wok, heat 1 tablespoon of sesame oil over medium-high heat. Add 1 minced garlic clove and 1 tablespoon of grated ginger. Sauté for around 30 seconds. You want the mix aromatic and slightly golden, not burnt. This step adds great flavor to your dish. Next, add 1 pound of peeled and deveined shrimp to the skillet. Cook the shrimp for 2-3 minutes. Stir occasionally until they turn pink and opaque. Lightly season with salt and pepper. This step makes the shrimp flavorful and juicy. Now it’s time to add color! Introduce 1 cup of broccoli florets, 1 cup of snap peas, and 1 thinly sliced red bell pepper to the skillet. Stir well and cook for an additional 3-4 minutes. You want the veggies to be tender but still crisp. This keeps them fresh and crunchy. Drizzle 3 tablespoons of teriyaki sauce over the shrimp and veggies. Stir gently to coat everything well. This step is key to bringing all the flavors together. Let it heat for about 1 minute. The sauce should make the dish shiny and flavorful. Carefully add the cooked rice noodles to the skillet. Mix all the ingredients well, ensuring the noodles are evenly coated in the teriyaki sauce. This step ties everything together, making each bite delicious. Remove the skillet from the heat. Top the dish with chopped green onions and a sprinkle of sesame seeds. This adds a nice crunch and color. Serve the noodle bowls right away for the best taste and texture. Enjoy this fresh and easy meal! To make your Minute Teriyaki Shrimp Noodle Bowls shine, focus on fresh ingredients. Use large, juicy shrimp for the best taste and texture. Cook the rice noodles just until tender. Drain them well to avoid clumping. Sauté the garlic and ginger until they smell great, but don't let them burn. That step builds flavor for your dish. Timing is key in this quick meal. Start by cooking the rice noodles first. While they cook, heat your skillet. This way, you save time. When the noodles are done, move to the shrimp. Cook the shrimp for just a few minutes. Then, add the veggies and teriyaki sauce. Everything cooks fast, so keep an eye on it. This helps you serve a warm dish. Presentation makes meals more inviting. Use deep bowls for serving. The colors of the shrimp, veggies, and noodles look great together. Top your bowls with green onions and sesame seeds. For a fun touch, drizzle more teriyaki sauce on top. This not only adds flavor but also makes your dish pop visually. Serve right away for the best taste! {{image_4}} You can switch the shrimp for other proteins. Chicken, tofu, or beef work well. If you use chicken, slice it thinly. Cook it until it is no longer pink. For tofu, use firm tofu for the best texture. Press it to remove extra moisture before cooking. This will help it absorb flavors better. Feel free to mix in your favorite vegetables. Carrots, bell peppers, or zucchini add nice color and crunch. You can also use kale or spinach for added nutrients. Just remember to adjust the cooking time so they stay crisp. The goal is to keep all veggies fresh and vibrant. To make this dish gluten-free, choose rice noodles that are certified gluten-free. You can also replace teriyaki sauce with a gluten-free version. For a vegan option, swap shrimp for chickpeas or extra firm tofu. Both options provide protein and pair well with the sauce. Enjoy experimenting to find your perfect bowl! Store any leftover Minute Teriyaki Shrimp Noodle Bowls in an airtight container. Make sure the dish cools to room temperature first. This helps keep the noodles from getting too soggy. Place the container in the fridge if you plan to eat it within a few days. To reheat, transfer the noodles to a skillet. Add a splash of water or extra teriyaki sauce to keep it moist. Heat over medium heat until warm. Stir often to heat evenly. You can also use a microwave, but cover the bowl to avoid drying out the dish. The noodles can last in the fridge for up to three days. If you want to freeze them, do so right after cooking. Place the dish in a freezer-safe container. It can stay frozen for up to three months. To enjoy later, thaw in the fridge overnight and reheat as mentioned above. Yes, you can use frozen shrimp. Just thaw them before cooking. This makes meal prep easy. To thaw, place shrimp in a bowl of cold water for about 15 minutes. This helps keep the shrimp juicy and tender. To lower the calories, try these tips: - Use less teriyaki sauce. - Swap rice noodles for zucchini noodles or a lower-calorie option. - Add more vegetables like spinach or mushrooms to bulk it up without extra calories. These swaps keep the dish tasty and healthy. If you don’t have teriyaki sauce, try these options: - Soy sauce mixed with a bit of honey or brown sugar. - A mix of soy sauce and rice vinegar for tang. - Make a quick sauce with hoisin and soy sauce. These options give a similar flavor. This dish takes about 20 minutes total. You spend 10 minutes prepping and cooking. This makes it a great weeknight meal when you're short on time. This guide walked you through making a tasty teriyaki shrimp dish. We covered ingredients, cooking steps, and helpful tips. You learned how to add your favorite veggies or switch proteins. We also shared storage tips and answered common questions. Now, you have all the tools to make this dish shine. Enjoy creating your flavorful masterpiece!

Minute Teriyaki Shrimp Noodle Bowls Fresh and Easy Meal

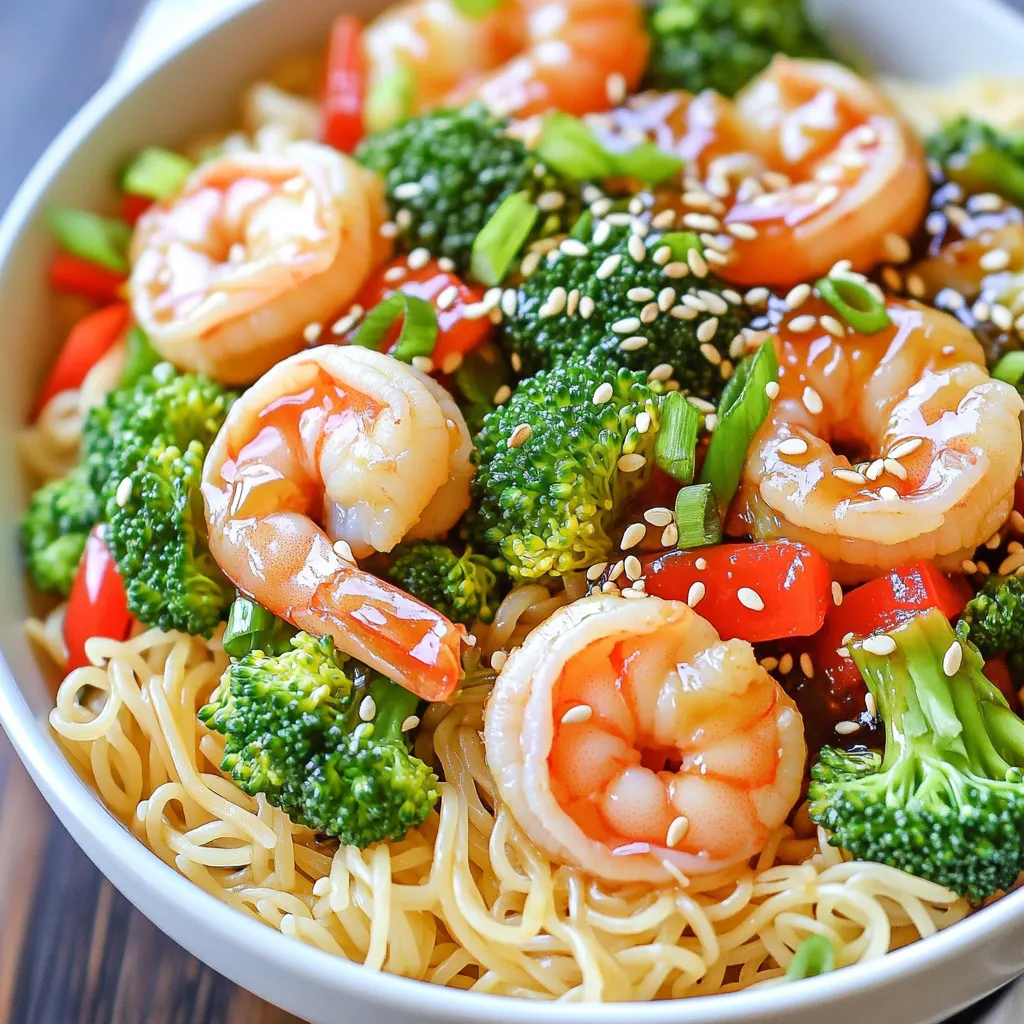
Are you craving a quick and tasty meal? Look no further than these Minute Teriyaki Shrimp Noodle Bowls! In just

To make Greek yogurt cheesecake jars, you need a few key ingredients. Here’s what you will need: - 2 cups Greek yogurt (preferably full-fat for an ultra-creamy texture) - 8 oz cream cheese, softened at room temperature - 1/2 cup honey or maple syrup (adjust based on your sweetness preference) - 1 teaspoon pure vanilla extract - 1 tablespoon freshly squeezed lemon juice - 1/4 teaspoon fine sea salt - 1 cup graham cracker crumbs - 1/4 cup unsalted butter, melted and slightly cooled - Fresh berries (such as strawberries, blueberries, or raspberries) for topping Each ingredient plays a role in making the cheesecake creamy and tasty. Greek yogurt adds protein and tang. Cream cheese gives it richness. Honey or maple syrup sweetens it just right. Vanilla extract and lemon juice add depth. The graham cracker crumbs and butter create a crunchy base. Finally, fresh berries add color and flavor. - Mixing Graham Cracker Crumbs with Butter In a medium bowl, mix 1 cup of graham cracker crumbs with 1/4 cup of melted butter. Stir until the crumbs soak up the butter. This mixture should feel sandy. - Pressing Down the Crust in Jars Take about 2 tablespoons of the crumb mixture for each jar. Press it down firmly with the back of a spoon. You want a nice, compact layer at the bottom of each jar. - Beating Cream Cheese until Smooth In a large bowl, beat 8 oz of softened cream cheese with an electric mixer. Mix until it’s smooth and creamy. This step is key for a good texture. - Incorporating Greek Yogurt Next, add 2 cups of Greek yogurt to the cream cheese. Keep mixing until they blend well. The filling should be velvety and thick. - Layering the Cheesecake Filling Spoon the cheesecake filling over the crust in each jar. Fill them about three-quarters full. Make sure the filling is even across all jars. - Tips for Even Distribution Use the back of a spoon to smooth the top of the filling. This helps with presentation. Clean edges make the jars look more appealing. - Refrigeration Time for Proper Setting Place the jars in the fridge for at least 2 hours. This helps the cheesecake set well. If you can wait longer, it will taste even better. - Final Touches with Fresh Berries Before serving, add a handful of fresh berries on top. Strawberries, blueberries, or raspberries work great. This adds color and a burst of flavor to your jars. Using full-fat Greek yogurt is key. It gives your cheesecake jars a rich and creamy texture. Low-fat yogurt can make the filling runny. Always choose full-fat for the best results. For a creamy cheesecake filling, make sure your cream cheese is at room temperature. This step helps blend it smoothly with the yogurt. Beat the cream cheese first until it is silky. Then, add the yogurt slowly, mixing well. This way, you avoid lumps for a perfect texture. To tailor sweetness levels, taste as you mix. Start with half of your sweetener and add more if needed. Honey and maple syrup work well, but they can vary in sweetness. Use your preference to find the right balance. If you seek alternative sweeteners, consider options like agave syrup or stevia. These can provide sweetness with fewer calories. Just remember to adjust the amount, as some are sweeter than honey. For visual appeal, clear jars are ideal. They show off the layers of crust and filling beautifully. Choose jars that are tall and narrow for a stunning look. Garnish your cheesecake jars with fresh berries. Strawberries, blueberries, or raspberries add color and flavor. You can also place a mint sprig on top for an extra touch. This adds freshness and makes your dessert pop! {{image_4}} You can change up the flavor of your Greek yogurt cheesecake jars easily. Try adding different extracts. Almond or coconut extracts can create a nice twist. Just a few drops can give your cheesecake a new taste. You can also use fruit purees in the filling. Think about blending in strawberry or raspberry puree. This adds color and a fruity punch. You can adjust the sweetness to match the fruit. Want a gluten-free option for the crust? Use gluten-free graham cracker crumbs. They taste great and keep the recipe simple. You still get that crunchy texture. If you're looking for a vegan version, swap out the cream cheese. Use soaked cashews or silken tofu instead. Blend them until smooth. You can still use Greek yogurt alternatives made from almond or coconut milk for creaminess. Seasonal fruits make great toppings for your jars. In summer, try fresh peaches or blackberries. In fall, use sliced apples and a sprinkle of cinnamon. For holidays, get creative with themed garnishes. Add crushed peppermint for winter or edible flowers for spring. These small touches can make your dessert feel special and festive. - How to Store Leftover Cheesecake Jars To store leftover cheesecake jars, cover each jar tightly with a lid or plastic wrap. This helps keep air out and prevents drying. Place the jars in the fridge right away. They can stay fresh for later enjoyment. - Keeping Toppings Fresh To keep toppings fresh, add berries just before serving. If you must store them, place any extra berries in a separate container. This way, they won’t get mushy or spoil the cheesecake. - Duration for Refrigerated Storage These cheesecake jars last up to five days in the fridge. After that, the texture and taste may change. Always check for freshness before eating. - Signs of Spoilage Look for changes in color or smell. If the cheesecake looks off or smells sour, it’s best to toss it. Safety first! - Can You Freeze the Cheesecake Jars? Yes, you can freeze the cheesecake jars. This is a great way to save leftovers. Just ensure they are sealed tightly. - How to Properly Freeze and Thaw To freeze, wrap the jars in plastic wrap and then aluminum foil. This prevents freezer burn. When ready to eat, move the jars to the fridge for several hours to thaw. Avoid using the microwave as it can ruin the texture. Yes, you can use low-fat Greek yogurt. However, full-fat yogurt makes a creamier cheesecake. The texture may change slightly, but the taste will still be good. If you want a lighter option, go ahead with low-fat. Chill the jars for at least 2 hours. This time helps the cheesecake set properly. If you can, chill them longer. Overnight is best for a firmer texture. You can use ricotta cheese or mascarpone. Both will give a rich flavor. For a dairy-free option, try cashew cream. Just blend soaked cashews until smooth for a creamy texture. Absolutely! You can make the jars a day or two ahead. Just store them in the fridge. This not only saves time but also allows the flavors to meld beautifully. Yes, store-bought graham cracker crust works well. It saves time and effort. Just spoon the cheesecake filling on top and enjoy! Making cheesecake jars is simple and fun. You start with quality ingredients like Greek yogurt and cream cheese. Then, follow the steps to prepare the crust, mix the filling, and assemble the jars. Remember to chill them for the perfect texture. You can customize your desserts with different flavors, sweeteners, or toppings. For best results, use fresh ingredients and store them properly. Enjoy every bite of your creamy treat!

Greek Yogurt Cheesecake Jars High Protein Delight

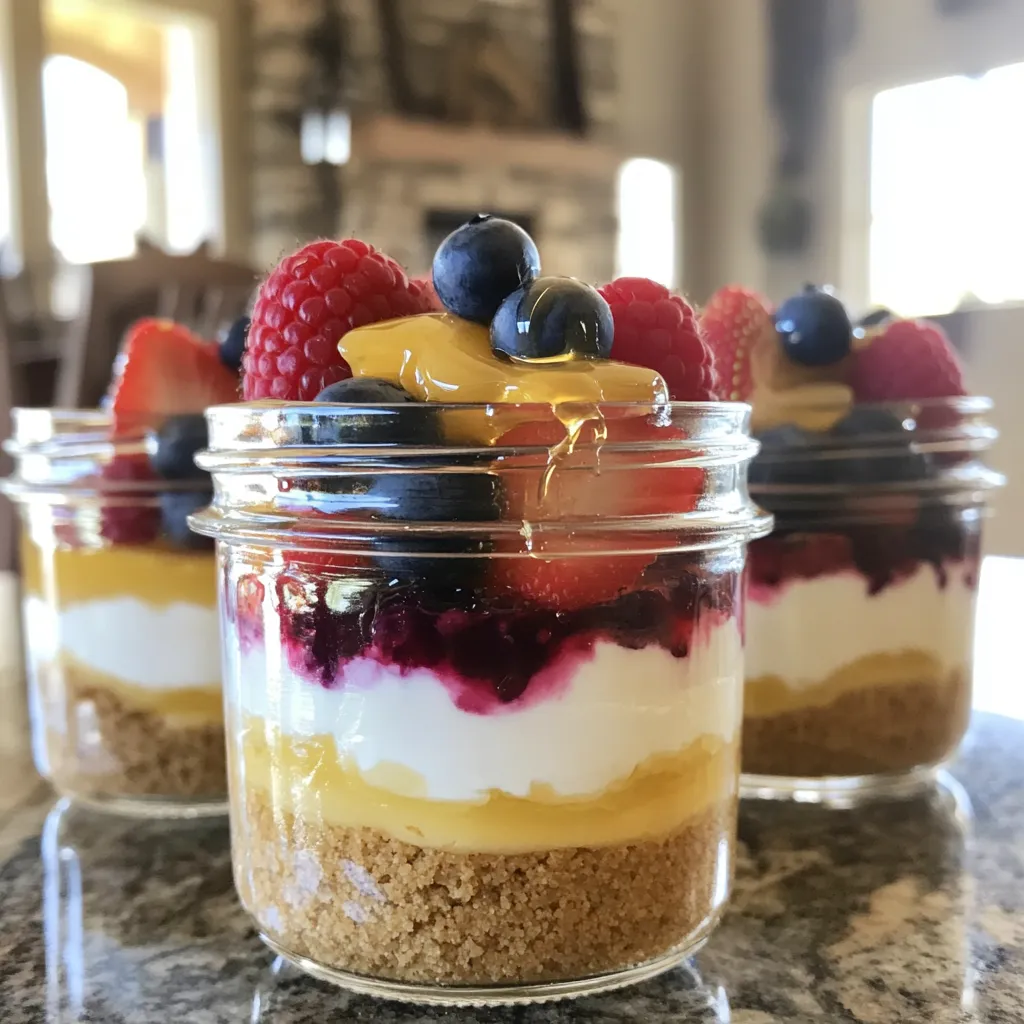
Looking for a tasty treat that packs a protein punch? Try my Greek Yogurt Cheesecake Jars! These little delights combine

- 4 cups Rice Krispies cereal - 1 cup mini marshmallows - 1/2 cup unsalted butter - 1 cup caramel sauce (store-bought or homemade) - 1 large Granny Smith apple, diced - 1/2 teaspoon ground cinnamon - 1/2 teaspoon pure vanilla extract - 1/4 cup chopped pecans (optional) - A pinch of fine sea salt Each ingredient in Caramel Apple Rice Krispie Treats has a special job. The Rice Krispies cereal gives a nice crunch and texture. Mini marshmallows add sweetness and help hold everything together. Unsalted butter adds richness and creaminess to the mix. Caramel sauce brings that sweet, gooey flavor we all love. The Granny Smith apple adds a tart bite that balances the sweetness. Ground cinnamon adds warmth and spice. Pure vanilla extract enhances the overall flavor. Pecan pieces can add a nice crunch and nutty taste, but they are optional. Finally, a pinch of sea salt brightens the flavors and cuts through the sweetness. You can change things up a bit with different ingredients. Try adding nuts like almonds or walnuts for extra crunch. You might also swap in dried fruit like cranberries or raisins for a chewy texture. For a chocolate twist, mix in some mini chocolate chips. If you want a fall flavor, add pumpkin spice instead of cinnamon. The fun is in mixing and matching to make these treats your own! 1. Prepare the Pan: Grease a 9x13 inch baking dish with butter or spray. Set it aside. 2. Melt Butter and Marshmallows: In a large saucepan, melt 1/2 cup of unsalted butter over medium-low heat. This takes about 2 minutes. Once melted, add 1 cup of mini marshmallows. Stir constantly until melted and smooth, about 3 to 4 minutes. 3. Infuse with Flavor: Remove the pan from heat. Stir in 1/2 teaspoon of pure vanilla extract, a pinch of fine sea salt, and 1/2 teaspoon of ground cinnamon. Mix well. 4. Mix in Rice Krispies: Gradually fold in 4 cups of Rice Krispies cereal. Use a gentle stirring motion until all pieces are coated. This should take about 2 minutes. 5. Fold in Apple and Caramel: Carefully add 1 diced Granny Smith apple and 3/4 cup of caramel sauce. If using, add 1/4 cup of chopped pecans. Fold gently to mix. 6. Transfer to the Baking Pan: Pour the mixture into the greased dish. Press it down evenly with a spatula or your hands. 7. Add the Final Touch of Caramel: Drizzle the remaining 1/4 cup of caramel sauce on top. Use a spatula to swirl it into the mixture gently. 8. Cool and Set: Allow the treats to cool at room temperature for about 30 minutes. For faster cooling, refrigerate for around 15 minutes. 9. Cut and Serve: Once set, slice into squares or rectangles. Enjoy your treats! - Use fresh marshmallows for the best gooeyness. - Do not overheat the marshmallows. They should melt, not brown. - Press the mixture firmly into the pan for a good shape. - Allow the treats to cool fully for a firm texture. - When melting butter, it should become completely liquid with no bubbles. - The marshmallow mixture should be smooth and glossy without lumps. - The Rice Krispies should be evenly coated, looking shiny but not wet. - After cooling, the treats should feel firm to the touch and hold their shape when cut. When making caramel apple Rice Krispie treats, avoid overcooking the marshmallows. They should melt but not brown. If they brown, your treats may taste burnt. Also, don’t skip the salt; it enhances the flavor. If you overload the caramel, it makes the treats too sticky and hard to cut. To mix well, fold the Rice Krispies gently into the melted marshmallows. Use a spatula for even mixing. Press down the mixture firmly in the pan, but don’t squish it. This keeps the treats light and airy. Use a piece of wax paper to help spread the mixture evenly without it sticking to your hands. To get that perfect gooey texture, use fresh mini marshmallows. They melt better and provide a softer bite. Adding the diced Granny Smith apple gives a nice tartness, balancing the sweetness of the caramel. For extra flavor, sprinkle cinnamon on top before serving. A drizzle of caramel adds both beauty and a delightful taste. {{image_4}} You can change the flavor of these treats for each season. For fall, try adding pumpkin spice. Just add one teaspoon of pumpkin spice to the butter and marshmallows. This gives the treats a warm, cozy flavor that fits right in with autumn. If you need gluten-free treats, use gluten-free Rice Krispies. They taste great and keep the same crunch. You can also swap the butter with coconut oil for a dairy-free version. This keeps the treats soft and tasty. Boost the flavor with fun add-ins. Try adding chocolate chips or toffee bits for extra sweetness. You can mix in 1/2 cup of either when you add the Rice Krispies. This adds a nice crunch and makes the treats even more fun. You can also toss in dried fruit like raisins or cranberries for a fruity twist. To keep your Caramel Apple Rice Krispie Treats fresh, store them in an airtight container. This helps prevent them from getting hard or stale. Place a piece of parchment paper between layers if they are stacked. This will keep them from sticking together. You can also wrap them in plastic wrap for extra protection. These treats stay fresh for about 3 to 5 days at room temperature. If you place them in the fridge, they can last up to a week. However, they may become a bit firmer when chilled. If you want to keep them longer, freezing is a good option. If your treats get a bit hard, you can refresh them easily. Just place a damp paper towel on top and microwave them for 10-15 seconds. This will help soften the marshmallow again. Be careful not to overheat, or they may melt too much. Enjoy them warm or at room temperature for the best taste! Yes, you can use store-bought caramel sauce. It saves time and tastes great. Just pour it over your treats as directed. If you want a homemade touch, you can make your own. You can use any puffed cereal. Crisped rice, corn puffs, or even granola work well. Each option gives a different taste and crunch. Yes! You can freeze these treats. Wrap them tightly in plastic wrap and store in an airtight container. They stay fresh for about two months. To reduce stickiness, butter your hands when pressing the mixture into the pan. You can also add a bit more cereal to the mix. Absolutely! You can make them a day or two ahead. Just store them in an airtight container to keep them fresh. Enjoy whenever you want! In this blog post, we explored key ingredients and their roles, plus steps for perfect treats. You learned tips to avoid mistakes and ways to keep the texture just right. We also discussed fun variations and storage methods. Each point shows you how to make tasty treats easier and more enjoyable. Remember, the best treats come from following the steps and thinking outside the box. Enjoy creating your version!

Caramel Apple Rice Krispie Treats Tasty and Fun Snack

Looking for a fun and tasty snack? You’ll love these Caramel Apple Rice Krispie Treats! Mixing sweet apples, gooey caramel,

To make these tasty bars, you need a few key ingredients: - 1 cup rolled oats - 1/2 cup pumpkin puree - 1/2 cup almond butter (or your favorite nut butter) - 1/4 cup honey or maple syrup - 1/4 cup unsweetened cocoa powder - 1/2 teaspoon vanilla extract - 1/4 teaspoon ground cinnamon - 1/4 teaspoon salt - 1/4 cup chocolate chips (or dark chocolate chunks) - 1/4 cup chopped nuts (optional, like walnuts or pecans) Each ingredient plays a big role. The oats give structure, while pumpkin adds moisture and flavor. The nut butter binds everything together, and the cocoa powder makes it chocolatey. You can customize this recipe by swapping nut butters and sweeteners. Here are some ideas: - Use peanut butter or sunflower seed butter instead of almond butter. - Swap honey for agave syrup if you want a vegan option. - Maple syrup can replace honey for a different flavor. These swaps keep the bars tasty and fit your diet needs. Want to add more flair to your bars? Try these fun mix-ins: - Chopped dried fruits like cranberries or apricots for sweetness. - Seeds like chia or flaxseeds for extra crunch. - A pinch of sea salt on top for a sweet and salty kick. These options not only add flavor but also give the bars a fun texture. Experiment to find your favorite combination! Start by gathering your ingredients. In a large bowl, mix together: - 1 cup rolled oats - 1/2 cup pumpkin puree - 1/2 cup almond butter - 1/4 cup honey or maple syrup - 1/4 cup unsweetened cocoa powder - 1/2 teaspoon vanilla extract - 1/4 teaspoon ground cinnamon - 1/4 teaspoon salt Stir all these ingredients well. You want a thick, sticky mixture that looks like cookie dough. It should be smooth and well combined. This base is where the magic begins. Next, you can add some fun extras! If you want, fold in: - 1/4 cup chocolate chips - 1/4 cup chopped nuts like walnuts or pecans Mix them gently. This step adds a nice crunch and extra flavor. Make sure the chocolate and nuts are spread out evenly. This way, every bite is a treat. Now, prepare your baking dish. Line an 8x8 inch dish with parchment paper. Leave some paper hanging over the sides. This helps with easy removal later. Pour your mixture into the dish. Press it down firmly with your hands or a spatula. Make sure it is nice and even. Place the dish in the fridge. Let it chill for at least 2 hours. This helps the mixture set and firm up. After that, you can slice it into bars. Enjoy your tasty snack! To get the best texture for your Chocolate Pumpkin Oat Bars, mix the ingredients well. You want a thick, sticky dough that holds together nicely. If it feels too dry, add a little more pumpkin puree or nut butter. If it’s too wet, sprinkle in a bit more oats or cocoa powder. Press the mixture firmly into the pan. This helps the bars hold their shape when you cut them. Chilling the bars for at least 2 hours is key. Cold helps them firm up and makes cutting easier. Keep your bars fresh by storing them in an airtight container. They will last about one week in the fridge. For longer storage, freeze them in single portions. Wrap them in plastic wrap, then place them in a freezer bag. This way, you can grab a bar whenever you want a snack. Just let it sit at room temperature for a few minutes to soften. When serving these bars, cut them into fun shapes or sizes. You can slice them into squares, rectangles, or even fun shapes with cookie cutters. For a nice touch, wrap each bar in parchment paper and tie a string around it. This makes them look great for sharing. Pair them with a glass of milk or a warm cup of tea for a delightful treat. Enjoy them as a quick breakfast, an afternoon snack, or a sweet dessert! {{image_4}} To make these bars vegan, swap honey for maple syrup. This change keeps the sweetness while being plant-based. For a gluten-free option, ensure your oats are certified gluten-free. Most rolled oats are safe, but checking the label is a smart step. You can also use sunflower seed butter instead of almond butter if you have nut allergies. This maintains the creamy texture without the nuts. Spices can elevate these bars. Try adding a pinch of nutmeg or ginger for warmth. A splash of almond or coconut extract adds a new flavor twist, too. For a richer chocolate taste, increase the cocoa powder to 1/3 cup. This makes the bars even more decadent and chocolatey. Don’t hesitate to experiment with mix-ins like dried fruit or seeds for a unique touch. If you want more bars, double the recipe. Use a 9x13 inch pan for a larger batch. Just remember to chill them longer if the mixture is thicker. For fewer bars, halve the ingredients and use a smaller dish. Adjust the chilling time as needed, making sure they set firmly. This flexibility makes these bars easy to fit into any occasion! Each bar contains about 150 calories. This means you can enjoy a sweet treat without guilt. The bars are made with healthy ingredients, so they provide good energy. - Rolled oats: These are great for your heart and give you fiber. - Pumpkin puree: This adds vitamins A and C, plus antioxidants. - Almond butter: Rich in healthy fats, it helps keep you full. - Honey or maple syrup: These natural sweeteners provide energy without refined sugar. - Cocoa powder: This offers antioxidants and may boost your mood. These ingredients work together to support your health and taste great too. - Swap almond butter for peanut butter if you prefer. - Use agave syrup instead of honey for a vegan option. - Try adding chia seeds for extra fiber and Omega-3s. - Use dark chocolate chips for less sugar and more antioxidants. These simple swaps keep your bars delicious and nutritious! You can store Chocolate Pumpkin Oat Bars in an airtight container. They stay fresh for up to one week in the refrigerator. If you want them to last longer, keep them in a cool, dry place. Always check for any signs of spoilage before eating. Yes, you can freeze these bars for later use. Wrap each bar in plastic wrap or parchment paper. Place them in a freezer-safe bag or container. They can last up to three months in the freezer. When you're ready to eat one, just take it out and let it thaw. These bars pair well with a variety of drinks and snacks. Here are some great suggestions: - A glass of cold almond milk or regular milk. - A cup of hot tea or coffee for a cozy snack. - Fresh fruit, like apple slices or banana, for a balanced treat. - Yogurt, which adds creaminess and extra protein. Feel free to mix and match these pairings to find your favorite! In this blog post, we explored how to make chocolate pumpkin oat bars. We discussed the main ingredients and shared options for nut butters and sweeteners. I provided step-by-step instructions to prepare and chill your mixture. You learned tips for perfect texture and storage. We also covered variations to fit different diets and tastes. These bars are a tasty treat packed with nutrition. They are easy to customize and perfect for any occasion. Enjoy making them your own and savor every bite!

Chocolate Pumpkin Oat Bars No-Bake Easy Snack Recipe

Are you looking for a quick and tasty snack? Try my Chocolate Pumpkin Oat Bars! They are easy to make,

To create the Pumpkin Spice Chia Pudding Parfaits, you'll need: - 1 cup almond milk (or your milk of choice) - 1/4 cup chia seeds - 1/2 cup pumpkin puree - 2 tablespoons maple syrup (adjust according to sweetness preference) - 1 teaspoon pumpkin pie spice - 1/2 teaspoon vanilla extract - A pinch of salt - 1/2 cup granola (choose your favorite variety) - 1/4 cup chopped nuts (such as walnuts or pecans, for added crunch) - Whipped coconut cream (optional, for an indulgent garnish) You can switch out some ingredients if you need to. Here are a few ideas: - Almond Milk: Use soy milk, coconut milk, or regular milk if you prefer. - Chia Seeds: Flaxseeds can work, but they may yield a different texture. - Pumpkin Puree: Sweet potato puree or butternut squash puree can be a tasty alternative. - Maple Syrup: Honey or agave syrup can replace maple syrup for sweetness. - Granola: You can use muesli or crushed graham crackers for a different crunch. Each ingredient in this parfait adds health benefits: - Chia Seeds: Rich in fiber, omega-3s, and protein, these seeds help digestion and heart health. - Pumpkin Puree: Loaded with vitamins A and C, pumpkin supports eye health and boosts your immune system. - Maple Syrup: This natural sweetener contains antioxidants and minerals like zinc and manganese. - Nuts: Chopped nuts add healthy fats and protein, which support brain health and energy levels. - Almond Milk: Low in calories, it is a great dairy alternative and is often fortified with vitamins. These ingredients make the parfait not just delicious but also nutritious! Enjoy the blend of flavors and health benefits with each spoonful. To start, grab a medium-sized mixing bowl. In it, combine the following ingredients: - 1 cup almond milk - 1/4 cup chia seeds - 1/2 cup pumpkin puree - 2 tablespoons maple syrup - 1 teaspoon pumpkin pie spice - 1/2 teaspoon vanilla extract - A pinch of salt Whisk these ingredients together until fully mixed. Make sure there are no clumps. The chia seeds will absorb the liquid, so this step is key. Next, cover the bowl with plastic wrap or a lid. Place it in the fridge for at least 4 hours. If you can, let it chill overnight. This gives the chia seeds time to expand. You want a thick, pudding-like texture. After chilling, stir the mixture again. This breaks up any clumps and makes it nice and smooth. Now, it’s time to build your parfaits. Take individual serving glasses or bowls. Start by adding a layer of chia pudding to the bottom. Then, add a layer of granola. Follow this with a sprinkle of chopped nuts. Repeat these layers until you fill the glasses. Make sure the last layer is chia pudding. For an extra treat, add a dollop of whipped coconut cream on top. You can finish it off with a sprinkle of cinnamon or more pumpkin pie spice for flair. Serve them right away to enjoy the fresh flavors! If you want, you can refrigerate them briefly for a cool dessert. To make the best chia seed pudding, follow these simple steps: - Mix well: Whisk the mixture until no clumps remain. This helps the seeds soak up the liquid evenly. - Chill: Let the pudding sit in the fridge for at least 4 hours. Overnight is even better! This gives the seeds time to swell and thicken. - Stir before serving: After chilling, give the pudding a good stir. This breaks up any clumps and makes it smooth. Presentation is key for parfaits. Here are some easy tips: - Use clear glasses: This shows off the pretty layers of pudding and toppings. - Layer carefully: Start with pudding at the bottom, then add granola and nuts. Repeat layers for a beautiful look. - Garnish: Top with whipped coconut cream and a sprinkle of spices. A mint sprig or a slice of pumpkin adds extra charm. You can customize the sweetness and flavor easily. Here’s how: - Taste as you go: Start with the maple syrup. Add more if you like it sweeter. - Play with spices: If you love spice, add more pumpkin pie spice or try cinnamon. - Experiment with milk: Different milks change the taste. Almond milk is great, but coconut or oat milk works too. These tips will help you make perfect pumpkin spice chia pudding parfaits every time! {{image_4}} You can mix flavors to create your own special parfait. Try using vanilla or chocolate pudding instead of pumpkin. You could add fresh berries for a fruity twist. Another option is to use matcha powder for a green, earthy flavor. Mix in spices like cinnamon or nutmeg for warmth. The goal is to have fun and experiment with flavors you love. This recipe is quite flexible. If you need a dairy-free option, use almond milk, coconut milk, or oat milk. For nut-free choices, try sunflower seed butter or pumpkin seed milk. If you want to skip the granola, use puffed rice or cereal instead. This way, everyone can enjoy a tasty parfait without worry. Seasonal fruits can add freshness to your parfait. In the fall, use apples or pears. In the spring, add strawberries or blueberries. You can also sprinkle in spices like ginger or cardamom. These flavors can uplift your dish and make it feel special. Don’t hesitate to mix in seasonal favorites that excite your taste buds! Store any leftover parfaits in the fridge. Use airtight containers to keep them fresh. This helps maintain the taste and texture. If you have layers, keep them separate for the best results. You can mix them before serving if you prefer. These parfaits last up to four days in the fridge. If you want to freeze them, do so without granola or cream. Store the chia pudding in a freezer-safe container. It can stay fresh for about two months in the freezer. Thaw overnight in the fridge before serving. You don’t need to reheat chia pudding. It tastes best when chilled. Serve parfaits cold with fresh toppings. Add extra granola, nuts, or a dollop of whipped cream for a tasty finish. Enjoy your parfaits as a healthy snack or dessert! Yes, you can make these parfaits ahead of time. The chia pudding needs time to chill and thicken. I recommend preparing it the night before. You can layer the parfaits before serving, or keep the layers separate in the fridge. This way, you can enjoy a quick breakfast or snack anytime. If you do not have chia seeds, you can use flax seeds. They will give a similar texture. Just remember to grind them for better absorption. You can also try using tapioca pearls for a different texture. Both options work well in this recipe. This recipe is already vegan-friendly! The ingredients like almond milk, pumpkin puree, and maple syrup are plant-based. Just make sure to use a vegan granola for the layers. This way, you can enjoy a tasty treat without any animal products. We covered all you need to make tasty chia pudding parfaits. We explored the ingredients and their health perks. Then, I shared easy steps to prepare and present your parfaits. I also gave tips to adjust sweetness and offered great flavor ideas. To wrap up, making chia pudding is fun and flexible. You can customize it to fit your taste and diet. Now, you can enjoy a delicious treat that’s also healthy.

Pumpkin Spice Chia Pudding Parfaits Delightfully Simple

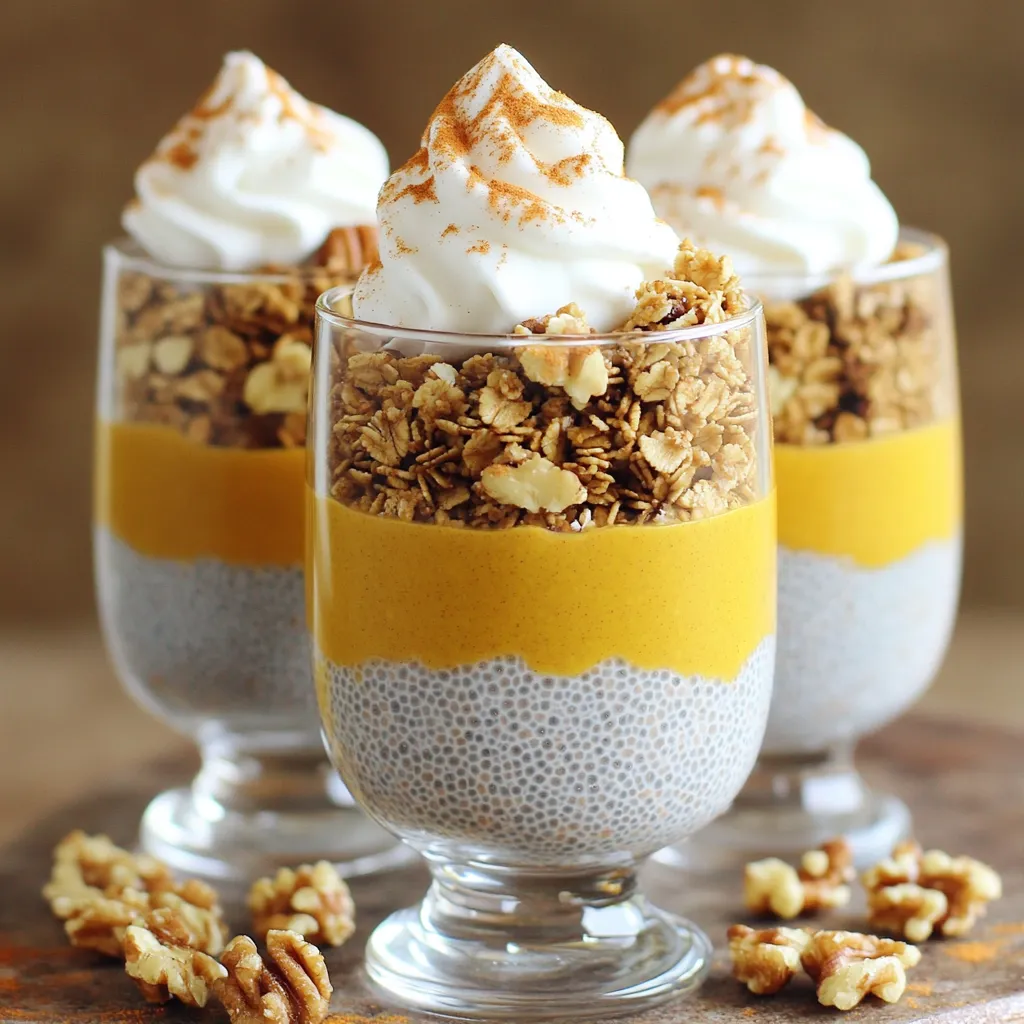
Fall is here, and that means pumpkin spice everything! If you love this cozy flavor, you’ll adore these Pumpkin Spice

Older posts
Newer posts
← Previous Page1 … Page5 Page6 Page7 … Page86 Next →

dsad

© 2026 recipetorch • Built with GeneratePress

Our Policies

  • Copyright Policy
  • Cookie Policy
  • GDPR Policy
  • Privacy Policy
  • Disclaimer
  • Terms Of Use

More Information

  • Home
  • About
  • Contact
  • Appetizers
  • Dessert
  • Dinner
  • Drinks
©2026, recipetorch About Back To Top