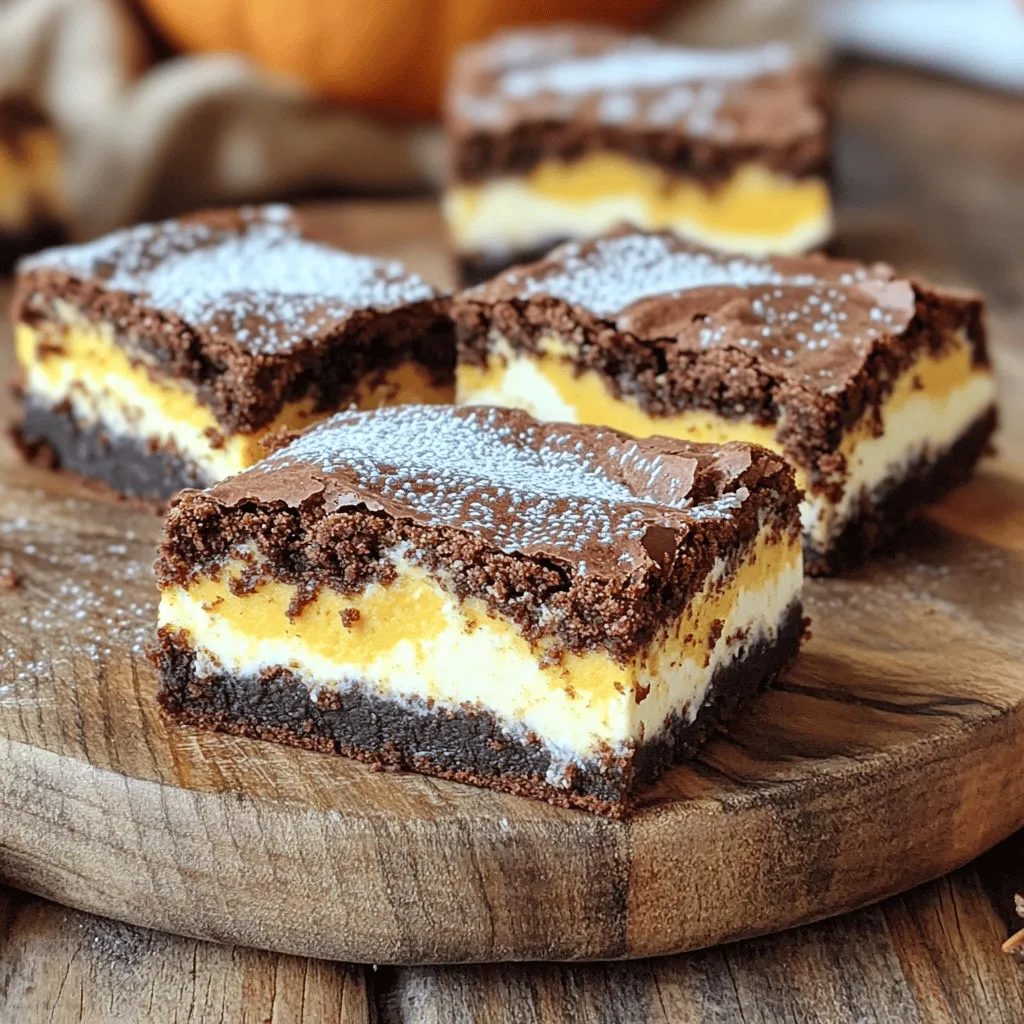
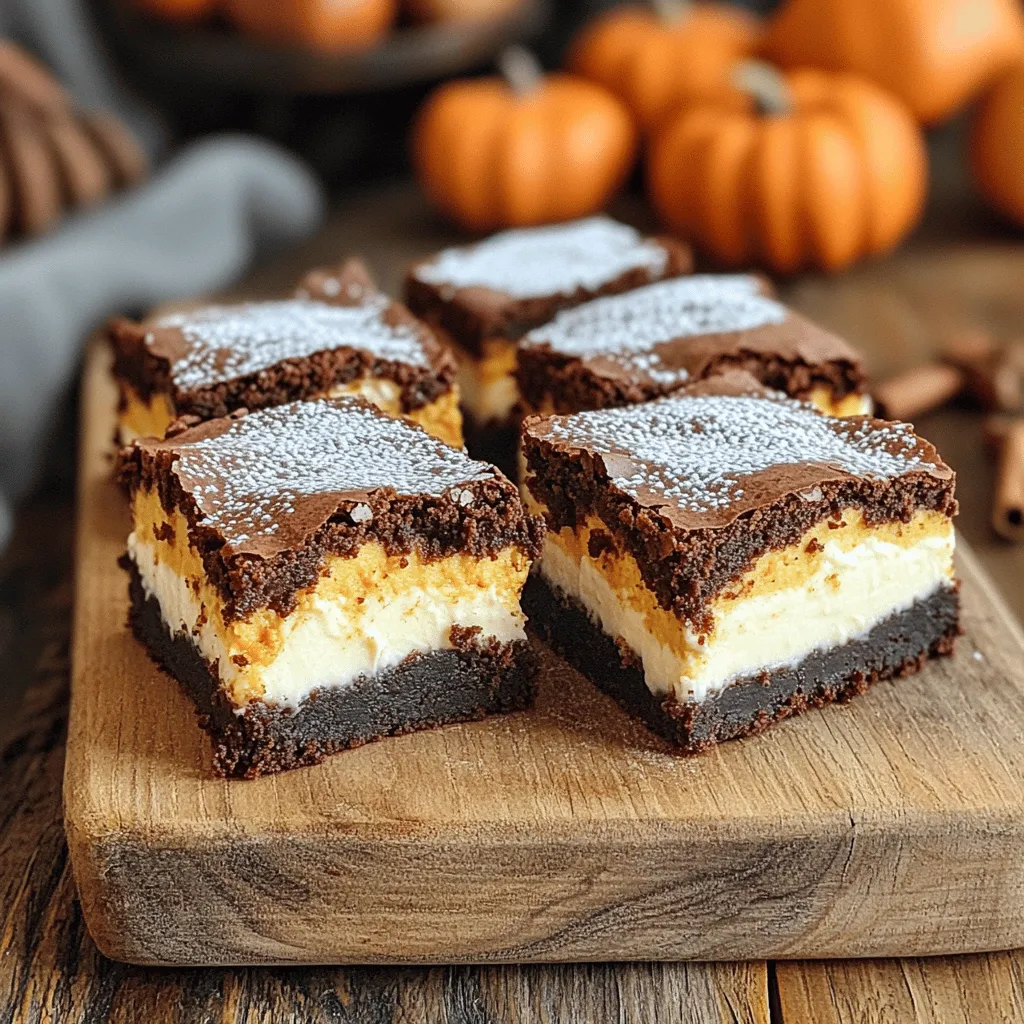
If you love pumpkin treats, you must try these Pumpkin Cream Cheese Brownies! This dessert combines rich chocolate flavors with creamy pumpkin goodness, making it perfect for fall. You can enjoy them on chilly nights or at gatherings. Follow my easy step-by-step guide, and soon you’ll have a warm plate of these brownies to share—or not! Get ready to satisfy your sweet tooth!
Ingredients
To create your Pumpkin Cream Cheese Brownies, gather the following ingredients:
– 1 cup all-purpose flour
– 1/2 teaspoon baking powder
– 1/2 teaspoon baking soda
– 1/4 teaspoon salt
– 1/2 cup unsweetened cocoa powder
– 1 cup granulated sugar
– 1/2 cup packed brown sugar
– 1/2 cup vegetable oil
– 2 large eggs
– 1 teaspoon vanilla extract
– 1 cup pumpkin puree
– 1 teaspoon ground cinnamon
– 1/2 teaspoon ground nutmeg
– 1/4 teaspoon ground cloves
– 8 oz cream cheese
– 1/4 cup powdered sugar
– 1/2 teaspoon vanilla extract (for cream cheese mixture)
These ingredients blend together to create a rich and creamy dessert. The pumpkin puree adds moisture and flavor. The cocoa powder gives the brownies a deep chocolate taste.
Using two types of sugar gives you both sweetness and depth. The spices like cinnamon, nutmeg, and cloves bring warmth to the dish. The cream cheese layer adds a smooth, tangy contrast.
Make sure you use pure pumpkin puree, not pumpkin pie filling. This ensures the right texture and flavor. With all these ingredients ready, you can create a dessert that is both tasty and visually appealing.
Step-by-Step Instructions
Preparation Steps
– Preheat the oven and prepare the baking pan: Start by preheating your oven to 350°F (175°C). Take a 9×9-inch baking pan and grease it lightly or line it with parchment paper. This makes it easy to remove the brownies later.
– Whisk dry ingredients together: In a medium bowl, combine 1 cup of all-purpose flour, 1/2 teaspoon baking powder, 1/2 teaspoon baking soda, 1/4 teaspoon salt, and 1/2 cup unsweetened cocoa powder. Whisk these ingredients well until they blend together nicely. Set this dry mix aside.
– Mix wet ingredients and incorporate eggs and vanilla: In a large mixing bowl, add 1 cup granulated sugar, 1/2 cup packed brown sugar, and 1/2 cup vegetable oil. Mix them until smooth. Now, add 2 large eggs one at a time, mixing well after each. Finally, stir in 1 teaspoon vanilla extract and 1 cup pumpkin puree until the mix is creamy.
Combining Mixtures
– Combine dry ingredients with wet mixture: Gradually add the dry mix to the wet mixture. Fold them together gently until just combined. Be careful not to overmix. Finally, fold in 1 teaspoon ground cinnamon, 1/2 teaspoon ground nutmeg, and 1/4 teaspoon ground cloves for warm spice flavors.
– Blend cream cheese layer separately: In another bowl, take 8 oz of softened cream cheese. Add 1/4 cup powdered sugar and 1/2 teaspoon vanilla extract. Blend these ingredients until you achieve a creamy and smooth mixture.
Baking Process
– Layer the brownie batter and cream cheese mixture: Pour half of the brownie batter into the prepared pan. Spread it evenly. Next, dollop spoonfuls of the cream cheese mixture over this layer. Pour the rest of the brownie batter on top. Use a knife to gently swirl the cream cheese mix to create a marbled effect.
– Bake and check for doneness: Place the pan in your preheated oven. Bake for about 30-35 minutes. To check if they are done, insert a toothpick into the center. It should come out with a few moist crumbs but not wet batter.
Tips & Tricks
Baking Tips
To make perfect pumpkin cream cheese brownies, mixing well is key. Start by blending your dry ingredients in one bowl. This includes flour, baking powder, baking soda, salt, and cocoa powder. Whisk them until they are well combined.
Next, mix your wet ingredients in a large bowl. Combine both granulated and brown sugars with vegetable oil. Make sure this mixture becomes smooth before adding eggs. Add them one at a time and stir well. Then, add vanilla and pumpkin puree. This creates a rich, creamy base.
When you add the dry mix to the wet mix, do it slowly. Fold the ingredients together gently. Overmixing can make the brownies tough. You want a soft and moist texture. Only mix until the dry ingredients disappear.
Serving Suggestions
Once your brownies cool, cut them into squares. For a nice touch, place them on a pretty platter. You can dust the top with powdered sugar. A sprinkle of cinnamon adds a festive look.
To make your dessert even better, serve with a dollop of whipped cream or a scoop of vanilla ice cream. The creaminess pairs so well with the rich brownie flavor. You can also add a drizzle of caramel sauce for extra sweetness. Enjoy your delicious creation!
Variations
Flavor Variations
You can make your Pumpkin Cream Cheese Brownies even more fun by adding nuts or chocolate chips.
– Nuts: Chopped walnuts or pecans add crunch and flavor. Stir in about 1/2 cup of your choice to the brownie batter.
– Chocolate Chips: Try adding 1/2 cup of semi-sweet or dark chocolate chips. They melt and create a rich, gooey surprise in every bite.
You can also play with spices or other flavorings.
– Alternative Spices: Instead of cinnamon, nutmeg, and cloves, try ginger or allspice for a new twist.
– Extracts: A splash of almond or orange extract can brighten the flavors.
Dietary Adjustments
If you need to make dietary changes, there are great options.
– Gluten-Free Flour: Substitute all-purpose flour with a gluten-free blend. Look for one that measures cup-for-cup.
– Vegan Substitutes: Use flax eggs (1 tablespoon ground flaxseed mixed with 3 tablespoons water per egg) instead of regular eggs. For cream cheese, use a vegan cream cheese. These swaps keep the brownies tasty while meeting dietary needs.
These variations let everyone enjoy this delicious treat!
Storage Info
How to Store
To keep your pumpkin cream cheese brownies fresh, store them properly. Here are some best practices:
– Room Temperature: Place brownies in an airtight container. They stay fresh for 3-4 days at room temperature. This keeps them soft and tasty.
– Refrigerator: If you prefer, you can store them in the fridge. They last about a week this way. Just make sure to keep them in an airtight container. The chill can make them a bit firmer, but they still taste great.
Freezing Instructions
If you want to save your brownies for later, freezing is a great option. Here’s how to do it:
– Freezing Brownies: Cut the brownies into squares. Wrap each piece in plastic wrap. Then, place them in a freezer-safe bag. They can last for up to three months.
– Thawing Instructions: To enjoy your frozen brownies, take them out of the freezer. Let them sit in the fridge for several hours or overnight. You can also warm them in the microwave for 10-15 seconds. This brings back their delicious, fudgy texture!
FAQs
Can I use canned pumpkin puree or fresh pumpkin?
You can use either canned pumpkin puree or fresh pumpkin. Canned pumpkin is easy and saves time. Just make sure it is pure pumpkin and not pie filling. If using fresh pumpkin, cook and mash it until smooth.
How long do pumpkin cream cheese brownies last?
These brownies last about 3 to 5 days when stored in an airtight container. Keep them at room temperature for the best taste. If you want them to last longer, refrigerate them. They can last up to a week in the fridge.
What can I substitute for vegetable oil?
You can use melted coconut oil or unsweetened applesauce instead of vegetable oil. Both options add moisture and flavor. If you want a lighter taste, use canola oil as another substitute.
Can I make these brownies in advance?
Yes, you can make these brownies in advance. Bake them a day or two before you plan to serve them. Just store them properly. For the best texture, let them cool completely before cutting and storing.
This blog outlined how to make delicious pumpkin cream cheese brownies. We covered the ingredients, step-by-step instructions, and tips for perfect results. You learned about storage options and tasty variations, too.
In cooking, practice makes perfect. Enjoy these brownies warm or cold, and share them with friends. You can also try different flavors and see what you like best. Happy baking, and let’s create sweet memories!