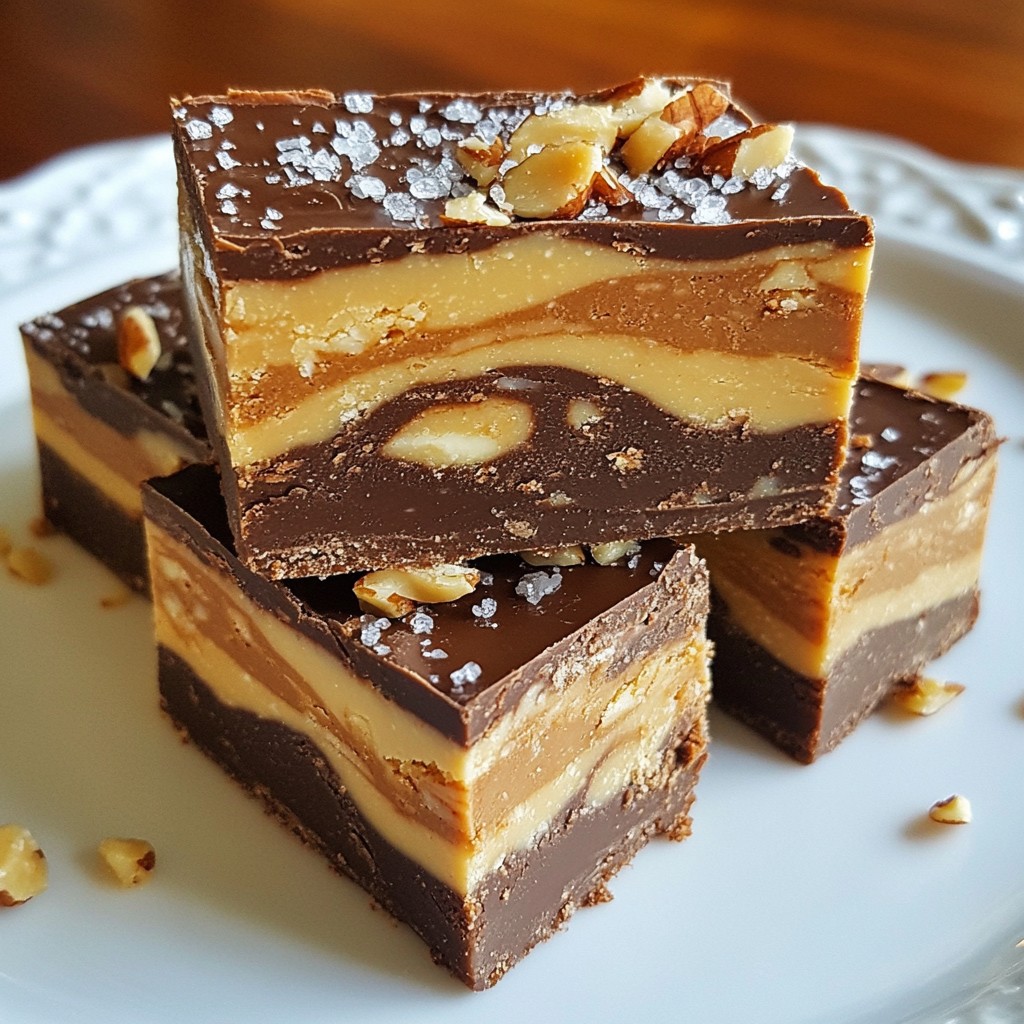
Are you ready for a sweet treat that is easy to make and oh-so-delicious? This Peanut Butter Chocolate Swirl Fudge is rich, creamy, and a perfect blend of flavors. Whether you want a snack for yourself or a dessert to impress guests, this fudge has you covered. In this post, I'll guide you through every step, from choosing your ingredients to achieving the perfect swirl. Get your taste buds ready—let's dive in!
Why I Love This Recipe
- Decadent Flavor: This fudge combines the rich, creamy taste of peanut butter and chocolate, creating a perfect balance that satisfies any sweet tooth.
- Easy to Make: With just a few simple ingredients and easy steps, this recipe is perfect for both novice and experienced bakers.
- Customizable: You can easily add your favorite nuts or even swirl in additional flavors like caramel for a unique twist.
- Perfect for Sharing: This recipe makes a generous batch, making it ideal for parties, gatherings, or simply to share with friends and family.
Ingredients
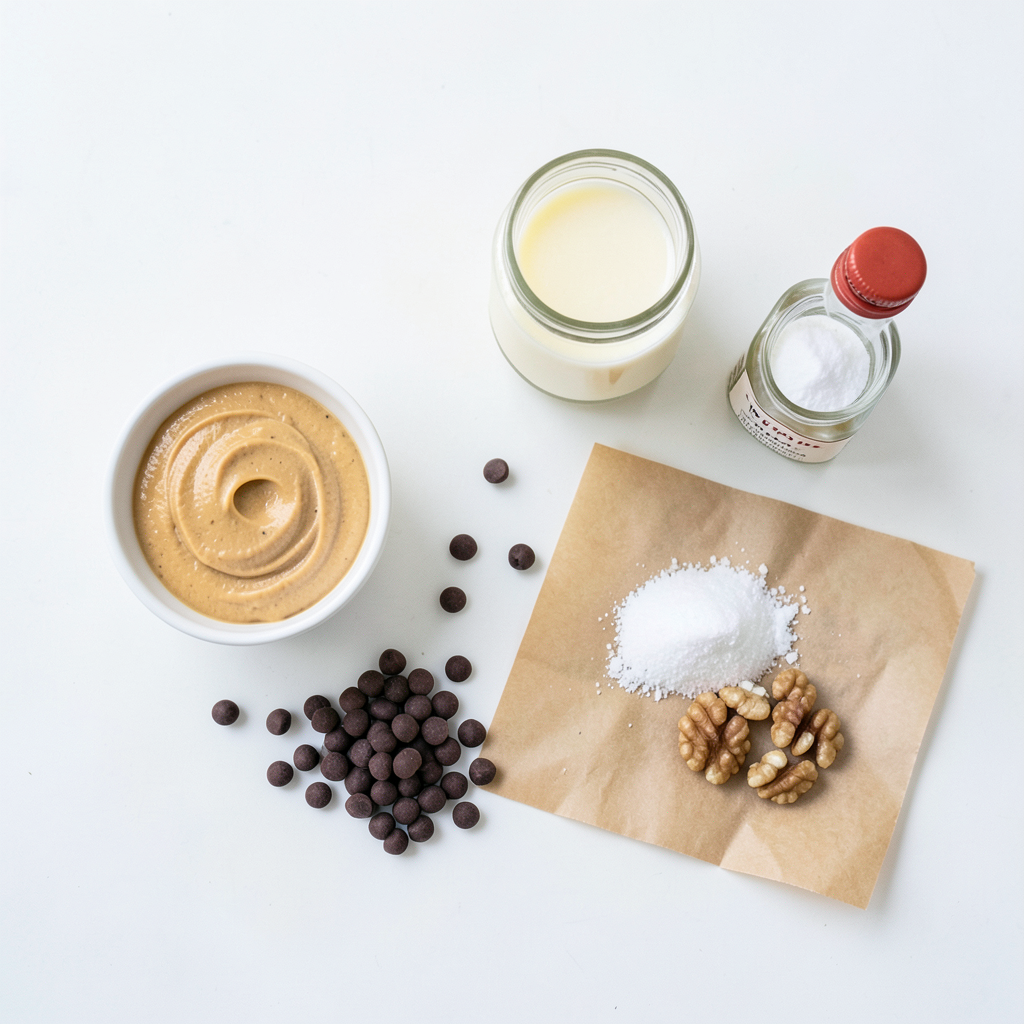
To make Peanut Butter Chocolate Swirl Fudge, you need the right ingredients. Here’s what you will need:
- 1 cup creamy peanut butter
- 1 cup semi-sweet chocolate chips
- 1 cup sweetened condensed milk
- 1 teaspoon vanilla extract
- 1/4 teaspoon salt
- 1/2 cup chopped nuts (optional - walnuts or pecans work well)
- Parchment paper for lining the pan
Optional Ingredients for Variations
If you want to mix it up, try adding nuts. They add a nice crunch and flavor. You can use walnuts or pecans. If you prefer a nut-free version, just skip them.
Ingredient Substitutions
If you don’t have creamy peanut butter, you can use crunchy peanut butter. This will give your fudge a fun texture. You can also swap semi-sweet chocolate chips for dark or milk chocolate chips based on your taste. Sweetened condensed milk is key, but if you need a dairy-free option, look for coconut condensed milk.
Step-by-Step Instructions
Preparation of the Pan
To start, you need to line your 8x8 inch baking dish with parchment paper. Cut a piece of paper that covers the bottom and sides. Leave some overhang on the edges. This overhang is key. It helps you lift the fudge out easily after it sets.
Melting the Chocolate
Next, let’s melt the chocolate. In a medium saucepan, add the semi-sweet chocolate chips and half of the sweetened condensed milk. Place this over low heat. Stir it often to make sure it melts smoothly. When the chocolate is fully melted, take it off the heat and let it cool a bit. Be careful! The pot will be hot, so use oven mitts if needed.
Mixing the Peanut Butter
Now we’ll mix the peanut butter. In a separate saucepan, combine the rest of the sweetened condensed milk with the creamy peanut butter, vanilla extract, and salt. Cook this mixture over low heat, stirring it constantly. This will help blend everything smoothly. Once it’s creamy and well mixed, remove it from the heat.
Layering and Swirling
It’s time to layer! Pour half of the peanut butter mixture into the bottom of your lined baking dish. Spread it out evenly. Next, pour half of the melted chocolate over the peanut butter layer. Repeat these steps with the remaining mixtures. Finish with the chocolate layer on top. To create a beautiful swirl, take a knife or toothpick and gently swirl the layers together. Be careful not to over-mix; you want to see both flavors.
Chilling and Slicing
Now let the fudge chill. Place the baking dish in the fridge for at least 2 hours. This will help it set properly. Once it’s firm to the touch, it’s time to slice. Use the parchment paper edges to lift the fudge out. Use a sharp knife to cut it into squares. For perfect squares, press down firmly and use a sawing motion.
Tips & Tricks
Pro Tips for Perfect Fudge
- Use good tools: A medium saucepan helps melt chocolate and mix well. A sharp knife is best for cutting.
- Check heat: Low heat is key. If it's too high, chocolate can burn.
- Don't rush the chill: Chill for at least 2 hours. This makes the fudge firm and easier to cut.
- Mix gently: When swirling, don’t over-mix. You want to see the layers, not a blend.
- Use parchment paper: This helps lift the fudge out easily. It keeps the fudge from sticking to the pan.
Serving and Presentation Suggestions
- Garnish well: A sprinkle of sea salt adds great flavor. You can also top with chocolate shavings.
- Serve on a nice plate: A decorative plate makes the fudge look special.
- Perfect for gatherings: Cut into small squares for easy sharing. You can also place them in cute cupcake liners.
- Pair with drinks: Serve with milk or coffee for a delightful treat.
Pro Tips
- Use Room Temperature Ingredients: Allow your peanut butter and condensed milk to come to room temperature before mixing. This helps achieve a smoother and creamier texture.
- Experiment with Flavors: Consider adding a pinch of cinnamon or a splash of almond extract for a unique twist on the classic peanut butter and chocolate combination.
- Store Properly: Keep the fudge in an airtight container in the refrigerator to maintain its freshness. It can last up to two weeks if stored correctly.
- Cut with Ease: For clean slices, warm your knife under hot water before cutting the fudge. This prevents it from sticking and helps achieve smooth edges.
Variations
Flavor Variations
You can change the taste of your fudge in fun ways. Start by swapping the chocolate types. Use dark chocolate for a richer taste or stick with milk chocolate for sweetness. Both options work great. You can also add flavor extracts. A dash of almond or mint extract can give a nice twist. Spices like cinnamon or sea salt can add depth, too. Just be careful not to overpower the peanut butter.
Dietary Adjustments
If you need vegan or gluten-free options, it’s easy to adjust. Use vegan chocolate chips and coconut milk to replace the sweetened condensed milk. This keeps the fudge rich and creamy without dairy. For nut-free options, try sun butter instead of peanut butter. This makes your fudge safe for those with nut allergies while keeping it delicious. These adjustments ensure everyone can enjoy this treat!
Storage Info
Best Practices for Storage
To keep your Peanut Butter Chocolate Swirl Fudge fresh, store it in an airtight container. This helps prevent air exposure and keeps the fudge soft. You can place parchment paper between layers of fudge to avoid sticking.
- Cold storage: For best results, keep fudge in the fridge. The cool temp helps preserve its rich taste and texture.
- Room temperature storage: If you prefer, you can store fudge at room temp. Just keep it in a cool place, away from sunlight.
Shelf Life
Homemade fudge can last for about one to two weeks in the fridge. If you store it at room temperature, it usually stays fresh for about five days.
- Signs of spoilage: If your fudge starts to smell off or develops a white film, it’s time to toss it. These signs mean that the fudge has gone bad. Always trust your senses when checking for freshness.
FAQs
Can I use crunchy peanut butter instead of creamy?
Yes, you can use crunchy peanut butter. It changes the texture and taste. Crunchy peanut butter gives the fudge a nice bite. The small nut pieces add a fun crunch. If you want a smoother fudge, stick with creamy peanut butter.
Can I freeze Peanut Butter Chocolate Swirl Fudge?
You can freeze this fudge! To freeze it, first, cut it into squares. Wrap each square in plastic wrap. Then, place the squares in a freezer-safe bag. When you want to eat it, take it out and let it thaw in the fridge. This keeps the taste fresh and yummy.
How do I soften hardened fudge?
If your fudge is too hard, don't worry! You can soften it easily. Place it in the microwave for a few seconds. Heat it in short bursts to avoid melting. You can also leave it at room temperature for a while. This helps restore its soft texture.
This blog post covered all you need to make Peanut Butter Chocolate Swirl Fudge. We discussed ingredients, step-by-step instructions, and helpful tips. You learned how to layer, chill, and cut fudge for the best results. Remember, small adjustments in flavors or storage can make a big difference. Keep these insights in mind to enhance your fudge-making skills. With practice, you'll impress friends and family with your tasty treats! Enjoy creating your sweet masterpiece!