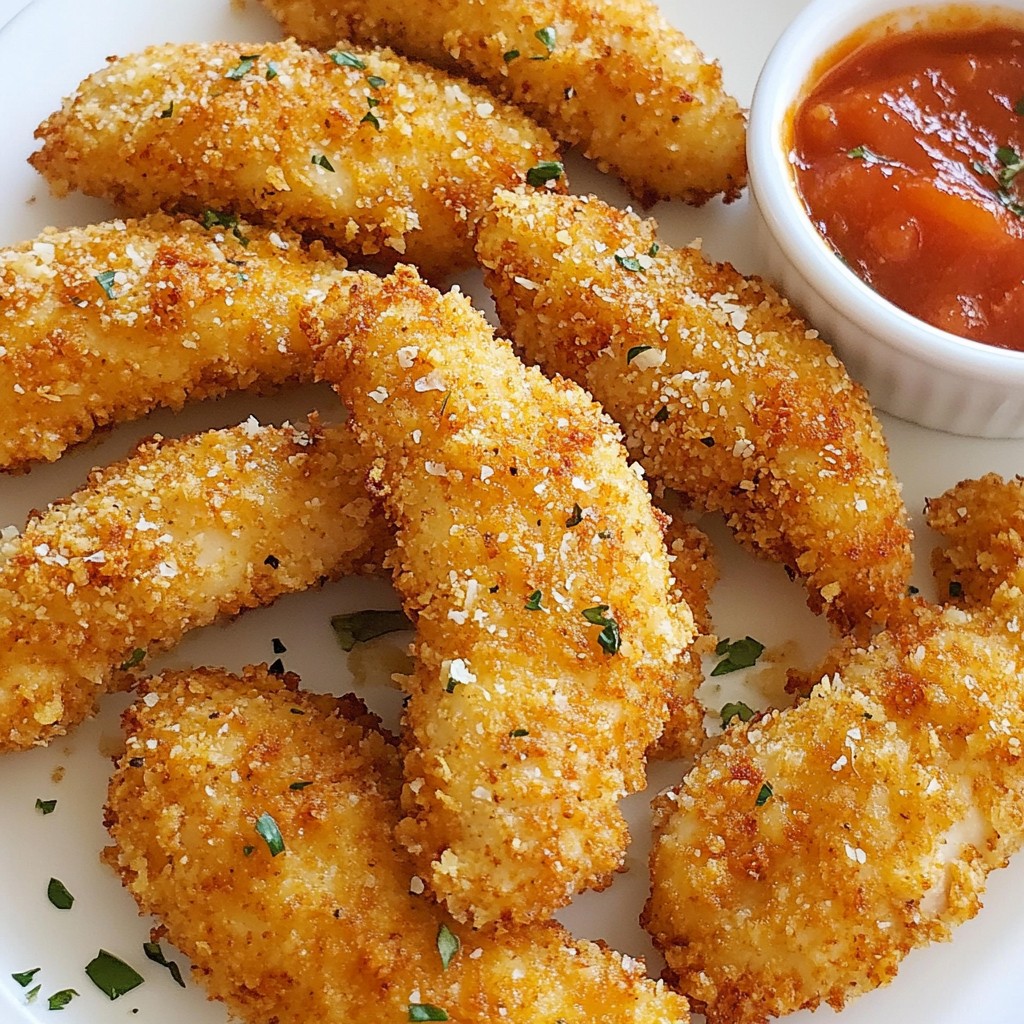
Are you ready to take your dinner to the next level? I’m excited to share my recipe for Parmesan Crusted Chicken Tenders! These tenders are juicy, crispy, and packed with flavor. With simple ingredients and easy steps, you’ll create a dish that impresses everyone. Whether for a weeknight meal or a gathering, this treat is sure to please. Let’s dive into the tasty details and get cooking!
Error: Connection error.
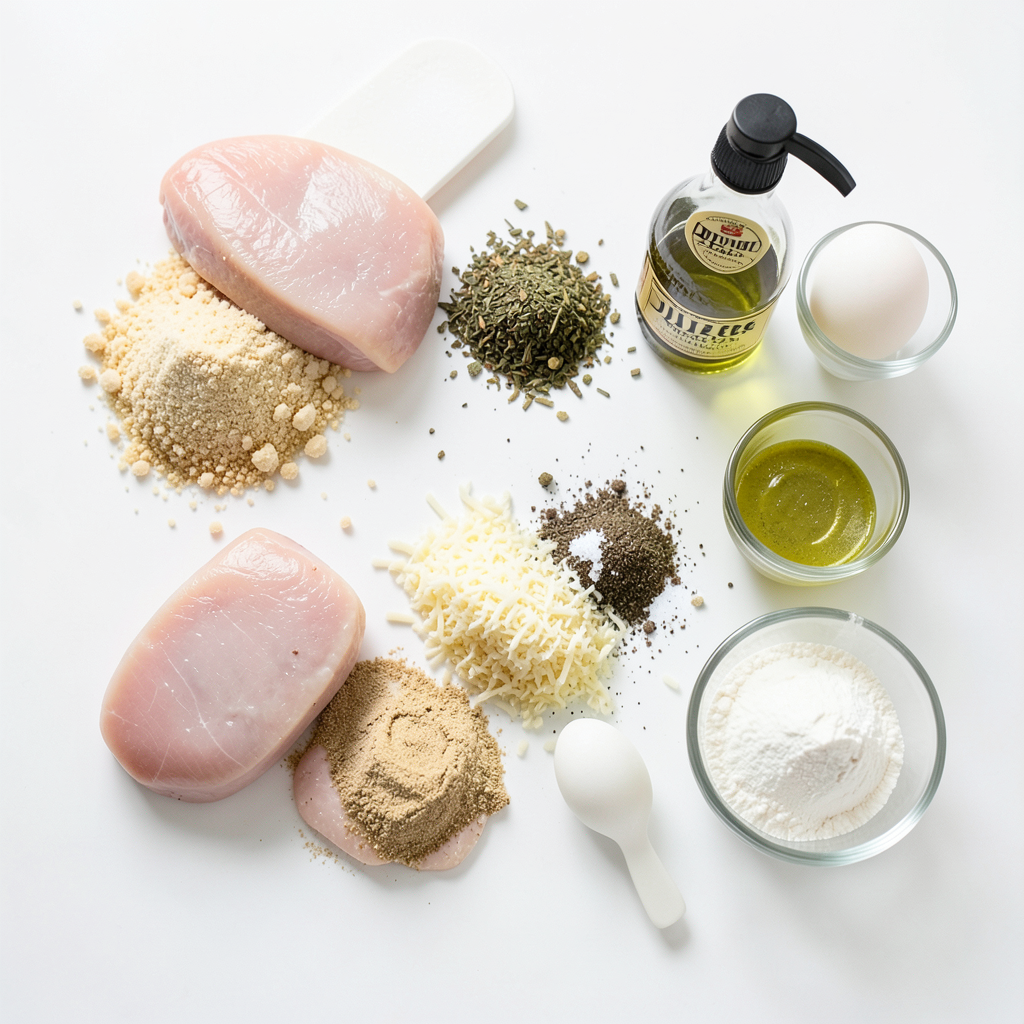
Ingredients
Main Ingredients
- 1 pound chicken tenderloins
- 1 cup panko breadcrumbs
- 1/2 cup freshly grated Parmesan cheese
Seasonings and Dredging Ingredients
- 1 teaspoon garlic powder
- 1 teaspoon dried oregano
- 1 teaspoon smoked paprika
- 1/2 teaspoon sea salt
- 1/2 teaspoon freshly cracked black pepper
Breading and Coating
- 2 large eggs
- 1 tablespoon Dijon mustard
- 1/4 cup all-purpose flour
- Light olive oil spray
When I make Parmesan crusted chicken tenders, I always start with the main ingredients. Fresh chicken tenderloins work best. They stay juicy and cook evenly. I love using panko breadcrumbs. They give the chicken a nice crunch. The freshly grated Parmesan cheese adds a rich flavor that pairs so well with the chicken.
Next, I prepare the seasonings. Garlic powder adds depth, while oregano and smoked paprika bring warmth. Sea salt and cracked black pepper balance all the flavors. You can adjust these seasonings to fit your taste.
For breading, I use eggs and Dijon mustard to coat the chicken. The mustard adds a subtle tang that enhances the overall dish. I also have all-purpose flour ready for dredging. This step helps the egg and breadcrumbs stick better. A light spray of olive oil at the end helps achieve a crisp finish.
With these ingredients ready, you can create a delicious meal that impresses everyone.
Step-by-Step Instructions
Prepping Ingredients
- Preheat your oven to 400°F (200°C). This ensures even cooking.
- Line a baking sheet with parchment paper. This prevents sticking and makes cleanup easy.
- In a shallow bowl, mix together the panko breadcrumbs, grated Parmesan cheese, garlic powder, dried oregano, smoked paprika, sea salt, and cracked black pepper. Stir until mixed well. This mix adds great flavor.
Breading the Chicken
- Take one chicken tenderloin and dredge it in the flour. Make sure it is fully coated.
- Gently shake off any extra flour. This helps the coating stick better.
- Dip the floured tenderloin into the egg mixture. Ensure it is completely coated.
- Roll the chicken tenderloin in the breadcrumb mix. Press lightly to ensure an even coating.
- Place the coated tenders on the baking sheet. Make sure they have space between them. This helps them cook evenly.
Baking Instructions
- Bake the chicken tenders in the preheated oven for 15-20 minutes.
- Flip the tenders halfway through baking for even cooking.
- Look for a golden brown color and ensure the chicken is fully cooked.
- Once done, let the tenders rest for a few minutes before serving. This helps keep them juicy.
Tips & Tricks
Achieving the Perfect Crispiness
To get the best crispiness, use panko breadcrumbs. They add a light and crunchy texture. Regular breadcrumbs work too, but panko gives a better bite.
Another key tip is to use a light spray of olive oil. This technique helps the coating crisp up nicely in the oven. It also gives a golden color. Just a quick spray on top before baking does wonders.
Cooking and Serving Tips
Always check that the chicken is fully cooked. The best way is to use a meat thermometer. The inside should reach 165°F (74°C). This ensures your chicken is safe to eat.
For serving, pair the chicken tenders with tasty sauces. Marinara sauce or creamy ranch dressing works great. You can also add a sprinkle of fresh parsley on top. It adds color and makes the dish look pretty.
Expert Advice for Flavor Enhancements
You can make your chicken tenders even better by adding spices or herbs. Try mixing in some Italian seasoning or cayenne pepper for heat. This lets you customize the flavor to your liking.
For a complete meal, serve these tenders with a side salad or roasted veggies. They balance out the crunch and make your plate more colorful. Enjoy your flavorful, crispy chicken tenders!
Error: Connection error.
Variations
Different Bread Crumb Options
You can switch up your breadcrumbs to fit your needs. If you need gluten-free options, use gluten-free breadcrumbs. They work just as well! This makes the dish friendly for more diets.
Whole wheat breadcrumbs are another option. They add some fiber and a nutty taste. This choice is great if you want a healthier twist.
Flavor Variations
You can get creative with the cheese. Try using mozzarella or cheddar for a different flavor. Both will melt nicely and add creaminess.
Adding herbs can also change the taste. Thyme and basil are excellent choices. They bring fresh notes that brighten the dish.
Cooking Method Alternatives
For a healthier option, try air frying the chicken tenders. This method cuts down on oil but keeps them crispy. It's a great way to enjoy the same taste with less guilt.
You can also pan-fry the tenders if you want that classic flavor. This method gives a rich taste and a crispy crust. Just use a bit of oil to keep them juicy.
Storage Info
Refrigerating Leftovers
To store cooked chicken tenders, let them cool first. Place them in an airtight container. Use parchment paper between layers to keep them from sticking. You can keep them in the fridge for up to three days. If you want to enjoy them later, proper storage will help maintain their taste.
Freezing for Future Meals
To freeze chicken tenders, wrap them well in plastic wrap or foil. This helps to keep the air out. Place them in a freezer-safe bag or container. Label it with the date, so you remember when you froze them. You can store them in the freezer for up to three months. This way, you’ll have a tasty meal ready for busy days.
Reheating Instructions
When reheating, the best method is to use the oven. Preheat the oven to 375°F (190°C). Place the chicken tenders on a baking sheet. Cover them with foil to keep moisture in. Bake for about 10-15 minutes. For extra crunch, remove the foil for the last few minutes. You can also use an air fryer to reheat them. This keeps the coating crispy while warming up the chicken inside.
FAQs
Can I make these chicken tenders in advance?
Yes, you can make these chicken tenders ahead of time. Here’s how:
- Prepare the chicken: Follow the recipe and bread the chicken tenders.
- Refrigerate: Store the breaded tenders in an airtight container. They can stay fresh for up to 24 hours.
- Cook later: When ready to eat, bake them as usual. This keeps them juicy and crispy.
How do I know when the chicken tenders are fully cooked?
Check the internal temperature to confirm doneness. Use a meat thermometer for accuracy.
- Ideal temperature: Chicken should reach 165°F (74°C).
- Visual cues: Look for a golden-brown color and clear juices when you cut into them.
Can I bake these chicken tenders instead of frying?
Yes, baking is a great option! It’s healthier and still tasty. Here’s the deal:
- Crispiness: Use panko breadcrumbs for a crunchier texture.
- Cooking time: Bake at 400°F (200°C) for 15-20 minutes. Flip halfway for even cooking.
What dipping sauces pair well with Parmesan Crusted Chicken Tenders?
Pair these tenders with delicious dips! Here are some great options:
- Marinara sauce: Adds a nice Italian twist.
- Ranch dressing: Creamy and cool for a classic combo.
- Honey mustard: Sweet and tangy for a fun flavor.
This post covered how to make delicious Parmesan-crusted chicken tenders. We discussed key ingredients, step-by-step cooking instructions, and tips for the perfect crunch. We also explored variations to keep things interesting. Lastly, we shared storage tips to enjoy leftovers later. You can easily adapt this recipe and make it your own. Enjoy these tasty tenders with your favorite dips or sides!