No-Bake Pumpkin Oreo Bars Creamy Dessert Delight

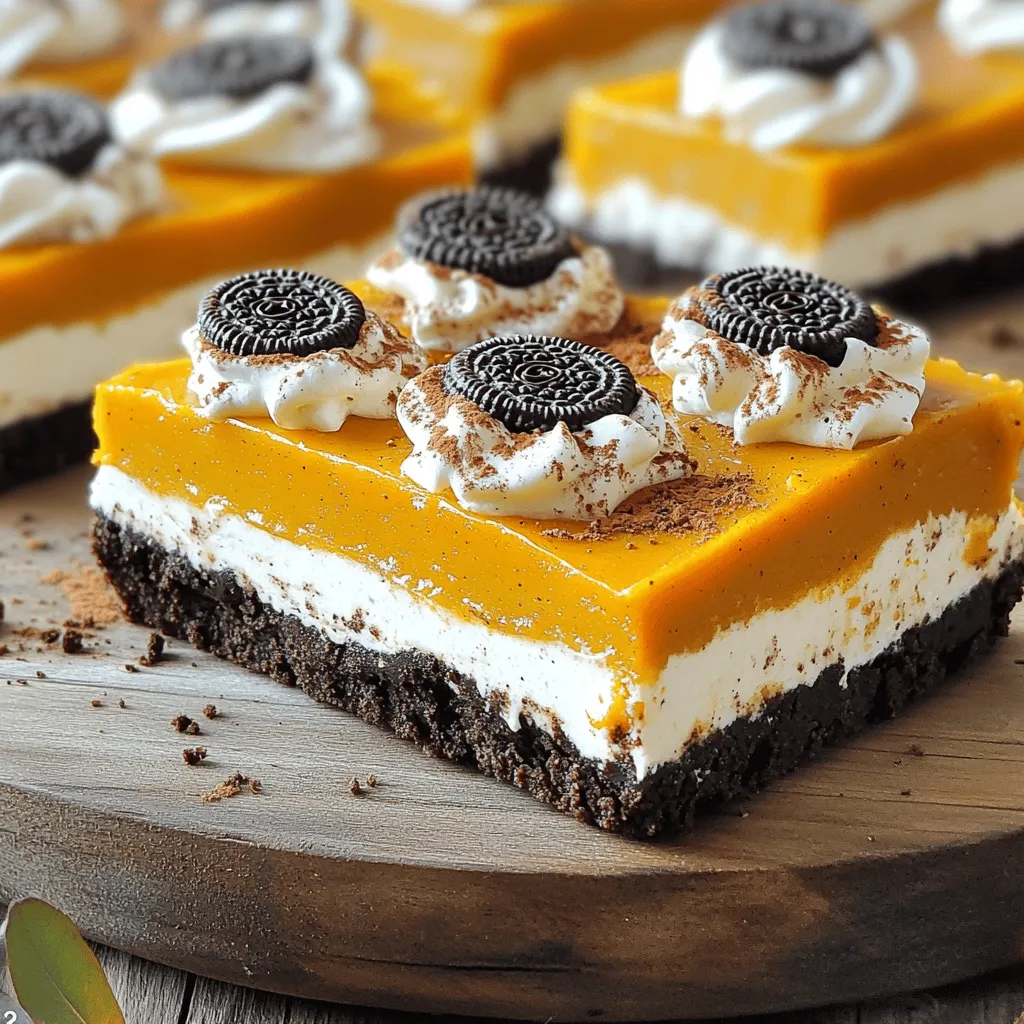
Get ready to dive into a tasty fall treat with my No-Bake Pumpkin Oreo Bars! This creamy dessert delight combines the classic flavors of pumpkin and Oreo in a simple, no-bake recipe. You’ll love how easy it is to make and how perfect it is for any gathering. Follow along as I guide you step-by-step to create a dessert that is both fun and delicious! Let’s get started!

Ingredients

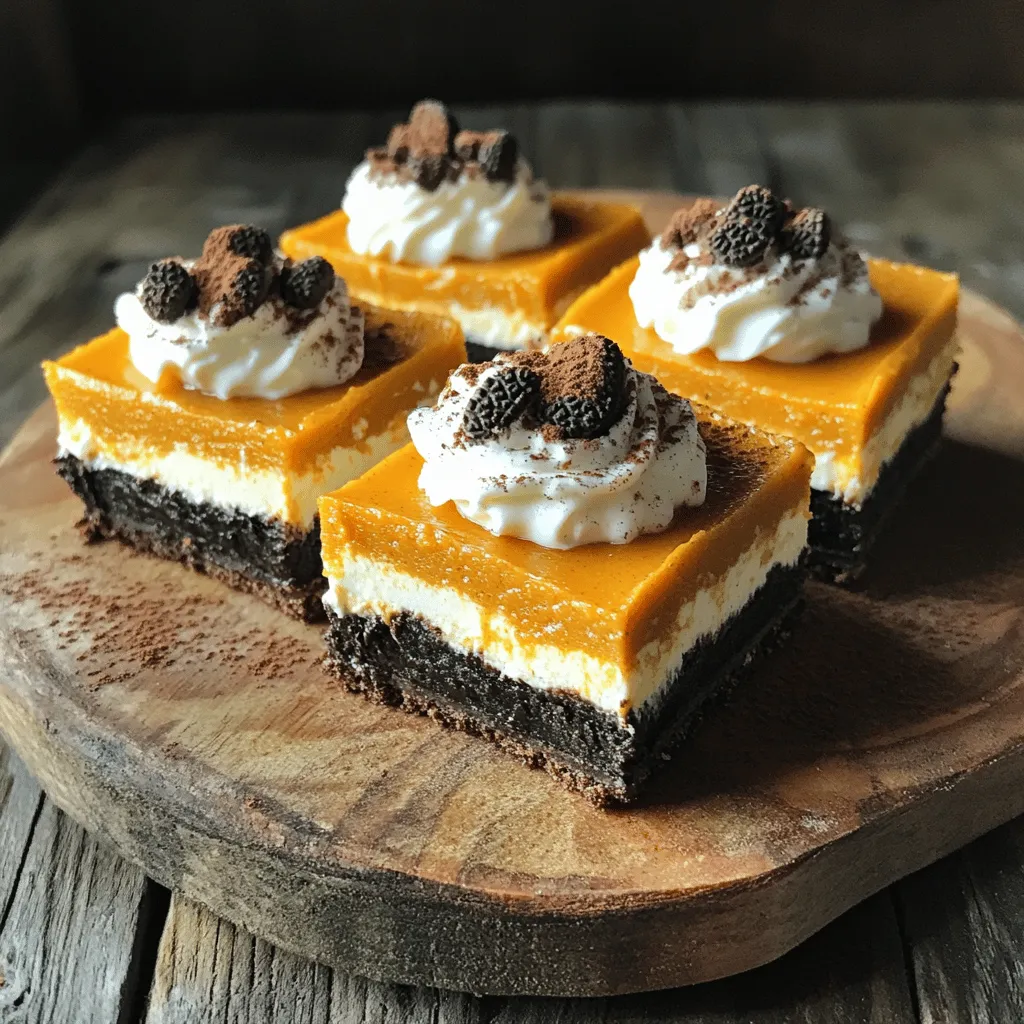
Main Ingredients for No-Bake Pumpkin Oreo Bars

– 24 Oreo cookies, finely crushed

– ½ cup unsalted butter, melted

– 1 cup pumpkin puree

– 1 cup cream cheese, softened to room temperature

– ½ cup powdered sugar

– 1 teaspoon pure vanilla extract

– 1 teaspoon pumpkin spice blend

– 1 cup Cool Whip or homemade whipped cream

– Additional crushed Oreo cookies for topping

The star of these bars is the Oreo cookies. They give the crust a rich chocolate flavor. You will mix these cookies with melted butter. This simple step creates a base that holds the entire dessert together.

Next, you need pumpkin puree. This ingredient brings that fall flavor we all love. It adds moisture and richness to the filling. Cream cheese is also vital. It gives the bars a creamy texture that blends well with pumpkin.

Powdered sugar sweetens the mix, and vanilla extract adds depth. Pumpkin spice blend gives that warm, cozy taste. It’s a mix of cinnamon, nutmeg, and cloves. Cool Whip or homemade whipped cream makes the filling light and fluffy.

Finally, extra crushed Oreo cookies add a nice touch on top. They give you a bit of crunch with each bite. Each ingredient plays an essential role in making these bars a creamy dessert delight. For the full recipe, refer to the detailed instructions above.

Step-by-Step Instructions

Preparing the Crust

First, grab a medium bowl. Add 24 crushed Oreo cookies. Pour in ½ cup of melted butter. Mix it well until the crumbs are coated. Next, take a greased 9×9-inch baking pan. Press the cookie mixture firmly into the bottom. Use the back of a measuring cup to make it even. This crust holds the bars together, so make sure it’s compact.

Making the Pumpkin Filling

Now, let’s make the filling. In a large bowl, combine 1 cup of pumpkin puree, 1 cup of softened cream cheese, and ½ cup of powdered sugar. Add 1 teaspoon of pure vanilla extract and 1 teaspoon of pumpkin spice blend. Beat everything with an electric mixer. Keep mixing until the mixture is smooth and creamy. This filling is where the magic happens!

Assembling the Bars

Next, it’s time to assemble the bars. Carefully fold in 1 cup of Cool Whip or homemade whipped cream. Mix gently until combined. Pour this fluffy pumpkin filling over the crust. Use a spatula to spread it evenly. For a fun touch, sprinkle additional crushed Oreo cookies on top. This adds great crunch and looks nice.

Chilling and Serving

Cover the pan with plastic wrap. Place it in the refrigerator. Chill the bars for at least 4 hours. This step is key for the bars to set well. When you are ready to serve, take them out. Cut the bars into squares. Serve them cold for the best taste. For a nice presentation, add a dollop of whipped cream or a sprinkle of pumpkin spice on top. Enjoy your delightful dessert!

Tips & Tricks

Best Practices for Creamy Filling

To get a smooth and creamy filling, start with cream cheese at room temperature. Cold cream cheese can make lumps. Leave it out for about 30 minutes before mixing. This helps it blend well with the other ingredients.

When mixing, gently fold in the whipped cream. Use a spatula and a light touch. This keeps the filling airy. If you mix too hard, you’ll lose that fluffy texture.

Presentation Ideas

Make your bars look extra special when serving. Place them on a colorful platter. Top each square with a swirl of whipped cream. A light sprinkle of pumpkin spice gives a warm touch. For a festive look, add mini pumpkins around the bars. This makes your dessert pop and feel seasonal.

Common Mistakes to Avoid

Don’t overwork the crust mixture. If you mix too much, the crust can become tough. Just combine the crushed Oreos and butter until they stick together.

Also, don’t skip the chilling step. Let the bars sit in the fridge for at least four hours. This helps them firm up. If you cut them too soon, they might fall apart. For the best results, follow the full recipe.

Variations

Flavor Substitutions

You can switch up your No-Bake Pumpkin Oreo Bars with different Oreo flavors. Try peanut butter or mint Oreos for a fun twist. Each flavor adds a unique taste to the crust. You can also change the spices. Instead of pumpkin spice, use cinnamon or nutmeg for a new flavor. Almond or maple extract also works well for a different taste.

Dietary Modifications

If you need gluten-free bars, use gluten-free Oreos. They give you the same great taste without gluten. For vegan options, swap cream cheese with a plant-based cream cheese. You can also use coconut whipped cream instead of Cool Whip. These changes keep the bars creamy while meeting dietary needs.

Portion Options

You can make mini bars for smaller treats. Just use a mini muffin tin to press the crust and filling. This way, you get bite-sized delights. If you have a big crowd, scale up the recipe. Double the ingredients and use a larger pan. This makes it easy to serve everyone at gatherings.

Storage Info

Storing Leftovers

To keep your No-Bake Pumpkin Oreo Bars fresh, store them in the refrigerator. Place the bars in an airtight container. This helps prevent them from drying out or absorbing other odors. You can also cover them tightly with plastic wrap if you don’t have a container.

You can freeze leftover bars for later. Cut the bars into squares, then wrap each piece in plastic wrap. Place the wrapped pieces in a freezer-safe bag or container. This will keep them fresh for about a month.

Shelf Life

These bars stay fresh in the fridge for up to five days. After that, they may start to lose their taste and texture. Look for signs of spoilage such as a sour smell or changes in color. If you see any of these, it’s best to toss them. Enjoy the creamy goodness while it’s fresh!

FAQs

Can I make No-Bake Pumpkin Oreo Bars in advance?

Yes, you can make these bars ahead of time. It is great for saving time. I suggest making them a day before your event. Store the bars in the fridge. Cover them well with plastic wrap. This keeps them fresh and prevents drying out. When ready to serve, just cut and enjoy!

Can I use homemade whipped cream instead of Cool Whip?

Absolutely! You can use homemade whipped cream. Just make sure it is light and fluffy. To substitute, whip heavy cream until it holds soft peaks. This keeps the texture creamy and nice. Fold it in gently to avoid losing air. This way, your bars stay light and tasty!

How can I make these bars spicier?

To spice up your bars, add more pumpkin spice blend. You can also add a pinch of cinnamon or nutmeg. For an extra kick, try adding ground ginger. Mix it well into the pumpkin filling. This will enhance the flavor and make each bite pop!

In this blog post, we explored how to make No-Bake Pumpkin Oreo Bars. We covered the main ingredients like Oreo cookies and pumpkin puree, plus step-by-step instructions. I shared tips for a creamy filling and ways to avoid common mistakes. We also discussed variations and how to store leftovers.

As you create these tasty bars, remember to enjoy the process. Have fun and let your creativity shine!

- 24 Oreo cookies, finely crushed - ½ cup unsalted butter, melted - 1 cup pumpkin puree - 1 cup cream cheese, softened to room temperature - ½ cup powdered sugar - 1 teaspoon pure vanilla extract - 1 teaspoon pumpkin spice blend - 1 cup Cool Whip or homemade whipped cream - Additional crushed Oreo cookies for topping The star of these bars is the Oreo cookies. They give the crust a rich chocolate flavor. You will mix these cookies with melted butter. This simple step creates a base that holds the entire dessert together. Next, you need pumpkin puree. This ingredient brings that fall flavor we all love. It adds moisture and richness to the filling. Cream cheese is also vital. It gives the bars a creamy texture that blends well with pumpkin. Powdered sugar sweetens the mix, and vanilla extract adds depth. Pumpkin spice blend gives that warm, cozy taste. It’s a mix of cinnamon, nutmeg, and cloves. Cool Whip or homemade whipped cream makes the filling light and fluffy. Finally, extra crushed Oreo cookies add a nice touch on top. They give you a bit of crunch with each bite. Each ingredient plays an essential role in making these bars a creamy dessert delight. For the full recipe, refer to the detailed instructions above. First, grab a medium bowl. Add 24 crushed Oreo cookies. Pour in ½ cup of melted butter. Mix it well until the crumbs are coated. Next, take a greased 9x9-inch baking pan. Press the cookie mixture firmly into the bottom. Use the back of a measuring cup to make it even. This crust holds the bars together, so make sure it's compact. Now, let’s make the filling. In a large bowl, combine 1 cup of pumpkin puree, 1 cup of softened cream cheese, and ½ cup of powdered sugar. Add 1 teaspoon of pure vanilla extract and 1 teaspoon of pumpkin spice blend. Beat everything with an electric mixer. Keep mixing until the mixture is smooth and creamy. This filling is where the magic happens! Next, it’s time to assemble the bars. Carefully fold in 1 cup of Cool Whip or homemade whipped cream. Mix gently until combined. Pour this fluffy pumpkin filling over the crust. Use a spatula to spread it evenly. For a fun touch, sprinkle additional crushed Oreo cookies on top. This adds great crunch and looks nice. Cover the pan with plastic wrap. Place it in the refrigerator. Chill the bars for at least 4 hours. This step is key for the bars to set well. When you are ready to serve, take them out. Cut the bars into squares. Serve them cold for the best taste. For a nice presentation, add a dollop of whipped cream or a sprinkle of pumpkin spice on top. Enjoy your delightful dessert! To get a smooth and creamy filling, start with cream cheese at room temperature. Cold cream cheese can make lumps. Leave it out for about 30 minutes before mixing. This helps it blend well with the other ingredients. When mixing, gently fold in the whipped cream. Use a spatula and a light touch. This keeps the filling airy. If you mix too hard, you’ll lose that fluffy texture. Make your bars look extra special when serving. Place them on a colorful platter. Top each square with a swirl of whipped cream. A light sprinkle of pumpkin spice gives a warm touch. For a festive look, add mini pumpkins around the bars. This makes your dessert pop and feel seasonal. Don’t overwork the crust mixture. If you mix too much, the crust can become tough. Just combine the crushed Oreos and butter until they stick together. Also, don’t skip the chilling step. Let the bars sit in the fridge for at least four hours. This helps them firm up. If you cut them too soon, they might fall apart. For the best results, follow the full recipe. {{image_4}} You can switch up your No-Bake Pumpkin Oreo Bars with different Oreo flavors. Try peanut butter or mint Oreos for a fun twist. Each flavor adds a unique taste to the crust. You can also change the spices. Instead of pumpkin spice, use cinnamon or nutmeg for a new flavor. Almond or maple extract also works well for a different taste. If you need gluten-free bars, use gluten-free Oreos. They give you the same great taste without gluten. For vegan options, swap cream cheese with a plant-based cream cheese. You can also use coconut whipped cream instead of Cool Whip. These changes keep the bars creamy while meeting dietary needs. You can make mini bars for smaller treats. Just use a mini muffin tin to press the crust and filling. This way, you get bite-sized delights. If you have a big crowd, scale up the recipe. Double the ingredients and use a larger pan. This makes it easy to serve everyone at gatherings. To keep your No-Bake Pumpkin Oreo Bars fresh, store them in the refrigerator. Place the bars in an airtight container. This helps prevent them from drying out or absorbing other odors. You can also cover them tightly with plastic wrap if you don’t have a container. You can freeze leftover bars for later. Cut the bars into squares, then wrap each piece in plastic wrap. Place the wrapped pieces in a freezer-safe bag or container. This will keep them fresh for about a month. These bars stay fresh in the fridge for up to five days. After that, they may start to lose their taste and texture. Look for signs of spoilage such as a sour smell or changes in color. If you see any of these, it’s best to toss them. Enjoy the creamy goodness while it’s fresh! Yes, you can make these bars ahead of time. It is great for saving time. I suggest making them a day before your event. Store the bars in the fridge. Cover them well with plastic wrap. This keeps them fresh and prevents drying out. When ready to serve, just cut and enjoy! Absolutely! You can use homemade whipped cream. Just make sure it is light and fluffy. To substitute, whip heavy cream until it holds soft peaks. This keeps the texture creamy and nice. Fold it in gently to avoid losing air. This way, your bars stay light and tasty! To spice up your bars, add more pumpkin spice blend. You can also add a pinch of cinnamon or nutmeg. For an extra kick, try adding ground ginger. Mix it well into the pumpkin filling. This will enhance the flavor and make each bite pop! In this blog post, we explored how to make No-Bake Pumpkin Oreo Bars. We covered the main ingredients like Oreo cookies and pumpkin puree, plus step-by-step instructions. I shared tips for a creamy filling and ways to avoid common mistakes. We also discussed variations and how to store leftovers. As you create these tasty bars, remember to enjoy the process. Have fun and let your creativity shine!

No-Bake Pumpkin Oreo Bars

Indulge in these delightful No-Bake Pumpkin Oreo Bars that are perfect for autumn! With a creamy pumpkin filling layered over a luscious Oreo crust, these treats are as easy to make as they are delicious. In just 20 minutes of prep, you can create a dessert that your family will love. Click through to explore the full recipe and impress your guests with this festive and simple dessert!

Ingredients
  

24 Oreo cookies, finely crushed

½ cup unsalted butter, melted

1 cup pumpkin puree

1 cup cream cheese, softened to room temperature

½ cup powdered sugar

1 teaspoon pure vanilla extract

1 teaspoon pumpkin spice blend

1 cup Cool Whip or homemade whipped cream

Additional crushed Oreo cookies for topping

Instructions
 

Prepare the Crust: In a medium-sized bowl, combine the crushed Oreo cookies and melted butter. Stir the mixture until all the cookie crumbs are evenly coated with butter.

    Create the Base: Transfer the mixture to a greased 9x9-inch baking pan. Firmly press the Oreo mixture into the bottom using the back of a measuring cup or a flat spatula, ensuring an even and compact layer.

      Mix the Filling: In a large mixing bowl, add the pumpkin puree, softened cream cheese, powdered sugar, vanilla extract, and pumpkin spice. Beat the ingredients together using an electric mixer until the mixture is smooth, creamy, and well combined.

        Fold in Whipped Cream: Carefully fold in the Cool Whip or freshly whipped cream into the pumpkin mixture. Gently mix until everything is combined for a light and airy filling.

          Layer the Filling: Pour the fluffy pumpkin filling over the prepared Oreo crust. Use a spatula to spread it evenly and smooth the top surface.

            Decorate: Add a sprinkle of additional crushed Oreo cookies on top of the pumpkin layer for a decorative touch and extra crunch.

              Set in the Fridge: Cover the baking pan with plastic wrap and place it in the refrigerator. Chill for at least 4 hours to allow the bars to firm up completely.

                Serve: After chilling, cut the pumpkin bars into squares and serve them cold.

                  Prep Time: 20 mins | Total Time: 4 hrs 20 mins | Servings: 12

                    - Presentation Tips: Serve the chilled bars on a decorative platter. For an autumn look, top each bar with a dollop of whipped cream and a light sprinkle of pumpkin spice. Add a few mini pumpkin decorations around the platter for a festive touch!

                      Leave a Comment

                      Recipe Rating