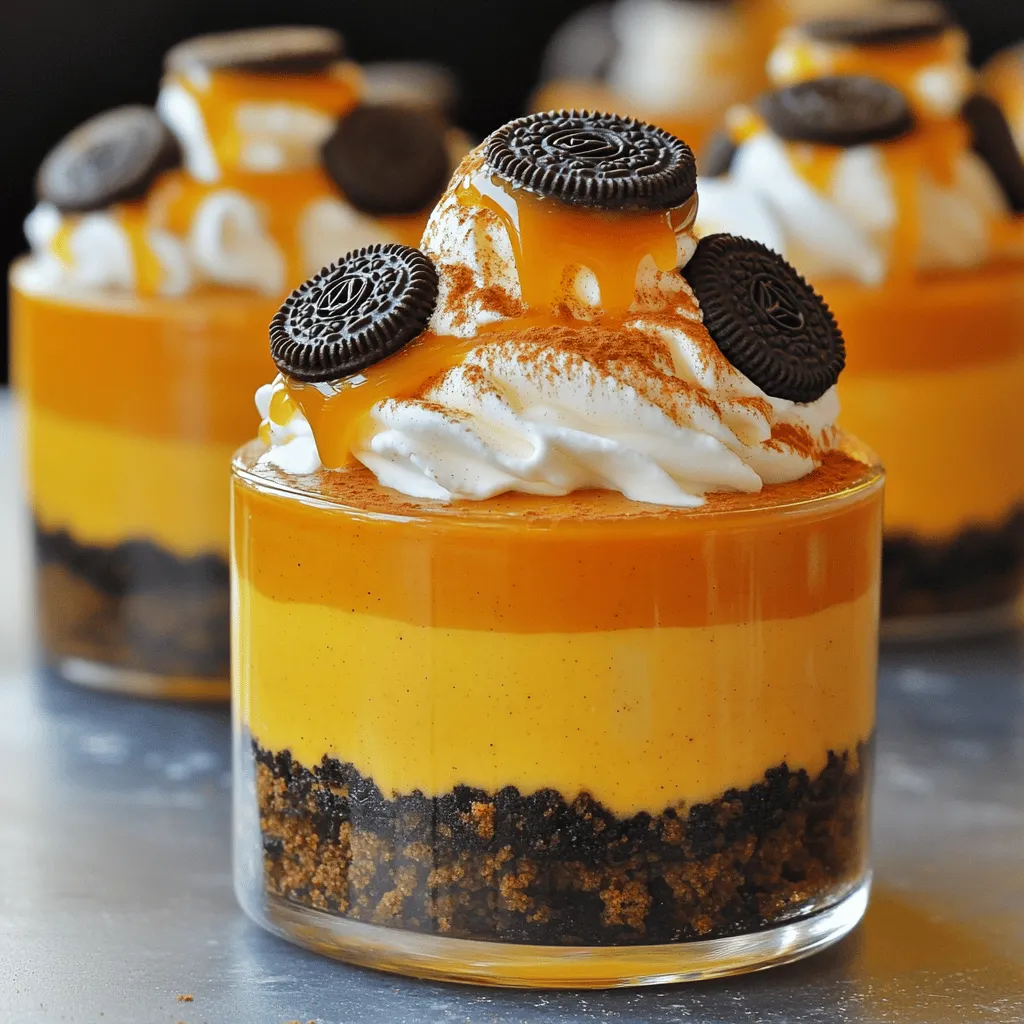
Get ready for a tasty fall treat with my No Bake Oreo Pumpkin Cheesecake Cups! This easy recipe combines rich cream cheese, smooth pumpkin puree, and crunchy Oreo cookies for a delightful dessert. No oven? No problem! Each cup is quick to assemble and perfect for parties or a cozy night in. In this post, I’ll walk you through the simple steps, essential ingredients, and tips for making these delicious treats. Let’s dive in!
Ingredients
Essential Ingredients
– 1 package of Oreo cookies
– 3 tablespoons unsalted butter
– 8 oz cream cheese
– 1 cup pumpkin puree
– 1/2 cup powdered sugar
Flavor Enhancers
– 1 teaspoon pure vanilla extract
– 1 teaspoon pumpkin pie spice
– Optional: Whipped cream for topping
Garnishing Ingredients
– Additional crushed Oreos
– Optional caramel sauce or cinnamon sprinkle
The heart of this no-bake Oreo pumpkin cheesecake lies in its ingredients. You will need a package of Oreo cookies for the crust. The creaminess comes from eight ounces of cream cheese. Pumpkin puree adds flavor and color, while powdered sugar gives sweetness.
Next, you will enhance the flavor with vanilla extract and pumpkin pie spice. These two ingredients make each bite taste like fall. For a fun touch, consider topping your dessert with whipped cream.
To make your cups visually appealing, use extra crushed Oreos. You can also drizzle caramel sauce or sprinkle cinnamon on top. These final touches elevate your treat from simple to stunning. Each layer of flavor and texture makes this dessert a must-try.
Step-by-Step Instructions
Preparing the Oreo Crust
To make the crust, start by combining the crushed Oreo cookies with melted butter in a bowl. Mix them well until the crumbs look sandy and hold together. This texture is key for a good base. Next, grab your serving cups or jars. Spoon the Oreo mixture into each cup. Use a small measuring cup or spoon to press it down firmly. This helps it stay compact and not crumble later.
Making the Pumpkin Cheesecake Filling
Now, let’s move on to the filling. In a large bowl, beat the softened cream cheese until it’s smooth. Make sure there are no lumps; we want a creamy texture. Then, add in the pumpkin puree, powdered sugar, vanilla extract, and pumpkin pie spice. Mix everything together until it’s all blended and smooth. This will give your filling a rich pumpkin flavor.
Folding the Whipped Cream
Next, we need to make the whipped cream. In a separate bowl, whip the heavy cream until it forms stiff peaks. This means it should look fluffy and hold its shape. Once that’s done, gently fold the whipped cream into the pumpkin mixture. Be careful not to stir too hard; we want to keep the airiness of the cream. This step adds lightness to your cheesecake.
Assembling the Cups
Now it’s time to assemble the cups. Carefully spoon the pumpkin cheesecake mixture onto the Oreo crust in each cup. Fill them generously, but don’t overflow! Use a spatula or the back of a spoon to level and smooth out the top. This gives it a nice finish and makes it look neat.
Refrigeration
Finally, cover the cups with plastic wrap and place them in the fridge. Chill them for at least four hours. This setting time is important; it helps the cheesecake firm up and makes it easier to enjoy. After chilling, your delightful treats will be ready to serve!
Tips & Tricks
Recipe Tweaks
– Using different types of cookies for the crust: Try using chocolate wafers or graham crackers. Each option adds a unique twist. Chocolate wafers give a richer taste, while graham crackers add a nice crunch.
– Experimenting with spices for added flavor: You can mix in nutmeg or cinnamon. These spices can enhance the pumpkin flavor. A pinch of ginger adds warmth too. Don’t be afraid to play with the spice amounts to find your favorite blend.
Serving Suggestions
– Presentation ideas for an eye-catching dessert: Use clear cups to show off those lovely layers. You can also drizzle caramel or chocolate on top for an extra touch. A sprinkle of cinnamon or extra crushed Oreos makes it pop.
– Pairing ideas for a dessert display: Serve these cups with spiced cookies or mini pumpkin muffins. This creates a fun dessert table. You might also want to offer some coffee or chai tea to complement the flavors.
Tools You’ll Need
– Recommended mixing bowls and tools: Use a large mixing bowl for the cream cheese and a medium bowl for the whipped cream. A spatula helps fold the mixtures without losing air.
– Suggestions for serving cups or jars: Small glass jars or clear plastic cups work well. Choose sizes that allow for a good layer of cheesecake and crust. This makes each bite enjoyable and pretty.

Variations
Different Flavors
You can add more flavors to your cheesecake cups. Try mixing in chocolate or caramel. This gives a rich taste. Just melt some chocolate or caramel and swirl it into the pumpkin mixture. You can also use fruit purees, like apples or pears. They add a fresh twist to the pumpkin flavor.
Dietary Adjustments
For those who need gluten-free options, swap out the Oreo cookies. Use gluten-free cookies instead. They work just as well in the crust. If you want vegan options, look for cream cheese made from plant-based ingredients. You can also use coconut cream instead of whipped cream. These simple swaps keep the taste delicious.
Serving Size Adjustments
Need to serve more people? You can easily scale up the recipe. Just double the ingredients for a larger gathering. For small events, make mini dessert cups. Use smaller jars or cups to create bite-sized treats. This way, everyone can enjoy a taste without feeling too full.
Storage Info
Best Storage Practices
To keep your No Bake Oreo Pumpkin Cheesecake Cups fresh, seal them tightly. Use plastic wrap or lids that fit well on your cups. This helps keep air out and prevents them from drying out. I recommend using small glass jars or plastic cups with covers. They are easy to store and look nice too.
Shelf Life
These cheesecake cups stay fresh in the fridge for about five days. After five days, the taste and texture may change. Watch for signs of spoilage like a sour smell or a change in texture. If the whipped cream starts to separate, it’s time to toss them out.
Freezing Instructions
You can freeze these cheesecake cups for up to a month. Just make sure to cover them well. Wrap each cup in plastic wrap, then place them in a freezer-safe bag. When you’re ready to eat them, thaw in the fridge overnight. Avoid thawing them at room temperature, as this can make the texture off.
FAQs
Can I use pre-made pumpkin puree?
Yes, you can use pre-made pumpkin puree. It is smooth and easy to work with. However, avoid pumpkin pie filling. Pumpkin pie filling has added sugar and spices. This will change the taste of your cheesecake. Stick to pure pumpkin puree for the best flavor.
How long does the cheesecake need to chill?
The cheesecake needs to chill for at least 4 hours. Chilling gives it the right texture. It helps the filling set and become firm. If you can, chill it overnight. This extra time makes it even better.
Can I make this recipe ahead of time?
You can make these cheesecake cups ahead of time. They are perfect for parties or special days. Just follow the recipe and store them in the fridge. They stay fresh for up to 3 days. This makes it easy to enjoy dessert without stress.
What’s the best way to garnish this dessert?
Garnishing is fun and easy! You can add extra crushed Oreos on top. This adds a nice crunch. Whipped cream is also a great choice. For a twist, try drizzling caramel sauce or sprinkling cinnamon. These toppings make the dessert look fancy and taste even better.
This blog post covered how to make delicious pumpkin cheesecake cups. We looked at key ingredients like Oreos, cream cheese, and pumpkin puree. The steps showed how to create a tasty crust and filling. Don’t forget to chill the cups for the best texture.
Feel free to try different cookies or flavors to make it your own. With these tips, you can impress friends and family. Enjoy your creation, and happy baking!