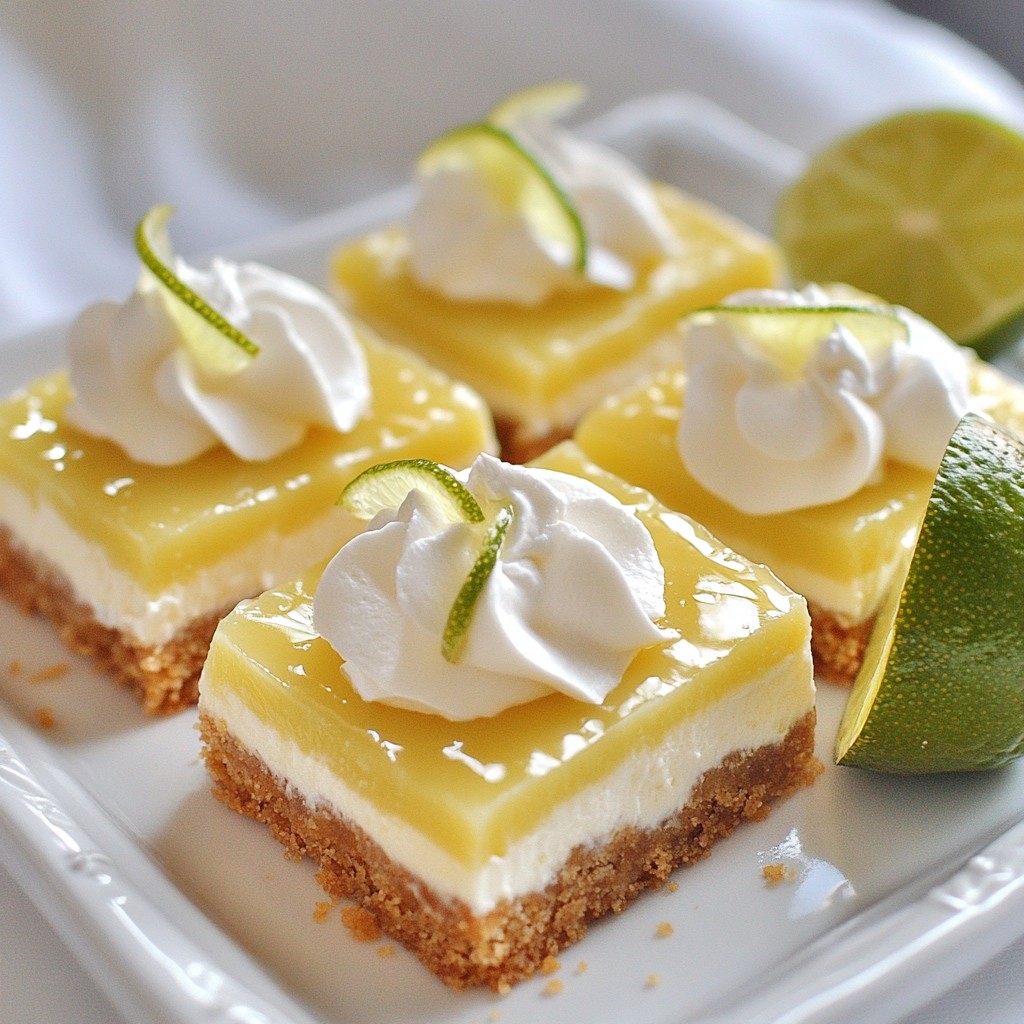
If you're craving a dessert that balances tangy and sweet, you're in for a treat! Key Lime Cheesecake Bars are perfect for any occasion, whether it’s a family gathering or a simple weeknight craving. With a creamy filling and a crisp crust, they’re easy to whip up and sure to impress. Ready to learn how to make these delightful bars? Let’s dive right into the recipe and tips!
Why I Love This Recipe
- Bright and Zesty Flavor: The use of fresh key lime juice and zest brings a refreshing tang that perfectly balances the creamy cheesecake.
- Simple Preparation: With straightforward steps and easily accessible ingredients, this recipe is perfect for both novice and experienced bakers.
- Perfect for Any Occasion: Whether it's a party, holiday, or just a treat for yourself, these cheesecake bars are a crowd-pleaser.
- Chill Factor: These bars are best served cold, making them a refreshing dessert option, especially during warm weather.
Ingredients
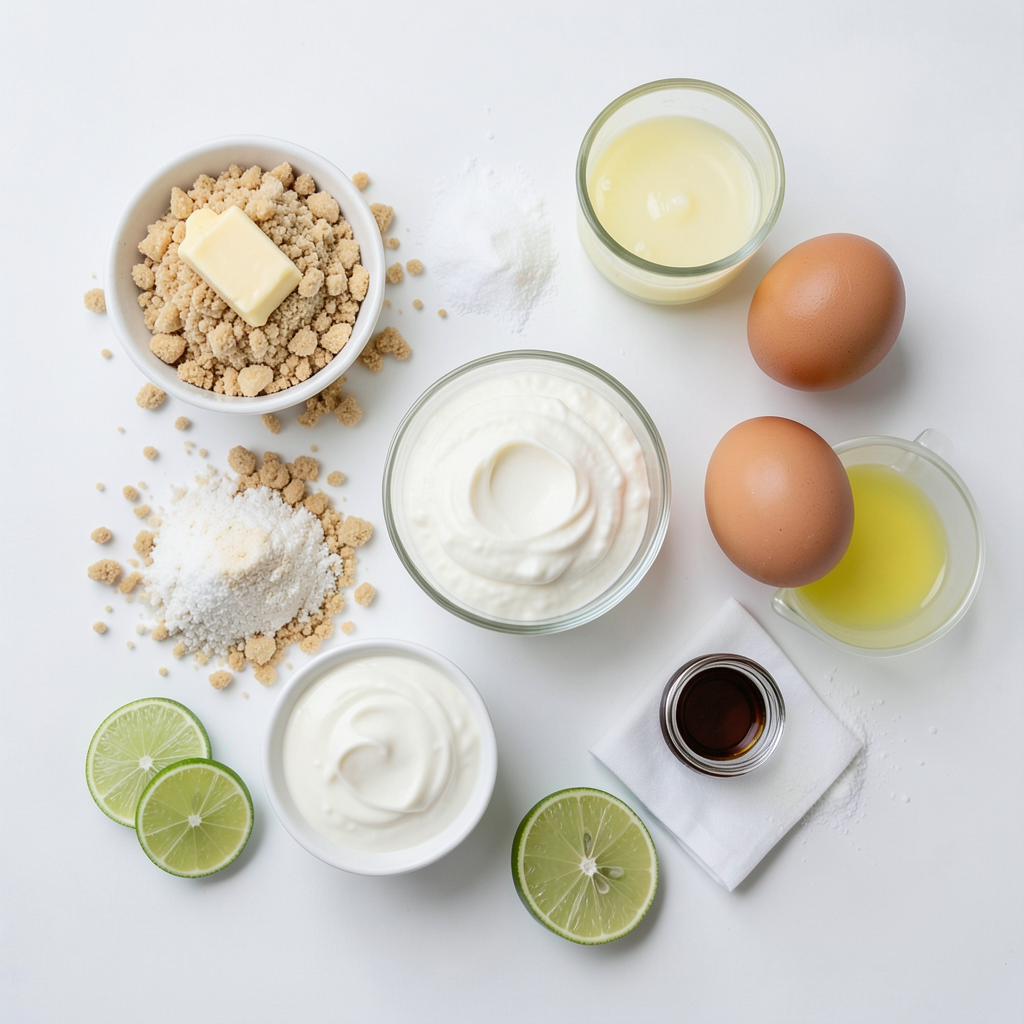
To make delicious Key Lime Cheesecake Bars, gather the following:
- 1 ½ cups graham cracker crumbs
- ½ cup unsalted butter, melted
- ¾ cup granulated sugar, divided
- 16 oz cream cheese, softened
- ½ cup sour cream
- 2 large eggs, at room temperature
- ½ cup key lime juice
- 1 tablespoon key lime zest
- 1 teaspoon pure vanilla extract
- Pinch of salt
- Optional toppings: whipped cream and lime slices
Each ingredient plays a key role in bringing the flavors together. The graham cracker crumbs form a rich and buttery crust. The melted butter binds the crumbs and gives a nice texture. Sugar sweetens the filling while balancing the tartness of key lime juice. Cream cheese gives the bars a creamy and smooth base.
Sour cream adds depth and richness, while the eggs provide structure. Key lime juice delivers that bright, zesty flavor, and zest adds an extra punch. Vanilla extract rounds out the flavors, and a pinch of salt enhances all the tastes.
When you gather these ingredients, you set the stage for a treat that is refreshing and perfect for any occasion. Don’t forget the optional whipped cream and lime slices for a fun garnish!
Step-by-Step Instructions
Preheat the Oven
Start by preheating your oven to 350°F (175°C). This temperature helps the cheesecake bars bake evenly. It’s important to do this first so your oven is ready when you need it.
Prepare the Crust
In a medium bowl, combine 1 ½ cups of graham cracker crumbs with ½ cup of melted butter. Mix them well until every crumb is moistened. The mixture should look like wet sand. This texture is key for a great crust.
Next, transfer the crumb mixture into a 9x9-inch baking pan. Press it down firmly and evenly into the bottom. This helps create a solid base. Bake the crust in your preheated oven for 8-10 minutes. Look for a light golden color. Once it’s done, take it out and let it cool.
Mix and Bake the Filling
In a large mixing bowl, beat 16 oz of softened cream cheese with ¾ cup of granulated sugar using an electric mixer. Mix on medium speed for about 2-3 minutes. The goal is a smooth and creamy texture.
Next, add ½ cup of sour cream, 2 large eggs, ½ cup of key lime juice, 1 tablespoon of key lime zest, 1 teaspoon of vanilla extract, and a pinch of salt. Beat all these ingredients together for another 1-2 minutes until they are well combined.
Carefully pour the cheesecake filling over the cooled crust. Use a spatula to spread it evenly. Bake the cheesecake for 25-30 minutes. The edges should look set, but the center can still jiggle a bit. This slight wiggle means it is just right.
After baking, turn off the oven and crack the door. Let the cheesecake cool slowly inside for about 1 hour. This step helps prevent cracks on the top. Then, transfer the pan to the refrigerator. Chill for at least 4 hours or, if you can, overnight. This waiting time helps the flavors blend and the texture firm up.
Tips & Tricks
Achieving the Perfect Crust
To get a great crust, press the graham cracker mixture firmly into the pan. This step is key. If you don’t press it down well, the bars may fall apart. A firm crust keeps everything together. To avoid a soggy bottom, make sure to bake the crust for 8-10 minutes until it is lightly golden. This helps to set it before adding the filling.
Preventing Cracks in the Cheesecake
Cooling your cheesecake bars slowly is important. After baking, turn off the oven and crack the door open. Let the bars cool in the oven for about an hour. This gentle cooling helps prevent cracks. After that, chill the bars in the fridge for at least 4 hours. Longer is even better, as it lets the flavors blend nicely.
Elevating Flavor and Presentation
Using fresh key lime juice makes a big difference. The flavor is brighter and more zesty than bottled juice. For serving, consider placing the bars on a white platter. This contrast makes the vibrant green lime garnish pop. Drizzle some additional lime juice around the plate for a pretty touch. You can also top each bar with whipped cream for a creamy finish.
Pro Tips
- Use Fresh Key Limes: For the best flavor, opt for freshly squeezed key lime juice instead of bottled juice. This enhances the zesty profile of your cheesecake bars.
- Room Temperature Ingredients: Ensure that your cream cheese and eggs are at room temperature before mixing. This helps achieve a smoother and creamier filling.
- Prevent Cracking: Allow the cheesecake to cool slowly in the oven with the door ajar after baking. This gradual cooling reduces the risk of cracking on the surface.
- Chill Overnight: For the best texture and flavor, chill your cheesecake bars overnight in the refrigerator. This allows the flavors to meld beautifully.
Variations
Alternative Crust Ideas
You can change the crust for your Key Lime Cheesecake Bars. Try using chocolate cookie crumbs for a rich twist. This adds a new layer of flavor that pairs well with the tart lime.
If you need a gluten-free option, you can use gluten-free graham crackers. Just crush them like regular crumbs. Combine them with melted butter just as you would with traditional crumbs.
Flavor Variations
To make your cheesecake bars even more fun, add coconut or berry toppings. Shredded coconut gives a tropical taste. Fresh berries, like raspberries or blueberries, add color and sweetness.
You can also experiment with different citrus juices. Instead of key lime juice, try fresh lemon or orange juice. Each juice will give a unique flavor to your bars.
Dietary Modifications
If you want a vegan option, look for cream cheese made from plants. Many stores sell dairy-free cream cheese. Use it in place of regular cream cheese for a tasty vegan treat.
For those watching sugar intake, consider sugar-free options. You can find sugar substitutes that work well in desserts. Just make sure to check the package for proper measurements.
Storage Info
Best Ways to Store Leftovers
To keep your key lime cheesecake bars fresh, store them in the fridge. Place them in an airtight container to avoid absorbing other smells. If you don’t have a container, cover the pan tightly with plastic wrap. This keeps them moist and tasty.
Freezing Instructions
You can freeze these cheesecake bars for later. First, let them cool completely in the fridge. Then, cut them into bars. Wrap each piece in plastic wrap, then place them in a freezer bag. This helps keep out air. When you want to eat them, take them out and let them thaw in the fridge. This keeps the texture smooth and creamy.
Shelf Life Expectations
In the fridge, key lime cheesecake bars last about 5 days. If you freeze them, they can stay good for about 3 months. Just remember to check for any signs of freezer burn before eating. This way, you can enjoy these bars at any time!
FAQs
Can I use bottled lime juice instead of fresh?
Using bottled lime juice is quick and easy. It saves time and effort. However, fresh lime juice has a brighter taste. The flavor is more vibrant and tangy. Bottled juice can taste more flat or less fresh. If you want the best taste, I recommend using fresh lime juice. You can also use fresh zest from the limes for added flavor.
How can I tell when the cheesecake is done?
You can tell the cheesecake is done by looking for a few signs. First, check the edges. They should be set and firm. The center should jiggle slightly when you shake the pan. This means it’s still creamy but not runny. You can also insert a toothpick into the center. If it comes out mostly clean, it’s ready. Watch for cracks on the surface. This can happen if it bakes too long.
What is the best way to serve Key Lime Cheesecake Bars?
Serving your Key Lime Cheesecake Bars is fun and simple! Slice them into squares after they chill. I love adding a dollop of whipped cream on top. You can also garnish with lime slices for a fresh look. Pair these bars with a light drink, like iced tea or lemonade. This adds a nice touch to the dessert. For a special treat, serve on a white platter to highlight the colors.
To wrap up, we explored how to make delicious Key Lime Cheesecake Bars. You learned about the essential ingredients, steps, and helpful tips to achieve the perfect dessert. Remember to pay attention to cooling and storage for the best flavor and texture. Enjoy experimenting with different crusts and toppings. Don't hesitate to try variations that suit your taste! This dessert is a fun treat for any occasion, bringing brightness to your table. Happy baking!