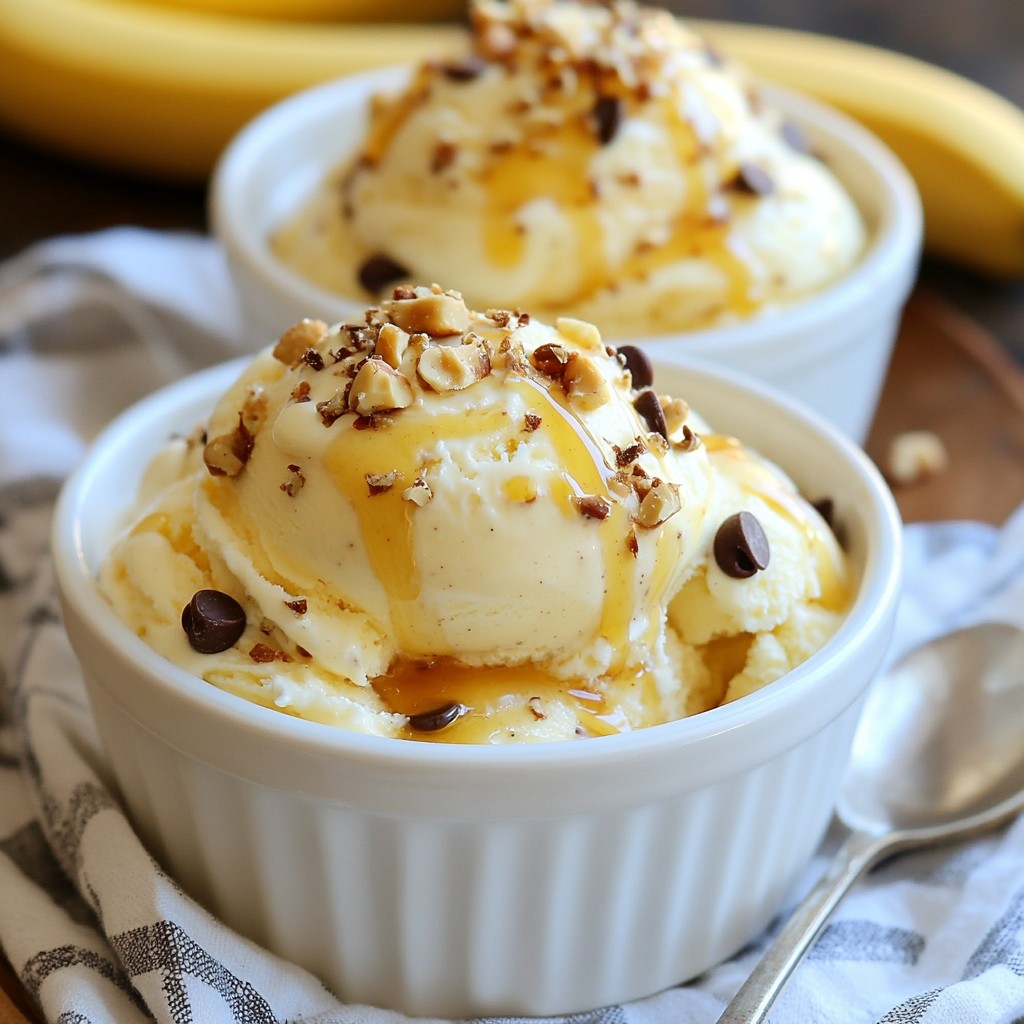
Craving something sweet that's both tasty and easy? This Irresistible Peanut Butter Banana Ice Cream recipe is your answer! With just a few simple ingredients, you can whip up a creamy, dreamy dessert that beats store-bought treats. I’ll guide you through every step, from selecting ripe bananas to serving up delightful bowls. Ready to chill out with this homemade ice cream? Let’s dive in!
Why I Love This Recipe
- Healthy Indulgence: This recipe combines the natural sweetness of bananas with the rich flavor of peanut butter, making it a guilt-free treat that satisfies your sweet tooth.
- Quick and Easy: With just a few simple ingredients and minimal prep time, you can whip up this delightful dessert in no time.
- Customizable: You can easily adjust the sweetness and add your favorite toppings, making each batch uniquely yours.
- Family-Friendly: This recipe is loved by both kids and adults, making it a perfect dessert for family gatherings or a simple weeknight treat.
Ingredients
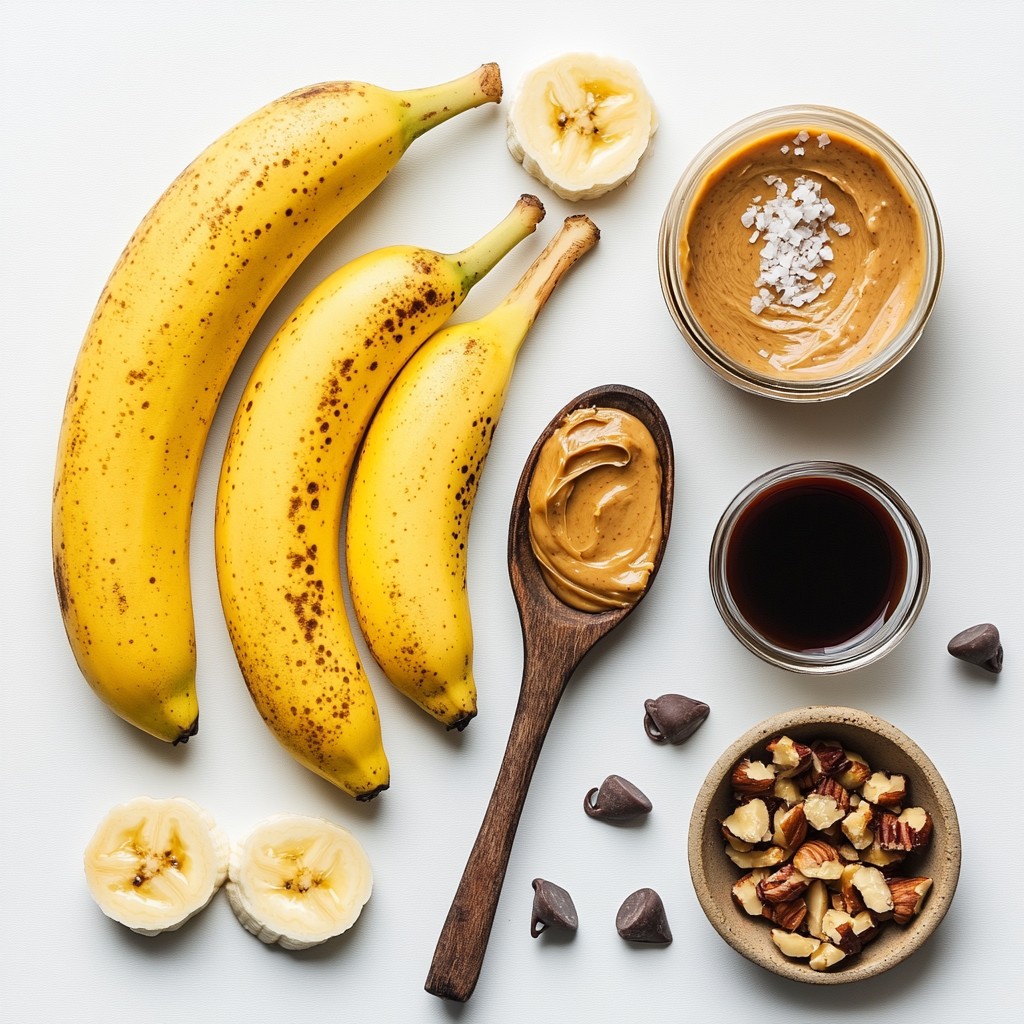
List of Required Ingredients
- 4 ripe bananas, peeled and sliced
- 1/2 cup creamy peanut butter
- 1/4 cup maple syrup or honey
- 1 teaspoon pure vanilla extract
- Pinch of sea salt
- Optional toppings: chopped nuts, dark chocolate chips, shredded coconut
To make this ice cream, you need simple and fresh ingredients. The ripe bananas are key. They provide natural sweetness and a creamy texture. Choose bananas that are spotty and just ripe. They should be firm but soft enough for easy slicing.
Creamy peanut butter comes next. It gives a rich flavor that pairs well with bananas. You can use any brand you love. Just make sure it is smooth and easy to blend.
For sweetness, use maple syrup or honey. Either works great, so pick what you prefer. Both add a nice touch without being too sweet.
Don’t forget the pure vanilla extract. It adds depth to the flavor. Just a teaspoon makes a big difference.
A pinch of sea salt enhances all the flavors. It balances the sweetness and brings out the banana taste.
Finally, you can add optional toppings. Chopped nuts, dark chocolate chips, or shredded coconut make great choices. They add texture and fun to your ice cream.
Step-by-Step Instructions
Freezing the Bananas
- First, prepare a baking sheet by lining it with parchment paper.
- Next, slice four ripe bananas into thin rounds and spread them out in a single layer. Make sure the slices do not overlap.
- Freeze the bananas for about two hours or until they are completely frozen solid. This step is key for a smooth texture later.
Blending the Ingredients
- In a high-speed blender or food processor, add the frozen banana slices.
- Next, pour in half a cup of creamy peanut butter, a quarter cup of maple syrup or honey, one teaspoon of pure vanilla extract, and a pinch of sea salt.
- Always follow this order for the best blend!
Achieving the Right Consistency
- Blend the mixture on high speed for several minutes.
- Stop and scrape down the sides of your blender or processor as needed.
- Keep blending until the mixture is creamy and has a soft-serve ice cream texture. This step is important for that delicious mouthfeel.
Taste and Adjusting Sweetness
- After blending, taste the mixture to see if it is sweet enough for you.
- You can add more maple syrup or honey if you want extra sweetness. Adjust to your own taste!
Optional Firming Up
- If you like firmer ice cream, transfer the blended mixture into an airtight container.
- Place it in the freezer for one to two hours. This helps achieve a thicker texture.
Serving Suggestions
- When ready to serve, scoop generous portions of the peanut butter banana ice cream into bowls.
- Feel free to add your favorite toppings! Chopped nuts, dark chocolate chips, or shredded coconut work great. These add fun flavors and textures.
Tips & Tricks
Best Practices for Freezing Bananas
- Selecting the right bananas: Choose bananas that are very ripe. The skin should have brown spots. This ripeness gives the best sweetness and flavor for your ice cream.
- Slicing techniques: Slice your bananas into even pieces. Aim for about half an inch thick. This size helps them freeze faster and blend smoothly.
Customizing Flavor and Texture
- Using different nut butters: You can swap peanut butter for almond or cashew butter. Each nut butter adds its own unique taste and richness.
- Alternatives for sweeteners: Maple syrup gives a nice flavor, but honey works too. For a low-calorie option, try using agave nectar or stevia.
Presentation Ideas
- Artistic serving tips: Use chilled bowls for serving. Stack ice cream high and sprinkle toppings like nuts or chocolate chips on top. This makes it look fancy.
- Choosing the right serving dish: Clear glass bowls show off the beautiful color. Choose fun shapes for an exciting twist.
Pro Tips
- Freeze Bananas Properly: Ensure banana slices are laid out in a single layer without overlapping to achieve even freezing.
- Use a High-Speed Blender: A powerful blender or food processor is essential for achieving the smooth, creamy texture desired for this treat.
- Experiment with Sweetness: Feel free to adjust the sweetness by adding more maple syrup or honey based on your personal preference.
- Presentation Matters: Serve in chilled bowls and consider garnishing with additional banana slices or a drizzle of peanut butter for an appealing look.
Variations
Dairy-Free Options
You can make this ice cream dairy-free easily. Instead of honey, use agave or maple syrup. Both are great for sweetness without dairy. For toppings, try shredded coconut or chia seeds. They add a nice crunch!
Flavor Add-Ins
Want to switch it up? Add cocoa powder or chocolate chips for a chocolate twist. If you like coffee, a splash of espresso can elevate the flavor. You can also mix in other fruits. Berries or mango chunks add fun and freshness!
Experimenting with Textures
The thickness of your banana slices matters. Thicker slices give a chunkier texture, while thinner slices blend smoother. You can also add mix-ins while blending. Small pieces of nuts or chocolate will give you a delightful surprise in every bite.
Storage Info
Proper Storage Techniques
To keep your peanut butter banana ice cream fresh, use an airtight container. This will help prevent freezer burn. Make sure the lid is tight and seals well. If you notice ice crystals forming, it means air got in. For best results, fill the container to the top. This limits air space and helps maintain the texture.
Shelf Life Guidelines
You can keep this ice cream in the freezer for about 2 to 3 weeks. After that time, it may lose flavor and texture. Signs of spoilage include ice crystals forming on the surface. If the ice cream smells off, it’s best to toss it. Always check before serving.
Reusing Leftovers
If you have leftover ice cream, don’t waste it! You can use it to make smoothies. Just blend it with milk or yogurt for a tasty treat. Another idea is to use it as a topping for pancakes or waffles. It adds a fun twist to breakfast! You can also incorporate it into milkshakes for a creamier drink.
FAQs
Can I use frozen bananas?
Yes, you can use frozen bananas. Frozen bananas add a creamy texture to the ice cream. They also help chill the mixture quickly. This makes your ice cream ready to eat sooner. When buying frozen bananas, look for ones that are ripe. Ripe bananas have more sweetness and flavor. If you freeze your own, choose bananas with spots. This shows they are sweet and ready for freezing.
How can I make this recipe nut-free?
To make this recipe nut-free, use sun butter or soy nut butter. These alternatives taste great and match the texture of peanut butter. You can also try coconut butter for a unique flavor. If you want a different base, use tahini. This sesame seed paste is smooth and adds a nice taste.
What toppings pair best with peanut butter banana ice cream?
Some popular topping ideas are chopped nuts and dark chocolate chips. You can also use shredded coconut for a tropical twist. Fresh fruits like strawberries or blueberries work well, too. In fall, try pumpkin spice or crushed graham crackers. In summer, go for fresh mint leaves for a refreshing bite.
Can I use this recipe without a blender?
Yes, you can make this recipe without a blender. Use a fork to mash the frozen bananas in a bowl. Mix in the peanut butter and other ingredients by hand. A potato masher works well for this too. If you have a whisk, it can help combine everything smoothly.
Is this recipe suitable for meal prep?
This recipe is great for meal prep. You can freeze the ice cream in portions. Use small containers or ice cube trays for easy serving. When you want to eat some, take out what you need. Let it thaw for about 10 minutes before eating. This way, it gets creamy again without melting too much.
This blog post guides you through making delicious peanut butter banana ice cream. We covered the needed ingredients, from ripe bananas to sweeteners. You learned how to freeze bananas and blend them smoothly. Adjusting flavors and adding toppings offer fun twists. Remember to store your ice cream properly for the best taste. My final thought: Enjoy experimenting with different flavors and textures. You'll create a treat that everyone loves!