Homemade Garlic Naan Soft and Flavorful Delight

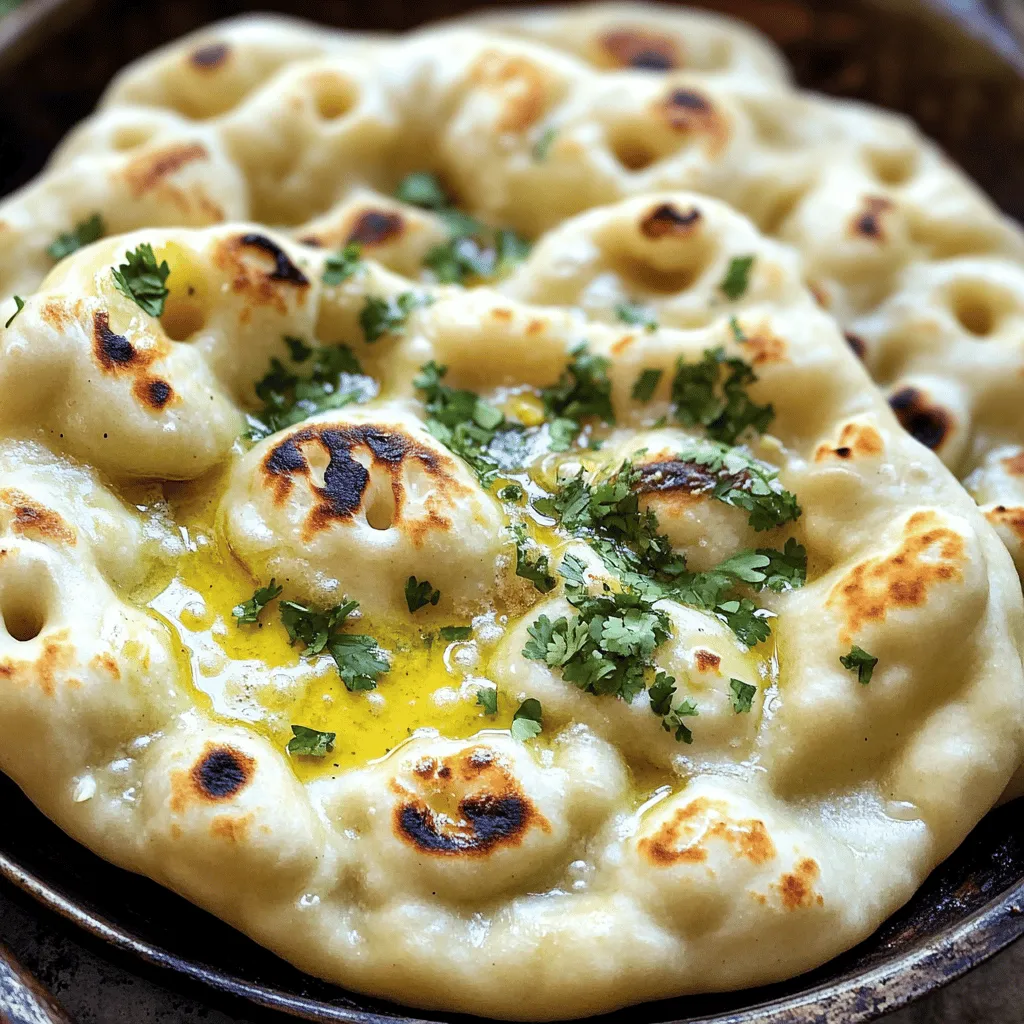
Are you ready to impress your family and friends with homemade garlic naan? This soft and flavorful delight takes simple ingredients and transforms them into a mouthwatering dish. With just a few steps, you can create naan that’s crispy on the outside and fluffy on the inside. Let’s dive into the easy process of making this delicious bread that pairs perfectly with your favorite Indian dishes. Your culinary adventure starts here!

Ingredients

Main Ingredients for Homemade Garlic Naan

– 2 cups all-purpose flour

– ½ cup plain yogurt

– ½ cup warm water

Flavor Enhancers

– 4 cloves of garlic, finely minced

– Fresh cilantro for garnish

Essential Baking Ingredients

– 1 teaspoon sugar

– 1 teaspoon salt

– 1 teaspoon baking powder

– 2 tablespoons ghee or melted butter

To make great garlic naan, you need simple yet key ingredients. First, all-purpose flour gives the naan its soft, fluffy texture. The yogurt adds moisture and a slight tang. Warm water helps bind the dough together.

Next, garlic is the star here. It brings strong flavor that shines through. Fresh cilantro adds color and a fresh taste as a garnish.

You also need some baking essentials. Sugar feeds the yeast (or baking powder, in this case) and helps it rise. Salt enhances flavors, while baking powder creates that lightness we all love. Finally, ghee or melted butter adds richness and a nice finish when brushed on the naan.

Check out the Full Recipe for all the steps to create this delicious naan!

Step-by-Step Instructions

Preparing the Dough

Mixing dry and wet ingredients is the first step. In a large bowl, sift together the all-purpose flour, sugar, salt, and baking powder. This ensures everything blends well. Create a well in the dry mixture. Pour in the yogurt and warm water. Using a spoon, mix until a shaggy dough forms.

Next, knead the dough. Transfer it to a floured surface. Knead for about 5-7 minutes. Your dough should feel smooth and elastic. If it’s sticky, add more flour, one tablespoon at a time. This helps you achieve the right texture. Shape the dough into a ball. Place it in a lightly greased bowl. Cover it with a damp cloth. Let it rest in a warm spot for at least 1 hour. This resting time is crucial for the dough to rise.

Letting the Dough Rise

Resting the dough is important. It helps the yeast activate and makes the naan soft. After the resting period, gently punch down the dough. This releases any trapped air bubbles. Now, divide it into 6 equal pieces. Shape each piece into a ball. Using a rolling pin, flatten each ball into an oval shape. Aim for a thickness of about ¼ inch.

Cooking the Naan

Now it’s time to cook the naan. Preheat a skillet or a tandoor over medium-high heat. In a small bowl, mix the minced garlic with ghee or melted butter. This creates a fragrant garlic butter. Once the skillet is hot, place one rolled naan on it. Cook for 1-2 minutes. Look for bubbles on the surface and a light brown bottom.

Brush the top of the naan with the garlic-ghee mixture. Flip the naan and cook the other side for another 1-2 minutes. It should be golden brown and fully cooked. Remove the naan and brush it with extra ghee or melted butter. Repeat this for the rest of the dough.

Finally, garnish each naan with freshly chopped cilantro. This adds color and flavor. Enjoy your homemade garlic naan with your favorite curry or dish for a real treat!

Tips & Tricks

Achieving the Perfect Texture

Kneading the dough is key. Knead for 5-7 minutes until smooth. This helps develop gluten, which gives naan its soft texture. If the dough is sticky, add flour slowly. Sprinkle one tablespoon at a time until it feels right. Remember, it should be soft but not tacky.

Flavoring Options

You can customize your garlic butter for great taste. Mix minced garlic with melted ghee or butter. Feel free to add herbs like parsley or oregano for extra flavor. You can also top your naan with cheese, or spices like cumin or chili flakes for a kick.

Best Practices for Cooking

When cooking, a skillet and tandoor have different methods. In a skillet, heat it well before adding naan. For tandoor, the heat is direct and quick. Make sure to flip the naan halfway through cooking for even browning. Look for bubbles on the surface; that’s a sign it’s ready to flip.

Variations

Different Flavored Naans

You can easily change up the flavor of your naan. Here are two tasty ideas:

Herb-infused naans: Add chopped fresh herbs like rosemary or thyme to the dough. This gives the naan a fragrant twist.

Cheese-stuffed naans: Place shredded cheese in the center before rolling the dough. This creates a gooey, cheesy delight that is hard to resist.

Gluten-Free Options

If you need gluten-free naan, you can use different flours. Here are some tips:

Using alternative flours: Try chickpea flour or almond flour instead of all-purpose flour. This keeps the naan tasty and gluten-free.

Adjusting other ingredients: You might need to alter the amounts of yogurt and water. This helps the dough bind properly and stay moist.

Vegan Alternatives

If you want to make vegan naan, you can swap some ingredients:

Replacing yogurt and ghee: Use plant-based yogurt and coconut oil instead of ghee. This keeps it creamy and flavorful.

Achieving similar textures and flavors: Add a bit of vinegar to the plant-based yogurt. This helps mimic the tangy flavor of regular yogurt.

For the complete recipe, check out the Full Recipe section.

Storage Info

How to Store Garlic Naan

You can store garlic naan easily to keep it fresh. For short-term storage, place the naan in an airtight container. Store it in the fridge. This method helps maintain its softness.

For long-term storage, freeze the naan. Wrap each piece in plastic wrap, then place them in a freezer bag. This keeps them safe from freezer burn. You can freeze garlic naan for up to three months.

Reheating Tips

To enjoy naan at its best, reheating is key. Start by taking it out of the fridge or freezer. If frozen, let it thaw for about 15 minutes.

For the best taste, reheat in a skillet. Heat a dry skillet over medium heat. Place the naan in the skillet and warm it for 1-2 minutes on each side. This method keeps it soft and tasty.

You can also use an oven. Preheat your oven to 350°F (175°C). Wrap naan in foil and bake for about 10 minutes. This method warms the naan evenly.

Shelf Life

How long does garlic naan last? When stored properly, garlic naan lasts about 3-4 days in the fridge.

Keep an eye out for signs of spoilage. If the naan has an off smell, or if it feels dry and hard, it’s time to toss it. Fresh garlic naan should feel soft and smell fragrant.

For full details on making this delightful garlic naan, check the Full Recipe.

FAQs

Can I make garlic naan without yeast?

Yes, you can make garlic naan without yeast. Instead, use baking powder. Baking powder helps the naan rise and stay fluffy. Just mix it with the flour, sugar, and salt. This method is fast and easy, making it great for quick meals.

How can I make garlic naan crispier?

To make garlic naan crispier, try these tips:

– Roll the dough thinner. A thinner naan will get crispier.

– Cook on high heat. This gives a nice char and crunch.

– Brush with ghee before cooking. This adds flavor and helps crisp up the edges.

– Let it rest a bit longer before cooking. This helps with texture.

What are the best side dishes for garlic naan?

Garlic naan pairs well with many dishes. Here are some great options:

– Creamy butter chicken

– Spicy lamb curry

– Tasty chickpea masala

– Rich dal makhani

– Fresh cucumber raita

These dishes complement the naan and create a balanced meal.

Full Recipe

For the complete recipe for Fluffy Homemade Garlic Naan, check out [Full Recipe].

Homemade garlic naan is simple and rewarding to make. We covered key ingredients, from flour to flavor enhancers. I shared step-by-step instructions for perfect dough and cooking methods. You also learned tips for textures and tasty variations.

Enjoy experimenting with different flavors and storing your naan for later. With practice, you’ll master garlic naan and impress your family and friends. Dive into this fun cooking journey and savor every bite!

- 2 cups all-purpose flour - ½ cup plain yogurt - ½ cup warm water - 4 cloves of garlic, finely minced - Fresh cilantro for garnish - 1 teaspoon sugar - 1 teaspoon salt - 1 teaspoon baking powder - 2 tablespoons ghee or melted butter To make great garlic naan, you need simple yet key ingredients. First, all-purpose flour gives the naan its soft, fluffy texture. The yogurt adds moisture and a slight tang. Warm water helps bind the dough together. Next, garlic is the star here. It brings strong flavor that shines through. Fresh cilantro adds color and a fresh taste as a garnish. You also need some baking essentials. Sugar feeds the yeast (or baking powder, in this case) and helps it rise. Salt enhances flavors, while baking powder creates that lightness we all love. Finally, ghee or melted butter adds richness and a nice finish when brushed on the naan. Check out the Full Recipe for all the steps to create this delicious naan! Mixing dry and wet ingredients is the first step. In a large bowl, sift together the all-purpose flour, sugar, salt, and baking powder. This ensures everything blends well. Create a well in the dry mixture. Pour in the yogurt and warm water. Using a spoon, mix until a shaggy dough forms. Next, knead the dough. Transfer it to a floured surface. Knead for about 5-7 minutes. Your dough should feel smooth and elastic. If it’s sticky, add more flour, one tablespoon at a time. This helps you achieve the right texture. Shape the dough into a ball. Place it in a lightly greased bowl. Cover it with a damp cloth. Let it rest in a warm spot for at least 1 hour. This resting time is crucial for the dough to rise. Resting the dough is important. It helps the yeast activate and makes the naan soft. After the resting period, gently punch down the dough. This releases any trapped air bubbles. Now, divide it into 6 equal pieces. Shape each piece into a ball. Using a rolling pin, flatten each ball into an oval shape. Aim for a thickness of about ¼ inch. Now it’s time to cook the naan. Preheat a skillet or a tandoor over medium-high heat. In a small bowl, mix the minced garlic with ghee or melted butter. This creates a fragrant garlic butter. Once the skillet is hot, place one rolled naan on it. Cook for 1-2 minutes. Look for bubbles on the surface and a light brown bottom. Brush the top of the naan with the garlic-ghee mixture. Flip the naan and cook the other side for another 1-2 minutes. It should be golden brown and fully cooked. Remove the naan and brush it with extra ghee or melted butter. Repeat this for the rest of the dough. Finally, garnish each naan with freshly chopped cilantro. This adds color and flavor. Enjoy your homemade garlic naan with your favorite curry or dish for a real treat! Kneading the dough is key. Knead for 5-7 minutes until smooth. This helps develop gluten, which gives naan its soft texture. If the dough is sticky, add flour slowly. Sprinkle one tablespoon at a time until it feels right. Remember, it should be soft but not tacky. You can customize your garlic butter for great taste. Mix minced garlic with melted ghee or butter. Feel free to add herbs like parsley or oregano for extra flavor. You can also top your naan with cheese, or spices like cumin or chili flakes for a kick. When cooking, a skillet and tandoor have different methods. In a skillet, heat it well before adding naan. For tandoor, the heat is direct and quick. Make sure to flip the naan halfway through cooking for even browning. Look for bubbles on the surface; that's a sign it's ready to flip. {{image_4}} You can easily change up the flavor of your naan. Here are two tasty ideas: - Herb-infused naans: Add chopped fresh herbs like rosemary or thyme to the dough. This gives the naan a fragrant twist. - Cheese-stuffed naans: Place shredded cheese in the center before rolling the dough. This creates a gooey, cheesy delight that is hard to resist. If you need gluten-free naan, you can use different flours. Here are some tips: - Using alternative flours: Try chickpea flour or almond flour instead of all-purpose flour. This keeps the naan tasty and gluten-free. - Adjusting other ingredients: You might need to alter the amounts of yogurt and water. This helps the dough bind properly and stay moist. If you want to make vegan naan, you can swap some ingredients: - Replacing yogurt and ghee: Use plant-based yogurt and coconut oil instead of ghee. This keeps it creamy and flavorful. - Achieving similar textures and flavors: Add a bit of vinegar to the plant-based yogurt. This helps mimic the tangy flavor of regular yogurt. For the complete recipe, check out the Full Recipe section. You can store garlic naan easily to keep it fresh. For short-term storage, place the naan in an airtight container. Store it in the fridge. This method helps maintain its softness. For long-term storage, freeze the naan. Wrap each piece in plastic wrap, then place them in a freezer bag. This keeps them safe from freezer burn. You can freeze garlic naan for up to three months. To enjoy naan at its best, reheating is key. Start by taking it out of the fridge or freezer. If frozen, let it thaw for about 15 minutes. For the best taste, reheat in a skillet. Heat a dry skillet over medium heat. Place the naan in the skillet and warm it for 1-2 minutes on each side. This method keeps it soft and tasty. You can also use an oven. Preheat your oven to 350°F (175°C). Wrap naan in foil and bake for about 10 minutes. This method warms the naan evenly. How long does garlic naan last? When stored properly, garlic naan lasts about 3-4 days in the fridge. Keep an eye out for signs of spoilage. If the naan has an off smell, or if it feels dry and hard, it's time to toss it. Fresh garlic naan should feel soft and smell fragrant. For full details on making this delightful garlic naan, check the Full Recipe. Yes, you can make garlic naan without yeast. Instead, use baking powder. Baking powder helps the naan rise and stay fluffy. Just mix it with the flour, sugar, and salt. This method is fast and easy, making it great for quick meals. To make garlic naan crispier, try these tips: - Roll the dough thinner. A thinner naan will get crispier. - Cook on high heat. This gives a nice char and crunch. - Brush with ghee before cooking. This adds flavor and helps crisp up the edges. - Let it rest a bit longer before cooking. This helps with texture. Garlic naan pairs well with many dishes. Here are some great options: - Creamy butter chicken - Spicy lamb curry - Tasty chickpea masala - Rich dal makhani - Fresh cucumber raita These dishes complement the naan and create a balanced meal. For the complete recipe for Fluffy Homemade Garlic Naan, check out [Full Recipe]. Homemade garlic naan is simple and rewarding to make. We covered key ingredients, from flour to flavor enhancers. I shared step-by-step instructions for perfect dough and cooking methods. You also learned tips for textures and tasty variations. Enjoy experimenting with different flavors and storing your naan for later. With practice, you'll master garlic naan and impress your family and friends. Dive into this fun cooking journey and savor every bite!

Homemade Garlic Naan

Indulge in the taste of homemade garlic naan with this easy recipe! Learn how to create fluffy, restaurant-style naan right in your kitchen using basic ingredients like flour, yogurt, and fresh garlic. This delicious bread pairs perfectly with your favorite curries or can be enjoyed on its own. Create a delightful dining experience and impress your family and friends. Click to explore the full recipe and elevate your meal!

Ingredients
  

2 cups all-purpose flour

1 teaspoon sugar

1 teaspoon salt

1 teaspoon baking powder

½ cup plain yogurt

½ cup warm water

2 tablespoons ghee or melted butter

4 cloves of garlic, finely minced

Fresh cilantro, finely chopped (for garnish)

Extra ghee or butter for brushing

Instructions
 

In a large mixing bowl, sift together the all-purpose flour, sugar, salt, and baking powder. This ensures that the leavening agents are well distributed throughout the flour.

    Create a well in the center of the dry mixture and pour in the plain yogurt and warm water. Using a spoon, begin mixing the ingredients together until a shaggy dough forms.

      Transfer the dough to a floured surface and knead it for 5-7 minutes, until it is smooth and elastic. If your dough feels too sticky, sprinkle in more flour, a tablespoon at a time, until it reaches a manageable consistency.

        Shape the kneaded dough into a ball and place it in a lightly greased bowl. Cover the bowl with a damp cloth and let it rest in a warm location for at least 1 hour, allowing the dough to rise and puff up.

          After the resting period, gently punch down the dough to release any air bubbles. Divide it into 6 equal portions, shaping each piece into a ball. Then, using a rolling pin, flatten each ball into an oval shape with a thickness of approximately ¼ inch.

            Preheat a skillet or a tandoor over medium-high heat. Meanwhile, in a small bowl, combine the minced garlic with the ghee or melted butter, mixing thoroughly to create a fragrant garlic butter.

              Once the skillet is hot, place one of the rolled naans onto the surface. Cook for about 1-2 minutes, or until bubbles appear on the surface and the bottom is lightly browned.

                Brush the top of the naan generously with the garlic-ghee mixture. Flip the naan over and cook for an additional 1-2 minutes, until the second side is golden brown and cooked through.

                  Remove the naan from the skillet, then brush the top with extra ghee or melted butter for added flavor and richness. Repeat this process for the remaining portions of dough.

                    Finally, garnish each naan with a sprinkle of freshly chopped cilantro to add a vibrant touch. Serve the naans warm, accompanied by your favorite curry or dish for a delightful meal.

                      Prep Time: 15 min | Total Time: 1 hr 15 min | Servings: 6

                        - Presentation Tips: Stack the naans on a wooden board or in a basket lined with a clean cloth. This keeps them warm and adds a rustic appeal to your dining experience.

                          Leave a Comment

                          Recipe Rating