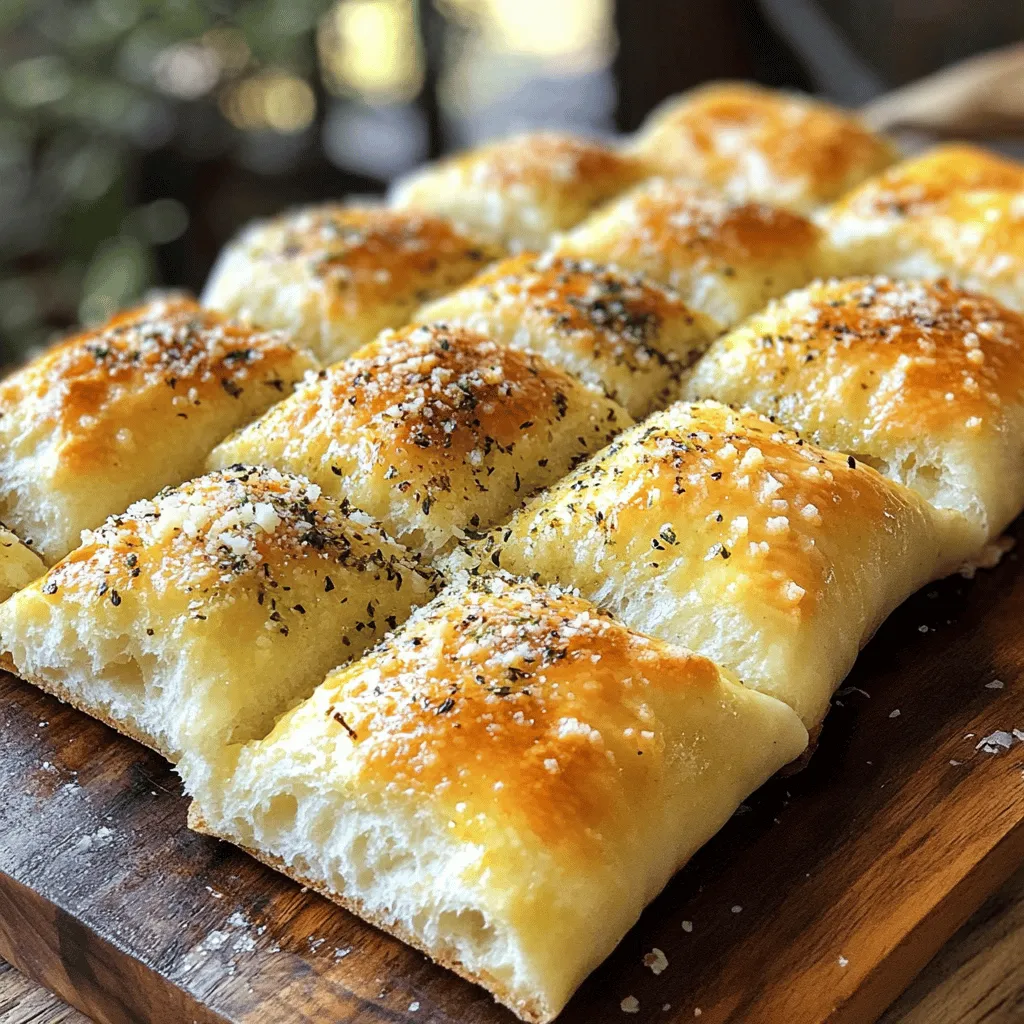
Are you ready to impress your family with homemade breadsticks that are quick and delicious? In this easy recipe, I’ll guide you through simple steps to create soft, fluffy breadsticks right from your kitchen. With just a few basic ingredients, you can enjoy warm, flavorful breadsticks that pair perfectly with any meal. Say goodbye to store-bought versions and let’s jump into the fun of baking together!
Ingredients
Essential Ingredients for Easy Homemade Breadsticks
To make your easy homemade breadsticks, you will need:
– 2 cups all-purpose flour
– 1 tablespoon baking powder
– 1 teaspoon salt
– 1 tablespoon granulated sugar
– 1 cup milk (or plant-based alternative)
– 1/4 cup extra virgin olive oil
These ingredients form the base of your breadsticks. The flour gives them structure, while the baking powder helps them rise and become fluffy.
Flavor Enhancements
To add some tasty notes, consider these flavor enhancements:
– 1 teaspoon garlic powder
– 1 teaspoon dried oregano
– 1 teaspoon dried basil
– Freshly grated Parmesan cheese (for topping)
These spices and cheese elevate the breadsticks, making them more delicious. Garlic powder brings warmth, while oregano and basil add a lovely herb flavor.
Optional Ingredients
You might want to brush your breadsticks with:
– Olive oil or melted butter (for brushing)
Brushing with oil or butter gives your breadsticks a golden and crispy finish. This step is simple but makes a big difference in taste and texture, ensuring each bite is delightful.
Step-by-Step Instructions
Preparing the Dough
1. Preheat your oven to 400°F (200°C). Line a baking sheet with parchment paper.
2. In a large bowl, mix the all-purpose flour, baking powder, salt, and sugar. Whisk them until well combined.
3. Pour in the milk and extra virgin olive oil. Stir gently until a soft, slightly sticky dough forms.
Shaping the Breadsticks
1. Lightly dust a clean surface with flour. Place the dough on it and knead gently for 1-2 minutes. You want it smooth, not tough.
2. Roll the dough into a rectangle about 1/2 inch thick. This thickness makes them fluffy.
3. Slice the dough into strips that are 1 inch wide and 6 inches long. This helps them bake evenly.
Baking and Finishing Touches
1. Mix garlic powder, dried oregano, and dried basil in a small bowl. Sprinkle this mix over the breadsticks.
2. Brush the tops with olive oil or melted butter. Add a sprinkle of freshly grated Parmesan cheese for extra flavor.
3. Place the baking sheet in the oven and bake for 12-15 minutes. They should look golden brown and puffed up.Enjoy your warm, delicious breadsticks!
Tips & Tricks
Common Baking Mistakes to Avoid
Baking can be tricky. Here are some common mistakes to skip:
– Over-kneading the dough: Knead just until smooth. Too much makes breadsticks tough.
– Incorrect oven temperature: Always check your oven. Too hot or too cold changes the bake.
– Not spacing breadsticks enough on the baking sheet: Leave room for them to grow. They need space to puff up.
Ensuring Perfect Flavor and Texture
A few tips can enhance your breadsticks:
– Use fresh herbs for more aroma: Fresh herbs give a burst of flavor. Try using rosemary or thyme.
– Adjust thickness for personal preference: Thinner breadsticks are crispier. Thicker ones are fluffier. Choose what you love!
– Experiment with additional toppings: Add seeds or cheese on top. This adds a fun twist to the classic recipe.
Serving Suggestions
Serve your breadsticks in style! Here are some ideas:
– Pairing with dips like marinara sauce: A warm marinara dip complements the breadsticks. It’s a classic combo.
– Serving warm in a breadbasket: Place them in a basket lined with a cloth. This keeps them warm and soft.
– Adding sides for a complete meal: Consider a salad or soup. These sides make your meal more hearty and satisfying.
Variations
Flavor Variations
You can make your breadsticks even more fun with flavors. Try cheese-stuffed breadsticks. Just roll the dough around your favorite cheese before baking. Mozzarella or cheddar works great!
You can also add herbs and garlic for a tasty twist. Mix fresh or dried herbs like rosemary or thyme into the dough. It adds a nice aroma and taste.
Want some heat? Add crushed red pepper to the dough or sprinkle it on top. This gives your breadsticks a spicy kick everyone will love!
Dietary Adjustments
If you need gluten-free options, use gluten-free flour. Many brands work well in this recipe. Just swap it one-for-one with regular flour.
For a vegan version, replace milk with almond or oat milk. You can also use vegan butter instead of regular butter. This way, everyone can enjoy your breadsticks!
Customizing the Serving Style
Make mini breadsticks for a fun appetizer. Simply slice the dough into smaller strips before baking. These bite-sized treats are perfect for dipping!
For a twist on presentation, try garlic knots. After slicing the dough, tie each strip into a knot. Brush with olive oil and sprinkle with garlic. These knots look fancy but are super easy to make!
Explore these variations and make your breadsticks unique!
Storage Info
How to Store Leftovers
Allow your breadsticks to cool down before storing them. This step helps prevent sogginess. Once they cool, wrap them tightly in plastic wrap or aluminum foil. This keeps them fresh longer. You can also use an airtight container for extra protection. Make sure the lid seals tightly to keep out air.
Reheating Tips
To reheat your breadsticks, the oven works best. Preheat your oven to 350°F (175°C). Place the breadsticks on a baking sheet. Heat them for about 5-10 minutes. This keeps them crispy and warm. If you’re in a hurry, you can use the microwave. Just heat them for 15-20 seconds. Be careful not to overheat, or they may get chewy.
Freezing Instructions
If you want to freeze your breadsticks, follow these steps. First, let them cool completely. Then, wrap each breadstick tightly in plastic wrap. Place them in a freezer bag, squeezing out as much air as possible. Label the bag with the date. To thaw, take them out and leave them in the fridge overnight. For the best results, reheat them in the oven, just like before. This gives you warm, soft breadsticks again!
FAQs
How long do homemade breadsticks last?
Homemade breadsticks can last about 3 days in the fridge. To keep them fresh, store them in an airtight container. You can also freeze them for up to 3 months. Just wrap them well in plastic wrap before placing them in a freezer-safe bag. Thaw them at room temperature before reheating.
Can I use whole wheat flour for this recipe?
Yes, you can use whole wheat flour. However, this will change the texture. Whole wheat flour makes breadsticks denser and gives them a nutty flavor. To achieve a lighter texture, mix whole wheat flour with all-purpose flour. A 50/50 mix can work well for a good balance.
What can I do if my dough is too sticky?
If your dough is sticky, add a little flour to it. Start with one tablespoon at a time. Mix well until it becomes soft and manageable. You can also knead the dough longer to help it come together. Just don’t over-knead, as this can make the breadsticks tough.
Making homemade breadsticks is simple and rewarding. You need basic ingredients like flour, milk, and oil. Follow the easy steps for mixing, kneading, and baking. Remember to avoid common mistakes for best results.
Overall, these breadsticks can fit various tastes and diets. Experiment with flavors and toppings to find your favorite. Enjoy them with dips for a tasty treat. With these tips, your breadsticks will be a hit every time. Happy baking!