Craving something decadent and sweet? You’re in the right place! This Easiest Chocolate Lava Cake recipe ensures you get that dreamy, gooey center every time. With just a few simple ingredients and easy steps, you can impress your friends and family (or even just treat yourself!). Let’s dive into the deliciousness and create a dessert that will satisfy any chocolate lover. Ready to bake?
Ingredients
– 1/2 cup (113g) unsalted butter: This adds richness and helps the cake stay moist. You can use salted butter for a slight taste change.
– 1 cup (170g) semi-sweet chocolate chips: These give the cake its deep chocolate flavor. Dark chocolate chips are a great swap if you want a richer taste.
– 2 large eggs: Eggs help bind the ingredients and create a fluffy texture. You can use egg substitutes if needed, like flaxseed meal mixed with water.
– 2 large egg yolks: These add creaminess and enhance the cake’s richness. You can skip them, but the texture will change.
– 1/4 cup (50g) granulated sugar: Sugar sweetens the cake and aids in browning. Brown sugar works as a tasty alternative.
– 2 tablespoons all-purpose flour: Flour gives structure to the cake. For a gluten-free option, use almond flour or a gluten-free blend.
– 1/4 teaspoon salt: Salt balances the sweetness and enhances flavor. You can omit it if you prefer.
– 1 teaspoon vanilla extract: This adds a warm aroma and flavor. Almond extract provides a nice twist if you want something different.
– Powdered sugar, for dusting: This adds a sweet touch on top. You can skip it for a simpler look.
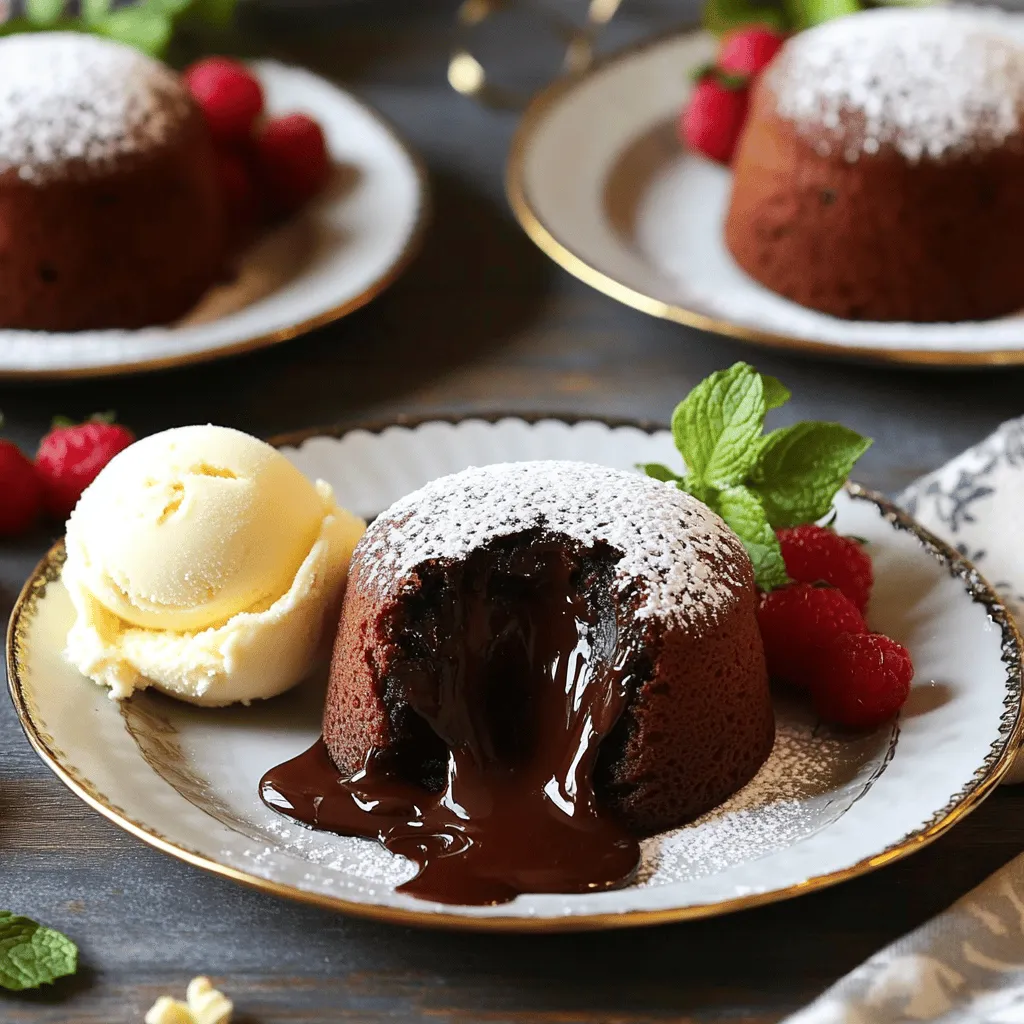
– Ice cream or whipped cream, for serving (optional): These add creaminess and contrast to the warm cake. Fresh berries also make a great pairing.
By using the right ingredients, you can make this cake a hit.
Step-by-Step Instructions
Prepping the Oven and Ramekins
Greasing and flouring ramekins is key. This step helps your cakes slide out easily. I use unsalted butter for greasing. Then, I sprinkle flour or cocoa powder inside. This adds a non-stick layer. Preheat your oven to 425°F (220°C). A hot oven ensures the cakes bake evenly.
Melting Chocolate and Butter
For melting chocolate and butter, I use a microwave-safe bowl. Combine 1/2 cup of butter and 1 cup of chocolate chips. Microwave in 30-second bursts. Stir after each round. This method works well for a smooth mix. You want it creamy with no lumps.
Whisking Eggs and Sugar
In a separate bowl, whisk two large eggs and two yolks. Add 1/4 cup of sugar to the mix. Whisk until it becomes light and frothy. This usually takes about 2-3 minutes. You want to see little bubbles forming. That shows you’re on the right track!
Combining Mixtures
Now, it’s time to mix! Gradually pour the melted chocolate into the egg mix. Stir gently to combine. This keeps the batter light. Be careful not to overmix. You want a smooth mixture without losing air.
Filling Ramekins and Baking
Divide the batter among your ramekins. Fill each about 3/4 full. This gives the cakes room to rise. Bake in the preheated oven for 12-14 minutes. The edges should feel set, while the center remains soft.
Cooling and Serving
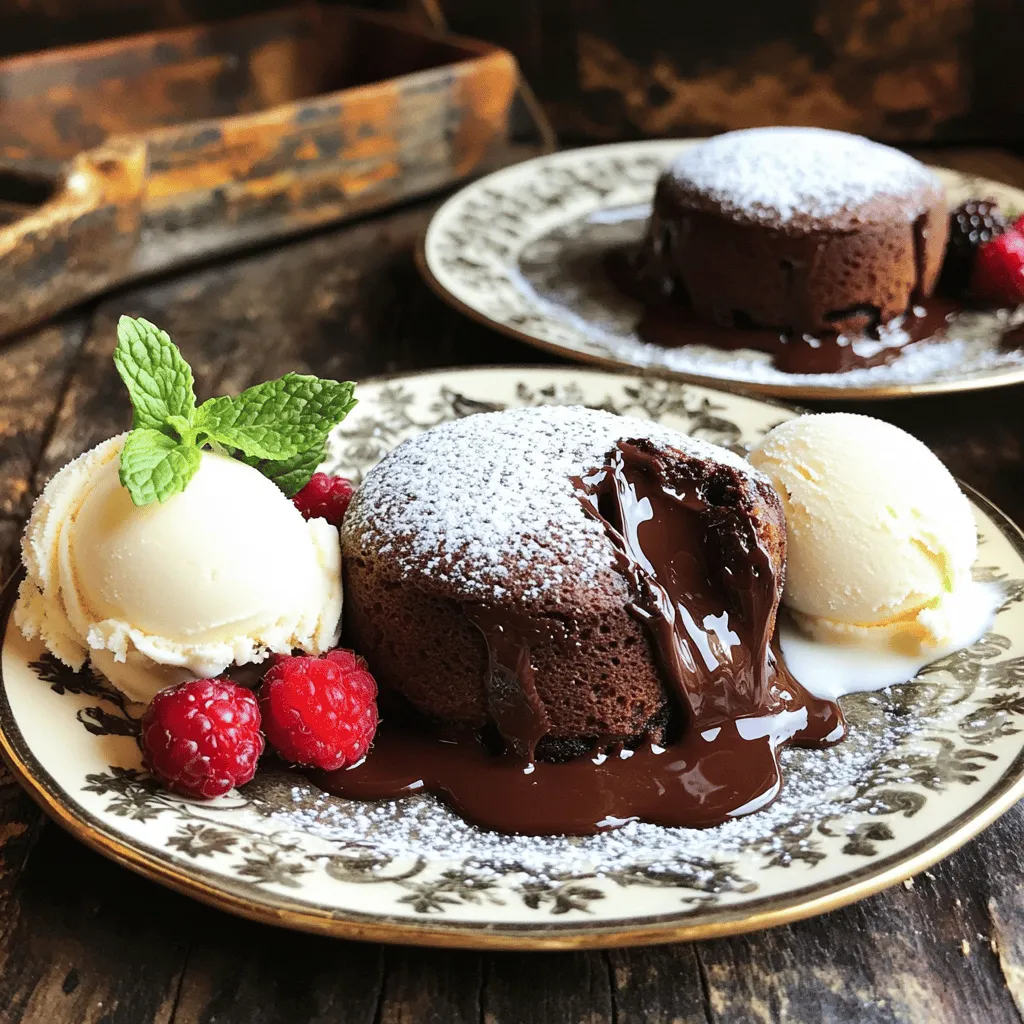
After baking, cool the cakes for about 1 minute. Use a knife to run around the edges. This helps release the cakes. Invert them onto plates gently. Dust with powdered sugar for a touch of style. Pair with ice cream or whipped cream for extra delight. Enjoy your delicious creation!
Tips & Tricks
How to Achieve the Perfect Lava Center
To get that oozy center, timing is key. Bake your cakes for 12 to 14 minutes. If you bake them too long, the center sets and you miss the lava. Check them at the 12-minute mark. Gently shake the ramekin. If it wiggles, you’re good! If it looks too firm, give it another minute.
Common pitfalls include overmixing and baking too long. Overmixing can make your cakes dense. You want a light, airy batter. Just fold in the flour gently.
Storing Leftover Lava Cakes
If you have leftover cakes, let them cool completely. Wrap them in plastic wrap or store them in an airtight container. This keeps them fresh in the fridge for up to three days.
To reheat, place the cake on a plate. Heat it in the microwave for about 20-30 seconds. Check to see if the center is warm and gooey again. If not, heat in small intervals until it is just right.
Enhancing the Flavor
Chocolate pairs well with many flavors. Try adding a splash of espresso for a boost. Vanilla ice cream is a classic, but a berry compote adds a nice twist.
Consider adding a bit of orange zest to the batter. This gives your cake a bright, fresh taste. Nuts or sea salt can also create a nice contrast to the sweetness. Get creative with add-ins to make your lava cake unique!
Variations
Gluten-Free Options
To make a gluten-free chocolate lava cake, swap all-purpose flour for almond flour or gluten-free flour. Both options work well, but almond flour adds a nutty taste. If you choose gluten-free flour, check if it has a binding agent like xanthan gum. This will help your cake hold its shape. You may need to adjust the baking time. Keep an eye on the cakes after 10 minutes. Gluten-free cakes may bake faster, so check for that gooey center!
Flavor Infusions
You can add a fun twist to your lava cake! Try mixing in a teaspoon of espresso powder for a rich coffee flavor. You can also add some orange zest for a bright citrus note. If you want to switch up the chocolate, use dark or milk chocolate instead of semi-sweet. Each type of chocolate gives a different taste and texture. Choose what you like best!
Portion Size Modifications
Baking in different ramekins or pans is fun, too! If you want mini lava cakes, use smaller ramekins. Just remember to adjust your baking time. Smaller cakes may need only 8 to 10 minutes in the oven. For larger cakes, like a full-size cake, increase the baking time to about 15 to 18 minutes. Always check for that soft center; it’s the best part!
Storage Info
Best Methods for Storing Leftovers
To store leftover chocolate lava cakes, you need to keep them fresh. Here are my best tips:
– Wrap each cake in plastic wrap. This will keep moisture in.
– Place the wrapped cakes in a sealed container. This adds another layer of protection.
– If you have extra room, use a cake dome. It will shield them from air and odors.
Storing them this way helps maintain their gooey center. You can enjoy them later without losing flavor.
Freezing Instructions
If you want to keep your lava cakes longer, freezing works well. Here’s how to do it right:
– Cool the cakes completely before freezing. Warm cakes can create ice crystals.
– Wrap each cake tightly in plastic wrap. This stops freezer burn.
– Then, place them in a freezer-safe bag or container. Label them with the date for easy tracking.
When you’re ready to enjoy them, follow these thawing and reheating tips:
– Thaw the cakes in the fridge overnight. This keeps them from getting soggy.
– To reheat, place the cakes in a microwave for 30 seconds. Check to see if they are warm but not hot.
This method helps keep the center soft and melty, just like fresh. You can enjoy your chocolate lava cakes anytime!
FAQs
How do I know when the lava cake is done?
You can tell when your lava cake is done by looking at its edges. The edges should be set, firm, and slightly puffed. The center, however, should still look soft and wobbly. This means it has that gooey lava you want. A good rule of thumb is to bake for 12-14 minutes. If you insert a toothpick, it should come out with some moist batter, not completely clean.
Can I make chocolate lava cake ahead of time?
Yes, you can prepare the lava cake batter ahead of time. Mix the batter and store it in the fridge for up to 24 hours. Just remember to bring it back to room temperature before baking. This way, you can enjoy a warm dessert with little fuss. If you bake it from cold, add a minute or two to the baking time.
What should I serve with chocolate lava cake?
Serving suggestions can elevate your lava cake experience. Here are a few ideas:
– Vanilla ice cream
– Whipped cream
– Fresh berries, like raspberries or strawberries
– A drizzle of chocolate or caramel sauce
– Mint leaves for a fresh touch
These toppings complement the rich chocolate flavor and add a fun twist.
How do I fix a lava cake that didn’t turn out?
If your lava cake is overcooked, it will not have the gooey center you desire. To avoid this, check your oven’s temperature with an oven thermometer. If the cake is undercooked, bake it a minute longer next time. If the cakes stick to the ramekins, ensure you grease and flour them well before filling. Don’t be afraid to experiment to find the perfect bake time for your oven. You can always learn and improve with each attempt.
In this article, we explored how to create the perfect chocolate lava cake. We covered ingredients, step-by-step instructions, and tips for success. Remember to use the right techniques for melting chocolate and whisking eggs. Timing is key for that gooey center. Whether you want gluten-free options or fun flavor twists, you have many ways to customize. With these insights, you can impress anyone with your baking skills. Enjoy your delicious creations and the smiles they bring!