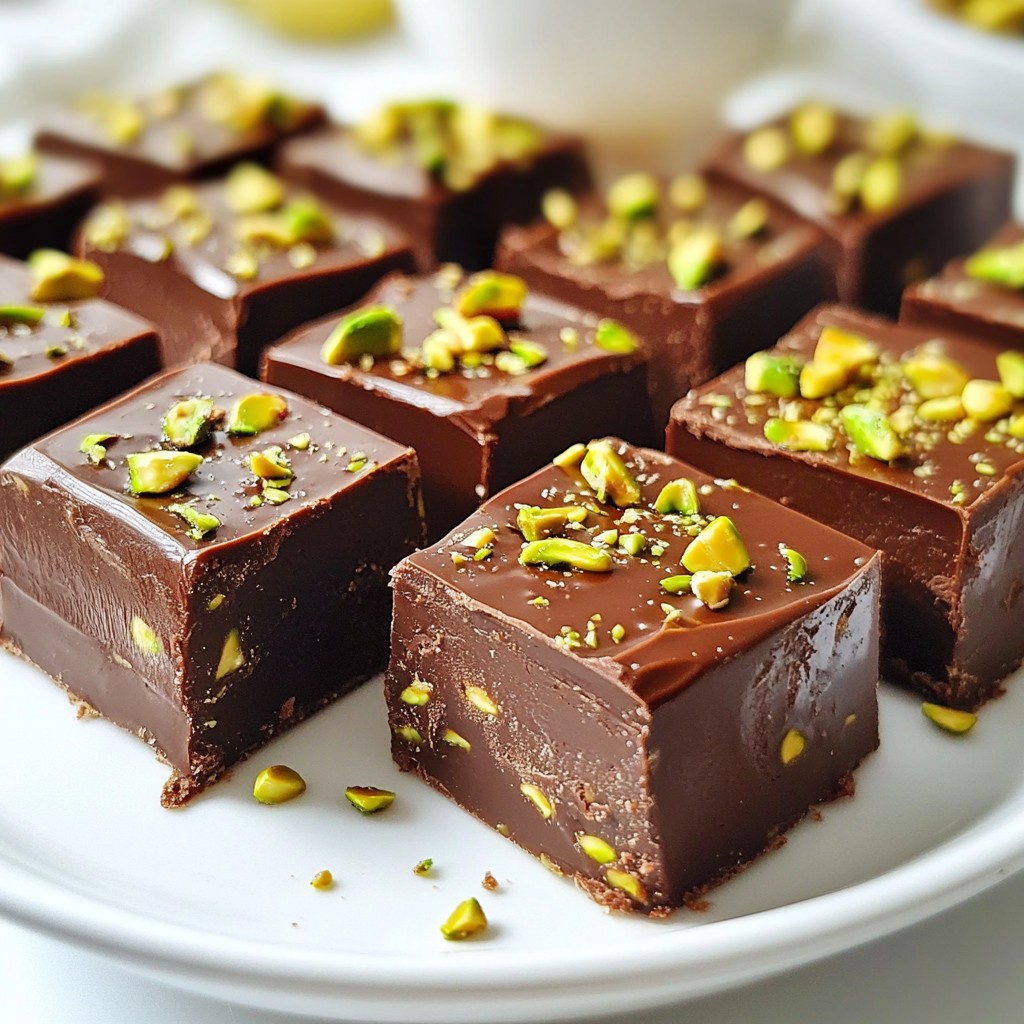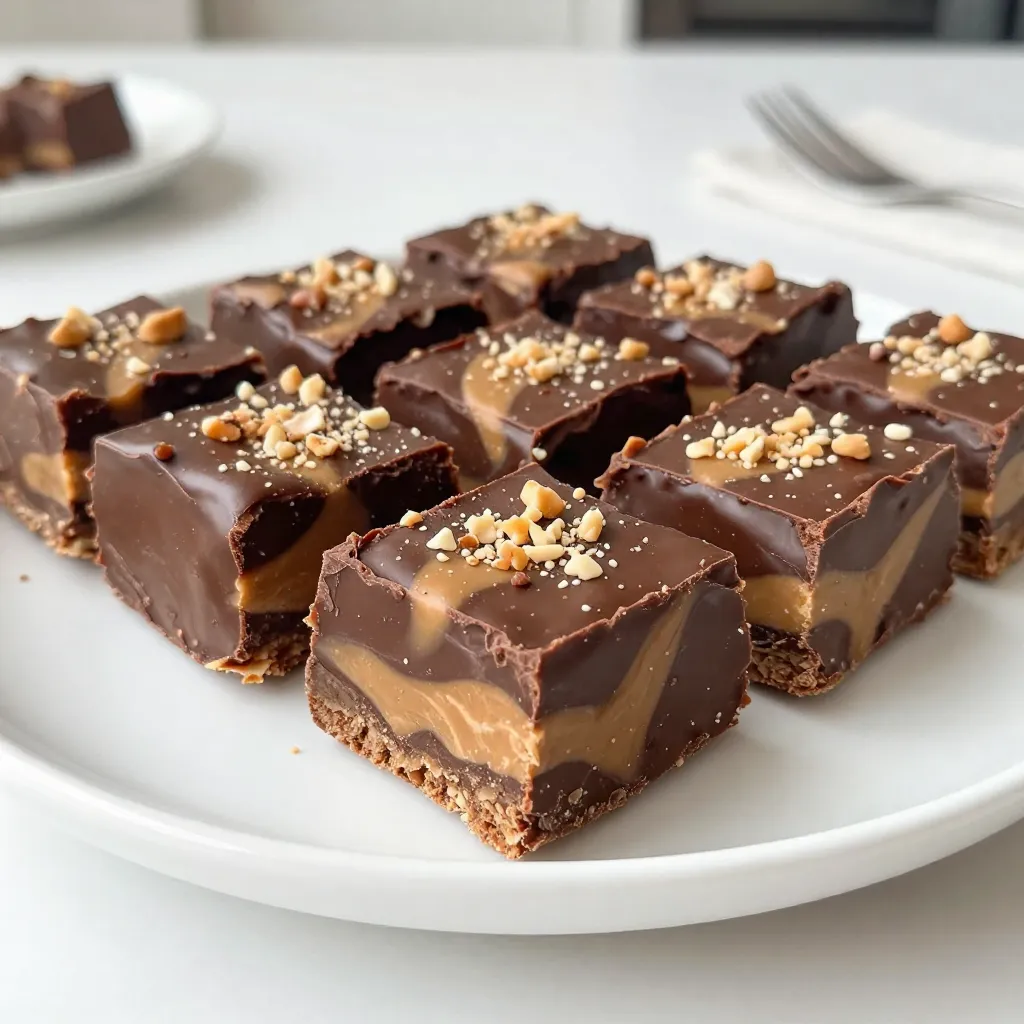
Indulging in a rich and creamy dessert is a treat we all crave. Chocolate Peanut Butter Swirl Fudge delivers that perfect mix of sweet and salty. With just a handful of ingredients, you can create a decadent dessert that impresses everyone. In this guide, I’ll show you how to make this easy treat step by step, plus share helpful tips to ensure your fudge turns out perfect every time. Let’s dive in!
Why I Love This Recipe
- Decadent Flavor: This fudge combines the rich taste of chocolate with the creamy goodness of peanut butter, creating a delightful treat that is hard to resist.
- Easy to Make: With just a few simple ingredients and straightforward steps, this recipe is perfect for both novice and experienced bakers.
- Customizable: You can easily add your favorite nuts or even a sprinkle of sea salt on top for extra texture and flavor, making it unique every time.
- Perfect for Sharing: This recipe yields 16 squares, making it ideal for gatherings, parties, or simply to enjoy with family and friends.
Ingredients
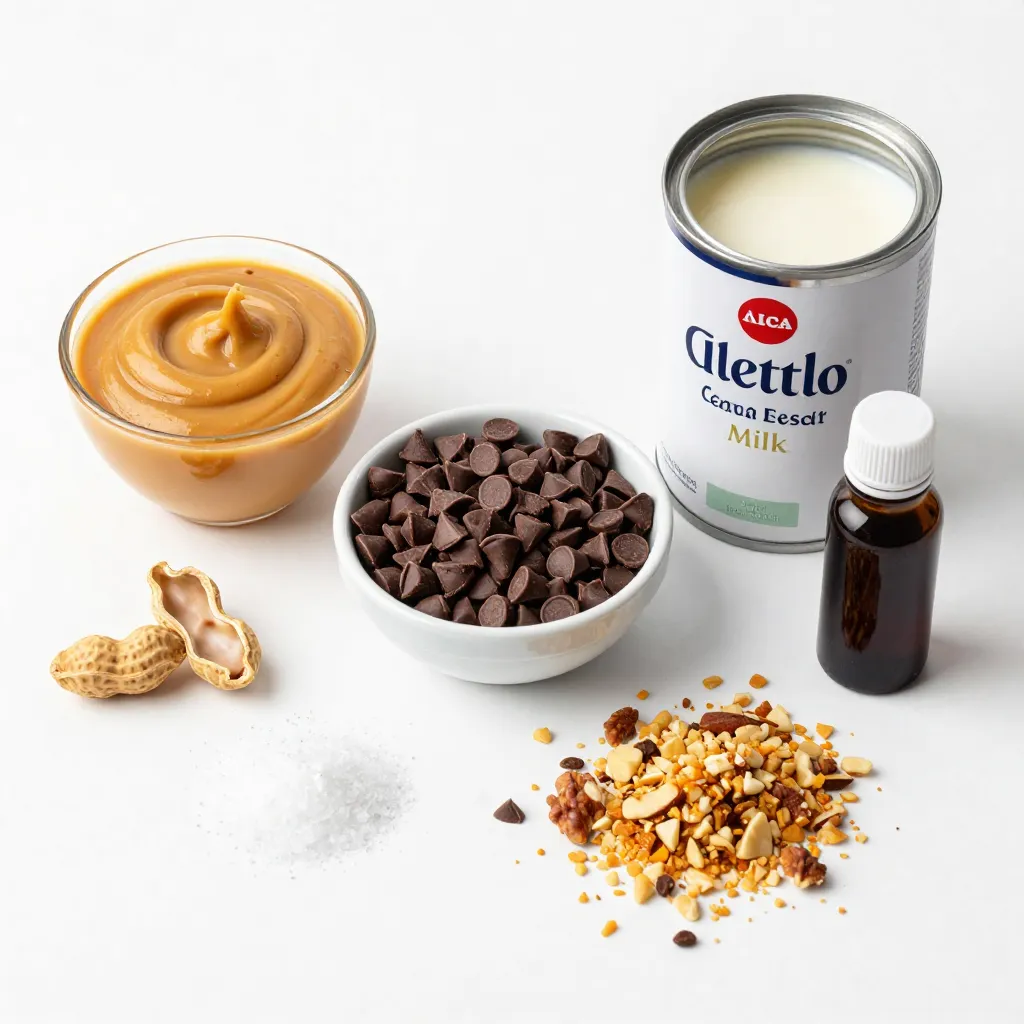
The heart of any great treat lies in its ingredients. For my Chocolate Peanut Butter Swirl Fudge, I keep it simple yet rich. Each ingredient plays a key role in creating that perfect blend of flavors. Here’s what you need:
– 1 cup creamy peanut butter
– 1 cup semi-sweet chocolate chips
– 1 can (14 oz) sweetened condensed milk
– 1 teaspoon vanilla extract
– 1/4 teaspoon salt
– 1/2 cup chopped nuts (optional)
Creamy peanut butter gives the fudge its signature taste. The semi-sweet chocolate chips create a rich chocolate base. Sweetened condensed milk adds sweetness and creaminess to the mix. Vanilla extract enhances all the flavors, while the salt balances the sweetness. If you want some crunch, add chopped nuts for extra texture. Each bite will be a delightful experience you won’t forget!
Step-by-Step Instructions
Preparing the Baking Pan
First, grab an 8-inch square baking pan. Line it with parchment paper. Make sure the paper hangs over the sides a bit. This helps you lift the fudge out easily once it sets.
Melting the Chocolate Mixture
Next, take a medium saucepan and place it on low heat. Add 1 cup of semi-sweet chocolate chips and 1 can of sweetened condensed milk. Stir the mix as it heats. Keep stirring until it turns into a smooth and glossy chocolate sauce.
Incorporating Peanut Butter
Now, get a microwave-safe bowl and add 1 cup of creamy peanut butter. Warm the peanut butter in the microwave for about 20 to 30 seconds. This makes it easier to mix. Once warm, combine it with the remaining chocolate mixture until smooth.
Chilling and Cutting the Fudge
After mixing, pour half of the chocolate into the pan. Spread it evenly. Use a spoon to drop spoonfuls of the peanut butter mix over the chocolate. Create a swirl by gently mixing with a skewer or knife. Don’t blend too much; you want that beautiful swirl!
Next, if you want, sprinkle 1/2 cup of chopped nuts on top for extra crunch. Place the pan in the fridge and let it chill for at least 2 hours. Once firm, lift it out using the parchment paper. Cut the fudge into squares. Enjoy your tasty treat!
Tips & Tricks
Achieving the Perfect Swirl
To get the perfect swirl in your fudge, keep distinct layers. Pour half of the chocolate first, then add dollops of the peanut butter mixture. Use a skewer or knife to gently swirl them together. Be careful not to mix too much; you want to see both chocolate and peanut butter. Over-mixing will make your fudge look muddy instead of beautiful.
Serving Suggestions
When it’s time to serve, cut the fudge into neat squares. Arrange them on a pretty plate for a nice display. For extra flair, sprinkle some chopped nuts on top or drizzle melted chocolate over the squares. This not only adds flavor but also makes your treat look fancy and inviting.
Best Practices for Melting Chocolate
Always melt chocolate on low heat. This prevents burning and keeps the chocolate smooth. You can use the stovetop or the microwave. If using the microwave, heat in short bursts of 20 seconds. Stir in between to help it melt evenly. This method gives you great control and helps avoid any burning.
Pro Tips
- Use Room Temperature Ingredients: Let your peanut butter and condensed milk come to room temperature before mixing. This helps achieve a smoother consistency and better blending.
- Don’t Overheat the Chocolate: When melting the chocolate chips, use low heat and stir continuously to prevent burning. This ensures a silky texture for your fudge.
- Experiment with Flavors: Consider adding a pinch of cinnamon or a drop of espresso to the chocolate mixture for an exciting twist on flavor!
- Storage Tips: Store the fudge in an airtight container in the refrigerator for up to two weeks. It can also be frozen for longer shelf life—just make sure to wrap it well!
Variations
Adding Flavor
You can enhance your fudge with different flavors. Try adding extracts like mint or almond. Just a teaspoon can change the taste. If you love dark chocolate, swap semi-sweet chips for dark chocolate ones. This adds depth and richness. You can even mix in white chocolate for a fun twist. Experimenting with chocolate types can lead to great surprises.
Nut Alternatives
If you’re looking for a nut-free version, you have options. You can use seeds like sunflower or pumpkin seeds. These add crunch and flavor without nuts. If you want to keep nuts, try different kinds. Walnuts, pecans, or hazelnuts all work well. Each nut brings a unique taste to the fudge.
Layering with Other Ingredients
Don’t be afraid to get creative! You can layer in cookies, marshmallows, or even caramel. Try crushed graham crackers for a s’mores twist. For a fun flavor change, mix in butterscotch chips with the chocolate. Layering different ingredients can create a taste adventure. Each bite will be a new surprise.
Storage Info
Refrigerator Storage
To keep your Chocolate Peanut Butter Swirl Fudge fresh, store it in an airtight container. This will help prevent it from drying out. You can also wrap it in plastic wrap before placing it in the container. This fudge stays tasty for up to two weeks in the fridge. Keep it cool to enjoy its rich flavor and smooth texture.
Freezing Instructions
Freezing is a great option if you want to save some fudge for later. Wrap each piece tightly in plastic wrap. Then, place them in a freezer-safe bag. Make sure to squeeze out as much air as possible before sealing. For the best texture, thaw the fudge in the fridge overnight before enjoying. This way, it stays delicious and creamy, just like when you first made it.
FAQs
How long does it take for the fudge to set?
The fudge needs at least 2 hours in the fridge to set. This time allows it to firm up well. Make sure your fridge is cold enough. If you check it early, it may still be soft. Patience is key for the best results!
Can I use chocolate bars instead of chocolate chips?
Yes, you can use chocolate bars! Just chop them into small pieces. They will melt well, just like chips. This can give a nice, rich taste. Use about the same amount, one cup, to keep the balance.
What can I do if my fudge is too soft?
If your fudge is soft, it may need more chill time. Try placing it back in the fridge for an hour more. If it’s still soft, you can melt it down again. Add a bit more chocolate or peanut butter. Mix well and set again.
Is it possible to make this fudge vegan?
You can make this fudge vegan! Use dairy-free chocolate chips and coconut milk. Swap the sweetened condensed milk for a vegan version. This way, you keep all the chocolate-peanut butter flavor without dairy.
You now have a simple, fun way to make delicious fudge. We covered key ingredients, easy steps, and tips for the perfect treat. Remember, you can customize your fudge with flavors and toppings to fit your tastes. Storing it properly ensures it stays fresh for up to two weeks. With these insights, you can impress family and friends with your fudge-making skills. Enjoy experimenting and sharing your sweet creation