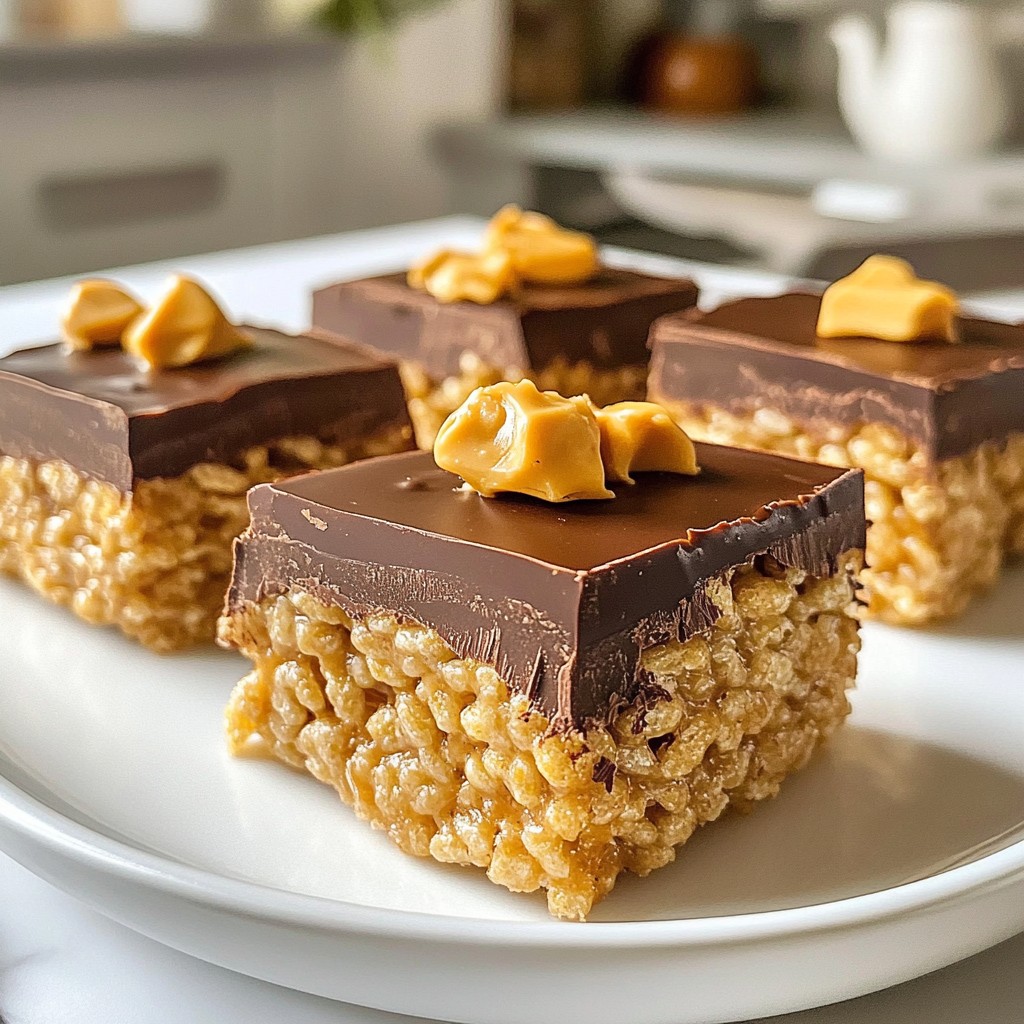
Craving a sweet treat that’s easy to make? Look no further! These Chocolate Peanut Butter Rice Crispy Bars combine the perfect crunch with rich, creamy flavor. In this guide, I’ll walk you through simple steps, essential tips, and tasty variations to help you whip up these delicious bars. Whether for a snack or dessert, your taste buds are in for a delightful surprise. Let’s get started on this tasty adventure!
Why I Love This Recipe
- Quick and Easy: This recipe takes only 10 minutes of prep time, making it a fast and simple dessert option for any occasion.
- No-Bake Delight: Since these bars require no baking, they are perfect for warm days or when you want to avoid heating up the kitchen.
- Nutritious Ingredients: With wholesome ingredients like peanut butter, honey, and rice crispy cereal, these bars offer a tasty treat without excessive guilt.
- Customizable: Feel free to add your favorite mix-ins or toppings, such as nuts or dried fruit, to make these bars uniquely yours!
Ingredients
List of Ingredients for Chocolate Peanut Butter Rice Crispy Bars
- 3 cups rice crispy cereal
- 1 cup creamy peanut butter
- 1 cup semi-sweet or dark chocolate chips
- 1/2 cup honey or pure maple syrup
- 1 teaspoon vanilla extract
- A pinch of salt
- Optional: Extra chocolate chips for topping
Measurements and Substitutions
Each ingredient brings its own flavor and texture. You can swap honey for maple syrup if you want a vegan option. Creamy peanut butter is best, but crunchy works too. Dark chocolate gives a rich taste, while semi-sweet offers a classic flavor. If you want to reduce sugar, use less honey or maple syrup.
Essential Equipment Needed
To make these bars, you need:
- An 8x8-inch baking dish
- Parchment paper for easy removal
- A large saucepan for melting
- A spatula for mixing
- A cutting board for slicing the bars
With these ingredients and tools, you can create a tasty treat that's simple and fun!

Step-by-Step Instructions
Preparation of the Baking Dish
Start by lining an 8x8-inch square dish with parchment paper. Make sure the paper hangs over the edges. This makes it easy to lift the bars out later. You want a clean removal for perfect squares.
Melting the Peanut Butter and Sweetener Mixture
In a large saucepan, set your heat to low. Add the creamy peanut butter and honey or maple syrup. Sprinkle in a pinch of salt. Stir nonstop for about 3-5 minutes. You need it to be smooth and creamy. This mixture is the heart of your bars.
Incorporating Chocolate and Combining with Cereal
After the mixture is smooth, take the saucepan off the heat. Add the chocolate chips and vanilla extract. Stir until the chocolate melts and the mix is glossy. Now, slowly add the rice crispy cereal. Use a spatula to fold it in gently. Make sure every piece is coated without crushing them.
Transferring and Packing the Mixture into the Dish
Pour your mixture into the lined baking dish. Use your spatula to press it down firmly. Make sure it fills the corners evenly. This step is key for a good texture in the bars.
Chilling and Cutting the Bars
Now, place the dish in the fridge. Let the bars chill for at least 1-2 hours. This helps them firm up. Once set, lift the bars out using the parchment. Place them on a cutting board and cut into squares or rectangles. Enjoy right away or store in an airtight container for later!
Tips & Tricks
Expert Tips for Perfect Bars
To make the best Chocolate Peanut Butter Rice Crispy Bars, follow a few key tips:
- Use fresh ingredients. Fresh peanut butter and chocolate taste best.
- Melt slowly. Keep the heat low when melting the peanut butter and honey.
- Mix well. Stir until the chocolate fully melts for a smooth texture.
- Pack tightly. Press the mixture firmly into the baking dish to avoid crumbling.
Common Mistakes to Avoid
Many people make mistakes when making these bars. Here are a few to watch for:
- Overheating the mixture. High heat can burn the peanut butter and sugar.
- Not cooling enough. If you skip chilling, the bars may fall apart.
- Crushing the cereal. Stir gently to keep the cereal crisp and airy.
- Not using parchment paper. This can make removing the bars difficult.
How to Achieve the Best Texture
Texture is key to a great treat. Here’s how to get it just right:
- Use creamy peanut butter. This helps create a smooth, cohesive mixture.
- Add honey or syrup. These keep the bars chewy and sweet.
- Don't skip the salt. A pinch enhances the flavor and balances sweetness.
- Chill properly. Let your bars set in the fridge for at least two hours.
Pro Tips
- Use Fresh Ingredients: For the best flavor, make sure your peanut butter is fresh and your chocolate chips are high quality. This will enhance the overall taste of your bars.
- Don’t Overmix: When combining the rice crispy cereal with the peanut butter-chocolate mixture, be gentle. Overmixing can lead to crushed cereal and a less crispy texture.
- Chill Thoroughly: Allow the bars to chill completely in the refrigerator for at least 1-2 hours. This helps them firm up nicely for easier cutting and better texture.
- Experiment with Add-Ins: Feel free to customize your bars by adding nuts, dried fruit, or even a sprinkle of sea salt on top for a gourmet touch!
Variations
Nut-Free Version Ideas
If you need a nut-free treat, swap the peanut butter. Try sun butter or soy nut butter. Both options work well in these bars. They keep the creamy texture and taste great. You can enjoy the same sweet flavor without nuts.
Flavor Variations
Want to change things up? Add some fun ingredients! You can mix in chopped nuts or dried fruit. Almonds, walnuts, or cashews add crunch. Dried cranberries or raisins offer a sweet chew. You can also try adding coconut flakes for a tropical twist. Each choice makes these bars unique and tasty!
Different Sweetener Options
You can use various sweeteners in this recipe. Honey and maple syrup are great options. But if you want something different, try agave nectar. Brown sugar can also work well and give a deeper flavor. Each sweetener changes the taste a bit. Experimenting with sweeteners is a fun way to find your favorite!
Storage Info
Best Practices for Storing Bars
To keep your chocolate peanut butter rice crispy bars fresh, use an airtight container. This helps keep moisture out. I suggest cutting the bars into squares before storage. This makes it easy to grab a quick snack. Place parchment paper between layers of bars to prevent sticking. You can stack them, but keep them separated.
Shelf Life and Freezing Tips
These bars can last up to one week in the fridge. If you want them longer, freeze them. Wrap each bar in plastic wrap before placing them in a freezer bag. They can stay fresh for up to three months in the freezer. When you're ready to enjoy, thaw them in the fridge overnight.
How to Keep Bars Fresh
To keep your bars fresh, store them in a cool, dry place. Avoid direct sunlight, as heat can melt the chocolate. If you notice the bars getting soft, place them back in the fridge. This helps maintain their shape and texture. Always check for freshness before eating. If they smell off or look different, it's best to toss them.
FAQs
Can I use crunchy peanut butter instead?
Yes, you can use crunchy peanut butter. It adds a nice texture to the bars. The small peanut pieces give a delightful crunch. Just make sure it is a good-quality brand. This switch will still keep the bars creamy and delicious.
How do I make them vegan-friendly?
To make these bars vegan, replace honey with pure maple syrup or agave syrup. Both options work well and keep the sweetness. Ensure the chocolate chips you use are dairy-free. This way, you can enjoy the bars without any animal products.
What if I don’t have rice crispy cereal?
If you don't have rice crispy cereal, you can use another cereal. Options like corn flakes or puffed rice will work. Even granola can be a fun twist! Just keep the texture in mind, as it will change slightly.
How can I make these bars healthier?
To make these bars healthier, consider using less sweetener. You can reduce the honey or syrup by a bit. You can also add in some chia seeds or flaxseeds for extra nutrients. Using dark chocolate chips adds antioxidants too.
What is the best way to cut these bars?
The best way to cut these bars is to chill them first. After chilling, lift them from the dish using the parchment paper. Then, use a sharp knife to slice. For clean cuts, wipe the knife between each slice.
In this post, we covered how to make chocolate peanut butter rice crispy bars. We went through the needed ingredients, step-by-step instructions, and helpful tips. I shared variations to suit your taste and storage tips to keep your bars fresh.
These bars are simple, tasty, and fun to make. You can adjust ingredients to match your needs. Enjoy creating your own version and sharing them with others!