![- Zucchini and Basic Coatings - 2 medium zucchinis, sliced into 1/4-inch thick rounds - 1 cup all-purpose flour - 1/2 cup cornmeal - Spices and Seasonings - 1 teaspoon garlic powder - 1 teaspoon onion powder - 1 teaspoon smoked paprika - 1/2 teaspoon cayenne pepper (optional, for a spicy kick) - 1 teaspoon salt - 1/2 teaspoon freshly ground black pepper - Additional Ingredients for Serving - 2 large eggs - 1/4 cup milk - Oil for frying (canola or vegetable oil recommended) - Fresh parsley, finely chopped (for garnishing) - Lemon wedges (for serving) When you gather these ingredients, you prepare for a fun cooking adventure. Zucchini is a star here. It is mild and absorbs flavors well. The flour and cornmeal create a crunchy coating. The spices add depth and warmth, making each bite exciting. You can adjust the spices to match your taste. Want more heat? Toss in extra cayenne. Prefer a smoky flavor? Use more smoked paprika. The choice is yours! Gathering fresh parsley and lemon wedges makes serving fun. The parsley adds a splash of color. The lemon gives a bright, zesty kick to each bite. This dish pairs well with many meals. It can be a side, a snack, or even a fun appetizer. Remember, the right ingredients set the stage for greatness. The crispy fried zucchini will impress anyone who tries it. Enjoy the process and the delicious results! For the full recipe, check out the detailed steps ahead. Washing and Slicing Start by washing the zucchinis under cold water. This ensures they are clean and ready to use. Next, slice them into rounds that are about 1/4-inch thick. Uniform slices help them cook evenly. Patting Dry for Crispiness After slicing, pat the zucchini rounds dry with a paper towel. Removing excess moisture is key to getting them crispy when fried. Mixing Dry Ingredients In a shallow bowl, combine the all-purpose flour, cornmeal, garlic powder, onion powder, smoked paprika, cayenne pepper, salt, and black pepper. Stir this mixture well to ensure all the spices blend nicely. Preparing the Egg Wash In a different bowl, crack the two large eggs and pour in the milk. Whisk them together until the mixture is smooth. This egg wash helps the coating stick to the zucchini. Dredging Technique Take each zucchini round and dip it into the egg wash first. Let any excess drip off. Next, dredge it in the flour mixture. Press gently to make sure the coating sticks well. Place the coated zucchini on a plate while finishing the rest. Preheating Oil and Frying Process In a deep skillet, pour in enough oil to reach about one inch deep. Heat the oil over medium-high heat until it’s around 350°F (175°C). You can test the oil by dropping a small piece of batter in. If it bubbles, the oil is ready. Draining and Seasoning Carefully add the zucchini rounds to the hot oil in batches. Fry each side for about 2-3 minutes until golden brown. Use a slotted spoon to transfer the fried zucchini to a plate lined with paper towels to drain excess oil. Once all are fried, sprinkle with a bit of salt. Garnish with fresh parsley for a nice touch. Enjoy these crispy fried zucchinis hot, and don’t forget to squeeze some lemon juice on top for extra flavor. For the full recipe, check the details above. Importance of Drying Zucchini When you slice zucchini, it holds a lot of water. This moisture can make your zucchini soggy. To fix this, pat the slices dry with a paper towel. Drying helps the coating stick better and makes them crispier. Proper Oil Temperature Getting the right oil temperature is key. If the oil is too cold, the zucchini will soak it up and become greasy. Aim for around 350°F (175°C). You can test the oil by dropping in a small amount of batter. If it bubbles right away, you’re good to go! Suggested Spice Variations You can mix and match spices to suit your taste. Try adding Italian herbs like oregano or basil. Or go for a taco twist with cumin and chili powder. This adds a fun kick to your crispy fried zucchini. Adding Heat with Cayenne If you like spice, sprinkle in some cayenne pepper. It brings a nice warmth without being overpowering. Start with half a teaspoon and adjust based on your taste. It makes for a delicious crispy treat! For the full recipe, check out the details above. Enjoy your cooking! {{image_4}} If you want a healthier option, try baking the zucchini. Instead of frying, you can coat the zucchini and bake them in the oven. Preheat your oven to 425°F (220°C). Place the coated rounds on a baking sheet lined with parchment paper. Bake for about 20 minutes, flipping halfway through. This method keeps the zucchini crispy while cutting down on oil. To boost the taste of your crispy fried zucchini, consider these fun flavor additions. - Cheesy Herb Coating: Mix grated Parmesan cheese into your flour mixture. Add dried herbs like oregano or thyme for a savory twist. This adds a rich flavor that pairs well with the zucchini. - Asian-inspired Spices: Add a teaspoon of sesame oil to the egg wash. Then, mix in some ground ginger and garlic powder into the flour. This gives your zucchini a tasty Asian flair, making it stand out. Crispy fried zucchini is a versatile side dish. Here are some great ways to serve it: - Pairing with Dips and Sauces: Serve your zucchini with ranch dressing or tzatziki sauce for dipping. You can also try a spicy sriracha mayo for a kick. These dips make the dish fun and interactive. - Side Dishes to Complement: Serve the zucchini alongside grilled chicken or fish. It also pairs well with a fresh salad or roasted vegetables. These options round out your meal nicely, creating a balanced plate. Try these variations to make your crispy fried zucchini even more special. For the full recipe, check the details above! To keep your crispy fried zucchini fresh, store leftovers in an airtight container. Place a paper towel at the bottom to absorb moisture. This helps maintain crispiness. Seal the container and store it in the fridge. It will stay good for about 2-3 days. If you want to freeze your crispy fried zucchini, place them in a single layer on a baking sheet. Freeze them for about an hour. Once frozen, transfer the pieces to a freezer bag. This stops them from sticking together. You can keep them in the freezer for up to 3 months. When reheating your fried zucchini, you want to keep them crispy. The best way to do this is in the oven. Preheat your oven to 375°F (190°C). Place the zucchini on a baking sheet and heat for about 10-15 minutes. This will help regain their crunch. You can also use an air fryer. Set it to 350°F (175°C) and heat for about 5-7 minutes. This method is quick and keeps them crispy. Avoid using the microwave, as it makes them soggy. To make crispy fried zucchini, start by slicing two medium zucchinis into 1/4-inch thick rounds. Dry them with a paper towel to get rid of moisture. This step is key for crispness. Then, mix flour, cornmeal, garlic powder, onion powder, smoked paprika, cayenne pepper, salt, and black pepper in a bowl. In another bowl, whisk together two eggs and milk. Dip each zucchini round in the egg wash, then coat it in the flour mix. Fry the rounds in hot oil until golden brown. Drain on paper towels, season, and serve. Check the [Full Recipe] for detailed steps! Yes, you can freeze crispy fried zucchini. First, let them cool completely. Then, place them in a single layer on a baking sheet. Freeze until solid, about one to two hours. After that, transfer them to a freezer-safe bag. This way, they won't stick together. When you want to eat them, bake or fry them straight from frozen for a quick snack. Fried zucchini pairs well with many dishes. You can serve it alongside grilled meats like chicken or fish. It also goes great with pasta dishes or as part of a veggie platter. For a fun twist, dip the zucchini in ranch dressing, marinara sauce, or garlic aioli. You can also garnish with fresh parsley for a pop of color. To prevent soggy zucchini, make sure to dry the rounds well after slicing. Moisture is the enemy of crispiness. Use a paper towel to pat the slices dry. Also, ensure the oil is hot enough before frying. If the oil is too cool, the zucchini will absorb more oil and get soggy. Fry in small batches to keep the oil temperature steady. In this blog post, we explored how to make crispy fried zucchini. We covered key ingredients, step-by-step instructions, and tips for the best results. You learned how to prepare, coat, and fry the zucchini perfectly. We also discussed baking options and ways to enhance flavor with spices. Storing and reheating tips help keep your leftovers tasty. I hope you feel ready to make this delicious dish. Enjoy your crispy zucchini anytime!](https://recipetorch.com/wp-content/uploads/2025/06/e1291477-15a7-47b8-a13c-761c8d82a7bf.webp)
Crispy Fried Zucchini Perfect Side for Any Meal
If you crave a crispy, tasty side, look no further than crispy fried zucchini! With its golden-brown coating and tender
If you crave a crispy, tasty side, look no further than crispy fried zucchini! With its golden-brown coating and tender
![To make Avocado Cucumber Salad, gather these fresh items: - 2 ripe avocados, diced into bite-sized pieces - 1 large cucumber, peeled and diced - 1 cup cherry tomatoes, halved for a burst of sweetness - 1/4 red onion, thinly sliced for a mild crunch - 1/4 cup fresh cilantro, finely chopped for a fragrant touch - 2 tablespoons freshly squeezed lime juice to brighten the flavors - 1 tablespoon extra virgin olive oil for richness - Salt and pepper to taste - 1/4 teaspoon chili flakes (optional, for a hint of heat) Each ingredient plays a key role in taste and texture. If you can’t find ripe avocados, use slightly under-ripe ones. They will soften as they mix with the other flavors. For cucumbers, you can swap in a seedless variety if you prefer. Cherry tomatoes add sweetness, but you can use regular tomatoes if needed. If you don’t have red onion, yellow or white onions work too. Fresh cilantro adds a unique flavor, but parsley can be a good substitute for those who dislike cilantro. Lime juice is crucial, but lemon juice can work in a pinch. This salad is not just tasty; it's healthy too. - Avocados provide healthy fats that support heart health. They also have fiber, which aids digestion. - Cucumbers are low in calories and high in water. They keep you hydrated and refreshed. - Cherry tomatoes are rich in vitamins A and C. They boost your immune system. - Red onions contain antioxidants and can help reduce inflammation. - Cilantro has anti-inflammatory properties and is rich in vitamins. - Lime juice adds vitamin C and helps with iron absorption. With these ingredients, you create a salad that’s as healthy as it is delicious. For the full recipe, check the recipe section above. To start, gather your fresh ingredients. You will need: - 2 ripe avocados, diced into bite-sized pieces - 1 large cucumber, peeled and diced - 1 cup cherry tomatoes, halved - 1/4 red onion, thinly sliced - 1/4 cup fresh cilantro, finely chopped - 2 tablespoons freshly squeezed lime juice - 1 tablespoon extra virgin olive oil - Salt and pepper to taste - 1/4 teaspoon chili flakes (optional) Begin by adding the diced avocados and cucumber to a large mixing bowl. Be gentle to keep the avocados intact. Next, add the halved cherry tomatoes and the sliced red onion. These add color and crunch. Sprinkle the chopped cilantro over the mixture. It brings a fresh aroma. In a separate bowl, mix the lime juice, olive oil, salt, and pepper. If you like a bit of heat, add the chili flakes. Whisk until combined. Drizzle this dressing over the salad. Use a large spoon to toss everything together gently. Make sure all the ingredients get coated in the dressing. Taste the salad and adjust the seasoning if needed. You might want to add more salt or lime juice for extra flavor. For the best taste, serve it right away. If you prefer, chill it in the fridge for 15-20 minutes. This helps the flavors blend nicely. When serving, choose colorful bowls to make the dish pop. Garnish with extra cilantro leaves and a lime wedge on the side. This adds a vibrant look. You can enjoy this salad as a side or a light main dish. It pairs well with grilled chicken or fish. For the complete recipe, refer to the Full Recipe section. Enjoy creating this fresh and flavorful delight! To pick the best avocados, feel for softness. Gently press the fruit. If it yields slightly, it's ripe. A ripe avocado should also have a dark green skin. Avoid fruit with large dents or dark spots. These signs mean the avocado may be overripe. If you find hard avocados, leave them at room temperature for a few days. Once ripe, you can store them in the fridge to slow down ripening. One common mistake is cutting avocados too early. Always wait until they are ripe to cut them. This ensures great flavor and texture. Another mistake is mashing the avocados too much. You want them in bite-sized pieces for a nice crunch. Also, avoid using too much salt. Start with a little and add more if needed. This keeps your salad fresh and flavorful. To improve your salad, try adding fresh herbs. Basil or mint can add a unique twist. Fresh lime juice not only brightens flavors but also keeps avocados from browning. For crunch, add nuts or seeds. Toasted sunflower seeds or chopped walnuts work well. If you like heat, chili flakes or diced jalapeños can add a kick. Lastly, serve the salad cold for the best taste. You can find the full recipe for this delicious dish [Full Recipe]. {{image_4}} You can easily boost the protein in your avocado cucumber salad. Grilled chicken or shrimp adds a nice flavor and texture. Try adding canned chickpeas for a plant-based option. Tofu is another great choice; just cube it and toss it in. These options make the salad heartier and more filling. While lime juice and olive oil work well, feel free to try other dressings. A yogurt-based dressing adds creaminess and tang. You can also mix balsamic vinegar with honey for a sweet twist. Experimenting with different dressings keeps your salad fresh and exciting. Using seasonal ingredients can change the salad's taste profile. In summer, add sweet corn or diced bell peppers for crunch. In fall, consider adding roasted butternut squash for a warm flavor. Seasonal swaps not only enhance taste but also showcase fresh produce. For the full recipe, check out the detailed instructions above! To keep your avocado cucumber salad fresh, store it in an airtight container. This helps to prevent air from getting in and causing browning. Place the salad in the fridge right after you serve it. If you have leftovers, consume them within two days for the best taste. To keep your ingredients fresh, store avocados at room temperature until they ripen. Once ripe, you can keep them in the fridge. Cucumbers last longer in the fridge, wrapped in a paper towel to absorb moisture. Always wash your vegetables before cutting them to remove dirt and bacteria. Look for signs of spoilage in your salad. If the avocados turn brown, they are past their prime. Also, check for a sour smell or slimy texture. If you notice these changes, it’s best to toss the salad to avoid any health risks. For the best taste, enjoy your avocado cucumber salad as soon as possible after making it. You can serve this salad with grilled chicken or fish for a tasty meal. It pairs well with a light soup, like tomato basil. Try it with whole-grain bread for a filling lunch. You can even serve it as a side dish at your next barbecue! Yes, you can prepare the salad ahead of time. However, for the best taste, add the dressing just before serving. If you mix it too early, the avocados may turn brown. To keep it fresh, store the salad in the fridge for up to 2 hours without the dressing. Absolutely! This salad is packed with healthy fats from avocados. Cucumbers add hydration and crunch. Tomatoes provide vitamins and antioxidants. Each bite is not only delicious but also good for your body. Enjoy this salad guilt-free! Some ask if they can swap ingredients. You can replace cilantro with parsley if you dislike it. Others wonder about spice levels. Add more chili flakes for extra heat or skip them altogether. Feel free to adjust the recipe to suit your taste! This article covered all you need for a tasty avocado cucumber salad. We discussed ingredients, steps, tips, and storage. You learned how to choose ripe avocados, avoid mistakes, and enhance flavors. Remember to try different proteins and dressings for variety. Making this salad is easy and fun. Enjoy fresh, healthy meals that make you feel great!](https://recipetorch.com/wp-content/uploads/2025/06/5ae1010b-fc2b-4ddc-b954-1e07ac86cb15.webp)
Are you ready to enjoy a bright and tasty dish? This Avocado Cucumber Salad is your ticket to fresh, healthy
![- 2 medium sweet potatoes, peeled and cut into bite-sized cubes - 1 can (15 oz) chickpeas, drained and thoroughly rinsed - 2 cups cooked quinoa (white, red, or a mix) - 1 cup kale, stems removed and chopped - 1 ripe avocado, sliced thinly - 2 tablespoons olive oil, divided - 1 teaspoon smoked paprika - 1 teaspoon ground cumin - 1/4 cup tahini (sesame seed paste) - 2 tablespoons fresh lemon juice - 1 tablespoon pure maple syrup - Sea salt and freshly ground black pepper, to taste - Water, as needed to achieve desired tahini dressing consistency - Fresh parsley, chopped (for a bright garnish) - Sea salt - Black pepper When you gather these ingredients, you set the stage for a nourishing meal. The sweet potatoes bring warmth and sweetness. Chickpeas add protein and fiber. Quinoa rounds it out with a nutty flavor. Kale packs in the nutrients, while avocado adds creaminess. Each ingredient plays a key role in making this bowl a delight. Explore the full recipe for detailed steps! Start by preheating your oven to 400°F (200°C). This hot temperature helps roast the sweet potatoes and chickpeas perfectly. Proper heat makes a big difference in texture and flavor. Next, take your sweet potatoes. Peel and cut them into bite-sized cubes. In a mixing bowl, toss the cubes with 1 tablespoon of olive oil, smoked paprika, ground cumin, sea salt, and black pepper. Ensure each piece is well coated. Spread them on a baking sheet in a single layer. Roast for 25-30 minutes, flipping halfway through. You want them tender with a caramelized edge. While the sweet potatoes cook, prepare the chickpeas. Drain and rinse them well. In a bowl, mix the chickpeas with the remaining tablespoon of olive oil, sea salt, and black pepper. Toss gently to coat. Spread them on another baking sheet. Roast for about 20 minutes until they turn crispy and golden. Now, let’s move on to the quinoa. If you haven’t cooked it yet, follow the package instructions. Use a 2:1 water-to-quinoa ratio for the best results. Once cooked, fluff it with a fork and keep it warm. For the tahini dressing, grab a small bowl. Whisk together 1/4 cup of tahini, 2 tablespoons of fresh lemon juice, and 1 tablespoon of pure maple syrup. Add water slowly until you reach a smooth, creamy consistency. This dressing should drizzle easily over your bowl. Now for the fun part: assembling your Buddha bowl! Start by layering the quinoa at the bottom. Next, add the roasted sweet potatoes and crispy chickpeas. Then, toss in some chopped kale and finish with thinly sliced avocado. Drizzle the tahini dressing on top and sprinkle fresh parsley for a pop of color. Enjoy your Sweet Potato and Chickpea Buddha Bowl! It’s a feast for both the eyes and your taste buds. For the complete recipe, check out the [Full Recipe]. When selecting sweet potatoes, look for firm and smooth skin. Avoid any with soft spots or blemishes. The color should be bright, indicating freshness. Choose medium-sized potatoes for even cooking. If you can, pick organic sweet potatoes. They usually have better taste and less pesticide. You can make your tahini dressing more exciting. Try adding garlic for a bold flavor. A pinch of cayenne adds heat if you like spice. For a sweet touch, mix in a bit more maple syrup. If you want a tangy taste, add a splash of apple cider vinegar. These tweaks make the dressing unique and delicious. A Buddha bowl is tasty on its own, but pairing it enhances the meal. Serve it with a side of roasted vegetables for extra crunch. A simple green salad works well too. If you want more protein, add grilled chicken or tofu. For a fun twist, serve it with pita bread and hummus. This makes for a colorful and filling dinner. For the full recipe, check out the Sweet Potato and Chickpea Buddha Bowl. {{image_4}} You can change the protein in your Buddha bowl. Instead of chickpeas, try black beans or lentils. Both legumes add great taste and protein. You can also use cooked chicken or tofu for a different flavor. Each option brings its own unique texture and taste to the dish. Feel free to switch out the quinoa for other grains. Brown rice, farro, or even couscous can work well. Each grain brings a different chewiness and flavor. Farro has a nutty taste, while brown rice is hearty. Choose what you like best! You can add seasonal veggies for freshness. In spring, try asparagus or peas. In summer, add bell peppers or zucchini. Fall calls for roasted Brussels sprouts or butternut squash. Winter is great for root veggies like carrots or parsnips. Use what is available to you! For the full recipe, check out the Sweet Potato and Chickpea Buddha Bowl. To store your Sweet Potato and Chickpea Buddha Bowl, let it cool first. Use airtight containers to keep it fresh. Place the quinoa, sweet potatoes, chickpeas, and veggies in separate containers. This helps keep the flavors and textures. Store them in the fridge for up to four days. When you reheat, aim for gentle warmth. Use a microwave or a pan on low heat. Add a splash of water if needed to keep things moist. This helps maintain the good texture of the sweet potatoes and chickpeas. Stir occasionally to heat evenly. For freezing, freeze each component separately. Use freezer-safe containers or bags. Sweet potatoes and chickpeas can last up to three months in the freezer. Quinoa can also freeze well. To use, thaw overnight in the fridge before reheating. This keeps your Buddha bowl fresh and tasty for future meals. Making a Sweet Potato and Chickpea Buddha Bowl takes about 50 minutes. You spend 15 minutes prepping and 35 minutes cooking. This time includes roasting the sweet potatoes and chickpeas, cooking the quinoa, and making the dressing. Yes, this dish is already vegan! It uses chickpeas, sweet potatoes, and quinoa. The tahini dressing is also plant-based. You can enjoy this bowl without any animal products. If you have an allergy or dislike tahini, you can use sunflower seed butter. You can also try almond butter or peanut butter. These options will change the flavor slightly but still taste great in the bowl. This article shows how to make a delicious Sweet Potato and Chickpea Buddha Bowl. You learned about the main ingredients like sweet potatoes, chickpeas, and quinoa. I shared tips on cooking, seasoning, and dressing to enhance your flavors. You also discovered variations and storage methods to keep your bowl fresh. Now, you can create a tasty, healthy meal that fits your needs. Enjoy trying out your own mix of ingredients and flavors!](https://recipetorch.com/wp-content/uploads/2025/06/a35817b6-037a-4e59-af9d-4ff190d2ddac.webp)
Are you looking for a tasty and healthy meal that’s both filling and easy to make? My Savory Sweet Potato
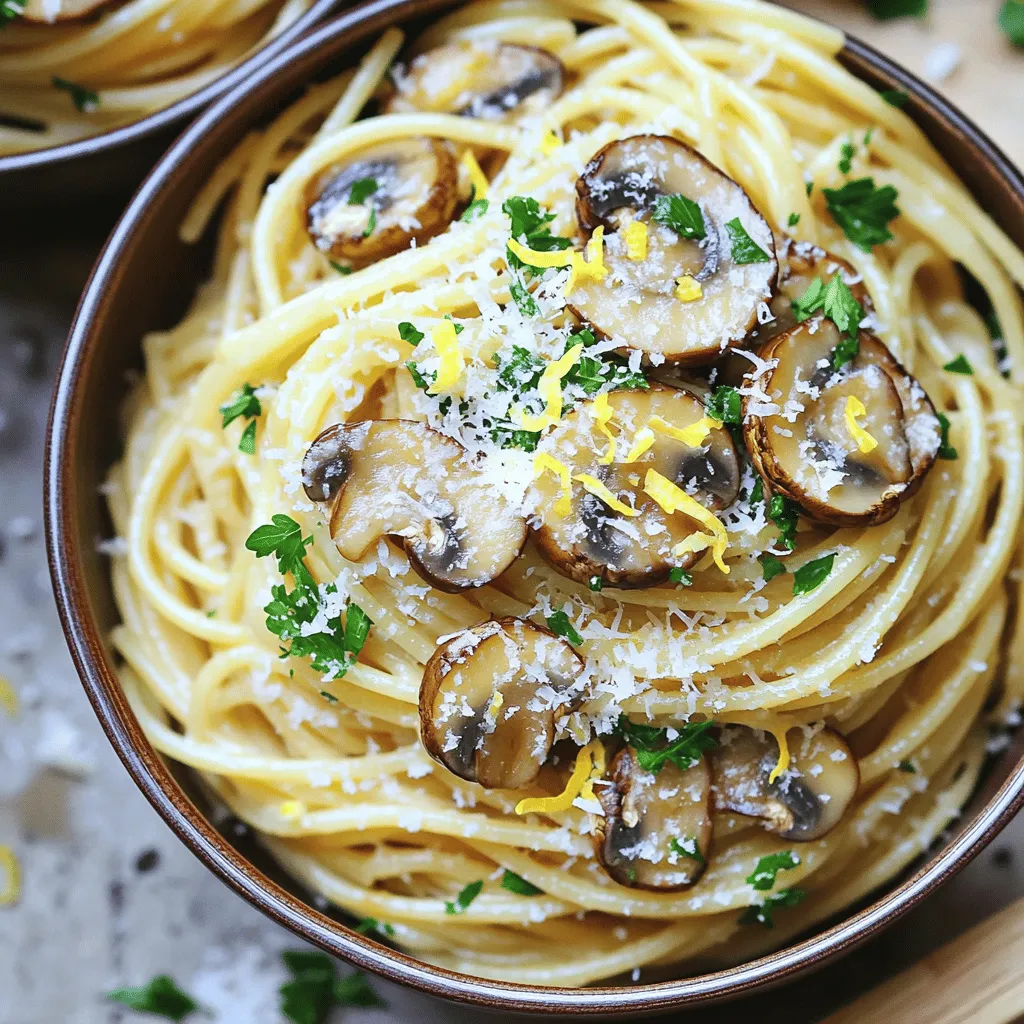
Are you ready to whip up a savory dish that’s both simple and delicious? My Garlic Butter Mushroom Pasta is
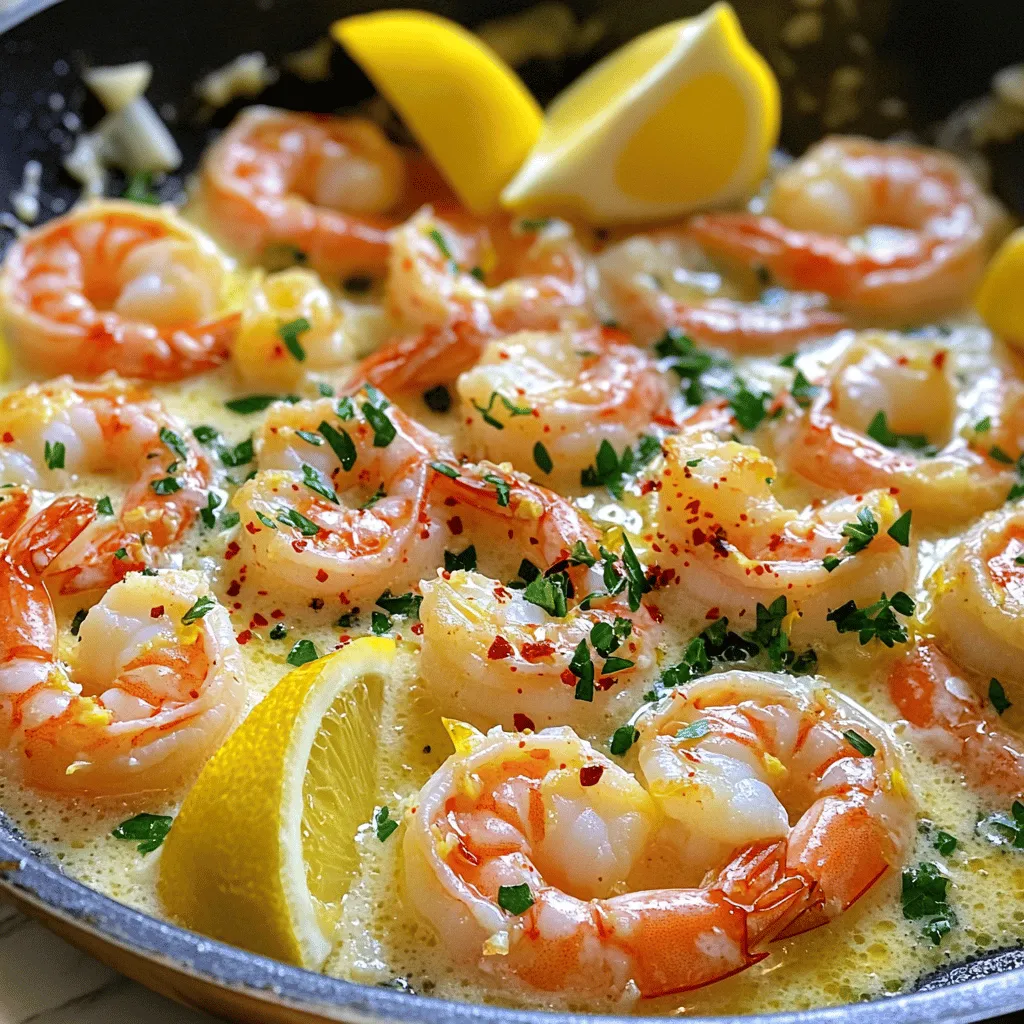
Looking for a quick yet delicious meal? I’ve got just the recipe for you: Zesty Lemon Garlic Shrimp! This dish
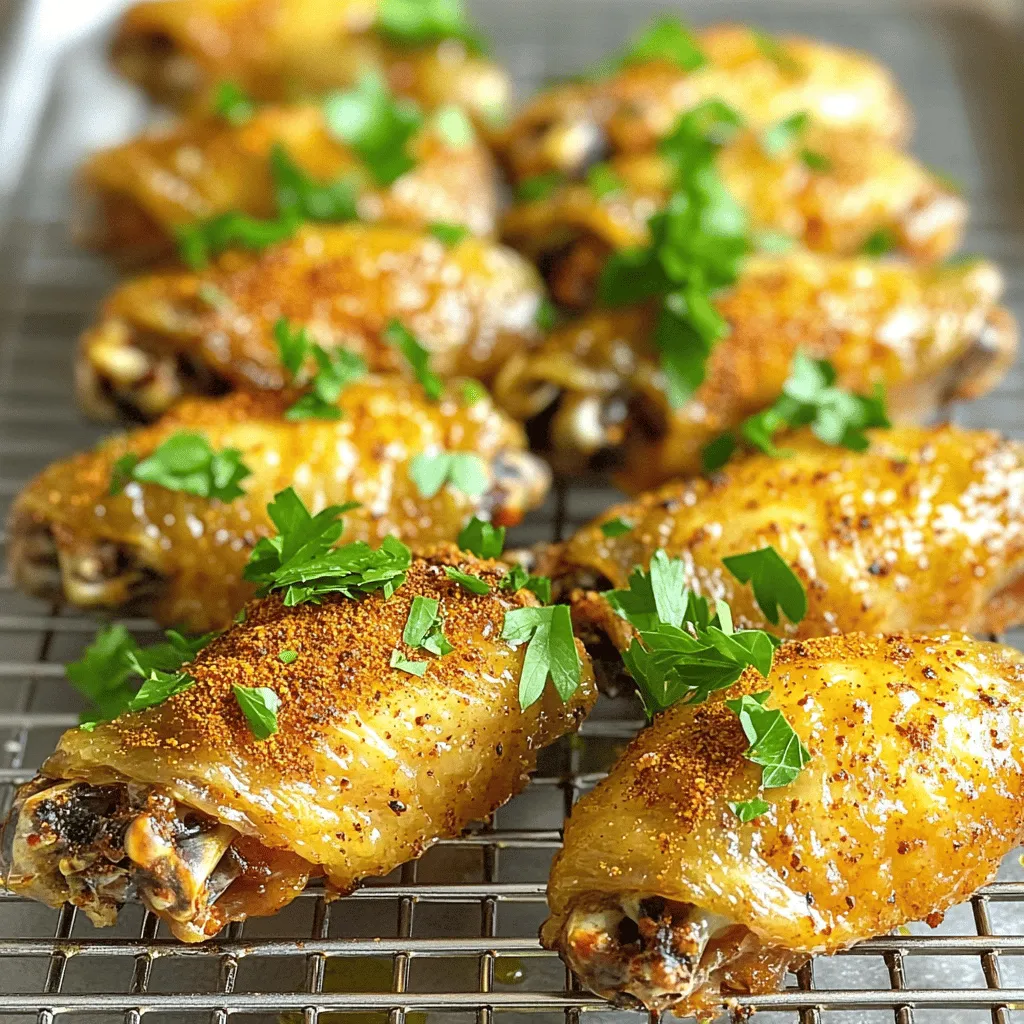
If you’re craving a tasty, easy meal, crispy baked chicken wings are the way to go. These wings pack big
![- 4 boneless, skinless chicken breasts - 1/4 cup fresh lemon juice - Zest of 1 lemon - 1/4 cup fresh basil, finely chopped - 2 cloves garlic, minced - 3 tablespoons olive oil - Salt and freshly ground black pepper to taste - Lemon wedges for serving Lemon Basil Grilled Chicken shines with fresh, simple ingredients. The chicken breasts are the star of the dish. I use boneless and skinless chicken for easy grilling and great flavor. Lemon juice and zest add a bright, tangy taste. Fresh basil brings a lovely herb note that complements the chicken perfectly. For extra depth, I add minced garlic and olive oil to the marinade. Garlic adds a punch of flavor, while olive oil keeps the chicken moist on the grill. The seasoning of salt and pepper is key. It enhances all the flavors without overpowering them. Finally, I serve the chicken with lemon wedges. This adds a refreshing finish when you squeeze the lemon over the grilled chicken. This dish is simple yet full of flavor, perfect for any meal. You can find the Full Recipe below to guide you through the preparation. To start, gather your ingredients. In a medium bowl, whisk together the fresh lemon juice, lemon zest, chopped basil, minced garlic, olive oil, salt, and pepper. This mixture becomes your marinade. Whisking well helps blend the flavors. The more you blend, the stronger the taste will be. Flavor absorption is key. A good marinade seeps into the chicken, making it juicy and flavorful. The lemon adds brightness, while basil brings an earthy note. This balance enhances your dish and makes for a delightful meal. Now it’s time to marinate the chicken. Place the chicken breasts in a large resealable bag or a shallow dish. Pour the marinade over the chicken, making sure each piece is covered. Seal the bag tightly or cover the dish with plastic wrap. For best results, let the chicken marinate for at least 30 minutes, but up to 2 hours is even better. This allows the flavors to soak in. Remember to always marinate in the fridge. It keeps the chicken safe and fresh. Next, preheat your grill to a medium-high heat. Aim for about 375°F to 400°F (190°C to 200°C). A hot grill ensures that the chicken cooks evenly. When the grill is ready, take the chicken out of the marinade. Let excess marinade drip off, and discard what’s left. This helps keep your meal safe. Place the chicken on the grill. Cook for about 6-7 minutes per side. The chicken should reach an internal temperature of 165°F (75°C). When done, the chicken will no longer be pink inside. After grilling, allow the chicken to rest for 5 minutes. This resting time keeps the juices in the meat. Once rested, slice the chicken and serve it with fresh lemon wedges for added zest. For the full recipe, check out the detailed instructions above. To keep chicken juicy, let it rest after cooking. Resting for five minutes helps the juices stay inside. This makes each bite tender and flavorful. Another way to keep chicken moist is to marinate it well. The lemon juice and olive oil in the marinade add moisture and flavor. Do you want to try new flavors? You can mix different herbs with the lemon and basil. Thyme, parsley, or oregano can add a nice touch. Also, spices like paprika or cumin can bring warmth. Feel free to create your own blends for unique tastes. Always handle raw chicken with care. Wash your hands after touching it. Use separate plates for raw and cooked chicken. When prepping your grill, make sure it is clean and hot. This helps prevent sticking and ensures even cooking. For safety, always cook chicken to an internal temperature of 165°F (75°C). For more detailed guidance, check the Full Recipe. {{image_4}} You can make this dish in the oven. Start by adjusting the cooking method. First, preheat your oven to 400°F (200°C). Place your marinated chicken in a baking dish. Bake for 25 to 30 minutes. The chicken should reach an internal temperature of 165°F (75°C). This method keeps the chicken juicy and tender. For skewers, cut the chicken into bite-sized pieces. Soak wooden skewers in water for 30 minutes to prevent burning. Thread the chicken onto the skewers, alternating with colorful veggies. Bell peppers, zucchini, and cherry tomatoes work well. Grill the skewers for about 10 to 12 minutes, turning frequently. This adds fun and variety to your meal. The marinade is versatile. You can use it on other proteins like fish or tofu. Just ensure the fish cooks to the right temperature. You can also use the marinade in salads. Drizzle it over fresh greens for a bright flavor. It adds a zesty kick to simple salads, making them exciting. For the full recipe, check out the Lemon Basil Grilled Chicken details. After enjoying your Lemon Basil Grilled Chicken, store leftovers in the fridge. Use an airtight container to keep the chicken fresh. It will stay good for up to four days. Always check for any signs of spoilage before eating. If it smells off or looks strange, throw it away. If you want to keep the chicken longer, freezing is a great option. Wrap each piece tightly in plastic wrap. Then, place them in a freezer bag. This method prevents freezer burn. You can freeze the chicken for up to three months. When you're ready to eat, thaw it overnight in the fridge. To reheat, place the chicken in a preheated oven at 350°F (175°C). Heat it for about 15-20 minutes until warm. You can also use a microwave, but it may dry out the chicken. Leftover Lemon Basil Grilled Chicken is so versatile! You can slice it and add it to salads for a quick lunch. It also works well in wraps with fresh veggies. Another idea is to mix it into pasta dishes for added protein. For meal prep, try shredding the chicken and using it in tacos or quesadillas. You can add some salsa and cheese for a tasty twist. There are many ways to enjoy this delicious chicken again! For the full recipe, check out the [Full Recipe]. You should marinate chicken for at least 30 minutes. This time allows the flavors to soak in. For the best taste, aim for 2 hours. Longer marinating enhances the lemon and basil flavors. Using dried basil can change the flavor. Fresh basil gives a bright, vibrant taste. Dried basil has a more muted flavor. If you use dried, use less, as it’s more potent. I love serving this chicken with fresh sides. Here are some great options: - Grilled vegetables like zucchini and bell peppers - A light salad with mixed greens and lemon vinaigrette - Quinoa or rice for a filling addition - Garlic bread for a tasty touch These sides balance the flavors of the chicken and create a complete meal. For more ideas, check out the Full Recipe. You now have a complete guide to making lemon basil grilled chicken. We covered all the key ingredients, tips for juicy chicken, and safe grilling practices. Remember to marinate for the best flavor. You can even try variations or use leftovers creatively. With these steps, you’ll impress everyone at the table. Enjoy your cooking and have fun experimenting with flavors! Your next meal will be bright and delicious.](https://recipetorch.com/wp-content/uploads/2025/06/ce484064-b019-42e8-84b7-8e2b5fc6bb73.webp)
Are you ready to elevate your grilling game? Lemon Basil Grilled Chicken is the juicy and flavorful dish you’ll want
![To make sweet and spicy shrimp tacos, you will need: - 1 pound shrimp, peeled and deveined - 2 tablespoons honey - 1 tablespoon sriracha sauce - 1 teaspoon smoked paprika - 1 teaspoon garlic powder - 1 teaspoon lime zest - Salt and pepper to taste - 8 small corn tortillas - 1 cup shredded cabbage - 1 avocado, sliced - Fresh cilantro, for garnish - Lime wedges, for serving These ingredients create a vibrant mix of flavors. The shrimp bring a tasty base. Honey adds sweetness, while sriracha brings heat. Smoked paprika and garlic powder give depth. Lime zest brightens the dish. You can swap some ingredients for other options. If you can’t find shrimp, try chicken or tofu. Use agave syrup instead of honey for a vegan option. If you want less heat, use mild chili sauce in place of sriracha. Also, you can use regular paprika if you don’t have smoked paprika on hand. The right toppings make your tacos even better. Here are some suggestions: - Diced tomatoes for freshness - Red onion slices for a kick - Crumbled queso fresco for creaminess - A drizzle of yogurt or sour cream for coolness - Pickled jalapeños for extra spice These toppings add color and taste. Mix and match to find your favorite combo! For the full recipe, check out the steps provided above. To start, gather your ingredients. You need honey, sriracha sauce, smoked paprika, garlic powder, lime zest, salt, and pepper. In a medium bowl, mix these ingredients well. The honey adds sweetness, while the sriracha brings heat. The spices give the shrimp a nice kick. Next, add the shrimp. Make sure each shrimp is well-coated in the marinade. Cover the bowl with plastic wrap and place it in the fridge. Let the shrimp marinate for at least 15 minutes. This helps the flavors soak in. Now, heat a non-stick skillet over medium-high heat. Once it’s hot, add the marinated shrimp. Cook them for about 2-3 minutes on each side. You want the shrimp to turn pink and opaque. This means they are fully cooked and safe to eat. Keep an eye on them! Overcooking shrimp can make them tough. When they are done, remove them from the skillet and set them aside. Next, warm your corn tortillas in a separate skillet over low heat. This should take about 30 seconds on each side. You want them soft and pliable, perfect for holding all the filling. Now it’s time to build your tacos. Start with a handful of shredded cabbage on each tortilla. Then, add several pieces of the cooked shrimp. Top it off with sliced avocado and fresh cilantro. Serve your tacos with lime wedges on the side. Squeezing fresh lime juice over them adds a bright flavor. For the full recipe, check here: [Full Recipe]. Enjoy your sweet and spicy shrimp tacos! To make a great marinade, mix honey, sriracha, smoked paprika, garlic powder, lime zest, salt, and pepper. This blend gives the shrimp a sweet and spicy kick. Let the shrimp soak in this mix for at least 15 minutes. This allows the flavors to soak in. The longer you marinate, the better the taste. But don't marinate too long, or the shrimp might turn mushy. When cooking shrimp, keep it simple. Heat a non-stick skillet over medium-high heat. Add the marinated shrimp, making sure not to crowd the pan. Cook for about 2-3 minutes on each side. Look for the shrimp to turn pink and opaque. This means they are ready. Avoid overcooking; it can make shrimp tough. If you see them curling tightly, it’s a sign they’re done. For fresh tacos, warm the corn tortillas first. Place them in a dry skillet over low heat. Heat them for about 30 seconds on each side. This makes them soft and pliable. Use fresh ingredients like shredded cabbage, creamy avocado, and cilantro. These add crunch and flavor to your tacos. For an extra zing, serve lime wedges on the side. A squeeze of lime juice brightens every bite. For the full recipe, check out the Sweet and Spicy Shrimp Tacos section. {{image_4}} You can easily swap shrimp for other proteins. Chicken works great. Just cut it into small pieces. You can also use fish, like tilapia or cod. For a vegetarian option, try grilled mushrooms or roasted cauliflower. Each protein brings a unique taste and texture. Adjust cooking times based on your choice. This recipe is easy to make gluten-free. Use corn tortillas, which are naturally gluten-free. Check the labels to ensure no hidden gluten. You can also use lettuce wraps instead of tortillas. This gives a fresh crunch and is low-carb. Your tacos will stay tasty and safe for everyone. Change up the flavors to suit your taste. Want more heat? Add extra sriracha or diced jalapeños. For a sweeter kick, add more honey or a splash of orange juice. You can also mix in spices, like cumin or chili powder, to deepen the flavor. Experiment with fresh herbs, like mint or basil, for a twist. These adjustments make your tacos unique every time. For the full recipe of Sweet and Spicy Shrimp Tacos, check back to create your perfect dish! To keep your sweet and spicy shrimp tacos fresh, store them in an airtight container. Make sure to separate the shrimp from the tortillas and toppings. This helps prevent soggy tortillas. You can keep the shrimp in the fridge for up to three days. The toppings, like cabbage and avocado, should be stored separately to maintain their texture. When you are ready to enjoy leftovers, reheat the shrimp in a skillet. Use medium heat and cook for about 2-3 minutes. Stir often to heat evenly. For the tortillas, warm them in a dry skillet for about 30 seconds on each side. This will make them soft and pliable again. If you want to freeze the shrimp, place them in a freezer-safe bag. Remove as much air as possible to avoid freezer burn. You can freeze the shrimp for up to two months. However, I recommend freezing the shrimp without the marinade. When you want to eat them, thaw them in the fridge overnight and then cook as usual. Toppings like cabbage and avocado do not freeze well, so plan to prepare them fresh when serving. For the full recipe, check the earlier section. To make shrimp tacos more spicy, you can add more sriracha sauce to the marinade. You might also try adding diced jalapeños or a sprinkle of cayenne pepper. These will boost the heat without losing flavor. Experiment with different hot sauces to find your perfect level of spice. Yes, you can prepare the shrimp ahead of time. Just marinate them and store them in the fridge. You can keep them for up to 24 hours. This allows the flavors to deepen, making your tacos even tastier. When you're ready, cook them quickly for a fresh meal. Several sides go well with shrimp tacos. Here are some great options: - Black beans: They add protein and fiber. - Mexican rice: A flavorful, filling side. - Corn salad: Adds crunch and sweetness. - Guacamole: Creamy and rich, it balances the spice. - Chips and salsa: Perfect for munching while you wait. These sides will enhance your meal and make it even more enjoyable! For the full recipe, check out the Sweet and Spicy Shrimp Tacos. In this post, we explored the essential ingredients for shrimp tacos, including substitutions and toppings. I shared step-by-step instructions for making a tasty marinade, cooking shrimp, and assembling your tacos. You learned tips for perfecting your dish, like achieving the right marinade and cooking shrimp well. We also touched on variations for proteins and gluten-free options. Remember, fresh ingredients and spices make a big difference. Enjoy your shrimp tacos, and don’t be afraid to experiment!](https://recipetorch.com/wp-content/uploads/2025/06/36538c34-4cae-45ba-9a8a-88c3cafb1dac.webp)
Get ready to transform your dinner with my Sweet and Spicy Shrimp Tacos! This quick meal packs a punch of
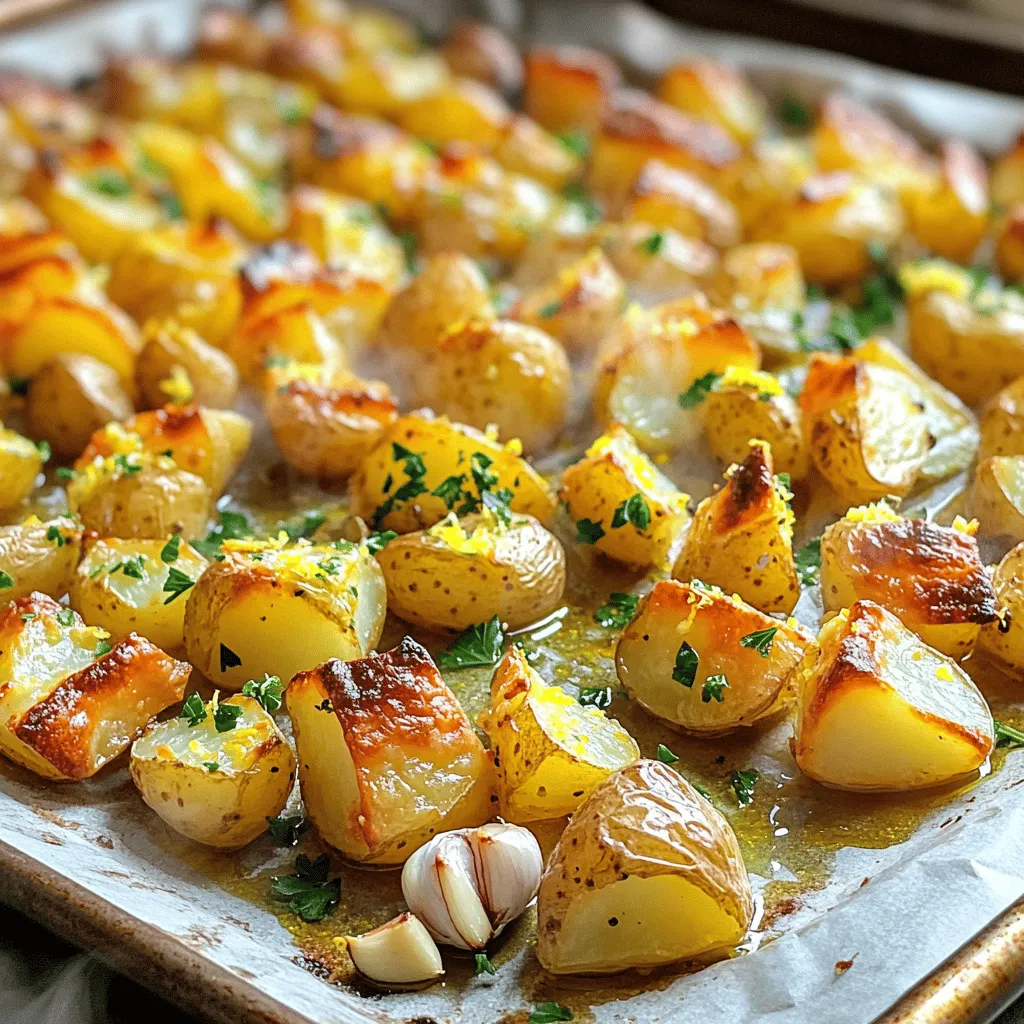
Looking for a side dish that impresses? These Crispy Roasted Garlic Potatoes deliver big on flavor! With golden, crunchy edges
![- 2 ripe avocados, diced - 2 cups cherry tomatoes, halved - 1 small red onion, finely sliced - 1 cucumber, peeled and diced - 2 tablespoons fresh basil, finely chopped - 2 tablespoons fresh lemon juice - 1 tablespoon extra virgin olive oil - Sea salt and freshly cracked black pepper - 1 teaspoon honey (optional) When making this salad, you want the best ingredients. Fresh avocados are key. They should be ripe but not mushy. Cherry tomatoes add a sweet burst of flavor. Slice them in half for easy eating. The red onion gives a nice crunch and a bit of spice. Cucumber adds a cool and refreshing bite. Fresh basil brings a wonderful aroma and flavor. Lemon juice brightens the dish and adds tang. Extra virgin olive oil adds richness. Don’t forget to season with salt and pepper to enhance all the flavors. If you like a hint of sweetness, add honey. It balances the acidity from the lemon. - Caloric content: This salad is light, with about 250 calories per serving. - Macronutrients breakdown: It contains healthy fats from avocados and olive oil, along with some carbs from the veggies. - Vitamins and minerals: You’ll get vitamins A, C, and K, plus potassium and fiber. This salad is not just tasty; it is also healthy. Each bite is packed with nutrients. Enjoy this dish as a side or a light meal. For the full recipe, check out the complete guide. 1. Start with the avocados. Cut them in half and remove the pit. Use a spoon to scoop out the flesh. Dice the avocados into bite-sized pieces. 2. Next, take the cherry tomatoes. Cut each one in half. This helps them release their sweet juices. 3. Now, slice the red onion thinly. A sharp knife helps with even slices. Dice the cucumber after peeling it. Aim for small, even pieces. 1. In a large mixing bowl, add all the prepared ingredients. This includes the avocados, cherry tomatoes, onion, and cucumber. 2. Then, sprinkle in the fresh basil. It adds a nice aroma and flavor to the salad. 1. In a small bowl, whisk together lemon juice, olive oil, and honey. This creates a bright and tasty dressing. 2. Taste the dressing and add sea salt and black pepper. Adjust to your liking. For the full recipe, check out the detailed instructions above. Enjoy your fresh avocado and tomato salad! How to choose ripe avocados To pick a ripe avocado, gently squeeze it. It should feel slightly soft but not mushy. Look for a dark green or black skin. Avoid any with large dents or dark spots. These signs mean the avocado may be overripe. Picking the best cherry tomatoes Choose cherry tomatoes that are bright and firm. Look for ones that feel heavy for their size. A shiny skin indicates freshness. Avoid any that have blemishes or wrinkles. Sweetness is key, so smell them. If they smell sweet, they will taste great! Techniques to avoid mashing the avocados When you mix the salad, use a gentle touch. A spatula or wooden spoon works well. Start by combining the other ingredients first. Then, add the diced avocados last. This way, they stay intact and look pretty. Ensuring even coating of dressing To coat the salad evenly, drizzle the dressing slowly. Toss gently, using a folding motion. This keeps the avocados from breaking apart. Make sure every piece gets some dressing. This way, each bite is full of flavor. Tips for serving in an elegant way Serve the salad in a large, shallow bowl. This allows everyone to see the bright colors. You can also layer the ingredients for a nice look. Start with cucumbers, add tomatoes, then avocados on top. Adding garnishes for color Finish your salad with fresh basil leaves. They add a pop of green and look stunning. You can also sprinkle some whole cherry tomatoes around the edge. This adds a fun touch and makes the dish more inviting. For the full recipe, check [Full Recipe]. {{image_4}} You can make this salad even better! Try adding protein like grilled chicken or shrimp. This addition makes it filling and nutritious. If you want some crunch, add nuts or seeds. Almonds or sunflower seeds bring a nice texture. There are many ways to dress this salad. You can explore vinegar-based dressings, like balsamic or apple cider vinegar. These add a tangy kick. If you're watching calories, think about low-calorie dressing alternatives. A splash of lemon juice or a yogurt-based dressing works well. To spice things up, consider adding spices like cumin or paprika. Just a pinch can elevate the flavor. You can also incorporate fruits like mango or pineapple for a sweet twist. These fruits pair nicely with avocado and tomato. For the full recipe, check out the main section. To keep your avocado and tomato salad fresh, use a few simple tricks. First, store avocados in the fridge to slow down browning. Wrap leftover avocado halves in plastic wrap tightly. This helps keep air away. For the salad, use an airtight container. This prevents the salad from drying out and keeps its flavors intact. The salad lasts in the fridge for about two days. After that, it may lose its taste and texture. Look for signs like browning on the avocados or a sour smell. If you see these signs, it’s best to toss the salad. Always check before you dig in! Yes, you can prepare this salad ahead of time. To keep it fresh, follow these tips: - Cut the avocados just before serving to prevent browning. - Store ingredients separately in airtight containers. - Mix the salad just before eating for the best taste. A little lemon juice on the avocados helps them stay green longer. If you want to save time, you can slice the onions and tomatoes early. Just keep everything cool in the fridge. This salad works well for many diets: - Vegan: All ingredients are plant-based, making it perfect for vegans. - Gluten-Free: There are no gluten ingredients, so it’s safe for gluten-free diets. If you want to add protein, grilled chicken or chickpeas are great options. You can also swap out the olive oil for a nut-based oil if you prefer. If you like heat, here are some ideas: - Add diced jalapeños for a fresh kick. - Sprinkle red pepper flakes on top for a little extra spice. - Mix in hot sauce to the dressing for an added layer of flavor. These small tweaks can really make your salad pop! Feel free to adjust the spice level to fit your taste. For the full recipe, check out the detailed instructions above. This blog post covered making a fresh avocado salad. We discussed the key ingredients, detailed step-by-step instructions, and shared helpful tips. We also explored variations and storage methods to keep your salad fresh. Remember, using ripe ingredients enhances flavor. You can adapt this recipe for any diet or taste preference. Enjoy creating your own avocado salad masterpiece! It’s simple, tasty, and perfect for any meal.](https://recipetorch.com/wp-content/uploads/2025/06/c53d80de-35ae-4f66-b110-a0453d97432f.webp)
If you crave a fresh and tasty side dish, this Avocado and Tomato Salad is for you! It’s easy to
