Skip to content
DisclaimerTerms Of UseGDPR PolicyCookie Policy

recipetorch

  • Home
  • Drinks
  • Appetizers
  • Dinner
  • Dessert
  • About
  • Contact
  • Privacy Policy
DisclaimerTerms Of UseGDPR PolicyCookie Policy

Nicole

- 1 lb boneless, skinless chicken thighs - 3 tablespoons extra virgin olive oil - 2 teaspoons ground cumin - 2 teaspoons smoked paprika - 1 teaspoon ground coriander - 1 teaspoon ground turmeric - 1/2 teaspoon ground cinnamon - 1/2 teaspoon cayenne pepper (adjust for desired spice) - 4 cloves garlic, finely minced - Juice of 1 fresh lemon - Sea salt and freshly ground black pepper to taste - Pita bread or flatbreads, for serving - Fresh parsley, finely chopped, for garnish To make the chicken shawarma, you need a few key ingredients. The chicken thighs are juicy and tender, perfect for grilling. The olive oil helps blend the spices. Cumin and smoked paprika give a deep flavor. Turmeric adds color, while cinnamon and cayenne pepper bring warmth. Fresh garlic and lemon juice brighten the dish. Salt and pepper enhance all the flavors. Finally, fresh parsley adds a pop of color and taste. - 1 cup creamy plain Greek yogurt - 4 cloves garlic, finely minced - Juice of 1/2 lemon - 2 tablespoons tahini - Sea salt to taste For the creamy garlic sauce, Greek yogurt is the base. It adds creaminess and tang. Minced garlic gives it a strong flavor. Lemon juice adds brightness, while tahini brings a nutty taste. Sea salt helps bring all the flavors together. This sauce pairs perfectly with the chicken, making each bite delicious. You can find the full recipe for this Chicken Shawarma with Creamy Garlic Sauce in the main article. To start, gather your ingredients. In a large mixing bowl, whisk together the olive oil, ground cumin, smoked paprika, ground coriander, ground turmeric, ground cinnamon, cayenne pepper, minced garlic, fresh lemon juice, sea salt, and black pepper. This mixture creates a flavorful marinade. Ensure that you combine the ingredients well. Each spice adds depth, making your chicken shawarma truly special. Next, add the boneless chicken thighs to your marinade. Make sure each piece is fully coated. This step is key. Cover the bowl with plastic wrap or a lid. Let the chicken sit in the fridge for at least 1 hour. For the best flavor, marinate overnight if you can. The longer the chicken sits, the more it absorbs those tasty flavors. Now, it's time to cook. Preheat your grill or stovetop grill pan over medium-high heat. Once the grill is hot, remove the chicken from the marinade. Let any excess marinade drip off. Place the chicken on the grill. Cook for about 5-7 minutes on each side. You want a nice char on the edges. To check for doneness, use an instant-read thermometer. The internal temperature should reach 165°F (75°C). This ensures your chicken is safe to eat and juicy. To get the best flavor from your chicken shawarma, start with marinating. I suggest marinating the chicken for at least one hour. If you can, let it sit overnight. This time allows the spices to soak in. For the marinade, use these spices: - Ground cumin - Smoked paprika - Ground coriander - Ground turmeric - Ground cinnamon - Cayenne pepper Feel free to adjust the spices. Want a different taste? Try adding some allspice or sumac for a unique twist. Each spice will change the flavor a bit, so mix it up! When it comes to serving chicken shawarma, think fresh and fun. Pita bread or flatbreads work great as a base. You can add these sides: - Sliced cucumbers - Diced tomatoes - Shredded lettuce These sides add color and crunch. For a festive look, arrange everything on a large platter. Place the creamy garlic sauce in the center. This way, guests can create their own wraps. It’s fun and personalizes each meal! Want a great visual? Add chopped parsley on top for a pop of green. You’ll impress friends and family while enjoying a delicious meal. {{image_4}} If you're not in the mood for chicken, there are great substitutes. Beef and lamb work well, too. These meats soak up flavors just like chicken. Simply use the same marinade for them. For a vegetarian twist, try using mushrooms or eggplant. They have a meaty texture and will absorb the spices beautifully. While creamy garlic sauce is a star, you can explore other flavors. You might enjoy tahini sauce, made with sesame paste and lemon. Another option is a spicy harissa yogurt. This adds heat and depth. You can also try a simple lemon-herb dressing. Regional variations are fun, too. In the Middle East, some serve shawarma with a tangy pickle sauce. Others use a spicy chili sauce for a kick. Each sauce brings its own flair to the dish. The choice is yours! For the full recipe, check out the link. To keep your chicken shawarma fresh, store it properly. First, let the chicken cool to room temperature. Then, place it in an airtight container. Make sure to separate the chicken from the creamy garlic sauce to keep flavors fresh. Store the chicken in the fridge for up to three days. If you want to keep it longer, you can freeze it. Wrap the chicken tightly in plastic wrap and then place it in a freezer-safe bag. It will stay good for about three months. When it’s time to enjoy the leftover chicken shawarma, you want it hot but not dry. The best way to reheat is in the oven. Preheat your oven to 350°F (175°C). Place the chicken in a baking dish and cover it with foil. This helps keep moisture in. Heat for about 15 minutes or until warm. You can also use a microwave, but be careful. Place the chicken on a plate and cover it with a damp paper towel. Heat in short bursts, checking often. This keeps the chicken juicy and tasty. Enjoy your meal! Chicken shawarma is a popular Middle Eastern dish. It features marinated chicken cooked on a vertical spit. The dish is flavorful and tender, often served in pita or flatbreads. Shawarma has roots in the Ottoman Empire, evolving into a street food favorite. Its rich spices make it a beloved choice worldwide. Yes, you can make chicken shawarma in the oven. Preheat your oven to 425°F (220°C). Place marinated chicken on a baking sheet lined with parchment paper. Bake for about 25-30 minutes, turning halfway through. This method is great for convenience and still yields tasty results. The spice level of chicken shawarma is adjustable. You can add more cayenne pepper for heat or skip it for mildness. Many enjoy a mix of spices, allowing for personal preference. Taste the marinade before using it, and adjust as needed. If you can't use tahini, try peanut butter or sunflower seed butter as a substitute. You can also blend sesame seeds with olive oil for a homemade version. Greek yogurt can work as a base for creamy sauces too, adding flavor without tahini. Yes, you can freeze cooked chicken shawarma. Allow the chicken to cool completely before placing it in an airtight container. It will keep well in the freezer for up to three months. To defrost, place it in the fridge overnight or use the microwave for a quick option. To check if the chicken is done, use an instant-read thermometer. The internal temperature should reach 165°F (75°C). Look for juices that run clear and the chicken should not be pink inside. Let it rest for a few minutes before slicing for best results. To make Chicken Shawarma, start with marinated chicken thighs and a creamy garlic sauce. This dish shines with the right spices and cooking techniques, which enhance the flavor. Remember to let the chicken marinate well for the best taste. You can also experiment with different proteins and sauces for variety. Proper storage and reheating keep leftovers tasty. Enjoy your cooking journey and savor this delightful dish!

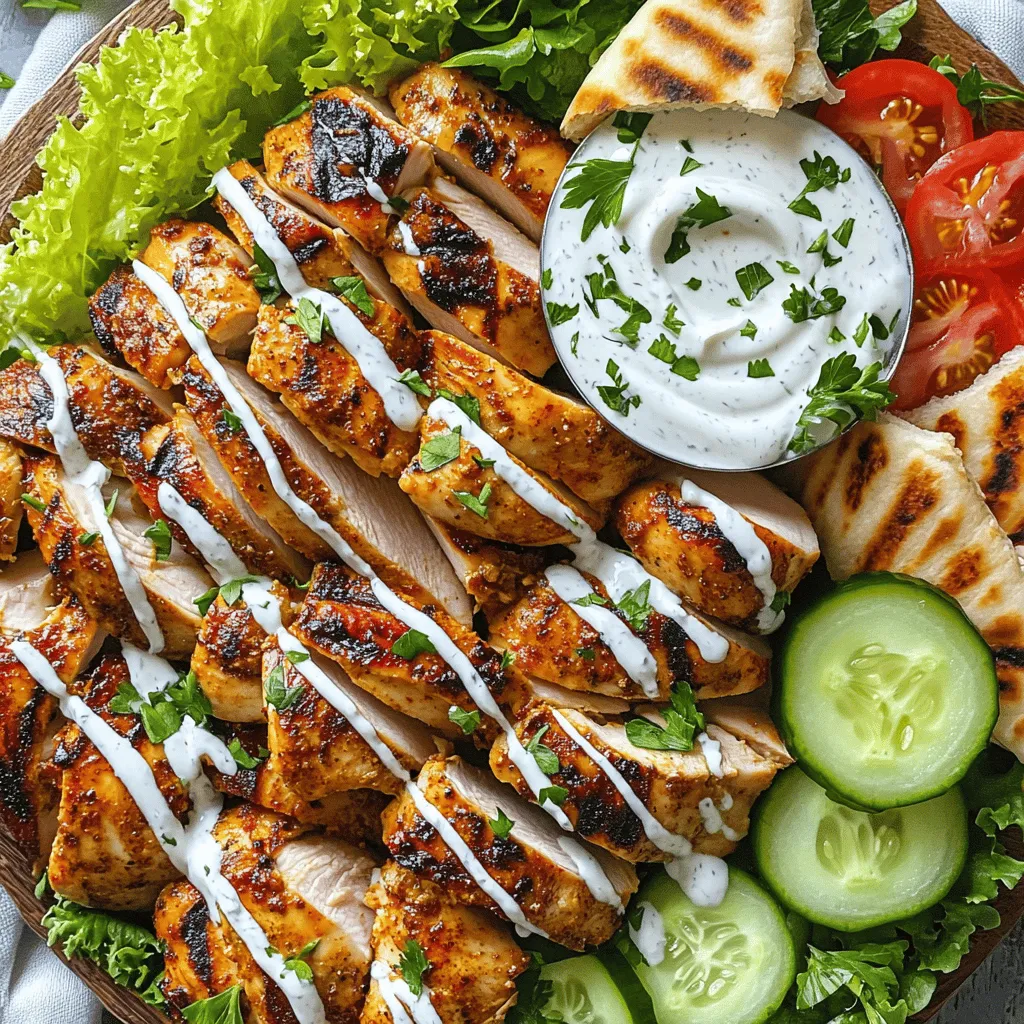
Savory Chicken Shawarma with Creamy Garlic Sauce

Are you ready to spice up your dinner routine? In this guide, I’ll show you how to make savory Chicken

To make Golden Oreo Strawberry Cheesecake Bars, you will need: - 24 Golden Oreo cookies, finely crushed - 1/4 cup unsalted butter, melted - 16 oz cream cheese, softened to room temperature - 1 cup powdered sugar - 1 teaspoon pure vanilla extract - 1/2 cup sour cream - 1 cup fresh strawberries, pureed (set aside some for drizzling on top) - 1 cup whipped cream (store-bought or homemade) - Additional fresh strawberries for garnish - Optional: Gold sprinkles for an elegant touch I use fresh strawberries for the best flavor. Frozen strawberries work too but may change the texture. For the cream cheese, choose a high-fat brand. It makes the filling rich. If you're dairy-free, look for vegan cream cheese. You can also swap the sour cream with Greek yogurt for a tangy kick. For the crust, Golden Oreos give a sweet base. Regular Oreos can be a fun swap, but they will change the flavor a bit. You will need a few key tools to make this recipe easy: - A 9x9-inch square baking pan - Parchment paper or cooking spray for easy lifting - A medium mixing bowl for the crust - A large mixing bowl for the filling - An electric mixer to blend the cheesecake filling - A spatula for smoothing the layers These tools help make this treat simple and fun to create! First, set your oven to 325°F (160°C). This heat is perfect for baking. Next, grab a 9x9-inch square baking pan. Lightly grease it or line it with parchment paper. This step helps when lifting out the bars later. In a medium mixing bowl, take 24 crushed Golden Oreo cookies. Add 1/4 cup of melted unsalted butter. Stir until the crumbs are moist. This mixture should feel like wet sand. Now, press it firmly into the bottom of your baking pan. Make sure it’s even. Bake this crust for 10 minutes, then let it cool completely. For the filling, start with 16 oz of softened cream cheese. Use an electric mixer to beat it until smooth. Next, slowly add 1 cup of powdered sugar, 1 teaspoon of vanilla extract, and 1/2 cup of sour cream. Mix until everything is smooth and lump-free. Now it's time for the strawberries! Take 1 cup of fresh strawberries and puree them. Gently fold this puree into your cream cheese mixture. Mix until the color is even. Be careful not to deflate the mixture. This keeps it light and fluffy. Take 1 cup of whipped cream. Fold it into the strawberry mixture. This makes the filling airy and creamy. Once combined, pour the cheesecake mixture over your cooled Oreo crust. Use a spatula to smooth the top. Cover the baking pan with plastic wrap. Place it in the fridge for at least 4 hours. This helps the bars set and become firm. After chilling, cut the cheesecake into squares with a sharp knife. Drizzle each square with the reserved strawberry puree. Add fresh strawberry slices on top for garnish. For a special touch, sprinkle some gold sprinkles over the bars. These steps will help you create the perfect Golden Oreo Strawberry Cheesecake Bars. Enjoy the process and the tasty results! For the full recipe, refer to the [Full Recipe]. When making Golden Oreo strawberry cheesecake bars, it’s easy to make mistakes. Here are some pitfalls to watch out for: - Overmixing the Filling: This can make the cheesecake dense. Mix just until smooth. - Not Cooling the Crust: Always let the crust cool before adding the filling. This helps keep layers separate. - Skipping the Chill Time: Don’t rush this step. Chilling helps the bars set properly. Texture is key for a great cheesecake. Follow these tips: - Use Softened Cream Cheese: This ensures a smooth, creamy filling. Let it sit at room temp for 30 minutes before mixing. - Fold, Don’t Stir: When adding whipped cream, fold gently. This keeps air in the mixture and makes it fluffy. - Control the Temperature: Chill the bars for at least 4 hours. This allows the flavors to meld and the texture to set. You can customize this recipe easily. Here are some swaps: - Cream Cheese: Use Greek yogurt for a lighter option. - Fresh Strawberries: Swap in other fruits like raspberries or blueberries for a new taste. - Golden Oreos: Regular Oreos work, but they change the flavor. You can also try graham crackers for a different crust. For the full recipe, check out the detailed instructions to make these delightful bars. {{image_4}} You can switch up the fruit in these bars. Try using raspberries or blueberries. They add a nice color and flavor. You can also mix different fruits for a fun twist. Just make sure to adjust the sweetness if needed. Each fruit brings its own taste and charm to the cheesecake. If you want to skip the oven, you can make a no-bake version. Just use the same crust and filling. Instead of baking, chill the bars for longer. Let them set overnight for the best results. This method keeps your kitchen cool and saves time. You can change the crust too. Use crushed graham crackers or even chocolate cookies. Each option brings a new flavor to the bars. Just remember to mix with melted butter to hold it together. This way, you can create your own unique twist on the Golden Oreo Strawberry Cheesecake Bars. For the full recipe, check out the detailed instructions above. To keep your Golden Oreo strawberry cheesecake bars fresh, wrap them tightly. Use plastic wrap or foil. Place them in an airtight container. Store them in the fridge for up to five days. This way, you maintain their creamy texture and flavor. Always keep them chilled for best results. You can freeze these cheesecake bars for even longer storage. First, let them cool completely after chilling. Then, cut them into squares. Wrap each square in plastic wrap and then in foil. Place them in a freezer-safe bag. They can last for up to three months in the freezer. To enjoy them, simply thaw in the fridge overnight before serving. Generally, you won’t need to reheat cheesecake bars. They are best served cold. If you prefer them slightly warm, place a square in the microwave for just 10 to 15 seconds. Keep a close eye on it to avoid melting. Enjoy your delightful treat at the perfect temperature! Yes, you can use regular Oreos. They will add a different flavor. The classic chocolate taste will contrast nicely with the strawberry filling. Just crush them the same way you would the Golden Oreos. The texture will remain similar. The cheesecake bars last about 5 days in the fridge. Be sure to keep them covered. This will keep them fresh and tasty. If you notice any changes in texture or smell, it's best to toss them. Yes, you can make this recipe gluten-free. Use gluten-free cookies as a crust. It’s easy to find gluten-free options in stores. Just check the labels to ensure they are safe for your needs. To cut cheesecake bars cleanly, use a sharp knife. Dip the knife in hot water and wipe it dry before cutting. This helps the knife glide through the bars. Repeat this process for each cut for neat slices. Enjoy your delicious Golden Oreo Strawberry Cheesecake Bars! This blog post covered how to make delicious cheesecake bars. We explored ingredients, preparation steps, and important tips. I shared how to make a golden Oreo crust and the perfect creamy filling. Remember, you can create variations with fruits or a no-bake version. Proper storage keeps leftovers fresh, too. As you try this recipe, be mindful of common mistakes for the best results. Enjoy every bite, and share these tasty bars with your friends!

Golden Oreo Strawberry Cheesecake Bars Delightful Treat

Are you ready to whip up a dessert that will impress? Golden Oreo Strawberry Cheesecake Bars are not just tasty;

- 2 boneless, skinless chicken thighs - 4 cups chicken broth - 2 packs of instant ramen noodles - 1 tablespoon sesame oil - 1 tablespoon chili paste - 2 soft-boiled eggs - Sesame seeds for garnish - 2 cloves garlic, minced - 1 teaspoon fresh ginger, grated - 2 green onions, finely chopped - 1 cup baby spinach - 1 cup sliced mushrooms To create this fiery chicken ramen, you need some key ingredients. First, the chicken thighs are the star of the dish. They give a nice, rich flavor. Chicken broth adds depth to the soup. Instant ramen noodles cook quickly and soak up all the tasty broth. Sesame oil adds a nutty taste. Chili paste gives the dish its heat. You can adjust how much you use based on your spice preference. For optional ingredients, soft-boiled eggs add creaminess. Sesame seeds make a lovely garnish. Use fresh garlic and ginger for a bold flavor. Green onions add a fresh crunch. Baby spinach and mushrooms give extra nutrition and color. These ingredients come together in a simple way to create a warm, inviting meal. For the full recipe, you can check the details above. To start, you need to sear the chicken thighs. First, heat sesame oil in a medium pot over medium heat. Season the chicken with salt and pepper. Place the chicken in the pot and cook for about 4-5 minutes on each side. You want them golden-brown and fully cooked. After cooking, remove the chicken and let it rest for a few minutes. Resting is key. It helps keep the chicken juicy. Next, it’s time to make the broth. In the same pot, add minced garlic and grated ginger. Sauté for about 30 seconds. You’ll know it’s ready when the mixture smells great. Now add the chicken broth and bring it to a gentle simmer. Mix in the chili paste to adjust the heat. You can add more or less based on your taste. Once the broth is simmering, it’s time for the veggies. Add sliced mushrooms and baby spinach. Cook for about 5 minutes. The spinach should wilt, and the mushrooms need to be tender. While that cooks, add the ramen noodles to the pot. Cook them in the broth for about 3-4 minutes. They should be tender. Now, your base is almost ready! For the full recipe, check out the complete guide. To make your fiery chicken ramen just right, you can adjust the spice levels. Start with one tablespoon of chili paste. If you like it hotter, add more paste a little at a time. You can also try other ingredients for extra flavor. Add soy sauce for umami or lime juice for brightness. To ensure tender chicken, sear the thighs on medium heat. This gives them a nice crust and keeps them juicy. Let them rest before shredding. This step is key. For the noodles, cook them in the broth. This gives them a great flavor and the right texture. Follow the cooking time on the package, usually about three to four minutes. Serve your ramen in deep bowls to showcase the vibrant colors. Top each bowl with sliced green onions and sesame seeds for a pop of color. If using soft-boiled eggs, cut them in half and place them on top. This not only looks great but adds creaminess. For a final touch, drizzle a little sesame oil before serving. It makes the dish shine and smell amazing! {{image_4}} You can easily make a vegetarian version of this dish. Simply swap the chicken for tofu. Use firm tofu for the best texture. Press it first to remove excess water. Then, cut it into cubes. Sear the tofu in sesame oil until golden brown. The tofu will soak up the spicy broth, creating a rich flavor. You can also add more veggies, like bell peppers or carrots, for extra crunch. If you want to try different proteins, you have many options. Beef is a great choice; use thin slices of ribeye or flank steak. Cook it quickly in the hot broth for tender bites. Seafood lovers can add shrimp or fish. Just make sure to cook them for a short time. For a vegan option, consider using plant-based proteins like lentils or chickpeas. They will add protein and fiber to your meal. Everyone has different spice preferences. You can adjust the heat in your ramen easily. Start with a small amount of chili paste. Taste the broth before adding more. If you want it milder, use less chili paste or add coconut milk. For those who love heat, feel free to add hot sauce or extra chili flakes. You can even serve sliced jalapeños on the side for a spicy kick. Store any leftover fiery chicken ramen in an airtight container. Let it cool first. Place it in the fridge for up to three days. Keep the broth separate from the noodles if possible. This keeps the noodles from getting too soft. To reheat ramen, use a pot over low heat. Add a splash of broth or water to keep it moist. Stir gently to avoid breaking the noodles. Heat until warm, but do not boil. This helps to keep the texture nice. You can freeze fiery chicken ramen, but it’s best to freeze only the broth and chicken. Noodles don’t freeze well. Store broth in a freezer-safe container for up to three months. When you’re ready to eat, thaw it and cook fresh noodles. Enjoy the great taste anytime! For the full recipe, check out the recipe details above. To make your ramen hotter, you can add more chili paste. Start with one tablespoon and slowly add more. You can also throw in some sliced fresh chilies or a sprinkle of red pepper flakes. Another great option is to use spicy sesame oil instead of regular sesame oil. Taste as you go to find your perfect heat level. Yes, you can use many types of noodles in ramen! While instant ramen is quick, you can try fresh ramen noodles or udon noodles for a chewier bite. Soba noodles are a fun twist too! Just remember to adjust cooking times based on the noodle type you choose. Spicy foods have several health perks. They can boost your metabolism and may help with digestion. Capsaicin, found in chili peppers, may even reduce inflammation. Plus, spicy meals can make you feel full faster, which can help with portion control. Eating spicy foods can also add excitement to your meals! Fiery chicken ramen combines simple ingredients and bold flavors. From the chicken broth to the chili paste, each step adds depth. Don’t forget to customize with veggies or adjust spice levels. Remember, cooking techniques are key for a perfect bowl. Leftovers can be stored or reheated with care. Now, you have all the tools to create your own delicious ramen. Dive in and enjoy this fun, satisfying dish!

Fiery Chicken Ramen Flavorful and Simple Delight

If you crave a dish that’s both fiery and satisfying, then you’ve come to the right place! In this post,

To make a delightful pineapple cake, gather these must-have ingredients: - 2 cups all-purpose flour - 1 ½ cups granulated sugar - ½ cup unsalted butter, softened - 3 large eggs - 1 cup crushed pineapple, drained - ½ cup fresh pineapple juice - 1 teaspoon vanilla extract - 1 teaspoon baking soda - ½ teaspoon baking powder - ½ teaspoon salt - 1 cup shredded coconut - 1 cup cream cheese, softened (for frosting) - 1 cup powdered sugar (for frosting) - 1 teaspoon fresh lemon juice (for frosting) These ingredients create a moist cake packed with sweet pineapple flavor. You can enhance your cake with these optional ingredients: - ½ cup chopped walnuts or pecans Adding nuts gives a crunchy texture and nutty flavor. If you need alternatives, here are some ideas: - Use whole wheat flour instead of all-purpose flour for a healthier option. - Substitute coconut oil for unsalted butter for a dairy-free choice. - For a lighter cake, use egg whites instead of whole eggs. - Replace fresh pineapple juice with orange juice for a different twist. These substitutions can keep your cake tasty while meeting dietary needs. For the full recipe, check out the Tropical Pineapple Paradise Cake. First, set your oven to 350°F (175°C). This will ensure even baking. While the oven heats, grab two 9-inch round cake pans. Grease each pan with butter or oil. Then, dust them with flour to stop the cake from sticking. This step is key for a smooth release. In a big mixing bowl, whisk together these dry ingredients: - 2 cups all-purpose flour - 1 teaspoon baking soda - ½ teaspoon baking powder - ½ teaspoon salt Set this bowl aside. Now, take another bowl. Cream together: - ½ cup unsalted butter - 1 ½ cups granulated sugar Use an electric mixer for about 3-4 minutes. The mix should be fluffy. Next, add 3 large eggs, one at a time. Beat well after each egg. Now, stir in: - 1 cup crushed pineapple - ½ cup fresh pineapple juice - 1 teaspoon vanilla extract Mix everything until combined. Slowly add the dry mix to this wet mixture. Use a spatula to fold it in. Be gentle so the cake stays light. Finally, fold in: - 1 cup shredded coconut - ½ cup chopped walnuts or pecans (optional) Pour the batter evenly into your prepared pans. Bake for 25-30 minutes. Check if the cake is done by inserting a toothpick. It should come out clean. Once baked, let the cakes cool in the pans for 10 minutes. Then, transfer them to a wire rack to cool completely. This helps prevent sogginess. For the frosting, mix cream cheese, powdered sugar, and lemon juice until smooth. Once the cakes are cool, frost them as desired. Enjoy your delightful treat! For the full recipe, check the previous section. To get a moist pineapple cake, start with fresh ingredients. Use ripe, juicy pineapples. Drain the crushed pineapple well to avoid excess moisture. The cream cheese frosting also adds to the cake's moisture. Lastly, do not overmix the batter, as this can make the cake dense. Avoid these common mistakes to ensure the best cake: - Using too much flour: Measure carefully. Too much flour can dry out the cake. - Not draining the pineapple: Excess liquid can lead to a soggy cake. - Overbaking: Check for doneness with a toothpick. Remove the cake when it’s just set. - Skipping the cooling time: Let the cake cool completely before frosting. This helps the frosting stay firm. Make your pineapple cake beautiful with these ideas: - Coconut topping: Sprinkle shredded coconut on top for a tropical look. - Fresh fruit: Add pineapple slices or cherries for color and freshness. - Layered look: Use a cake stand to show off the layers. - Piping: Use a piping bag to add decorative swirls of frosting around the edges. For the full recipe and more detailed steps, check the Full Recipe. {{image_4}} You can make a fun pineapple upside-down cake with this recipe. Start by greasing a round cake pan. Place pineapple slices in a single layer at the bottom. Sprinkle brown sugar over the slices. Then, pour the batter on top. Bake as usual. When you flip it over, the caramelized pineapple will shine! To add more tropical flair, consider these fun options. You can mix in diced mango or papaya. For a zesty kick, add lime zest to the batter. You can swap half the crushed pineapple for diced fresh fruit. This will keep the cake moist and add a burst of flavor. While cream cheese frosting is tasty, you can try other frostings. A coconut whipped cream frosting adds a light touch. For a tropical twist, use a passion fruit glaze. Simply mix passion fruit pulp with powdered sugar for sweetness. Each option brings its own unique taste to your cake. Don't hesitate to experiment with different flavors! To keep your leftover pineapple cake fresh, wrap it well. Use plastic wrap or foil. Place the wrapped cake in an airtight container. This method keeps it moist and tasty. Store it at room temperature for up to three days. If you want it to last longer, refrigerate it. Freezing your pineapple cake is easy. First, let it cool completely. Next, wrap each layer in plastic wrap. Make sure the wrap is tight to prevent freezer burn. Then, place the wrapped layers in a freezer bag or container. You can freeze the cake for up to three months. When ready to eat, thaw it in the fridge overnight. Choose the right container for storing your cake. Use a cake dome or a large airtight container for best results. These options help keep moisture in. If using a freezer bag, remove as much air as possible. This helps prevent freezer burn and keeps your cake fresh longer. This Pineapple Cake stands out due to its bright tropical flavors. It combines sweet crushed pineapple with creamy frosting. The addition of coconut adds a fun texture. Each bite feels like a mini vacation. The balance of flavors makes it perfect for any gathering. Yes, you can use fresh pineapple! Just make sure to chop it well. Drain it thoroughly to avoid excess juice. Fresh pineapple offers a bright, juicy taste. It can enhance the cake's flavor profile. To check if the cake is done, insert a toothpick into the center. If it comes out clean, your cake is ready. The edges may start to pull away from the pan. The top should be golden brown and spring back when touched. Pineapple Cake pairs well with many treats. Try serving it with whipped cream for extra creaminess. A scoop of vanilla ice cream adds a nice touch. Fresh fruit like berries can brighten the dish. You can even drizzle some caramel or chocolate sauce for added flavor. For the full recipe, check out the Tropical Pineapple Paradise Cake. Enjoying a homemade pineapple cake is easy with the right ingredients and steps. We discussed essential and optional ingredients, plus tips for great flavor. You learned how to prep, mix, bake, and store your cake. Remember to avoid common mistakes for that perfect moist texture. Try variations like upside-down cake or tropical twists. With these tips, you can impress anyone. Enjoy your baking adventure and share your delicious results!

Pineapple Cake Delightful Recipe for Every Occasion

Looking to impress at your next gathering? This Pineapple Cake recipe is your solution! Bursting with tropical flavor, it’s perfect

- 2 boneless, skinless chicken breasts - 1 cup shredded mozzarella cheese - 4 large whole wheat tortillas - 1/4 cup ranch dressing or sauce of your choice - Fresh basil leaves for garnish - 2 tablespoons extra virgin olive oil - 4 cloves garlic, finely minced - 1 teaspoon dried oregano - 1 teaspoon smoked paprika - Salt and pepper, to taste These ingredients create the base for your cheesy garlic chicken wraps. The chicken breasts add protein and flavor, while shredded mozzarella brings a creamy texture. Whole wheat tortillas provide a hearty wrap that holds everything together. For extra flavor, consider adding ranch dressing. It pairs well with the chicken and cheese. Fresh basil leaves add a nice touch and make your wraps look pretty. The spices are key. Extra virgin olive oil helps in cooking and adds richness. Garlic brings a strong aroma and taste, while oregano and smoked paprika add depth. Salt and pepper enhance all the flavors, bringing everything together. With these ingredients, you're ready to make a delicious meal. For the full recipe, check out the detailed steps. First, preheat your oven to 375°F (190°C). This will get it hot and ready for the wraps. Next, grab a medium-sized bowl. In this bowl, mix 2 tablespoons of olive oil, 4 minced garlic cloves, 1 teaspoon of dried oregano, 1 teaspoon of smoked paprika, salt, and pepper. Whisk these together until you see a nice blend. Take the two chicken breasts and put them in the bowl. Make sure they get coated well with the garlic mix. It’s important to let the chicken marinate for about 10 minutes. This step boosts the flavor of the chicken. Now, heat a non-stick skillet over medium-high heat. Add the marinated chicken breasts to the hot skillet. Cook them for about 5 to 7 minutes on each side. You want the chicken to be fully cooked through. The inside should not be pink, and the internal temperature should reach 165°F (75°C). After cooking, transfer the chicken to a cutting board. Let it rest for a few minutes, then slice it into thin strips. To start making the wraps, take one large tortilla and lay it flat on a clean surface. Spread about 1 tablespoon of ranch dressing evenly over the tortilla. Next, layer fresh spinach leaves on top. Then, add the sliced chicken, halved cherry tomatoes, and a sprinkle of mozzarella cheese. Now, carefully roll the tortilla tightly from one end to the other. Don’t forget to tuck in the sides as you go. This keeps all the yummy filling inside. Repeat this process for the rest of the tortillas and fillings. Once everything is rolled, place the wraps seam side down on a baking sheet lined with parchment paper. Place the baking sheet in the preheated oven. Bake for 10 to 15 minutes, or until the tortillas turn golden brown and the cheese melts beautifully. After baking, let the wraps cool slightly before slicing them in half. Garnish with fresh basil leaves to make it look nice. Enjoy your Cheesy Garlic Chicken Wraps! For the complete recipe, check out the [Full Recipe]. - Marinate the chicken for at least 10 minutes. This lets the flavors soak in well. You can marinate for up to an hour for even more taste. - Cook the chicken for 5-7 minutes on each side. Make sure it reaches 165°F (75°C) inside. This ensures the chicken is juicy and safe to eat. - To make the wraps crispy, bake them seam side down. This keeps the filling from spilling out. - For melting cheese, add it to the wraps before baking. The heat will melt it perfectly, making it gooey. You can also cover the wraps with foil for the first few minutes to trap steam. - Present the wraps on a large platter. Scatter cherry tomatoes and fresh basil around for a pop of color. - Serve with extra ranch dressing or your favorite dip on the side. This adds a nice touch and gives everyone a choice. Enjoy your meal! {{image_4}} You can easily switch up the cheese in these wraps. Try cheddar for a sharp taste or gouda for a smoky flavor. You can also change the protein. Use turkey for a leaner option or tofu for a plant-based choice. This lets you tailor the wraps to your taste and dietary needs. Want to spice things up? Add jalapeños or a splash of hot sauce for heat. You can also mix in different herbs and spices. Basil, cilantro, or even a pinch of cumin can totally change the taste. Experimenting with flavors keeps the wraps fresh and exciting every time you make them. If you need gluten-free options, choose gluten-free tortillas. Many brands offer great choices. For a lighter meal, consider low-calorie tortillas. These swaps help you enjoy the wraps without sacrificing your dietary goals. You can indulge while still keeping things healthy. For the full experience, check out the Full Recipe for Cheesy Garlic Chicken Wraps! To keep your cheesy garlic chicken wraps fresh, follow these steps. Place them in airtight containers. This helps keep moisture out and flavors locked in. If you plan to eat them within a few days, store them in the fridge. They can last for about 3 days. If you want to keep them longer, freeze them instead. Wrap each one tightly in plastic wrap, then place them in a freezer-safe bag. This way, they can stay good for up to 3 months. When it's time to enjoy the leftovers, reheating is key to keeping that delicious flavor. The best method is to use an oven. Preheat it to 350°F (175°C). Place the wraps on a baking sheet. Heat them for about 10-15 minutes. This warms them through and keeps them crispy. You can also use a microwave, but it may make them a bit soggy. If you use the microwave, heat for 1-2 minutes. Check to see if they are warm enough; if not, add more time in small increments. Enjoy your tasty wraps! Cheesy Garlic Chicken Wraps can last up to three days in the fridge. To keep them fresh, store them in an airtight container. If you want to prevent sogginess, place a paper towel inside the container. This will absorb extra moisture. Always check for any off smells or changes before eating. Yes, you can prepare the wraps in advance! Assemble the wraps but do not bake them. Wrap them tightly in plastic wrap or foil. Keep them in the fridge for up to 24 hours. When you are ready, just bake them as directed. This is great for busy weeknights. You can serve these wraps with many sides. Here are some ideas: - Fresh Salad: A simple green salad can add crunch. - Vegetable Sticks: Carrot and cucumber sticks are refreshing. - Sweet Potato Fries: They add a nice touch of sweetness. - Beverages: Pair with iced tea or sparkling water. These sides will complement the flavors nicely and make a complete meal. Cheesy Garlic Chicken Wraps are easy to make and delicious. You learned about the main ingredients, spices, and steps to cook. We covered perfecting flavors, serving ideas, and variations to suit your taste. Storage tips help keep your leftovers fresh. Remember, you can customize these wraps with different proteins or cheeses. Enjoy creating this dish for friends or family any time. Delicious meals should bring joy and fun to your kitchen!

Cheesy Garlic Chicken Wraps Flavorful Weeknight Meal

Looking for a quick and tasty meal to spice up your weeknights? These Cheesy Garlic Chicken Wraps are perfect! Made

This recipe brings comfort and joy straight to your table. It combines frozen pierogi, kielbasa, and tangy sauerkraut into a delightful casserole. You will love how easy it is to make in a crockpot. Plus, it's a great dish for family gatherings or cozy nights. Here’s what you need for the Crockpot Pierogi Casserole with Kielbasa: - 1 package (16 oz) frozen pierogi, preferably with cheese and potato filling - 1 pound kielbasa, sliced into rounds - 1 large onion, finely chopped - 2 cups sauerkraut, drained and rinsed - 1 cup shredded cheddar cheese (plus extra for topping) - 1 cup sour cream - 1 teaspoon garlic powder - 1 teaspoon smoked paprika - Salt and pepper to taste - Fresh chives, chopped (for garnish) For the best results, I suggest using these brands: - Pierogi: Look for Mrs. T’s or any local brand with good reviews. - Kielbasa: Try Hillshire Farm or a local butcher for fresh sausage. - Cheddar Cheese: Use sharp cheddar for a bold flavor. - Sauerkraut: Choose a brand that uses minimal preservatives for a fresh taste. Selecting quality ingredients sets the foundation for this flavorful dish. Enjoy the process, and don’t hesitate to experiment with brands that you love! To start, take your crockpot and place half of the frozen pierogi at the bottom. This layer is key for a good base. Next, add half of the sliced kielbasa on top. The kielbasa adds a nice, smoky flavor. After that, sprinkle half of the finely chopped onion over the kielbasa. Onions bring sweetness and depth. Finally, add half of the sauerkraut. This adds a tangy kick that balances the dish. Once you have your first layer, sprinkle half of the shredded cheddar cheese over it. Cheese melts beautifully and creates a creamy texture. This layering method helps build flavor and makes sure every bite is delicious. Now, let’s make the seasoning mixture. In a small bowl, combine the sour cream, garlic powder, smoked paprika, salt, and pepper. This mixture is what brings everything together. Mix until smooth and well combined. It should look creamy and inviting. Spoon half of this mixture evenly over the cheese layer. This adds richness and a burst of flavor. Cover your crockpot with the lid. Set it to cook on low for 6-8 hours or on high for 3-4 hours. This long cooking time helps the flavors meld together. The pierogi should be tender when it's done. Check to make sure the kielbasa is heated through. About 15 minutes before serving, add more shredded cheddar cheese on top. Cover the crockpot again to let it melt. This makes for an extra cheesy and creamy finish. Enjoy the aroma as it fills your kitchen while it cooks! The best part? You can relax while it does the work for you. To make your Crockpot Pierogi Casserole shine, focus on layers. Each layer adds flavor. Start with half of the pierogi. This gives a solid base. Use quality kielbasa for the best taste. The smoked paprika adds depth. If you want more zing, add more garlic powder. For texture, make sure the sauerkraut is drained well. It keeps the dish from getting soggy. A good crockpot is key to success. Look for one with a locking lid. This keeps moisture in and cooks evenly. Use a large spoon or spatula for mixing. I also recommend a sharp knife for slicing kielbasa and onion. A cutting board is essential for prep. You may want measuring cups for the cheese and sour cream. Having these tools makes cooking easier and more fun! When it's time to serve, think about the presentation. You can serve directly from the crockpot for a casual feel. This also keeps it warm. For a fancier touch, use individual bowls. Top each bowl with extra cheese and a dollop of sour cream. Fresh chives add a pop of color. Pair this dish with a simple green salad for balance. Enjoy every bite! {{image_4}} If you want a meat-free version, skip the kielbasa. You can add mushrooms or spinach for extra flavor. Use a mix of veggies like bell peppers and zucchini for a fresh twist. You can keep the other ingredients the same. This way, you still get that creamy and cheesy goodness. Cheese can change the whole dish. Instead of cheddar, try mozzarella for a milder taste. Gouda brings a rich flavor, while feta adds a nice tang. You can mix different cheeses too! Just make sure to use enough to keep it creamy and delicious. Get creative with toppings! You can sprinkle crispy bacon bits for crunch. Fried onions add a great texture. Consider fresh herbs like parsley or dill for a burst of flavor. A drizzle of hot sauce can give it a kick. These small additions can make your casserole even more special. For the full recipe, check out the details above. After enjoying your Crockpot Pierogi Casserole with Kielbasa, let it cool down. Transfer any leftovers into an airtight container. This helps keep your meal fresh and tasty. You can store it in the fridge for up to four days. When you're ready to eat, check for any signs of spoilage before warming it up. If you want to save some for later, this casserole freezes well. Use a freezer-safe container or heavy-duty freezer bags. Make sure to remove as much air as possible. Label the container with the date, and it will keep for up to three months. To avoid freezer burn, wrap the dish tightly with plastic wrap before sealing. To reheat your casserole, you have two great options. If you're in a hurry, use the microwave. Place a portion in a microwave-safe dish and heat it for 2-3 minutes. If you prefer a crispy top, bake it in the oven. Preheat the oven to 350°F (175°C) and heat for about 20-25 minutes. Cover the dish with foil to keep it moist, then remove it for the last few minutes to crisp the top. Enjoy every last bite! Yes, you can use fresh pierogies. They will cook well in the crockpot. Just layer them as you would with frozen ones. Fresh pierogies often have a softer texture. You may want to reduce the cooking time slightly. Check them after about 4 hours on low. To make this dish gluten-free, use gluten-free pierogies. Many brands offer gluten-free options now. Ensure your kielbasa is also gluten-free; check the label. Use gluten-free sour cream and spices. Always read ingredient labels to be sure. This casserole pairs well with several sides: - A light green salad for freshness - Steamed broccoli for color and nutrition - Applesauce for a sweet touch - Pickled vegetables for a tangy taste These sides complement the rich flavors of the casserole. Enjoy your meal with a variety of textures and tastes! In this blog post, we've covered the key ingredients for your Crockpot Pierogi Casserole. You learned step-by-step instructions for layering and cooking. I shared tips for perfect flavor and important cooking tools. We discussed variations to suit any diet and how to store leftovers. Try these ideas to make your meal special. Enjoy your cooking and have fun sharing with family and friends!

Crockpot Pierogi Casserole with Kielbasa Delight

Welcome to the delicious world of Crockpot Pierogi Casserole with Kielbasa Delight! If you love comfort food that’s easy to

- 4 bone-in pork chops, approximately 1-inch thick - 4 large russet potatoes, thinly sliced - 1 large onion, thinly sliced - 3 cloves garlic, minced - 1 cup heavy cream - 1 cup chicken broth - 1 teaspoon dried thyme - 1 teaspoon paprika - Salt and freshly ground black pepper to taste - 2 tablespoons olive oil - 1 cup shredded sharp cheddar cheese - Fresh parsley, chopped (for garnish) - Fresh herbs such as rosemary or sage - Additional cheese varieties for topping - Sour cream for creaminess Gathering the right ingredients is key to making a great dish. I always recommend using fresh and high-quality items. For the pork chops, I prefer bone-in for more flavor. Thick, juicy chops work best. You want them to stay tender during cooking. For the potatoes, go with russets. They get creamy and soft when baked. Onions and garlic add layers of flavor. The heavy cream and chicken broth create a rich sauce. Don’t forget the spices! Thyme and paprika add warmth and depth. Always season your dish well with salt and pepper. For an extra kick, consider fresh herbs like rosemary. You can also mix in different cheeses for a fun twist. Sour cream can add a nice creamy texture if you like. This dish is all about your taste and creativity. If you're ready to cook, check the full recipe for steps to bring it all together. Enjoy the process and have fun! Preheat your oven to 375°F (190°C). This step is key for even cooking. Next, grease a 9x13-inch casserole dish with olive oil. A non-stick spray works too. Greasing helps prevent sticking, making serving easier. Take the bone-in pork chops and season them. Use salt, pepper, dried thyme, and paprika. Rub the spices on both sides for full flavor. In a large skillet, heat olive oil over medium heat. Sear the pork chops for 3-4 minutes on each side. Look for a nice golden brown color. Once done, set them aside on a plate. In the same skillet, add the sliced onions and minced garlic. Sauté them over medium heat for about 3 minutes. Stir occasionally until the onions are soft and translucent. This releases great flavors into the oil. You want the garlic to become fragrant, but not burnt. In a bowl, whisk together heavy cream and chicken broth. This mixture ties everything together. Start layering the casserole: first, place half of the sliced potatoes evenly in the dish. Then, sprinkle half of the sautéed onions and garlic over the potatoes. Drizzle half of the cream mixture on top. Don’t forget to season lightly with salt and pepper between layers for depth. Now, cover the dish tightly with aluminum foil. This traps moisture and helps cook the potatoes. Bake it in the preheated oven for 40 minutes. After that time, check the casserole. The potatoes should feel tender. Carefully remove the foil, being cautious of hot steam. Sprinkle shredded cheddar cheese evenly on top. Return the dish to the oven for an additional 15-20 minutes. You want the cheese to melt and bubble up. Once done, let the casserole rest for 5-10 minutes. This helps the layers set nicely. Garnish with chopped parsley for a fresh touch. For the complete recipe, check the Full Recipe section. To make your pork chops tender, start by seasoning them well. Use salt, pepper, thyme, and paprika. Searing adds a nice crust. Heat olive oil in a skillet, then cook each chop for 3-4 minutes on both sides. Aim for an internal temperature of 145°F (63°C). This keeps them juicy and safe to eat. For a creamy mix, consider adding fresh herbs. Rosemary or sage can boost the flavor. When it comes to potatoes, russets work best. They become soft and creamy during baking, which adds a great texture to the dish. Thin slices allow for even cooking and blending with the cream. Serve the casserole in individual plates. This makes it look fancy and inviting. Garnish with fresh parsley on top for a pop of color. Pair with a light green salad to balance the richness. A simple vinaigrette adds freshness and keeps the meal light. Feel free to explore more ideas in the Full Recipe for unique twists! {{image_4}} You might want to make this dish lighter. To do this, swap heavy cream for a lighter cream. You can also use low-fat cheese for a healthier touch. If you need a gluten-free option, simply check the broth for gluten. Most chicken broth brands are gluten-free, but always read labels. Adding spices can give this dish a unique flair. Try garlic powder, onion powder, or even a bit of cayenne for heat. Different cheeses can change the taste too. Use mozzarella for a mild flavor or pepper jack for a kick. You can also add veggies like spinach or bell peppers. They add both color and nutrition to your casserole. If you prefer a slow cooker, you can make this dish without the oven. Just layer everything in the slow cooker and cook on low for 6-8 hours. For a quicker option, use an Instant Pot. Sear the pork chops first, then layer your ingredients inside the pot. Cook on high pressure for about 30 minutes. These methods save time and still deliver great taste. For the full recipe, check out the [Full Recipe]. After enjoying your savory pork chops and potatoes casserole, store leftovers properly. For refrigeration, place the casserole in an airtight container. Make sure it cools to room temperature first. If you plan to keep it longer, freeze it. Use freezer-safe containers or heavy-duty freezer bags. Remove as much air as possible to prevent freezer burn. Reheat your casserole for the best taste and texture. The oven is the best method. Preheat it to 350°F (175°C). Cover the dish with foil to keep it moist. Heat for about 25-30 minutes. You can also use the microwave. Heat in short bursts, stirring in between, for about 5-7 minutes. Make sure it’s hot all the way through. In the fridge, your casserole lasts about 3-4 days. If you freeze it, it can keep for up to 3 months. After that, the taste and texture may fade. Always check for signs of spoilage before eating leftovers. Trust your nose; if it smells off, it’s best to toss it. I love serving this casserole with simple sides. Here are some great ideas: - Steamed green beans - Roasted Brussels sprouts - A fresh garden salad - Creamy coleslaw These sides add color and balance to the meal, making it more enjoyable. Yes, you can make this casserole ahead of time! Here’s how: 1. Prepare the Casserole: Follow the recipe until the baking step. 2. Cover and Refrigerate: Wrap it tightly in foil or plastic wrap. 3. Bake When Ready: Just pop it in the oven when you're ready to eat. Bake for about 45-60 minutes. Check if it’s hot all the way through. This makes dinner planning much easier! This casserole serves about 4 to 6 people. It depends on portion sizes, of course. If you have big eaters, you might want to serve it with extra sides. Absolutely! Here are a few tips to add some heat: - Add Red Pepper Flakes: Sprinkle some on the pork chops before searing. - Use Spicy Paprika: Swap regular paprika for a spicy variety. - Mix in Hot Sauce: Blend some hot sauce into the cream mixture. These changes will give your casserole a nice kick! I recommend using bone-in pork chops. They provide more flavor and stay juicy. Boneless pork chops work too, but they can dry out more easily. Choose chops that are about 1-inch thick for the best results. Yes, you can! Here are some non-dairy options: - Coconut Milk: Use canned coconut milk instead of heavy cream. - Nut Milk: Almond or soy milk can replace cream or broth. - Dairy-free Cheese: Use a dairy-free cheese for topping. These swaps keep the dish creamy and tasty without dairy. For the [Full Recipe], check out the earlier sections! This blog post covered a flavorful pork chops and potatoes casserole. You learned about essential ingredients, cooking steps, and tips for success. Don’t forget the optional ingredients to enhance flavors! Consider trying variations for different tastes or dietary needs. Proper storage can keep your leftovers fresh and tasty. Enjoy making this easy dish that’s great for any meal. Your family will love it!

Savory Pork Chops and Potatoes Casserole Delight

If you’re looking for a warm, hearty meal, you’ve come to the right place! Our Savory Pork Chops and Potatoes

- 4 boneless, skinless chicken breasts - 5 cloves garlic, minced - 1 tablespoon fresh rosemary, finely chopped - 1 tablespoon fresh thyme, finely chopped - Zest of 1 lemon - 1 cup orzo pasta - 3 cups low-sodium chicken broth

Garlic Herb Chicken with Lemon Orzo Delight

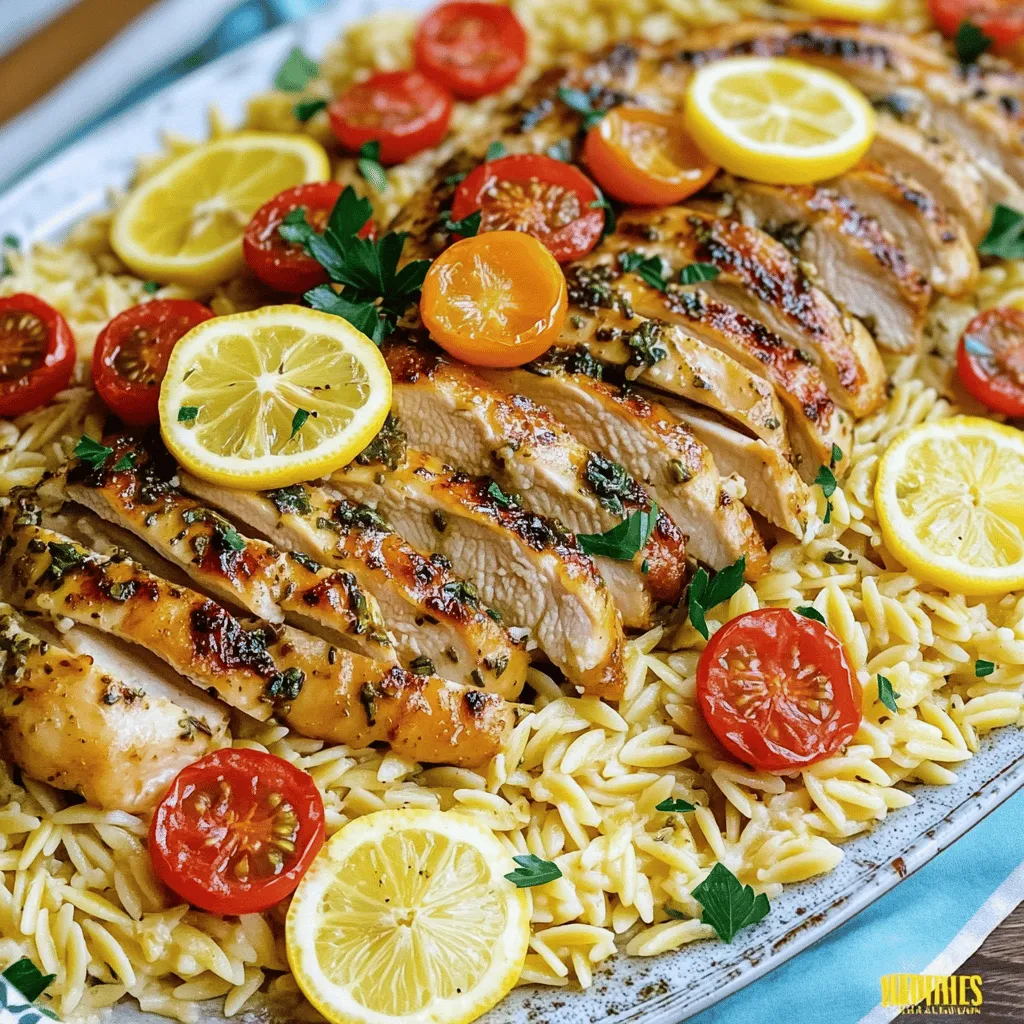
Are you ready to impress your family with a delicious Garlic Herb Chicken with Lemon Orzo? This recipe combines juicy

- 4 cups all-purpose flour - 1 packet (2 1/4 tsp) active dry yeast - 1/2 cup whole milk, warmed - 1/4 cup granulated sugar - 1/4 cup unsalted butter, melted - 2 large eggs, at room temperature - 1 teaspoon salt - 1 tablespoon ground cinnamon - 1/2 cup brown sugar, packed - 1/2 cup unsalted butter, softened (for filling) - 1/2 cup powdered sugar (for icing) - 2 tablespoons cream cheese, softened (for icing) - 1-2 tablespoons milk (for icing)

Homemade Cinnamon Roll Irresistible Comfort Food Treat

There’s nothing quite like the scent of warm cinnamon rolls filling your kitchen. In this guide, I’ll show you how

- 4 boneless, skinless chicken thighs - 1 cup long-grain white rice - 2 cups chicken broth

Dump-and-Bake Chicken Tzatziki with Rice Delight

Welcome to a delicious twist on dinner! In this post, I’ll show you how to create a simple Dump-and-Bake Chicken

Older posts
Newer posts
← Previous Page1 … Page36 Page37 Page38 Next →

dsad

© 2025 recipetorch • Built with GeneratePress

Our Policies

  • Copyright Policy
  • Cookie Policy
  • GDPR Policy
  • Privacy Policy
  • Disclaimer
  • Terms Of Use

More Information

  • Home
  • About
  • Contact
  • Appetizers
  • Dessert
  • Dinner
  • Drinks
©2025, recipetorch About Back To Top