Skip to content
DisclaimerTerms Of UseGDPR PolicyCookie Policy

recipetorch

  • Home
  • Drinks
  • Appetizers
  • Dinner
  • Dessert
  • About
  • Contact
  • Privacy Policy
DisclaimerTerms Of UseGDPR PolicyCookie Policy

Nicole

- Heat 2 tablespoons of unsalted butter in a large skillet over medium heat. - Allow the butter to melt completely. - Once melted, add 5 cloves of minced garlic. Sauté for about 1 minute. - Stir until the garlic smells great and turns golden. - Next, add 1 pound of peeled and deveined shrimp. - Season with salt, black pepper, and 1 teaspoon of smoked paprika. - Cook for 2-3 minutes, stirring gently. Shrimp should turn pink and opaque. - Carefully remove the shrimp from the skillet and set aside. - In the same skillet, add the remaining 2 tablespoons of butter. - Pour in 1 cup of heavy cream. Stir to mix until it simmers. - Add 1 teaspoon of fresh lemon juice. If you like it spicy, add 1/2 teaspoon of red pepper flakes. - Stir for 2-3 minutes. Let the sauce thicken a bit. - Return the cooked shrimp to the skillet. Toss them in the creamy sauce. - Heat through for another minute to warm the shrimp. - Taste the sauce and adjust seasoning with more salt or pepper if needed. - Serve over cooked pasta or rice. Garnish with fresh chopped parsley. - For a nice touch, drizzle extra sauce over the dish. For the complete guide on making this dish, refer to the Full Recipe. - How to know when shrimp are done: Shrimp cook fast. They turn pink and curl up. Cook shrimp for 2-3 minutes. When they are opaque, they are ready to eat. Check them closely to avoid overcooking. Overcooked shrimp become rubbery and tough. - Importance of not burning garlic: Garlic adds great flavor. You want it golden, not brown. Cook garlic for 1 minute until fragrant. If garlic burns, it tastes bitter. This can ruin your dish. Keep the heat at medium and stir often. - Best sides to pair with creamy garlic butter shrimp: This dish shines with pasta or rice. Serve it over fettuccine or jasmine rice. You can also add steamed vegetables like broccoli or green beans for color and crunch. A fresh salad with lemon vinaigrette complements the meal well. - Presentation ideas for a restaurant-style dish: Make it look fancy! Serve the shrimp on a large plate. Drizzle extra sauce over the top. Garnish with fresh parsley and lemon wedges. Use a nice bowl to show off your meal. This makes it feel special. - How to store leftovers: Let the shrimp cool down. Place them in an airtight container. Store in the fridge for up to 2 days. If you have a lot, you could freeze them. However, be aware that freezing may change their texture. - Best reheating techniques to maintain flavor: When reheating, do it gently. Use a skillet over low heat. Add a splash of cream or broth to keep it moist. Stir often until warmed. Avoid the microwave, as it can make shrimp rubbery. {{image_4}} You can make this dish spicy by adding more red pepper flakes. Start with 1/2 teaspoon and adjust to your taste. If you love heat, try adding hot sauce too. A few dashes can transform the dish. Just stir it into the cream sauce for a zesty kick. Mixing in veggies is a great way to enhance this meal. Spinach or bell peppers work well. Add spinach at the end to wilt it down. For bell peppers, add them early to cook through. Adjust cooking times based on the type of vegetable you choose. This adds color and nutrition to your dish. If you want a low-carb version, use cauliflower rice or zucchini noodles. Cauliflower rice is light and fluffy, perfect for soaking up the sauce. Zucchini noodles are also a great choice. Just sauté them for a few minutes until tender. You can still enjoy this creamy dish without the carbs. Try these variations to keep things exciting! For the full recipe, check the earlier section. Each serving of creamy garlic butter shrimp has about 400 calories. It contains roughly 25 grams of protein. The dish also has around 30 grams of fat and 7 grams of carbohydrates. This meal provides a good balance of protein and healthy fats, making it satisfying. Shrimp is low in calories and high in protein. It offers essential nutrients like selenium, vitamin B12, and iodine. Garlic boosts the immune system and may lower blood pressure. To make this dish healthier, you could use less butter or swap heavy cream for a lighter option, like Greek yogurt. Shrimp is a common allergen. Those with shellfish allergies should avoid this dish. For gluten-free options, serve it over rice instead of pasta. To make it dairy-free, use coconut cream in place of heavy cream and omit the butter. You can still enjoy a creamy texture with these swaps. To make creamy garlic butter shrimp, follow these steps: 1. Melt butter in a skillet over medium heat. 2. Sauté minced garlic until fragrant. 3. Add the shrimp and season with salt, pepper, and paprika. 4. Cook shrimp until they turn pink. 5. Remove shrimp and set aside. 6. Add more butter and heavy cream to the skillet. 7. Stir in lemon juice and red pepper flakes. 8. Return shrimp to the skillet and coat in the sauce. 9. Adjust seasoning and serve over pasta or rice. This dish is quick and easy, taking about 20 minutes from start to finish. The creamy sauce pairs perfectly with the shrimp, creating a comforting meal. You can find the Full Recipe to guide you through the process step by step. You can serve creamy garlic butter shrimp with several side dishes. Here are some tasty ideas: - Cooked pasta, like spaghetti or fettuccine - Fluffy rice, either white or brown - Steamed vegetables, such as broccoli or green beans - Crusty bread to soak up the sauce - A fresh salad with a light vinaigrette These options complement the rich flavors of the shrimp and add variety to your meal. Yes, you can use frozen shrimp for this recipe. Here’s how to do it: 1. Thaw the shrimp in the fridge overnight or place them in a bowl of cold water for quick thawing. 2. Once thawed, peel and devein the shrimp if needed. 3. Cook them as you would fresh shrimp, following the same steps. Using frozen shrimp is a great option when fresh shrimp is not available. Just ensure they are fully thawed before cooking for best results. In this blog post, we explored how to make creamy garlic butter shrimp, from selecting fresh ingredients to cooking tips and serving ideas. You learned valuable techniques to create a flavorful meal everyone will love. Remember, simple steps can yield excellent dishes. Keep experimenting with variations, like adding veggies or adjusting spice levels. Whether for yourself or guests, this dish is sure to impress. Enjoy your cooking journey, and make it tasty!

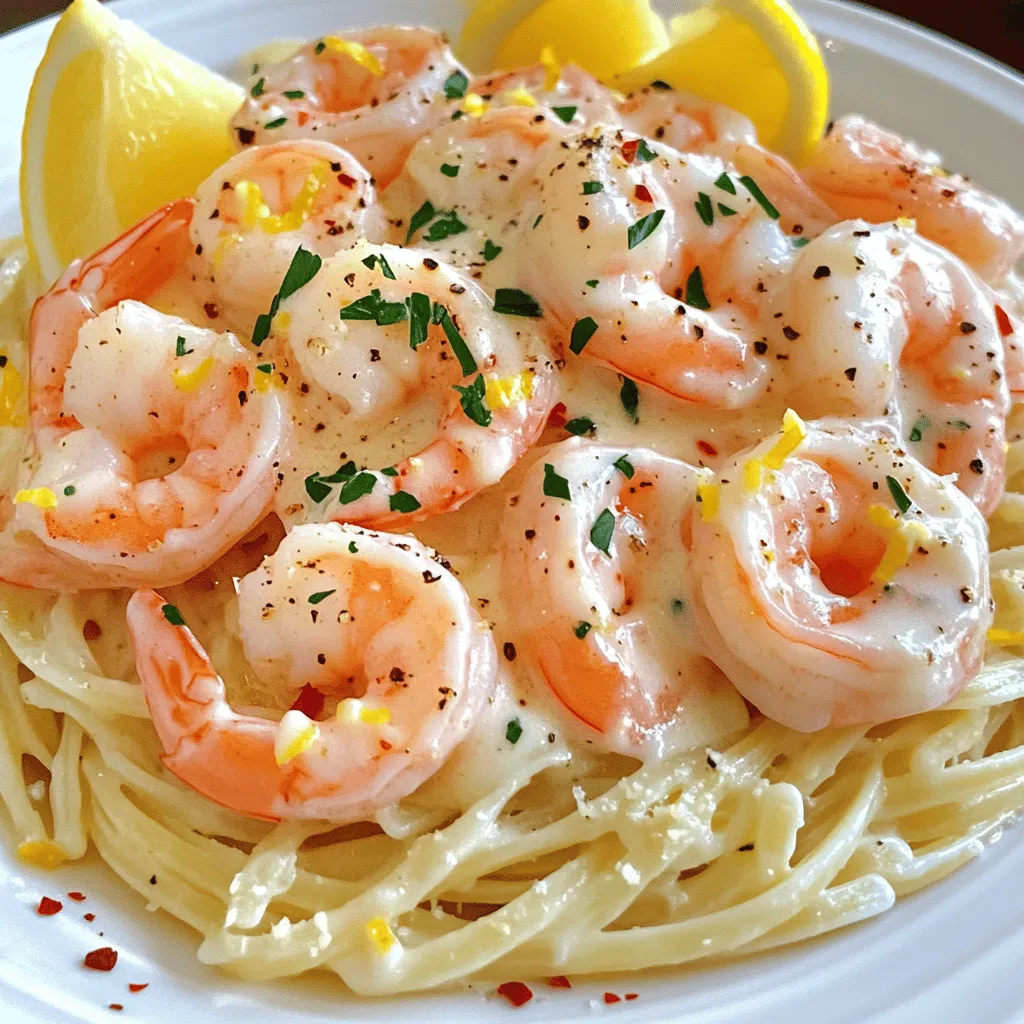
Creamy Garlic Butter Shrimp Tasty and Simple Meal

Are you ready to impress with a dish that’s both tasty and simple? Creamy Garlic Butter Shrimp combines large shrimp,

- 1 lb large shrimp, peeled and deveined - 2 cups fresh broccoli florets - 2 tablespoons soy sauce - 1 tablespoon Sriracha - 1 tablespoon honey - 1 teaspoon sesame oil - 1/2 teaspoon fresh ginger, grated - 1 tablespoon olive oil - 2 cloves garlic, finely minced - 1 tablespoon sesame seeds (for garnish) - 2 green onions, chopped (for garnish) The key to this dish is fresh, high-quality shrimp and vibrant broccoli. The shrimp should be large and juicy. I always choose shrimp that are peeled and deveined for ease. Fresh broccoli adds a nice crunch and color. The sauce brings it all together. The soy sauce gives umami, while Sriracha packs a punch. Honey balances the heat, and sesame oil adds depth. Grated ginger enhances the flavor, making it aromatic. You can also play with the ingredients. Add more Sriracha for heat or swap honey for maple syrup for a vegan option. My secret? A sprinkle of sesame seeds and green onions on top. They add a special touch that makes the dish shine. For the full recipe, check the section above. You’ll find all the steps to make this tasty dish. - Rinse shrimp and pat dry - Cut broccoli into bite-sized florets First, you need to rinse the shrimp well. Use cold water to wash off any grit. After rinsing, pat them dry with paper towels. This step helps the shrimp sear nicely. Next, take fresh broccoli and cut it into small, bite-sized florets. This makes it easy to eat and helps it cook evenly. - Steam broccoli for 3-4 minutes until bright green Now, let’s cook the broccoli. In a saucepan, bring about 1 inch of water to a boil. Place the broccoli in a steamer basket on top of the boiling water. Cover the pot tightly. Steam for about 3 to 4 minutes. You want the broccoli to be bright green and a bit crisp. Once done, remove it from the heat and set it aside. - Sauté garlic, then add shrimp until pink and opaque Next, heat a large skillet over medium-high heat. Add olive oil and let it heat up until it shimmers. Then, add minced garlic to the pan. Sauté for about 30 seconds. You want the garlic to smell good but not brown too much. After that, add the shrimp. Cook for about 2 to 3 minutes. Turn them so they cook evenly. They are done when they turn a lovely pink and are opaque. - Whisk sauce components and pour over shrimp - Gently fold in steamed broccoli While the shrimp cooks, whisk together soy sauce, Sriracha, honey, sesame oil, and grated ginger in a small bowl. Pour this sauce over the shrimp in the skillet. Make sure every shrimp gets coated. Then, gently fold in the steamed broccoli. Stir carefully to mix everything. Cook together for about 2 minutes, allowing the flavors to blend. - Cook together and garnish before serving Once everything is cooked, remove the skillet from the heat. To finish, sprinkle sesame seeds and chopped green onions on top. This adds texture and flavor. Serve your savory 20-minute Sriracha shrimp and broccoli dish hot, over rice or noodles for a complete meal. For the full recipe, check out the detailed instructions above. To keep broccoli fresh and tasty, steaming is best. Here’s how to do it right: - Prep the Broccoli: Cut the broccoli into small, bite-sized florets. This helps it cook evenly. - Steam: Boil water in a saucepan. Place the broccoli in a steamer basket above the boiling water. Cover and steam for 3-4 minutes. The broccoli should be bright green and still crisp. This method locks in nutrients. For shrimp, you want them cooked just right: - Prep the Shrimp: Rinse and dry the shrimp well. This ensures they cook evenly. - Sauté: In a hot skillet, add olive oil. Once hot, toss in minced garlic. After about 30 seconds, add the shrimp. Cook until they turn pink and opaque, usually 2-3 minutes. Adjusting the spice level can make this dish fit your taste: - Spice It Up: Add more Sriracha if you like heat. Start with a little, then taste and add more. - Cooling Garnishes: Try adding a dollop of sour cream or yogurt. This can balance the heat. You can also add garnishes for extra flavor: - Fresh Herbs: Cilantro or basil can add a fresh kick. - Crunchy Elements: Peanuts or cashews provide a nice texture contrast. Pair your dish with sides for a complete meal: - Rice or Noodles: Serve the shrimp and broccoli over white rice or noodles. They soak up the sauce well. - Meal Prep: This dish is great for lunches. Store in containers with rice or noodles for easy grab-and-go meals. For the full recipe, check out the detailed steps above. Enjoy your cooking! {{image_4}} You can easily change proteins in this dish. Chicken works well if you prefer it over shrimp. Tofu is a great plant-based choice. It absorbs the sauce's flavor nicely. For veggies, consider using snap peas, bell peppers, or green beans. They add color and crunch. Customizing the sauce can take this dish to new heights. Add lime or lemon juice for a fresh twist. Fresh herbs like cilantro or basil give a nice lift too. If you want more heat, try adding chili flakes or more Sriracha. You can even mix in peanut butter for a creamy touch. If you're short on time, try the sheet pan method. Just toss everything on a pan and bake. Cleanup is simple, as it all cooks together. For a hands-off approach, use a slow cooker. Cook the shrimp and broccoli on low for a few hours. This method lets the flavors blend beautifully. For the full recipe, check out the detailed instructions to make this dish shine. To keep your cooked shrimp and broccoli fresh, follow these tips: - Place leftovers in an airtight container. - Store them in the fridge within two hours of cooking. - Enjoy them within three days for best taste and safety. Reheat leftovers gently to maintain texture. Here are some methods: - Microwave: Use a microwave-safe dish, cover it with a damp paper towel, and heat in 30-second intervals. Stir in between to avoid hot spots. - Stovetop: Heat a non-stick skillet over low heat. Add a splash of water or broth to help steam the dish. Stir often to keep the shrimp from overcooking. To prevent shrimp from becoming rubbery, heat just until warmed through. If you want to store your dish long-term, freezing is a great choice. - Let the shrimp and broccoli cool completely before freezing. - Pack them in a freezer-safe container or bag, removing as much air as possible. - Label the container with the date and freeze for up to three months. When you are ready to use them: - Thaw in the fridge overnight or use the microwave's defrost setting. - Cook the shrimp immediately after thawing for the best texture. For the full recipe, check the above sections. Enjoy your meals! This dish takes just 20 minutes total. You need about 10 minutes to prep and 10 minutes to cook. It’s a quick meal for busy nights. You can easily fit it into your schedule. Yes, you can use frozen shrimp. Just thaw them before cooking. Rinse and pat them dry. Frozen shrimp may need a bit more time to cook. Make sure they turn pink and opaque. Yes, this dish works great for meal prep. You can make it ahead and store it in the fridge. It stays tasty for a few days. Just reheat it for a quick meal later. This way, you save time during your busy week. This dish pairs well with rice or noodles. You can also serve it with a fresh salad. If you want a crunch, try adding some toasted nuts. These sides balance the flavors and make your meal complete. Absolutely! If you like it spicy, add more Sriracha. For less heat, cut back on the Sriracha. You can also add some honey to balance the spice. Adjust it to your taste for the best experience. This dish combines shrimp and broccoli with a zesty sauce for a tasty meal. You learned the main ingredients, cooking steps, and helpful tips. Remember, you can adjust flavors and ingredients to match your taste. Whether you choose to meal prep or enjoy it fresh, this recipe is versatile. Feel free to experiment with different proteins or sauces to keep things exciting. Make this dish yours and enjoy every bite!

Savory 20-Minute Sriracha Shrimp and Broccoli Dish

Are you ready to whip up a delicious meal in just 20 minutes? This Savory 20-Minute Sriracha Shrimp and Broccoli

- 1 cup all-purpose flour - 2 tablespoons granulated sugar - 1 teaspoon baking powder - 1/2 teaspoon baking soda - 1/4 teaspoon salt - 1 cup buttermilk - 1 large egg - 2 tablespoons melted unsalted butter - 1 teaspoon vanilla extract - 1/4 cup packed brown sugar - 1 tablespoon ground cinnamon - 2 tablespoons unsalted butter, softened - 4 ounces cream cheese, softened - 1/2 cup powdered sugar - 2 tablespoons milk - 1 teaspoon vanilla extract These ingredients create the perfect mix for a delightful breakfast. The main pancake mix is simple and classic. The cinnamon swirl adds that sweet twist. Finally, the cream cheese glaze ties everything together beautifully. When you gather these ingredients, ensure they are fresh. Fresh ingredients give the best taste. I suggest using real buttermilk for a rich flavor. If you don't have buttermilk, mix regular milk with vinegar as a substitute. The cinnamon swirl is a game-changer. It transforms a basic pancake into a cinnamon roll delight. The cream cheese glaze adds a creamy finish that makes these pancakes irresistible. For the full recipe, refer to the details provided earlier. Enjoy the process of making these pancakes as much as you enjoy eating them! - Mix 1/4 cup brown sugar and 1 tablespoon ground cinnamon in a small bowl. - Add 2 tablespoons of softened butter to this mixture. Blend until smooth. - In a large bowl, whisk together 1 cup of flour, 2 tablespoons sugar, 1 teaspoon baking powder, 1/2 teaspoon baking soda, and 1/4 teaspoon salt. - In another bowl, mix 1 cup buttermilk, 1 large egg, 2 tablespoons melted butter, and 1 teaspoon vanilla extract. - Pour the wet ingredients into the dry mixture. Stir gently until just combined. - Preheat your griddle or skillet over medium heat. - Lightly grease the surface with butter or cooking spray. - Pour 1/4 cup of batter onto the griddle. - Immediately drizzle the cinnamon swirl mixture over the batter in a spiral pattern. - Cook until small bubbles form on the surface, about 2-3 minutes. - Flip the pancake and cook for another 2 minutes, until golden brown. - Repeat with the remaining batter. For the complete process, check the Full Recipe. To achieve fluffy pancakes, you must avoid overmixing the batter. When you mix too much, the pancakes can turn tough. Gently combine the wet and dry ingredients until just mixed. This keeps the pancakes light. Next, let’s talk about griddle temperature. Heat your griddle to medium. If it's too hot, the pancakes can burn before cooking through. You want a nice golden brown color. A drop of water should sizzle when you test the temperature. For the best cinnamon swirls, use a squeeze bottle. This helps control how much you add and where it goes. If you don't have one, a spoon works, but it can be less precise. Timing is key when adding the swirl. Drizzle the cinnamon mixture right after you pour the batter onto the griddle. This ensures the swirl cooks right into the pancake, making it look beautiful and taste amazing. To get the right consistency for your cream cheese glaze, start with softened cream cheese. Beat it until smooth. Gradually add powdered sugar and milk. This helps create a pourable glaze that coats the pancakes nicely. For flavor enhancement, you can add a pinch of salt or a splash of lemon juice. This balances the sweetness and adds depth. You might also try adding vanilla extract or even a bit of maple syrup for a different twist. For the full recipe, check out the detailed steps to create these delightful breakfast treats! {{image_4}} You can make cinnamon roll pancakes even more fun. Adding chocolate chips gives a sweet twist. Just sprinkle them on the batter before flipping. You can also add nuts or fruit. Chopped apples or pecans mix well with the cinnamon flavor. Both options add texture and taste to your pancakes. While the cream cheese glaze is a hit, you have other choices. A drizzle of maple syrup brings a classic touch. You can also use honey or nut butter for a different flavor. Each option adds a unique taste to your pancakes. Experiment with what you love best. If you need gluten-free pancakes, swap the flour for a gluten-free mix. Many brands work well in this recipe. For vegan options, use plant-based milk and replace the egg with flaxseed meal or applesauce. These swaps help you enjoy delicious pancakes while meeting your dietary needs. For the full recipe, check out the detailed instructions to create your perfect cinnamon roll pancakes. To keep your leftover pancakes fresh, place them in an airtight container. If you stack them, add parchment paper between layers. This helps prevent sticking. Store the container in the fridge. Your pancakes will stay fresh for about 3 to 4 days. To freeze your cinnamon roll pancakes, let them cool completely first. Then, place them in a single layer on a baking sheet. This stops them from sticking together. Once frozen, transfer them to a freezer bag. They can last up to 2 months in the freezer. To thaw, take them out and let them sit in the fridge overnight. For reheating, use a microwave or a skillet. Heat them until warm, but be careful not to overcook. For the cream cheese glaze, you should store it in a sealed container. Keep it in the fridge. The glaze will last for about 1 week. If it thickens, simply stir in a little milk to bring it back to a pourable consistency. To make your pancakes fluffier, focus on a few key techniques. - Use fresh baking powder for a strong rise. - Whip the egg whites separately and fold them in gently. - Avoid overmixing; mix just until combined for a lighter texture. - Let the batter rest for 10 minutes before cooking. This helps with air pockets. These small steps can lead to big changes in pancake fluffiness. Yes, you can prepare the batter in advance. Here are the best practices for storing it: - Mix the wet and dry ingredients separately. - Combine them just before you are ready to cook. This keeps the pancakes light. - If you must store, cover the bowl tightly and keep it in the fridge for up to 24 hours. Before cooking, stir gently to reincorporate any settled ingredients. If your pancakes turn out chewy, adjust your ingredients for better texture. - Reduce the amount of flour slightly. Too much flour can lead to chewiness. - Ensure you use the right measurement for liquids. Too little can also cause a dense pancake. - Mix the batter lightly. Overmixing activates gluten, making pancakes tough. By following these tips, you can achieve the perfect pancake texture. In summary, you now have a guide to making delicious cinnamon roll pancakes. We covered key ingredients, step-by-step instructions, and helpful tips for the perfect stack. Remember to experiment with different flavors and make adjustments to fit your diet. Proper storage keeps these treats fresh longer. Enjoy this fun twist on a classic breakfast!

Cinnamon Roll Pancakes Delightful Breakfast Treat

Welcome to the delicious world of Cinnamon Roll Pancakes! If you love the sweet, gooey goodness of cinnamon rolls but

To make Honey Sriracha Meatballs, gather these simple ingredients: - 1 lb ground beef (or ground turkey) - 1/2 cup breadcrumbs (panko works best) - 1/4 cup grated Parmesan cheese - 1/4 cup finely chopped green onions (plus extra for garnish) - 1 large egg - 2 garlic cloves, minced - 1/4 teaspoon salt - 1/4 teaspoon black pepper - 1 teaspoon minced fresh ginger - 1/4 cup honey - 1/4 cup sriracha sauce - 2 tablespoons low-sodium soy sauce - 1 tablespoon rice vinegar - Sesame seeds for garnish You can swap some ingredients if needed: - Use ground turkey or chicken for a lighter meat. - Replace breadcrumbs with crushed crackers or oats. - Skip Parmesan for a dairy-free option. - For spice, try chili garlic sauce instead of sriracha. - Use agave nectar as a honey substitute in the sauce. When measuring, use dry measuring cups for solids and liquid cups for liquids. - Make sure to pack the breadcrumbs lightly for accurate amounts. - Fresh herbs give the best flavor, but dried ones can work in a pinch. - If you want spicier meatballs, add more sriracha to the mixture. - Keep the meatballs uniform in size to ensure they cook evenly. - For easier cleanup, line your baking sheet with parchment paper. You can find the Full Recipe for more details on cooking steps! - Preheat the Oven First, set your oven to 400°F (200°C). Line a baking sheet with parchment paper. This helps keep the meatballs from sticking. - Making the Meatball Mixture In a large bowl, mix the ground beef, breadcrumbs, Parmesan, and chopped green onions. Add the egg, minced garlic, salt, black pepper, and minced ginger. Use your hands to combine the mixture. Be gentle; overmixing can make tough meatballs. - Forming the Meatballs With clean hands, take a small portion of the mixture. Roll it into a ball about 1 inch wide. Place the meatballs on the lined baking sheet. Make sure to leave space between each meatball for even cooking. - Baking Instructions Place the baking sheet in the oven. Bake the meatballs for 15-20 minutes. They should be fully cooked and golden brown. If you want them crispy, broil for the last 2-3 minutes. - Making the Honey Sriracha Sauce While the meatballs bake, prepare the sauce. In a small saucepan, mix honey, sriracha, soy sauce, and rice vinegar. Heat over medium heat. Whisk constantly for about 5 minutes. The sauce will thicken and blend well. - Coating the Meatballs Once the meatballs are baked, take them out of the oven. Drizzle the honey sriracha sauce over them. Gently toss the meatballs to coat evenly. Return the baking sheet to the oven for another 5-7 minutes. This helps the meatballs absorb the sauce. - Serving Instructions Let the meatballs cool for a few minutes. Then, transfer them to a serving platter. Garnish with sesame seeds and extra chopped green onions. You can serve them warm as an appetizer or over rice for a main dish. For the full recipe, check the section above. - Avoiding Tough Meatballs: To keep your meatballs tender, mix the meat gently. Overmixing can make them tough. Use your hands to combine ingredients just until mixed. - Ensuring Even Cooking: Space each meatball apart on the baking sheet. This helps them cook evenly. If they are too close, they might steam instead of bake. - Additional Herbs and Spices: Try adding fresh herbs like cilantro or parsley. A pinch of paprika or cumin can add a nice twist. Experiment with flavors you enjoy and see what works best. - Adjusting Sweetness and Spice Levels: Taste the honey sriracha sauce before using it. If you prefer it sweeter, add more honey. For extra heat, add more sriracha. Adjust the sauce to fit your taste. - Best Side Dishes: Honey sriracha meatballs pair well with rice or noodles. You can also serve them with a fresh salad. These sides balance the flavors and make a filling meal. - Presentation Tips: To make your dish look great, use a large platter. Arrange the meatballs in a circle and sprinkle sesame seeds and chopped green onions on top. This adds color and makes it inviting. Feel free to check out the Full Recipe for more details on how to make these delicious honey sriracha meatballs! {{image_4}} You can easily swap the ground beef in the recipe. Ground turkey offers a lighter choice. You can also use ground chicken for a milder taste. If you're feeling adventurous, try ground lamb. Each type of meat brings its own flavor. For a vegetarian or vegan version, use lentils or chickpeas. You can also use plant-based meat alternatives. Mix in breadcrumbs, egg substitutes, and spices. This option keeps all the flavors but caters to different diets. The honey sriracha sauce is fantastic, but you can mix it up! Try adding garlic or lime juice for an extra zing. If you love heat, add more sriracha or some chili flakes. Alternatively, use a sweet soy glaze for a different twist. Explore different sauces to find your favorite blend! For the full recipe, check out the complete list of ingredients and steps. After enjoying your honey sriracha meatballs, store any leftovers in an airtight container. Keep them in the fridge for up to three days. This makes it easy to enjoy them later. Just make sure they cool down before sealing. If you want to keep them longer, freezing is a great option. Place the meatballs in a single layer on a baking sheet. Freeze them for about two hours until firm. Once frozen, transfer them to a freezer bag or container. They can last for up to three months in the freezer. Remember to label the bag with the date. To reheat your honey sriracha meatballs, you have a few choices. For oven reheating, preheat it to 350°F (175°C). Place the meatballs on a baking sheet and heat for about 10-15 minutes. You can also use the microwave. Just place them on a microwave-safe plate and heat in short bursts, checking often. Make sure they reach an internal temperature of 165°F (74°C) before serving. Enjoy your cozy meal again! Yes, you can make Honey Sriracha Meatballs ahead of time. You can prepare the meatballs and even bake them. Then, just store them in the fridge for up to 2 days. When you are ready to eat, reheat them in the oven. Drizzle on the honey sriracha sauce before serving. This makes meal prep easy and saves time on busy nights. Honey Sriracha Meatballs pair well with many sides. Here are some great options: - Steamed rice or jasmine rice - Noodles, like lo mein or udon - Fresh vegetables, such as broccoli or snap peas - A simple salad with sesame dressing - Sticky rice for a fun twist These sides balance the sweet and spicy flavors of the meatballs nicely. To adjust the heat level, you can change the amount of sriracha. If you want it milder, use less sriracha. You can also add more honey to sweeten it, which will help tone down the heat. For those who like it hot, add extra sriracha or some red pepper flakes. Taste the sauce before coating the meatballs to find your perfect heat. Yes, you can use other sauces if you prefer. Some tasty alternatives include: - Teriyaki sauce for a sweeter flavor - Barbecue sauce for a smoky taste - Sweet chili sauce for a fruity kick - Soy sauce mixed with garlic and ginger for a savory option Feel free to get creative with your sauce choice! You can mix and match flavors to suit your taste. This article covered everything you need to know about making Honey Sriracha Meatballs. We explored the key ingredients, preparation steps, and cooking tips. You learned about ingredient swaps and how to store your leftovers. You can also try variations, including vegetarian options. Now that you're equipped with solid tips and knowledge, get creative in the kitchen. Enjoy the process and impress your friends and family with your delicious meatballs!

Honey Sriracha Meatballs Cozy and Flavorful Recipe

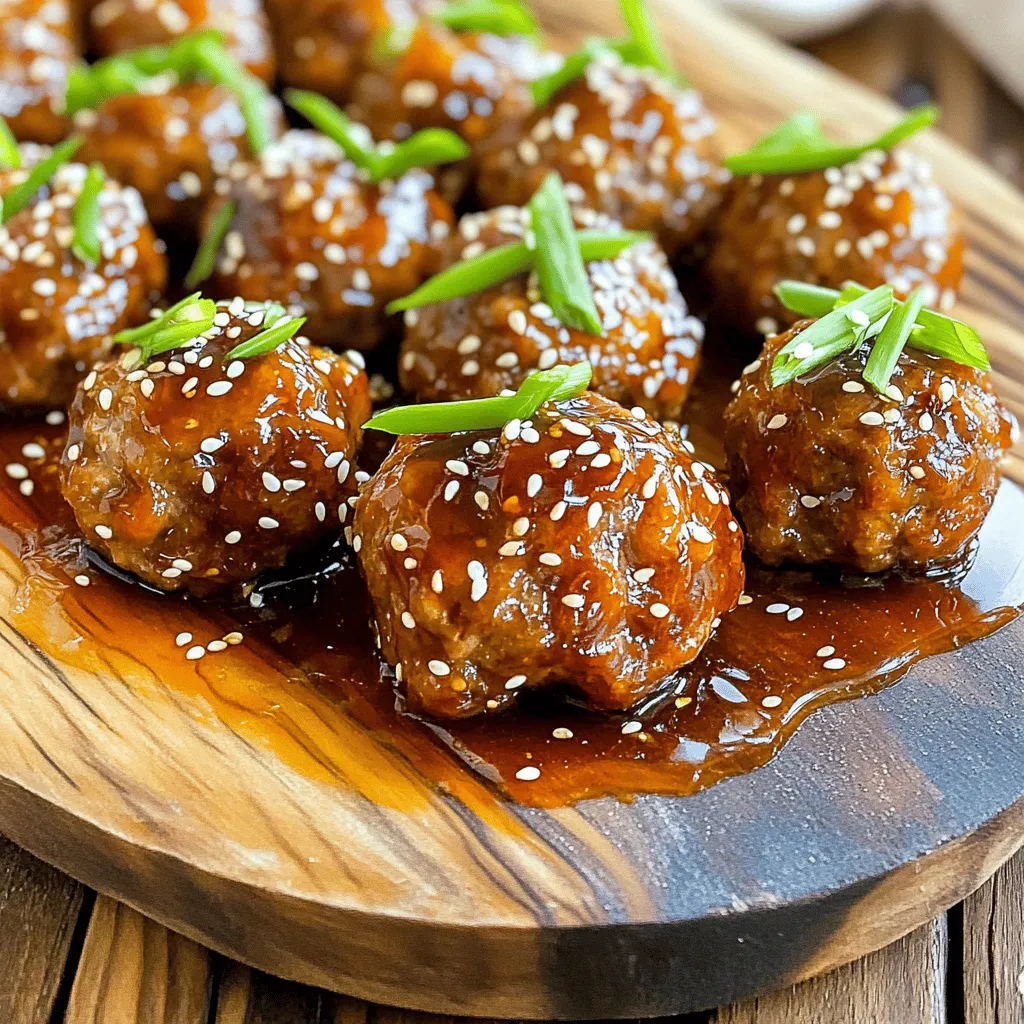
If you’re ready to spice up your dinner routine, you’re in the right place! Honey Sriracha meatballs are a cozy,

To make a tasty vegetable quiche, gather these ingredients: - 1 pre-made pie crust (or homemade if preferred for a personal touch) - 1 cup fresh spinach, chopped - 1 cup mushrooms, sliced - 1 red bell pepper, diced - 1 small zucchini, grated - ½ cup onion, finely diced - 4 large eggs - 1 cup heavy cream - 1 cup shredded cheese (cheddar or your favorite cheese) - 1 teaspoon garlic powder - 1 teaspoon fresh thyme leaves (or ½ teaspoon dried thyme) - Salt and freshly ground black pepper to taste - 1 tablespoon olive oil These ingredients make the quiche rich and full of flavor. The mix of fresh vegetables gives a bright taste. You can choose any cheese you love. I recommend a sharp cheddar for a nice kick. The heavy cream makes it creamy, but you can use milk if you want something lighter. Using a pre-made pie crust saves time, but if you feel adventurous, make your own. A homemade crust can add a special touch. Don’t forget to season well. Salt and pepper enhance all the flavors. This recipe allows for fun and creativity. You can swap veggies based on what you have at home. The full recipe will guide you through the cooking steps. Enjoy the process and make it your own! Start by preheating your oven to 375°F (190°C). This step is key to getting a well-cooked quiche. A hot oven helps the crust become crispy. Always check that the oven rack is in the middle. This ensures even baking. Be careful when you open the oven door to avoid burns. Next, we sauté the vegetables. In a skillet, warm one tablespoon of olive oil over medium heat. Add finely diced onion and sliced mushrooms first. Cook these for about 3 minutes. They need to soften a little. Then, add diced red bell pepper and grated zucchini. Cook for another 2-3 minutes until they are tender. Finally, stir in chopped spinach and cook for 2 more minutes. Season with salt, black pepper, and one teaspoon of garlic powder. This adds great flavor. Once done, remove the skillet from heat and let the veggies cool slightly. In a large bowl, whisk together four large eggs and one cup of heavy cream. Mix until the eggs and cream are fully combined. This creates a creamy base. Add in fresh thyme leaves and half of your shredded cheese. Stir well to blend the flavors. This mixture is the heart of your quiche. Now, gently fold your sautéed veggies into the egg mixture. Ensure they are evenly distributed. This step is important for flavor in every bite. Pour this combined mixture into your prepared pie crust. Sprinkle the remaining cheese on top for a tasty finish. Place your filled quiche in the oven. Bake for 35-40 minutes. You'll know it’s done when the center is set, and the top is golden brown. A knife inserted in the center should come out clean. This shows that your quiche is perfectly baked. Once baked, take the quiche out of the oven. Let it cool for about 10 minutes. Cooling helps the quiche set and makes it easier to slice. Enjoy your delicious quiche warm or at room temperature. For a beautiful presentation, garnish with fresh thyme and serve with a side salad. This adds color and freshness to your meal. For the full recipe, check out the complete guide. To make your quiche fluffy, whisk the eggs and cream well. This adds air and lightness. Use fresh eggs for the best flavor and texture. Don’t overcook your vegetables; they should be tender but not mushy. Be sure to cool them slightly before mixing them with the eggs. Common mistakes include skipping the pre-baking of the crust, which can lead to a soggy bottom. Also, avoid overfilling the crust; leave some space for the quiche to rise. Lastly, check the doneness by inserting a knife. It should come out clean. Garnish your quiche with fresh herbs like thyme or parsley. This adds color and flavor. You can also sprinkle some extra cheese on top for a delightful finish. Serve your quiche with a fresh green salad or sliced tomatoes. This brightens up the dish and adds a refreshing crunch. Another idea is to pair it with a dollop of sour cream or yogurt for creaminess. You can prep the quiche a day before serving. Just assemble it and store it in the fridge. Bake it fresh when you are ready to serve. For reheating, set your oven to 350°F (175°C). Heat the quiche for about 15-20 minutes, until warmed through. This keeps the crust crispy and the filling creamy. Enjoy your Garden Delight Vegetable Quiche at its best! {{image_4}} For those who need gluten-free options, try using a crust made from almond flour or cornmeal. You can also make a crustless quiche. Just grease your pie dish well and pour in the filling directly. If you want a dairy-free recipe, swap heavy cream with almond or coconut milk. For cheese, use vegan cheese or nutritional yeast for a cheesy flavor without dairy. These changes make the quiche fit different diets while keeping the taste great. Using seasonal vegetables makes your quiche fresh and tasty. Try asparagus in spring, tomatoes in summer, or squash in fall. Each season brings new options to explore. For unique flavor combinations, mix roasted red peppers with feta cheese or add fresh herbs like basil and dill. You can even experiment with spicy peppers for a kick! These ideas keep your quiche exciting and full of flavor. If you want to add protein, consider cooked bacon, ham, or chicken. These meats add great taste and make the quiche heartier. For a plant-based option, you can include tofu or tempeh. Both soak up flavors well and add a nice texture. Pair these with herbs like thyme or spices such as paprika to enhance their taste. For the full recipe, check out the Garden Delight Vegetable Quiche 🥧. To keep your quiche fresh, follow these tips: - Refrigeration: Store leftover quiche in an airtight container. It will stay good for about 3-4 days in the fridge. If you want to keep it longer, consider freezing. - Freezing: For freezing, slice the quiche first. Wrap each slice tightly in plastic wrap, then place them in a freezer bag. This way, you can grab just what you need later. Frozen quiche lasts about 2-3 months. When reheating quiche, you want to keep the flavor and texture. Here’s how: - Oven Method: Preheat your oven to 350°F (175°C). Place the quiche on a baking sheet. Cover it with foil to avoid burning the top. Bake for about 15-20 minutes or until heated through. - Microwave Method: If you're short on time, you can use the microwave. Place a slice on a microwave-safe plate. Heat it for 30 seconds to 1 minute. Check to ensure it’s warm but not rubbery. Using these methods, you will enjoy your delicious vegetable quiche again! For the full recipe, check the detailed instructions. You can tell when the quiche is done by a few signs. First, look for a golden-brown top. The center should be set, not wobbly. If you insert a knife into the center, it should come out clean. This means the eggs are fully cooked. If you see any liquid, bake it a bit longer. Once you see these signs, your quiche is ready to enjoy! Yes, you can make a tasty crustless vegetable quiche! Just skip the pie crust and pour the filling directly into a greased pie dish. This option is great for a lighter meal. It also makes it gluten-free! You can bake it the same way and enjoy a delicious quiche without the crust. The best vegetables for quiche are those that add flavor and texture. Here are some popular choices: - Spinach: Mild and adds color. - Mushrooms: Earthy taste with a nice texture. - Bell Peppers: Sweet and crunchy. - Zucchini: Soft with a mild flavor. - Onions: Sweet when cooked and adds depth. Feel free to mix and match your favorites. Fresh or sautéed, they all work well! Vegetable quiche can last about 3 to 4 days in the fridge. Make sure to store it in an airtight container. This keeps it fresh and safe to eat. If you want to save it longer, consider freezing it. It can last up to 2 months in the freezer. Just thaw and reheat before serving. Yes, you can use plant-based milk instead of cream! Almond milk, soy milk, or oat milk all work well. They will change the flavor a bit, but it can still be delicious. Use unsweetened versions for the best taste. The texture might be slightly lighter, but your quiche will still be tasty and satisfying. For the full recipe, check out the Garden Delight Vegetable Quiche 🥧. In this post, I covered how to make a tasty vegetable quiche. We discussed key ingredients, from fresh veggies to the egg mixture. I shared step-by-step instructions for baking your quiche to perfection. You learned tips for storage and serving, plus many variations for dietary needs. Making quiche is fun and versatile, suitable for any occasion. Enjoy your own creations and impress your family and friends with your cooking skills!

Vegetable Quiche Deliciously Simple Recipe Guide

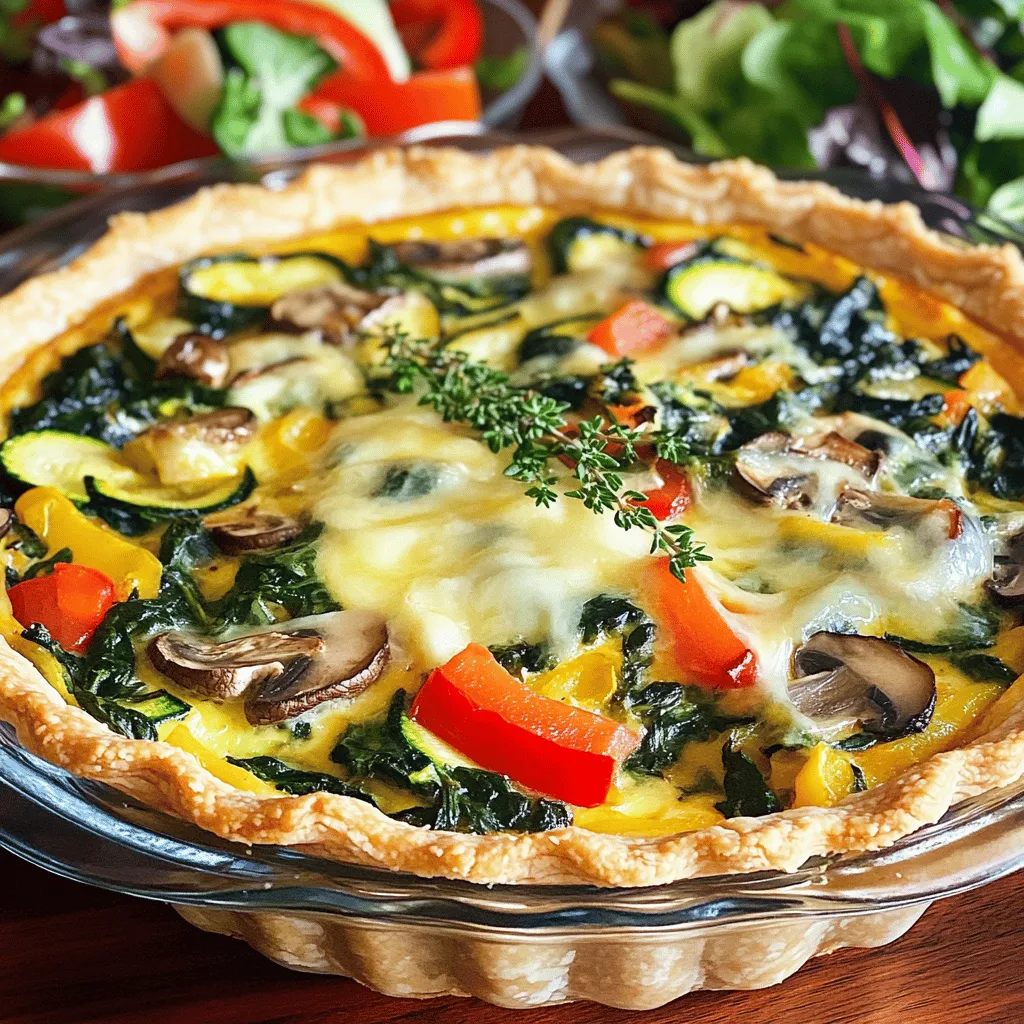
Looking for a tasty and easy meal? This Vegetable Quiche recipe is just for you! With fresh veggies and simple

- 4 boneless, skinless chicken thighs - 1 cup button mushrooms, sliced - 1 cup cremini mushrooms, sliced - 2 tablespoons olive oil - 3 cloves garlic, minced Mushroom chicken starts with juicy chicken thighs. They offer a rich flavor and stay moist. I love using a mix of button and cremini mushrooms. They bring a great taste and texture. Olive oil gives a nice sear, while garlic adds a punch of flavor. - 1 teaspoon dried thyme - 1 teaspoon dried rosemary - 1 teaspoon onion powder - Salt and pepper to taste Seasoning is key for flavor. Dried thyme and rosemary give earthy notes. Onion powder adds sweetness, while salt and pepper enhance everything. Make sure to season the chicken well. This step makes a huge difference in taste. - 1 cup chicken broth - ¼ cup heavy cream - 2 tablespoons fresh parsley, chopped (for garnish) The sauce ties the dish together. Chicken broth adds depth and moisture. Heavy cream makes it rich and creamy. Fresh parsley adds color and freshness. It’s the finishing touch that brightens up the plate. For the full recipe, check out the details above. - Seasoning the chicken thighs Begin by seasoning the chicken thighs. Use salt, pepper, onion powder, dried thyme, and dried rosemary. Make sure to coat both sides well. This step ensures the chicken is full of flavor. - Searing for flavor Heat 1 tablespoon of olive oil in a large skillet. Once hot, add the seasoned chicken thighs. Sear them for about 5-6 minutes on each side. Look for a nice golden brown crust. After searing, remove the chicken and set it aside on a plate. - Sautéing button and cremini mushrooms In the same skillet, add 1 tablespoon of olive oil. Then, add the sliced button and cremini mushrooms. Sauté them for about 4-5 minutes until they turn golden brown. This brings out their rich flavor. - Adding garlic for aroma Stir in the minced garlic. Cook for another minute until the garlic smells fragrant. This adds a wonderful aroma that fills your kitchen. - Combining broth and scraped bits Carefully pour in the chicken broth. Use a wooden spoon to scrape the bottom of the skillet. This helps mix in all the flavorful bits left from the chicken and mushrooms. - Adjusting seasoning Bring the mixture to a gentle simmer. Let it cook for about 2 minutes to blend the flavors. Taste the sauce and adjust seasoning with more salt or pepper if needed. You can find the full recipe to create this savory dish in the previous section. - Choosing the right skillet: Use a heavy skillet for even heat. Cast iron or stainless steel works best. - Timing for golden crust: Sear the chicken thighs for about 5-6 minutes on each side. Look for a rich golden color. - How to thicken or thin sauce: To thicken, simmer the sauce longer or add more cream. To thin, add more chicken broth. - Flavor balancing tips: Taste the sauce as you go. Adjust with salt, pepper, or herbs to enhance the flavor. - Ideal side dishes for Mushroom Chicken: Serve with creamy mashed potatoes or steamed green beans for a balanced meal. - Presentation tips for a beautiful plate: Drizzle sauce over the chicken and garnish with fresh parsley. Use a colorful plate to make it pop. {{image_4}} You can easily switch out rice for pasta. Use your favorite noodles, like fettuccine or penne. Cook the pasta according to the package instructions while you make the chicken. To create a creamy sauce, add more heavy cream and cheese. This adds richness that pairs well with the mushrooms. For a warm, comforting dish, try a casserole. Start by layering the chicken, sautéed mushrooms, and sauce in a baking dish. You can add cooked rice or pasta for heartiness. Cover and bake at 350°F (175°C) for about 30 minutes. Check that the chicken is cooked through before serving. If you want a meat-free option, use mushrooms as the main protein. Shiitake and portobello mushrooms work great. For creaminess, try plant-based cream like coconut or cashew. This keeps the dish rich and satisfying without meat. For more ideas, check the Full Recipe. To keep your mushroom chicken fresh, use airtight containers. Glass containers work well, as they keep the food safe and easy to heat. You can store the dish in the fridge for up to three days. If you want to keep it longer, freezing is a great option. You can reheat mushroom chicken in two ways: the microwave or stovetop. The microwave is quick, but it can dry out the dish. The stovetop is better for keeping moisture. Just add a splash of broth while heating to keep it juicy. To freeze mushroom chicken, let it cool completely before packing it away. Use freezer-safe bags or containers, and remove as much air as possible. For the best results, thaw it in the fridge overnight before reheating. This helps maintain the flavor and texture. Yes, you can use many types of mushrooms. Here are some great choices: - Shiitake mushrooms - Portobello mushrooms - Oyster mushrooms - Maitake mushrooms These options can add unique flavors and textures to your dish. Just remember: each type might change the taste a bit. Feel free to mix and match to find your favorite! Mushroom Chicken can be a healthy meal. Here’s the breakdown: - Chicken thighs are a good source of protein. - Mushrooms are low in calories and high in nutrients. - Olive oil provides healthy fats. - Heavy cream adds richness but is higher in calories. Overall, it’s a well-rounded dish when enjoyed in moderation. Pair it with veggies for more nutrients! To check if the chicken is cooked, use a meat thermometer. The chicken should reach an internal temperature of 165°F (75°C). This temperature ensures it is safe to eat. If you don’t have a thermometer, cut into the thickest part. The meat should be white and the juices clear. Avoid undercooking to keep your meal safe and tasty. Mushroom Chicken is a simple yet delicious dish. You can use chicken thighs, mushrooms, and great seasonings. I shared how to prepare, cook, and serve it well. Save leftovers safely and enjoy different variations too. Experiment with pasta, casseroles, or vegetarian options. With the tips I've given, you can impress anyone at your table. Remember, cooking is about having fun. Enjoy your meal creations and make them your own!

Savory Mushroom Chicken Tender and Flavorful Meal

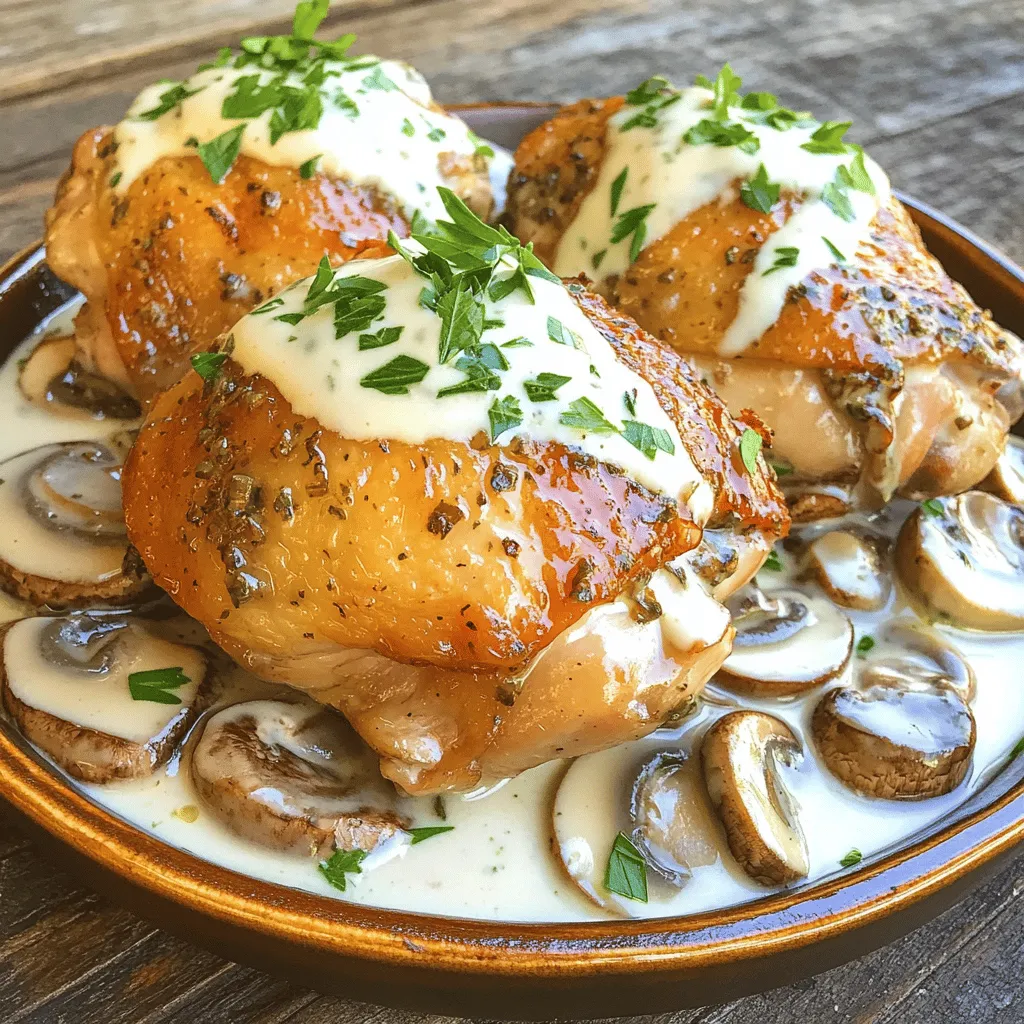
Are you ready to impress your taste buds? This Savory Mushroom Chicken is both tender and full of flavor. With

- 2 cups all-purpose flour - 1 ½ cups granulated sugar - 1 teaspoon baking soda - ½ teaspoon salt - 1 teaspoon ground cinnamon - 1 cup vegetable oil - 3 large eggs, at room temperature - 1 teaspoon pure vanilla extract - 1 ½ cups crushed ripe bananas - 1 cup crushed pineapple, well-drained - 1 cup finely chopped pecans or walnuts - ½ cup unsweetened shredded coconut - ½ cup diced fresh mango (optional) The main ingredients in Hummingbird Cake create a joyful blend of flavors. You can see the vibrant mix of tropical fruits and nuts. The bananas and pineapple add sweetness and moisture. The nuts give a nice crunch, while the coconut brings extra texture. Each bite feels like a trip to a sunny paradise. - 8 oz cream cheese, softened - ½ cup unsalted butter, softened - 4 cups powdered sugar - 1 teaspoon pure vanilla extract - Chopped pecans or shredded coconut for garnish (optional) The cream cheese frosting is rich and creamy. It perfectly balances the sweet cake. Using room temperature ingredients helps the frosting stay smooth. You can also add a sprinkle of nuts or coconut on top. This gives your cake a beautiful and inviting look. For the full recipe, check out the Tropical Hummingbird Cake section. You will love how easy it is to make this dessert. Each ingredient plays a role in creating a cake that is both fun and delicious. - Preheat the oven to 350°F (175°C). - Prepare two 9-inch round cake pans by greasing and dusting them with flour. - In a large bowl, combine 2 cups of flour, 1 ½ cups of sugar, 1 teaspoon of baking soda, ½ teaspoon of salt, and 1 teaspoon of cinnamon. Whisk these dry ingredients well. - In another bowl, mix 1 cup of vegetable oil, 3 eggs, and 1 teaspoon of vanilla extract until smooth. Slowly add this wet mix to the dry ingredients, stirring gently. - Gently fold in 1 ½ cups of crushed bananas, 1 cup of well-drained crushed pineapple, 1 cup of chopped nuts, ½ cup of shredded coconut, and ½ cup of diced mango if you like. - Carefully divide the batter evenly between the two prepared pans. - Place the pans in the oven and bake for 25-30 minutes. Check doneness by inserting a toothpick into the center; it should come out clean. - Once baked, remove the cakes from the oven and let them cool in the pans for 10 minutes. - Transfer the cakes to a wire rack to cool completely before frosting. - In a bowl, beat 8 oz of softened cream cheese and ½ cup of softened butter until creamy. - Gradually add 4 cups of powdered sugar and 1 teaspoon of vanilla extract. Beat until fluffy and well-mixed. - Place one cooled cake layer on a serving plate. Spread a layer of cream cheese frosting on top. - Add the second layer on top and frost the entire cake. You can garnish with chopped pecans or shredded coconut if desired. For the complete recipe, check out the Full Recipe. Enjoy your baking! - Ensure your oven is properly calibrated. An oven thermometer is a great tool for this. - Avoid overmixing the batter. Mix until just combined for the best texture. - Use room temperature ingredients for a smooth frosting. This helps everything blend well. - Chill the frosting briefly if it is too soft. A quick chill can make it easier to spread. - Display the cake on a cake stand for aesthetic appeal. This makes it look extra special. - Pair slices with fresh tropical fruit. Pineapple or mango can brighten the plate and taste delicious. These tips will help you make a great Hummingbird Cake. For the full recipe, check the earlier section. Enjoy your baking! {{image_4}} To make a vegan version, you need to replace eggs and dairy. You can use flaxseed or applesauce as egg replacers. For flaxseed, mix one tablespoon of ground flaxseed with three tablespoons of water. Let this sit for five minutes to thicken. For applesauce, use ¼ cup to replace one egg. This keeps the batter moist and fluffy. Using plant-based milk, like almond or oat milk, can replace dairy. You can also use coconut oil instead of butter for added richness. These swaps keep the cake delicious and moist. If you need a gluten-free cake, there are great flour alternatives. Almond flour or coconut flour works well. You can also use a gluten-free all-purpose blend. Make sure it has xanthan gum for better texture. Adjusting moisture is key. Gluten-free flours absorb more liquid. Add an extra egg or a bit of yogurt to help with moisture. This keeps your cake light and fluffy. You can easily change the flavors in your Hummingbird Cake. Add spices like nutmeg or ginger for warmth. These spices will enhance the cake’s tropical taste. Try adding fresh fruits too. Berries or citrus zest can give the cake a nice twist. They add bright flavors that mix well with the banana and pineapple. Experimenting with these variations makes your cake unique and fun. You can find the Full Recipe in the previous section. Happy baking! To keep your Hummingbird Cake fresh for a few days, store it in an airtight container at room temperature. This keeps the cake moist and tasty. If you want it to last longer, put it in the fridge. Just make sure to cover it well to avoid drying out. If you want to save some cake for later, freezing is a great option. First, let the cake layers cool completely. Then, wrap each layer tightly in plastic wrap. After that, put them in a freezer bag. When you are ready to enjoy the cake, take it out and let it thaw in the fridge. This helps keep the texture nice and soft. Hummingbird Cake is best enjoyed fresh, but it can last. When stored correctly, it stays good for about 4-5 days in the fridge. Watch for signs of spoilage. If you see mold or smell something off, it’s time to throw it away. Enjoy your cake while it’s still at its best! Hummingbird Cake comes from the South in the United States. It got its name from the sweet taste that attracts hummingbirds. The cake is a mix of bananas and pineapple. It often has nuts and coconut too. The dish reflects Southern hospitality and joy. Many people serve it at parties and special events. Yes, you can make Hummingbird Cake in advance. Bake the cake layers a day before. Let them cool completely, then wrap them in plastic wrap. Store them at room temperature or in the fridge. Frost the cake just before serving. This keeps the cake fresh and moist. To check if your cake is done, use a toothpick. Insert the toothpick into the center of the cake. If it comes out clean, the cake is ready. If it has batter on it, bake a few more minutes. Keep checking until the toothpick is clean. This method ensures the perfect bake every time. You can use a bundt pan for Hummingbird Cake. Just adjust the baking time. The cake may take longer to bake in a bundt pan. Start checking for doneness around 35 minutes. Use the toothpick test to ensure it’s fully baked. A bundt pan gives a beautiful shape and makes serving easy. Hummingbird cake is a delightful treat packed with flavors. You learned the key ingredients, step-by-step instructions, and tips for success. We explored fun variations and storage tips too. With these pointers, you can bake a perfect cake every time. Enjoy sharing this delicious dessert with friends and family. Don’t forget to experiment with flavors to make it your own! Happy baking!

Irresistible Hummingbird Cake Easy and Flavorful Recipe

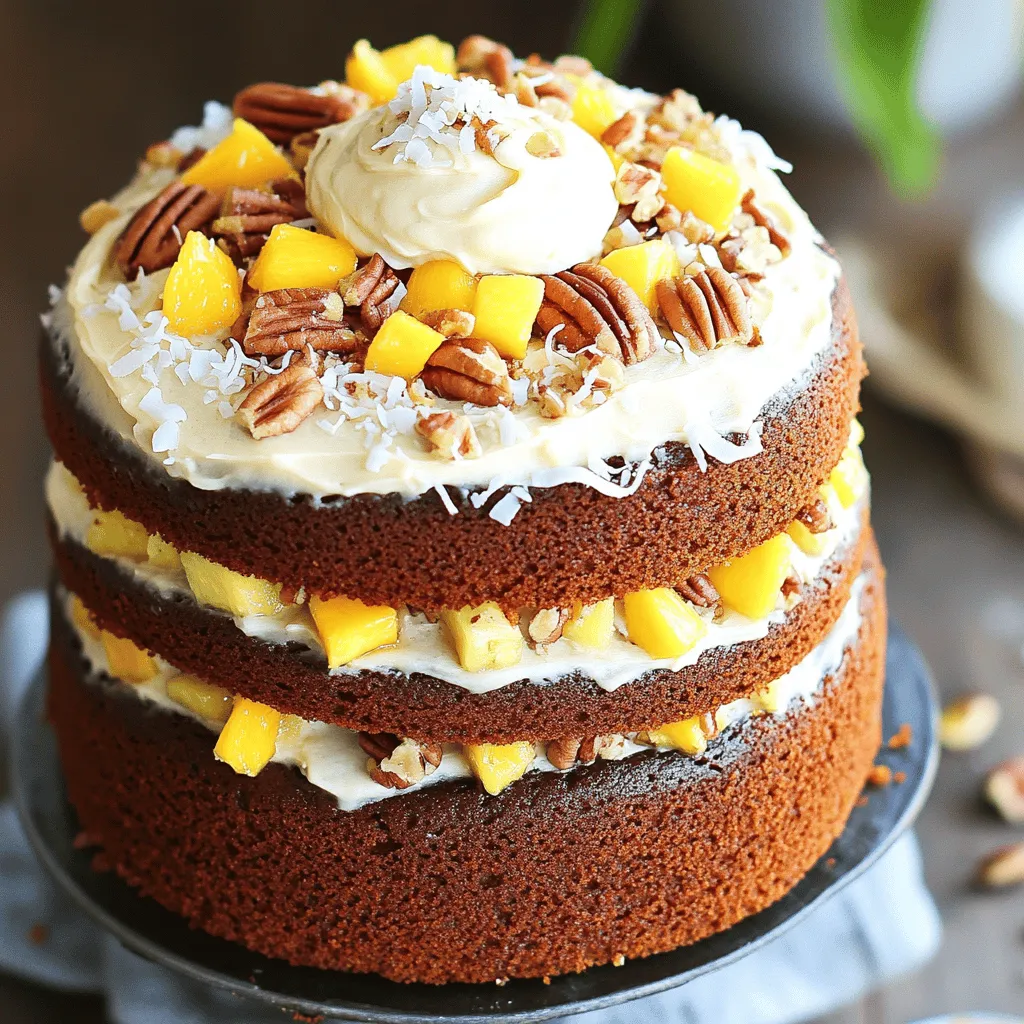
Are you ready to indulge in a slice of pure joy? This easy and flavorful Hummingbird Cake recipe combines ripe

- 1 cup mini marshmallows - 1 cup shredded sweetened coconut - 1 cup diced pineapple (fresh or canned, well-drained) - 1 cup mandarin oranges (fresh or canned, well-drained) - 1 cup halved strawberries - 1/2 cup Greek yogurt (vanilla or plain) - 1/2 cup sour cream - 1 tablespoon honey (optional, for added sweetness) - 1/4 teaspoon vanilla extract - 1/4 cup chopped pecans or walnuts (optional, for added crunch) Gather these ingredients to create your delightful ambrosia salad. Each fruit adds a unique flavor and texture. The creamy dressing brings it all together. You can add nuts for extra crunch. This combination makes a fun and tasty dish. You can find the full recipe above for detailed steps to follow. Enjoy creating this delicious treat! Making Ambrosia Salad is easy and fun. Here’s a quick guide: 1. Gather all your ingredients. 2. Mix the fruits in a big bowl. 3. Whip up the creamy dressing in a small bowl. 4. Combine the dressing with fruits gently. 5. Chill in the fridge for an hour. 6. Serve and enjoy! To combine the fruits and dressing, follow these steps: - First, gently toss the mini marshmallows, shredded coconut, diced pineapple, mandarin oranges, and halved strawberries in a large bowl. - Be careful not to mash the fruits; you want to keep them whole. - In another bowl, whisk the Greek yogurt, sour cream, honey, and vanilla extract until smooth. - Slowly pour this creamy mixture over the fruits. - Use a spatula to fold it in softly. This keeps the fruit pieces intact. - If you like, add chopped pecans or walnuts for crunch at this point. Chilling is key for great flavor. Here’s why: - Cover the bowl with plastic wrap tightly. - Refrigerate the salad for at least 1 hour. - This time allows the flavors to blend and makes the salad cool and refreshing. - After chilling, it’s ready to serve. Enjoy your Tropical Ambrosia Delight! To make your ambrosia salad just right, you can adjust the sweetness and creaminess. If you want it sweeter, add more honey. Taste the mix and add little by little. For a creamier texture, use extra Greek yogurt or sour cream. This will make the salad rich and smooth. Serve your ambrosia salad cold for the best taste. You can scoop it into small bowls for individual servings. If you are hosting a party, use a large bowl to share. Top each serving with a sprinkle of shredded coconut or a few nuts for a lovely touch. This makes it look inviting and fun. To impress guests, style your ambrosia salad with flair. Use a clear glass bowl so they can see the colorful fruits. You can also layer the fruit and creamy mix to create a beautiful design. Add a mint leaf on top for a fresh look. This simple touch can elevate your dish for any special event. {{image_4}} You can swap fruits in ambrosia salad easily. Instead of pineapple, try fresh mango or kiwi. They add a sweet and juicy burst. If you want a tangy kick, use green apples or grapes. For a berry twist, blueberries or raspberries work great. Feel free to mix and match your favorites. Each fruit brings a new taste and color. This makes your salad fun and unique! Crispy nuts or coconut can take ambrosia salad to the next level. Chopped pecans or walnuts add a nice crunch. They balance the soft fruits and creamy dressing. If you love coconut, add more shredded coconut for a tropical vibe. Toasted nuts also enhance the flavor. Just sprinkle them in before serving. This little touch makes a big difference! You can adapt ambrosia salad for holidays or seasons. For spring, add pastel-colored fruits like peaches or cherries. In fall, use apples and cranberries for a cozy touch. During summer, mix in juicy watermelon or peaches. For winter, try pomegranate seeds for a festive look. Each theme makes the salad special and fun. Your guests will love the creativity! To keep your ambrosia salad fresh, place it in an airtight container. Make sure to cover it well. This helps keep the fruits from getting mushy. Store it in the fridge right after making it. The cool temperature helps the flavors blend. Always use a clean spoon to serve. This keeps it safe from germs. You can safely store ambrosia salad in the fridge for up to 3 days. After that, the fruits may start to lose their freshness. If you notice any strange smells or changes in texture, it’s best to toss it. Eating it fresh is always the tastiest option. I do not recommend freezing ambrosia salad. Freezing changes the texture of the fruits and cream. When thawed, the fruits can become watery and mushy. If you want to prepare it ahead of time, store it in the fridge instead. Enjoy it cold and fresh for a delightful treat! Ambrosia salad is a sweet fruit dish with a creamy base. It has roots in the Southern United States. The dish often combines fruits, nuts, and a sweet dressing. This salad is a fun mix of flavors and textures. It stands out at potlucks and holiday meals. Many families have their own versions of this classic dish. Yes, you can make ambrosia salad ahead. Mix the fruits and the creamy dressing separately. Combine them just before serving. This keeps the fruits firm and fresh. You can store the salad in the fridge for up to a day. Just make sure to cover it well. You can use many fruits in ambrosia salad. Try adding grapes, apples, or bananas. Kiwi and mango can add a tropical twist. Diced peaches or cherries also work well. Feel free to mix and match your favorites. The key is to keep the flavors bright and fresh. For the full recipe, check the Tropical Ambrosia Delight section. Ambrosia Salad is a fun and tasty dish made with fresh fruits and a creamy dressing. Using Greek yogurt and honey adds a great flavor boost. You can change the recipe by adding nuts or different fruits to make it your own. Remember to chill the salad well for the best taste. Watching how you present it will impress your guests at any party. Enjoy making or sharing this classic dish anytime!

Ambrosia Salad Delightful Creamy Fruit Fantasy

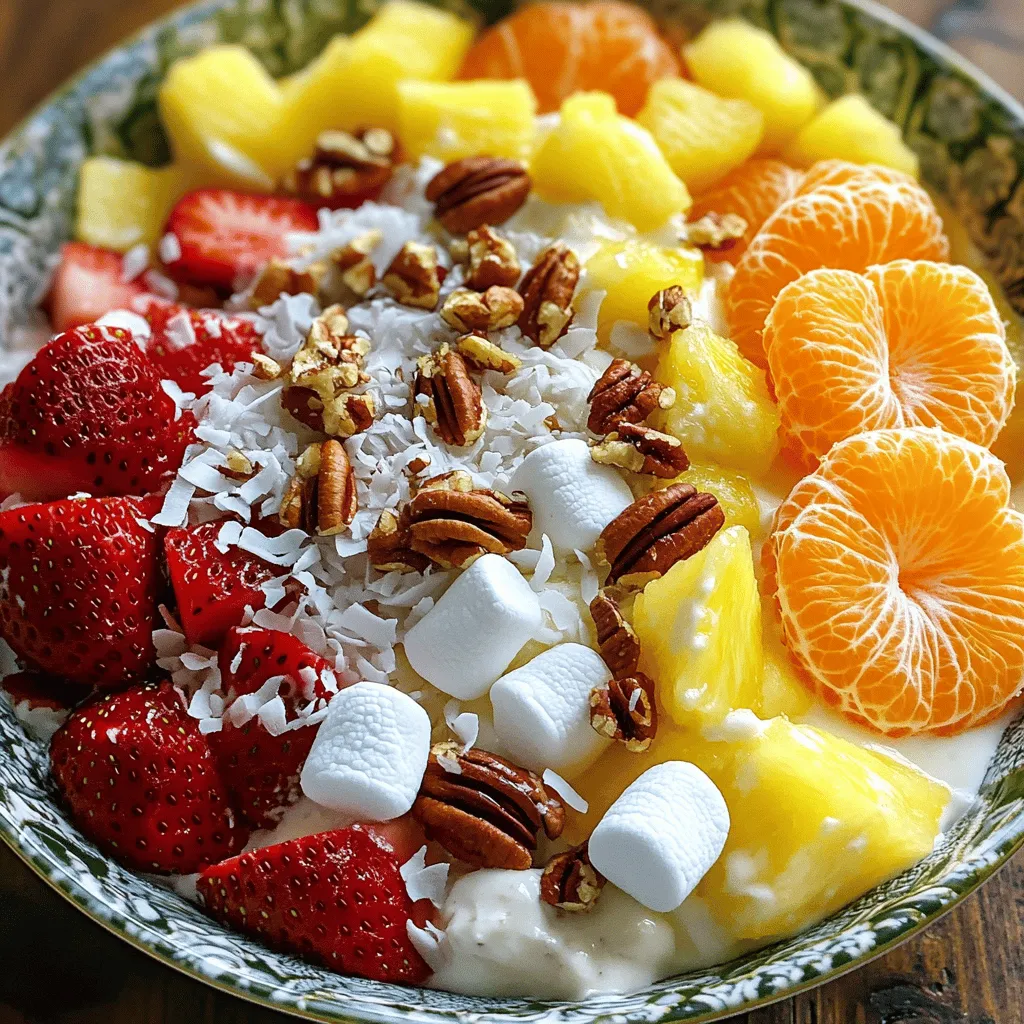
Are you ready to dive into a fruity wonderland? In Ambrosia Salad: Delightful Creamy Fruit Fantasy, I’ll share an easy,

- 1 cup snap peas, trimmed - 1 bell pepper (your choice of red or yellow), sliced into thin strips - 1 medium zucchini, sliced into half-moons - 1 cup asparagus, cut into 2-inch pieces - 1 cup fresh baby spinach - 1/2 cup carrots, julienned In spring, fresh vegetables burst with flavor. Snap peas add a sweet crunch. Bell peppers bring color and sweetness. Zucchini offers a soft texture. Asparagus gives a slight bite. Baby spinach wilts to add depth. Carrots provide a hint of earthiness. - 2 garlic cloves, finely minced - 1-inch piece of ginger, freshly grated - 3 tablespoons low-sodium soy sauce (or regular if preferred) - 2 tablespoons toasted sesame oil - 1 tablespoon honey or maple syrup (to add a touch of sweetness) Garlic and ginger create a fragrant base. Soy sauce adds saltiness, enhancing flavors. Toasted sesame oil gives a nutty aroma. Honey or maple syrup offers a sweet balance. Together, these ingredients make the dish pop. - Salt and pepper, to taste - Sesame seeds, for garnish - Serving suggestions (e.g., rice or quinoa) Finish your stir-fry with salt and pepper. Sesame seeds add crunch and flavor. Serve over rice or quinoa for a complete meal. This vibrant dish is both healthy and satisfying, making it perfect for any spring gathering. For the full recipe, check out the details above. - Wash and trim vegetables. - Chop and julienne as needed. Start by washing all your vegetables. Use cold water to ensure they are clean. Trim the ends of snap peas and asparagus. Then, slice the bell pepper into thin strips. Cut the zucchini into half-moons. Julienning the carrots means cutting them into thin matchsticks. This will help all the vegetables cook evenly. - Heat the skillet or wok and add sesame oil. - Sauté garlic and ginger. - Stir-fry vegetables until tender. Next, heat a large skillet or wok over medium-high heat. Pour in the sesame oil and let it warm for about 30 seconds. Once hot, add the minced garlic and grated ginger. Stir them for about 30 seconds until you smell their wonderful aroma. Do not let them burn. Now, add the snap peas, bell pepper, zucchini, asparagus, and julienned carrots. Stir-fry these veggies for about 4-5 minutes. Mix them often. You want them tender but still a bit crisp. - Add soy sauce and honey. - Finish with baby spinach. - Adjust seasoning to taste. After the vegetables are cooked, drizzle the soy sauce and honey over them. Toss everything together to coat the veggies evenly. Continue stir-frying for another 2-3 minutes. This lets all the flavors blend well. Gently add the baby spinach to the mix. Stir it in until it just wilts, which takes about a minute. Taste your stir-fry and add salt and pepper as needed. You can find the full recipe for more details. Once everything looks great and tastes delicious, you can serve your vibrant dish. Enjoy the fresh flavors of spring! To make a great stir-fry, you need high heat. A hot pan helps cook the veggies fast. This keeps them crisp and colorful. Use a wok if you have one; it’s perfect for stir-frying. Preheat the skillet for a few minutes before adding oil. This helps the oil heat evenly. When you add the vegetables, spread them out in a single layer. This allows them to cook evenly. Stir them often, but don’t overcrowd the pan. Overcrowding means lower heat and soggy veggies. If you can’t find some veggies, don’t worry! You can swap them out easily. Try broccoli, green beans, or even mushrooms. Just cut them into similar sizes for even cooking. For those who are gluten-free, look for gluten-free soy sauce. Tamari is a great option too. It adds a nice flavor without gluten. To boost flavor, add spices. Chili flakes can give a nice kick. You can also add some sesame seeds or crushed peanuts for crunch. For garnishes, try fresh herbs like cilantro or green onions. They add color and freshness. A squeeze of lime juice right before serving brightens the dish. Enjoy making this vibrant spring vegetable stir-fry! You can find the full recipe above. {{image_4}} You can make your spring vegetable stir-fry heartier by adding protein. Chicken, shrimp, or tofu work great. For chicken, cut it into bite-sized pieces. Cook it in the pan before adding the vegetables. Shrimp cooks fast, so add it after the garlic and ginger. Tofu can be cubed and sautéed until golden. This boosts flavor and makes the meal more filling. Mix up the taste by using different sauces. Teriyaki sauce adds a sweet touch, while oyster sauce gives a savory depth. Want some heat? Add chili flakes or a squirt of sriracha. These simple swaps can transform your stir-fry into a new dish. Play around with flavors to find what you love best. You don't have to stick to spring vegetables. Try using summer squash, bell peppers, or even fall veggies like broccoli or carrots. Seasonal swaps keep your dish fresh and exciting. If you have leftovers, toss them into a salad or wrap. This way, you avoid waste and enjoy a tasty meal again. For the full recipe, check back to create your own spring vegetable stir-fry masterpiece! Store your leftovers in an airtight container. This keeps them fresh. You can enjoy them for up to 3 days in the fridge. Always check for any signs of spoilage before eating. Use clear containers so you can see what’s inside. This helps avoid waste. You can freeze stir-fry for later meals. Let it cool completely before freezing. Use freezer-safe bags or containers for storage. Make sure to remove as much air as possible. This prevents freezer burn. To thaw, leave it in the fridge overnight. You can also use the microwave for quick thawing. When ready to eat, reheat on the stove until hot. Prepare your spring vegetable stir-fry in advance. This saves time on busy days. Chop vegetables and store them in containers. Use clear glass or BPA-free plastic containers. You can mix and match veggies for variety. Cook the stir-fry on the day you plan to eat it for the best taste. Enjoy a healthy meal without the hassle! To make Spring Vegetable Stir-Fry, start by washing and chopping your vegetables. Heat sesame oil in a skillet. Add minced garlic and ginger, cooking for about 30 seconds. Next, toss in the snap peas, bell pepper, zucchini, asparagus, and carrots. Stir-fry for 4-5 minutes until tender. Drizzle soy sauce and honey, mixing everything well. Finally, add spinach and season to taste. For the full recipe, check below. Good vegetables for stir-fry include: - Snap peas - Bell pepper - Zucchini - Asparagus - Carrots - Broccoli These veggies cook quickly and keep their crunch. Choose fresh, crisp veggies for the best taste. Cut them into uniform sizes for even cooking. Yes, you can easily make this dish vegan. Simply replace honey with maple syrup. Make sure your soy sauce is vegan. This dish remains colorful and tasty without animal products. You can also add tofu for extra protein. Making a stir-fry takes about 20 minutes total. You’ll need 15 minutes for prep and 5 minutes for cooking. This quick time makes it a perfect meal for busy days. Yes, this recipe is very customizable. You can switch out vegetables based on what you have. Try adding mushrooms, bell pepper, or even baby corn. You can also adjust the sauce to suit your taste. Want it spicy? Add chili flakes. This blog post explored making a fresh spring vegetable stir-fry. We covered ingredients like snap peas, zucchini, and bell peppers, plus key seasonings. I shared step-by-step cooking instructions and tips for perfecting your stir-fry. Remember, you can customize the dish with proteins, sauces, or seasonal veggies. Don’t forget to store leftovers properly to enjoy them later. Embrace experimentation in your cooking and make it fun!

Spring Vegetable Stir-Fry Fresh and Flavorful Dish

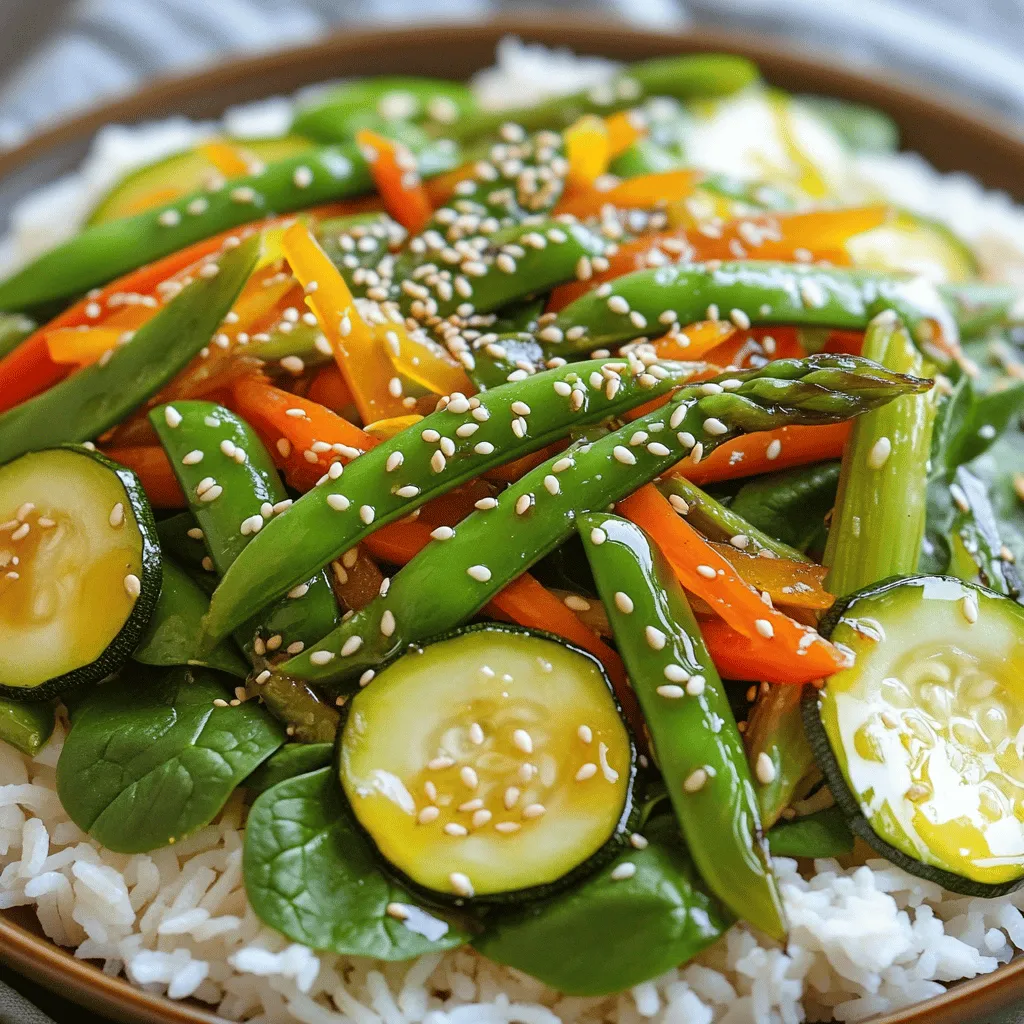
Spring is the season for fresh, vibrant vegetables, and there’s no better way to enjoy them than in a delicious

- 4 bone-in, skin-on chicken thighs - 1 cup cherry tomatoes, halved - 1 medium zucchini, sliced into half-moons - 1 red bell pepper, chopped into bite-sized pieces - 1 teaspoon garlic powder - 1 teaspoon onion powder - 1 teaspoon dried oregano - 1 teaspoon dried basil - 1 teaspoon dried thyme - 1/2 teaspoon red pepper flakes (optional) - Salt and freshly ground black pepper, to taste - 1/4 cup extra virgin olive oil - 1/4 cup freshly grated Parmesan cheese - Fresh basil leaves for garnish When you look at the ingredients, you can see they are simple yet flavorful. The chicken thighs are juicy and tender. The cherry tomatoes add a sweet burst. The zucchini and bell pepper bring freshness and crunch. Next, the seasoning is key to this dish. Garlic powder and onion powder give a rich base. Oregano, basil, and thyme add that classic Italian flavor. The red pepper flakes can give a bit of heat if you like. Salt and pepper finish the mix, making it just right. Finally, the extra virgin olive oil brings everything together. It adds moisture while roasting. The Parmesan cheese melts and crisps on top, creating a delightful crust. Fresh basil leaves at the end brighten the dish and add color. For a full guide on how to put this all together, check out the Full Recipe. - Preheat your oven to 400°F (200°C). - Combine the herbs and spices in a small mixing bowl. - Season the chicken thighs thoroughly with the spice mix. - In another bowl, add halved cherry tomatoes, sliced zucchini, and chopped red bell pepper. - Drizzle half the olive oil over the vegetables and season with salt and pepper. Toss well. - On a large baking sheet, place the chicken thighs skin-side up. - Arrange the seasoned vegetables around the chicken. - Drizzle the remaining olive oil on top. - Sprinkle the grated Parmesan cheese evenly over the chicken. - Roast in the oven for 30-35 minutes. - Check that the chicken reaches 165°F (74°C) for safety. - Let the chicken rest for about 5 minutes before serving. For the full details, check the Full Recipe. To ensure even cooking, always preheat your oven to 400°F (200°C). Place the chicken on a baking sheet with space between pieces. This air circulation helps cook the chicken evenly. Use a meat thermometer to check for doneness. Insert it into the thickest part of the chicken. The internal temperature should reach 165°F (74°C). This ensures the chicken is safe to eat and juicy. For a beautiful serving, arrange the chicken and vegetables on a large platter. Drizzle any pan juices over them. This adds flavor and keeps everything moist. Garnish with fresh basil leaves for a pop of color and aroma. Pair this dish with sides like creamy mashed potatoes or a crisp salad. These options complement the flavors well and round out the meal. You can enhance the flavor by adding lemon juice or balsamic vinegar. These add brightness and a tangy kick. For variety, mix different herbs and spices. Try adding rosemary or parsley along with the original seasonings. This will give your baked chicken a unique twist each time you make it. You can always explore new flavor combinations to keep things exciting. For the complete experience, check out the Full Recipe for Italian Herb-Infused Baked Chicken. {{image_4}} You can boost the flavor of Italian baked chicken easily. Adding lemon juice gives a bright zest. Balsamic vinegar can also add a tangy twist. You can try different veggies too. Asparagus and carrots work well and add color. The more variety you add, the more exciting your dish becomes. Making this dish gluten-free is simple. Just use gluten-free breadcrumbs or skip them entirely. For a dairy-free option, leave out the Parmesan cheese. You can also adjust it for low-carb or keto diets. Swap regular potatoes with cauliflower for a great low-carb choice. You can change how you cook the chicken for fun. An air fryer can give it a crispier texture. Grilling the chicken adds a nice smoky flavor. If you prefer tender chicken, try a slow cooker. It keeps the meat juicy and makes it easy to shred. Each method gives you a different taste and feel. For the full experience, don’t forget to check out the Full Recipe. To keep your Italian Baked Chicken fresh, refrigerate leftovers within two hours. Use an airtight container. This helps to lock in moisture and flavor. When stored right, the chicken can last up to four days in the fridge. To keep the chicken moist, place a damp paper towel over it before sealing. This simple trick helps prevent it from drying out. When reheating chicken, aim for low heat. Use an oven set to 350°F (175°C). This helps keep the chicken juicy. Heat it for about 20 minutes. If using a microwave, cover the chicken with a damp paper towel. Heat in 30-second bursts to check warmth. This method helps avoid dry spots. To freeze Italian Baked Chicken, let it cool completely. Then, wrap each piece tightly in plastic wrap. Place it in a freezer bag to seal out air. This keeps it fresh for up to three months. When ready to enjoy, thaw in the fridge overnight. Reheat as explained above for the best taste. The best way to season your chicken is to use a mix of herbs and spices. I recommend garlic powder, onion powder, oregano, basil, and thyme. These flavors blend well. You can also add red pepper flakes for some heat. Rub the mixture all over the chicken. Make sure to cover every part. This helps the chicken taste great. You can use boneless chicken. It cooks faster than bone-in chicken. Boneless chicken also has less fat. However, bone-in chicken keeps more juice and flavor. If you want extra flavor, stick with bone-in. If time is short, boneless works well. To check if the chicken is ready, use a meat thermometer. The chicken should reach 165°F (74°C). This is safe to eat. You can also look for golden brown skin. If the juices run clear, it’s done. Italian Baked Chicken goes great with many sides. Here are some ideas: - Garlic bread - Roasted vegetables - Salad with fresh greens - Creamy polenta - Pasta with marinara sauce Italian Baked Chicken lasts about 3 to 4 days in the fridge. Store it in an airtight container. Make sure it cools down first. Always check for any bad smell before eating leftovers. If it smells off, throw it away. This blog post covers a tasty Italian Baked Chicken dish. You learned about the main ingredients, seasoning, and cooking steps. I shared tips on how to enhance flavors and suggested variations for different diets. Finally, we discussed storage and reheating methods for any leftovers. With this knowledge, you can enjoy a delicious meal that fits your taste and needs. Try it out and make it your own! Happy cooking!

Italian Baked Chicken Flavorful Meal Every Time

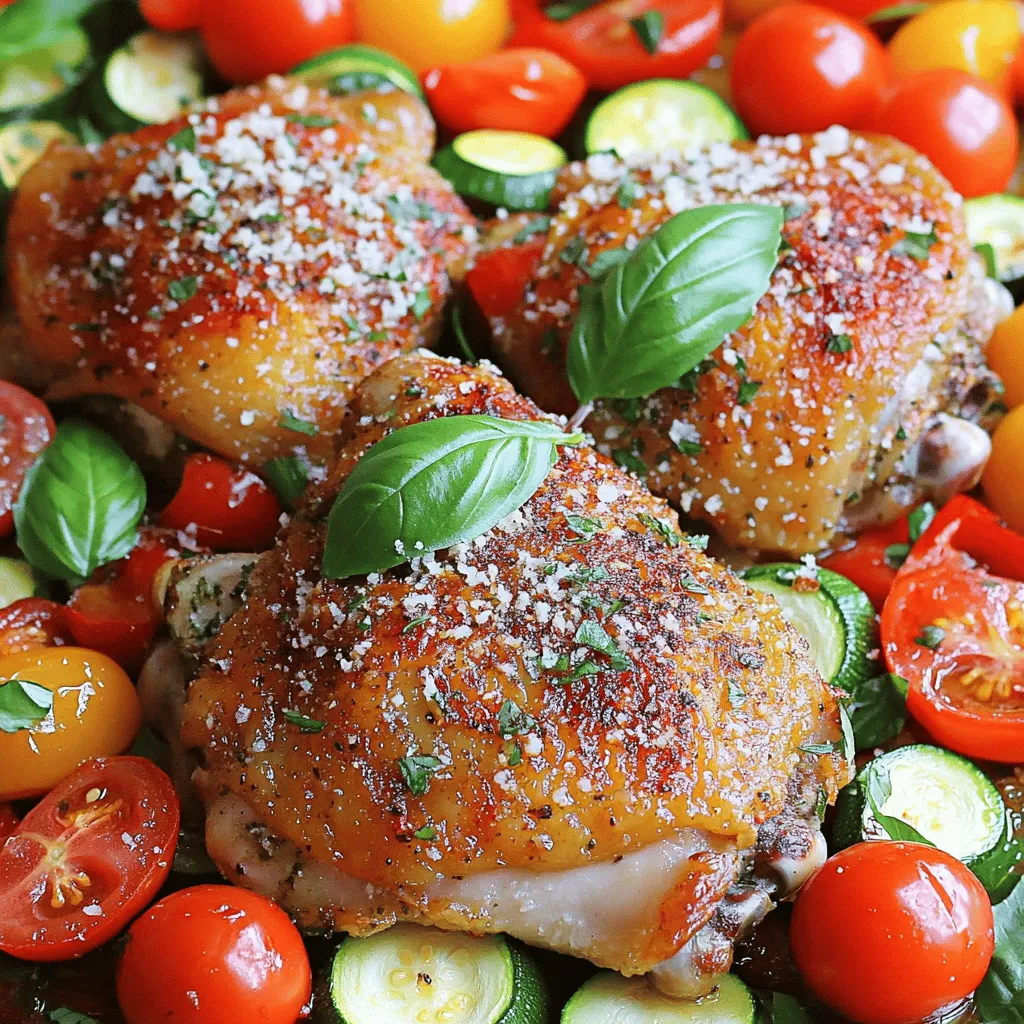
Looking for a delicious and simple dinner that leaves everyone’s taste buds happy? I’ve got you covered with my Italian

Older posts
Newer posts
← Previous Page1 … Page34 Page35 Page36 … Page38 Next →

dsad

© 2025 recipetorch • Built with GeneratePress

Our Policies

  • Copyright Policy
  • Cookie Policy
  • GDPR Policy
  • Privacy Policy
  • Disclaimer
  • Terms Of Use

More Information

  • Home
  • About
  • Contact
  • Appetizers
  • Dessert
  • Dinner
  • Drinks
©2025, recipetorch About Back To Top