Skip to content
DisclaimerTerms Of UseGDPR PolicyCookie Policy

recipetorch

  • Home
  • Drinks
  • Appetizers
  • Dinner
  • Dessert
  • About
  • Contact
  • Privacy Policy
DisclaimerTerms Of UseGDPR PolicyCookie Policy

Nicole

To make this lemon cake, gather these ingredients: - 1 ½ cups all-purpose flour - 1 cup granulated sugar - ½ cup unsalted butter, softened - 2 large eggs - ½ cup buttermilk - 2 tablespoons freshly grated lemon zest - ¼ cup freshly squeezed lemon juice - 1 teaspoon baking powder - ½ teaspoon baking soda - ½ teaspoon fine sea salt - 1 teaspoon pure vanilla extract - Powdered sugar for dusting (optional) - Fresh berries and mint leaves for garnish (optional) Each ingredient plays a key role in the cake's flavor and texture. The all-purpose flour gives structure, while sugar adds sweetness. Unsalted butter provides richness, and eggs help bind the batter. Buttermilk adds moisture and a slight tang. Fresh lemon zest and juice create that bright, zesty flavor we love. When selecting lemons, look for ones that feel heavy for their size. This means they are juicy. Fresh ingredients yield the best taste. If you need to make changes, don't worry. Here are some alternatives: - For buttermilk, mix ½ cup milk with 1 tablespoon white vinegar or lemon juice. Let it sit for 5 minutes. - If you want a dairy-free option, use a plant-based butter and almond milk. - You can swap granulated sugar with coconut sugar for a different sweetness level. - For a gluten-free version, use a 1:1 gluten-free flour blend. These options help you customize the cake while still keeping it delicious! For the full recipe, check out the detailed instructions. First, set your oven to 350°F (175°C). This warm heat will help bake the cake perfectly. Next, grab an 8-inch round cake pan. Grease it with butter or cooking spray. Then, dust it with flour to prevent sticking. This step ensures your cake comes out easily after baking. In a medium bowl, mix the dry ingredients. Whisk together 1 ½ cups of flour, 1 teaspoon of baking powder, ½ teaspoon of baking soda, and ½ teaspoon of fine sea salt. Set this aside for later. In a large bowl, cream ½ cup of softened butter and 1 cup of sugar. Use an electric mixer on medium speed. Beat for about 3-4 minutes until fluffy and pale. Add 2 large eggs, one at a time. Mix well after each one. Then, stir in 1 teaspoon of pure vanilla extract. Now, combine the wet and dry ingredients. Start with a third of the flour mixture. Then, add half of ½ cup of buttermilk. Alternate adding the remaining flour and buttermilk. Mix gently to keep the cake light. Finally, fold in 2 tablespoons of freshly grated lemon zest and ¼ cup of lemon juice. This adds that zesty flavor we love! Pour the batter into the prepared cake pan. Use a spatula to smooth the top. This helps the cake rise evenly. Place the pan in the oven. Bake for 25-30 minutes. Check the cake by inserting a toothpick into the center. If it comes out clean or with a few moist crumbs, it’s ready. Once baked, take the cake out of the oven. Let it cool in the pan for about 10 minutes. Then, transfer the cake to a wire rack to cool completely. This cooling step helps keep your cake moist and fluffy. For a lovely finish, dust the top with powdered sugar. Serve with fresh berries and mint leaves for a beautiful touch. If you want the full recipe, check it out here: [Full Recipe]. To achieve a fluffy and light lemon cake, you must avoid overmixing. Mix only until the ingredients blend. If you overmix, the cake can turn dense. Also, use room temperature ingredients. This helps the batter mix well and rise perfectly. For a stronger lemon taste, add more lemon zest. The zest holds essential oils that boost flavor. You can also use lemon extract for extra zing. Just a teaspoon will do. Fresh lemon juice is key; it brightens the cake and makes it shine. One common mistake is skipping the oven preheating. Always preheat the oven before baking. Another error is not greasing the cake pan well. If the pan sticks, you may lose part of your cake. Lastly, check the cake with a toothpick. If it comes out wet, give it more time in the oven. For a full recipe, check out the complete Lemon Cake to Die For recipe. {{image_4}} You can make your lemon cake even better with fun add-ins. Here are some ideas: - Blueberries: Fresh or frozen blueberries add a burst of flavor. They pair well with lemon and add a nice color. - Poppy Seeds: Sprinkle in some poppy seeds for a nice crunch. They give a unique texture and look great. - Coconut: Shredded coconut can add a tropical twist. It makes the cake moist and adds flavor depth. - Chocolate: For a bold choice, mix in some white chocolate chips. They create a lovely contrast with the lemon. The right frosting can take your lemon cake to the next level. Here are some tasty options: - Lemon Buttercream: This classic choice is sweet and tangy. Use lemon zest and juice for a fresh kick. - Cream Cheese Frosting: This frosting is rich and creamy. It balances the cake’s lemon flavor well. - Whipped Cream: Light and airy, whipped cream adds a soft touch. You can flavor it with lemon zest for extra zing. - Glaze: A simple lemon glaze is easy to make. Just mix lemon juice and powdered sugar until smooth. You can easily adapt this lemon cake for different diets. Here’s how: - Gluten-Free: Use a gluten-free flour blend. Make sure it includes xanthan gum for better texture. - Vegan: Replace eggs with flax eggs or chia seeds. Use a vegan butter alternative and non-dairy milk. - Sugar-Free: Consider a sugar substitute like erythritol. This option keeps the sweetness while cutting calories. Each variation can help you create a lemon cake that fits your tastes and needs. For more details on making this cake, check out the Full Recipe. To keep your lemon cake fresh, store it in an airtight container. This method helps prevent it from drying out or absorbing other smells. You can keep the cake at room temperature for up to two days. If you have leftover slices, I suggest wrapping them in plastic wrap or aluminum foil. If you want to keep it longer, refrigerate it. Just remember to allow it to come to room temperature before serving again. Freezing your lemon cake is a fantastic way to enjoy it later. First, let the cake cool completely. Next, wrap it tightly in plastic wrap. After that, place the wrapped cake in a freezer-safe bag or container. It can stay frozen for up to three months. When you’re ready to enjoy it, thaw the cake in the fridge overnight. This helps it retain moisture and flavor. If you stored your lemon cake in the fridge or freezer, reheating can bring back its delightful taste. Preheat your oven to 350°F (175°C). Place the cake on a baking sheet and cover it loosely with foil. Heat it for about 10-15 minutes. This method warms the cake without making it dry. For extra flavor, you can drizzle a little lemon juice on top before reheating. Enjoy your slice and savor every bite! For the full recipe, check out the details above. To keep your lemon cake moist, use buttermilk. Buttermilk adds richness and helps create a soft crumb. Also, do not overmix your batter. Overmixing can make the cake dense. Finally, check the oven temperature. If it’s too hot, the cake may dry out. To boost the lemon flavor, add more lemon zest. You can use the zest from an extra lemon. Fresh lemon juice also helps. Try increasing the juice by one tablespoon. This will give your cake a brighter taste. Yes, you can make this lemon cake ahead of time. Bake the cake and let it cool completely. Wrap it in plastic wrap and store it in the fridge. It will stay fresh for about three days. You can also freeze it for up to three months. Just thaw it in the fridge when you're ready to enjoy it. For the full recipe, check the detailed instructions provided above. You now have a complete guide to making a delicious lemon cake. We reviewed the key ingredients and their substitutes, ensuring you can customize your cake. The step-by-step instructions make the baking process simple. Tips for texture and flavor boost your cake to new heights. Variations let you explore different tastes and dietary needs. Remember, the right storage will keep your cake fresh. Review the FAQs for quick answers to common questions. Enjoy your baking journey and the tasty results!

Lemon Cake to Die For Delightful and Easy Dessert

If you crave a dessert that brightens your day, look no further. This Lemon Cake to Die For is both

To make a flavorful Spanish rice dish, you need simple and fresh ingredients. Here’s what you will need: - 1 cup long-grain white rice - 2 cups vegetable broth (or chicken broth) - 1 medium onion, finely chopped - 1 red bell pepper, diced - 1 cup diced tomatoes (canned or fresh) - 2 cloves garlic, minced - 1 teaspoon smoked paprika - 1/2 teaspoon ground cumin - 1/2 teaspoon chili powder - 1/4 teaspoon saffron threads (optional, for an authentic touch) - 1/2 cup frozen peas - 2 tablespoons extra-virgin olive oil - Salt and freshly ground black pepper, to taste - Fresh cilantro, chopped, for garnish These ingredients create a colorful and tasty dish. The long-grain rice gives a nice texture. The broth adds depth. Fresh veggies bring crunch. Garlic and spices give bold flavors. The saffron, though optional, adds a unique touch. This combination makes your Spanish rice truly special. For the full recipe, you can check the Sizzling Spanish Rice Fiesta . Happy cooking! 1. Start by heating 2 tablespoons of extra-virgin olive oil in a medium pot. Use medium heat until the oil shimmers. 2. Add 1 medium onion, finely chopped, and 1 diced red bell pepper. Sauté for about 5 minutes. The veggies should soften, and the onion should look clear. 3. Next, stir in 2 cloves of minced garlic. Cook for one more minute. You want the garlic to smell great and turn lightly golden. 4. Now, introduce 1 cup of long-grain white rice to the pot. Sauté for 2-3 minutes. This toasts the rice and brings out its flavor. 5. Sprinkle in 1 teaspoon of smoked paprika, 1/2 teaspoon of ground cumin, and 1/2 teaspoon of chili powder. If you like, add 1/4 teaspoon of saffron threads for an extra touch. Stir well to coat the rice. 1. Pour in 1 cup of diced tomatoes and 2 cups of vegetable broth (or chicken broth) into the pot. Stir to mix everything. Bring this to a gentle boil. 2. Once it boils, lower the heat to a simmer. Cover the pot with a lid and let it cook for 20 minutes. The rice should become tender and soak up all the liquid. 3. After 20 minutes, take the pot off the heat. Stir in 1/2 cup of frozen peas. Cover it again and let it sit for 5 more minutes. This warms the peas through. 4. Fluff the rice gently with a fork. Taste it to check seasoning. Adjust with salt and black pepper as needed. 5. Finally, serve the rice in bowls. Top it with fresh chopped cilantro for color and taste. You now have a vibrant Sizzling Spanish Rice Fiesta! For the complete meal experience, check out the Full Recipe. To get the right texture, rinse the rice before cooking. This removes excess starch. Rinsing helps the rice become fluffy and less sticky. I suggest cooking the rice for about 20 minutes. Keep it covered while it simmers. This keeps the steam in and ensures even cooking. To boost the taste, try adding more spices. A pinch of cayenne can add heat. You can also use fresh herbs like parsley or thyme for a fresh twist. If you need a substitute for broth, use water with a squeeze of lemon. This will keep the flavor bright. For those on special diets, replace the rice with quinoa or cauliflower rice. Both options work well and add unique textures. For the full recipe, check out the detailed steps and ingredient list. {{image_4}} You can make Spanish rice in many ways. A great option is vegetarian Spanish rice. It uses vegetable broth and fresh veggies, making it light and healthy. Just follow the Full Recipe, and skip the meat. You can add extra veggies like zucchini or corn for more flavor and color. If you want protein in your dish, add chicken or shrimp. For chicken, sauté bite-sized pieces until golden before adding the rice. For shrimp, toss them in during the last few minutes of cooking. They cook fast and will add a nice touch to your rice. Spanish rice has many cousins across the globe. For example, in Cuba, they make a dish called arroz con pollo. It has chicken and peas cooked right in. In parts of Latin America, they use sofrito, a mix of garlic, peppers, and onions, for deeper flavor. You can also try adding spices from other cultures. A pinch of curry powder or turmeric can give your rice a new twist. Experiment with herbs like oregano or thyme for fresh flavor. Each change can make your dish unique and exciting. After enjoying your Sizzling Spanish Rice Fiesta, you may have some leftovers. To store them, use airtight containers. Glass or plastic containers work well. Make sure they are clean and dry before you add the rice. Keep the leftovers in the fridge for up to four days. If you want to save them longer, freeze the rice. In the freezer, it can last for up to three months. Just remember to label the containers with the date. Reheating Spanish rice is easy and quick. The best method is to use a microwave. Place the rice in a microwave-safe bowl and cover it with a damp paper towel. This helps keep the rice moist. Heat it for one minute, then stir. If it needs more time, heat in 30-second bursts until warm. You can also reheat on the stove. Add a splash of broth or water to the pan. Stir the rice over low heat until it's heated through. This method helps keep the rice fluffy and tasty. For both methods, avoid reheating the rice more than once. This helps keep the flavor and texture just right. Enjoy your leftovers just as much as your first meal! What is the difference between Spanish rice and Mexican rice? Spanish rice often uses saffron, giving it a golden color. It usually includes more spices, like smoked paprika. Mexican rice tends to be simpler, often made with tomato sauce and fewer spices. Both are tasty but have different flavors and colors. Can I make Spanish rice in advance? Yes, you can! Make the rice ahead of time and let it cool. Store it in an airtight container in the fridge for up to three days. Just reheat it gently before serving, adding a splash of broth to keep it moist. How to make Spanish rice spicier? Add more chili powder or a pinch of cayenne pepper. You can also mix in diced jalapeños or hot sauce. Start small to find the right heat level for you. What to do if the rice is too soggy or hard? For soggy rice, remove the lid and let it cook longer. This helps the extra liquid evaporate. For hard rice, add a little water, cover, and cook for a few more minutes. Check often until it’s just right. How to fix over-seasoned rice? If your rice is too salty, add a little water or broth. You can also mix in extra cooked rice to balance the flavors. Another option is to add a bit of diced potato to absorb the excess salt. You’ve learned how to make delicious Spanish rice, from the right ingredients to the cooking steps. We discussed different variations and tips for perfecting your dish. Remember, using quality broth and adding your favorite spices can take your rice to the next level. Storing and reheating properly will keep it fresh. Enjoy experimenting with flavors and sharing your creations! This dish is versatile and can fit any meal or occasion. Happy cooking!

Spanish Rice Flavorful and Easy Recipe Guide

Are you ready to impress your family with a delicious, homemade Spanish rice? In this guide, you’ll find a simple,

To make homemade vanilla wafers, you need a few simple ingredients. Each one plays a key role in creating that delightful flavor and texture. Here’s what you will need: - 1 cup all-purpose flour - 1/2 teaspoon baking powder - 1/4 teaspoon salt - 1/2 cup unsalted butter, softened to room temperature - 3/4 cup granulated sugar - 1 large egg - 1 tablespoon pure vanilla extract - 1/4 teaspoon almond extract (optional) These ingredients come together beautifully. The flour gives structure, while the butter adds richness. Sugar sweetens the wafers, and eggs help bind everything. Vanilla extract brings that classic flavor we love. If you want a twist, add almond extract for a hint of nuttiness. As you gather these ingredients, think about how they will mix and bake into something special. Each step in the process builds on these basics, leading to a crunchy and tasty treat. For the full recipe, check out the complete instructions. First, preheat your oven to 350°F (175°C). This step is key for a perfect bake. While the oven heats, take two baking sheets. Line them with parchment paper. This will stop the wafers from sticking. In a medium bowl, add 1 cup of all-purpose flour. To this, add 1/2 teaspoon of baking powder and 1/4 teaspoon of salt. Use a whisk to mix them well. This helps to evenly distribute the baking powder and salt. Set the bowl aside for later. In a large bowl, add 1/2 cup of softened butter. Then, add 3/4 cup of granulated sugar. Using an electric mixer, beat them together on medium speed. Keep mixing for about 3-4 minutes. You want it to look light and fluffy. This step adds air to your mixture for a nice texture. Next, crack one large egg into the bowl. Add 1 tablespoon of pure vanilla extract. If you want a twist, you can add 1/4 teaspoon of almond extract. Mix these ingredients on medium speed until everything is smooth. This will make your wafers taste amazing. Now it’s time to add the dry mix to the wet mix. Gradually add the flour mixture into the wet mixture. Use a spatula to fold it in gently. Mix until just combined. Do not overmix; this keeps your wafers light and airy. Using a small scoop, drop rounded tablespoons of dough onto your baking sheets. Leave about 2 inches between each scoop. This space allows the wafers to spread out. Next, gently flatten each dough ball with a fork or your fingers. This gives them a nice round shape. Bake in the oven for 10-12 minutes. Watch closely; they are ready when the edges turn golden. Once baked, let them cool on the sheets for 5 minutes. Then, transfer them to a wire rack to cool completely. For a full recipe with all the details, check out the link! To make light and airy wafers, beat the butter and sugar well. This adds air to the mix. Aim for a fluffy texture. Mix the wet and dry ingredients just until combined. Overmixing can make the wafers tough. Use room temperature butter for better mixing. This helps achieve the right consistency. Keep an eye on your oven temperature. An oven thermometer can help. Always preheat your oven before baking. This ensures even cooking. Space the dough balls well on the baking sheet. This gives them room to spread. Bake until the edges are lightly golden. Check them a minute or two before the time ends. Make your wafers look great when serving. Stack them in clear glass jars for a fun display. You can also arrange them on a decorative platter. Dust the tops lightly with powdered sugar. This adds a nice touch. Serve with a side of whipped cream for dipping. It adds a creamy contrast to the crunchy wafers. For the full recipe, refer to the earlier section. {{image_4}} You can add fun flavors to your wafers. Try mixing in spices like cinnamon or nutmeg for warmth. A splash of lemon zest or orange zest brightens the taste. For a unique twist, use almond extract instead of vanilla. This small change adds a whole new layer of flavor. If you want to switch things up, consider using different flours. Almond flour or coconut flour can give a nutty taste. You can also try vegan butter to make this recipe dairy-free. If you need a sugar substitute, consider using coconut sugar or agave syrup. These swaps can fit many diets while keeping the taste great. Serve your vanilla wafers in fun ways. Stack them in a clear jar for an eye-catching display. You can pair them with ice cream or yogurt for a treat. Crumble them over fruit for a crunchy topping. Another idea is to dip them in chocolate for an extra sweet bite. These options make your wafers not just tasty but also fun to enjoy! To keep your homemade vanilla wafers fresh, use an airtight container. Place layers of parchment paper between the wafers to prevent sticking. This method helps maintain their crispness. Store the container in a cool, dry place away from sunlight. Avoid storing them in the fridge; moisture can make them soft. When stored properly, your vanilla wafers can last up to one week. If you notice any change in texture or smell, it's best to toss them. For optimal taste, enjoy them within the first few days. The fresher, the better! You can freeze your vanilla wafers for longer storage. Just make sure they are completely cooled. Place them in a freezer-safe bag, removing as much air as possible. They can last up to three months in the freezer. When ready to enjoy, thaw them at room temperature. If you want them crisp again, pop them in a warm oven for a few minutes. This revives their delightful crunch! For the full recipe, check back at the beginning of our article! To make your wafers crispier, you can try a few simple tricks. First, bake them a little longer. Keep an eye on them to avoid burning. Second, use less moisture in your dough. You could cut back on the butter or egg. Lastly, ensure your oven is at the right temperature. An oven thermometer can help with this. Yes, you can use gluten-free flour for this recipe. Look for a blend that works well for baking. Many brands offer one-to-one substitutes. Just keep in mind that the texture may change a bit. The wafers might be a little softer, but they will still taste great. Leftover vanilla wafers have many fun uses. You can crush them to make a crust for pies or cheesecakes. They also work well as a topping for ice cream or yogurt. For a quick snack, dip them in chocolate or serve them with fresh fruit. The options are endless! You learned the key ingredients and steps needed to bake delicious wafers. Remember to mix dry and wet ingredients well for light, airy treats. Use the tips to enhance flavor and presentation. Store your wafers properly to keep them fresh. Feel free to experiment with variations. Enjoy baking! Appreciate the fun and joy these wafers can bring to your table. Simple recipes can create lasting memories.

Homemade Vanilla Wafers Delightful and Easy Treat

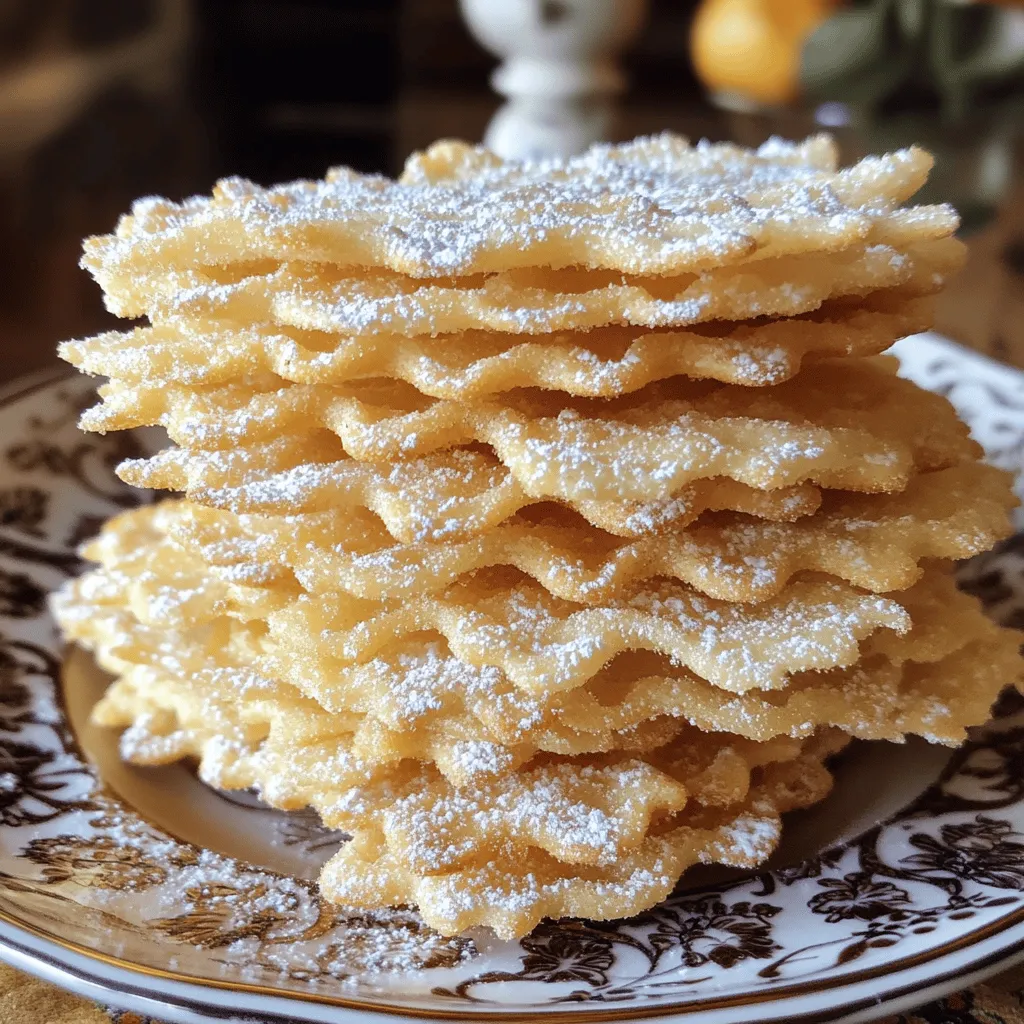
If you crave a sweet and simple treat, then homemade vanilla wafers are for you! These delightful cookies are easy

To make Creamy Rigatoni Delight, gather the following items: - 12 ounces rigatoni pasta - 2 tablespoons olive oil - 1 small onion, finely chopped - 3 cloves garlic, minced - 1 cup heavy cream - 1 cup grated Parmesan cheese - 1 cup baby spinach, roughly chopped - 1 teaspoon garlic powder - 1 teaspoon Italian seasoning - Salt and black pepper, to taste - 1/2 teaspoon crushed red pepper flakes (optional) - Fresh basil leaves, for garnish You can swap some ingredients if needed. Here are some ideas: - Rigatoni: Use penne or fusilli instead. - Heavy cream: Try half-and-half or coconut cream for a lighter option. - Parmesan cheese: Grated Pecorino Romano works well too. - Baby spinach: Kale or arugula can be a good substitute. - Olive oil: Any neutral oil, like canola or grapeseed, works fine. For this recipe, you will need: - A large pot for boiling pasta - A colander for draining - A spacious skillet for the sauce - A wooden spoon or spatula for stirring - Measuring cups and spoons for accuracy - A whisk to mix the sauce smoothly These ingredients and tools will help you create the perfect Creamy Rigatoni Delight. Enjoy your cooking! First, bring a big pot of salted water to a boil. This salty water helps flavor the pasta. Add 12 ounces of rigatoni and cook it for about 10-12 minutes. You want it to be al dente, which means it should still have a bite. Before draining, save 1 cup of the starchy water. Drain the pasta in a colander and set it aside. In a large skillet, heat 2 tablespoons of olive oil over medium heat. When the oil is hot, add 1 small chopped onion. Cook the onion for about 4-5 minutes until it’s soft and clear. Then, add 3 minced garlic cloves. Stir it for another minute. Be careful not to burn the garlic, as it can taste bitter. Now, lower the heat to a gentle simmer. Pour in 1 cup of heavy cream while stirring. Slowly add 1 cup of grated Parmesan cheese, 1 teaspoon of garlic powder, and 1 teaspoon of Italian seasoning. Sprinkle in a pinch of salt and black pepper. Whisk this mixture until it’s smooth and creamy. If it’s too thick, add the reserved pasta water one tablespoon at a time until it’s just right. Gently fold in the cooked rigatoni and 1 cup of roughly chopped baby spinach into the creamy sauce. Toss everything together until the pasta and spinach are well coated. Let it cook for another 2-3 minutes to warm through and wilt the spinach. Taste and adjust seasoning with more salt, pepper, or red pepper flakes if you like a little heat. Once everything is mixed, take the skillet off the heat. Let the dish rest for a minute. Serve the creamy rigatoni in bowls. Garnish with fresh basil leaves and a sprinkle of crushed red pepper flakes for extra kick, if desired. For a great meal, pair it with garlic bread and a green salad. For the full details, check out the Full Recipe. To get that perfect creamy texture, start with high-quality heavy cream. This cream gives richness. When you add the cheese, do it slowly. Stir as you go. If the sauce is too thick, use the pasta water you saved. This starchy water helps to loosen the sauce. Always whisk well to mix everything smoothly. You can boost the flavor of your creamy rigatoni with extra ingredients. Try adding sautéed mushrooms for umami. Sun-dried tomatoes add a sweet and tangy twist. If you like heat, toss in some crushed red pepper flakes. Fresh herbs like parsley or thyme also add freshness. You can even mix in cooked chicken or shrimp for protein. For a beautiful presentation, use shallow bowls. Drizzle a little olive oil on top. This adds shine and flavor. A sprinkle of extra Parmesan cheese makes it look fancy. Add fresh basil leaves for color and aroma. Serve with garlic bread and a green salad for a complete meal. Each bite will impress your guests! You can find the full recipe to guide you through making this delightful dish. {{image_4}} You can make creamy rigatoni even better by adding proteins. Chicken is a great choice. Use grilled or sautéed chicken breast for a juicy bite. Shrimp adds a nice touch too. Sauté shrimp in the same pan as your garlic for extra flavor. If you love sausage, try Italian sausage. Cook it and crumble it before mixing it into the sauce. Each protein gives a new spin to the dish. To make this dish vegetarian, skip the meat and add more veggies. Try mushrooms, zucchini, or bell peppers. They add great taste and texture. For a vegan option, replace heavy cream with coconut milk or cashew cream. Use nutritional yeast instead of Parmesan cheese for that cheesy flavor. This way, you keep the dish creamy and rich without dairy. Changing herbs and spices can change the whole flavor. Basil and oregano are classic, but you can try fresh thyme or rosemary. They bring unique tastes to the sauce. For a kick, add crushed red pepper flakes or smoked paprika. This adds warmth and depth. Experimenting with flavors keeps the dish exciting each time you make it. For the full recipe, check the details above. After you enjoy your creamy rigatoni delight, store any leftovers in an airtight container. Let the dish cool down first, then place it in the fridge. It will stay fresh for up to three days. If you want to keep it longer, freezing is a great option. To reheat your creamy rigatoni, use a skillet over low heat. Add a splash of water or cream to keep it from drying out. Stir often until it warms through. You can also use the microwave. Heat in short bursts, stirring in between, until hot. If you want to freeze your creamy rigatoni, do so without the spinach. Spinach can get mushy when thawed. Pack the pasta in a freezer-safe container. It will last for up to two months. When ready to eat, thaw it in the fridge overnight and reheat as mentioned. Follow the Full Recipe for more details on making this delicious dish! Yes, you can use various pasta types. Penne, fusilli, or farfalle work great. They hold sauce well. Just make sure to adjust the cooking time based on the pasta you choose. To add heat, include crushed red pepper flakes. Start with a half teaspoon. You can also use fresh diced jalapeños for more kick. Mix them in when cooking the garlic. Creamy rigatoni pairs well with garlic bread and a green salad. You can also add grilled chicken, shrimp, or a side of roasted vegetables for a balanced meal. To lighten the dish, swap heavy cream for half-and-half or use a plant-based cream. You can also reduce cheese or add more veggies. This keeps the dish creamy without too many calories. Yes, creamy rigatoni reheats nicely. Just add a splash of water or broth to keep it creamy. Heat on low in a pan or microwave until warmed through. It tastes almost as good as fresh! This blog post covered the essential steps to make creamy rigatoni. We explored key ingredients and tasty substitutions. I shared tips to achieve the perfect texture and enhance flavors. You learned about different variations and how to store leftovers safely. Remember, cooking is about creativity and enjoying the process. Don’t be afraid to try new things. With these tips, you can create a dish that suits your taste perfectly. Happy cooking!

Creamy Rigatoni Delightful and Flavorful Treat

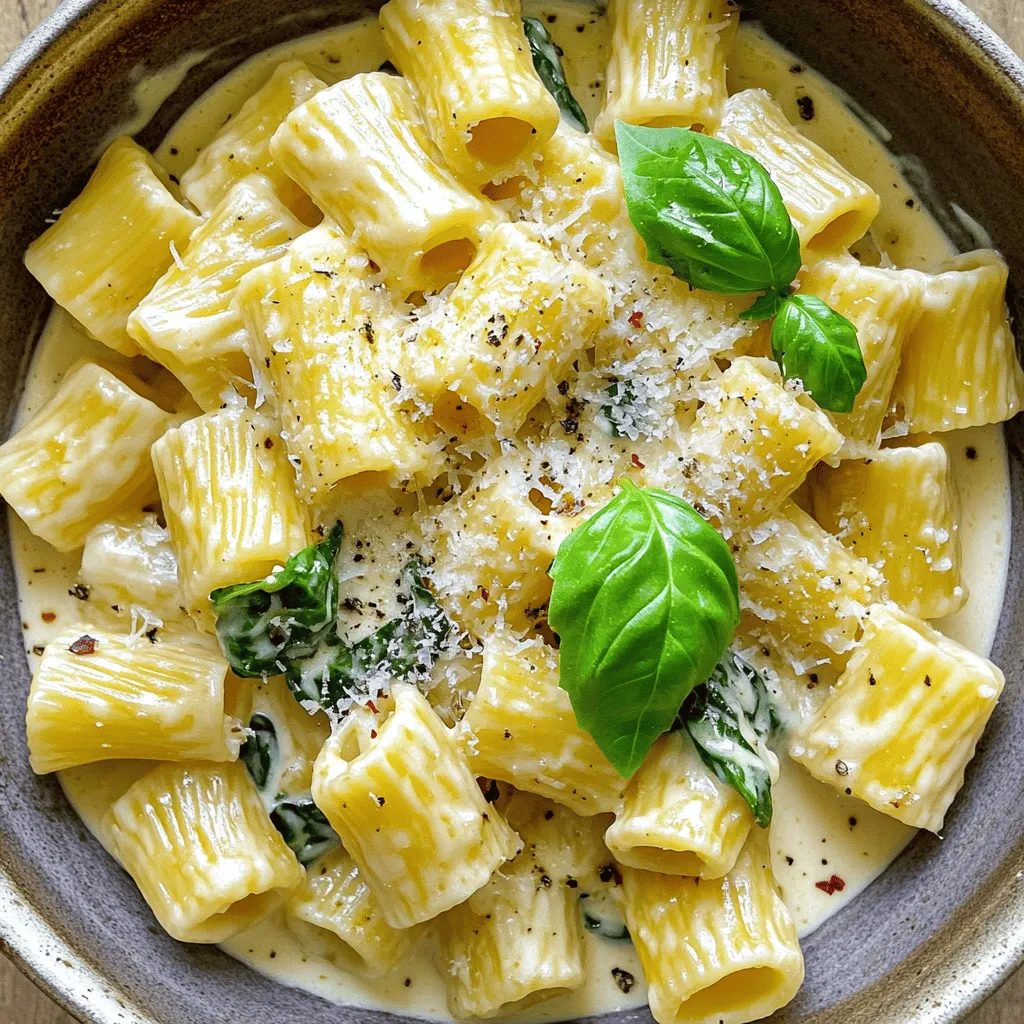
Are you ready to enjoy a delicious meal with creamy rigatoni? This delightful dish will take your taste buds on

To make your enchiladas tasty and filling, gather these main ingredients: - 2 cups cooked chicken, shredded - 1 cup black beans, drained and rinsed - 1 cup corn kernels (fresh or frozen) - 1 cup shredded sharp cheddar cheese (divided) - 1 cup enchilada sauce (your choice of store-bought or homemade) - 8 small soft flour tortillas These items form the base of your dish. The shredded chicken brings protein and texture. Black beans add fiber and earthiness. Corn brings sweetness, while cheese offers creamy goodness. Feel free to add your twist with these optional ingredients: - Diced bell peppers - Jalapeños for heat - Sliced olives - Avocado for creaminess - Fresh tomatoes for brightness These extras can change the flavor and texture. For example, jalapeños add a spicy kick. Avocado gives a creamy touch, which balances the dish well. Seasonings can elevate your enchiladas to the next level. Include: - 1/2 teaspoon ground cumin - 1/2 teaspoon garlic powder - Salt and black pepper, to taste These spices add warmth and depth. Cumin brings a smoky note, while garlic gives a savory touch. Adjust salt and pepper to suit your taste. These small changes can create a big impact in flavor. For the full recipe, check out the detailed steps to make these easy chicken enchiladas. Enjoy creating a dish that pleases everyone! First, grab a large mixing bowl. Add 2 cups of shredded chicken. Then, mix in 1 cup of black beans and 1 cup of corn. Next, add half of the cheddar cheese, which is 1 cup. Sprinkle in 1/2 teaspoon of ground cumin and 1/2 teaspoon of garlic powder. Season with salt and black pepper to taste. Stir everything well until mixed. Now, take a 9x13 inch baking dish. Start by spreading about 1/4 cup of enchilada sauce on the bottom. This step keeps the tortillas from sticking. Take a soft flour tortilla and place 1/3 cup of the chicken mixture in the center. Roll it up tightly, making sure it is closed at one end. Place it seam-side down in the dish. Repeat this for all tortillas, filling the dish. Pour the rest of the enchilada sauce over the tortillas. Make sure they are well coated. Then, sprinkle the remaining cheddar cheese on top. Cover the baking dish with aluminum foil. Bake in a preheated oven at 350°F (175°C) for 20 minutes. After that, remove the foil and bake for another 10 minutes. Look for bubbling cheese that is lightly golden. Let the enchiladas rest for a few minutes. Garnish with chopped cilantro before serving. To keep your enchiladas from getting soggy, start with dry tortillas. Warm them briefly in a pan. This softens them but keeps them firm. Next, don’t oversaturate with sauce. Use just enough to coat without drowning the tortillas. When layering, use a thin sauce layer on the bottom of the dish. This helps absorb moisture while baking. Finally, bake covered for the first part, then uncover to let steam escape. If you have leftover chicken or beans, you can make a quick soup. Just add broth, seasoning, and vegetables. Another option is to create a chicken salad by mixing with mayo, herbs, and spices. You can also use leftover tortillas to make quesadillas. Fill them with cheese and any extra veggies. This way, you waste nothing and enjoy new meals! For perfect enchiladas, preheat your oven to 350°F (175°C). Cover with foil for the first 20 minutes. This helps heat through without burning. After that, bake uncovered for 10 more minutes. Keep an eye on the cheese. It should be bubbling and lightly golden. This cooking method ensures your enchiladas are warm and delicious. For more details, check the Full Recipe. {{image_4}} You can easily make a vegetarian version of chicken enchiladas. Swap out the chicken for two cups of cooked lentils or black beans. Use the same spices to keep the flavor strong. You can also add more veggies like bell peppers, zucchini, or spinach. This makes for a hearty filling that everyone will love. If you want dairy-free enchiladas, there are great options. Use a dairy-free cheese that melts well, like cashew cheese. Instead of sour cream, try a vegan sour cream or avocado for creaminess. Ensure your enchilada sauce is also dairy-free. This way, you keep the flavors while sticking to a dairy-free diet. To spice things up, add some heat to your chicken enchiladas. Mix in chopped jalapeños or a dash of cayenne pepper to the chicken filling. You can also use spicy enchilada sauce for an extra kick. If you want more flavor, add some chipotle peppers in adobo sauce. This will make your enchiladas bold and exciting. For the full recipe, check out the details above. You can store leftover enchiladas in an airtight container. Make sure they are cool before sealing. Place them in the fridge if you plan to eat them within three days. For longer storage, consider freezing them. They will taste great later on. To reheat your enchiladas, use the oven for the best taste. Preheat it to 350°F (175°C). Place the enchiladas in a baking dish and cover them with foil. Heat for about 15-20 minutes. This keeps them moist and prevents drying out. You can also microwave them for a quicker option. Just cover them with a damp paper towel to keep them soft. Freezing enchiladas is easy and smart! First, let them cool completely. Wrap each enchilada in plastic wrap. Then place them in a freezer-safe bag or container. They can last for up to three months in the freezer. To enjoy them later, thaw them in the fridge overnight before reheating. This method helps keep the texture nice. You can find the Full Recipe for these cheesy delights to ensure perfect results every time! Yes, you can use corn tortillas. Corn tortillas add a nice texture and flavor. They are smaller, so you may need more of them. Just remember to warm them up first. This helps prevent them from breaking. You can serve enchiladas with many tasty sides. Here are some great options: - Guacamole for creamy goodness - Salsa for a fresh kick - Mexican rice for a filling touch - Refried beans for extra protein - A simple salad for crunch These sides make your meal more fun and flavorful. Enchiladas can last for about 3 to 4 days in the fridge. Make sure you store them in an airtight container. This keeps them fresh and safe to eat. When you're ready to enjoy them again, simply reheat in the oven or microwave. They taste great even after a few days! For the full recipe, check out the details above. You’ve learned how to make easy chicken enchiladas, step by step. We covered key ingredients, preparation, and baking tips. You can customize these enchiladas with different flavors and variations. Remember to store any leftovers properly for the best taste later. With these simple tricks, you’ll impress family and friends alike. Enjoy experimenting with your own twist on this classic dish!

Easy Chicken Enchiladas Flavorful and Simple Recipe

If you’re looking for a tasty meal that’s simple and quick to make, you’re in the right place! My Easy

To make this dish, gather the following ingredients: - 2 cups elbow macaroni - 4 cups sharp cheddar cheese, shredded - 1 cup Gruyère cheese, shredded - 1 cup whole milk - 1 cup heavy cream - 1/4 cup unsalted butter - 1/4 cup all-purpose flour - 2 teaspoons truffle oil - 1 teaspoon garlic powder - 1 teaspoon onion powder - Salt and freshly cracked black pepper to taste - 1 cup panko breadcrumbs - 2 tablespoons fresh parsley, finely chopped (for garnish) When measuring, make sure to be precise. This will help your dish turn out perfect. Use a measuring cup for liquids and a dry measuring cup for solids. For the cheese, I recommend shredding it yourself. Pre-shredded cheese can have additives that affect melting. If you need to substitute, here are some ideas: - Use macaroni shapes like shells or rotini if you can’t find elbow macaroni. - Swap sharp cheddar for mild cheddar for a less intense flavor. - Gruyère can be replaced with mozzarella for a milder taste. - If you want a lighter dish, use low-fat milk or half-and-half instead of whole milk and heavy cream. - For a vegan option, try using plant-based cheese and milk. These swaps can help you customize the recipe while keeping that creamy texture. Don't be afraid to get creative! For the full recipe, check out the details above. First, preheat your oven to 350°F (175°C). This step warms the oven for baking. Next, fill a large pot with water and add salt. Once the water boils, add 2 cups of elbow macaroni. Cook until al dente, which means it should be firm. After cooking, drain the macaroni and set it aside. In the same pot, melt 1/4 cup of unsalted butter over medium heat. Once it melts, sprinkle in 1/4 cup of all-purpose flour. Whisk this mixture for about 2 minutes. You want it to turn light golden. This is your roux, which helps thicken the sauce. Gradually pour in 1 cup of whole milk and 1 cup of heavy cream. Keep whisking to prevent lumps. After about 4-5 minutes, the mixture should be smooth and slightly thick. Now, stir in 1 teaspoon of garlic powder, 1 teaspoon of onion powder, and a pinch of salt and pepper. Slowly mix in 4 cups of sharp cheddar cheese and 1 cup of Gruyère cheese. Stir until fully melted and creamy. Finally, add in 2 teaspoons of truffle oil for a rich flavor. Mix in the cooked macaroni, ensuring every piece is coated with the sauce. Transfer the macaroni and cheese to a greased 9x13 inch baking dish. Spread it evenly. In a small bowl, combine 1 cup of panko breadcrumbs with 1 tablespoon of melted butter. Toss to coat. Sprinkle this mixture over the top for a crispy finish. Bake in your preheated oven for 25-30 minutes. The top should be golden brown and crisp when done. Once baked, let it cool slightly before serving. For a touch of color, garnish with 2 tablespoons of fresh parsley. Enjoy this creamy comfort dish! For the full recipe, check out the link. To get a creamy cheese sauce, start with a good roux. Use equal parts butter and flour. Cook this mix until it turns light gold. This step adds depth to your sauce. Next, slowly whisk in milk and cream. Keep stirring to avoid lumps. Add cheese only when the sauce thickens. I like to use sharp cheddar and Gruyère for great flavor. Always stir until melted. For an extra touch, drizzle in truffle oil at the end. This adds a rich, unique taste. Baking your mac and cheese right is key. First, preheat your oven to 350°F. This ensures even cooking. When you put the dish in, check the time. Bake for 25-30 minutes. This lets the top become golden and crispy. If you want it crispier, broil it for the last few minutes. Just watch closely so it doesn’t burn. A mix of panko breadcrumbs and butter makes the top perfect. This adds crunch and a nice contrast to the creamy sauce. Baked macaroni and cheese is a stand-alone dish, but it pairs well with many sides. Try serving it with a fresh salad. The crunch from greens balances the creaminess. You can also serve it with grilled chicken or vegetables. For a fun twist, add sautéed spinach or roasted broccoli inside the dish before baking. This adds nutrients and color. Don’t forget to garnish with fresh parsley for a bright touch. For more ideas, check the Full Recipe for creative additions! {{image_4}} You can easily change up this dish with tasty add-ins. Try adding cooked broccoli, peas, or spinach for some green goodness. If you want protein, consider mixing in cooked chicken, bacon, or even shrimp. These additions boost the flavor and make your meal more filling. Cheese is the star of this dish. While sharp cheddar and Gruyère shine, don’t be afraid to mix it up. Add mozzarella for stretchiness or pepper jack for a spicy kick. Mixing different cheeses gives depth and richness. Each blend creates a unique flavor that can surprise your taste buds. You can make this dish fit different diets too. For a vegetarian version, skip the meat and focus on flavors like smoked paprika or nutmeg. To make gluten-free, swap regular pasta for a gluten-free type made from rice or quinoa. Just make sure to use gluten-free flour in the roux, and you are all set. These tweaks make the dish accessible for everyone, ensuring no one misses out on the creamy goodness. For the full recipe, check out the detailed steps to create this comfort classic! To store leftover baked macaroni and cheese, wait for it to cool. Place it in an airtight container. Make sure to seal it tightly to keep out air. You can keep it in the fridge for up to three days. If you want to keep it longer, consider freezing it. When reheating, use an oven for the best results. Preheat your oven to 350°F (175°C). Place the macaroni in an oven-safe dish. Add a splash of milk to keep it creamy. Cover it with foil to avoid drying out. Bake for 15-20 minutes until hot. You can also reheat it in the microwave. Use a microwave-safe dish and cover it to keep moisture in. Heat in short bursts, stirring in between. To freeze baked macaroni and cheese, first let it cool completely. Portion it into smaller containers for easy use later. Wrap each container tightly with plastic wrap. Then, place it in a freezer bag for extra protection. Label with the date for easy tracking. You can freeze it for up to three months. When ready to eat, thaw it overnight in the fridge before reheating. For the complete recipe, refer to the Full Recipe section. Yes, you can make Baked Macaroni and Cheese ahead of time. Prepare the dish, but do not bake it yet. Cover it tightly and store it in the fridge for one to two days. When you are ready to bake, just add a few extra minutes to the cooking time. This way, you can enjoy a creamy comfort dish without the stress of last-minute cooking. Elbow macaroni works best for Baked Macaroni and Cheese. Its shape holds the cheese sauce well. You can also try cavatappi or shells if you want a different look. Just make sure that the pasta is small enough to fit in each bite perfectly. To make your Baked Macaroni and Cheese less dry, use enough cheese sauce. Ensure you mix the pasta well with the sauce before baking. If you see it getting dry, add more milk or cream to the sauce. You can also cover the dish with foil while baking to keep moisture in. Yes, there are many ways to make this dish healthier. Use whole wheat macaroni for more fiber. You can also swap some cheese for low-fat options. Adding veggies like spinach or broccoli can boost nutrition without losing flavor. These changes help you enjoy this creamy comfort dish while keeping it balanced. Baked macaroni and cheese is a comforting dish you can easily make. We covered the key ingredients, step-by-step instructions, and useful tips to ensure success. You learned about variations and storage ideas to keep your meal fresh. Now, go ahead and enjoy this delicious recipe. Don't be afraid to get creative with flavors and ingredients. Happy cooking!

Baked Macaroni and Cheese Creamy Comfort Dish

Looking for the perfect comfort food? Baked Macaroni and Cheese is a warm hug on a plate! With creamy cheese

To make Instant Pot Beef and Broccoli, you need the following ingredients: - 1 pound flank steak, thinly sliced against the grain - 2 cups fresh broccoli florets - 1/4 cup low sodium soy sauce - 2 tablespoons oyster sauce - 2 tablespoons cornstarch - 2 tablespoons sesame oil, divided - 1 tablespoon brown sugar - 3 cloves garlic, minced - 1 teaspoon freshly grated ginger - 1/4 cup beef broth - 2 tablespoons chopped green onions (for garnish) - Cooked rice (for serving) If you want to switch things up, consider these substitutions: - Flank steak can be swapped for sirloin or ribeye. - You can use tamari instead of soy sauce for a gluten-free option. - If you don’t have oyster sauce, hoisin sauce works well too. - For a lighter dish, you can use chicken or vegetable broth. - Broccoli can be replaced with snow peas or bell peppers for variety. When choosing your ingredients, keep these tips in mind: - Look for flank steak that has a bright red color and minimal fat. - Choose fresh broccoli with firm stems and bright green florets. - Opt for low sodium soy sauce to control salt levels in your dish. - Fresh garlic and ginger enhance the flavor; avoid pre-packaged versions. - Use high-quality sesame oil for the best flavor in your recipe. These ingredients help create a delicious and satisfying meal. If you want the full recipe, check the details above. First, gather your ingredients. You will need: - 1 pound flank steak, thinly sliced against the grain - 2 cups fresh broccoli florets - 1/4 cup low sodium soy sauce - 2 tablespoons oyster sauce - 2 tablespoons cornstarch - 2 tablespoons sesame oil, divided - 1 tablespoon brown sugar - 3 cloves garlic, minced - 1 teaspoon freshly grated ginger - 1/4 cup beef broth - 2 tablespoons chopped green onions (for garnish) - Cooked rice (for serving) Next, in a medium bowl, whisk the soy sauce, oyster sauce, sesame oil, brown sugar, garlic, ginger, and beef broth. Mix it well. Then, add the sliced flank steak. Make sure every piece gets coated. Let it marinate for about 10 to 15 minutes. While it marinates, prepare your broccoli florets. Now, set your Instant Pot to Sauté mode. Once it shows Hot, add 1 tablespoon of sesame oil. Carefully add the marinated beef in a single layer. Sauté for about 2 to 3 minutes until the meat browns. Stir it occasionally to cook evenly. Then, sprinkle the cornstarch over the beef. Stir well to coat the meat. This step helps the sauce thicken later. Pour the marinade mixture into the pot and gently stir to combine. Next, place the broccoli florets on top of the beef. Do not stir, as the broccoli will steam during cooking. Secure the Instant Pot lid and set the valve to Sealing. Choose the Manual or Pressure Cook mode and set the time for 10 minutes. When the cooking ends, let the pressure release naturally for 5 minutes. After that, switch the valve to Quick Release to let out the remaining pressure. Once you open the lid, check the sauce. If it seems too thin, switch the pot back to Sauté mode. Simmer for a few minutes until the sauce thickens to your taste. Serve the beef and broccoli hot over cooked rice. Garnish with chopped green onions for a fresh touch. Enjoy this savory dish straight from the Instant Pot! For the full recipe, check the section above. To boost the flavor of your Instant Pot beef and broccoli, use fresh ingredients. Fresh garlic and ginger add a punch to the dish. Try marinating the beef longer for deeper taste. You can also add a splash of rice vinegar for extra zing. A sprinkle of sesame seeds before serving gives a nice crunch. If you like your beef tender, stick to the 10-minute cook time. For a firmer texture, reduce the time to 8 minutes. Remember, the pressure release is just as key. Letting it sit for 5 minutes helps keep the meat juicy. If you're adding more veggies, increase the cooking time by a minute or two. The right tools make cooking easier. A good cutting board helps slice the beef thin. A sharp knife is essential for even cuts. Use measuring cups and spoons for accuracy in your sauces. Finally, a sturdy spatula ensures you mix everything well without damaging the pot. {{image_4}} You can make this dish even better by adding more veggies. Try bell peppers, snap peas, or carrots. These vegetables cook well in the Instant Pot and add color. You can also swap beef for chicken, shrimp, or tofu. Each option gives a new twist to the flavor. Want to make this dish gluten-free? Switch to tamari instead of soy sauce. Tamari has a similar taste but is gluten-free. You can also use coconut aminos for a different flavor. This way, everyone can enjoy this tasty meal with no worries. If you love heat, add some spice! Try red pepper flakes or sriracha in the marinade. Start with a little, taste, and then add more if needed. You can also serve it with sliced jalapeños on top. This adds a fresh kick that brightens up the dish. Enjoy your spicy version of Instant Pot Beef and Broccoli! For the full recipe, check out the details above. To store leftover beef and broccoli, let the dish cool first. Once cooled, place it in an airtight container. Make sure to separate the beef from the broccoli to keep it fresh. Store the container in the fridge. It should stay good for about three days. When you are ready to eat, you can reheat the beef and broccoli in two ways. If you prefer the microwave, place it in a microwave-safe bowl. Heat it for about 1-2 minutes. Stir halfway through to warm it evenly. If you want to use the stove, heat a pan over medium heat. Add a splash of water or broth to help steam it. Stir occasionally until it’s hot. For longer storage, you can freeze the leftovers. Place the beef and broccoli in a freezer-safe bag or container. Remove as much air as possible to prevent freezer burn. This dish can last up to three months in the freezer. When you are ready to enjoy it, thaw it in the fridge overnight. Then, reheat as mentioned above. Enjoy your savory meal again! You can skip the oyster sauce and still enjoy great flavor. Use more soy sauce for saltiness. Add a splash of rice vinegar for tang. You can also try hoisin sauce as a sweet substitute. This keeps the dish balanced without losing its essence. Yes, you can use other cuts of beef. Sirloin works well and is tender. Chuck roast is another option, but it takes longer to cook. If you want a leaner cut, try eye of round. Just remember to slice it thinly for the best texture. I recommend serving it over cooked rice for a complete meal. Steamed jasmine or brown rice pairs nicely. You can also add some egg noodles for a different twist. For a colorful plate, toss in a side of stir-fried bok choy or snap peas. For the full recipe, check out the link! This blog post covered everything you need to make Instant Pot Beef and Broccoli. We discussed key ingredients, helpful cooking steps, and smart tips for great flavor. You learned how to store leftovers and even how to customize the dish. In summary, this meal is quick, easy, and full of flavor. With the right ingredients and a few simple steps, you can enjoy a delicious dish your family will love. Now, get cooking!

Instant Pot Beef and Broccoli Quick Dinner Recipe

If you crave a quick and tasty meal, this Instant Pot Beef and Broccoli recipe is for you. In just

- 4 bone-in, skin-on chicken thighs - 1/4 cup honey - 1/4 cup soy sauce - 4 cloves garlic, minced - 1 tablespoon fresh ginger, grated - 1 tablespoon rice vinegar - 1 teaspoon sesame oil - Salt and freshly ground black pepper, to taste - 1 tablespoon olive oil - Chopped green onions and sesame seeds for garnish When I make honey garlic chicken thighs, I love to gather fresh ingredients. The main stars are the chicken thighs, honey, soy sauce, garlic, and ginger. These flavors blend to create something special. Chicken thighs are rich and juicy, perfect for this dish. The honey adds sweetness, while soy sauce brings a nice salty touch. Garlic and ginger give the chicken a bold flavor. For the extra kick, I add rice vinegar and sesame oil. They give the dish a unique twist. Don’t forget salt and pepper to season well. I also like to garnish with green onions and sesame seeds. They add color and texture. This recipe is easy and fun to make. You can find the full recipe at the end of this section. Set your oven to 400°F (200°C) before you start cooking. This temperature gives you that perfect bake. It helps the chicken skin get crispy while keeping the meat juicy. Preheating is key for even cooking, so don’t skip this step. In a medium bowl, mix the following for the marinade: - 1/4 cup honey - 1/4 cup soy sauce - 4 cloves garlic, minced - 1 tablespoon fresh ginger, grated - 1 tablespoon rice vinegar - 1 teaspoon sesame oil Whisk these ingredients together until they blend well. This mixture will give your chicken a rich, sweet flavor. Marinating is important because it allows the chicken to soak up all that delicious taste. Take the chicken thighs and pat them dry with paper towels. This helps the skin get crispy. Then, sprinkle salt and black pepper on both sides. Next, heat 1 tablespoon of olive oil in a large oven-safe skillet over medium-high heat. When the oil is hot, place the chicken thighs in the skillet skin-side down. Sear them for about 5-7 minutes until they turn golden brown. This step locks in flavors and gives you that nice texture. After searing, flip the chicken thighs so the skin side is up. Pour the marinade over the chicken in the skillet. Make sure each piece is well-coated. Now, transfer the skillet into your preheated oven. Bake the chicken for 20-25 minutes. You want the internal temperature to reach 165°F (75°C) to ensure it’s fully cooked. This will keep the meat tender and juicy. Once the chicken is cooked, take it out of the oven. Let it rest for about 5 minutes. Resting is important because it helps the juices settle back into the meat. Before you serve, drizzle any sauce from the skillet over the chicken. For a nice touch, garnish with chopped green onions and sesame seeds. This adds color and extra flavor to your dish. You can find the full recipe [here](#). To get that crispy skin, start with the right oil temperature. Heat the olive oil until it shimmers, about 2 minutes. The chicken thighs should sizzle as soon as they touch the pan. Sear them skin-side down for 5-7 minutes. This step locks in flavor and gives you that golden brown look. Adding herbs and spices can elevate your chicken. Try fresh thyme or rosemary for a new twist. You can also add chili flakes for a bit of heat. Let the chicken soak in the marinade for at least 30 minutes. This ensures the flavors meld and penetrate the meat. For the best results, use a large, heavy skillet. Cast iron works great for even heat. An oven-safe pan lets you move from stove to oven easily. A meat thermometer is essential to check doneness. Aim for 165°F (75°C) to ensure your chicken is safe to eat. For the full recipe, check the section above. {{image_4}} If you want to bake instead of sear your chicken thighs, here’s how. First, you still need to prepare the marinade as described in the full recipe. Instead of searing, you can skip straight to baking. - Preheat your oven to 400°F (200°C). - After marinating, place the chicken thighs on a baking sheet. - Bake for 30-35 minutes or until the chicken reaches 165°F (75°C). Baking makes the chicken juicy and easy. The honey garlic sauce will caramelize nicely, giving you a sweet and savory dish. Using a slow cooker gives a different twist to this recipe. This method makes the chicken super tender. Here’s what you do: - Follow the same steps to prepare the marinade. - Place the chicken thighs in the slow cooker and pour the marinade over them. - Cook on low for 6-7 hours or high for about 3-4 hours. This method allows the chicken to soak up all the flavors. The result is tender, fall-off-the-bone chicken that’s great for meals any day of the week. For a quick meal, try the stir-fry version. It’s fast and simple. Here’s how: - Cut the chicken thighs into bite-sized pieces. - Heat some oil in a large skillet or wok. - Add the chicken pieces and cook until golden brown, about 5-7 minutes. - Stir in the marinade and add your favorite vegetables like bell peppers or broccoli. - Cook for another 5-7 minutes until the chicken is cooked through. This stir-fry is quick and packed with flavor. It’s perfect for busy nights when you want a meal that’s both tasty and healthy. After cooking, you can store the honey garlic chicken thighs in the fridge. Make sure to place them in an airtight container. Properly stored, they last for about 3 to 4 days. If you want to enjoy them later, you can use them in salads or wraps for a quick meal. To freeze the chicken, let it cool completely first. Then, wrap each piece tightly in plastic wrap. Place the wrapped chicken in a freezer-safe bag. This way, it keeps its flavor and texture. You can freeze it for up to 3 months. When you're ready to eat, thaw it in the fridge overnight for best results. When reheating, aim to keep the chicken moist. Preheat your oven to 350°F (175°C). Place the chicken in a baking dish and add a splash of broth or water. Cover the dish with foil to trap steam. Bake for about 15 to 20 minutes, or until heated through. This method helps to keep the chicken juicy and flavorful. Enjoy your sweet and savory chicken again! Yes, you can use boneless chicken thighs. They cook faster than bone-in thighs. Boneless thighs usually take about 15-20 minutes in the oven. However, the texture may differ. Bone-in thighs stay juicier due to the bone. Boneless thighs can be a bit drier if overcooked. This recipe is not spicy. The honey and soy sauce balance the flavors. If you want heat, add red pepper flakes or sriracha. Start with a pinch, and taste as you go. You can always add more for your perfect heat level. Pair these chicken thighs with rice or quinoa. Steamed broccoli or green beans also work well. A simple salad adds freshness. Try a light cucumber salad for crunch. These sides complement the sweet and savory notes of the chicken. To reduce sugar, use less honey. You can replace some honey with unsweetened apple sauce. This keeps the sauce sweet without too much sugar. You can also try using a sugar substitute like agave or stevia. Adjust the amounts to taste for your health goals. Each serving has about 320 calories. It includes 20 grams of protein and 22 grams of fat. The dish has 10 grams of carbs and 2 grams of sugar. This is a great option for a balanced meal. For more detailed info, check the Full Recipe. You can create a tasty honey garlic chicken dish with just a few ingredients. We covered the key seasonings, cooking methods, and tips to ensure a great meal. Remember, letting the chicken rest is vital for flavor. Feel free to experiment with variations to suit your taste. With these easy steps, your chicken will be juicy and full of flavor. Enjoy exploring the recipe and making it your own. Happy cooking!

Honey Garlic Chicken Thighs Flavorful and Easy Recipe

Looking for a delicious and simple dinner idea? Try my Honey Garlic Chicken Thighs! This easy recipe packs a sweet

To create these tasty skewers, you need: - 1 pint of fresh cherry tomatoes - 8 oz of creamy fresh mozzarella balls (bocconcini) - 1 ripe avocado, diced into bite-sized pieces - Handful of fresh basil leaves - 1 tablespoon balsamic glaze - 2 tablespoons extra virgin olive oil - Salt and freshly cracked pepper to taste - Skewers (8-10 inches long) These ingredients work together to give you that classic Caprese taste with a fun twist. You can mix it up a bit with these extras: - Sliced black olives for a salty kick - Prosciutto for a savory touch - Cherry bomb peppers for some heat - A sprinkle of crushed red pepper flakes for spice Adding any of these ingredients can make your skewers even more delightful. You will need some simple tools to make this dish: - A sharp knife for cutting - A cutting board for prep - Small bowls for holding ingredients - Serving platter to display your skewers Having the right tools makes the process smooth and fun. Follow the Full Recipe for complete steps to make these delicious skewers! Start by washing your cherry tomatoes and basil leaves in cold water. This gets rid of dirt. Drain the mozzarella balls well to avoid extra moisture. Next, cut the avocado in half and remove the pit. Slice the avocado into small cubes. Lightly sprinkle salt and pepper on the avocado. This adds flavor and stops it from browning. Grab a skewer and thread a cherry tomato onto it first. Then, add a fresh basil leaf. Next, slide on a mozzarella ball, followed by a piece of diced avocado. Keep layering until the skewer is filled. Leave about one inch at the end for easy handling. Aim for 3-4 pieces of each ingredient on each skewer. This makes your skewers colorful and fun! Once you finish assembling all the skewers, place them on a nice platter. Drizzle extra virgin olive oil and balsamic glaze over them for extra flavor. Sprinkle a bit of salt and fresh cracked pepper on top to taste. For a great display, stand the skewers up in a tall glass or jar. Surround them with fresh basil leaves to add color and a lovely smell. Don't forget to check out the Full Recipe for more details! To make perfect skewers, use fresh ingredients. Choose ripe cherry tomatoes. They should be bright and firm. Look for mozzarella balls that are creamy and smooth. For added texture, include ripe avocado cubes. Layer your ingredients on the skewer in this order: tomato, basil, mozzarella, and avocado. This pattern creates balance and taste. Aim for 3-4 pieces of each ingredient. This builds a colorful skewer. Balsamic glaze adds a rich sweetness. Choose a high-quality glaze for the best flavor. Drizzle it over the skewers just before serving. This adds a shiny finish and depth of taste. You can also dip each skewer in the glaze. This lets guests control their flavor. Remember to keep it light; a little goes a long way. Make your skewers look great on the table. Stand them upright in a tall glass or jar. This displays them nicely and makes them easy to grab. Surround the base with fresh basil leaves. It adds color and a nice scent. You can also use a wooden board for a rustic feel. Arrange them in a circle for a fun look. The key is to make them inviting and fun to eat. {{image_4}} The classic Caprese skewer is a simple delight. It features fresh tomatoes, mozzarella, and basil. The freshness of these ingredients shines through. But let’s add a twist! The avocado twist gives you creamy goodness. It makes the skewers richer and more filling. The ripe avocado pairs well with the tangy balsamic glaze. You get a taste explosion that will impress your guests. You can play with your ingredients. Want a kick? Add slices of spicy salami or prosciutto. For a crunchy texture, try adding cucumber slices. You can also swap in different cheeses. Feta or goat cheese give unique flavors. Experiment with colorful bell peppers or marinated artichokes too. Each change makes your skewer special and fun. Making these skewers vegan is easy! Just skip the mozzarella and add more veggies. Try using marinated tofu or a nut-based cheese. These options keep the flavor while being dairy-free. You can also use a balsamic reduction made from just vinegar and a sweetener. It adds depth without any animal products. Enjoy the same great taste while catering to dietary needs. For the full recipe, see the details above. Store any leftover skewers in an airtight container. This keeps them fresh and tasty. You can also wrap them tightly in plastic wrap. Keep them in the fridge for the best results. Avoid stacking them too high to prevent squishing. When prepping for a gathering, make your skewers a few hours ahead. This saves time and keeps things easy. If you want to prep a day in advance, store the ingredients separately. Assemble them just before serving for the best flavor. Leftover skewers stay fresh for about two days in the fridge. After that, the mozzarella may become soggy, and the avocado might brown. It's best to enjoy them within this time to keep the flavors bright. If you notice any changes, it's time to toss them. For maximum quality, aim to make them fresh when you can. For the complete process, check the Full Recipe. Yes, you can prepare Caprese Salad Skewers ahead of time. Make them a few hours before your event. Just keep them in the fridge. This helps the flavors blend nicely. You can also drizzle the balsamic glaze just before serving. This keeps the skewers looking fresh and tasty. You can add many fun ingredients to your skewers. Try adding olives for a salty bite. You can also use different cheeses, like feta or goat cheese. Cherry peppers can bring a nice kick. For a sweet twist, add some diced fruit like strawberries or peaches. The key is to mix flavors that you enjoy. To stop avocado from browning, use a light sprinkle of salt and pepper. This adds flavor and slows oxidation. You can also squeeze some lemon juice on the avocado pieces. The acid helps keep them green and fresh. If you prepare them in advance, cover them tightly with plastic wrap. This limits air exposure and keeps them looking great. Caprese salad skewers offer a fresh, tasty snack or meal. We covered the key ingredients like tomatoes and mozzarella, plus optional flavors to make them special. I gave step-by-step instructions for quick prep and assembly. You learned tips for perfect skewers and fun variations, like the avocado twist. Finally, I shared how to store leftovers and keep them fresh. These easy skewers fit any occasion. Enjoy making them your own!

Quick Caprese Salad Skewers Fresh and Festive Treat

Looking for a fresh and festive treat? You’ll love my Quick Caprese Salad Skewers! They’re easy to make and perfect

To make these tasty tacos, you need: - 1 medium cauliflower, cut into bite-sized florets - 2 tablespoons extra virgin olive oil - 1 teaspoon smoked paprika - 1 teaspoon ground cumin - 1 teaspoon garlic powder - 1/2 teaspoon sea salt - 1/4 teaspoon freshly ground black pepper - 8 small corn tortillas The seasoning blend makes the cauliflower burst with flavor. I use: - Smoked paprika for a nice, smoky taste. - Ground cumin adds warmth and earthiness. - Garlic powder brings a savory touch. - Sea salt and black pepper enhance all the flavors. Mix these seasonings well with the olive oil. This will coat the cauliflower and make it delicious. Toppings are key for a great taco. I suggest: - 1 cup red cabbage, finely sliced for crunch. - 1 ripe avocado, sliced for creaminess. - 1/4 cup fresh cilantro, roughly chopped for freshness. - 1 lime, cut into wedges for a bright, zesty kick. - Hot sauce, if you like it spicy! These fresh toppings add texture and flavor, making each bite satisfying. You can find the Full Recipe online for more details. First, gather your ingredients. You need: - 1 medium cauliflower, cut into bite-sized florets - 2 tablespoons extra virgin olive oil - 1 teaspoon smoked paprika - 1 teaspoon ground cumin - 1 teaspoon garlic powder - 1/2 teaspoon sea salt - 1/4 teaspoon freshly ground black pepper - 8 small corn tortillas - 1 cup red cabbage, finely sliced - 1 ripe avocado, sliced - 1/4 cup fresh cilantro, roughly chopped - 1 lime, cut into wedges - Hot sauce (optional, for an extra spicy kick) Next, preheat your oven to 425°F (220°C). This will help the cauliflower roast perfectly. In a large bowl, mix the cauliflower florets with the olive oil and spices. Toss until every piece is coated. Spread the florets evenly on a baking sheet. Ensure they are not overlapping. Bake for about 25 minutes. Halfway through, flip the cauliflower to brown it evenly. It should come out golden and tender. While the cauliflower roasts, warm the corn tortillas in a skillet. Heat each side for around 30 seconds. Once the cauliflower is done, take a tortilla and add a generous scoop of roasted cauliflower. Top it with red cabbage, slices of avocado, and fresh cilantro. Serve your tacos warm with lime wedges on the side. For extra kick, drizzle hot sauce on top. Enjoy your meal! Roasting cauliflower well is key to tasty tacos. Preheat your oven to 425°F (220°C). The high heat helps the cauliflower caramelize. Cut the cauliflower into bite-sized pieces. This size allows for even cooking. Toss the florets in olive oil and spices. Make sure every piece is coated. Spread them out on a baking sheet. Avoid overlapping pieces for even roasting. Flip the cauliflower halfway through to get a nice brown color. Roast for about 25 minutes until tender. Serve your tacos warm and fresh. Start with a corn tortilla as a base. Place a generous amount of roasted cauliflower on top. Add thin slices of red cabbage for crunch. Avocado brings a creamy texture, so don’t skip it! A sprinkle of cilantro adds brightness. Squeeze fresh lime juice over the top. This adds a zesty kick. If you like heat, drizzle some hot sauce on your tacos. Enjoy them right away for the best taste. You can easily boost the flavor of your tacos. Try adding a dollop of vegan sour cream for creaminess. Pickled onions can add a tangy punch. You could also include fresh salsa for extra freshness. Chopped tomatoes or jalapeños offer a burst of flavor. Experiment with different herbs like parsley or mint. Each addition can change the taste. These small changes can make your vegan tacos even more satisfying. For more ideas, check out the Full Recipe online. {{image_4}} If you want a lighter meal, swap the corn tortillas for lettuce wraps. They cut calories and add crunch. You can also skip the oil when roasting the cauliflower. Use vegetable broth instead. This change helps you enjoy the tasty flavors without the added fat. You can mix it up with other veggies. Try adding bell peppers, zucchini, or mushrooms. These will add more texture and flavor. If you want a protein boost, add black beans or chickpeas. They make your meal filling and nutritious. To adjust the spice level, add or reduce the amount of hot sauce. For mild tacos, skip the sauce altogether. If you love heat, sprinkle in some cayenne pepper or diced jalapeños. These will give your tacos that extra kick. Feel free to explore these variations. Customizing your tacos makes them even more fun to eat! To store your leftover cauliflower tacos, let them cool down first. Place them in an airtight container. Keep them in the fridge for up to three days. If you have extra toppings, store them separately to keep everything fresh. This helps maintain the taste and texture of the tacos. When you're ready to enjoy your leftovers, reheating is easy. You can use a microwave or a skillet. If using a microwave, heat for about 1 to 2 minutes. If you prefer using a skillet, warm the tacos over low heat for about 5 minutes. This keeps the tortillas soft and the filling warm. If you want to freeze your tacos, I recommend storing the filling and tortillas separately. Place the cooled cauliflower in a freezer-safe bag. Seal it tightly and store it for up to three months. For the tortillas, stack them and wrap them in foil or plastic wrap. When you're ready to eat, just thaw and reheat. This way, you can easily enjoy your vegan tacos anytime! You can use lettuce leaves, like romaine or butter lettuce. This creates a fresh, low-carb taco. Other options include rice paper wraps or gluten-free tortillas. Both options hold the filling well and taste great. Yes, you can make these tacos gluten-free. Simply choose corn tortillas or look for gluten-free wraps. Always check labels to ensure they are safe for your diet. To achieve extra crispy cauliflower, make sure to spread the florets in a single layer on the baking sheet. Use enough olive oil to coat them well. You can also add a sprinkle of cornstarch to the seasoning. This helps create a crunchy texture when roasting. For the full recipe, please check online resources. You’ll find all the details you need to make these tasty tacos. In this post, we covered how to make tasty vegan cauliflower tacos. We explored the key ingredients, seasoning, and fresh toppings. I shared step-by-step instructions for preparation and roasting. You learned tips for perfect tacos and explored fun variations. We also looked at storage, reheating, and answers to common questions. These tacos are easy, healthy, and full of flavor. Enjoy trying new twists and sharing with friends!

Satisfying Vegan Cauliflower Tacos Recipe

Looking for a delicious and filling meal that fits your vegan lifestyle? Look no further! My satisfying vegan cauliflower tacos

Older posts
Newer posts
← Previous Page1 … Page30 Page31 Page32 … Page42 Next →

dsad

© 2025 recipetorch • Built with GeneratePress

Our Policies

  • Copyright Policy
  • Cookie Policy
  • GDPR Policy
  • Privacy Policy
  • Disclaimer
  • Terms Of Use

More Information

  • Home
  • About
  • Contact
  • Appetizers
  • Dessert
  • Dinner
  • Drinks
©2025, recipetorch About Back To Top