Skip to content
DisclaimerTerms Of UseGDPR PolicyCookie Policy

recipetorch

  • Home
  • Drinks
  • Appetizers
  • Dinner
  • Dessert
  • About
  • Contact
  • Privacy Policy
DisclaimerTerms Of UseGDPR PolicyCookie Policy

Nicole

- Boneless, skinless chicken thighs - Honey and soy sauce - Garlic and ginger To whip up sticky honey chicken, you need just a few main ingredients. Start with boneless, skinless chicken thighs. I love these because they stay juicy and tender. Next, grab some honey and soy sauce. These two will give your dish that sweet and savory flavor we all crave. Don’t forget garlic and ginger! They add a nice kick to the sauce. - Green onions - Toasted sesame seeds For a little added flair, consider using some optional garnishes. Green onions add a fresh taste and a pop of color. Toasted sesame seeds give a nice crunch and a nutty flavor. These simple touches make your dish look and taste better. - Alternatives to honey - Soy sauce substitutes (e.g., tamari) If you want to switch things up, there are easy substitutions. For a different sweetness, try maple syrup instead of honey. If you need a soy sauce alternative, tamari works well. Both keep the dish flavorful while making sure everyone can enjoy it. First, we need to make the marinade. In a mixing bowl, combine the following ingredients: - 1/4 cup honey - 2 tablespoons low-sodium soy sauce - 1 tablespoon apple cider vinegar - 2 minced garlic cloves - 1/2 teaspoon freshly grated ginger - A pinch of salt and pepper Whisk these together until well mixed. Then, add 1 pound of bite-sized chicken thighs. Toss the chicken pieces gently to coat them evenly. Cover the bowl and place it in the fridge for 15-20 minutes. This step helps the chicken soak up all that yummy flavor. While the chicken marinates, get your skillet ready. Heat 1 tablespoon of sesame oil over medium-high heat. Once the oil shimmers, add the marinated chicken pieces. Spread them out in a single layer. This helps them brown nicely. Cook for about 6-8 minutes, turning them occasionally. You want the chicken to be golden brown and cooked all the way through. Now it's time to make the sauce! Lower the heat to medium. Carefully pour the honey mixture from the bowl into the skillet with the chicken. Stir gently to mix everything together and let it cook for about 2 minutes. Next, grab a small bowl and mix 1 tablespoon of cornstarch with 2 tablespoons of water to make a slurry. Stir until smooth. Gradually add this slurry to the skillet while stirring continuously. This will thicken the sauce, giving it that sticky glaze. Once thickened, your chicken will be ready to serve! For the full recipe, check the details above! To make sure your chicken is cooked right, use a meat thermometer. The chicken should reach 165°F (75°C). This way, it stays juicy and safe to eat. If you don't have a thermometer, cut a piece to check if it’s pink inside. To avoid a sticky sauce, keep the heat steady when cooking. If it gets too hot, the sauce can burn. Stir it gently as it cooks. This helps mix the flavors without sticking. Want to spice things up? Add some red pepper flakes or cayenne pepper for a kick. Just a pinch can make a big difference. You can also mix in a bit of paprika for a smoky taste. Fresh herbs make a great garnish. Try using chopped cilantro or basil on top. These herbs add color and bright flavors that pop! A good non-stick skillet works best for this dish. It helps the chicken brown nicely and makes cleanup easier. For easy cleanup, keep a spatula and a bowl handy. The spatula lets you flip the chicken with ease, while the bowl holds the marinade. This keeps your work area neat as you cook. Don't forget to check out the Full Recipe for all the steps! {{image_4}} You can swap chicken for tofu or shrimp. Tofu gives a great texture. Use firm tofu and press it to remove excess water. Shrimp cooks fast, so watch the time. - For tofu, cook it for 8-10 minutes until golden. - For shrimp, cook for only 3-4 minutes until pink. Want to change the taste? Add spicy elements like chili flakes for heat. You can also try adding sriracha or a dash of hot sauce to the marinade. Mix in different sauces like teriyaki or hoisin for unique flavors. Each sauce brings a new twist, making it fun to experiment. Pair sticky honey chicken with great side dishes. Steamed rice is a classic choice. You could also serve it with stir-fried veggies or a fresh salad. For plating, use a colorful bowl and layer the rice first. Place the chicken on top and drizzle some sauce around. Add green onions and sesame seeds for a pop. This makes your meal look as good as it tastes. Try the full recipe for Sticky Honey Chicken Delight and enjoy! You can keep leftover sticky honey chicken in the fridge for up to four days. Store it in an airtight container to keep it fresh. Make sure it cools down before sealing. This way, you avoid moisture build-up that can make the chicken soggy. When ready to eat, simply reheat it in a skillet or microwave. If you want to save sticky honey chicken for later, freezing is a great option. Place it in a freezer-safe container or a heavy-duty freezer bag. It can last up to three months in the freezer. When you are ready to enjoy it again, thaw it overnight in the fridge. To reheat, warm it on the stove over low heat until heated through. This keeps the chicken juicy and flavorful. Batch cooking sticky honey chicken is a smart way to save time. You can prepare a large amount and store it for quick meals. Cook extra rice or veggies to pair with it. Store the chicken and sides separately to keep everything fresh. This way, you can mix and match for different meals throughout the week. If you need a honey substitute, maple syrup works well. You can also use agave nectar. Both options will keep the sweet taste and stickiness. Adjust the amount to your liking. Start with the same amount as honey, then taste and tweak. Marinating the chicken for 15-20 minutes is perfect. This time lets the flavors soak in. If you have more time, you can marinate it longer, even up to an hour. Just remember to keep it in the fridge while it soaks. Yes, you can use chicken breast. It will cook faster, so check for doneness sooner. Thighs are juicier and more tender, but breasts will still taste great. Just cut them into similar-sized pieces for even cooking. Serve sticky honey chicken over steamed rice or a bed of stir-fried veggies. This adds color and flavor. You can drizzle extra sauce on top for a nice finish. Garnish with green onions and sesame seeds for a pop of taste and texture. For the full recipe, check out the Sticky Honey Chicken Delight. This article covered a delicious sticky honey chicken recipe. We focused on main ingredients like chicken thighs, honey, and soy sauce. I provided step-by-step instructions for marinating and cooking the chicken. You learned tips to enhance flavor and ensure perfect doneness. We also explored variations with different proteins and how to store leftovers. I hope you feel inspired to try this dish. Simple ingredients and clear steps make cooking fun and tasty. Enjoy your cooking journey!

Sticky Honey Chicken Quick Recipe for Easy Dinner

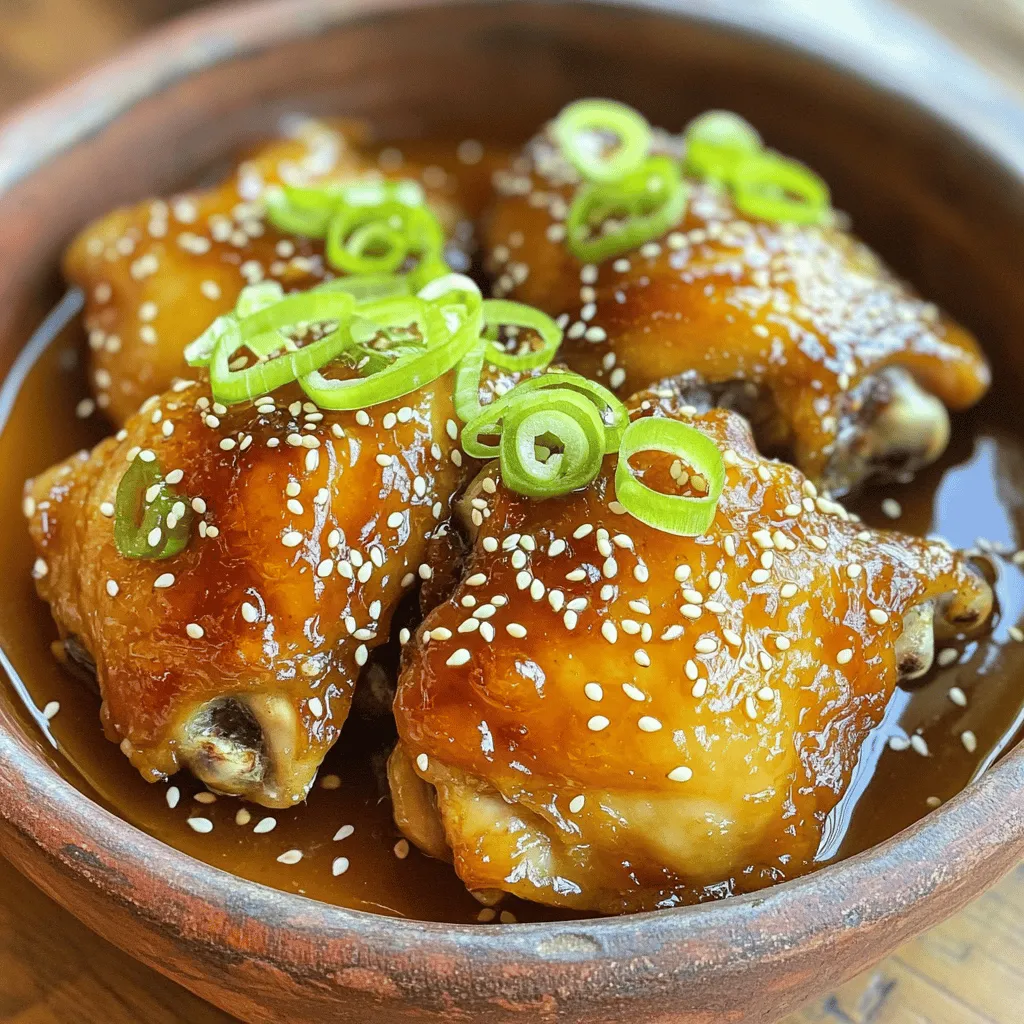
Looking for a quick and tasty dinner idea? I’ve got you covered with my Sticky Honey Chicken recipe! This dish

To make the Coconut Rice Pudding, you need these simple ingredients: - 1 cup Arborio rice - 4 cups canned coconut milk - 1/2 cup granulated sugar - 1/4 teaspoon sea salt - 1 teaspoon pure vanilla extract - 1/2 cup shredded coconut - Fresh mango slices for topping - Toasted coconut flakes for garnish Arborio rice makes this pudding creamy and rich. Canned coconut milk adds that tropical flavor. Sugar balances the coconut's sweetness, while sea salt enhances all the tastes. Pure vanilla extract gives the pudding a nice aroma. You can choose sweetened or unsweetened shredded coconut based on your taste. Fresh mango slices add a fruity touch, and toasted coconut flakes provide a crunchy finish. For the full recipe, follow the steps after gathering these ingredients! First, gather your ingredients. You need Arborio rice, coconut milk, sugar, salt, and vanilla. In a medium saucepan, add 1 cup of Arborio rice. Pour in 4 cups of canned coconut milk. Then, add 1/2 cup of granulated sugar and 1/4 teaspoon of sea salt. Use a wooden spoon to mix everything well. This step is key to a smooth pudding. Now it’s time to heat the mixture. Place your saucepan over medium heat. Stir often to keep the rice from sticking. Bring the mixture to a gentle boil. You want it to bubble lightly, not rush. This helps release the starch from the rice, making it creamy. Once it boils, reduce the heat to low. Cover the saucepan with a lid. Let it simmer for about 30-35 minutes. Stir occasionally during this time. This helps the rice soak up the coconut milk. After simmering, remove the pan from heat. Stir in 1 teaspoon of pure vanilla extract and 1/2 cup of shredded coconut. This adds a lovely flavor. Let it cool for a few minutes; it will thicken as it cools. You can serve the pudding warm or chilled. For a fun touch, use individual serving bowls. Top each bowl with fresh mango slices for a sweet burst. Sprinkle toasted coconut flakes on top for a crunchy finish. For a nice look, use clear glass bowls. This way, everyone can see the creamy texture. To make the best coconut rice pudding, focus on the rice. I prefer Arborio rice. This type has a creamy texture once cooked. It absorbs the coconut milk well. Make sure you stir often while it cooks. This keeps the rice from sticking and helps it get creamy. If you want a thicker pudding, let it cook a bit longer. Just be careful not to let it burn. For a burst of flavor, add a pinch of cinnamon or nutmeg when cooking. These spices bring warmth and depth. You can also switch the vanilla extract for almond extract. This adds a nutty twist. If you enjoy fruit, add diced pineapple or a splash of mango juice. This makes the pudding even more tropical. You can adjust the sweetness too. Try adding more sugar or a drizzle of honey based on your taste. Presentation is key for any dessert. Use clear glass bowls to show off the creamy pudding. This makes it look fancy. Top with fresh mango slices for color and flavor. Toasted coconut flakes add crunch and a nice touch. For a pop of green, add a mint leaf on top. This not only looks good but also gives a fresh aroma. For the full recipe, check out the Coconut Rice Pudding: Disney Copycat. {{image_4}} When making coconut rice pudding, you can choose different sweeteners. Coconut sugar adds a unique flavor. It has a caramel-like taste that pairs well with coconut. Granulated sugar offers a more classic sweetness. You can use either based on your taste. If you want a vegan option, this recipe works well. The main ingredients are already vegan-friendly. Use coconut milk and skip dairy. For gluten-free needs, Arborio rice is naturally gluten-free. This dish is perfect for many diets, and you'll love the rich flavor. For the full recipe, check out the detailed steps and ingredients listed above. To store your leftover coconut rice pudding, let it cool. Once cool, transfer it to an airtight container. Make sure to close the lid tightly. Place it in the fridge. This helps keep the pudding fresh. When you're ready to enjoy your pudding again, take it out of the fridge. You can reheat it in a microwave or on the stove. If using a microwave, heat it for 30-60 seconds. Stir it in between to warm it evenly. If using the stove, add a splash of coconut milk to keep it creamy. Heat it over low heat until warm. Coconut rice pudding stays good for about 3-4 days in the fridge. After that, it may lose its taste and texture. Always check for any off smells or changes in color before eating. Enjoy your tasty dessert for as long as it lasts! For the full recipe, check out the details above. Yes, you can use other types of rice. However, Arborio rice works best for creaminess. It absorbs liquid well and gives a nice texture. If you try another type, like jasmine or basmati, the pudding may not be as creamy. Jasmine rice will add a lovely floral note. To adjust sweetness, you can add more or less sugar. Start with the half cup in the recipe. Taste the pudding before serving. If it's not sweet enough, add a few tablespoons more. You can also use honey or maple syrup for a different flavor. This recipe is a copycat because it mimics the Disney version. You can find this dessert at Disney parks. I loved the creamy texture and coconut flavor there. This recipe captures that essence while being easy to make at home. You can freeze Coconut Rice Pudding, but it may change texture. Once cooled, place it in an airtight container. When ready to eat, thaw it in the fridge overnight. Reheat gently on the stove, adding a splash of coconut milk for creaminess. This blog post covered how to make creamy coconut rice pudding. We talked about key ingredients like Arborio rice and coconut milk. I shared step-by-step instructions for cooking and tips to make it perfect. You can also explore tasty variations and find storing methods to keep it fresh. In the end, this dessert is simple and delicious. Enjoy making it your own with different flavors, toppings, and adjustments.

Coconut Rice Pudding Disney Copycat Tasty Dessert Recipe

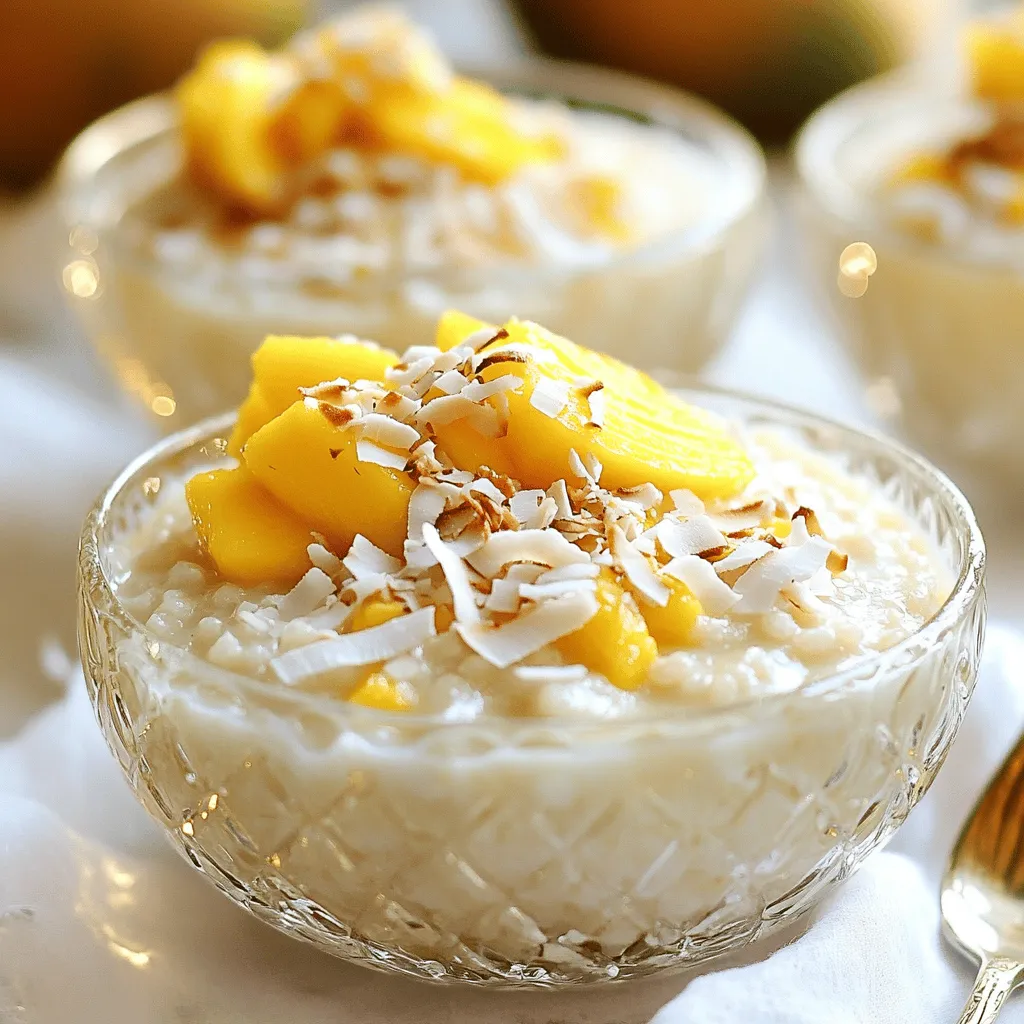
If you love the magical world of Disney, you’ll enjoy this Coconut Rice Pudding recipe! This tasty dessert is a

To make Easy Honey Garlic Chicken Breasts, gather these ingredients. Each one plays a key role in flavor. - 4 boneless, skinless chicken breasts - 1/3 cup honey - 3 cloves garlic, finely minced - 2 tablespoons low-sodium soy sauce - 1 tablespoon apple cider vinegar - 1 tablespoon cornstarch - 2 tablespoons extra virgin olive oil - Salt and freshly ground black pepper, to taste - Fresh parsley, finely chopped (for garnish) The chicken breasts are the star here. They need to be tender and juicy. Honey adds sweetness and a lovely glaze. Minced garlic brings a strong, savory punch. Soy sauce gives a salty depth, while vinegar adds a nice balance. Cornstarch thickens the sauce, making it rich. Olive oil helps cook the chicken without sticking. Finally, salt and pepper enhance all the flavors. Fresh parsley adds a pop of color and freshness. For the full recipe, check out the complete instructions to create this fantastic dish. To start, mix honey, minced garlic, and soy sauce in a bowl. This mix gives the chicken its sweet and savory taste. Next, add cornstarch. This ingredient is key for making the sauce thick and sticky. Without it, the sauce may be too runny. Before marinating, season both sides of the chicken breasts with salt and pepper. This step boosts the chicken's flavor. After seasoning, place the chicken in a resealable bag or dish, then add the marinade. Make sure each piece is well coated. Seal the bag or cover the dish. Let it marinate for at least 30 minutes, or up to 2 hours for more flavor. Heat olive oil in a large skillet over medium heat. Remove the chicken from the marinade, letting any extra drip off. Place the chicken in the hot skillet. Cook for 5-7 minutes on each side. Look for a golden-brown crust and check that the internal temperature reaches 165°F (75°C). This ensures the chicken is safe to eat. After cooking, take the chicken out and keep it warm on a plate. In the same skillet, pour in the reserved marinade. Bring it to a gentle simmer over medium heat. Stir often for 2-3 minutes until the sauce thickens and shines. Now, drizzle this sauce over the chicken or toss it in the skillet to coat well. This adds a burst of flavor and makes the dish look great. To get that golden-brown crust, start by heating your skillet well. Use medium heat to avoid burning. When the oil is hot, place the chicken in the skillet. Don't overcrowd the pan. Leave space between each piece. This helps the chicken cook evenly. For juicy chicken breasts, remember to season well. Use salt and pepper on both sides before cooking. Marinating also helps. It adds moisture and flavor. Let the chicken sit in the marinade for at least 30 minutes. Longer is better, up to two hours. This really enhances the taste. To make your honey garlic chicken even better, think about sides. Fluffy steamed rice works great. It soaks up the tasty sauce. Seasonal roasted vegetables also add a nice touch. You can mix colors and textures for a beautiful plate. For garnishing, use fresh parsley. It adds color and freshness. Chop it finely and sprinkle it over the chicken before serving. This small step boosts the dish's visual appeal. Feel free to change the recipe to suit your taste. Want less sweetness? Use less honey. You can also try maple syrup or agave. They give a different flavor. For a tangy kick, switch apple cider vinegar with lemon juice. If you like spice, add red pepper flakes or hot sauce. Start with a small amount and taste. You can always add more, but it’s hard to take it away. Adjust to your liking, and enjoy your custom dish! {{image_4}} You can easily switch up some ingredients in this recipe. Here are a few ideas: - Different Sweeteners: Use maple syrup or agave nectar if you want. They work well in place of honey. Each option gives a unique flavor twist. - Vinegar Choices: Apple cider vinegar adds a nice tang. You can also try rice vinegar or balsamic vinegar for a new taste. - Protein Substitutes: If you prefer, use pork chops or tofu instead of chicken. Adjust cooking times based on the protein you choose. For example, pork needs more heat. Tofu absorbs flavors well, so marinate it just like chicken. Explore flavors from around the world to make this dish your own. Here are some fun ideas: - Cuisines Influence: Add a splash of soy sauce for an Asian flair. Use curry powder for an Indian twist. Each culture brings its own spin to this dish. - New Herbs and Spices: Try adding fresh ginger for a zesty kick. You can also use rosemary for a more earthy taste. Fresh herbs add brightness and depth to your meal. Feel free to experiment with these variations. Each change can unlock a different flavor profile, making your honey garlic chicken unique every time you cook it. Want to dive deeper? Check out the Full Recipe for all the details! To keep your honey garlic chicken fresh, store it in the fridge. Place the chicken in an airtight container. It will last for about 3 to 4 days. For longer storage, freeze the chicken. Wrap it tightly in plastic wrap or foil. Then, place it in a freezer-safe bag. This way, it can last for up to 3 months. When reheating, use the oven or stovetop. The oven helps keep the chicken juicy. Preheat it to 350°F (175°C). Place the chicken in a baking dish, cover it with foil, and heat for about 15-20 minutes. On the stovetop, use a skillet over medium heat. Add a splash of water or broth to keep it moist. Heat for about 5-7 minutes, flipping the chicken halfway. Always check that the internal temperature reaches 165°F (75°C) for safety. You should marinate the chicken for at least 30 minutes. This lets the flavors soak in. If you have time, marinating for up to 2 hours gives even better taste. The honey and garlic will really shine! Yes, you can use bone-in chicken. Just add a few extra minutes to the cooking time. Make sure the internal temperature reaches 165°F (75°C). This ensures it cooks all the way through. This dish pairs well with several sides. Try serving it with fluffy rice or roasted vegetables. Steamed broccoli or a fresh salad also make great choices. These sides balance the sweet and savory flavors. Yes, you can make this dish gluten-free. Simply substitute regular soy sauce with gluten-free soy sauce. This keeps the flavor while making it safe for gluten-free diets. The best way to check is by using a meat thermometer. Insert it into the thickest part of the chicken. It should read 165°F (75°C). This ensures the chicken is safe to eat and juicy. For the full recipe, check out the details above. Enjoy your cooking! In this blog post, we explored how to make honey garlic chicken. We covered the key ingredients, the marinade preparation, and cooking techniques. I shared tips for perfecting texture and flavor, along with serving ideas and possible variations. Remember, marinating is key for great taste. Whether you stick to the original recipe or make a twist, enjoy the process. You’ll impress everyone with a dish that’s simple yet packed with flavor. Happy cooking!

Easy Honey Garlic Chicken Breasts Fantastic Flavor Dish

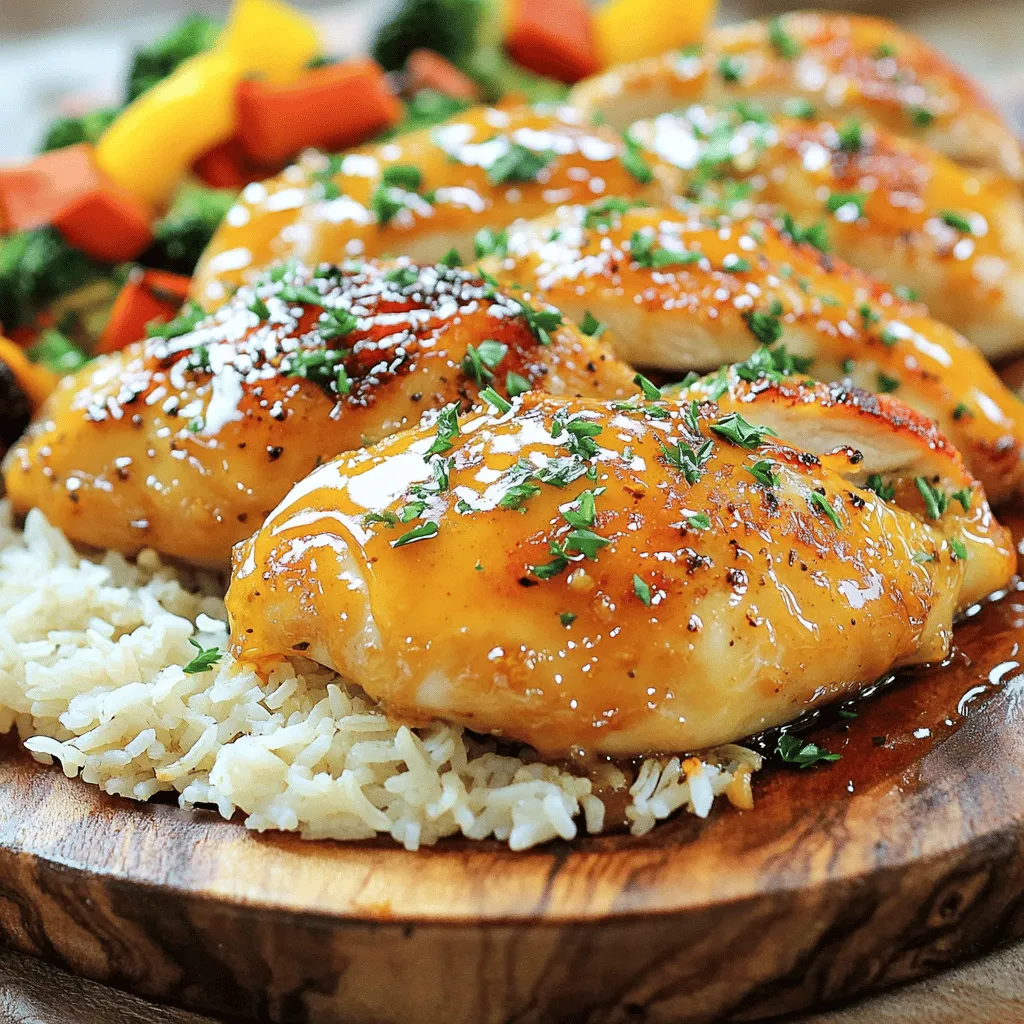
Are you ready for a dinner that’s quick, easy, and packed with flavor? My Easy Honey Garlic Chicken Breasts will

- 8 oz rotini pasta - 1 cup fresh crab meat (or shredded imitation crab) - 1/2 cup celery, finely diced - 1/2 cup red bell pepper, chopped - 1/2 cup creamy mayonnaise - 2 tablespoons freshly squeezed lemon juice - 1 teaspoon Dijon mustard - 1/2 teaspoon garlic powder - Salt and freshly ground black pepper to taste - Chopped fresh parsley for garnish The key to a great crab pasta salad lies in its fresh ingredients. I love using rotini pasta for its fun shape that holds onto the dressing well. The crab meat adds a sweet ocean flavor. You can use fresh crab or imitation crab, depending on what you have. Both work nicely! Next, I add crunchy celery and sweet red bell pepper. These veggies not only add color but also great texture. For the dressing, I mix creamy mayonnaise, fresh lemon juice, Dijon mustard, and garlic powder. This blend creates a smooth and tangy flavor that makes the salad shine. Finally, I season the dish with salt and black pepper. A sprinkle of chopped fresh parsley adds a pop of color and freshness. You can find the complete recipe under the title "Oceanic Bliss Crab Pasta Salad" to help you make this quick and tasty dish. - Bring salted water to a boil. - Add 8 oz of rotini pasta and cook until al dente. - Drain the pasta and cool it under cold water. Cooking pasta is simple, yet it sets the base for your salad. Start by bringing a large pot of salted water to a boil. The salt will help flavor the pasta. Once boiling, add the rotini pasta. Cook it according to the package instructions until it is al dente, which means it should be firm to the bite. After cooking, drain the pasta in a colander. Rinse it under cold water to stop the cooking process and cool it down. This step is key to keeping the pasta from becoming mushy. - Combine cooked pasta with crab and vegetables. - Mix together dressing ingredients. Now, it's time to bring your salad to life. In a large mixing bowl, combine the cooled pasta with 1 cup of fresh crab meat, 1/2 cup of finely diced celery, 1/2 cup of chopped red bell pepper, 1/4 cup of minced red onion, and 1/2 cup of halved cherry tomatoes. Gently stir everything together. This mix of ingredients adds great textures and flavors. Next, in a separate bowl, whisk together the dressing. Combine 1/2 cup of creamy mayonnaise, 2 tablespoons of freshly squeezed lemon juice, 1 teaspoon of Dijon mustard, 1/2 teaspoon of garlic powder, and a pinch of salt and pepper. Mixing these well makes a smooth dressing that ties the salad together. - Toss pasta and crab mixture with the dressing. - Refrigerate for flavor enhancement. - Serve and garnish with parsley. Now for the fun part! Drizzle the dressing over the pasta and crab mixture. Use a spatula or a large spoon to toss everything gently. Make sure the pasta and veggies get coated evenly with the creamy dressing. Taste the salad and adjust the seasoning if needed. Cover the bowl with plastic wrap and place it in the fridge for at least 30 minutes. This chilling step is important. It allows the flavors to blend and deepen. Once chilled, give the salad a final toss. Scoop it into a serving dish and garnish with chopped fresh parsley for a vibrant touch. For the full recipe, refer to the detailed instructions above. Enjoy your delicious crab pasta salad! I love tweaking flavors to make this dish shine. You can adjust the seasoning to fit your taste. A little extra salt can bring out the crab's natural sweetness. If you want more brightness, add a touch more lemon juice. The zest of lemon really lifts the salad. When it comes to serving, presentation matters. You can serve the salad in individual bowls for a fancy touch. A large glass dish also looks great and shows off the vibrant colors. Don’t forget to pair it with lemon wedges for an extra citrus burst. It adds a nice zing when you squeeze it on top. Chilling the salad is key. It helps all the flavors blend well. I usually chill it for at least 30 minutes before serving. If you want to add more flavor, test different herbs. Fresh dill or chives can make a delightful difference. They add a unique twist and can enhance the overall taste. {{image_4}} You can easily swap crab for other seafood. - Use shrimp for a sweet bite. - Try lobster for a touch of luxury. - Canned tuna is a quick and tasty choice. Each option gives a unique flavor to your salad. Shrimp adds a nice crunch, while lobster enhances richness. Canned tuna is simple and more affordable. Adding veggies can make your salad even better. - Incorporate avocado for a creamy texture. - Add peas or corn for a sweet pop. Avocado brings a rich flavor that pairs well with crab. Peas and corn add a bright touch and extra sweetness. Feel free to mix and match your favorite veggies! You can adjust this recipe to fit your diet. - Use gluten-free pasta for a gluten-free dish. - Opt for low-fat mayo for a lighter option. Choosing gluten-free pasta allows those with allergies to enjoy this dish. Low-fat mayo keeps it light without losing flavor. You can still enjoy all the taste in a healthier way. Store your crab pasta salad in an airtight container in the fridge. This keeps it fresh and safe. It tastes best within 2-3 days after you make it. If you eat it too late, the flavors might not be as good. I do not recommend freezing this salad. Freezing changes the texture of the pasta and crab. When thawed, it may become mushy and less tasty. You should serve this salad cold. If you reheat it, the texture will change. The creamy dressing will not taste right when warm. Enjoy it straight from the fridge for the best taste! Fresh crab meat offers the best flavor. It tastes sweet and briny. If you're on a budget, imitation crab is a tasty alternative. It still works well in this dish. You can keep it for 2-3 days. It will taste best when eaten fresh, but it still holds up well in the fridge. Yes, you can! Making it a few hours ahead helps the flavors meld beautifully. Just cover it and chill in the fridge until you're ready to serve. If you're looking for a healthier twist, use Greek yogurt or mashed avocado. Both options add creaminess and a fresh taste. Absolutely! The mild flavors make it appealing to children. They will enjoy the fun shapes of the pasta and the sweetness of the crab. To add some heat, you can include chopped jalapeños or a dash of hot sauce. Start small and taste as you go to find the right balance. This crab pasta salad combines fresh ingredients and easy steps for a delicious meal. You start with rotini pasta, crab, and fresh veggies. The creamy dressing ties it all together. Don't forget to chill the salad for richer flavors. You can mix and match with different seafood or add veggies. Store leftovers for a quick snack, but enjoy within a few days for the best taste. This dish is simple, tasty, and sure to please everyone at your table. Enjoy your culinary adventure!

Super Easy Crab Pasta Salad Quick and Tasty Dish

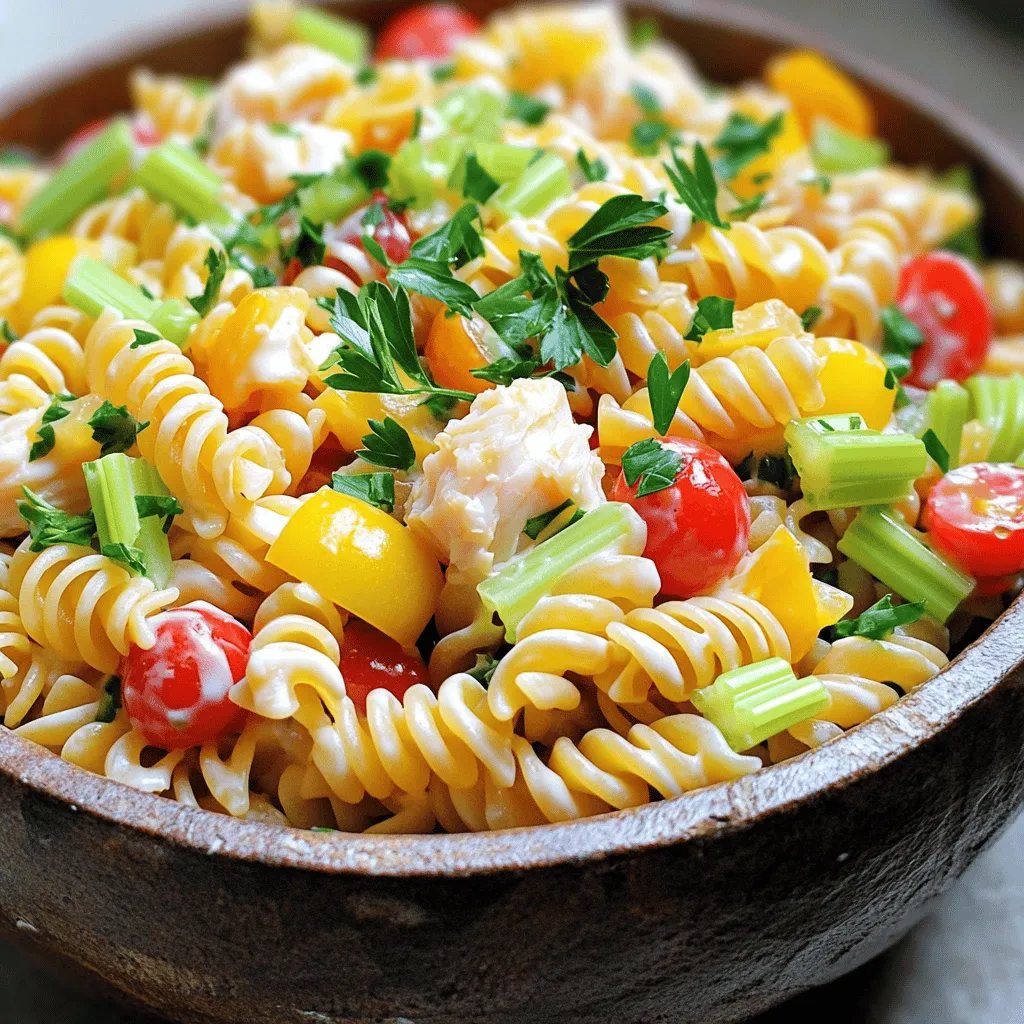
Looking for a dish that’s quick, tasty, and sure to impress? You’re in the right place! My Super Easy Crab

For this creamy banana dessert, you will need: - 3 ripe bananas, mashed - 1 cup heavy cream - 1/2 cup cream cheese, softened - 1/2 cup powdered sugar - 1 teaspoon vanilla extract - 1/4 teaspoon ground cinnamon - 1/2 cup crushed graham crackers - Fresh banana slices for garnish These key ingredients create the rich and smooth texture of the dessert. The ripe bananas add natural sweetness, while the cream cheese gives it a nice tang. Whipping the heavy cream makes the dessert light and airy. You can add these optional ingredients to boost flavor: - 1/4 cup chopped walnuts or pecans - A drizzle of chocolate sauce - A sprinkle of cocoa powder Chopped nuts add crunch. Chocolate sauce gives a sweet touch. Cocoa powder adds a rich flavor. Feel free to mix and match to make the recipe your own! To make this dessert, you will need: - A large mixing bowl - An electric mixer - Serving glasses or bowls - A spatula Having these tools ready makes the process smooth and easy. The electric mixer helps achieve the perfect creaminess. Using clear glasses for serving enhances the visual appeal of your creamy banana dessert. For the full recipe, check the detailed instructions above! To start, gather your ingredients. You need ripe bananas, cream cheese, powdered sugar, and vanilla extract. In a big bowl, mash the bananas until smooth. Add the cream cheese, powdered sugar, and vanilla. I like to use an electric mixer here. Beat the mix on medium speed until it is creamy and lump-free. This step is key for a smooth texture. Now, take another bowl and pour in the heavy cream. Using a hand mixer or a whisk, whip the cream until stiff peaks form. This means the cream should stand up well. Be gentle as you fold this whipped cream into your banana mix. Use a spatula and make sure everything combines well. The goal is to keep it light and fluffy. Next, it's time to layer your dessert. Grab some clear glasses or bowls for a pretty view. Start with a big spoonful of the banana cream mix at the bottom. Then, add a layer of crushed graham crackers. Repeat this process until you use all your mix. Make sure the top layer is the banana cream. Once done, place the desserts in the fridge for at least one hour. This helps the flavors blend together. Before you serve, add fresh banana slices and mint leaves on top for a nice touch. Enjoy your creamy banana dessert delight in every bite! To make sure your banana dessert is creamy, use ripe bananas. Ripe bananas have more taste and natural sweetness. Mash them well so there are no lumps. When mixing the cream cheese and sugar, blend until it is smooth. Whipping the heavy cream is key. Beat it until stiff peaks form. This step adds a light texture. When you fold the whipped cream into the banana mix, do it gently. This keeps the mixture airy and fluffy, creating the perfect creamy texture. If you have any leftovers, store them in the fridge. Use airtight containers to keep them fresh. It's best to finish the dessert within two days for optimal taste. The flavors will blend and get even better after a day in the fridge. If you want to save it longer, consider freezing it. Just remember that the texture may change a bit after thawing. Presentation matters! Serve your creamy banana dessert in clear glasses. This way, everyone can see the pretty layers. Top each serving with fresh banana slices and a mint leaf. This adds a nice touch and makes it look fancy. For extra crunch, sprinkle some crushed graham crackers on top. These tips will make your dessert look as good as it tastes. For the full recipe, check out the earlier section. {{image_4}} You can make a tasty banana pudding with simple steps. Start by layering vanilla wafers and sliced bananas in a dish. Pour a rich vanilla pudding mix over the layers. You can use the creamy banana mixture from the full recipe instead of the pudding. This adds a fun twist and extra creaminess. Chill it for a few hours, and serve with whipped cream on top. For a banana cream pie, use a pie crust as your base. Spread the creamy banana mixture over the crust. Top it with fresh banana slices. You can add whipped cream to make it even richer. This dessert looks great and tastes amazing. It's a perfect treat for gatherings or special events. Try a no-bake banana cheesecake for a unique dessert. Use the creamy banana mixture as the filling. Pour it into a prepared crust of crushed graham crackers. Let it chill in the fridge for a few hours. This dessert is easy to make and always impresses guests. You can add a drizzle of chocolate sauce for a fun touch. To keep your creamy banana dessert fresh, cover it tightly. Use plastic wrap or a lid. This helps avoid drying out. Store it in the fridge. It should stay tasty for a few days. If you notice any browning on the bananas, just remove those slices. The rest will still be great! You can refrigerate the creamy banana dessert for up to three days. After that, the texture may change. The bananas can become mushy and lose their flavor. Always check for any signs of spoilage before eating. If you keep it sealed, you can enjoy it longer. If you want to save some for later, freezing is a great option. Just remember that freezing may change the texture. To freeze, place the dessert in an airtight container. Leave some space for expansion. You can freeze it for up to a month. When you're ready to eat it, thaw it in the fridge overnight. This way, you can indulge in creamy banana bliss anytime! For the full recipe, check out the earlier sections. Yes, you can use frozen bananas. Thaw them first before mashing. This helps keep the texture smooth. Frozen bananas may add extra moisture. If so, add a bit more powdered sugar to balance it out. You can use Greek yogurt or silken tofu as a cream cheese substitute. Both options keep the dessert creamy. Greek yogurt adds a tangy flavor. Silken tofu blends smoothly and is great for a vegan option. To make this dessert vegan, use dairy-free cream cheese and coconut cream. You can whip the coconut cream just like heavy cream. This keeps the dessert light and airy. Sweeten with maple syrup or agave instead of powdered sugar. This way, everyone can enjoy the creamy banana bliss. For the full recipe, check out the detailed steps above. This article covered how to make a delicious creamy banana dessert. We discussed key ingredients and helpful tools. You learned how to prepare the banana mixture, whip cream, and layer it. I shared tips to get perfect creaminess and how to store leftovers. We looked at fun variations like banana pudding and cheesecake. In the end, enjoy your dessert creations! Experiment with flavors and share them with friends. You’ll impress everyone with your tasty treats!

Creamy Banana Dessert Delight in Every Bite

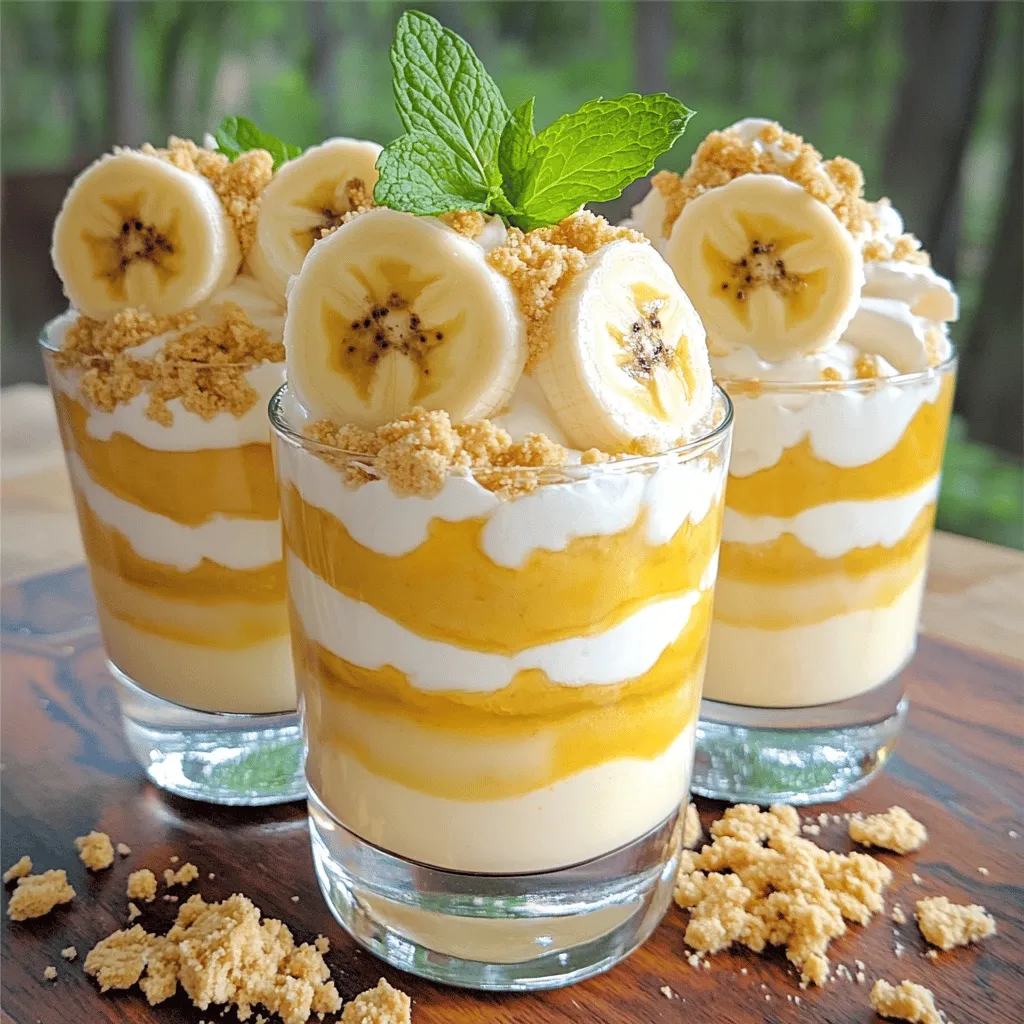
Ready to indulge in a dessert that bursts with flavor? My Creamy Banana Dessert Delight in Every Bite will satisfy

To make Crab Stuffed Cheddar Bay Biscuits, you need the following ingredients: - 2 cups all-purpose flour - 1 tablespoon baking powder - 1 teaspoon garlic powder - 1 teaspoon onion powder - 1 teaspoon salt - ½ teaspoon black pepper - ½ cup cold unsalted butter, cut into small cubes - 1 cup shredded sharp cheddar cheese - ¾ cup cold milk - 1 cup lump crab meat - 2 green onions, finely chopped - ¼ cup mayonnaise - 1 tablespoon fresh lemon juice - 1 teaspoon Old Bay seasoning - 2 tablespoons fresh parsley (for garnishing) Each ingredient plays a key role in the flavor and texture of the biscuits. The flour gives structure, while the baking powder helps them rise. Garlic and onion powder add depth to the taste, making each bite flavorful. Cold butter is a secret to flaky biscuits. It creates steam as it melts, which helps the biscuits puff up. Sharp cheddar cheese adds a rich, tangy taste. The crab meat provides a sweet, ocean-like flavor that makes these biscuits special. Green onions add freshness, while mayonnaise keeps the crab filling creamy. Lemon juice brightens the dish, and Old Bay seasoning brings a signature taste that pairs perfectly with seafood. Finally, parsley adds a pop of color and fresh flavor to the finished dish. For the full recipe, refer to the detailed cooking steps that follow this section. - Step 1: Preheat Oven Start by preheating your oven to 425°F (220°C). This helps the biscuits rise and bake evenly. - Step 2: Combine Dry Ingredients In a large bowl, mix the flour, baking powder, garlic powder, onion powder, salt, and black pepper. This blend creates a tasty base for your biscuits. - Step 3: Mix in Butter Add the cold, cubed butter to the dry mix. Use your fingers or a pastry cutter to blend until it looks like coarse crumbs. Some small lumps of butter are good for flakiness. - Step 4: Add Cheese to Dry Mixture Next, stir in the shredded cheddar cheese. Make sure the cheese is evenly mixed throughout the flour. - Step 5: Incorporate Milk Gradually pour in the cold milk. Mix gently until the dough forms. Avoid overmixing, as this can make the biscuits tough. - Step 6: Prepare Crab Filling In a separate bowl, mix the lump crab meat, chopped green onions, mayonnaise, lemon juice, and Old Bay seasoning. Be soft when mixing so you don’t break the crab too much. - Step 7: Shape Biscuit Dough Scoop the biscuit dough with a tablespoon. Flatten each scoop into a small disc. Place a heaping teaspoon of crab filling in the center. - Step 8: Arranging on Baking Sheet Fold the dough over the filling and seal it well. Place the stuffed biscuits seam-side down on a lined baking sheet. Space them about 2 inches apart for even baking. - Step 9: Baking Instructions Bake the biscuits in the oven for 15-18 minutes. Look for a golden brown top and a nice rise. - Step 10: Cooling and Serving After baking, let the biscuits cool slightly. Transfer them to a serving platter. Garnish with chopped parsley for a fresh touch. Find the full recipe above to make your Crab Stuffed Cheddar Bay Biscuits today! - Cold Ingredients Importance: Cold butter and milk make the biscuits flaky. Cold butter creates steam when baked, which helps the biscuits rise. For best results, chill your butter before using it. - Avoiding Overmixing: Mix your dough gently. Overmixing can make the biscuits tough. Stop mixing as soon as the dough comes together. - Presentation Tips: Serve the warm biscuits on a rustic wooden board or a colorful platter. This makes them look inviting and fun. - Recommended Dipping Sauce: Pair the biscuits with lemon herb butter. The creamy, zesty flavor complements the crab well. - Flavor Enhancements: Add some shredded cheese to the crab mixture. Try adding a pinch of cayenne pepper for a spicy kick. - Dietary Adjustments: For gluten-free options, use a gluten-free flour blend. You can also substitute the crab with a mix of vegetables for a vegetarian option. {{image_4}} You can change the filling to suit your taste. Try a shrimp stuffed version. Use cooked shrimp instead of crab. Chop the shrimp into small pieces. Mix it with the same seasonings for a new flavor. If you prefer a vegetarian option, use a mix of cheese and veggies. Combine cream cheese, spinach, and artichokes. This makes a tasty filling that everyone will love. Herbs can add great flavor. You can mix different herbs into the filling. Fresh dill or chives work well with crab. They bring a nice touch of brightness. If you don’t have fresh herbs, use dried spices. Garlic powder or Italian seasoning can also add depth. You can make gluten-free biscuits with special flour. Use a gluten-free blend that works for baking. Adjust the liquid as needed to get the right dough texture. If you want to switch the cheese, try Monterey Jack or pepper jack. These cheeses melt well and give a nice flavor twist. - Refrigeration Guidelines: Store your crab stuffed cheddar bay biscuits in an airtight container. They stay fresh for up to three days in the fridge. Be sure to let them cool completely before sealing. This keeps the biscuits from getting soggy. - Freezing Instructions: For longer storage, freeze these biscuits. Place them in a single layer on a baking sheet. Once frozen solid, transfer them to a freezer-safe bag. They can last up to three months in the freezer. When you're ready to enjoy them, just thaw in the fridge overnight. - Tips for Keeping Biscuits Flaky: To keep your biscuits flaky, reheat them gently. Avoid high heat, as it can dry them out. Wrap them in foil to trap moisture, which helps maintain their texture. - Microwave vs Oven Heating: The oven is the best option for reheating. Preheat it to 350°F (175°C) and warm the biscuits for about 10 minutes. If using the microwave, heat them for 20 to 30 seconds. Check often to avoid overheating. Enjoy your biscuits warm! How do I know when the biscuits are done? You can tell the biscuits are done when they turn golden brown. They should rise nicely and feel firm when you touch them. Can I make the dough ahead of time? Yes, you can make the dough ahead of time. Just wrap it tightly in plastic wrap and store it in the fridge. Use it within 24 hours for the best results. What can I serve with crab stuffed biscuits? These biscuits pair well with a fresh salad or a bowl of soup. You could also serve them with lemon herb butter for dipping. How long do leftovers last in the refrigerator? Leftovers can last about 3 days in the fridge. Just store them in an airtight container to keep them fresh. Can I use imitation crab meat for this recipe? Yes, imitation crab meat works well if you prefer it. Just make sure to chop it into small pieces for even mixing. For a delicious treat, follow the full recipe for Crab Stuffed Cheddar Bay Biscuits. You’ll love the blend of crab and cheddar in every bite! This blog post guides you through making delicious crab stuffed biscuits from scratch. We covered key ingredients, preparation steps, and tips for the best texture. Remember, using cold ingredients helps keep your biscuits flaky. You can customize them with different fillings and herbs to suit your taste. Proper storage ensures they stay fresh. Enjoy these tasty biscuits warm and share them with friends! Your kitchen will never be the same again.

Crab Stuffed Cheddar Bay Biscuit Delight Recipe

Are you ready to impress your friends and family with a mouthwatering treat? This Crab Stuffed Cheddar Bay Biscuit Delight

To make this delightful cheesecake, you need some key ingredients. Here is what you will need: - 1 ½ cups graham cracker crumbs - ½ cup unsalted butter, melted - 2 cups cream cheese, softened - 1 cup powdered sugar - 1 teaspoon vanilla extract - 1 cup heavy whipping cream - 1 cup fresh orange juice - Zest of 1 orange - 2 tablespoons orange gelatin powder - Fresh orange slices for garnish (optional) These ingredients create a creamy, zesty flavor that is sure to impress. When choosing brands, I suggest using Philadelphia cream cheese. It offers a rich taste and smooth texture. For graham crackers, Honey Maid is a great choice. Their crackers are fresh and taste excellent in crusts. Quality counts, so pick brands you trust for the best results. If you have allergies, there are good swaps. For cream cheese, you can use a dairy-free option like Tofutti or Kite Hill. If you're avoiding gluten, choose gluten-free graham crackers. You can also use coconut cream instead of heavy whipping cream for a dairy-free option. These swaps keep the dish tasty and fun for everyone. To make the crust, start by mixing graham cracker crumbs and melted butter in a bowl. You want to stir until it feels like damp sand. When you squeeze it, it should hold together. Next, take this mixture and press it into a 9-inch springform pan. Use the back of a measuring cup or your fingers to make it flat and even. After that, place the pan in the fridge. This helps the crust firm up while you make the filling. Now, let’s focus on the cheesecake filling. In a large bowl, beat the softened cream cheese with an electric mixer. Mix it for about 2-3 minutes until it is smooth. Gradually add the powdered sugar and vanilla extract, mixing until fluffy. Then, gently fold in the fresh orange juice and orange zest. This gives the cheesecake its bright flavor. In another bowl, whip the heavy cream until it forms stiff peaks. This takes about 3-4 minutes. Carefully fold the whipped cream into the cream cheese mixture. Do this in stages to keep it light. To finish the filling, mix the orange gelatin powder with a bit of hot water in a small bowl. Stir until there are no lumps. Add this to your cheesecake filling and mix well. Next, pour the creamy filling over your chilled crust. Use a spatula to smooth the top into an even layer. Cover the pan tightly with plastic wrap and place it in the fridge. Let it chill for at least 4 hours, or overnight if you can wait. This helps the cheesecake set perfectly. When ready to serve, run a knife around the edge of the pan. Carefully remove the sides of the springform pan. Slice the cheesecake into wedges and serve it chilled. For a nice touch, add fresh orange slices on top if you like. For the complete recipe, check out the full recipe. To get a super smooth cheesecake filling, start with softened cream cheese. Cold cream cheese will clump. Beat it well for 2-3 minutes until creamy. Add powdered sugar and vanilla next. Mix until it's fluffy and well combined. When you add orange juice and zest, do so gently. This keeps the mixture smooth. When whipping cream, make sure it is very cold. Use a chilled bowl and beaters for the best results. Start on low speed to prevent splatters. Gradually increase to medium-high speed. Stop when you see stiff peaks. This takes about 3-4 minutes. Careful not to overwhip; it can turn into butter! One mistake is not chilling the crust long enough. It needs time to firm up. Another error is not folding in the whipped cream gently. This can deflate your filling. Also, don’t skip the gelatin. It helps the cheesecake hold its shape. For the best texture, always let it chill for at least 4 hours, or overnight is even better. For the full recipe, check out the earlier sections. {{image_4}} You can easily mix in chocolate for a twist. Try adding melted dark or white chocolate to the filling. Start with ½ cup of melted chocolate and adjust to your taste. This adds a rich depth to the orange flavor. You can also swap the orange juice for lemon or lime juice for a tart variation. To make a healthier cheesecake, consider using Greek yogurt instead of cream cheese. This offers a creamy texture with less fat. You can also use honey or maple syrup instead of powdered sugar. For the crust, choose whole-grain crackers or nuts for a nutritious base. This will cut down on sugar and boost fiber. Seasonal fruits make great toppings. In summer, fresh berries like strawberries, blueberries, or raspberries add color and flavor. In fall, try sliced apples or pears with a sprinkle of cinnamon. In winter, pomegranate seeds give a festive touch. Use what is fresh and local for the best taste. For the full recipe, check out the details above. After making the No-Bake Orange Creamsicle Cheesecake, you may have leftovers. To store them, cover the cheesecake with plastic wrap or aluminum foil. You want to keep the air off it to prevent drying. Place it in the refrigerator. It can stay fresh for about 3 to 5 days. Make sure to keep it in the springform pan if it’s not fully set yet. This helps maintain its shape. If you need to keep the cheesecake for longer, freezing is a great option. First, slice the cheesecake into individual pieces. Wrap each slice tightly in plastic wrap. Then place the wrapped slices in a freezer-safe container or a zip-top bag. This keeps them safe from freezer burn. The cheesecake can last in the freezer for up to 2 months. When you’re ready to enjoy a slice, take it out of the freezer. Remove the plastic wrap but keep it in the container. Let it thaw in the fridge for about 4 to 6 hours. This slow thaw helps maintain its creamy texture. If you're in a hurry, you can leave it at room temperature for about 30 minutes. Just be careful not to leave it out too long, or it may get too soft. Enjoy your cheesecake! Yes, you can use low-fat cream cheese. It will change the taste and texture a bit. The cheesecake may be less creamy but still delicious. Just remember, the flavor may not be as rich. Always check the packaging for any moisture differences. This can affect how well the cheesecake sets. The cheesecake needs to chill for at least 4 hours. However, chilling it overnight is best. This allows the flavors to blend well. A longer chill time helps the cheesecake set better. If you’re short on time, 4 hours will still give you a tasty treat. If you want to skip orange gelatin, try using agar-agar. This is a plant-based option that works well. You can also use cornstarch mixed with water for a different texture. Just remember, these substitutes may change the flavor and firmness a bit. Always adjust the amount based on your preference. For a fresh taste, consider using orange juice or zest to keep it vibrant. For the full recipe, check the details above. This blog post covered all you need for No-Bake Orange Creamsicle Cheesecake. We explored key ingredients, famous brands, and useful substitutions. You learned simple steps for making the crust and filling, then how to assemble it all. I shared tips for a smooth filling and common mistakes to avoid. You discovered tasty variations and storage tips to keep your cheesecake fresh. Making this dessert can be fun and rewarding. Now you have everything to create your cheesecake masterpiece! Enjoy each delicious bite.

No-Bake Orange Creamsicle Cheesecake Delight Recipe

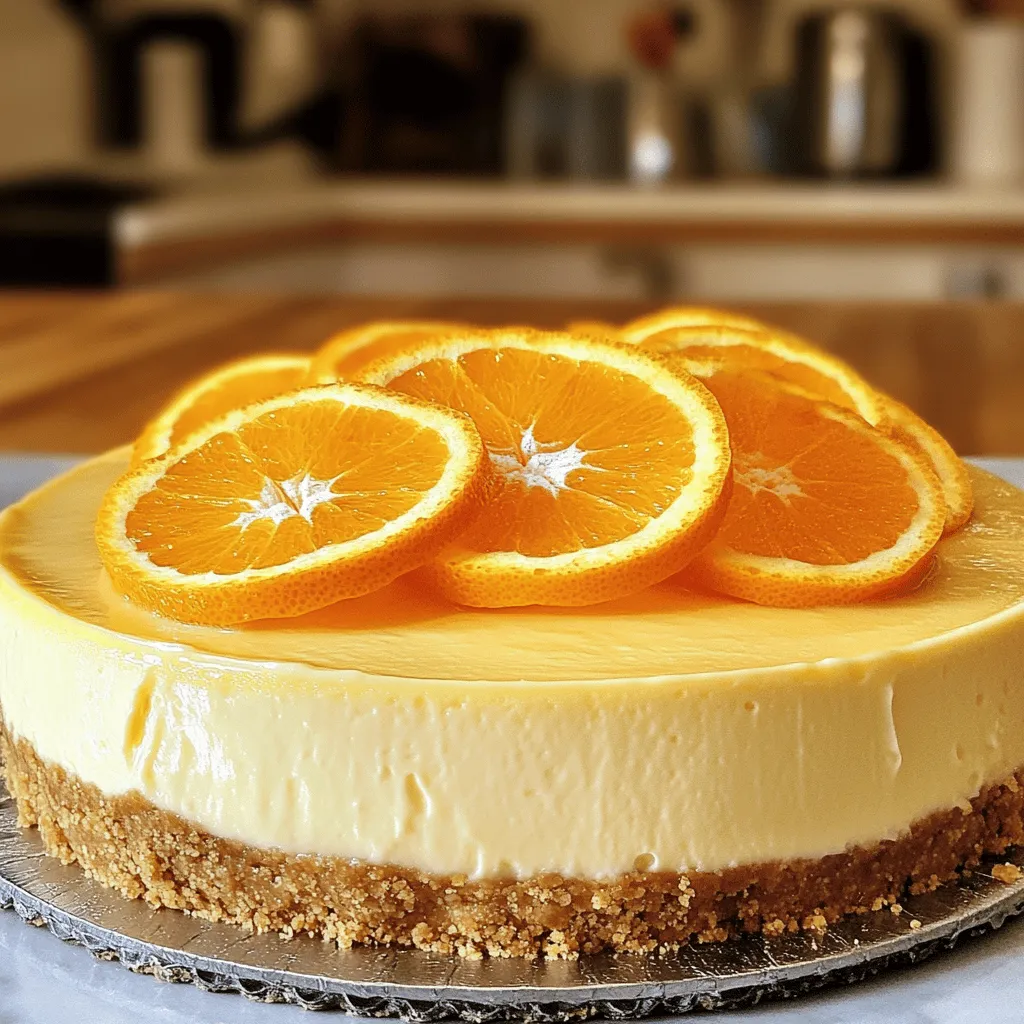
Ready to satisfy your sweet tooth? Join me as we whip up a No-Bake Orange Creamsicle Cheesecake Delight! This easy,

- 2 cups ziti pasta - 2 cups cooked, shredded chicken - 2 cups cream cheese - 1 cup ranch dressing - 1 cup shredded cheddar cheese - 1 cup shredded mozzarella cheese - 1 teaspoon garlic powder - 1 teaspoon onion powder - 1 teaspoon paprika - Salt and pepper to taste - 1/2 cup green onions, finely chopped To make Crack Chicken Baked Ziti, start with these key ingredients. The ziti pasta forms the base. I like to use rotisserie chicken for great flavor. Cream cheese adds a creamy touch. Ranch dressing gives the dish a unique twist. The combination of cheddar and mozzarella creates a cheesy delight. The seasoning components are also important. Garlic powder, onion powder, and paprika enhance the flavor. Use salt and pepper to taste. Finally, garnish with green onions for a fresh look and taste. These ingredients work together to create a rich and comforting meal. If you want to dive deeper into the cooking process, check out the Full Recipe for more detailed instructions. - Preheat oven to 350°F (175°C). - Boil ziti pasta and drain. Start by getting your oven ready. Preheating the oven ensures even cooking. While that heats up, grab a large pot. Fill it with water and add salt. Bring it to a boil. Once boiling, add the ziti pasta. Cook it for about 8-10 minutes until it’s al dente. When done, drain the pasta in a colander and set it aside. - Combine cream cheese and ranch dressing. - Add spices to the mixture. In a large bowl, add the softened cream cheese. Then pour in the ranch dressing. Use a mixer or a whisk. Blend until the mixture is smooth. This creamy base is key to the dish. Next, add the garlic powder, onion powder, and paprika. Don’t forget to season with salt and pepper. Mix until everything is well combined. - Fold in shredded chicken and cooked ziti pasta. - Transfer to baking dish and top with cheese. Now it’s time to bring it all together. Gently fold in the shredded chicken. Add the drained ziti pasta next. Make sure every piece is coated in that creamy sauce. Grab a greased 9x13 inch baking dish. Pour in the mixture and spread it out evenly. Finally, sprinkle shredded cheddar and mozzarella cheese on top. This will create a delicious, cheesy crust. - Bake for 25-30 minutes. - Allow to cool before serving. Slide the baking dish into your preheated oven. Bake it for 25-30 minutes. You want the cheese to be melted and bubbly. Once it’s ready, take it out and let it sit for about 5 minutes. This helps the dish set. Serve it warm and watch everyone enjoy this ultimate comfort dish. - Use rotisserie chicken for added taste. This saves time and boosts flavor. - Experiment with different cheese blends. Mixing mozzarella and pepper jack gives a nice kick. - Cook pasta al dente for best results. This keeps the pasta firm and helps it hold the sauce. - Allow the dish to set before serving for optimal texture. This helps the flavors meld together. - Serve with garlic bread and salad. This adds a nice crunch and freshness to the meal. - Use fresh herbs for garnish. Chopped parsley or basil makes the dish pop with color. {{image_4}} You can change the pasta type in this dish. Use penne or shells instead of ziti. This swap gives a fun twist. If you want a lighter option, swap cream cheese with Greek yogurt. It still tastes great and cuts some calories. To make this dish gluten-free, choose gluten-free pasta. It works just as well. For those avoiding dairy, use dairy-free cheese alternatives. There are many options now, and they melt nicely. Want to pack in more flavor? Incorporate veggies like spinach or bell peppers. They add color and nutrition. For a savory boost, add crispy bacon. It brings extra richness and flavor to the dish. After you enjoy your Crack Chicken Baked Ziti, store the leftovers in an airtight container. This keeps the dish fresh and tasty. Try to eat it within 3-4 days for the best flavor. When it’s time to eat again, you can reheat it in the oven or microwave. If you use the oven, cover it to keep it moist. Adding a splash of milk helps bring back some creaminess while reheating. You can freeze Crack Chicken Baked Ziti either before baking or after it is fully cooked. Just make sure to store it in sealed containers. It can last up to 2 months in the freezer, ready for a quick meal. Crack Chicken Baked Ziti is a creamy and cheesy pasta dish. It combines ziti pasta with shredded chicken and a rich cream cheese ranch sauce. The dish gets its name from its addictive flavors. The creamy sauce covers every bite, making it super comforting and satisfying. Yes, you can make Crack Chicken Baked Ziti ahead of time. Just follow these steps: - Prepare the dish as directed, but do not bake it. - Cover it tightly with plastic wrap or foil. - Store it in the fridge for up to 24 hours. - When ready, bake it straight from the fridge. You may need to add a few extra minutes to the baking time. You can easily scale the recipe up or down. For fewer servings, cut the ingredients in half. For more, double them. Keep in mind that baking times may change slightly. Check the dish as it bakes. The Full Recipe can help with precise measurements. This blog post covers how to make Crack Chicken Baked Ziti, a tasty dish. We talked about the key ingredients, from ziti and chicken to rich cheeses. I shared step-by-step instructions to guide you through the prep and baking. Plus, I offered tips to enhance flavor and make variations. Remember, you can easily store leftovers or freeze for later use. With these simple steps, you can create a meal that delights everyone. Enjoy making this dish and customize it to fit your taste!

Crack Chicken Baked Ziti Ultimate Comfort Dish

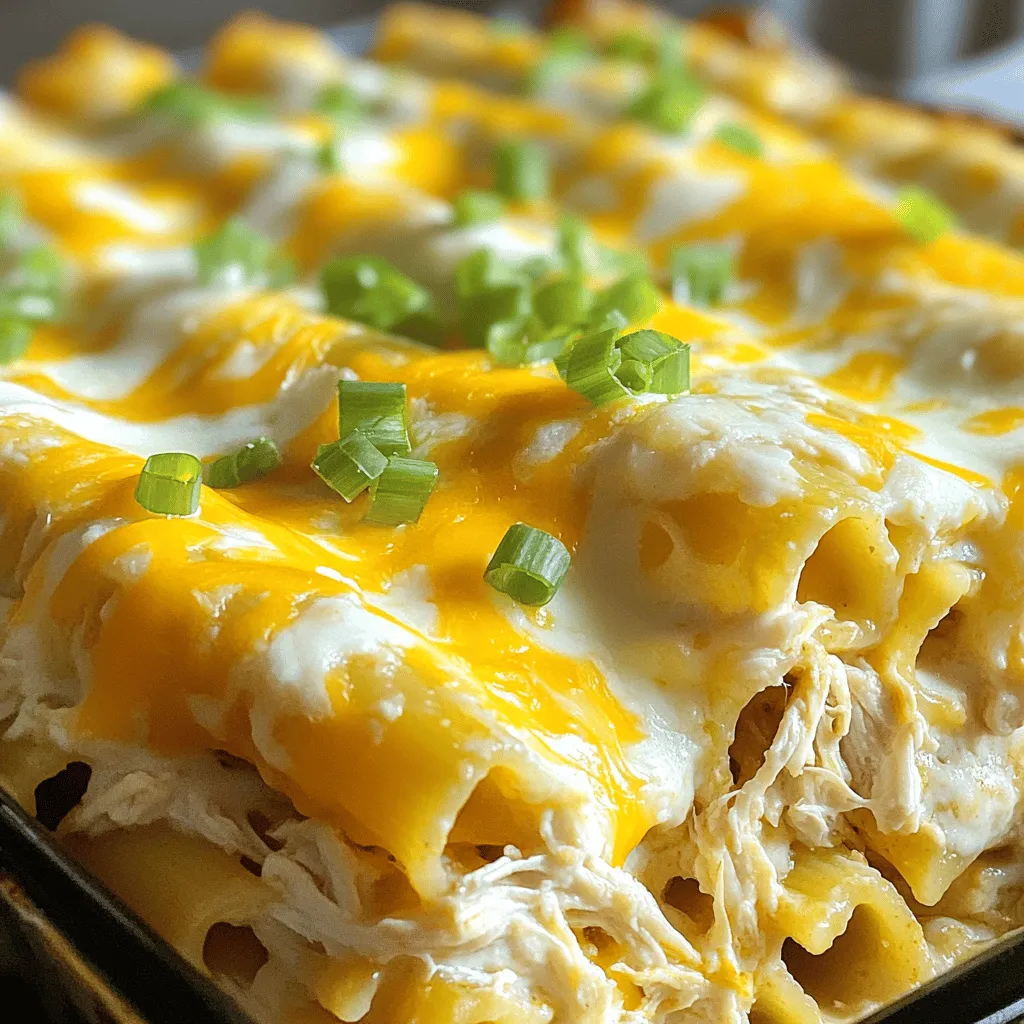
Crack Chicken Baked Ziti is the ultimate comfort food you’ll crave on a cold night! Packed with creamy goodness and

- 1 pound large shrimp, peeled and deveined - 2 tablespoons extra virgin olive oil - 4 cloves fresh garlic, minced - 1 teaspoon smoked paprika - 1 teaspoon chili powder - Sea salt and freshly ground black pepper, to taste - 1 cup cooked quinoa - 1 cup cherry tomatoes, halved - 1 ripe avocado, sliced - 1 cup baby spinach - 2 tablespoons fresh cilantro, finely chopped - 1 lime, cut into wedges Gathering the right ingredients makes all the difference. Shrimp is the star here. I suggest using large shrimp for the best bite. They cook quickly and stay juicy. Extra virgin olive oil adds richness. It also helps the garlic and spices cling to the shrimp. Fresh garlic is key. It brings a punch of flavor. Use smoked paprika for a warm, smoky taste. Chili powder adds a nice kick. Don't forget the salt and pepper! They help bring out the flavors of all the other ingredients. For the base of the bowl, cooked quinoa gives a nice texture and adds protein. Fresh veggies like cherry tomatoes and avocado bring color and freshness. Baby spinach adds a nice crunch. Finally, cilantro gives a bright, herbaceous note. Squeeze lime on top for a zesty finish. Check out the Full Recipe for more details on how to bring this dish together! Start by whisking together the olive oil, minced garlic, smoked paprika, chili powder, sea salt, and black pepper. This mix creates a tasty marinade. Next, toss the shrimp in the marinade. Make sure each shrimp gets coated well. Let them sit for 20 minutes at room temperature. This helps the shrimp soak up all the flavors. Now, preheat your grill or grill pan to medium-high heat. It should be hot enough for a nice sear. While it heats, thread the marinated shrimp onto skewers. If you use wooden skewers, soak them in water first. This prevents them from burning on the grill. Place the skewers on the grill. Grill the shrimp for about 2 to 3 minutes on each side. Watch for them to turn pink and opaque. Be careful not to overcook them. Overcooked shrimp can become tough and chewy. While the shrimp grill, it’s time to build your bowl. Start with a base layer of cooked quinoa in a large serving bowl. Next, add fresh baby spinach, halved cherry tomatoes, and sliced avocado on top. Arrange them nicely for a colorful look. Once the shrimp are done, remove them from the skewers. Place the grilled shrimp atop your beautiful bowl. For an extra flavor boost, drizzle the remaining garlic marinade over the shrimp and veggies. Finish by garnishing with chopped cilantro. Serve with lime wedges on the side for a refreshing zing. For the complete method, refer to the Full Recipe. When making a grilled shrimp bowl, start with the right shrimp. Choose fresh shrimp when you can. If fresh shrimp is not an option, high-quality frozen shrimp works well too. Look for large or extra-large shrimp, as they hold up better on the grill. You can also find different types of shrimp, like wild-caught or farm-raised. Wild-caught shrimp often have a better flavor and texture. To get the best flavor from your shrimp, let them marinate. It's best to allow them to sit in the marinade for about 20 minutes. This time lets the shrimp soak up the garlic, olive oil, and spices. If you have more time, you can marinate them for up to an hour in the fridge. Just remember to bring them back to room temperature before grilling to ensure even cooking. Shrimp cook quickly, so keep an eye on them. Look for a bright pink color and an opaque center. This shows they are done. For large shrimp, grill them for about 2-3 minutes on each side. If they curl up tightly, they may be overcooked. Overcooked shrimp can become rubbery, so check them often while grilling. Enjoy the grilled shrimp in your flavorful bowl after they are perfectly cooked! {{image_4}} If you want to switch things up, try using chicken or tofu. Chicken thighs work well for a juicy bite. Simply cut the chicken into pieces and use the same marinade. Tofu is great for a vegan option. Press the tofu to remove excess water and then cut it into cubes. Marinate for about 30 minutes for the best flavor. You can easily make this bowl gluten-free. Just ensure your spices and any sauces are gluten-free. For a vegan version, simply substitute shrimp with tofu. If you're on a low-carb diet, skip the quinoa and load up on veggies like zucchini or bell peppers. For a paleo approach, stick with shrimp or chicken and lots of fresh greens. Add more veggies for texture and color. Try bell peppers, corn, or shredded carrots. For a fresh taste, sprinkle on herbs like parsley or dill. You can also add nuts for crunch, such as sliced almonds or crushed walnuts. For a creamy finish, a dollop of yogurt or a drizzle of tahini can elevate your bowl. For the full recipe, check out the Grilled Shrimp Bowl with Zesty Garlic Sauce. To store leftovers safely, place the shrimp bowl in an airtight container. Make sure it is sealed well to keep out air and moisture. This helps maintain freshness and flavor. You can store it in the fridge for up to three days. After that, the shrimp may lose taste and texture. For freezing, first, let the shrimp cool completely. Then, transfer the bowl to a freezer-safe container. You can freeze it for up to three months. When you are ready to eat, thaw it in the fridge overnight. To reheat, warm the shrimp gently in a skillet over low heat. This keeps the shrimp tender and juicy. Avoid using a microwave as it can overcook the shrimp. You can find the Full Recipe for a perfect grilled shrimp bowl to enjoy today! You can tell shrimp are cooked by looking at their color and texture. When shrimp turn pink and opaque, they are done. You want them to feel firm but still springy when you touch them. If they curl tightly into a C shape, that means they are overcooked. Keep an eye on them because shrimp cook quickly! Yes, you can make the garlic sauce ahead of time. Store it in an airtight container in the fridge. It will stay fresh for about three days. Just give it a good stir before using. If you want to spice it up, add a little more garlic or lime juice right before serving. Pair your grilled shrimp bowl with fresh sides to enhance the meal. Here are some great options: - A simple green salad with lemon vinaigrette - Grilled vegetables like bell peppers and zucchini - Brown rice or wild rice for a hearty touch - A side of corn on the cob for sweetness - Crispy tortilla chips with salsa for crunch These sides will balance the flavors in your bowl and make your meal even more enjoyable! For the full recipe, check out the Grilled Shrimp Bowl with Zesty Garlic Sauce. This blog covered a simple and tasty grilled shrimp bowl. You learned about the main and additional ingredients, step-by-step instructions, and helpful tips. Cooking shrimp can be easy and rewarding with the right method. Use fresh or quality shrimp for the best taste. Feel free to customize by trying different proteins or toppings. Enjoy making this dish for your next meal. Cooking can be fun, and your taste buds will thank you!

Grilled Shrimp Bowl with Garlic Sauce Flavor Boost

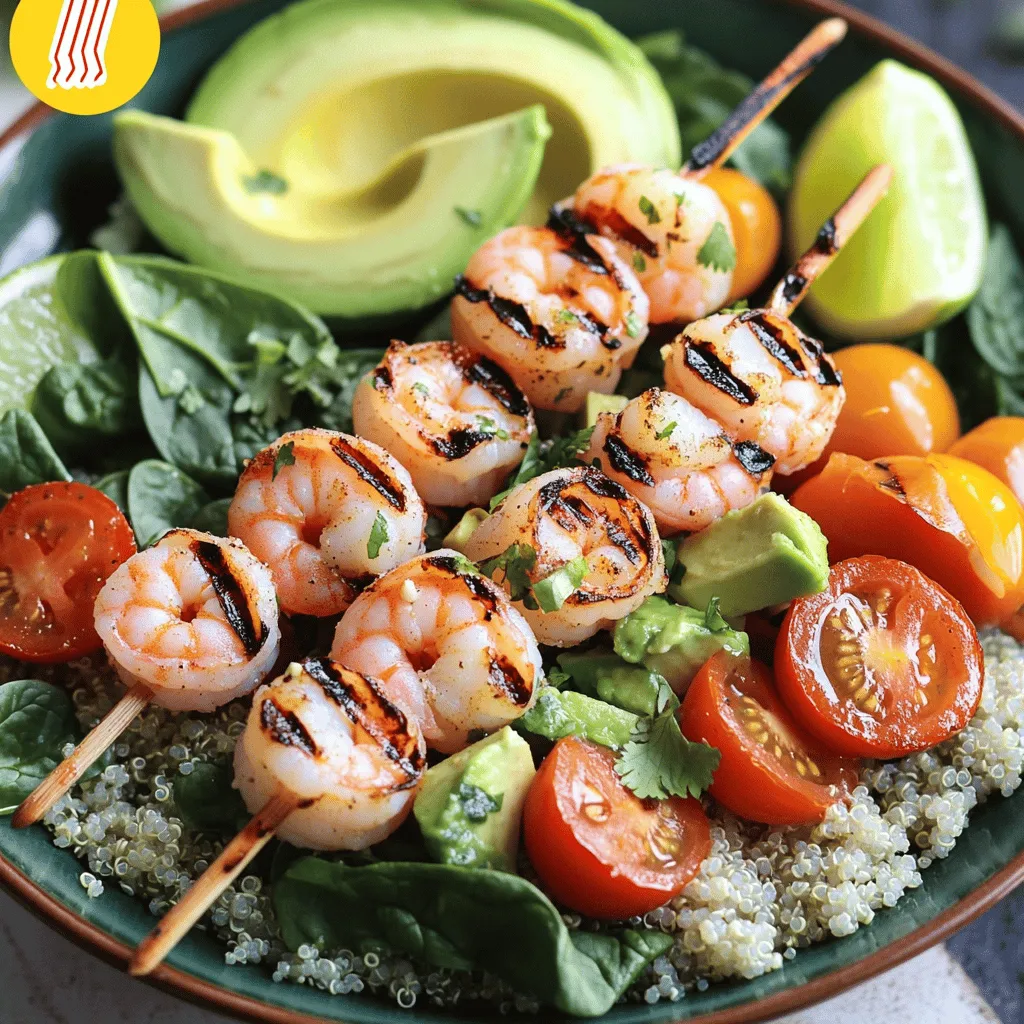
Welcome to the best grilled shrimp bowl you’ll ever make! With just a few simple ingredients, you can create a

To make a tasty chicken taco casserole, you need key ingredients. Here’s what you’ll need: - 2 cups cooked shredded chicken - 1 can (15 oz) black beans, drained and rinsed - 1 cup corn kernels (fresh or frozen) - 1 cup diced tomatoes (canned or fresh) - 1 cup salsa (choose mild, medium, or hot according to your spice preference) - 1 teaspoon chili powder - 1 teaspoon ground cumin - ½ teaspoon garlic powder - ½ teaspoon onion powder - 1 cup shredded sharp cheddar cheese - 1 cup crushed tortilla chips - Fresh cilantro, chopped (for garnish) - Sour cream (for serving, optional) Garnishes can make your dish look and taste better. Here are some fun options: - Avocado slices add creaminess. - Jalapeño slices give a spicy kick. - Chopped green onions add a fresh crunch. - A sprinkle of lime juice brightens the flavors. Fresh ingredients make a big difference in your casserole. Here are some tips: - Choose chicken that smells fresh and is pink in color. - Look for black beans that are firm, not mushy. - Pick corn that is bright yellow and firm. - For tomatoes, choose ones that are ripe and fragrant. - When buying salsa, check the label for real ingredients, not fillers. Using these tips will help you create a great dish. Gather your ingredients and get ready to cook! For the full recipe, check out the complete instructions. First, preheat your oven to 350°F (175°C). This step is key for even baking. Next, grab a 9x13-inch baking dish and lightly grease it. This helps when you serve later. In a large bowl, mix the cooked shredded chicken, black beans, corn, diced tomatoes, and salsa. Add the chili powder, ground cumin, garlic powder, and onion powder. Stir until combined. This mix packs in great flavor. Now, take half of this mixture and spread it evenly in the prepared baking dish. This layer holds all the good stuff. Next, sprinkle half of the shredded sharp cheddar cheese over it. This cheese will melt perfectly. Then, layer the crushed tortilla chips on top. This adds a nice crunch. Now, spoon the rest of the chicken mixture on top of the tortilla chips. Spread it out evenly. Finish with the remaining shredded cheddar cheese on top. This will create a golden, cheesy crust. Cover the dish tightly with aluminum foil. This keeps moisture in while baking. Place the dish in the preheated oven for 20 minutes. This warms everything through. After 20 minutes, remove the foil. Let it bake uncovered for another 10 minutes. Keep an eye on it. You want the cheese to bubble and turn golden brown. Once it looks perfect, take it out of the oven. Let it cool for a few minutes. This makes it easier to cut into neat squares. Before serving, garnish the casserole with freshly chopped cilantro. This adds a pop of color and freshness. Serve warm and offer sour cream on the side. This creamy addition pairs well with the flavors. You can find the full recipe to follow these steps at [Full Recipe]. To get the best flavor, use fresh ingredients. Fresh cilantro adds brightness. Choose ripe tomatoes for sweetness. Mix spices well to ensure every bite is tasty. Use good quality salsa for depth. You can adjust the spice level by picking mild, medium, or hot salsa. Don't skip the chili powder and cumin; they give great flavor. Taste the mixture before baking. This way, you can add more spices if needed. Many people forget to season their chicken. Always add seasoning to the chicken before mixing. Some skip the layering process. Each layer adds flavor and texture. Avoid overbaking the casserole. This can make it dry. Also, not letting it cool before cutting can lead to messy servings. Take time to let it rest for a few minutes after baking. To save time, use cooked shredded chicken from a store or your leftovers. Canned black beans and corn save prep time too. Pre-chopping veggies can help speed things up. If you have a busy week, prepare the mixture the night before. Store it in the fridge and bake it later. This makes dinner quick and easy. For a speedy clean-up, line your baking dish with parchment paper before adding the mixture. For the full recipe, check the section above. {{image_4}} You can easily swap out chicken for your favorite veggies. Use mushrooms, zucchini, or bell peppers. Add black beans and corn for protein. This mix keeps the meal filling and tasty. Use a good salsa to add flavor. You can still use all the spices as in the original recipe. Top with cheese and tortilla chips for that crunchy finish. For a kick, add diced jalapeños or a splash of hot sauce. Mix in pepper jack cheese instead of cheddar. This cheese melts smoothly and adds heat. You can also use chipotle salsa for a deeper flavor. Just be careful with the spice levels if you have kids. Taste as you go to find the right balance for your family. If you want to cut carbs, skip the tortilla chips. Instead, use cauliflower rice or sliced zucchini. This keeps the casserole light and healthy. Make sure to add extra cheese to maintain that creamy texture. You can also increase the amount of beans for more protein. This variation is just as satisfying while being easier on your waistline. Feel free to explore these variations for a fun twist on the classic dish. Each option lets you enjoy the same great flavors while catering to your needs. Check out the Full Recipe to get started on making your delicious Chicken Taco Casserole today! After enjoying your tasty Chicken Taco Casserole, let it cool. Place leftovers in an airtight container. This keeps your meal fresh. Store it in the fridge for up to three days. If you want to keep it longer, freezing is a great option. To reheat, take the casserole out of the fridge. Preheat your oven to 350°F (175°C). Cover the dish with foil to keep it moist. Bake for about 20 minutes. Check if it’s heated through. If you want it crispy, remove the foil for the last 5 minutes. You can freeze the casserole before baking. Prepare it as usual, but do not bake. Wrap it tightly in plastic wrap and foil. This prevents freezer burn. Label it with the date. It will stay good for up to three months. When ready to eat, thaw it overnight in the fridge. Bake it according to the Full Recipe instructions. Enjoy a quick meal on busy days! Yes, you can use different meats. Ground beef or turkey works great. You can also try shredded pork for a tasty twist. Just cook the meat before adding it to the casserole. This will keep your dish flavorful and juicy. To add heat, use hot salsa instead of mild. You can also add sliced jalapeños or cayenne pepper. For a smoky flavor, try chipotle powder. Adjust the spices to your liking, and remember to taste as you go! Absolutely! You can assemble the casserole a day before. Just cover it with plastic wrap and store it in the fridge. When you’re ready to bake, remove the wrap and bake as directed. This makes weeknight dinners a breeze! For the full recipe, check out the details above. In this blog post, we explored essential ingredients, step-by-step cooking, and handy tips. You gained insights into flavor tweaks, storage methods, and various dish variations. Remember, using fresh ingredients leads to better flavor and a healthier meal. Pay attention to the common mistakes to avoid for the best results. With your newfound knowledge, you can create a tasty Chicken Taco Casserole that fits your taste. Enjoy experimenting and perfecting your dish!

Flavorful Chicken Taco Casserole Easy Weeknight Meal

If you’re looking for an easy weeknight meal that’s full of flavor, you’ve found it! My Chicken Taco Casserole takes

Older posts
Newer posts
← Previous Page1 … Page27 Page28 Page29 … Page44 Next →

dsad

© 2025 recipetorch • Built with GeneratePress

Our Policies

  • Copyright Policy
  • Cookie Policy
  • GDPR Policy
  • Privacy Policy
  • Disclaimer
  • Terms Of Use

More Information

  • Home
  • About
  • Contact
  • Appetizers
  • Dessert
  • Dinner
  • Drinks
©2025, recipetorch About Back To Top