Skip to content
DisclaimerTerms Of UseGDPR PolicyCookie Policy

recipetorch

  • Home
  • Drinks
  • Appetizers
  • Dinner
  • Dessert
  • About
  • Contact
  • Privacy Policy
DisclaimerTerms Of UseGDPR PolicyCookie Policy

Nicole

- 300g pasta (fettuccine or your preferred variety) - 200g fresh spinach, thoroughly washed and roughly chopped - 250g mushrooms (button or cremini), sliced into even pieces - 2 tablespoons extra virgin olive oil - 3 cloves garlic, minced - 1/2 teaspoon red pepper flakes (adjust to taste, optional) - 1/2 cup vegetable broth (low sodium recommended) - 1/2 cup heavy cream (or a dairy-free alternative like coconut cream) - 50g grated Parmesan cheese (plus extra for serving, or use a dairy-free alternative) - Salt and freshly ground black pepper to taste - Fresh basil leaves for garnish - Lemon juice for brightness - Toasted pine nuts for crunch - Sun-dried tomatoes for sweetness - Fresh herbs like thyme or parsley for added freshness - Pasta: Provides energy through carbohydrates, essential for an active lifestyle. - Spinach: Packed with vitamins A, C, and K, plus iron and calcium for strong bones. - Mushrooms: Low in calories and high in antioxidants; they support the immune system. - Olive Oil: Contains healthy fats that may lower heart disease risk. - Garlic: Known for its antibacterial properties, garlic also adds flavor. - Red Pepper Flakes: Adds spice and may boost metabolism. - Vegetable Broth: Low in calories, it enhances flavor without extra fat. - Heavy Cream: Provides richness and contributes to a creamy texture. - Parmesan Cheese: Adds protein and calcium, enhancing flavor with umami. - Salt and Pepper: Essential for seasoning; they help balance flavors. - Basil: Offers antioxidants and adds a fresh, aromatic taste. The full recipe is easy to follow, and you can make this dish your own! Start by boiling water in a large pot. Add salt to season the water. Once it boils, add the pasta. Cook it until al dente, which takes about 8-10 minutes. Drain the pasta in a colander. Keep 1/2 cup of pasta water for later use. Set the pasta aside. In a large skillet, heat the olive oil over medium heat. When the oil is hot, add the sliced mushrooms. Sauté them for about 5-7 minutes. Stir often until the mushrooms turn golden brown. Next, add the minced garlic and red pepper flakes, if you like spice. Cook for one more minute. Then, add the washed spinach. Stir until the spinach wilts. Pour the vegetable broth into the pan. Scrape any brown bits from the bottom of the skillet. This adds great flavor. Let it simmer for 2-3 minutes. Next, stir in the heavy cream. Mix well and let the sauce thicken for about 2 minutes. Add the drained pasta to the skillet. Toss it well with the creamy sauce. If the sauce is too thick, add some reserved pasta water. Stir until you reach a creamy texture. Serve the pasta hot on warm plates. Garnish with fresh basil leaves for color. You can also sprinkle extra Parmesan cheese on top for more flavor. Enjoy this delicious meal! For the full recipe, check the accompanying section. To sauté mushrooms well, start with dry, clean mushrooms. Moisture causes them to steam instead of brown. Slice the mushrooms evenly for uniform cooking. Heat your skillet over medium heat and add olive oil. When the oil shimmers, add the mushrooms in a single layer. Let them sit for a minute before stirring. This helps them brown nicely. Cook for about 5-7 minutes until they are golden and tender. Al dente pasta has the right bite. To achieve this, use plenty of salted water. Bring it to a rolling boil. Add the pasta and stir occasionally to prevent sticking. Check the cooking time on the package, usually 8-10 minutes for fettuccine. Taste the pasta a minute before the time is up. It should be firm but not hard. Save some pasta water; it helps make your sauce creamy. If you want a dairy-free option, use coconut cream instead of heavy cream. It gives a rich taste without dairy. For cheese, try nutritional yeast or a store-bought dairy-free cheese. These options keep the dish creamy and flavorful. Always check labels to ensure they fit your diet. To boost flavor, add spices like red pepper flakes or black pepper. Fresh herbs like basil or parsley add brightness. You can also use dried herbs like oregano or thyme. Add them at the end of cooking for fresh taste. Experiment with different herbs to find your favorite combo! {{image_4}} You can easily make this dish vegan. Simply swap out the heavy cream and cheese. Use coconut cream for a creamy texture. Nutritional yeast can replace the cheese for a cheesy flavor. This keeps the dish rich and tasty while staying plant-based. Want to add protein? Chicken, shrimp, or tofu are great choices. For chicken, sauté bite-sized pieces until golden. For shrimp, cook them until pink and firm. If you prefer tofu, use firm tofu and cube it. Sauté until crispy. Add your protein when mixing in the sauce for a filling meal. Don’t limit yourself to one type of pasta! Try fettuccine, penne, or even whole grain options. Each pasta type brings a new texture to the dish. Gluten-free pasta is also an option if you need it. Just follow the cooking time on the package for best results. For the full recipe, check out the main article. After you enjoy your meal, let the pasta cool down. Place it in an airtight container. This will keep it fresh. Store it in the fridge for up to three days. If you want to enjoy it later, freezing is a great option. When it's time to eat the leftovers, reheat with care. The best way is to use a skillet. Add a splash of water or broth to keep it moist. Heat on low to medium until warm. Stir occasionally to ensure even heating. You can also use a microwave, but cover the bowl to trap steam. This helps keep the pasta soft. If you want to freeze your mushroom and spinach pasta, follow these steps. First, let it cool completely. Then, use a freezer-safe container. Make sure to leave some space at the top for expansion. You can freeze it for up to three months. When ready to eat, thaw it overnight in the fridge. Reheat as mentioned above for the best taste and texture. For the full recipe, check out the detailed steps and tips to create this delicious dish! Yes, you can use frozen spinach. Just thaw and drain it well. Fresh spinach has a crisp taste, but frozen works great in a pinch. It will mix well with the other ingredients. You can use coconut cream or cashew cream if you want a dairy-free option. Both choices give a nice creaminess. You can also use half-and-half or whole milk if you prefer. To add heat, increase the red pepper flakes. You can also use fresh chili peppers or a dash of hot sauce. Start small, then taste and adjust to get your perfect spice level. Some great side dishes include a simple green salad or garlic bread. You could also serve it with roasted vegetables for a healthy touch. Pairing with a light white wine adds a nice finish too. Mushroom and spinach pasta lasts about 3-4 days in the fridge. Store it in an airtight container to keep it fresh. Reheat it gently to avoid overcooking. You can find the full recipe in the main article section. It's a great guide for making the dish just right! In this post, you learned about the main ingredients for mushroom and spinach pasta. We covered cooking methods, tips for best results, and how to store leftovers. Making this dish is simple and rewarding. You can customize it to fit your taste or diet. Experiment with herbs or protein options. Your culinary journey can start today by trying this tasty recipe. Enjoy your delicious meal and share it with others!

Mouthwatering Mushroom and Spinach Pasta Recipe

If you’re craving a quick and tasty dinner, look no further! This Mushroom and Spinach Pasta is simple yet packed

- 2 medium zucchinis, grated - 1 cup sweet corn kernels (fresh or frozen) - 1/2 cup green onions, finely chopped Zucchini adds moisture and a light taste. Fresh corn gives sweetness and crunch. Green onions provide a mild onion flavor that brightens the dish. - 1/2 cup all-purpose flour - 1/2 teaspoon baking powder - 1/4 teaspoon cayenne pepper (adjust based on your spice preference) - 1/2 teaspoon garlic powder - Salt and black pepper to taste Flour binds the fritters, while baking powder helps them rise. Spices like cayenne pepper and garlic add depth. Salt and pepper enhance all the flavors. - 2 tablespoons fresh parsley, finely chopped - Olive oil, for frying Fresh parsley gives color and a nice herbal note. Use olive oil for frying to keep it healthy and flavorful. For the full recipe, check out the Zesty Zucchini and Corn Fritters section. Start with your zucchinis. Grate them using a box grater or food processor. Grating helps release their water. After grating, put the zucchini in a clean kitchen towel. Gather the towel and squeeze out the water. This step is key. Too much moisture makes the fritters soggy. In a large mixing bowl, add the grated zucchini. Then, toss in the sweet corn kernels and chopped green onions. Mix in fresh parsley for flavor. In a separate bowl, whisk the eggs until lightly beaten. Pour the eggs into the zucchini mix. Now, add flour, baking powder, cayenne pepper, garlic powder, salt, and black pepper. Stir gently until just combined. The batter should be thick but spoonable. Heat a non-stick skillet over medium heat. Pour in enough olive oil to cover the bottom. Once the oil is hot, scoop about 2 tablespoons of the batter. Shape it into a patty and place it in the skillet. Repeat with the rest of the batter, leaving space between fritters. Fry them for 3-4 minutes on each side. Look for a golden brown color and a crispy outside. Adjust the heat if needed to prevent burning. Once cooked, transfer fritters to a paper towel-lined plate to drain excess oil. Serve warm, and enjoy! For more details, check the Full Recipe. To make your fritters crispy, start by squeezing the moisture from the zucchini. After grating the zucchini, place it in a clean kitchen towel. Gather the towel and twist it tightly. Squeeze hard to get as much liquid out as you can. This step is key. Too much moisture makes the fritters soggy instead of crunchy. For serving, think about fun garnishes and dips. A sprinkle of fresh parsley brightens the dish. You can also serve these fritters with a dollop of Greek yogurt. This adds creaminess and tang. Other good options include sour cream or a spicy salsa. Each adds a different flavor kick to the fritters. Watch the frying heat closely. Start with medium heat to get the oil hot but not smoking. If the fritters brown too quickly, lower the heat. This helps cook them evenly without burning. If they take too long, increase the heat slightly. Adjusting the heat is key to getting perfectly cooked fritters without any burnt bits. For a complete guide, check the Full Recipe. {{image_4}} You can change the zucchini and corn in many ways. Try using yellow squash instead of zucchini. It has a similar texture and taste. For corn, you can use diced bell peppers or even peas. They add a nice crunch and color. If you want a different flavor, use canned black beans as a base. They are tasty and full of protein. Adding herbs and spices can take your fritters to the next level. Consider fresh basil or cilantro for a pop of flavor. You can also mix in some dill for a fresh taste. If you like heat, add red pepper flakes or smoked paprika. These spices bring warmth and depth to your fritters. Don't be afraid to experiment and find your favorite mix. You can bake the fritters instead of frying them. This makes them a bit healthier. To bake, preheat your oven to 400°F (200°C). Place the fritters on a baking sheet lined with parchment paper. Brush them lightly with olive oil. Bake for about 15-20 minutes, flipping halfway through. This method gives you a nice crispy texture without all the oil. If you want a quicker way, try an air fryer. It cooks them fast and keeps them crispy. Check the [Full Recipe] for more details. After you make your fritters, let them cool. Place any leftovers in an airtight container. They will keep well in the fridge for about 3 days. If you want to enjoy them later, make sure they are fully cooled before storing. This way, they won’t get soggy. To freeze fritters, first cool them completely. Lay them flat on a baking sheet in a single layer. Freeze for about 1 hour or until firm. Then, transfer them to a freezer bag. Remove as much air as possible and seal. They can last for up to 3 months in the freezer. Remember to label the bags with the date for easy tracking. For the best taste, reheat fritters in a skillet. Heat a bit of oil over medium heat. Add the fritters and cook for about 2-3 minutes on each side. This will help them regain their crispiness. If you prefer using the oven, preheat to 350°F (175°C) and bake for about 10-15 minutes. Just make sure they are heated through. You can also use a microwave, but they may become soft. For even better flavor, serve with a dip from the Full Recipe. To reheat zucchini and corn fritters, use your oven or a skillet. Preheat your oven to 350°F (175°C). Place the fritters on a baking sheet and heat for about 10-15 minutes. This keeps them crispy. If using a skillet, add a little oil and heat on medium. Cook for a few minutes until warm and crisp. Yes, you can make these fritters ahead of time. Prepare the fritters and cook them. Let them cool completely. Store them in an airtight container in the fridge for up to three days. You can reheat them when ready to eat. To boost the flavor of your fritters, try these tips: - Add more spices, like smoked paprika or cumin. - Mix in some grated cheese for a cheesy touch. - Use fresh herbs like basil or cilantro for a fresh taste. - Experiment with different types of peppers for a spicy kick. Zucchini and corn fritters pair well with several tasty dipping sauces. Here are a few ideas: - Greek yogurt mixed with lemon juice and herbs. - Spicy mayo or sriracha mayo for a kick. - Homemade salsa or pico de gallo for freshness. - A tangy ranch dressing to balance the flavors. You can also check the Full Recipe for more ideas! This blog post detailed how to make tasty zucchini and corn fritters. You learned about key ingredients, step-by-step cooking, and tips for crunchiness. Variations and storage tips help you enjoy these fritters longer. Embrace your creativity by trying new flavors and cooking methods. These fritters are easy to adapt and fun to share. Enjoy your cooking and delicious fritters!

Zucchini and Corn Fritters Tasty and Simple Snack

Looking for a fun and tasty snack? Zucchini and Corn Fritters are both easy to make and delicious! With just

To make a vibrant roasted beet salad, you need the following ingredients: - 3 medium-sized beets, trimmed, scrubbed - 4 cups of mixed greens (arugula, spinach, baby kale) - 1/2 cup creamy goat cheese, crumbled - 1/4 cup walnuts, lightly toasted - 1/4 cup dried cranberries - 1/4 red onion, thinly sliced - 2 tablespoons extra virgin olive oil - 1 tablespoon balsamic vinegar - Salt and freshly ground black pepper to taste - Fresh herbs (parsley or dill) for garnish Each ingredient adds its own special touch. The beets bring a sweet, earthy flavor. Mixed greens provide freshness and a nice crunch. Goat cheese adds creaminess, while walnuts give a delightful crunch. Dried cranberries offer a sweet-tart contrast. Red onion adds a sharp bite, balancing the flavors. Olive oil and balsamic vinegar create a simple dressing that brings everything together. This salad not only tastes great, but it also looks stunning. The bright colors of the beets pop against the greens. You can find the full recipe for a step-by-step guide to prepare this delicious dish. Enjoy the blend of flavors and textures! 1. Preheat the oven to 400°F (200°C). This helps the beets roast perfectly. 2. Wrap each beet in aluminum foil. Make sure to seal them tightly. 3. Place the wrapped beets on a baking sheet. Roast them for 45-60 minutes. 4. Check for doneness by using a fork. If it goes in easily, they are ready. 5. Once done, take them out and let them cool. 6. Peel off the skins. They should come off easily. 7. Cut the beets into wedges. This makes them easy to mix into the salad. 1. In a large bowl, combine the mixed greens and sliced red onion. This will be the base of your salad. 2. In a separate small bowl, whisk together the extra virgin olive oil and balsamic vinegar. 3. Add a sprinkle of salt and pepper for taste. This dressing enhances the flavors. 1. Drizzle the dressing over the mixed greens and onion. 2. Gently toss the salad so everything is coated. 3. Carefully add the roasted beet wedges to the salad. 4. Sprinkle the crumbled goat cheese, toasted walnuts, and dried cranberries on top. 5. Use a light hand to toss again, keeping the beets intact. 6. Garnish with fresh herbs for extra color and flavor. For detailed ingredients and additional insights, check the Full Recipe. How to know when beets are perfectly roasted You can tell when beets are ready by testing them with a fork. They should feel soft and tender. If your fork slides in easily, they are done. Aim for about 45-60 minutes in the oven at 400°F (200°C). Tips for peeling beets easily after roasting Peeling beets can be tricky, but there’s an easy way. After roasting, let them cool for a few minutes. When cool enough to touch, wear kitchen gloves. The skins will slide off easily with your fingers. This method keeps your hands from staining. Suggestions for vinegar or oil substitutes If you want a twist on the dressing, try other vinegars. Apple cider vinegar or red wine vinegar work well. For oils, you can use avocado oil or flaxseed oil for a different flavor. How to make a citrus-based dressing A citrus dressing can brighten your salad. Mix the juice of one lemon or orange with olive oil. Add salt and pepper to taste. This fresh dressing will give your salad a zesty kick. Suggestions for additional herbs or spices Fresh herbs like basil or mint add great flavor. You can also use spices like cumin or smoked paprika to give a unique twist. Try mixing in some fresh chives for a mild onion flavor. Ways to add extra crunch or texture For more texture, consider adding seeds or crispy chickpeas. Toasted pumpkin seeds or sunflower seeds give a delightful crunch. You can also use croutons for an extra layer of flavor. {{image_4}} You can make your roasted beet salad even better. Try adding fruits like apples or pears. Their sweet crunch pairs perfectly with the earthy beets. You can also add nuts or seeds for a fun crunch. Pecans, almonds, or pumpkin seeds work well too. They bring both flavor and texture to the dish. Cheese can change the flavor of your salad. Feta cheese adds a nice tang, while blue cheese gives a bold taste. If you want a dairy-free option, try vegan cheese. It melts well and still adds creaminess to your salad. Choose a cheese that matches your taste and mood. Mixing your salad with different greens can enhance your dish. Try using arugula, spinach, or even kale. You can also add beans or lentils for extra protein. Seasonal ingredients keep the salad fresh. In spring, add fresh peas. In fall, try roasted squash. These small changes can make your salad exciting. For the full recipe, check out the guidelines above. To keep your roasted beet salad fresh, store it in an airtight container. Place it in the fridge right after serving. This way, you prevent moisture loss and keep flavors intact. If you have leftover beets, wrap them in foil or plastic. Store them in the fridge to keep them fresh for longer. You can make parts of the salad ahead of time. Roast the beets a day before and store them in the fridge. Mix the greens and onions in another container. Keep the dressing in a separate jar. When it’s time to serve, toss everything together. This keeps the salad crisp and fresh. The salad will last about three days in the fridge. Check for signs of spoilage, like an off smell or slimy greens. If you see these signs, it’s best to toss the salad. Always trust your senses; they guide you on food safety. For the freshest taste, eat it sooner rather than later. Beets are low in calories but high in nutrients. They contain fiber, vitamins, and minerals. A cup of cooked beets has around 58 calories, 2 grams of protein, and 3.8 grams of fiber. They are rich in folate, which helps in cell growth. Beets also have antioxidants that fight free radicals. The health benefits of beets include: - Improved heart health: Beets can lower blood pressure due to their nitrates. - Enhanced exercise performance: Nitrates also help increase blood flow and oxygen. - Anti-inflammatory properties: Beets may reduce inflammation and boost your immune system. Yes, using pre-cooked beets is very convenient. You can find them in most grocery stores. They save time and effort since you won’t have to roast them. To adjust the recipe, simply skip the roasting steps. Just chop the pre-cooked beets and add them to your salad. The flavor remains great, and you still get all the health benefits. Yes, this salad is perfect for meal prep! To make it a meal prep option, you can prepare the components in advance. - Store the greens and beets separately: This helps keep everything fresh. - Dress just before eating: Dress the salad right before serving to avoid sogginess. For the best freshness during the week, keep the salad in an airtight container. This way, you can enjoy a tasty, healthy meal anytime! This salad combines beets, greens, and cheese for a healthy treat. I shared tips on roasting beets and making the perfect dressing. You can add fruits or nuts for more flavor. Leftovers can last a few days if stored right. Enjoy this easy recipe to boost your meals. It’s a simple way to eat well and feel great!

Roasted Beet Salad Vibrant and Nutritious Delight

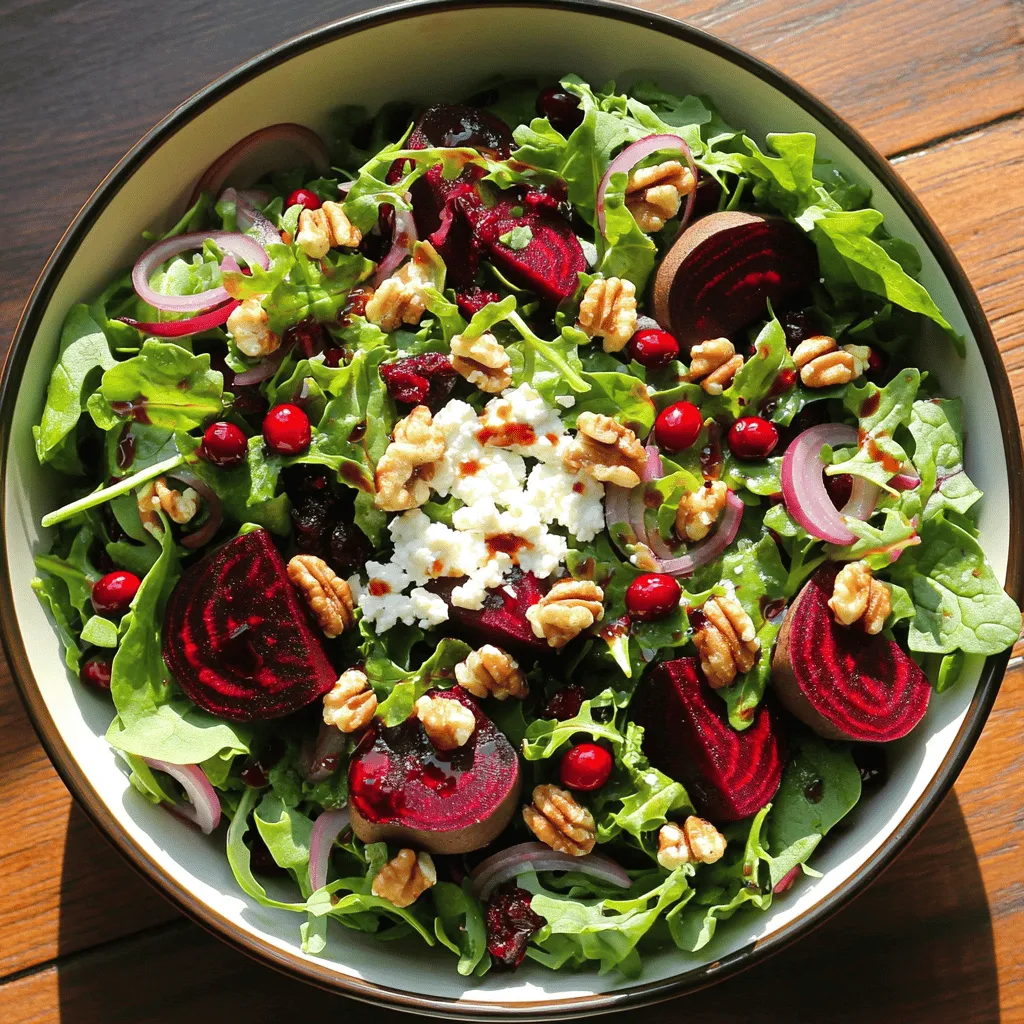
Are you ready to enjoy a bright and healthy dish? This Roasted Beet Salad is a vibrant mix of flavors

To make these tasty chocolate mint energy bites, gather the following: - 1 cup rolled oats - 1/2 cup almond butter - 1/4 cup honey or maple syrup - 1/4 cup unsweetened cocoa powder - 1/4 cup dark chocolate chips - 1 teaspoon peppermint extract - 1/4 teaspoon sea salt - 1/4 cup unsweetened shredded coconut - Optional: 2 tablespoons chia seeds or ground flaxseed Each ingredient in these energy bites brings great health benefits: - Rolled oats: Full of fiber, oats help with digestion and provide energy. - Almond butter: This nut butter is rich in healthy fats and protein, which can keep you full. - Honey or maple syrup: Both sweeteners add natural sugars for quick energy. - Cocoa powder: Packed with antioxidants, cocoa can boost your mood and heart health. - Dark chocolate chips: They add flavor and provide antioxidants, too. - Peppermint extract: This ingredient adds flavor and can aid digestion. - Sea salt: A little salt can enhance flavors and balance your body’s electrolytes. - Shredded coconut: Coconut offers healthy fats and adds a chewy texture. - Chia seeds or ground flaxseed: These options boost fiber and provide omega-3 fats. If you need to swap some ingredients, here are some ideas: - Rolled oats: Use quick oats or even almond flour as a gluten-free option. - Almond butter: Any nut butter works, like peanut or cashew butter. - Honey or maple syrup: Agave syrup is a great vegan choice. - Cocoa powder: You can replace it with carob powder for a caffeine-free option. - Dark chocolate chips: Use white chocolate or omit them for a lower sugar version. - Peppermint extract: If you don’t have it, vanilla extract adds a nice flavor. - Sea salt: Table salt works, but use less since it’s finer. - Shredded coconut: You can leave it out or use chopped nuts instead. - Chia seeds or ground flaxseed: Omit them if you prefer, or use hemp seeds for a different taste. Following this guide helps you make delicious chocolate mint energy bites with ease! If you want to see the full recipe, just check the [Full Recipe]. Start by gathering your ingredients. You will need: - 1 cup rolled oats - 1/2 cup almond butter - 1/4 cup honey or maple syrup - 1/4 cup unsweetened cocoa powder - 1/4 cup dark chocolate chips - 1 teaspoon peppermint extract - 1/4 teaspoon sea salt - 1/4 cup unsweetened shredded coconut - Optional: 2 tablespoons chia seeds or ground flaxseed Make sure everything is ready. This will help you mix quickly. In a large bowl, add the rolled oats, almond butter, and honey (or maple syrup). Use a spoon to mix these until smooth. Next, add the unsweetened cocoa powder, dark chocolate chips, peppermint extract, and sea salt. Stir it all together well. You want every bite to have the same flavor. If you want extra nutrition, add chia seeds or ground flaxseed now. Finally, fold in the shredded coconut gently. This helps keep the texture light. Now, it’s time to shape your energy bites. Take a small amount of the mixture in your hands and roll it into a ball about 1 inch wide. Keep doing this until all the mixture is shaped. Place the balls on a parchment-lined baking sheet or plate. Make sure they are not touching. After that, put the baking sheet in the fridge for at least 30 minutes. This helps them hold their shape. Once they are firm, store them in an airtight container in the fridge. They will stay fresh for up to one week. For the full recipe, you can refer to the previous section. When making chocolate mint energy bites, some common mistakes can ruin the fun. First, don’t skip the chilling step. If you skip it, the bites may fall apart. Second, measure your ingredients carefully. Too much cocoa or almond butter can change the taste and texture. Lastly, avoid overmixing. You want a good mix, but don’t make it mushy. To make your energy bites perfect, use fresh ingredients. Fresh cocoa and nut butter make a big difference. I also recommend using a cookie scoop. This tool helps you shape the bites evenly. For a fun twist, add a pinch of sea salt on top after rolling. This brings out the chocolate flavor. Don’t forget, the right balance of mint and chocolate is key. Taste as you go and adjust to your liking. These energy bites are great on their own, but you can pair them for extra fun. Try serving them with a cup of herbal tea or a glass of almond milk. You can also add fresh fruit on the side. Berries or banana slices work well. Want to impress guests? Arrange the bites on a platter with chocolate drizzles or fresh mint leaves for decoration. For the full recipe, check out the detailed steps above. {{image_4}} You can change the taste of your chocolate mint energy bites easily. Try adding nuts like walnuts or almonds for a crunchy twist. If you want a different flavor, use vanilla or almond extract instead of peppermint. This small change can make a big difference in taste. You can also mix in spices like cinnamon for warmth and depth. If you follow a vegan or gluten-free diet, these bites can fit your needs. Use maple syrup instead of honey to keep it vegan. For gluten-free options, just ensure that your oats are certified gluten-free. This way, everyone can enjoy these tasty treats without worry. Mix-ins can add variety and nutrition to your bites. Dried fruit, like cranberries or apricots, gives a sweet touch. Seeds, such as pumpkin or sunflower seeds, add crunch and healthy fats. You can also add protein powder for an extra boost. Be creative with these options and find what you like best! For the full recipe, check out the detailed steps above. Store your chocolate mint energy bites in an airtight container. This keeps them fresh and tasty. Place a piece of parchment paper between layers if stacking. This helps prevent sticking. Always keep them in the refrigerator. These energy bites last about one week in the fridge. They stay firm and delicious during this time. If you notice any changes in smell or texture, it's best to toss them. Always check for freshness before eating. You can freeze energy bites for longer storage. Place them in a single layer on a baking sheet first. Freeze for 1-2 hours. Once firm, transfer them to a freezer bag. Label the bag with the date. They can last up to three months in the freezer. When ready to eat, thaw them in the fridge overnight. Enjoy your tasty treat anytime! For the full recipe, check out the detailed instructions above. To make chocolate mint energy bites healthier, swap out honey for maple syrup. Maple syrup has fewer calories and still offers sweetness. You can also use unsweetened cocoa powder for less sugar. Adding chia seeds or ground flaxseed boosts fiber. This helps you feel full longer. You can also use a nut butter with no added sugar. This change adds healthy fats without the extra calories. Yes, you can use different nut butters! Almond butter is great, but peanut or cashew butter works too. Each nut butter adds a unique flavor. If you use peanut butter, expect a richer taste. For cashew butter, the bites will be creamier. Just make sure the nut butter is natural, with no added sugars or oils. Energy bites offer many benefits. They are quick snacks that provide energy. They are easy to make and portable. You can grab them on the go. Energy bites are also customizable for your taste. They are packed with protein and fiber. This helps keep you satisfied between meals. Plus, they contain healthy fats, which are good for your heart. If you want to make chocolate mint energy bites without honey, use maple syrup or agave nectar instead. These options are sweet and keep the bites sticky. You can also try mashed ripe bananas for natural sweetness. Just remember, the texture might change slightly. Adjust the other ingredients if needed to keep the mixture cohesive. Enjoy the process of crafting your treats! For the full recipe, check the Chocolate Mint Energy Bites section. In this blog post, we covered key ingredients for energy bites, focusing on their benefits, substitutions, and variations. You learned how to prepare, mix, and shape these treats, plus tips to avoid common mistakes. I shared storage best practices and answered common questions. Energy bites are easy to make and fun to customize. With the right ingredients and techniques, you can enjoy tasty snacks that boost your energy while fitting your diet. Start creating your own energy bites today!

Chocolate Mint Energy Bites Simple and Tasty Treat

Looking for a quick and tasty treat? These Chocolate Mint Energy Bites are both simple and delicious! With just a

To make a delicious spinach and feta quiche, you need these key ingredients: - 1 pre-made 9-inch pie crust - 2 cups fresh spinach, finely chopped - 1 cup feta cheese, crumbled - 1 cup heavy cream - 4 large eggs - 1 small onion, finely diced - 2 garlic cloves, minced - 1 tablespoon olive oil - 1/2 teaspoon dried oregano - Salt and freshly ground black pepper to taste - Optional: 1/4 cup shredded mozzarella cheese for topping Each ingredient plays a vital role in creating a tasty dish. The pie crust holds everything together, while fresh spinach adds color and nutrients. Feta cheese gives a nice tang, and heavy cream makes it rich and creamy. Eggs bind the filling and provide structure. Onions and garlic add depth of flavor, and oregano brings an herbal note. Using fresh ingredients makes a big difference in taste. If you want a cheesy top, adding mozzarella is a great choice. This quiche is simple yet flavorful, perfect for any meal. For the complete method, check out the Full Recipe. - Preheat oven to 375°F (190°C). - Heat olive oil in a medium skillet. - Add finely diced onion and sauté until clear, about 3-4 minutes. - Stir in minced garlic, then add chopped spinach. - Cook until spinach wilts, about 2-3 minutes. - In a large bowl, whisk together eggs and heavy cream. - Gently fold in crumbled feta cheese and seasonings. - This mix adds rich flavor and creaminess to your quiche. - Spread spinach and onion mixture evenly in the crust. - Pour the egg mixture over the filling. - If you like cheese, sprinkle shredded mozzarella on top. - Place quiche in the oven and bake for 35-40 minutes. - Check for a golden top and a firm center. - Let it cool for about 10 minutes before slicing. This simple process creates a tasty dish that impresses everyone. For the full recipe, check out Spinach & Feta Delight Quiche. Enjoy your cooking adventure! To get a crispy crust, use a pre-made pie crust. Bake it for five minutes before adding the filling. This helps it hold up. For a fluffy filling, beat the eggs well. Ensure they blend smoothly with the cream. This makes the quiche light and airy. To boost flavor, add fresh herbs like dill or basil. They pair well with spinach and feta. You can also try a pinch of nutmeg for warmth. When serving, enjoy your quiche with a crisp side salad. A light vinaigrette adds a nice contrast. Be careful not to overcook your quiche. The center should be set, but still a bit wobbly. Underbaking can lead to a runny filling. Another mistake is using wet spinach. Always squeeze out extra moisture before mixing it in. This keeps your quiche from becoming soggy. {{image_4}} You can make your quiche unique by changing the cheese. Try goat cheese or cheddar for a twist. You can also add meats like ham or bacon. If you want more veggies, consider peppers or mushrooms. These changes will add exciting flavors. If you need a gluten-free option, use a gluten-free pie crust. You can also make a crustless quiche. For dairy-free or vegan diets, replace heavy cream with coconut cream. Use tofu instead of eggs for a vegan version. These swaps keep the taste great without dairy. You can serve your quiche in fun ways. Make individual quiche cups using a muffin tin. This is perfect for parties. Mini quiches also work well as appetizers. They are easy to grab and eat. Explore these options for different meal settings. For the full recipe, check the section above. To keep leftover quiche fresh, cool it to room temperature. Then, wrap it well in plastic wrap or foil. You can also place it in an airtight container. This helps maintain its flavor and texture. Store the quiche in the fridge for up to three days. If you want to freeze your quiche, wait until it cools completely. Wrap it tightly in plastic wrap, then in foil. This prevents freezer burn. Quiche can stay frozen for up to two months. When you are ready to eat, thaw it overnight in the fridge. To reheat, place it in a 350°F (175°C) oven for about 20-25 minutes. Refrigerated quiche is best eaten within three days. After that, its quality may drop. Look for signs that your quiche has gone bad. Check for a sour smell or a change in texture. If it feels slimy or has mold, it's time to toss it. Enjoy your Spinach and Feta Quiche while it’s fresh for the best taste! For the full recipe, check out the link above. To make your quiche gluten-free, choose a gluten-free pie crust. Many stores sell these ready-made. You can also use almond flour or coconut flour to make your own crust. Ensure all other ingredients are gluten-free. Yes, you can use frozen spinach. Thaw it first and drain it well. This helps avoid a watery quiche. Squeeze out extra moisture with a paper towel. This keeps the filling firm and tasty. Check the quiche at the 35-minute mark. It should be golden on top. The center should not jiggle when you shake it. A knife inserted should come out clean. This means it’s cooked properly. Yes, you can prep the quiche ahead of time. Make it a day before and store it in the fridge. You can also freeze it for later. Just bake it straight from the freezer; it may take a bit longer. For the full recipe, refer to the ingredients and steps outlined above. This quiche combines spinach, feta, and cream for a tasty dish. We reviewed key ingredients and gave simple, step-by-step instructions. You learned tips to master texture and flavor, plus common mistakes to avoid. Variations let you customize for diets or personal taste. Remember to store leftovers properly for the best freshness. Enjoy making your quiche, whether it's for a meal or a snack. Happy cooking!

Spinach and Feta Quiche Delightful and Simple Recipe

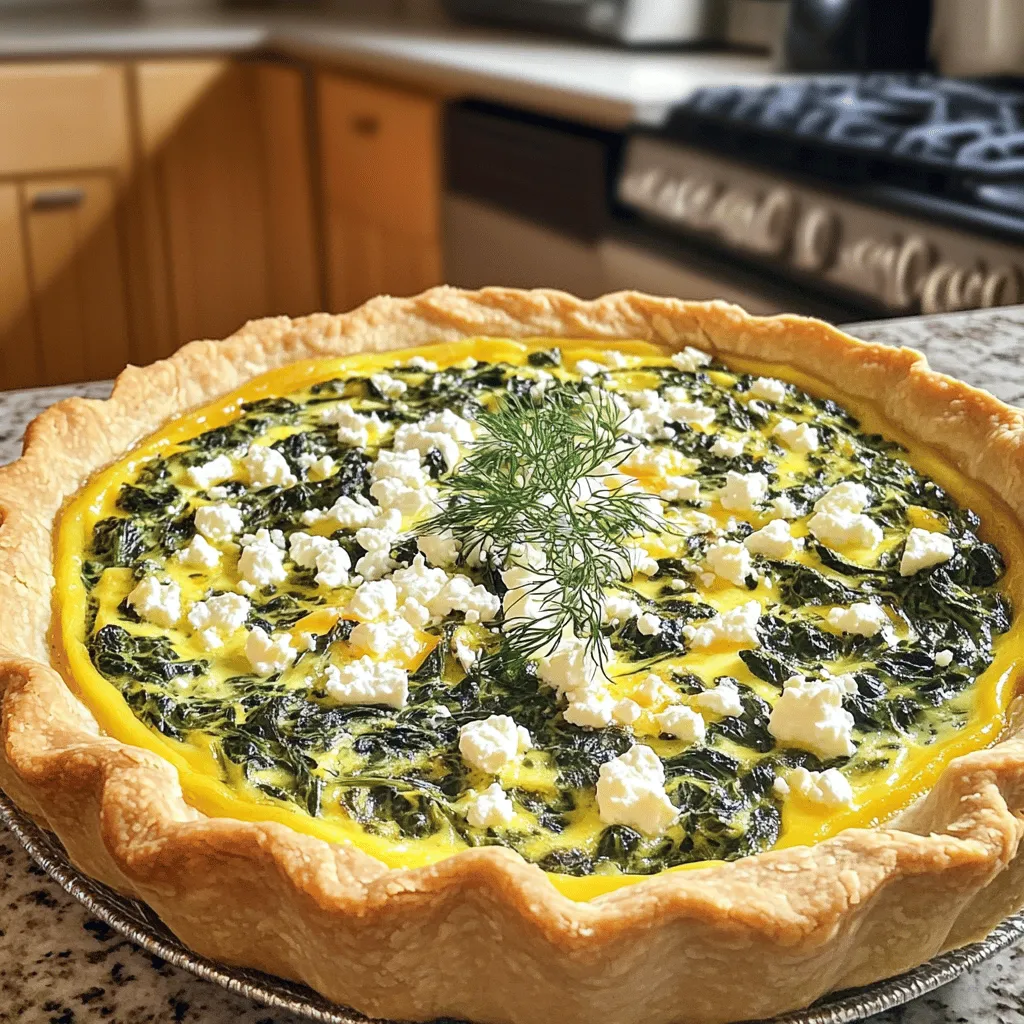
Looking for a tasty dish that’s easy to make? Try my Spinach and Feta Quiche! With just a few simple

To make a tasty honey Sriracha tofu, you need some simple ingredients. Here’s the full list: - 14 oz firm tofu, pressed and cut into 1-inch cubes - 3 tablespoons of honey - 2 tablespoons of Sriracha sauce - 1 tablespoon of soy sauce - 1 tablespoon of rice vinegar - 1 tablespoon of sesame oil (plus extra for cooking) - 1 teaspoon of garlic powder - 1 teaspoon of ginger powder - 2 green onions, finely sliced (for garnish) - Sesame seeds (for garnish) - Cooked rice or quinoa (for serving) These ingredients come together to create a rich flavor. The firm tofu is key for a good texture. Pressing it helps remove extra water. This makes the tofu crispier when cooked. Honey adds sweetness, while Sriracha brings heat. Soy sauce gives a savory depth, and rice vinegar adds a nice tang. Garlic and ginger powders bring warmth and spice to the dish. Green onions and sesame seeds are perfect for garnishing. They add color and crunch. You can serve the dish on cooked rice or quinoa for a filling meal. Now that you know the ingredients, let’s get cooking! Check out the full recipe to see how to combine these tasty items. Start by gathering your ingredients. You need honey, Sriracha, soy sauce, rice vinegar, sesame oil, garlic powder, and ginger powder. In a small bowl, mix these together. Whisk until the sauce is smooth. This sauce gives the tofu its sweet and spicy flavor. Set it aside for later. Next, take your firm tofu. Press it to remove extra water, then cut it into 1-inch cubes. Heat a non-stick skillet over medium heat. Optionally, add a bit of sesame oil for taste. Once hot, add the tofu cubes. Cook them for about 5-7 minutes. Turn the cubes gently with a spatula to get them golden brown. This step makes the tofu crispy and delicious. Now, it’s time to bring it all together. Carefully pour your prepared honey Sriracha sauce over the crispy tofu. Toss the tofu cubes gently in the sauce. Ensure each piece is well coated. Cook for another 2-3 minutes. This will thicken the sauce and help it stick to the tofu. Afterward, remove the skillet from the heat. Allow the tofu to cool for a minute. Serve it over warm rice or quinoa. Garnish with sliced green onions and sesame seeds for a tasty finish. Enjoy your Honey Sriracha Tofu! For the complete recipe, check out the Full Recipe. To get that perfect crisp on your tofu, start with firm tofu. Press it well to remove excess moisture. This helps the tofu soak up flavors while cooking. When cooking, use a non-stick skillet. Heat it before adding tofu for an even golden brown color. Cook each side for 5-7 minutes, turning gently. A light drizzle of sesame oil adds more flavor and helps with crisping. The key to great Honey Sriracha Tofu is balance. The honey gives sweetness, while Sriracha adds heat. Adjust the amounts to suit your taste. If it’s too spicy for you, add more honey. If you love heat, add extra Sriracha. Mixing in soy sauce and rice vinegar gives depth and richness. Taste the sauce before pouring it on the tofu to ensure it’s just right. Garnishing makes your dish look and taste better. Sliced green onions add a fresh touch and a little crunch. A sprinkle of sesame seeds adds texture and visual appeal. For a pop of color, consider adding chopped cilantro or parsley. Serve your Honey Sriracha Tofu over cooked rice or quinoa for a complete meal. For the full recipe, check out the details provided earlier. {{image_4}} You can switch honey for maple syrup or agave. Both options keep the sweet flavor. They also work well with the spicy Sriracha. You can adjust the sweetness to your taste. Just remember, different sweeteners may alter the final taste. Try using chili garlic sauce instead of Sriracha for a different kick. You can also mix in peanut butter for a creamy touch. If you like a tangy taste, add some lime juice. Each sauce will give a unique flavor twist to your dish. Add bell peppers or broccoli for extra crunch and color. You could also toss in snap peas or carrots for more texture. These veggies will not only enhance flavor but also boost nutrition. Feel free to experiment with your favorites! Store any leftover honey Sriracha tofu in an airtight container. Keep it in the fridge for up to 3 days. The sauce may thicken as it cools. To keep the tofu from getting soggy, try to store the sauce separately. You can freeze honey Sriracha tofu if you need to keep it longer. Place it in a freezer-safe container. Make sure to leave some space for the tofu to expand. Use it within 2 months for the best taste. Thaw in the fridge before reheating. To reheat, use a skillet over medium heat. Add a splash of water or oil if it seems dry. Stir often until heated through. You can also microwave it, but the tofu may lose some crispness. For the best texture, stick to the skillet method. Enjoy your tasty meal! To reduce the spice, cut back on Sriracha. You can use one tablespoon instead of two. Adding more honey also helps balance the heat. You can mix in a splash of lime juice for a fresh taste. Another option is to add more soy sauce. This will tone down the spice while adding flavor. Try these tips to find your perfect level of heat. Yes, you can use different types of tofu. Soft or silken tofu can work, but they may break more easily. Firm tofu is the best choice for this recipe. It holds its shape well and crisps up nicely. If you prefer a different texture, consider tempeh. It absorbs flavors well and has a nutty taste. Just adjust the cooking time based on the tofu type you choose. You can serve Honey Sriracha Tofu with various sides. Warm cooked rice or quinoa makes a great base. You can also pair it with steamed veggies for a healthy meal. Broccoli, snap peas, or bell peppers work well. For a crunchy touch, add a side salad. A fresh cucumber salad can also brighten your meal. Use your favorite sides to create a balanced plate. In this article, we explored how to make Honey Sriracha Tofu. We covered key ingredients, including tofu, honey, and sriracha sauce. You learned about the cooking steps and helpful tips for the perfect dish. We also discussed fun variations and storage tips. Cooking does not have to be hard or boring. With these ideas, you can create tasty meals that excite your taste buds. Enjoy trying out this recipe and make it your own!

Honey Sriracha Tofu Quick and Flavorful Recipe

Looking for a quick, flavorful dish to spice up your meal? Try my Honey Sriracha Tofu! This easy recipe blends

To make a warm and comforting spiced apple cider, you need these key ingredients: - 8 cups apple cider - 1 orange, thinly sliced - 1 lemon, thinly sliced - 4 cinnamon sticks - 1 teaspoon whole cloves - 1 teaspoon allspice berries - 1 teaspoon fresh ginger, thinly sliced - 1/2 cup maple syrup (adjust to taste) These ingredients form the base of your cider. The apple cider delivers a sweet, fruity flavor. The orange and lemon add a bright, citrus note. Cinnamon, cloves, and allspice bring warmth and spice. Ginger adds a little heat, making the cider truly comforting. You can add these optional ingredients for a twist: - Fresh apple slices for garnish Adding fresh apple slices makes your drink look pretty. They also give a hint of extra apple flavor. You can experiment with other spices too, like nutmeg or star anise, to create your own unique taste. This spiced apple cider isn't just tasty; it has health benefits too: - Apple cider: Rich in antioxidants and vitamins, it supports heart health. - Oranges and lemons: High in vitamin C, they help boost your immune system. - Cinnamon: Known to lower blood sugar levels and fight inflammation. - Cloves: Have antibacterial properties and can aid digestion. - Allspice: Contains antioxidants and may help soothe digestive issues. - Ginger: Good for digestion and may relieve nausea. - Maple syrup: A natural sweetener with minerals like zinc and manganese. This cider warms your body and supports your health too. Enjoy the flavors and benefits in every sip! To start, pour 8 cups of apple cider into a large pot. I prefer using a heavy-bottomed pot because it warms evenly. Turn the heat to medium. This helps to warm the cider without burning it. Once the cider is warm, it’s time to add the fresh fruit. Slice one orange and one lemon, then add them to the pot. Their bright flavors will lift the cider’s taste. Now, let's add some spices for that warm feeling. Toss in 4 cinnamon sticks, 1 teaspoon of whole cloves, and 1 teaspoon of allspice berries. Thinly slice 1 teaspoon of fresh ginger and add it too. These spices will make your kitchen smell amazing! Next, pour in 1/2 cup of maple syrup. Start with this amount, and you can always add more later. Stir gently until the syrup mixes well into the cider. Let this mixture come to a gentle simmer. It should take about 30 minutes to infuse all those lovely flavors. After 30 minutes, it’s time to taste your cider. If you want it sweeter, feel free to add more maple syrup. Once the flavor is just right, take the pot off the heat. Let it cool for a bit, then strain the cider. Use a fine mesh sieve or cheesecloth to remove the spices and fruit pieces. This way, you’ll get a smooth drink. Serve the hot cider in mugs. For a fun touch, add fresh apple slices as a garnish. You might even sprinkle a little cinnamon on top for extra warmth. Enjoy this spiced apple cider! For the full recipe, check out the details above. To make your spiced apple cider just right, start with a solid base. Use good-quality apple cider. It carries the main flavor. When adding sweeteners, begin with half a cup of maple syrup. Taste it after simmering. You can always add more syrup if you want it sweeter. Remember, everyone’s taste is different. Use this method to find your sweet spot. One common mistake is using too many spices. While spices add warmth, too much can overwhelm the apple flavor. Stick to the recipe for best results. Another mistake is not simmering long enough. You want the spices and fruits to blend well. Don’t rush this step. Also, avoid boiling the cider. Boiling can change the taste and texture. For a cozy experience, serve your cider hot. Pour it into mugs, and add fresh apple slices for a nice look. If you want to enjoy it cold, let the cider cool and refrigerate. Serve it over ice for a refreshing drink. You can also warm it up later if needed. This flexibility makes it a great drink for any season. {{image_4}} You can add a splash of fun to your spiced apple cider with some alcohol. For a warm, cozy drink, try adding bourbon or rum. These spirits blend well with the sweet and spicy notes. Just pour about a cup into your cider after it simmers. If you want something lighter, consider adding a splash of hard cider instead. This keeps the apple flavor strong while adding a new twist. You can get creative with flavors by adding more ingredients. For example, vanilla gives a smooth and sweet touch. Just add a teaspoon of vanilla extract when the cider is simmering. Another great option is nutmeg, which adds warmth and richness. Use a pinch or two to enhance the spice blend. Don't forget about adding a few star anise pods for a unique flavor that’s both sweet and spicy. The type of apples you use can change your cider’s taste. Tart apples like Granny Smith add a nice balance to the sweetness. Sweet apples, such as Fuji or Honeycrisp, make the cider richer. You can even mix different kinds. Mixing sweet and tart apples brings depth to the flavor. Try using what you have on hand or visit your local market for the freshest options. For the complete recipe, check out the Spiced Apple Cider Delight. If you have leftover spiced apple cider, store it in a clean, airtight container. Glass jars or plastic bottles work well. Make sure to let the cider cool to room temperature before sealing. This helps prevent condensation, which can dilute the flavor. Keep the container in the fridge. It stays fresh and tasty for up to a week. When you want to enjoy your cider again, reheat it gently. Pour the cider into a pot and heat it on low. Stir it often to avoid scorching. You can also use the microwave. Heat it in short bursts, stirring in between. This way, the flavors remain rich and warm. Homemade spiced apple cider typically lasts about five to seven days in the fridge. Store-bought cider can last longer, often up to two weeks. Check the label for exact dates. Always smell and taste before using any cider, whether homemade or store-bought. If it smells off or tastes strange, it’s better to toss it out. The best way to make spiced apple cider at home is to use fresh ingredients. You will need apple cider, citrus fruits, and spices. Start by warming the apple cider in a pot. Add thin slices of orange and lemon for bright flavors. Toss in cinnamon sticks, cloves, allspice, and fresh ginger for warmth. Sweeten with maple syrup to taste. Simmer for about 30 minutes. This allows the flavors to blend well. Strain the cider to remove solids. Serve warm for the best taste. You can buy pre-made spiced apple cider in local grocery stores. Many stores carry it, especially in the fall and winter. Look in the beverage aisle or near the juice section. Some farmers' markets may also sell fresh spiced apple cider. Check online retailers too, as they often have a variety of options. Yes, you can make spiced apple cider in a slow cooker. This method is great for keeping cider warm during gatherings. Just add the apple cider and all the ingredients to the slow cooker. Set it on low heat for about 4 hours. Stir occasionally to blend the flavors. This method allows the spices to infuse deeply, making the cider even tastier. Spiced apple cider lasts about 5 to 7 days in the refrigerator. Store it in an airtight container to keep it fresh. If you notice any changes in smell or color, it's best to toss it out. You can also freeze it for longer storage. Just make sure to leave room for expansion when freezing. Spiced apple cider is a great drink with so many flavors. We covered the key ingredients that make it special. You learned how to prepare the base, infuse it with spices, and serve it perfectly. Remember to avoid common mistakes for the best results. There are plenty of fun variations, too! Store any leftovers right to keep the taste fresh. Enjoy your homemade spiced apple cider for all occasions!

Spiced Apple Cider Warm and Comforting Beverage Recipe

Looking for a warm drink that feels like a cozy hug? Spiced apple cider is your answer! This easy recipe

- Baby potatoes: 1.5 lbs, halved for even cooking. - Garlic: 4 cloves, minced to release flavor. - Parmesan cheese: 1/4 cup, grated for a rich taste. - Olive oil: 3 tablespoons to help crisp the potatoes. - Herbs and spices: 1 teaspoon dried Italian herb blend (oregano, thyme, basil) for depth. - Salt and pepper: To taste, enhancing all the flavors. - Garnish options: Fresh parsley, finely chopped for color and freshness. - Alternative types of potatoes: You can use Yukon gold or red potatoes if you prefer. - Dairy-free cheese options: Look for vegan Parmesan to keep it dairy-free. - Fresh vs. dried herbs: Fresh herbs add bright flavor, but dried herbs are a great shortcut. If you want to try out this recipe, you can find the Full Recipe in the article. 1. Preheat oven temperature Start by preheating your oven to 425°F (220°C). This high heat helps the potatoes become crispy. 2. Prepare the potato mixture In a big bowl, mix 1.5 lbs of halved baby potatoes and 4 minced garlic cloves. Pour in 3 tablespoons of olive oil, then add 1 teaspoon of dried Italian herbs, and some salt and pepper. If you like a bit of spice, throw in 1/2 teaspoon of red pepper flakes. Toss everything well so the potatoes are covered in the oil and spices. 1. Initial roasting time and tips Line a baking sheet with parchment paper, making cleanup easy. Spread the potato mix evenly on the sheet. Roast them in the oven for 20 minutes. This step lets the potatoes start to brown. 2. Adding Parmesan cheese After 20 minutes, take the sheet out. Now, sprinkle 1/4 cup of grated Parmesan cheese over the potatoes. This cheese melts and adds a nice flavor. Put the potatoes back in the oven and roast them for another 15-20 minutes until they are golden brown. Stir them halfway through to help them cook evenly. 1. Garnishing with parsley Once the potatoes are done, take them out of the oven. For a fresh touch, sprinkle some chopped parsley on top. 2. Serving suggestions Serve the Garlic Parmesan Roasted Potatoes in a rustic bowl or on a wooden platter. You can add more parsley and a sprinkle of Parmesan on top for a beautiful finish. You can find the full recipe [here](#). To get the best crispiness from your garlic Parmesan roasted potatoes, choose small baby potatoes. Their size helps them cook evenly. Cut them in half for better surface area exposure. Also, maximize crispiness by ensuring your potatoes are dry. Any moisture can make them soggy. After washing, pat them dry with a paper towel. Spacing on the baking sheet is key. Spread the potatoes out in a single layer. If they overlap, they will steam instead of roast. This means no crispy goodness. To boost flavor, try adding fresh herbs like rosemary or thyme. Herbs elevate the dish and add a fresh taste. You can also mix in spices like paprika for a smoky touch. Experiment with cheese types, too. Try using sharp cheddar or feta for a twist. Each cheese brings its unique flavor, making your dish stand out. For a zesty kick, sprinkle some lemon zest on top before serving. It adds a bright note that complements the garlic and cheese. Dive into the full recipe for more delicious details! {{image_4}} You can change the taste of Garlic Parmesan Roasted Potatoes easily. - Garlic herb variations: Try mixing in fresh herbs. Rosemary or thyme adds a nice touch. You can also blend garlic with parsley for a fresh flavor. This will enhance the taste and make the dish pop. - Spicy cheese version: If you love heat, add more red pepper flakes. You can also use spicy cheese, like pepper jack. This gives the potatoes a kick that many will enjoy. Making seasonal changes can keep this dish exciting. - Fall-inspired roasted potatoes: In fall, add sweet potatoes or butternut squash. These ingredients bring a sweet flavor that pairs well with garlic. Toss in some cinnamon for a warm touch that feels cozy. - Summer variations with fresh veggies: In summer, mix in colorful veggies like bell peppers or zucchini. These will roast well and add vibrant colors. The fresh taste will lighten the dish and make it perfect for summer meals. For the full recipe, check the section above. To keep your Garlic Parmesan Roasted Potatoes fresh, store them in an airtight container. Place the container in the fridge. They stay good for about 3 to 5 days. When reheating, use the oven for the best results. Preheat your oven to 350°F (175°C). Spread the potatoes on a baking sheet and heat for about 10 to 15 minutes. This keeps them crispy and tasty. Can you freeze roasted potatoes? Yes, you can! Freezing is a great way to save leftovers. First, let the potatoes cool completely. Then, place them in a freezer-safe bag or container. Squeeze out as much air as you can. They can last up to 3 months in the freezer. When you're ready to eat, thaw them in the fridge overnight. After thawing, reheat them in the oven for a crispy texture. Just remember to check for any frost. Enjoy every bite of your Garlic Parmesan Roasted Potatoes later on! How long does it take to cook Garlic Parmesan Roasted Potatoes? It takes about 45 minutes to cook Garlic Parmesan roasted potatoes. This includes 10 minutes for prep and 35 minutes for roasting. You first roast the potatoes for 20 minutes, add the cheese, then roast for another 15-20 minutes. Can I make this recipe ahead of time? Yes, you can prep the potatoes ahead. Cut them and mix with oil and spices. Store them in the fridge for a few hours. Roast them right before serving for the best taste. What should I serve with Garlic Parmesan Roasted Potatoes? These potatoes go well with many dishes. Try them with grilled chicken, steak, or a fresh salad. They also work as a great side for a holiday feast. Why are my potatoes not crispy? If your potatoes are not crispy, they may be crowded on the baking sheet. Make sure they have space. Also, check that your oven is hot enough. Preheating is key for crispiness. Can I use larger potatoes instead of baby potatoes? Yes, you can use larger potatoes. Just cut them into smaller, even pieces. This helps them cook evenly. Keep an eye on the cooking time, as larger pieces may take longer. Caloric content per serving Each serving of Garlic Parmesan roasted potatoes has about 200 calories. This can vary based on the amount of oil and cheese used. Macronutrients breakdown - Carbohydrates: 30g - Protein: 4g - Fat: 8g - Fiber: 3g For more details, check the Full Recipe. This blog post covered everything you need for Garlic Parmesan Roasted Potatoes. We discussed ingredients, cooking steps, and variations. You learned how to achieve crispy texture and enhance flavors. Plus, we shared tips on storing and reheating. Explore different herbs and spices to make this dish your own. Remember, cooking is about creativity and enjoyment. With these simple steps, you can impress anyone at your table. Enjoy your cooking journey and make these potatoes a new favorite!

Garlic Parmesan Roasted Potatoes Simple Side Dish

Looking for an easy side that wows? Garlic Parmesan Roasted Potatoes are your answer! This simple dish combines crispy potatoes

- 1 cup quinoa, rinsed thoroughly - 2 cups vegetable broth (or water, for a lighter option) - 1 tablespoon extra virgin olive oil - Zest of 1 lemon - Juice of 1 lemon - 1/2 cup cherry tomatoes, sliced in half - 1/4 cup fresh parsley, finely chopped - 2 tablespoons fresh basil, finely chopped - 1 clove garlic, minced - Sea salt and freshly cracked black pepper, to taste - Optional: Crumbled feta cheese for garnishing The ingredients for Zesty Lemon Herb Quinoa are simple yet fresh. Quinoa is a super grain that cooks easily. It has a nutty taste and fluffy texture. The vegetable broth adds depth. If you want a lighter dish, you can use water. Fresh herbs and citrus bring bright flavors. The lemon zest gives a punchy contrast. The juice adds a refreshing twist. Cherry tomatoes add sweetness and color. Parsley and basil bring vibrant freshness. Garlic adds a nice aroma. Adding sea salt and black pepper enhances all the flavors. You can top your quinoa with crumbled feta cheese. This makes the dish even creamier and adds a salty kick. For different serving sizes, keep this in mind: - For 2 servings, use 1/2 cup quinoa and 1 cup broth. - For 6 servings, use 1 1/2 cups quinoa and 3 cups broth. If you need substitutes: - Use chicken broth if you want a meatier flavor. - Swap quinoa with rice for a different base. - For a vegan option, skip the feta or use a plant-based cheese. Try these tips to adjust the dish according to your taste. For the full recipe, check out the complete guide to cooking Zesty Lemon Herb Quinoa. To start, you need to rinse the quinoa correctly. Place it in a fine-mesh strainer. Rinse it under cold water for about a minute. This step removes the bitter coating called saponin. Next, combine the rinsed quinoa with vegetable broth or water in a medium saucepan. I prefer using broth for extra flavor. Bring the mixture to a vigorous boil over medium-high heat. Once it boils, reduce the heat to low. Cover the saucepan with a lid and let it simmer for 15 minutes. The quinoa should absorb all the liquid and become light and fluffy. Once your quinoa is cooked, it’s time to combine the ingredients. Transfer the warm quinoa to a large mixing bowl. Drizzle in one tablespoon of extra virgin olive oil. Toss the quinoa gently to coat it evenly. This helps keep the grains from sticking. Next, add the zest and juice of one lemon. Stir well to mix in those bright citrus flavors. Now, fold in the halved cherry tomatoes, minced garlic, chopped parsley, and basil. These fresh ingredients bring color and taste to the dish. Season it with sea salt and freshly cracked black pepper for the perfect touch. You can serve the Zesty Lemon Herb Quinoa warm or at room temperature. Both options are tasty. For a beautiful plate, add a scoop of quinoa to a bowl. Top it with crumbled feta cheese for a creamy finish. You can also add a sprinkle of fresh herbs for a pop of color. This dish pairs well with grilled chicken or fish, making it a perfect side. Enjoy this fresh and zesty meal with your friends and family. Check out the Full Recipe for more details. To achieve fluffy quinoa, rinse it well before cooking. This removes the bitter coating called saponin. Use a fine-mesh sieve for best results. When cooking, use two cups of liquid for every cup of quinoa. Bring it to a boil, then lower the heat to let it simmer. Cover it and let it cook for about 15 minutes. Avoid lifting the lid too soon. This keeps the steam in, making your quinoa light and fluffy. If you overcook quinoa, it gets mushy and sticky. It’s best to keep an eye on the time. When the liquid is absorbed, turn off the heat and let the quinoa rest for another 5 minutes. This step helps it fluff up nicely. To boost flavor, season the quinoa while it cooks. Using vegetable broth adds depth. After cooking, mix in olive oil, lemon zest, and juice for a bright taste. These ingredients wake up the dish and add freshness. Herbs are key to flavor. Fresh parsley and basil work well together. You can also try dill or cilantro for a different twist. Experiment with what you like best. Don't be afraid to mix in spices, too. A pinch of cumin or smoked paprika can make a big difference. Garnishing makes your dish look appealing. Sprinkle fresh herbs on top for a pop of color. You can also add halved cherry tomatoes for brightness. Crumbled feta cheese adds a nice touch and creaminess. Serve Zesty Lemon Herb Quinoa on a colorful plate. Pair it with grilled chicken or roasted veggies for a full meal. This dish is great warm or at room temperature, making it perfect for any occasion. {{image_4}} You can easily switch up your grains. Try using brown rice or farro instead of quinoa. Both add a nice chewiness. If you want something gluten-free, use millet or amaranth. These grains offer great textures too. Want to add more color? Toss in diced bell peppers or zucchini. They add crunch and taste. For protein, consider adding chickpeas or grilled chicken. Both options make this dish heartier. Feel free to spice things up! Adding cumin or smoked paprika gives a warm flavor. You can also mix in a splash of soy sauce for a savory kick. For a creamy touch, add a dollop of tahini or a drizzle of balsamic glaze. If you follow a vegan or gluten-free diet, this recipe is flexible. Use tamari instead of soy sauce to keep it gluten-free. You can also skip the cheese or use a plant-based alternative. Using fresh, seasonal produce makes your dish pop! In spring, add peas and asparagus for a vibrant look. Summer is perfect for sweet corn or grilled veggies. In fall, opt for roasted butternut squash or kale. Adjust flavors to match the season too. In winter, add warming spices like nutmeg or cinnamon. This keeps the dish cozy and satisfying during colder months. To keep your Zesty Lemon Herb Quinoa fresh, store it in an airtight container. This method helps prevent air exposure and retains flavor. Make sure the quinoa has cooled before sealing it. The dish stays fresh in the fridge for about 3 to 5 days. If you notice any off smells or signs of spoilage, it’s best to discard it. You can freeze Zesty Lemon Herb Quinoa for longer storage. Use a freezer-safe container or bag. Divide the quinoa into portions for easy thawing later. When you're ready to eat, thaw it in the fridge overnight or use the microwave. Reheat the quinoa in a pan over low heat, adding a splash of water or broth to keep it moist. This way, it will taste fresh and flavorful! Quinoa is a tiny seed that cooks like a grain. It is high in protein, fiber, and antioxidants. One cup of cooked quinoa has about 8 grams of protein and 5 grams of fiber. It is a complete protein, meaning it has all nine essential amino acids. Quinoa is gluten-free, making it great for those with gluten allergies. Eating quinoa can help with weight management and heart health. It also supports digestion and helps keep your blood sugar stable. Yes, you can prep Zesty Lemon Herb Quinoa in advance. This dish stores well in the fridge for about three to five days. To meal prep, cook the quinoa and mix in the flavors. Let it cool before storing in an airtight container. For best results, keep the toppings separate until serving. When reheating, add a splash of water to keep it moist. Heat it in the microwave or on the stove until warm. You can easily customize this recipe to fit your taste. If you love spice, add red pepper flakes or jalapeños. For a different flavor, try adding nuts or seeds. You can also use different vegetables like bell peppers or spinach. If you want protein, mix in grilled chicken, shrimp, or chickpeas. This dish is versatile, so feel free to make it your own! For the full recipe, check the section above. This blog post covered essential ingredients for Zesty Lemon Herb Quinoa. We looked at how to prep quinoa and combine flavors. I shared tips to ensure perfect cooking and great presentation. You can even customize this dish with different ingredients. Remember, quinoa is not just tasty; it's also packed with nutrients. Enjoy your cooking journey and feel free to experiment! Try new flavors and share your results. It's all about making it your own and having fun in the kitchen.

Zesty Lemon Herb Quinoa Flavorful and Fresh Dish

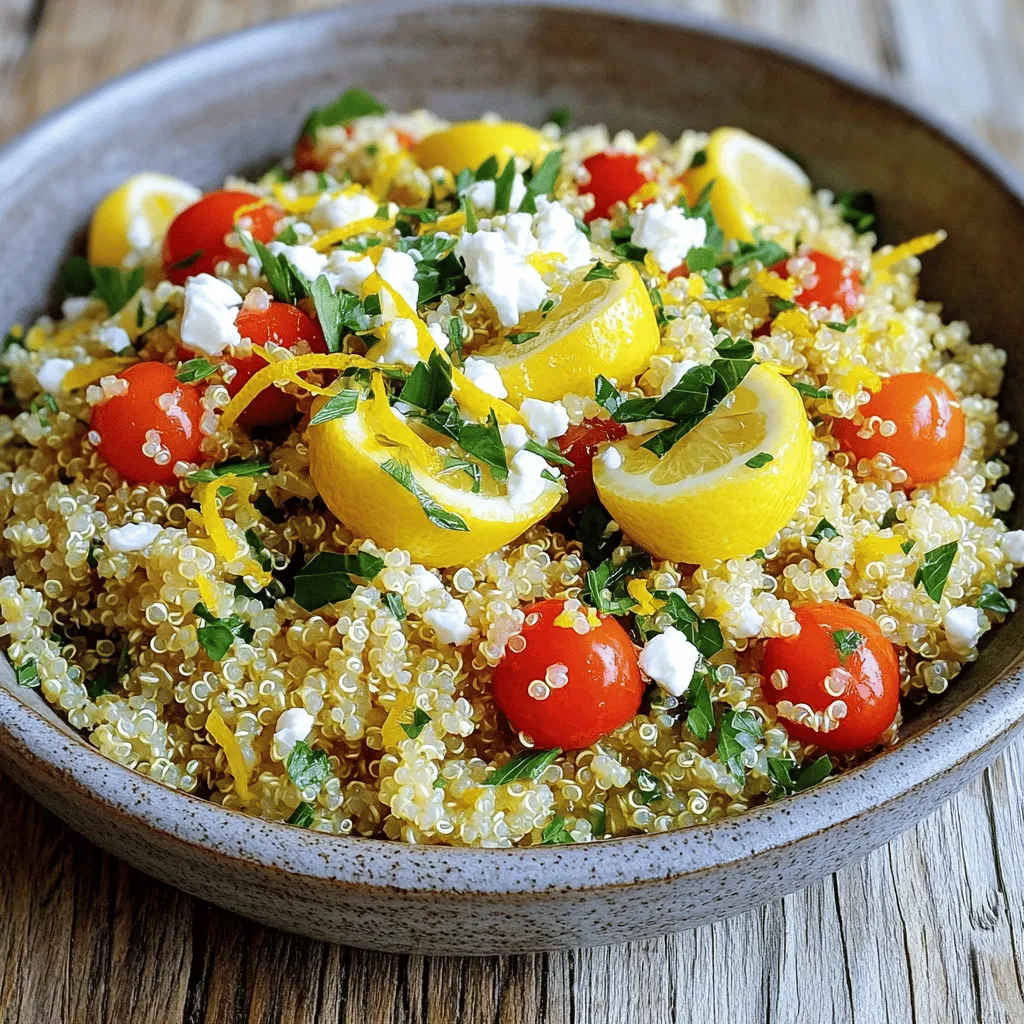
Are you ready to spice up your meals with something fresh and zesty? This Zesty Lemon Herb Quinoa is your
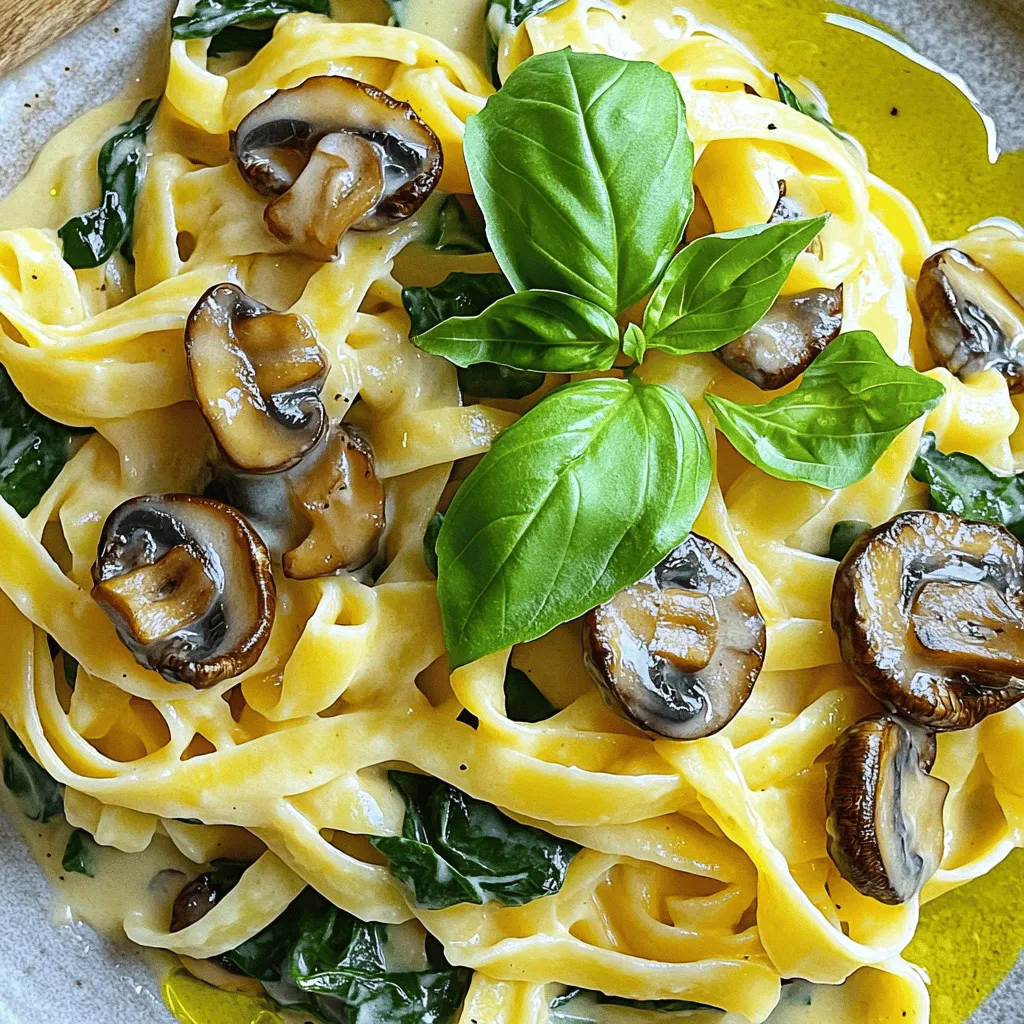
- 8 oz fettuccine or preferred pasta - 2 tablespoons extra virgin olive oil - 3 cups sliced mushrooms (button or cremini) - 4 cloves garlic, finely minced - 1 teaspoon dried thyme or 1 tablespoon fresh thyme - 1 cup heavy cream or lighter substitute - ½ cup freshly grated Parmesan cheese - Salt and freshly cracked black pepper to taste - Fresh parsley for garnish For this creamy garlic mushroom pasta, you need simple ingredients that pack a punch. Start with 8 oz of fettuccine, or any pasta you love. The choice of pasta shapes can change how the sauce clings, so pick one that speaks to you. Next, grab 2 tablespoons of extra virgin olive oil. This oil gives the dish a rich flavor and helps sauté the mushrooms perfectly. I often use button or cremini mushrooms, about 3 cups sliced. Their earthy taste complements the garlic nicely. Speaking of garlic, you’ll need 4 cloves, finely minced. Garlic adds warmth and depth to this dish. For seasoning, I like to use 1 teaspoon of dried thyme or, if you have it fresh, 1 tablespoon. This herb enhances the flavor beautifully. The creamy part comes from 1 cup of heavy cream. If you want a lighter dish, you can swap it for a substitute. Don’t forget ½ cup of freshly grated Parmesan cheese for that cheesy goodness! Finally, bring everything together with salt and freshly cracked black pepper to taste. To make it look lovely, sprinkle fresh parsley on top as a garnish. To see how to make this dish step-by-step, check out the Full Recipe. - Cook fettuccine according to package instructions. - Reserve ½ cup starchy pasta water. Cooking the pasta is the first step. Use a large pot with salted boiling water. This adds flavor to the pasta. Follow the time on the package for al dente texture. Al dente means the pasta is firm yet tender. Once cooked, drain it but keep that starchy water. This water helps to make the sauce creamy later. - Heat olive oil in a skillet over medium-high heat. - Sauté mushrooms until golden brown (5-7 minutes). Next, we sauté the mushrooms. In a large skillet, heat extra virgin olive oil over medium-high heat. You want it hot but not smoking. Add the sliced mushrooms in a single layer. Let them cook for 5-7 minutes. Stir them gently for even cooking. They should turn golden brown and lose their moisture. This step adds deep flavor and texture to our dish. - Add minced garlic and thyme to mushrooms. - Stir in heavy cream and cheese, adjust consistency. Now, let’s prepare the sauce. Once the mushrooms are browned, add minced garlic and thyme. Cook for 1-2 minutes until the garlic smells amazing. Then, pour in the heavy cream. Stir it well and let it simmer for 2-3 minutes. This thickens the sauce. Gradually mix in the grated Parmesan cheese. If the sauce gets too thick, add some reserved pasta water. This keeps it creamy and smooth. Now, fold the drained pasta into the sauce. Make sure every piece of pasta is coated in that delicious, creamy sauce. You can find the Full Recipe to make this tasty dish easy to follow! To cook pasta just right, time is key. Aim for about 8-10 minutes for fettuccine. You want it al dente, meaning it should feel firm but not hard. This texture holds up well in the sauce. After cooking, don’t forget to save half a cup of that starchy pasta water. It helps the sauce cling better later. For the sauce, the right consistency is vital. Start with heavy cream, which gives a rich base. If the sauce thickens too much, add some reserved pasta water. This will help you reach the creamy texture you desire. Seasoning can make or break your dish. Start with salt and black pepper to taste. Fresh herbs elevate flavors. If you can’t find fresh thyme, dried thyme works well too. You can also try adding a pinch of crushed red pepper for a hint of heat. If you love cheese, consider mixing in a bit of goat cheese or feta. These options add unique flavors that pair nicely with mushrooms. For a beautiful plate, use deep bowls. This adds elegance to your meal. You can drizzle a little extra cream on top for a fancy touch. Garnish with fresh parsley for color and flavor. A sprinkle of extra Parmesan on top looks great too. It makes your creamy garlic mushroom pasta even more appealing. Enjoy every bite! {{image_4}} You can change the pasta to fit your needs. For gluten-free options, try using brown rice pasta or chickpea pasta. These alternatives cook well and taste great. If you're looking for a lighter dish, you can swap heavy cream for coconut cream or cashew cream. Both give a nice flavor without dairy. Adding vegetables can enhance your dish. Fresh spinach brings a lovely color and nutrients. Just toss it in during the last minute of cooking. Sun-dried tomatoes add a sweet and tangy taste. You can also mix in seasonal veggies like asparagus or zucchini. These add freshness and a unique twist. Want to make this dish heartier? Grilled chicken or shrimp works well. Just cook them separately and add them to the pasta. For a vegetarian option, try adding tofu. Firm tofu works best—just sauté it until golden. This way, you add protein without losing flavor. For more ideas and the full recipe, check out the [Full Recipe]. To store leftovers, place them in an airtight container. This keeps the flavors fresh. Make sure to cool the pasta to room temperature before sealing it. Properly stored, creamy garlic mushroom pasta lasts for about 3 to 4 days in the fridge. When you're ready to eat, just reheat it on the stove or in the microwave. If you want to freeze creamy garlic mushroom pasta, use a freezer-safe container. Leave some space for expansion, as sauces can change texture when frozen. This dish can stay good in the freezer for up to 2 months. When you're ready to enjoy, thaw it in the fridge overnight. Reheat it gently on the stove. Add a splash of cream or reserved pasta water to restore its creamy texture. The total time to make creamy garlic mushroom pasta is about 25 minutes. It takes 10 minutes to prep and 15 minutes to cook. This quick recipe is perfect for busy weeknights or a cozy dinner. Yes! You can swap mushrooms to suit your taste. Try using shiitake, oyster, or portobello mushrooms. Each type adds a unique flavor and texture to your dish. Button mushrooms are mild, while shiitake gives a rich, earthy taste. Absolutely! For a vegan version, use plant-based cream and nutritional yeast instead of cheese. Coconut cream or cashew cream works well too. These substitutes keep the dish creamy and delicious without animal products. This pasta pairs well with a fresh salad or garlic bread. A simple arugula salad with lemon dressing adds a nice touch. Roasted vegetables like asparagus or broccoli also complement the dish nicely. You can even enjoy it with some crusty bread for dipping! This blog post covers making creamy garlic mushroom pasta in easy steps. We detailed the ingredients, cooking process, and helpful tips. You can customize it with different proteins or vegetables. Storing and reheating are simple too. In conclusion, you can create a delicious meal that fits your taste. Enjoy making this dish your own!

Creamy Garlic Mushroom Pasta Rich and Flavorful Dish

If you’re craving a dish that’s rich, creamy, and packed with flavor, you’re in for a treat! My Creamy Garlic

Older posts
Newer posts
← Previous Page1 Page2 Page3 … Page38 Next →

dsad

© 2025 recipetorch • Built with GeneratePress

Our Policies

  • Copyright Policy
  • Cookie Policy
  • GDPR Policy
  • Privacy Policy
  • Disclaimer
  • Terms Of Use

More Information

  • Home
  • About
  • Contact
  • Appetizers
  • Dessert
  • Dinner
  • Drinks
©2025, recipetorch About Back To Top