Skip to content
DisclaimerTerms Of UseGDPR PolicyCookie Policy

recipetorch

  • Home
  • Drinks
  • Appetizers
  • Dinner
  • Dessert
  • About
  • Contact
  • Privacy Policy
DisclaimerTerms Of UseGDPR PolicyCookie Policy

Nicole

- 8 oz spaghetti - 1 lb large shrimp, peeled and deveined - 1 lemon, zested and juiced - 1/4 cup olive oil - 1/4 cup heavy cream - 3 cloves garlic, minced - 1/2 teaspoon red pepper flakes These ingredients create a bright and tasty dish. The fresh shrimp adds protein and flavor. The lemon zest and juice bring a fresh, zesty kick. Olive oil adds richness, while heavy cream creates a smooth sauce. Garlic boosts the flavor, and red pepper flakes add warmth. - Fresh parsley - Grated Parmesan cheese - Salt and pepper Adding fresh parsley makes the dish look beautiful. Grated Parmesan cheese adds a salty touch and depth. Don’t forget salt and pepper to enhance all the flavors. - Garlic bread - Arugula salad - Roasted vegetables Garlic bread pairs well with the meal, giving a nice crunch. An arugula salad adds freshness and lightness. Roasted veggies are a great way to add color and nutrients. These sides make your meal even better. For the full recipe, check out the detailed steps above. 1. Start by bringing a large pot of salted water to a rolling boil. 2. Add the spaghetti to the pot. Cook it according to the package instructions until it’s al dente. 3. Before draining, reserve about 1/2 cup of the pasta cooking water. Drain the spaghetti and set it aside. 1. In a large skillet, heat the olive oil over medium heat. 2. Once the oil is hot, add minced garlic and red pepper flakes. Sauté for 1-2 minutes until the garlic smells good but does not brown. 3. Add the cleaned shrimp to the skillet. Season them with salt and pepper. Cook for about 2-3 minutes on each side until they turn pink and opaque. 1. Pour in the lemon juice and add the reserved lemon zest. Stir well to combine. 2. Mix in the heavy cream. Let the sauce simmer gently for 2-3 minutes until it thickens slightly. 3. Add the drained spaghetti to the skillet, tossing well to coat the pasta in the sauce. If it feels too dry, add reserved pasta water a little at a time until you like the texture. Enjoy the fresh flavors of this dish. For a full recipe, check the section above. To cook shrimp perfectly, look for a pink color. They should be opaque all the way through. Start with a hot skillet and add shrimp in a single layer. This ensures they cook evenly. Timing is key; cook them for about 2-3 minutes on each side. For timing the spaghetti and sauce, cook the pasta to al dente. This means it should still have a slight bite. Begin cooking the spaghetti when you start the sauce. This way, both will finish at the same time. You can add veggies to make this dish even better. Spinach wilts nicely into the sauce. Cherry tomatoes add a sweet burst of flavor. Toss them in when you add the shrimp, and let them cook briefly. If you like spice, adjust the red pepper flakes. You can add more for heat or leave them out for a milder taste. This makes the dish fit your spice level perfectly. For a richer taste, use homemade stock instead of water. This gives your pasta an extra layer of flavor. Simply replace the water with stock when boiling the spaghetti. Adding a splash of white wine can also boost the flavor. Pour it in after cooking the shrimp. Let it reduce slightly before adding lemon juice and cream. This step adds depth to your sauce and makes it unforgettable. For the full recipe, check out the [Full Recipe]. {{image_4}} You can swap shrimp for chicken or scallops. Chicken gives a hearty feel, while scallops add a touch of elegance. For a vegan twist, use tofu or tempeh. These options still create a tasty dish with lemon's bright flavor. Adding fresh herbs can uplift your meal. Basil or thyme works well. You can also experiment with different citrus. Lime adds a zesty kick, making the dish even more exciting. To make this dish gluten-free, choose gluten-free pasta. Many brands offer great options that taste fantastic. If you want a dairy-free version, replace heavy cream with coconut cream or a nut-based alternative. These swaps keep the creamy texture without dairy. For the full recipe, check out the Lemon Zest Shrimp Spaghetti . To keep your Lemon Spaghetti with Shrimp fresh, store leftovers in an airtight container. Make sure to cool your dish to room temperature before sealing it. This helps to avoid steam buildup inside the container, which can lead to sogginess. When you’re ready to eat, reheat in a skillet over low heat. Add a splash of olive oil or a bit of reserved pasta water to help restore texture. You can freeze this dish, but it’s best to do so before adding the heavy cream. For freezing, place the cooked spaghetti and shrimp in a freezer-safe container. Allow it to cool completely before sealing. When you want to enjoy it, thaw it overnight in the fridge. To reheat, warm in a skillet and add fresh lemon juice and cream to brighten the flavors. In the fridge, your Lemon Spaghetti with Shrimp will last about 3 days. Look for signs of spoilage, like off smells or changes in color. If the shrimp appears slimy or the pasta looks dry and hard, it’s time to toss it. Enjoy your meal while it’s fresh for the best flavor and quality! To cook shrimp well, heat olive oil in a skillet. When hot, add shrimp. Cook them for 2-3 minutes on each side. Watch for them to turn pink and opaque. This means they are done. Avoid cooking them too long. Overcooked shrimp can become rubbery. You want them tender and juicy. Yes, you can prepare some parts ahead. Cook the spaghetti and store it in the fridge. Cook the shrimp and sauce, then keep them separate. When ready to eat, combine everything. Reheat gently on the stove. Add a splash of water if it feels dry. For best taste, eat it fresh, but it stores well. Lemon Spaghetti with Shrimp pairs well with many sides. Here are some ideas: - Garlic bread for a crunchy bite. - A fresh arugula salad for bright flavors. - Roasted vegetables for a warm touch. These sides enhance the meal and make it even better! For the full recipe, check out the detailed section above. In this blog post, we explored how to make Lemon Spaghetti with Shrimp. We covered key ingredients like spaghetti, shrimp, and lemon juice. I shared easy, step-by-step cooking instructions and tips to enhance your dish. You can customize flavors and adapt for diets. Remember, store leftovers properly to keep them fresh. Enjoy this light and zesty meal with your favorite sides. Cooking can be fun, and I hope you try this recipe soon!

Lemon Spaghetti with Shrimp Flavorful and Fast Meal

Looking for a quick and tasty dinner? Lemon Spaghetti with Shrimp is the answer! This dish bursts with bright flavors

- 4 ears of corn - 1 cup cherry tomatoes - 1/2 red onion - 1 avocado - 1/2 cup cotija cheese - 1/4 cup fresh cilantro - 1 jalapeño - Juice of 2 limes - 2 tablespoons olive oil - Spices: chili powder, smoked paprika, salt, and pepper In this recipe, corn is the star. It brings a sweet crunch that you’ll love. I use fresh corn for the best taste. Next, cherry tomatoes add a pop of color and sweetness. Then, red onion offers a sharp bite. Avocado gives a creamy texture that pairs well with the other ingredients. Cotija cheese adds a salty tang, enhancing the salad's flavor. Fresh cilantro brings a bright note. The jalapeño adds heat, but you can adjust it based on your preference. Lime juice adds acidity, while olive oil ties everything together. Finally, the spices elevate the dish with warmth and zest. - Other vegetables (bell peppers, cucumber) - Proteins (grilled chicken, black beans) - Alternative cheeses (feta, vegan cheese) Feel free to customize your salad! Bell peppers and cucumber add extra crunch and color. Adding grilled chicken or black beans boosts protein. If you want a different cheese, feta or vegan cheese works well, too. These options help you make the dish your own. - Gluten-free options - Vegan options (substituting cheese and dressing) This salad can fit many diets. It’s naturally gluten-free, so no worries there! For a vegan option, substitute cotija cheese and use a plant-based dressing. You can still enjoy all the fresh flavors without dairy. This flexibility makes it easy to share with friends and family. You can find the full recipe at the top of this article. Enjoy making your Mexican Street Corn Salad! 1. Grilling the corn: Start by preheating your grill to medium-high heat. Place the husked ears of corn on the grill. Grill them for about 10 to 12 minutes. Turn them often to get that nice char. You want them tender and slightly crispy. 2. Removing kernels safely: Once the corn is cool enough to touch, use a sharp knife. Carefully cut the kernels off the cob. Make sure to hold the cob upright in a bowl. This keeps the kernels from flying everywhere. 1. Combining fresh ingredients in a bowl: In a large bowl, add the grilled corn. Next, toss in the halved cherry tomatoes, diced red onion, diced avocado, crumbled cotija cheese, chopped cilantro, and the finely chopped jalapeño. Mix these fresh ingredients gently. 2. Preparing the dressing: In a small bowl, whisk together the lime juice, olive oil, chili powder, smoked paprika, and a pinch of salt and pepper. Mix well until all ingredients blend nicely. 1. Drizzling dressing over the salad: Pour the dressing over the salad mixture. Gently toss everything together. Make sure all the ingredients get a good coat of that tasty dressing. 2. Chilling time for flavor enhancement: Cover the bowl and place it in the fridge for at least 30 minutes. This chilling time allows the flavors to meld together. Trust me, it makes a big difference! For the full recipe, refer to the earlier section. Enjoy your delicious Mexican Street Corn Salad! To get perfect grill marks, start with clean grates. Preheat your grill to medium-high heat. Place the corn on the grill and turn it every few minutes. This method gives you those nice charred lines. If you can’t grill, you can use a grill pan on the stove. Just heat it well and follow the same steps. You can add zest to your salad with spices. Chili powder and smoked paprika brighten the dish. If you like heat, add more jalapeño or a pinch of cayenne. For mild flavor, remove the jalapeño seeds. This way, you control the spice level. When serving, choose a large, colorful bowl. This makes the salad pop on your table. Adding fresh cilantro and extra cotija cheese on top looks great. You can also place lime wedges on the side. This invites guests to add more lime juice as they like. Enjoy your vibrant dish! For the complete dish, check the Full Recipe. {{image_4}} You can change your Mexican Street Corn Salad with seasonal produce. In summer, fresh corn is sweet and juicy. Use ripe tomatoes and peppers for bright colors. In fall, add roasted squash or sweet potatoes. These additions bring new flavors and textures. Adapting to local ingredients makes your salad unique. Check your farmer's market for fresh finds. For a Mexican twist, add lime zest and chipotle. These ingredients boost the salad's flavor. You can also try Mediterranean touches like olives and feta. Asian flavors work well too; consider sesame oil and green onions. Mixing these flavors keeps your salad exciting and fresh. Add crunch with nuts or seeds. Toasted pumpkin seeds or chopped walnuts add great texture. You can also brighten the dish with colorful ingredients. Try adding bell peppers or radishes for a pop of color. Each bite becomes a fun experience with different textures and hues. Explore these variations to make your Mexican Street Corn Salad even more delightful. For the complete recipe, check out the Full Recipe. To keep your Mexican Street Corn Salad fresh, store it in an airtight container. This helps lock in flavors and keeps it safe. Place the salad in the fridge right after serving. It should stay good for about 3 days. After this period, the ingredients may start to lose their crunch. If you have extra salad, you can freeze it too. To do this, put it in a freezer-safe container. Make sure to leave some space at the top, as the salad may expand. It can last up to 2 months in the freezer, but keep in mind that the texture may change once thawed. When reheating your salad, do it slowly. Use the microwave at a low power level. Heat it in short bursts, stirring often. This will help keep the flavors fresh and prevent overheating. If you want to enjoy the salad cold, top it with fresh cilantro and a squeeze of lime. This will give it a bright taste, just like when you first made it. Check for signs of spoilage before eating. Look for any off smells or color changes. If the salad looks or smells bad, it's best to toss it. Mexican Street Corn Salad can last up to 3 days in the fridge. If frozen, it can last up to 2 months. Always remember to enjoy your salad while it's fresh for the best taste! To add spice to your salad, you can adjust the jalapeño. Start by using half of a jalapeño for a mild kick. If you want it hotter, use more. You can also leave the seeds in for extra heat. Another option is to add a pinch of cayenne pepper or hot sauce to the dressing. This gives your dish a nice boost. Yes, you can prepare this salad ahead of time. Make it up to a day in advance. Just keep it covered in the fridge. This allows the flavors to blend well. However, wait to add the avocado until just before serving. This keeps it fresh and bright. If you like a bit of crunch, add the dressing just before serving too. If you can't find cotija cheese, try using feta cheese. Feta has a similar crumbly texture and salty flavor. You can also use queso fresco for a milder taste. For a dairy-free option, try using cashew cheese or a vegan cheese substitute. These options work well and keep your salad tasty. This blog post covered all the key steps to make a delicious Mexican Street Corn Salad. We discussed the main ingredients, optional add-ins, and easy preparation methods. I shared tips for flavor, presentation, and storage. You can even modify the recipe to fit your diet. With all these details, you can create a fresh, flavorful salad for any occasion. Enjoy experimenting with flavors and sharing this tasty dish with friends and family!

Mexican Street Corn Salad Flavorful and Fresh Dish

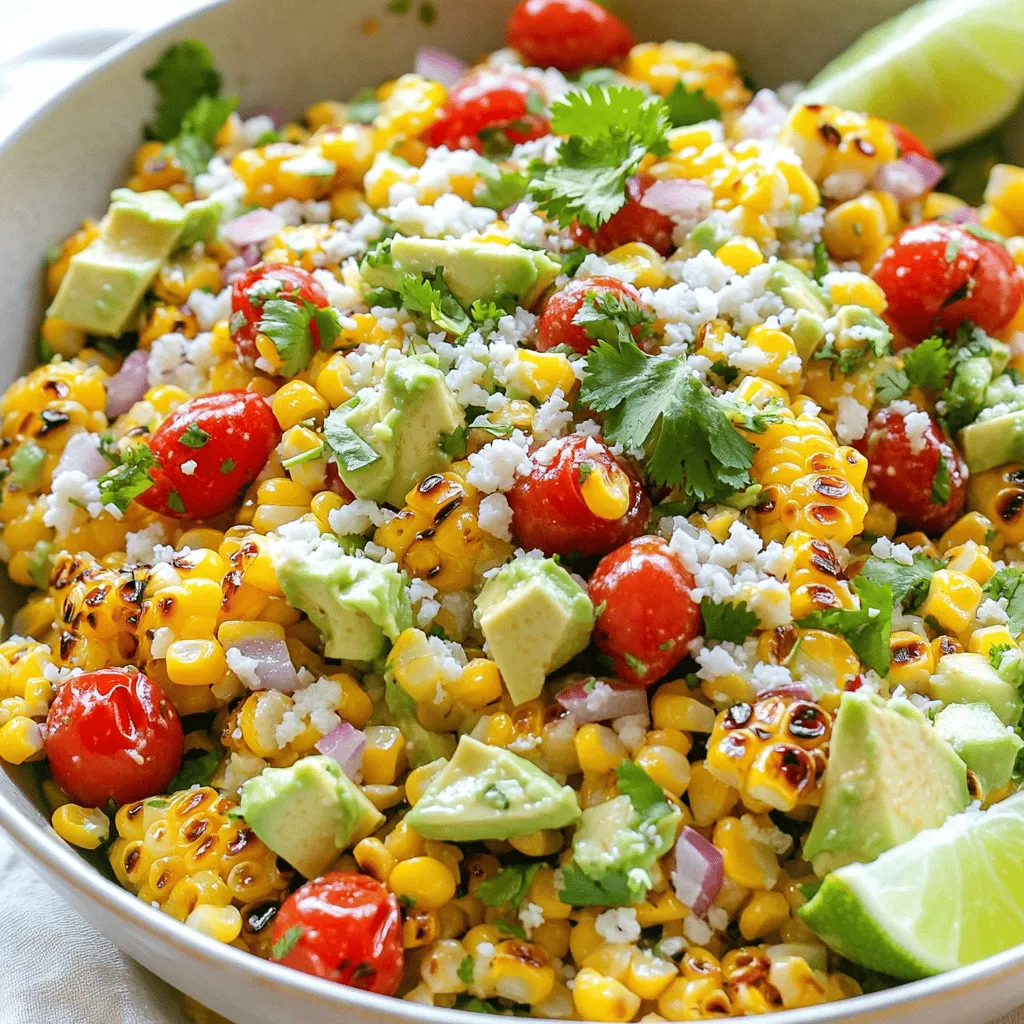
Are you ready to taste a burst of flavor? Mexican Street Corn Salad is a fun, fresh dish that’s perfect

- 4 flounder fillets (approximately 6 ounces each) - 2 tablespoons Cajun seasoning - 2 tablespoons olive oil - 1 tablespoon unsalted butter - 2 cloves garlic, minced - 1 red bell pepper, thinly sliced - 1 cup cherry tomatoes, halved - 1/4 cup fresh parsley, finely chopped - Juice of 1 fresh lemon - Salt and pepper to taste Fresh ingredients make a big difference in your dish. The flounder should smell like the sea, and the veggies should feel crisp. Always choose bright, vibrant red bell peppers and ripe cherry tomatoes to give your meal that extra pop of flavor. Cajun seasoning is key for this recipe. It should be spicy but balanced. Look for one with a mix of paprika, garlic, and herbs. If you want it hotter, feel free to add more. If you prefer mild flavors, use less. Remember, the right seasoning can elevate your flounder to new heights. For the full recipe, check out the details above and get cooking! To start, dry the flounder fillets with a paper towel. This step helps the seasoning stick better. Next, season both sides of the fish with Cajun seasoning. Make sure to add a pinch of salt and pepper for more flavor. This simple prep makes a big difference in taste. Now, let’s heat the skillet! Use a large, non-stick skillet and add olive oil and unsalted butter. Turn the heat to medium-high. Wait until the butter melts and bubbles a bit before adding the fish. Place the fillets into the hot skillet. Cook each side for 3-4 minutes. You want a nice golden brown color. The fish should look opaque and flaky when done. Once cooked, move the flounder to a plate and cover it to keep warm. In the same skillet, lower the heat to medium. Add the minced garlic. Sauté it for about 30 seconds. Stir it often to stop it from burning. You want it fragrant, not browned. Next, add the thinly sliced red bell pepper. Cook for about 3 minutes until it softens but still has some crunch. Then, toss in the halved cherry tomatoes. Cook for another 2-3 minutes. The tomatoes will start to burst and add sweetness to the dish. Finally, gently add the cooked flounder back to the skillet. Spoon the sautéed veggies over the fish. Squeeze fresh lemon juice on top for a bright finish. Sprinkle chopped parsley for a pop of color. Your Skillet Cajun Spiced Flounder is now ready to enjoy! Check out the Full Recipe for all the details. To make your flounder just right, you can adjust the spiciness to fit your taste. If you like it milder, use less Cajun seasoning. If you crave heat, add a pinch of cayenne pepper. Cooking techniques also matter. For flaky fish, avoid overcooking. Cook the flounder for about 3-4 minutes on each side. When the fish is opaque and flakes easily with a fork, it’s done. Plating your dish well makes it look tasty. Serve the flounder on warm plates. Make sure each piece has a good amount of sautéed veggies on top. For garnish, sprinkle fresh parsley over the dish. Add lemon wedges on the side for a pop of color and flavor. This simple touch adds a fresh look. Pair flounder with tasty sides for a full meal. Good choices include rice, quinoa, or a crisp green salad. These sides balance the spices and add texture. For drinks, try a chilled white wine like Sauvignon Blanc. A nice sparkling water with a slice of lemon also works great. These drinks will enhance the flavors of your Cajun spiced flounder. For the full recipe, check out the Skillet Cajun Spiced Flounder. {{image_4}} You can change the flavor by swapping Cajun seasoning for Creole or blackening spice. Each option offers a unique twist. Creole spice adds a slight sweetness. Blackening spice brings a smoky heat. Both work well with flounder. Experiment based on your taste. You might find a new favorite! While skillet cooking is great, consider baking for a hands-off approach. Preheat your oven to 400°F. Place the seasoned flounder on a baking sheet. Bake for about 15 minutes. The fish will cook through and stay moist. You can also try an air fryer. It cooks quickly and gives a nice crisp. Set the air fryer to 375°F for about 10 minutes. You can use other fish like tilapia or sole instead of flounder. Salmon also works if you want a richer taste. Adding seasonal veggies makes the dish colorful. Try zucchini in summer or butternut squash in fall. These swaps keep the meal fresh and exciting. Don't hesitate to mix and match! For the full recipe, check the details above. To store leftovers, place the flounder in an airtight container. Add the sautéed veggies on top or in a separate container. This keeps the flavors fresh and the fish safe. You can keep it in the fridge for up to three days. Always check for any off smells before eating. If you want to save flounder for later, freeze it. Wrap each fillet tightly in plastic wrap. Place the wrapped fish in a freezer bag. For the veggies, freeze them separately in a container. This helps maintain their texture. When you are ready to use them, thaw the flounder in the fridge overnight. To reheat, you can place it in a skillet over low heat. This helps keep the flounder moist. To keep the flounder juicy, avoid the microwave. Instead, use a skillet. Heat a little olive oil over low heat. Place the flounder in the pan and cover it. Cook until warm, about 5 minutes. This helps maintain the fish’s texture. Enjoy your meal! For more details, check the Full Recipe. You can tell flounder is cooked by its color and texture. The flesh should turn opaque and firm. When you flake it with a fork, it should break apart easily. If it looks shiny and translucent, it needs more time. Cook until the fillets are golden brown and fully opaque. Yes, you can use frozen flounder. Just make sure to thaw it properly. Place the fillets in the fridge overnight or run them under cold water for quicker thawing. Adjust your cooking time slightly. Frozen fillets may need an extra minute or two to cook through. Cajun spiced flounder pairs well with many sides. Here are some great options: - Steamed rice or quinoa for a hearty base - Roasted vegetables for a colorful plate - A fresh salad with mixed greens and a light vinaigrette - Crispy potatoes or fries for a satisfying crunch For a full experience, check out the Full Recipe for more tips! In this blog post, we covered how to make Cajun spiced flounder. We explored the list of fresh ingredients, step-by-step cooking instructions, and tips for perfecting the dish. I shared alternatives for seasoning and cooking methods, along with storage tips for leftovers. Remember, using fresh ingredients makes a big difference. Whether you serve it with rice or a fresh salad, this flounder recipe is sure to impress. Enjoy trying this delicious dish in your kitchen!

Skillet Cajun Spiced Flounder Savory Weeknight Meal

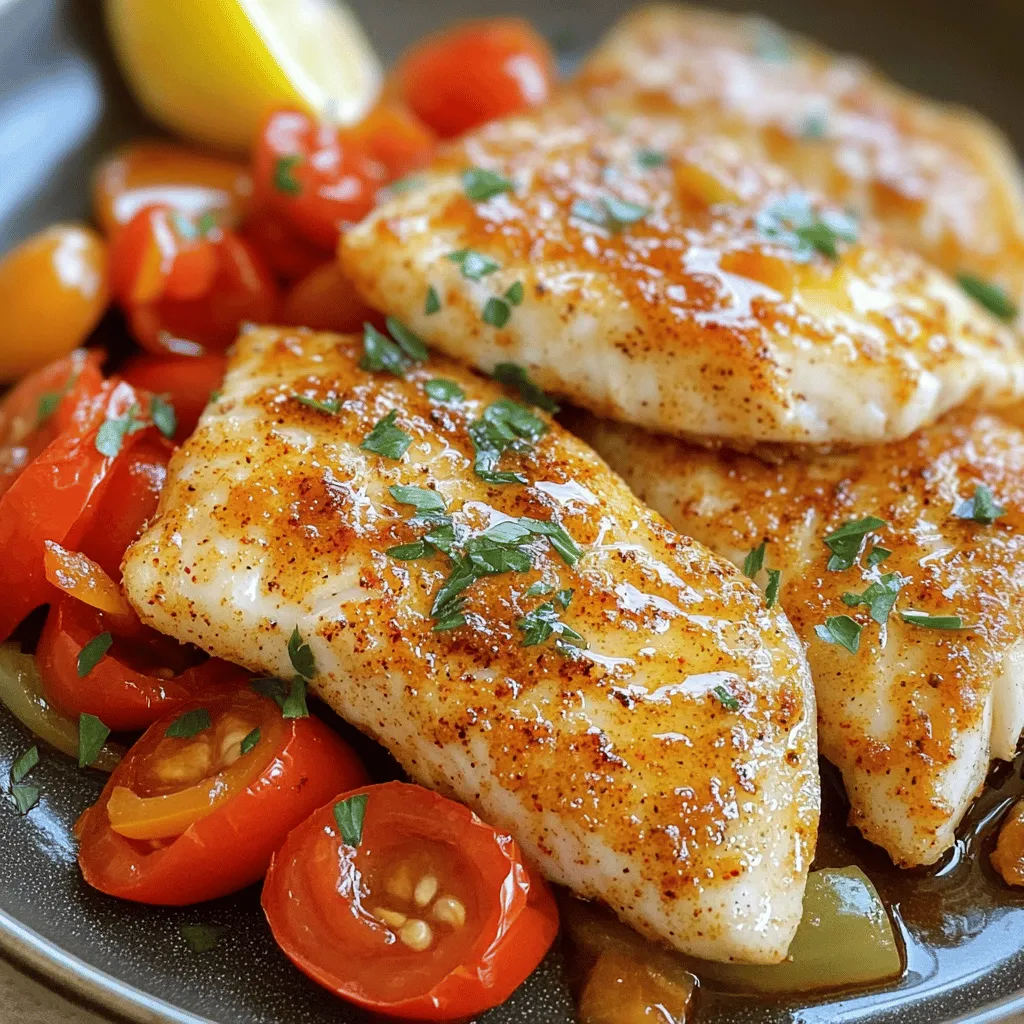
Looking for a quick and tasty weeknight dinner? You’ll love this Skillet Cajun Spiced Flounder! It’s packed with flavor and

- 2 cups cooked chicken, shredded - 6 slices of ham, chopped into bite-sized pieces - 1 cup Swiss cheese, shredded - 1 cup sharp cheddar cheese, shredded - 1 cup cooked noodles (cavatappi or egg noodles recommended) - 1 cup cream of chicken soup - 1/2 cup milk - 1 teaspoon garlic powder - 1 teaspoon onion powder - 1/2 teaspoon black pepper - 1/2 teaspoon dried thyme - 1/2 cup breadcrumbs - 2 tablespoons butter, melted For this Chicken Cordon Bleu Casserole, you'll need basic, easy-to-find ingredients. The chicken and ham give it a hearty feel. The Swiss and cheddar cheeses make it creamy and rich. Noodles add a comforting touch, while the cream of chicken soup binds everything together. If you want to switch things up, consider these easy swaps: - Use turkey instead of chicken for a different taste. - Try prosciutto or turkey ham instead of regular ham. - For cheese, mozzarella or pepper jack can work great too. For gluten-free options, look for gluten-free noodles. Rice noodles or quinoa pasta can be good choices. If you want a dairy-free meal, use a dairy-free cream of chicken soup made from cashews or coconut milk. This way, you can enjoy a tasty dish no matter your needs! - Preheat your oven to 350°F (175°C). - Grease a 9x13 inch casserole dish with cooking spray or butter. - In a large bowl, mix together these ingredients: - 2 cups cooked chicken, shredded - 6 slices of ham, chopped into bite-sized pieces - 1 cup Swiss cheese, shredded - 1 cup sharp cheddar cheese, shredded - 1 cup cooked noodles (cavatappi or egg noodles) - 1 cup cream of chicken soup - 1/2 cup milk - 1 teaspoon garlic powder - 1 teaspoon onion powder - 1/2 teaspoon black pepper - 1/2 teaspoon dried thyme - Pour the chicken and noodle mixture into the greased casserole dish. - Spread it out evenly to make a flat layer. - In a small bowl, mix 1/2 cup breadcrumbs with 2 tablespoons melted butter. - Sprinkle this breadcrumb mix over the casserole. - Cover the dish loosely with foil. Bake for 25 minutes. - After 25 minutes, take off the foil. Bake for another 10-15 minutes. - Look for a golden brown top and bubbly edges. - Once baked, let the casserole cool for 5-10 minutes before serving. This easy Chicken Cordon Bleu Casserole brings comfort to any table, and you can find the full recipe above. Enjoy the simple steps to create a delicious dish! How to avoid dry casserole: To keep your casserole moist, use shredded chicken that is juicy. Cooked chicken should not be overdone. Adding cream of chicken soup and milk helps add moisture too. Cover the dish with foil while baking. This keeps it from drying out. Best methods for shredding chicken: Shredding chicken can be easy! Use two forks to pull apart the meat. This method gives you nice, even shreds. You can also use a stand mixer. Just place the cooked chicken in the bowl and mix on low speed. It shreds quickly and saves time. Garnishing suggestions for presentation: For a lovely touch, sprinkle fresh chopped parsley on top. This adds color and flavor. You can also use paprika for a nice look. A squeeze of lemon juice can brighten the dish too. Recommended side dishes to complement: A fresh side salad pairs well with this dish. You can also serve steamed green beans or roasted broccoli. These sides add color and nutrition to your meal. They balance the rich flavors of the casserole. For the full recipe, check out the Cheesy Chicken Cordon Bleu Casserole. {{image_4}} You can switch up the meats in this casserole. Turkey or sausage works well. Both add a fun twist to the classic flavors. You can also explore different cheese choices. Try using mozzarella for a milder taste or pepper jack for a spicy kick. Each cheese brings its own unique flavor, so feel free to experiment! For those watching carbs, consider using cauliflower noodles instead of regular pasta. This makes the dish lighter while keeping it tasty. If you want a vegetarian version, skip the chicken and ham. Instead, use more veggies like spinach and mushrooms. You can still use the same creamy sauce to keep it rich and satisfying. These variations keep everyone happy at the table! To store leftovers, let the casserole cool down first. Then, cover it tightly with plastic wrap or foil. You can also transfer it to an airtight container. It stays fresh for about three to four days in the fridge. For best results, store portions separately if you plan to share. This makes it easy to reheat just what you need. You can freeze this casserole for longer storage. First, let it cool completely, then wrap it tightly. Use plastic wrap followed by aluminum foil for extra protection. It can last up to three months in the freezer. To thaw, place it in the fridge overnight. Reheat it in the oven at 350°F (175°C) until warmed through. If frozen, it may take 40 to 50 minutes to heat fully. Enjoy the same great taste even after freezing! Can I make Chicken Cordon Bleu Casserole ahead of time? Yes, you can prepare this casserole a day in advance. Just cover it and store it in the fridge. When you're ready to bake, let it sit at room temp for about 30 minutes. Then, bake as directed. What can I substitute for cream of chicken soup? If you need a substitute, you can use cream of mushroom soup. You can also mix equal parts of sour cream and chicken broth for a lighter option. How long does it take to bake this casserole? It takes about 35 to 40 minutes to bake. The first 25 minutes should be covered. Then, you uncover it for the last 10 to 15 minutes. Is it possible to prepare this recipe in a slow cooker? Yes, you can use a slow cooker. Mix all the ingredients as directed. Cook on low for 4 to 6 hours. Just note that the top won't be crunchy. How can I make the casserole spicier? To add some heat, sprinkle in red pepper flakes or a dash of hot sauce. You can also use pepper jack cheese instead of Swiss for more flavor. For the full recipe, check out the complete guide to Chicken Cordon Bleu Casserole! This blog post covered the Chicken Cordon Bleu Casserole recipe from top to bottom. We explored ingredients, steps, and variations for every preference. I also shared smart tips for cooking and storing this dish. Remember, you can swap ingredients to suit your taste. In the end, this casserole is a simple, enjoyable meal. It's great for family dinners or special gatherings. Keep trying new versions to keep it fresh and exciting. Enjoy your cooking!

Chicken Cordon Bleu Casserole Easy Comfort Dish

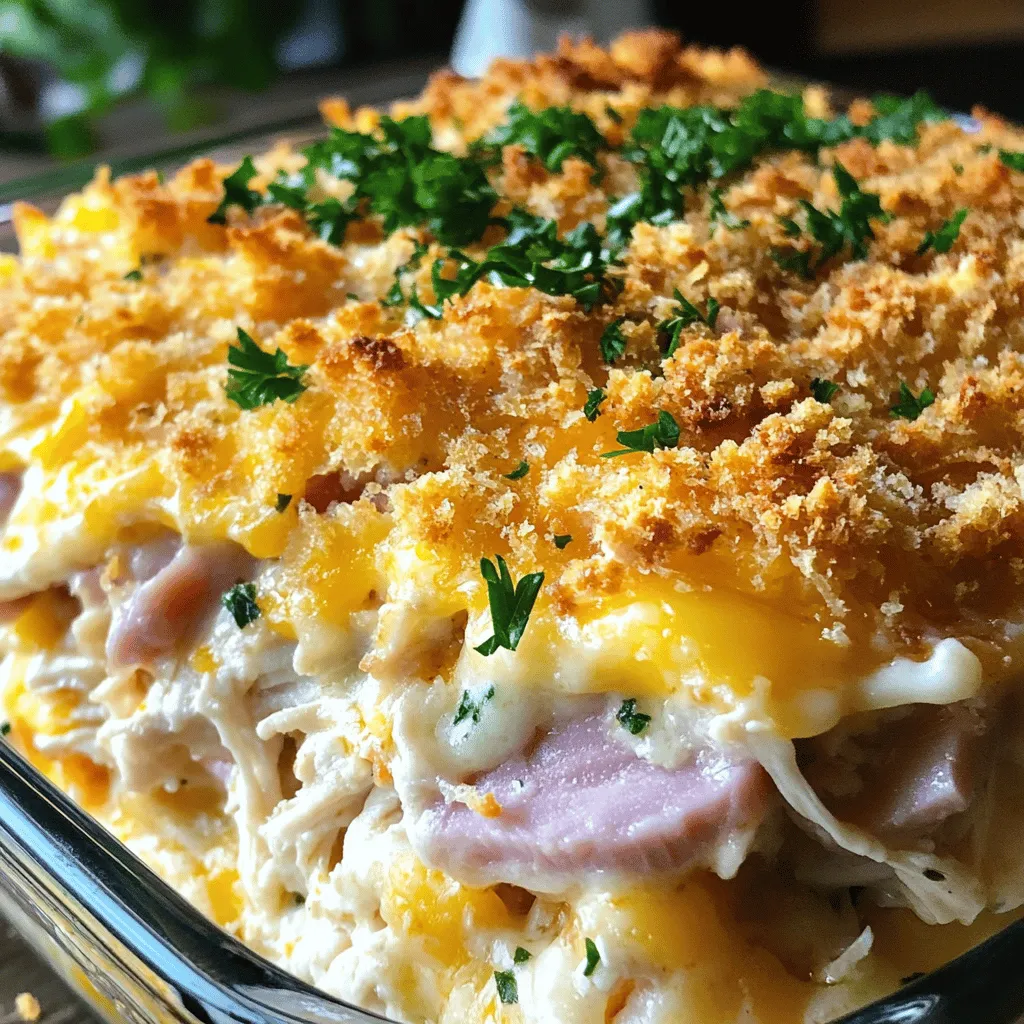
Looking for an easy comfort dish that packs a punch? You’ve stumbled upon the perfect recipe! This Chicken Cordon Bleu

To make a delicious shrimp fried rice, you need the following ingredients: - 1 cup jasmine rice (uncooked) - 1 pound large shrimp, peeled and deveined - 2 eggs, lightly beaten - 1 cup frozen peas and carrots mix - 1 bell pepper, diced (color of your choice) - 3 green onions, chopped - 2 cloves garlic, minced - 3 tablespoons soy sauce - 2 tablespoons sesame oil - 1 tablespoon vegetable oil - Salt and pepper to taste This simple list covers everything. Each ingredient plays a role in making your dish tasty and fun. The jasmine rice gives a nice, fluffy base. The shrimp adds protein and flavor. Eggs add richness, while the veggies bring color and crunch. Soy sauce and sesame oil give it that savory touch we all love. When you gather these items, you set yourself up for success. This shrimp fried rice is quick, easy, and packed with flavor. You can check the full recipe to see how these ingredients come together! Start with 1 cup of jasmine rice. Rinse it well under cold water. This removes excess starch. You want the water to run clear. Next, cook the rice as per the package instructions. Once cooked, spread it out on a plate to cool. If you have day-old rice, use that. It gives the best texture for fried rice. In a large skillet or wok, heat 1 tablespoon of vegetable oil over medium-high heat. Add 1 pound of peeled and deveined shrimp. Season the shrimp with salt and pepper. Cook them for about 3-4 minutes. They should turn pink and opaque. After cooking, take the shrimp out of the skillet and set them aside. Using the same skillet, pour in 2 lightly beaten eggs. Scramble them until they are fully cooked. They should not be runny. Once finished, remove the eggs and set them aside with the shrimp. Now, add another tablespoon of vegetable oil to the skillet. Toss in 2 cloves of minced garlic and 1 diced bell pepper. Sauté for 2-3 minutes. Stir often until the garlic smells good and the bell pepper softens. Next, add 1 cup of frozen peas and carrots to the skillet. Mix them with the garlic and bell pepper. Cook until heated through, about 2 minutes. Then, add the cooled jasmine rice, cooked shrimp, and scrambled eggs. Mix everything well. Drizzle 3 tablespoons of soy sauce and 2 tablespoons of sesame oil over the rice. Stir well and keep stir-frying for 5-7 minutes. This allows the rice to get crispy. Taste it and add more salt and pepper if needed. Finally, fold in 3 chopped green onions. Serve in a large bowl or on plates. For a nice touch, garnish with more green onions and sesame seeds. Enjoy your Shrimp Fried Rice! For the full recipe, check the earlier sections. When making shrimp fried rice, always use day-old rice. Freshly cooked rice is too moist. It clumps together when you fry it. Day-old rice dries out a bit, which helps it fry better. To prepare, cook jasmine rice as usual. Let it cool down and store it in the fridge overnight. This step makes a big difference. Select large shrimp for this dish. They offer great flavor and texture. Look for shrimp that are firm and pink. Fresh shrimp is best, but frozen works too. If using frozen shrimp, thaw them in cold water before cooking. This ensures they cook evenly in the fried rice. To achieve fluffy fried rice, keep the heat high while cooking. This helps the rice fry evenly. Stir continuously to avoid burning. If you notice your rice sticking, add a little more oil. This keeps everything moving smoothly. Follow the steps in the Full Recipe for best results. {{image_4}} You can easily make a vegetarian version of shrimp fried rice. Swap out shrimp for tofu or tempeh for a plant-based twist. Use the same spices and soy sauce to keep the flavors bold. Add in extra veggies like broccoli, mushrooms, or snap peas for more texture. This way, you can enjoy a delicious meal that is still packed with flavor. To give your shrimp fried rice a Thai flair, use jasmine rice as the base. Add fish sauce, lime juice, and fresh basil for that unique taste. Use Thai chili for heat or bell peppers for sweetness. This variation brings a bright, zesty flavor that will transport your taste buds to Thailand. Feel free to customize your fried rice by adding more vegetables or proteins. Consider carrots, zucchini, or corn for added color and crunch. You can also mix in chicken, pork, or even egg for a protein boost. This makes your dish heartier and gives it a personal touch. The best part? It still remains quick and easy to make. For more detailed instructions, check out the Full Recipe. To keep shrimp fried rice fresh, store it in an airtight container. This helps keep out moisture and air. Let the rice cool to room temperature before sealing it. This step prevents condensation, which can make it soggy. You can safely keep it in the fridge for up to 3 days. Make sure to label the container with the date. This way, you can track how long it’s been stored. When you’re ready to enjoy your shrimp fried rice again, reheat it carefully. The best method is to use a skillet. Heat a bit of oil over medium heat and add the rice. Stir it often to avoid sticking. You can also add a splash of water or broth. This will help steam the rice and keep it moist. If you prefer the microwave, place the rice in a bowl. Cover it with a damp paper towel and heat in short bursts. Stir between each burst until it's hot. If you want to store shrimp fried rice for longer, freezing is a great option. First, let the rice cool completely. Then, portion it into freezer-safe bags or containers. Remove as much air as possible to avoid freezer burn. Label the bags with the date. You can freeze it for up to 2 months. When you’re ready to eat, thaw it in the fridge overnight. Then, reheat it in a skillet or microwave. For the best taste, use the shrimp fried rice within a month. For the full recipe, check out the section above. I love using jasmine rice. It has a nice aroma and a great texture. You can also use basmati rice if you prefer. Just make sure the rice is cooked and cooled before using. Day-old rice works best for fried rice. To add heat, you can mix in chili flakes or sriracha. You can also add diced jalapeños for a fresh kick. Start with a small amount and taste as you go. Adjust it to your spice level. Yes, frozen shrimp works great! Just thaw them first under cold water. Pat them dry before cooking. This helps them cook evenly and keeps the texture nice. You can use coconut aminos or tamari for a soy-free option. Another choice is to use a mix of lime juice and salt. It adds flavor without soy sauce. Experiment to find what you like best. Shrimp fried rice goes well with spring rolls or a fresh salad. You can also serve it with stir-fried vegetables. For a warm touch, try it with miso soup. These sides balance the meal and add variety. This post covered how to make shrimp fried rice with ease. We discussed key ingredients, step-by-step cooking instructions, and helpful tips. I shared variations to suit your taste and storage tips for leftovers. In the end, shrimp fried rice is quick, tasty, and versatile. It’s a dish that you can enjoy many ways. So gather your ingredients and start cooking. You'll love the results!

Savory Shrimp Fried Rice Quick and Easy Recipe

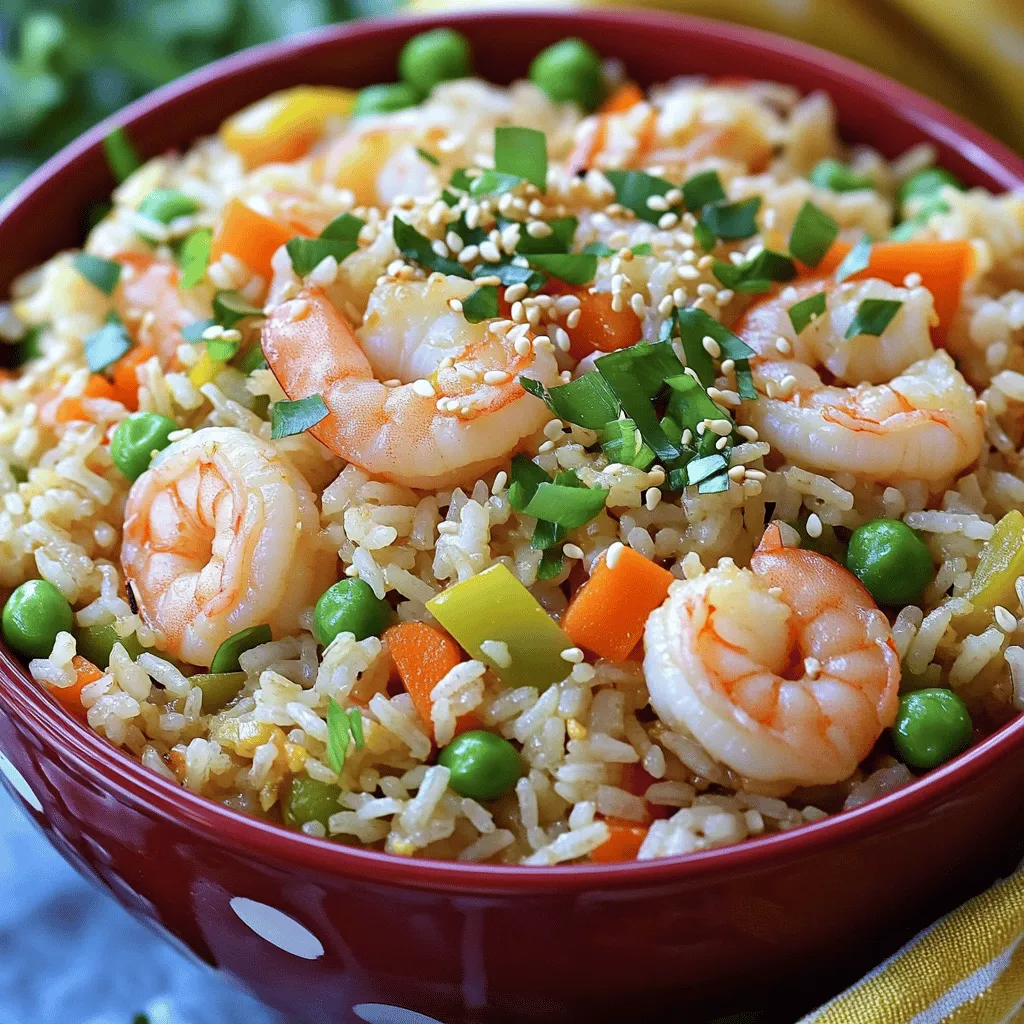
Are you craving a quick and tasty meal? Look no further than this savory shrimp fried rice recipe! With just

For a tasty sweet chili chicken, gather these main items: - 1.5 lbs boneless, skinless chicken thighs - 1/2 cup sweet chili sauce - 3 tablespoons soy sauce - 2 tablespoons honey - 2 cloves garlic, finely minced - 1 teaspoon fresh ginger, grated - 1 tablespoon rice vinegar - 1 tablespoon sesame oil - Salt and freshly ground black pepper, to taste The marinade adds a burst of flavor. You need: - Sweet chili sauce for sweetness and heat - Soy sauce for saltiness and depth - Honey to enhance the caramelization - Garlic and ginger for a fragrant kick - Rice vinegar for a touch of acidity - Sesame oil for a nutty flavor Mix these ingredients well. This blend is key to juicy chicken. Garnishes make your dish pop. Use: - Fresh green onions, chopped - Toasted sesame seeds Serve the chicken with steamed jasmine rice or a fresh vegetable stir-fry. This adds color and texture to your plate. For the full recipe, check the detailed instructions for cooking this delightful dish. First, gather your ingredients. In a large mixing bowl, combine: - 1/2 cup sweet chili sauce - 3 tablespoons soy sauce - 2 tablespoons honey - 2 cloves garlic, finely minced - 1 teaspoon fresh ginger, grated - 1 tablespoon rice vinegar - 1 tablespoon sesame oil Use a whisk and mix well until everything blends smoothly. The sweet chili sauce gives a nice kick, while honey adds depth. This marinade will soak into the chicken. Next, take 1.5 pounds of boneless, skinless chicken thighs and add them to your bowl. Make sure each piece is coated in the marinade. Cover the bowl with plastic wrap. Let it marinate for 30 minutes at room temperature or refrigerate for up to 2 hours. The longer you wait, the more flavor it will soak up. Preheat your oven to 400°F (200°C). Line a baking sheet with parchment paper to stop sticking. Take the marinated chicken out of the bowl and place it evenly on the baking sheet. Bake for 25-30 minutes. Check that the internal temperature reaches 165°F (75°C). If you want a thicker sauce, remove the chicken and pour the leftover marinade into a small saucepan. Bring it to a boil over medium heat. Stir in 1 tablespoon of cornstarch mixed with 2 tablespoons of water. Keep stirring until it thickens. Finally, brush the thickened sauce over the chicken. Return it to the oven for 5 more minutes. This lets the glaze set nicely. After cooking, let the chicken rest for 5 minutes. Garnish with chopped green onions and toasted sesame seeds for extra flavor and crunch. Enjoy your delicious meal! You can find the full recipe for more details. To make your sweet chili chicken even better, try these tips: - Use fresh ginger for a zesty kick. - Add lime juice for a bright, tangy finish. - Experiment with a dash of chili flakes for heat. These changes will elevate the dish and impress your guests. Many home cooks make simple errors. Here’s how to avoid them: - Don’t skip marinating; it adds crucial flavor. - Ensure your oven is preheated; this helps cook evenly. - Check the chicken's internal temperature. It should reach 165°F (75°C). Avoiding these mistakes means better results every time. When serving your sweet chili chicken, keep it fun and easy: - Pair it with steamed jasmine rice for a classic touch. - Serve alongside a fresh vegetable stir-fry for color and crunch. - Add a side of crispy spring rolls for extra texture. These sides complement the chicken and create a balanced meal. For the complete recipe, check out the Full Recipe section. {{image_4}} You can swap chicken for other proteins. Try boneless pork or shrimp for a twist. Both options cook quickly and absorb flavors well. If you prefer beef, flank steak works nicely too. Just remember to adjust cooking times based on the protein you choose. For a vegetarian option, use tofu or tempeh. Press and cube tofu before marinating. This helps it soak up the sweet chili sauce. For a vegan version, simply ensure all ingredients are plant-based. You can also use jackfruit for a meat-like texture that's perfect in this recipe. If you like heat, add red pepper flakes or sriracha to the marinade. Start with a small amount, then taste as you go. You can also serve the chicken with a spicy dipping sauce. For a milder version, use less sweet chili sauce and add more soy sauce. Adjustments ensure everyone enjoys the dish. For the full recipe, check out the complete instructions in the Full Recipe section. You can store leftover sweet chili chicken in the fridge. Place it in an airtight container. It will stay fresh for three to four days. Make sure it cools down before sealing it. This helps keep the chicken juicy and flavorful. If you have more leftovers, freezing is a great option. Wrap the chicken tightly in plastic wrap and then in foil. This gives it extra protection from freezer burn. You can freeze it for up to three months. When you want to enjoy it again, just thaw it in the fridge overnight. To reheat sweet chili chicken, use the oven or a microwave. If using the oven, preheat it to 350°F (175°C). Place the chicken on a baking sheet and cover it with foil. Heat for about 15 minutes. If using a microwave, place it on a microwave-safe plate. Cover it with a damp paper towel and heat in short bursts until warmed through. This keeps the chicken moist. For added flavor, brush on some extra sauce before serving. Enjoy your meal! For the full recipe, check out the delicious steps above. Yes, you can use chicken breasts. They work well in this recipe. Chicken breasts are leaner than thighs. This can make them dry if overcooked. To avoid dryness, check the internal temperature. Cook until it reaches 165°F (75°C). You may also want to marinate them for less time. About 30 minutes should be enough. To change the sweetness, you can add more or less sweet chili sauce. Adding honey will also increase sweetness. If the sauce is too sweet, add more soy sauce. This will balance the flavors. You can also mix in lime juice for a tangy kick. Taste the sauce as you adjust it. Yes, this recipe is great for meal prep. You can make it ahead of time and store it. Cooked chicken stays fresh in the fridge for about four days. To reheat, use a microwave or oven. Pair it with rice or veggies for easy lunches. For the best flavor, glaze the chicken just before serving. For the full recipe, check out the details above. This blog post covers the key ingredients, step-by-step instructions, and helpful tips. You now know how to make a tasty dish that suits your preferences. Variations can help you try new flavors, and proper storage tips ensure your food stays fresh. Remember, cooking is fun and creative. Experiment with different proteins and adjust spice levels to find what you love. Enjoy your cooking journey and impress others with your skills!

Irresistible Sweet Chili Chicken Flavorful Dinner Idea

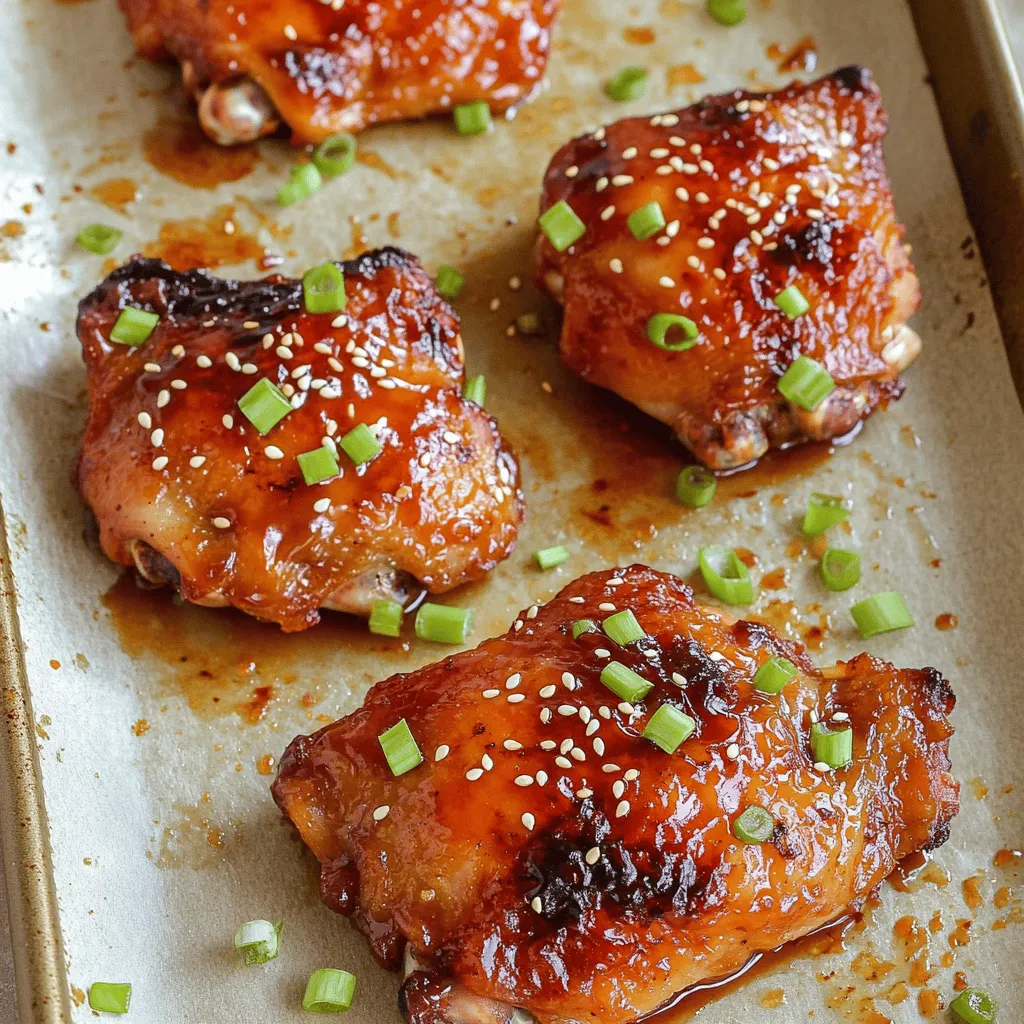
Are you ready to impress with a dinner that’s both easy and delicious? My Irresistible Sweet Chili Chicken is a

To make a delightful Strawberry Danish, gather these key ingredients: - 1 sheet of frozen puff pastry, thawed - 1 cup fresh strawberries, hulled and sliced - 1 tablespoon granulated sugar - 1 teaspoon vanilla extract - 1/2 cup cream cheese, softened to room temperature - 1/4 cup powdered sugar - 1 egg, beaten (for egg wash) - 1 tablespoon fresh lemon juice These ingredients bring together the sweetness of strawberries and the creaminess of cheese. For those looking to boost flavor, consider adding: - Zest of 1 lemon for a fresh, zesty touch - A sprinkle of cinnamon for a warm spice - A handful of chopped nuts for crunch These additions can personalize your Danish and make it even more special. Here’s a quick look at the nutrient breakdown for one serving of Strawberry Danish: - Calories: 220 - Protein: 4g - Fat: 12g - Carbohydrates: 25g - Fiber: 1g - Sugar: 6g This pastry offers a nice balance of taste and indulgence, making it a treat worth savoring. For the complete recipe, check out the Full Recipe. Start by washing your fresh strawberries. Cut off the green tops, called hulls, and slice the berries. In a bowl, mix the sliced strawberries with granulated sugar, vanilla extract, and lemon juice. Let them sit for about 10 minutes. This helps the strawberries release their juices. The result is a sweet and syrupy mixture that adds flavor to your Danish. While the strawberries are marinating, take your frozen puff pastry out to thaw. Once it’s soft, lightly flour your work surface. Roll out the pastry to smooth out any creases. You can cut it into one large rectangle or six smaller squares. For a nice shape, score a smaller rectangle inside each piece, about 1 inch from the edge. Be careful not to cut all the way through; this will create a puffed edge when baked. In a bowl, combine softened cream cheese and powdered sugar. Mix until smooth and creamy. If you want more flavor, fold in lemon zest. Spread this cream cheese mixture within the scored border of each pastry piece. Top it with a spoonful of your marinated strawberries, letting some juice seep into the cream cheese. Brush the edges with the beaten egg for a golden finish. Finally, bake the Danish in a preheated oven at 400°F (200°C) for 15-20 minutes. Keep an eye on them; you want a golden-brown color. Once done, let them cool on a wire rack before serving. Enjoy your Strawberry Bliss Danish! For detailed steps, check the Full Recipe. To make great puff pastry, keep your ingredients cold. Use chilled butter and water. Cold dough helps create those lovely layers. Roll the dough gently, and don't overwork it. When baking, preheat your oven well. A hot oven gives you the best rise. For a tasty cream cheese filling, start with softened cream cheese. Mix in powdered sugar until smooth. Add a splash of vanilla extract for depth. For a zesty twist, fold in lemon zest. This brightens the cream cheese and enhances the overall flavor. One mistake is not scoring the pastry. This step is crucial for a nice rise. Also, don’t skip the egg wash. It gives your Danish a beautiful, shiny finish. Lastly, avoid overbaking. Keep an eye on them after 15 minutes. You want golden brown, not burnt! For the full recipe, check out the Strawberry Bliss Danish section. {{image_4}} You can easily make a vegan version of this delightful treat. Swap the cream cheese for a vegan cream cheese alternative. Use a plant-based milk for the egg wash, like almond or soy milk. This keeps your Danish creamy and delicious while being vegan-friendly. For a gluten-free option, use gluten-free puff pastry. There are many brands available now. Ensure that the other ingredients are also gluten-free. This way, everyone can enjoy this tasty pastry without worry. You can mix up the flavors in your Strawberry Danish. Try adding almond extract for a nutty twist. You can also use mixed berries instead of just strawberries. Blueberries and raspberries work well together. Feel free to get creative and make the recipe your own! For the full recipe, check out Strawberry Bliss Danish. To keep your leftover Danish fresh, place them in an airtight container. You can also wrap them in plastic wrap. Store the container at room temperature for one day. If you need a longer storage time, move them to the fridge for up to three days. This helps maintain their taste and texture. If you want to freeze your Strawberry Danishes, first let them cool completely. Then, wrap each one in plastic wrap. Place the wrapped Danishes in a freezer-safe bag. They can stay in the freezer for up to three months. When you are ready to enjoy them, just thaw overnight in the fridge. To reheat your Danish, preheat your oven to 350°F (175°C). Place the Danish on a baking sheet. Heat them for about 10 minutes. This warms them evenly and keeps them crispy. You can also use a microwave, but the texture may change. Enjoy your warm Strawberry Bliss Danish! For the full recipe, check the earlier section. A Strawberry Danish is a sweet pastry that features a flaky puff pastry filled with cream cheese and fresh strawberries. The pastry is often shaped into a neat rectangle or square. It is a delightful treat that is perfect for breakfast or dessert. Yes, you can use frozen strawberries. Just thaw and drain them before using. This helps to avoid excess juice in your filling. However, fresh strawberries provide the best flavor and texture. You can find Strawberry Danish at many bakeries and cafes. Some supermarkets also carry them in the bakery section. If you want a fresh one, consider making it at home using the full recipe. Making Strawberry Danish from scratch takes about 40 minutes. This includes prep and baking time. With some practice, you can whip up a batch in no time. The best toppings include a dusting of powdered sugar or a drizzle of icing. You can also add some fresh mint leaves or extra sliced strawberries for color and freshness. These toppings enhance the visual appeal and taste of your Danish. In this post, we covered essential and optional ingredients for your Strawberry Danish. We walked through easy steps for prepping strawberries and puff pastry and assembling your treat. You learned tips to improve flavor and avoid common mistakes. We also explored tasty variations and how to store or freeze leftovers. Making a Strawberry Danish is fun and rewarding. You can enjoy it fresh or try new flavors. With practice, you'll create a dessert everyone loves. Enjoy your baking journey!

Strawberry Danish Delight Easy and Tasty Recipe

Are you ready to elevate your dessert game? In this post, you’ll learn how to make a delicious Strawberry Danish

To make Savory Onion Beef Fried Rice, you need fresh and simple ingredients. They create a tasty dish that is easy to prepare. Here’s what you will need: - 2 cups cooked jasmine rice (preferably day-old) - 1 lb (450g) beef sirloin, thinly sliced - 2 tablespoons soy sauce - 1 tablespoon oyster sauce (optional) - 1 tablespoon sesame oil - 2 tablespoons vegetable oil (divided) - 1 large onion, thinly sliced - 2 garlic cloves, minced - 1 cup mixed vegetables (peas, carrots, corn) - 2 green onions, chopped - Salt and black pepper to taste - 1 tablespoon fresh ginger, minced - Sesame seeds for garnish Using day-old rice makes the fried rice better. It helps prevent mushiness. Fresh rice can work too, but spread it out and cool it for about 30 minutes. This helps dry it out. Gathering these ingredients will lead to a delicious meal. Check out the Full Recipe for more details! Start by slicing the beef sirloin thinly. Place it in a bowl. Add soy sauce and a pinch of black pepper. Mix it well, so every slice gets coated. Let it sit for at least 15 minutes. This step adds great flavor to the beef. In a large skillet or wok, heat one tablespoon of vegetable oil over high heat. When the oil is hot, add the marinated beef. Stir-fry for about 2-3 minutes. You want the beef to brown nicely and cook through. Once done, take it out and set it aside on a plate. In the same skillet, add another tablespoon of vegetable oil. Toss in the sliced onions. Sauté them for around 5 minutes until they become soft and translucent. Add minced garlic and fresh ginger next. Stir-fry for about a minute, letting those aromas fill your kitchen. Now, it's time for the mixed vegetables. Add them to the skillet and cook for 3-4 minutes. Stir occasionally until they are tender but still bright in color. This keeps them crunchy and fresh. Gently add in the cooked jasmine rice. If your rice is clumpy, break it apart as you mix. Drizzle in sesame oil and optional oyster sauce. Toss everything together until the rice and veggies are well mixed and coated with flavor. Return the cooked beef to the skillet. Stir everything together for another 2-3 minutes. This helps the flavors blend. Taste and adjust the seasoning with salt and black pepper. Finally, add chopped green onions, giving it a last toss to combine all the ingredients. For a colorful presentation, serve this dish on a vibrant platter. A sprinkle of sesame seeds adds a nice touch. Enjoy this savory onion beef fried rice as a perfect weeknight meal. For the complete recipe, refer to the Full Recipe section. For fried rice, jasmine rice works best. It has a nice texture and flavor. Using day-old rice is key. Fresh rice can be too sticky. Spread fresh rice out to cool for 30 minutes. This helps dry it out. Soy sauce adds a rich umami taste. Adding oyster sauce gives extra depth but is optional. Sesame oil brings a warm, nutty flavor. Don't forget salt and black pepper. Use these to taste, adjusting as needed. Heat is vital when cooking fried rice. A hot skillet or wok prevents sticking. Stir-fry quickly to keep the rice from getting mushy. Toss ingredients gently to mix well. This keeps your dish vibrant and full of flavor. {{image_4}} You can change the beef in this dish. Try chicken, shrimp, or tofu. Each protein brings its own flavor. Chicken is tender and mild. Shrimp adds a sweet and briny taste. Tofu is a great choice for a plant-based meal. Just make sure to marinate them like the beef for best taste. If you want a meatless meal, swap beef for more veggies. Use mushrooms for a hearty bite. Bell peppers add sweetness and color. You can also add extra tofu for protein. Replace the oyster sauce with soy sauce for a vegan dish. This way, you still enjoy the great flavors without meat. Change your veggies with the seasons. In spring, add asparagus and snap peas. Summer brings fresh corn and zucchini. In fall, use squash and Brussels sprouts. Winter is great for carrots and kale. These seasonal veggies not only taste great but also make your dish colorful and fresh. Check out the Full Recipe to see how you can make this dish your own! To keep your savory onion beef fried rice fresh, store it in an airtight container. Let the fried rice cool down to room temperature before sealing it. This helps prevent excess moisture, which can make it soggy. It will stay good in the fridge for about 3 to 4 days. If you want to save some for later, freezing is a great option. Place the cooled fried rice in a freezer-safe container or zip-top bag. Remove as much air as possible to avoid freezer burn. It can last for up to 3 months in the freezer. Just remember to label it with the date! When you're ready to enjoy your fried rice again, reheating it properly is key. If it's frozen, let it thaw in the fridge overnight. You can reheat it in a skillet over medium heat. Add a splash of water or soy sauce to help it steam and prevent sticking. Stir it often for even heating. You can also microwave it in short bursts, stirring in between, until it’s hot. For the full recipe, check the earlier section! You can use fresh rice, but it's not ideal. Fresh rice is moist, which can make the fried rice mushy. Day-old rice is drier and gives better texture. If you need to use fresh rice, let it cool for at least 30 minutes. This helps remove some moisture. You can add heat or extra flavor with different spices. Try adding red pepper flakes for heat. You can also mix in some soy sauce or hoisin sauce for more depth. For a twist, add some pineapple for sweetness or a splash of lime juice for tang. Leftover fried rice can last in the fridge for about 3 to 5 days. Store it in an airtight container to keep it fresh. If you want to keep it longer, you can freeze it. It will stay good for about 2 to 3 months in the freezer. Yes, adding eggs is a great idea! Scramble some eggs in the skillet before adding the rice. This adds protein and richness to the dish. You can mix the eggs in after cooking the beef or with the vegetables for more flavor. - Full Recipe: Savory Onion Beef Fried Rice 🥩 This recipe for Savory Onion Beef Fried Rice combines tasty ingredients and simple steps. You now know how to marinate beef, sauté onions, and mix in vegetables. Don’t forget to choose the right rice for best results. You can also explore different proteins and veggies for variety. Store your leftovers with care and use my reheating tips for a quick meal. Enjoy making this dish! It’s a great way to enjoy flavors and share with others. Happy cooking!

Savory Onion Beef Fried Rice Flavorful Weeknight Meal

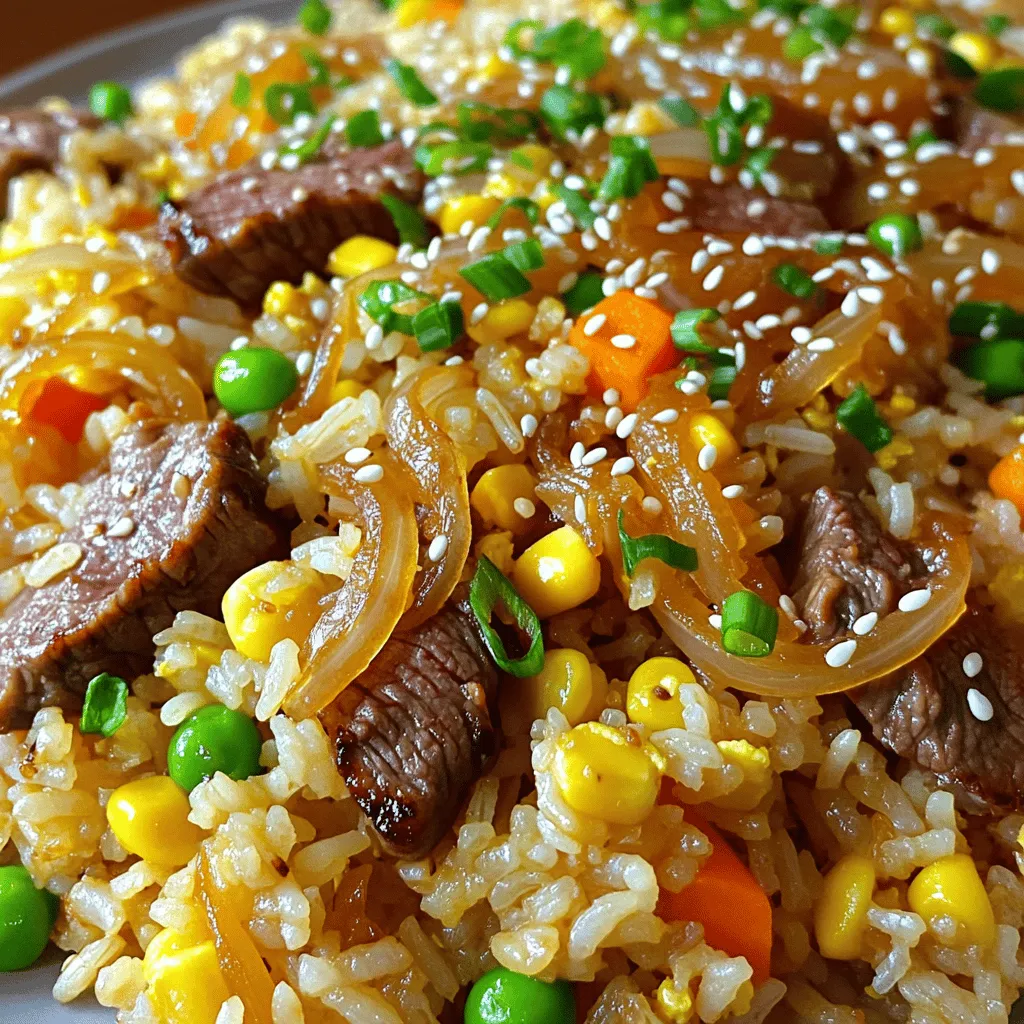
Looking for a quick and tasty dinner idea? This Savory Onion Beef Fried Rice is the answer! With juicy beef,

- Garlic: Roasting garlic brings out its sweet, nutty flavor. This makes the soup rich and warm. - Fresh herbs: Basil and sage add a bright, earthy taste. They balance the garlic's sweetness well. - Vegetables: Onion, carrots, celery, and spinach form the soup base. They provide texture and nutrition. - Vegetable broth: This adds depth and flavor to the soup. Choose a good quality broth for the best taste. - Parmesan cheese: This cheese adds creaminess and a salty kick. It enhances the overall flavor profile. - Walnuts: Toasted walnuts give a nice crunch. They also add healthy fats and protein. - Olive oil: Use high-quality olive oil for sautéing and drizzling. It adds richness and healthy fats. - Lemon juice: A splash of lemon juice brightens the flavors. It adds a refreshing twist to the soup. - Salt and pepper: These are essential for seasoning. Adjust to your taste for the best results. For the complete recipe, check out the Full Recipe. Enjoy making this healthy comfort dish! To start, we need to roast the garlic head. Preheat your oven to 400°F (200°C). Carefully slice off the top of the garlic head. This exposes the cloves inside. Drizzle with one tablespoon of olive oil. Wrap it in aluminum foil and place it on a baking sheet. Roast for 30 to 35 minutes. The cloves should be soft and golden brown. Once done, set it aside to cool slightly. After cooling, squeeze the roasted cloves out of their skins. They should pop out easily. Next, we cook the vegetables. In a large pot, heat two tablespoons of olive oil over medium heat. Add the chopped onion, diced carrots, and diced celery to the pot. Sauté these veggies for about 5 to 7 minutes. They should soften and the onion will turn translucent. Stir occasionally to keep them from sticking. Once they are tender, pour in the vegetable broth. Increase the heat slightly and bring it to a gentle simmer. Now, it’s time to make the pesto. In a food processor, combine the roasted garlic cloves, fresh spinach, basil, sage, grated Parmesan cheese, and toasted walnuts. Blend all the ingredients until the mixture is smooth and creamy. If it looks too thick, add a splash of vegetable broth or water. This will help you reach your desired consistency. After making the pesto, stir it into the simmering vegetable broth. Let the soup cook for an additional 5 to 10 minutes. Stir occasionally to blend the flavors. Once it is heated through, add the freshly squeezed lemon juice. Season with salt and pepper to taste. Make sure everything is evenly seasoned before removing the pot from the heat. For a creamier soup, you can blend it further. Use an immersion blender to puree the soup right in the pot until it’s smooth. If you don’t have one, carefully blend the soup in batches using a standard blender. Just be sure to let the steam escape while blending. When ready to serve, ladle the soup into bowls. For an extra touch, drizzle a little olive oil on top. You can also sprinkle with more grated Parmesan cheese if you like. To make it look nice, garnish each bowl with fresh sage leaves or chopped walnuts. This adds a lovely visual and textural contrast. Enjoy your vibrant and flavorful Roasted Garlic Sage Pesto Soup! For the complete details, check the Full Recipe. - How to avoid burning garlic: Roasting garlic can be tricky. To prevent it from burning, wrap it tightly in foil. Keep an eye on it as it roasts. You want it soft and golden, not dark and crunchy. - Steps for perfect seasoning: Start with a small amount of salt. You can always add more. Taste as you go. The lemon juice adds brightness, but don't skip the salt. It helps bring out all the flavors. - Best bread pairings: Serve your soup with crusty bread, like a baguette or sourdough. These breads soak up the soup nicely and add a nice texture. - Salad recommendations: A simple green salad is a great side. Try mixed greens with a light vinaigrette. It refreshes the palate and balances the richness of the soup. - Preparing in advance: You can make this soup a day ahead. Just let it cool completely before storing it in the fridge. The flavors develop beautifully overnight. - Reheating tips: When reheating, do it slowly on medium heat. Stir often to avoid sticking. If it thickens up, add a splash of broth or water. This soup should be creamy, not too thick. {{image_4}} You can switch up the nuts in the pesto. Instead of walnuts, try pine nuts or almonds. Both add a nice crunch and flavor. If you want a nut-free version, use seeds like pumpkin or sunflower seeds instead. They work great too! For a dairy-free option, replace Parmesan cheese with nutritional yeast. It gives a cheesy taste without the dairy. You can also use a dairy-free cheese alternative. Look for options made from nuts or soy. To spice things up, add chili flakes to your soup. This will give it a nice kick. You can start with a pinch and add more if you like it hot. Using different herbs can change the soup's taste too. Try adding parsley or cilantro for a fresh twist. Even a bit of thyme can give it a warm, earthy flavor. Incorporate seasonal vegetables to enhance your soup. In spring, add peas or asparagus for a pop of color. In fall, try adding sweet potatoes for a hearty feel. You can also adapt the soup for warmer or colder months. For summer, serve it chilled with fresh tomatoes. In winter, keep it hot and comforting by adding root vegetables like turnips or parsnips. Explore these variations to make this soup your own! For the full recipe, check out the instructions above. To keep your Roasted Garlic Sage Pesto Soup fresh, use airtight containers. Glass jars or plastic containers work well. Store in the fridge for up to four days. After that, the soup may lose its nice taste and texture. You can freeze this soup for later meals. Pour the cooled soup into freezer-safe containers or bags. Leave some space at the top for expansion. It stays good in the freezer for up to three months. When you're ready to eat, take it out and thaw overnight in the fridge. For reheating, use the stove or microwave. On the stove, heat over low to medium heat. Stir often to keep it smooth. In the microwave, heat in short bursts. Stop to stir between each round. This way, you avoid texture changes. If the soup seems thick, add a splash of broth or water. Enjoy your warm and tasty soup! Roasted Garlic Sage Pesto Soup is a creamy, hearty dish great for any time. It has rich garlic flavors, fresh herbs, and a smooth texture. The main ingredients include: - 1 head of garlic - Fresh basil and sage - Onion, carrots, and celery - Vegetable broth - Spinach - Parmesan cheese - Walnuts The garlic gets roasted first, adding depth to the flavor. You blend it with fresh herbs and nuts to create a vibrant pesto. This soup warms you up and is perfect for chilly days. Yes, you can easily make this soup vegan. For a dairy-free version, replace Parmesan cheese with nutritional yeast or a vegan cheese. You can also skip the cheese altogether and still enjoy a great taste. To keep the flavor strong without dairy, add a bit more roasted garlic or a squeeze of lemon juice. These will give your soup a bright taste and keep it creamy. The soup lasts about 4-5 days in the fridge. To store it, use airtight containers. Make sure to let it cool down before sealing. Signs of spoilage include an off smell, mold, or a change in color. If you see any of these, it’s best to toss the soup. Yes, adding protein is a great idea! Cooked chicken or white beans work well. They add heartiness and make the soup more filling. If you use cooked chicken, add it during the last few minutes of cooking. If you use beans, stir them in when you add the pesto. This keeps cooking times short and flavors fresh. Yes, Roasted Garlic Sage Pesto Soup can be gluten-free. Always check ingredient labels to ensure that your vegetable broth and any other added products are gluten-free. If you want to thicken the soup, use a cornstarch slurry or pureed beans instead of flour. These options keep the soup gluten-free while adding great texture. This blog post guided you through making delicious Roasted Garlic Sage Pesto Soup. You learned about key ingredients like garlic, fresh herbs, and vegetables. We discussed preparing and blending the soup and shared tips for serving and storage. Final thoughts: This soup is versatile and easy. You can adjust flavors or substitute ingredients as needed. It's perfect for any season, and you'll enjoy experimenting with it. Happy cooking!

Roasted Garlic Sage Pesto Soup Healthy Comfort Recipe

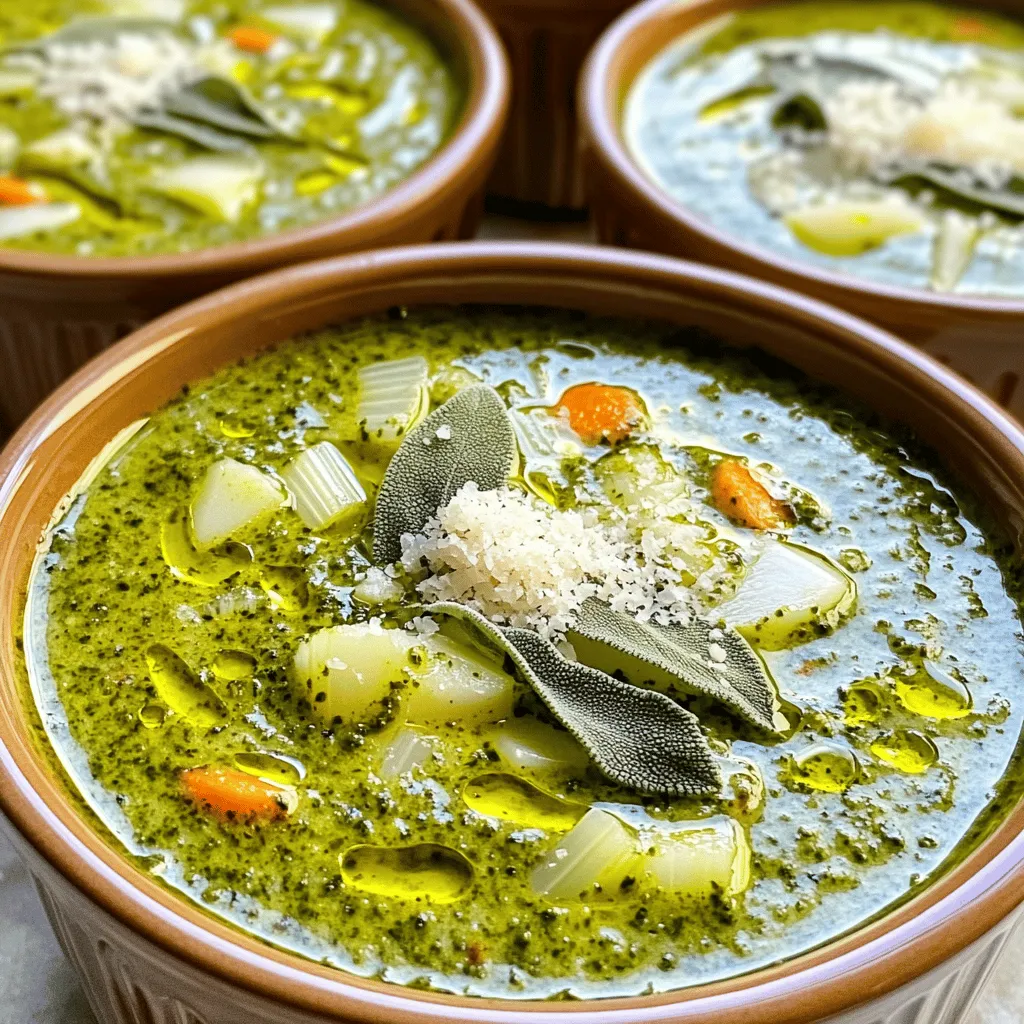
Warm, creamy, and bursting with flavor, Roasted Garlic Sage Pesto Soup is the perfect dish for chilly days. Imagine the

To make Baked Garlic Parmesan Potato Wedges, you need: - 4 medium russet potatoes, thoroughly washed and cut into wedges - 3 tablespoons extra virgin olive oil - 5 cloves of garlic, finely minced These main ingredients form the base of your dish. Russet potatoes give a fluffy inside and a crispy outside. The olive oil helps the spices stick and adds flavor. For seasoning and toppings, gather: - 1 teaspoon smoked paprika - 1 teaspoon Italian seasoning blend - ½ teaspoon sea salt - ½ teaspoon freshly ground black pepper - ½ cup freshly grated Parmesan cheese - Fresh parsley, finely chopped (for garnish) These seasonings bring out the best flavors. Smoked paprika adds a warm, deep note. The Italian blend gives a herbal touch. Parmesan cheese melts into a tasty crust on top of the wedges. If you want to get creative, consider these optional add-ins: - Chili flakes for heat - Different cheese types, like cheddar or mozzarella - Fresh herbs, such as rosemary or thyme These add-ins can give your wedges a unique twist. You can spice them up or make them even cheesier. Choose according to your taste! For the complete recipe, check out the Full Recipe. First, pick medium russet potatoes. Wash them thoroughly to remove any dirt. Cut each potato into wedges. Aim for even sizes so they cook well. This helps them bake evenly and become crispy. Grab a large mixing bowl. Pour in three tablespoons of extra virgin olive oil. Add five cloves of minced garlic for that tasty flavor. Then, mix in one teaspoon of smoked paprika and one teaspoon of Italian seasoning. Sprinkle in half a teaspoon of sea salt and half a teaspoon of black pepper. Stir it all together until it blends well. Now, toss the potato wedges in the bowl with the seasoning. Make sure each wedge is coated fully. Lay the wedges on a lined baking sheet in a single layer. This space helps them get crispy. Bake them in a preheated oven at 425°F (220°C) for about 25 to 30 minutes. Flip them halfway through to brown evenly. After the first bake, sprinkle half a cup of freshly grated Parmesan cheese on top. Bake for another 5 to 7 minutes until the cheese melts. Once done, let them cool briefly before serving. For a pop of color, add fresh parsley on top. Enjoy your crispy delight! For the full recipe, check the details above. To get your potato wedges crispy, start with dry potatoes. After washing, pat them dry with a towel. Use enough olive oil to coat each wedge well. Space them out on the baking sheet; this helps air circulate. Flip them halfway through baking for even crispiness. For extra crunch, broil them for a minute at the end. I love using russet potatoes for their texture. They have a high starch content, which makes them fluffy inside. Yukon golds are also great; they are creamy and add a nice flavor. Avoid waxy potatoes like red or new potatoes; they don’t crisp up well for this recipe. To reheat your baked garlic Parmesan potato wedges, use the oven. Preheat it to 375°F (190°C). Spread the wedges in a single layer on a baking sheet. Bake for about 10-15 minutes until they are hot and crispy again. You can also use an air fryer for a quick and crispy result. {{image_4}} To add heat to your baked garlic parmesan potato wedges, sprinkle chili flakes on top. A half teaspoon of chili flakes can give your dish a nice kick. You can adjust the amount based on your taste. If you love spice, feel free to go wild! Mix the chili flakes with your olive oil and garlic for a consistent flavor. The heat will balance nicely with the creamy parmesan. Cheese can change the flavor of your potato wedges. Cheddar brings a sharp taste, while mozzarella adds a stretchy texture. You can mix cheeses too. Try half a cup of each for a rich, gooey goodness. Just like with parmesan, add the cheese in the last few minutes of baking. This way, it melts perfectly over the hot wedges. If you want a vegan version, swap out the parmesan for nutritional yeast. It has a cheesy flavor and is packed with nutrients. You can also use vegan cheese shreds if you prefer. Use the same amount as parmesan. The rest of the recipe stays the same, so you won't miss out on the fun! These swaps make the dish lighter but still tasty. For the full recipe, check out the details above. To keep leftover potato wedges fresh, place them in an airtight container. Let them cool first. Store them in the fridge for up to three days. This method helps retain taste and texture. If you want to freeze your potato wedges, follow these steps. First, let them cool completely after baking. Next, spread them on a baking sheet in a single layer. Place the sheet in the freezer for about an hour. After that, transfer the frozen wedges to a freezer bag. Squeeze out as much air as you can. They will last for up to three months in the freezer. To reheat your potato wedges, the oven is the best choice. Preheat your oven to 400°F (200°C). Spread the wedges on a baking sheet. Bake for about 10 to 15 minutes until they are hot and crispy again. You can also use an air fryer for a quicker option. Set it to 375°F (190°C) and cook for about 5 to 8 minutes. Enjoy them as if they were freshly made! For the full recipe, you can check the complete instructions and ingredients listed above. Yes, you can! An air fryer is a great option for making these wedges. It cooks them faster and keeps them crispy. To do this, cut the potatoes as usual. Toss them in the seasoning blend just like in the oven method. Preheat your air fryer to 400°F (200°C). Then, place the wedges in the basket in a single layer. Cook them for about 15 to 20 minutes, shaking the basket halfway through. This method yields a crunchy outside and soft inside. Dipping sauces make everything better! Here are some tasty options for your potato wedges: - Ranch dressing for a creamy touch - Ketchup for a classic flavor - Garlic aioli for a rich taste - Spicy sriracha mayo for a kick - Barbecue sauce for a sweet and smoky flavor Feel free to mix and match to find your favorite. Making this recipe gluten-free is easy! The main ingredients are naturally gluten-free. Just ensure that your seasonings, especially the Italian blend, are gluten-free. Check the labels on each product to be safe. You can also pair these wedges with gluten-free sauces for dipping. Enjoy your crispy, delicious potato wedges without worry! This article covered all you need for tasty baked potato wedges. We discussed the main ingredients, seasonings, and optional add-ins for flavor. I explained simple steps from prepping to baking. You learned tips to make them crispy and how to store leftovers. There are fun variations to try, like spicy or cheesy versions. Always feel free to get creative! Now, you're all set to enjoy delicious potato wedges your way. Happy cooking!

Baked Garlic Parmesan Potato Wedges Crispy Delight

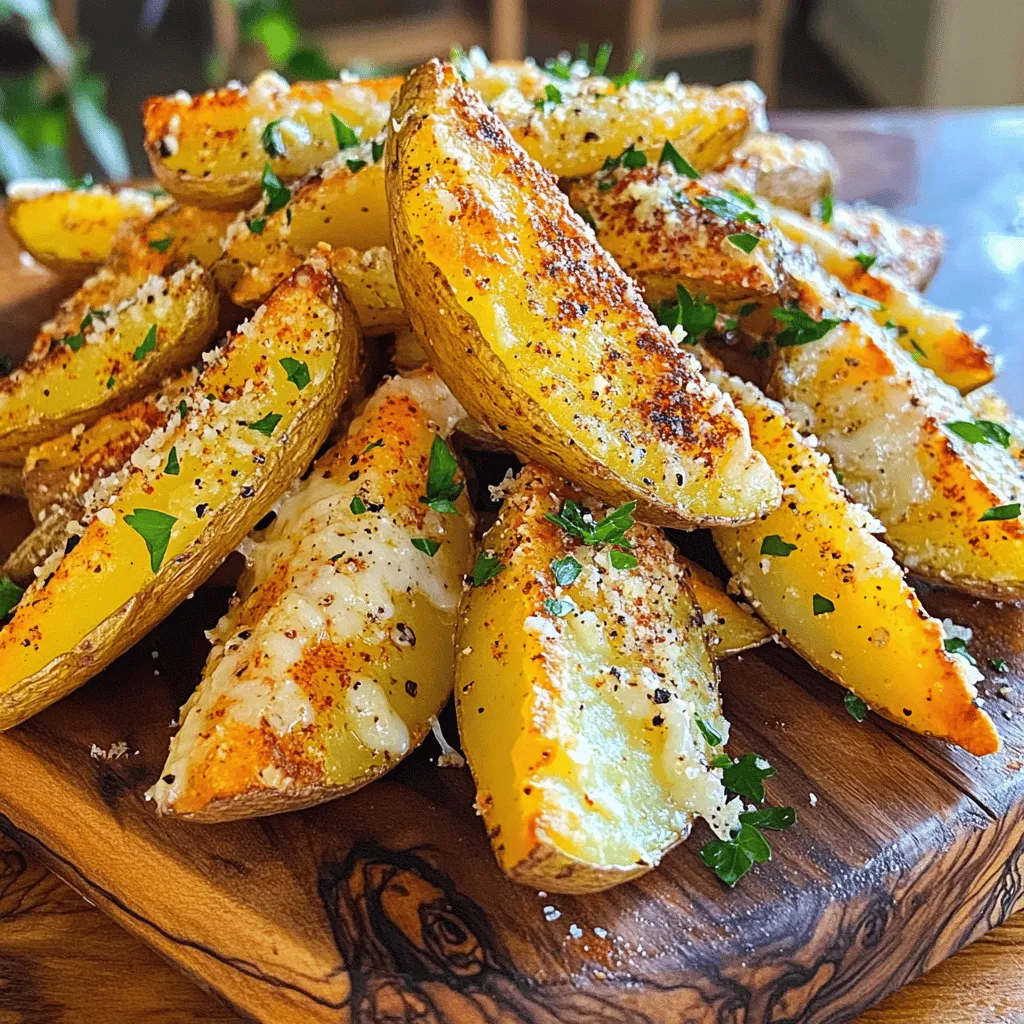
If you’re craving a tasty snack, I’ve got just the thing: Baked Garlic Parmesan Potato Wedges. These crispy delights are

Older posts
Newer posts
← Previous Page1 … Page76 Page77 Page78 … Page90 Next →

dsad

© 2025 recipetorch • Built with GeneratePress

Our Policies

  • Copyright Policy
  • Cookie Policy
  • GDPR Policy
  • Privacy Policy
  • Disclaimer
  • Terms Of Use

More Information

  • Home
  • About
  • Contact
  • Appetizers
  • Dessert
  • Dinner
  • Drinks
©2025, recipetorch About Back To Top