Skip to content
DisclaimerTerms Of UseGDPR PolicyCookie Policy

recipetorch

  • Home
  • Drinks
  • Appetizers
  • Dinner
  • Dessert
  • About
  • Contact
  • Privacy Policy
DisclaimerTerms Of UseGDPR PolicyCookie Policy

Nicole

To make your enchiladas tasty and filling, gather these main ingredients: - 2 cups cooked chicken, shredded - 1 cup black beans, drained and rinsed - 1 cup corn kernels (fresh or frozen) - 1 cup shredded sharp cheddar cheese (divided) - 1 cup enchilada sauce (your choice of store-bought or homemade) - 8 small soft flour tortillas These items form the base of your dish. The shredded chicken brings protein and texture. Black beans add fiber and earthiness. Corn brings sweetness, while cheese offers creamy goodness. Feel free to add your twist with these optional ingredients: - Diced bell peppers - Jalapeños for heat - Sliced olives - Avocado for creaminess - Fresh tomatoes for brightness These extras can change the flavor and texture. For example, jalapeños add a spicy kick. Avocado gives a creamy touch, which balances the dish well. Seasonings can elevate your enchiladas to the next level. Include: - 1/2 teaspoon ground cumin - 1/2 teaspoon garlic powder - Salt and black pepper, to taste These spices add warmth and depth. Cumin brings a smoky note, while garlic gives a savory touch. Adjust salt and pepper to suit your taste. These small changes can create a big impact in flavor. For the full recipe, check out the detailed steps to make these easy chicken enchiladas. Enjoy creating a dish that pleases everyone! First, grab a large mixing bowl. Add 2 cups of shredded chicken. Then, mix in 1 cup of black beans and 1 cup of corn. Next, add half of the cheddar cheese, which is 1 cup. Sprinkle in 1/2 teaspoon of ground cumin and 1/2 teaspoon of garlic powder. Season with salt and black pepper to taste. Stir everything well until mixed. Now, take a 9x13 inch baking dish. Start by spreading about 1/4 cup of enchilada sauce on the bottom. This step keeps the tortillas from sticking. Take a soft flour tortilla and place 1/3 cup of the chicken mixture in the center. Roll it up tightly, making sure it is closed at one end. Place it seam-side down in the dish. Repeat this for all tortillas, filling the dish. Pour the rest of the enchilada sauce over the tortillas. Make sure they are well coated. Then, sprinkle the remaining cheddar cheese on top. Cover the baking dish with aluminum foil. Bake in a preheated oven at 350°F (175°C) for 20 minutes. After that, remove the foil and bake for another 10 minutes. Look for bubbling cheese that is lightly golden. Let the enchiladas rest for a few minutes. Garnish with chopped cilantro before serving. To keep your enchiladas from getting soggy, start with dry tortillas. Warm them briefly in a pan. This softens them but keeps them firm. Next, don’t oversaturate with sauce. Use just enough to coat without drowning the tortillas. When layering, use a thin sauce layer on the bottom of the dish. This helps absorb moisture while baking. Finally, bake covered for the first part, then uncover to let steam escape. If you have leftover chicken or beans, you can make a quick soup. Just add broth, seasoning, and vegetables. Another option is to create a chicken salad by mixing with mayo, herbs, and spices. You can also use leftover tortillas to make quesadillas. Fill them with cheese and any extra veggies. This way, you waste nothing and enjoy new meals! For perfect enchiladas, preheat your oven to 350°F (175°C). Cover with foil for the first 20 minutes. This helps heat through without burning. After that, bake uncovered for 10 more minutes. Keep an eye on the cheese. It should be bubbling and lightly golden. This cooking method ensures your enchiladas are warm and delicious. For more details, check the Full Recipe. {{image_4}} You can easily make a vegetarian version of chicken enchiladas. Swap out the chicken for two cups of cooked lentils or black beans. Use the same spices to keep the flavor strong. You can also add more veggies like bell peppers, zucchini, or spinach. This makes for a hearty filling that everyone will love. If you want dairy-free enchiladas, there are great options. Use a dairy-free cheese that melts well, like cashew cheese. Instead of sour cream, try a vegan sour cream or avocado for creaminess. Ensure your enchilada sauce is also dairy-free. This way, you keep the flavors while sticking to a dairy-free diet. To spice things up, add some heat to your chicken enchiladas. Mix in chopped jalapeños or a dash of cayenne pepper to the chicken filling. You can also use spicy enchilada sauce for an extra kick. If you want more flavor, add some chipotle peppers in adobo sauce. This will make your enchiladas bold and exciting. For the full recipe, check out the details above. You can store leftover enchiladas in an airtight container. Make sure they are cool before sealing. Place them in the fridge if you plan to eat them within three days. For longer storage, consider freezing them. They will taste great later on. To reheat your enchiladas, use the oven for the best taste. Preheat it to 350°F (175°C). Place the enchiladas in a baking dish and cover them with foil. Heat for about 15-20 minutes. This keeps them moist and prevents drying out. You can also microwave them for a quicker option. Just cover them with a damp paper towel to keep them soft. Freezing enchiladas is easy and smart! First, let them cool completely. Wrap each enchilada in plastic wrap. Then place them in a freezer-safe bag or container. They can last for up to three months in the freezer. To enjoy them later, thaw them in the fridge overnight before reheating. This method helps keep the texture nice. You can find the Full Recipe for these cheesy delights to ensure perfect results every time! Yes, you can use corn tortillas. Corn tortillas add a nice texture and flavor. They are smaller, so you may need more of them. Just remember to warm them up first. This helps prevent them from breaking. You can serve enchiladas with many tasty sides. Here are some great options: - Guacamole for creamy goodness - Salsa for a fresh kick - Mexican rice for a filling touch - Refried beans for extra protein - A simple salad for crunch These sides make your meal more fun and flavorful. Enchiladas can last for about 3 to 4 days in the fridge. Make sure you store them in an airtight container. This keeps them fresh and safe to eat. When you're ready to enjoy them again, simply reheat in the oven or microwave. They taste great even after a few days! For the full recipe, check out the details above. You’ve learned how to make easy chicken enchiladas, step by step. We covered key ingredients, preparation, and baking tips. You can customize these enchiladas with different flavors and variations. Remember to store any leftovers properly for the best taste later. With these simple tricks, you’ll impress family and friends alike. Enjoy experimenting with your own twist on this classic dish!

Easy Chicken Enchiladas Flavorful and Simple Recipe

If you’re looking for a tasty meal that’s simple and quick to make, you’re in the right place! My Easy

To make this dish, gather the following ingredients: - 2 cups elbow macaroni - 4 cups sharp cheddar cheese, shredded - 1 cup Gruyère cheese, shredded - 1 cup whole milk - 1 cup heavy cream - 1/4 cup unsalted butter - 1/4 cup all-purpose flour - 2 teaspoons truffle oil - 1 teaspoon garlic powder - 1 teaspoon onion powder - Salt and freshly cracked black pepper to taste - 1 cup panko breadcrumbs - 2 tablespoons fresh parsley, finely chopped (for garnish) When measuring, make sure to be precise. This will help your dish turn out perfect. Use a measuring cup for liquids and a dry measuring cup for solids. For the cheese, I recommend shredding it yourself. Pre-shredded cheese can have additives that affect melting. If you need to substitute, here are some ideas: - Use macaroni shapes like shells or rotini if you can’t find elbow macaroni. - Swap sharp cheddar for mild cheddar for a less intense flavor. - Gruyère can be replaced with mozzarella for a milder taste. - If you want a lighter dish, use low-fat milk or half-and-half instead of whole milk and heavy cream. - For a vegan option, try using plant-based cheese and milk. These swaps can help you customize the recipe while keeping that creamy texture. Don't be afraid to get creative! For the full recipe, check out the details above. First, preheat your oven to 350°F (175°C). This step warms the oven for baking. Next, fill a large pot with water and add salt. Once the water boils, add 2 cups of elbow macaroni. Cook until al dente, which means it should be firm. After cooking, drain the macaroni and set it aside. In the same pot, melt 1/4 cup of unsalted butter over medium heat. Once it melts, sprinkle in 1/4 cup of all-purpose flour. Whisk this mixture for about 2 minutes. You want it to turn light golden. This is your roux, which helps thicken the sauce. Gradually pour in 1 cup of whole milk and 1 cup of heavy cream. Keep whisking to prevent lumps. After about 4-5 minutes, the mixture should be smooth and slightly thick. Now, stir in 1 teaspoon of garlic powder, 1 teaspoon of onion powder, and a pinch of salt and pepper. Slowly mix in 4 cups of sharp cheddar cheese and 1 cup of Gruyère cheese. Stir until fully melted and creamy. Finally, add in 2 teaspoons of truffle oil for a rich flavor. Mix in the cooked macaroni, ensuring every piece is coated with the sauce. Transfer the macaroni and cheese to a greased 9x13 inch baking dish. Spread it evenly. In a small bowl, combine 1 cup of panko breadcrumbs with 1 tablespoon of melted butter. Toss to coat. Sprinkle this mixture over the top for a crispy finish. Bake in your preheated oven for 25-30 minutes. The top should be golden brown and crisp when done. Once baked, let it cool slightly before serving. For a touch of color, garnish with 2 tablespoons of fresh parsley. Enjoy this creamy comfort dish! For the full recipe, check out the link. To get a creamy cheese sauce, start with a good roux. Use equal parts butter and flour. Cook this mix until it turns light gold. This step adds depth to your sauce. Next, slowly whisk in milk and cream. Keep stirring to avoid lumps. Add cheese only when the sauce thickens. I like to use sharp cheddar and Gruyère for great flavor. Always stir until melted. For an extra touch, drizzle in truffle oil at the end. This adds a rich, unique taste. Baking your mac and cheese right is key. First, preheat your oven to 350°F. This ensures even cooking. When you put the dish in, check the time. Bake for 25-30 minutes. This lets the top become golden and crispy. If you want it crispier, broil it for the last few minutes. Just watch closely so it doesn’t burn. A mix of panko breadcrumbs and butter makes the top perfect. This adds crunch and a nice contrast to the creamy sauce. Baked macaroni and cheese is a stand-alone dish, but it pairs well with many sides. Try serving it with a fresh salad. The crunch from greens balances the creaminess. You can also serve it with grilled chicken or vegetables. For a fun twist, add sautéed spinach or roasted broccoli inside the dish before baking. This adds nutrients and color. Don’t forget to garnish with fresh parsley for a bright touch. For more ideas, check the Full Recipe for creative additions! {{image_4}} You can easily change up this dish with tasty add-ins. Try adding cooked broccoli, peas, or spinach for some green goodness. If you want protein, consider mixing in cooked chicken, bacon, or even shrimp. These additions boost the flavor and make your meal more filling. Cheese is the star of this dish. While sharp cheddar and Gruyère shine, don’t be afraid to mix it up. Add mozzarella for stretchiness or pepper jack for a spicy kick. Mixing different cheeses gives depth and richness. Each blend creates a unique flavor that can surprise your taste buds. You can make this dish fit different diets too. For a vegetarian version, skip the meat and focus on flavors like smoked paprika or nutmeg. To make gluten-free, swap regular pasta for a gluten-free type made from rice or quinoa. Just make sure to use gluten-free flour in the roux, and you are all set. These tweaks make the dish accessible for everyone, ensuring no one misses out on the creamy goodness. For the full recipe, check out the detailed steps to create this comfort classic! To store leftover baked macaroni and cheese, wait for it to cool. Place it in an airtight container. Make sure to seal it tightly to keep out air. You can keep it in the fridge for up to three days. If you want to keep it longer, consider freezing it. When reheating, use an oven for the best results. Preheat your oven to 350°F (175°C). Place the macaroni in an oven-safe dish. Add a splash of milk to keep it creamy. Cover it with foil to avoid drying out. Bake for 15-20 minutes until hot. You can also reheat it in the microwave. Use a microwave-safe dish and cover it to keep moisture in. Heat in short bursts, stirring in between. To freeze baked macaroni and cheese, first let it cool completely. Portion it into smaller containers for easy use later. Wrap each container tightly with plastic wrap. Then, place it in a freezer bag for extra protection. Label with the date for easy tracking. You can freeze it for up to three months. When ready to eat, thaw it overnight in the fridge before reheating. For the complete recipe, refer to the Full Recipe section. Yes, you can make Baked Macaroni and Cheese ahead of time. Prepare the dish, but do not bake it yet. Cover it tightly and store it in the fridge for one to two days. When you are ready to bake, just add a few extra minutes to the cooking time. This way, you can enjoy a creamy comfort dish without the stress of last-minute cooking. Elbow macaroni works best for Baked Macaroni and Cheese. Its shape holds the cheese sauce well. You can also try cavatappi or shells if you want a different look. Just make sure that the pasta is small enough to fit in each bite perfectly. To make your Baked Macaroni and Cheese less dry, use enough cheese sauce. Ensure you mix the pasta well with the sauce before baking. If you see it getting dry, add more milk or cream to the sauce. You can also cover the dish with foil while baking to keep moisture in. Yes, there are many ways to make this dish healthier. Use whole wheat macaroni for more fiber. You can also swap some cheese for low-fat options. Adding veggies like spinach or broccoli can boost nutrition without losing flavor. These changes help you enjoy this creamy comfort dish while keeping it balanced. Baked macaroni and cheese is a comforting dish you can easily make. We covered the key ingredients, step-by-step instructions, and useful tips to ensure success. You learned about variations and storage ideas to keep your meal fresh. Now, go ahead and enjoy this delicious recipe. Don't be afraid to get creative with flavors and ingredients. Happy cooking!

Baked Macaroni and Cheese Creamy Comfort Dish

Looking for the perfect comfort food? Baked Macaroni and Cheese is a warm hug on a plate! With creamy cheese

To make Instant Pot Beef and Broccoli, you need the following ingredients: - 1 pound flank steak, thinly sliced against the grain - 2 cups fresh broccoli florets - 1/4 cup low sodium soy sauce - 2 tablespoons oyster sauce - 2 tablespoons cornstarch - 2 tablespoons sesame oil, divided - 1 tablespoon brown sugar - 3 cloves garlic, minced - 1 teaspoon freshly grated ginger - 1/4 cup beef broth - 2 tablespoons chopped green onions (for garnish) - Cooked rice (for serving) If you want to switch things up, consider these substitutions: - Flank steak can be swapped for sirloin or ribeye. - You can use tamari instead of soy sauce for a gluten-free option. - If you don’t have oyster sauce, hoisin sauce works well too. - For a lighter dish, you can use chicken or vegetable broth. - Broccoli can be replaced with snow peas or bell peppers for variety. When choosing your ingredients, keep these tips in mind: - Look for flank steak that has a bright red color and minimal fat. - Choose fresh broccoli with firm stems and bright green florets. - Opt for low sodium soy sauce to control salt levels in your dish. - Fresh garlic and ginger enhance the flavor; avoid pre-packaged versions. - Use high-quality sesame oil for the best flavor in your recipe. These ingredients help create a delicious and satisfying meal. If you want the full recipe, check the details above. First, gather your ingredients. You will need: - 1 pound flank steak, thinly sliced against the grain - 2 cups fresh broccoli florets - 1/4 cup low sodium soy sauce - 2 tablespoons oyster sauce - 2 tablespoons cornstarch - 2 tablespoons sesame oil, divided - 1 tablespoon brown sugar - 3 cloves garlic, minced - 1 teaspoon freshly grated ginger - 1/4 cup beef broth - 2 tablespoons chopped green onions (for garnish) - Cooked rice (for serving) Next, in a medium bowl, whisk the soy sauce, oyster sauce, sesame oil, brown sugar, garlic, ginger, and beef broth. Mix it well. Then, add the sliced flank steak. Make sure every piece gets coated. Let it marinate for about 10 to 15 minutes. While it marinates, prepare your broccoli florets. Now, set your Instant Pot to Sauté mode. Once it shows Hot, add 1 tablespoon of sesame oil. Carefully add the marinated beef in a single layer. Sauté for about 2 to 3 minutes until the meat browns. Stir it occasionally to cook evenly. Then, sprinkle the cornstarch over the beef. Stir well to coat the meat. This step helps the sauce thicken later. Pour the marinade mixture into the pot and gently stir to combine. Next, place the broccoli florets on top of the beef. Do not stir, as the broccoli will steam during cooking. Secure the Instant Pot lid and set the valve to Sealing. Choose the Manual or Pressure Cook mode and set the time for 10 minutes. When the cooking ends, let the pressure release naturally for 5 minutes. After that, switch the valve to Quick Release to let out the remaining pressure. Once you open the lid, check the sauce. If it seems too thin, switch the pot back to Sauté mode. Simmer for a few minutes until the sauce thickens to your taste. Serve the beef and broccoli hot over cooked rice. Garnish with chopped green onions for a fresh touch. Enjoy this savory dish straight from the Instant Pot! For the full recipe, check the section above. To boost the flavor of your Instant Pot beef and broccoli, use fresh ingredients. Fresh garlic and ginger add a punch to the dish. Try marinating the beef longer for deeper taste. You can also add a splash of rice vinegar for extra zing. A sprinkle of sesame seeds before serving gives a nice crunch. If you like your beef tender, stick to the 10-minute cook time. For a firmer texture, reduce the time to 8 minutes. Remember, the pressure release is just as key. Letting it sit for 5 minutes helps keep the meat juicy. If you're adding more veggies, increase the cooking time by a minute or two. The right tools make cooking easier. A good cutting board helps slice the beef thin. A sharp knife is essential for even cuts. Use measuring cups and spoons for accuracy in your sauces. Finally, a sturdy spatula ensures you mix everything well without damaging the pot. {{image_4}} You can make this dish even better by adding more veggies. Try bell peppers, snap peas, or carrots. These vegetables cook well in the Instant Pot and add color. You can also swap beef for chicken, shrimp, or tofu. Each option gives a new twist to the flavor. Want to make this dish gluten-free? Switch to tamari instead of soy sauce. Tamari has a similar taste but is gluten-free. You can also use coconut aminos for a different flavor. This way, everyone can enjoy this tasty meal with no worries. If you love heat, add some spice! Try red pepper flakes or sriracha in the marinade. Start with a little, taste, and then add more if needed. You can also serve it with sliced jalapeños on top. This adds a fresh kick that brightens up the dish. Enjoy your spicy version of Instant Pot Beef and Broccoli! For the full recipe, check out the details above. To store leftover beef and broccoli, let the dish cool first. Once cooled, place it in an airtight container. Make sure to separate the beef from the broccoli to keep it fresh. Store the container in the fridge. It should stay good for about three days. When you are ready to eat, you can reheat the beef and broccoli in two ways. If you prefer the microwave, place it in a microwave-safe bowl. Heat it for about 1-2 minutes. Stir halfway through to warm it evenly. If you want to use the stove, heat a pan over medium heat. Add a splash of water or broth to help steam it. Stir occasionally until it’s hot. For longer storage, you can freeze the leftovers. Place the beef and broccoli in a freezer-safe bag or container. Remove as much air as possible to prevent freezer burn. This dish can last up to three months in the freezer. When you are ready to enjoy it, thaw it in the fridge overnight. Then, reheat as mentioned above. Enjoy your savory meal again! You can skip the oyster sauce and still enjoy great flavor. Use more soy sauce for saltiness. Add a splash of rice vinegar for tang. You can also try hoisin sauce as a sweet substitute. This keeps the dish balanced without losing its essence. Yes, you can use other cuts of beef. Sirloin works well and is tender. Chuck roast is another option, but it takes longer to cook. If you want a leaner cut, try eye of round. Just remember to slice it thinly for the best texture. I recommend serving it over cooked rice for a complete meal. Steamed jasmine or brown rice pairs nicely. You can also add some egg noodles for a different twist. For a colorful plate, toss in a side of stir-fried bok choy or snap peas. For the full recipe, check out the link! This blog post covered everything you need to make Instant Pot Beef and Broccoli. We discussed key ingredients, helpful cooking steps, and smart tips for great flavor. You learned how to store leftovers and even how to customize the dish. In summary, this meal is quick, easy, and full of flavor. With the right ingredients and a few simple steps, you can enjoy a delicious dish your family will love. Now, get cooking!

Instant Pot Beef and Broccoli Quick Dinner Recipe

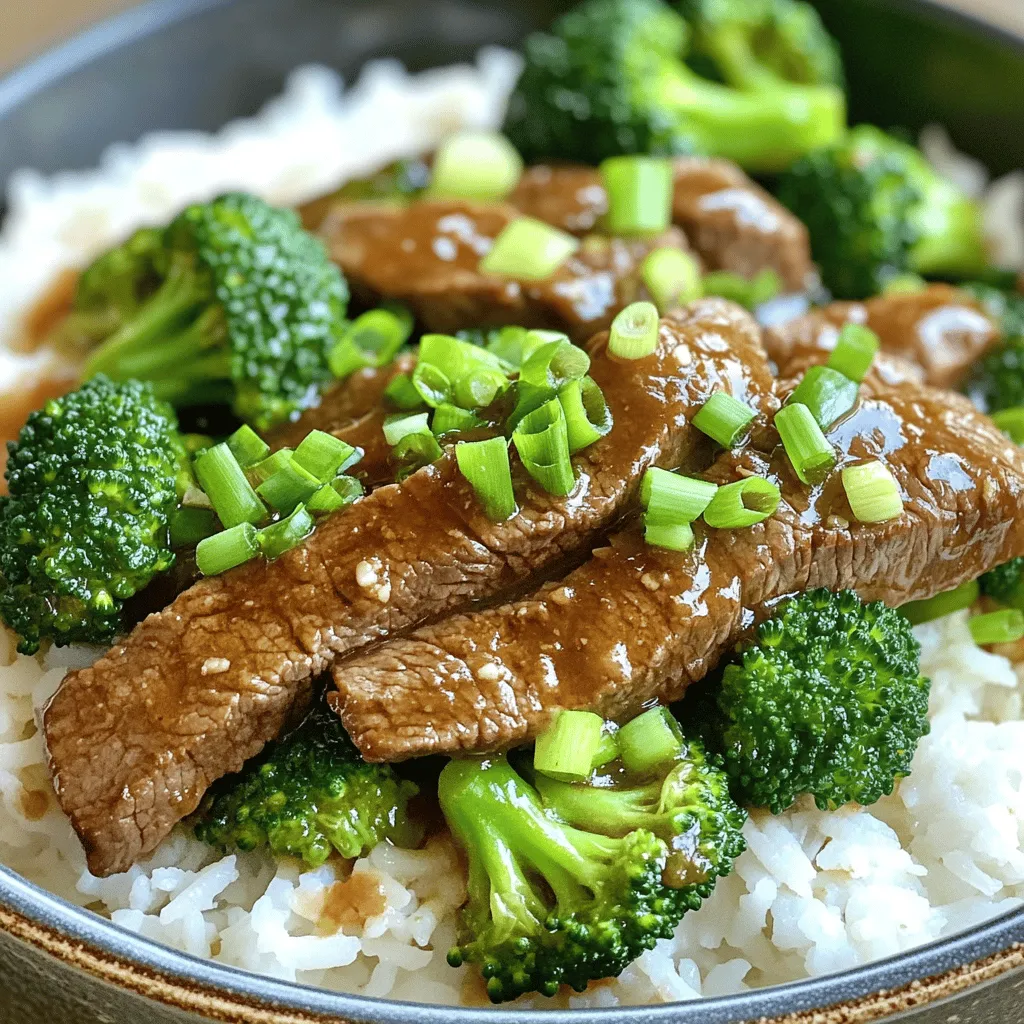
If you crave a quick and tasty meal, this Instant Pot Beef and Broccoli recipe is for you. In just

- 4 bone-in, skin-on chicken thighs - 1/4 cup honey - 1/4 cup soy sauce - 4 cloves garlic, minced - 1 tablespoon fresh ginger, grated - 1 tablespoon rice vinegar - 1 teaspoon sesame oil - Salt and freshly ground black pepper, to taste - 1 tablespoon olive oil - Chopped green onions and sesame seeds for garnish When I make honey garlic chicken thighs, I love to gather fresh ingredients. The main stars are the chicken thighs, honey, soy sauce, garlic, and ginger. These flavors blend to create something special. Chicken thighs are rich and juicy, perfect for this dish. The honey adds sweetness, while soy sauce brings a nice salty touch. Garlic and ginger give the chicken a bold flavor. For the extra kick, I add rice vinegar and sesame oil. They give the dish a unique twist. Don’t forget salt and pepper to season well. I also like to garnish with green onions and sesame seeds. They add color and texture. This recipe is easy and fun to make. You can find the full recipe at the end of this section. Set your oven to 400°F (200°C) before you start cooking. This temperature gives you that perfect bake. It helps the chicken skin get crispy while keeping the meat juicy. Preheating is key for even cooking, so don’t skip this step. In a medium bowl, mix the following for the marinade: - 1/4 cup honey - 1/4 cup soy sauce - 4 cloves garlic, minced - 1 tablespoon fresh ginger, grated - 1 tablespoon rice vinegar - 1 teaspoon sesame oil Whisk these ingredients together until they blend well. This mixture will give your chicken a rich, sweet flavor. Marinating is important because it allows the chicken to soak up all that delicious taste. Take the chicken thighs and pat them dry with paper towels. This helps the skin get crispy. Then, sprinkle salt and black pepper on both sides. Next, heat 1 tablespoon of olive oil in a large oven-safe skillet over medium-high heat. When the oil is hot, place the chicken thighs in the skillet skin-side down. Sear them for about 5-7 minutes until they turn golden brown. This step locks in flavors and gives you that nice texture. After searing, flip the chicken thighs so the skin side is up. Pour the marinade over the chicken in the skillet. Make sure each piece is well-coated. Now, transfer the skillet into your preheated oven. Bake the chicken for 20-25 minutes. You want the internal temperature to reach 165°F (75°C) to ensure it’s fully cooked. This will keep the meat tender and juicy. Once the chicken is cooked, take it out of the oven. Let it rest for about 5 minutes. Resting is important because it helps the juices settle back into the meat. Before you serve, drizzle any sauce from the skillet over the chicken. For a nice touch, garnish with chopped green onions and sesame seeds. This adds color and extra flavor to your dish. You can find the full recipe [here](#). To get that crispy skin, start with the right oil temperature. Heat the olive oil until it shimmers, about 2 minutes. The chicken thighs should sizzle as soon as they touch the pan. Sear them skin-side down for 5-7 minutes. This step locks in flavor and gives you that golden brown look. Adding herbs and spices can elevate your chicken. Try fresh thyme or rosemary for a new twist. You can also add chili flakes for a bit of heat. Let the chicken soak in the marinade for at least 30 minutes. This ensures the flavors meld and penetrate the meat. For the best results, use a large, heavy skillet. Cast iron works great for even heat. An oven-safe pan lets you move from stove to oven easily. A meat thermometer is essential to check doneness. Aim for 165°F (75°C) to ensure your chicken is safe to eat. For the full recipe, check the section above. {{image_4}} If you want to bake instead of sear your chicken thighs, here’s how. First, you still need to prepare the marinade as described in the full recipe. Instead of searing, you can skip straight to baking. - Preheat your oven to 400°F (200°C). - After marinating, place the chicken thighs on a baking sheet. - Bake for 30-35 minutes or until the chicken reaches 165°F (75°C). Baking makes the chicken juicy and easy. The honey garlic sauce will caramelize nicely, giving you a sweet and savory dish. Using a slow cooker gives a different twist to this recipe. This method makes the chicken super tender. Here’s what you do: - Follow the same steps to prepare the marinade. - Place the chicken thighs in the slow cooker and pour the marinade over them. - Cook on low for 6-7 hours or high for about 3-4 hours. This method allows the chicken to soak up all the flavors. The result is tender, fall-off-the-bone chicken that’s great for meals any day of the week. For a quick meal, try the stir-fry version. It’s fast and simple. Here’s how: - Cut the chicken thighs into bite-sized pieces. - Heat some oil in a large skillet or wok. - Add the chicken pieces and cook until golden brown, about 5-7 minutes. - Stir in the marinade and add your favorite vegetables like bell peppers or broccoli. - Cook for another 5-7 minutes until the chicken is cooked through. This stir-fry is quick and packed with flavor. It’s perfect for busy nights when you want a meal that’s both tasty and healthy. After cooking, you can store the honey garlic chicken thighs in the fridge. Make sure to place them in an airtight container. Properly stored, they last for about 3 to 4 days. If you want to enjoy them later, you can use them in salads or wraps for a quick meal. To freeze the chicken, let it cool completely first. Then, wrap each piece tightly in plastic wrap. Place the wrapped chicken in a freezer-safe bag. This way, it keeps its flavor and texture. You can freeze it for up to 3 months. When you're ready to eat, thaw it in the fridge overnight for best results. When reheating, aim to keep the chicken moist. Preheat your oven to 350°F (175°C). Place the chicken in a baking dish and add a splash of broth or water. Cover the dish with foil to trap steam. Bake for about 15 to 20 minutes, or until heated through. This method helps to keep the chicken juicy and flavorful. Enjoy your sweet and savory chicken again! Yes, you can use boneless chicken thighs. They cook faster than bone-in thighs. Boneless thighs usually take about 15-20 minutes in the oven. However, the texture may differ. Bone-in thighs stay juicier due to the bone. Boneless thighs can be a bit drier if overcooked. This recipe is not spicy. The honey and soy sauce balance the flavors. If you want heat, add red pepper flakes or sriracha. Start with a pinch, and taste as you go. You can always add more for your perfect heat level. Pair these chicken thighs with rice or quinoa. Steamed broccoli or green beans also work well. A simple salad adds freshness. Try a light cucumber salad for crunch. These sides complement the sweet and savory notes of the chicken. To reduce sugar, use less honey. You can replace some honey with unsweetened apple sauce. This keeps the sauce sweet without too much sugar. You can also try using a sugar substitute like agave or stevia. Adjust the amounts to taste for your health goals. Each serving has about 320 calories. It includes 20 grams of protein and 22 grams of fat. The dish has 10 grams of carbs and 2 grams of sugar. This is a great option for a balanced meal. For more detailed info, check the Full Recipe. You can create a tasty honey garlic chicken dish with just a few ingredients. We covered the key seasonings, cooking methods, and tips to ensure a great meal. Remember, letting the chicken rest is vital for flavor. Feel free to experiment with variations to suit your taste. With these easy steps, your chicken will be juicy and full of flavor. Enjoy exploring the recipe and making it your own. Happy cooking!

Honey Garlic Chicken Thighs Flavorful and Easy Recipe

Looking for a delicious and simple dinner idea? Try my Honey Garlic Chicken Thighs! This easy recipe packs a sweet

To create these tasty skewers, you need: - 1 pint of fresh cherry tomatoes - 8 oz of creamy fresh mozzarella balls (bocconcini) - 1 ripe avocado, diced into bite-sized pieces - Handful of fresh basil leaves - 1 tablespoon balsamic glaze - 2 tablespoons extra virgin olive oil - Salt and freshly cracked pepper to taste - Skewers (8-10 inches long) These ingredients work together to give you that classic Caprese taste with a fun twist. You can mix it up a bit with these extras: - Sliced black olives for a salty kick - Prosciutto for a savory touch - Cherry bomb peppers for some heat - A sprinkle of crushed red pepper flakes for spice Adding any of these ingredients can make your skewers even more delightful. You will need some simple tools to make this dish: - A sharp knife for cutting - A cutting board for prep - Small bowls for holding ingredients - Serving platter to display your skewers Having the right tools makes the process smooth and fun. Follow the Full Recipe for complete steps to make these delicious skewers! Start by washing your cherry tomatoes and basil leaves in cold water. This gets rid of dirt. Drain the mozzarella balls well to avoid extra moisture. Next, cut the avocado in half and remove the pit. Slice the avocado into small cubes. Lightly sprinkle salt and pepper on the avocado. This adds flavor and stops it from browning. Grab a skewer and thread a cherry tomato onto it first. Then, add a fresh basil leaf. Next, slide on a mozzarella ball, followed by a piece of diced avocado. Keep layering until the skewer is filled. Leave about one inch at the end for easy handling. Aim for 3-4 pieces of each ingredient on each skewer. This makes your skewers colorful and fun! Once you finish assembling all the skewers, place them on a nice platter. Drizzle extra virgin olive oil and balsamic glaze over them for extra flavor. Sprinkle a bit of salt and fresh cracked pepper on top to taste. For a great display, stand the skewers up in a tall glass or jar. Surround them with fresh basil leaves to add color and a lovely smell. Don't forget to check out the Full Recipe for more details! To make perfect skewers, use fresh ingredients. Choose ripe cherry tomatoes. They should be bright and firm. Look for mozzarella balls that are creamy and smooth. For added texture, include ripe avocado cubes. Layer your ingredients on the skewer in this order: tomato, basil, mozzarella, and avocado. This pattern creates balance and taste. Aim for 3-4 pieces of each ingredient. This builds a colorful skewer. Balsamic glaze adds a rich sweetness. Choose a high-quality glaze for the best flavor. Drizzle it over the skewers just before serving. This adds a shiny finish and depth of taste. You can also dip each skewer in the glaze. This lets guests control their flavor. Remember to keep it light; a little goes a long way. Make your skewers look great on the table. Stand them upright in a tall glass or jar. This displays them nicely and makes them easy to grab. Surround the base with fresh basil leaves. It adds color and a nice scent. You can also use a wooden board for a rustic feel. Arrange them in a circle for a fun look. The key is to make them inviting and fun to eat. {{image_4}} The classic Caprese skewer is a simple delight. It features fresh tomatoes, mozzarella, and basil. The freshness of these ingredients shines through. But let’s add a twist! The avocado twist gives you creamy goodness. It makes the skewers richer and more filling. The ripe avocado pairs well with the tangy balsamic glaze. You get a taste explosion that will impress your guests. You can play with your ingredients. Want a kick? Add slices of spicy salami or prosciutto. For a crunchy texture, try adding cucumber slices. You can also swap in different cheeses. Feta or goat cheese give unique flavors. Experiment with colorful bell peppers or marinated artichokes too. Each change makes your skewer special and fun. Making these skewers vegan is easy! Just skip the mozzarella and add more veggies. Try using marinated tofu or a nut-based cheese. These options keep the flavor while being dairy-free. You can also use a balsamic reduction made from just vinegar and a sweetener. It adds depth without any animal products. Enjoy the same great taste while catering to dietary needs. For the full recipe, see the details above. Store any leftover skewers in an airtight container. This keeps them fresh and tasty. You can also wrap them tightly in plastic wrap. Keep them in the fridge for the best results. Avoid stacking them too high to prevent squishing. When prepping for a gathering, make your skewers a few hours ahead. This saves time and keeps things easy. If you want to prep a day in advance, store the ingredients separately. Assemble them just before serving for the best flavor. Leftover skewers stay fresh for about two days in the fridge. After that, the mozzarella may become soggy, and the avocado might brown. It's best to enjoy them within this time to keep the flavors bright. If you notice any changes, it's time to toss them. For maximum quality, aim to make them fresh when you can. For the complete process, check the Full Recipe. Yes, you can prepare Caprese Salad Skewers ahead of time. Make them a few hours before your event. Just keep them in the fridge. This helps the flavors blend nicely. You can also drizzle the balsamic glaze just before serving. This keeps the skewers looking fresh and tasty. You can add many fun ingredients to your skewers. Try adding olives for a salty bite. You can also use different cheeses, like feta or goat cheese. Cherry peppers can bring a nice kick. For a sweet twist, add some diced fruit like strawberries or peaches. The key is to mix flavors that you enjoy. To stop avocado from browning, use a light sprinkle of salt and pepper. This adds flavor and slows oxidation. You can also squeeze some lemon juice on the avocado pieces. The acid helps keep them green and fresh. If you prepare them in advance, cover them tightly with plastic wrap. This limits air exposure and keeps them looking great. Caprese salad skewers offer a fresh, tasty snack or meal. We covered the key ingredients like tomatoes and mozzarella, plus optional flavors to make them special. I gave step-by-step instructions for quick prep and assembly. You learned tips for perfect skewers and fun variations, like the avocado twist. Finally, I shared how to store leftovers and keep them fresh. These easy skewers fit any occasion. Enjoy making them your own!

Quick Caprese Salad Skewers Fresh and Festive Treat

Looking for a fresh and festive treat? You’ll love my Quick Caprese Salad Skewers! They’re easy to make and perfect

To make these tasty tacos, you need: - 1 medium cauliflower, cut into bite-sized florets - 2 tablespoons extra virgin olive oil - 1 teaspoon smoked paprika - 1 teaspoon ground cumin - 1 teaspoon garlic powder - 1/2 teaspoon sea salt - 1/4 teaspoon freshly ground black pepper - 8 small corn tortillas The seasoning blend makes the cauliflower burst with flavor. I use: - Smoked paprika for a nice, smoky taste. - Ground cumin adds warmth and earthiness. - Garlic powder brings a savory touch. - Sea salt and black pepper enhance all the flavors. Mix these seasonings well with the olive oil. This will coat the cauliflower and make it delicious. Toppings are key for a great taco. I suggest: - 1 cup red cabbage, finely sliced for crunch. - 1 ripe avocado, sliced for creaminess. - 1/4 cup fresh cilantro, roughly chopped for freshness. - 1 lime, cut into wedges for a bright, zesty kick. - Hot sauce, if you like it spicy! These fresh toppings add texture and flavor, making each bite satisfying. You can find the Full Recipe online for more details. First, gather your ingredients. You need: - 1 medium cauliflower, cut into bite-sized florets - 2 tablespoons extra virgin olive oil - 1 teaspoon smoked paprika - 1 teaspoon ground cumin - 1 teaspoon garlic powder - 1/2 teaspoon sea salt - 1/4 teaspoon freshly ground black pepper - 8 small corn tortillas - 1 cup red cabbage, finely sliced - 1 ripe avocado, sliced - 1/4 cup fresh cilantro, roughly chopped - 1 lime, cut into wedges - Hot sauce (optional, for an extra spicy kick) Next, preheat your oven to 425°F (220°C). This will help the cauliflower roast perfectly. In a large bowl, mix the cauliflower florets with the olive oil and spices. Toss until every piece is coated. Spread the florets evenly on a baking sheet. Ensure they are not overlapping. Bake for about 25 minutes. Halfway through, flip the cauliflower to brown it evenly. It should come out golden and tender. While the cauliflower roasts, warm the corn tortillas in a skillet. Heat each side for around 30 seconds. Once the cauliflower is done, take a tortilla and add a generous scoop of roasted cauliflower. Top it with red cabbage, slices of avocado, and fresh cilantro. Serve your tacos warm with lime wedges on the side. For extra kick, drizzle hot sauce on top. Enjoy your meal! Roasting cauliflower well is key to tasty tacos. Preheat your oven to 425°F (220°C). The high heat helps the cauliflower caramelize. Cut the cauliflower into bite-sized pieces. This size allows for even cooking. Toss the florets in olive oil and spices. Make sure every piece is coated. Spread them out on a baking sheet. Avoid overlapping pieces for even roasting. Flip the cauliflower halfway through to get a nice brown color. Roast for about 25 minutes until tender. Serve your tacos warm and fresh. Start with a corn tortilla as a base. Place a generous amount of roasted cauliflower on top. Add thin slices of red cabbage for crunch. Avocado brings a creamy texture, so don’t skip it! A sprinkle of cilantro adds brightness. Squeeze fresh lime juice over the top. This adds a zesty kick. If you like heat, drizzle some hot sauce on your tacos. Enjoy them right away for the best taste. You can easily boost the flavor of your tacos. Try adding a dollop of vegan sour cream for creaminess. Pickled onions can add a tangy punch. You could also include fresh salsa for extra freshness. Chopped tomatoes or jalapeños offer a burst of flavor. Experiment with different herbs like parsley or mint. Each addition can change the taste. These small changes can make your vegan tacos even more satisfying. For more ideas, check out the Full Recipe online. {{image_4}} If you want a lighter meal, swap the corn tortillas for lettuce wraps. They cut calories and add crunch. You can also skip the oil when roasting the cauliflower. Use vegetable broth instead. This change helps you enjoy the tasty flavors without the added fat. You can mix it up with other veggies. Try adding bell peppers, zucchini, or mushrooms. These will add more texture and flavor. If you want a protein boost, add black beans or chickpeas. They make your meal filling and nutritious. To adjust the spice level, add or reduce the amount of hot sauce. For mild tacos, skip the sauce altogether. If you love heat, sprinkle in some cayenne pepper or diced jalapeños. These will give your tacos that extra kick. Feel free to explore these variations. Customizing your tacos makes them even more fun to eat! To store your leftover cauliflower tacos, let them cool down first. Place them in an airtight container. Keep them in the fridge for up to three days. If you have extra toppings, store them separately to keep everything fresh. This helps maintain the taste and texture of the tacos. When you're ready to enjoy your leftovers, reheating is easy. You can use a microwave or a skillet. If using a microwave, heat for about 1 to 2 minutes. If you prefer using a skillet, warm the tacos over low heat for about 5 minutes. This keeps the tortillas soft and the filling warm. If you want to freeze your tacos, I recommend storing the filling and tortillas separately. Place the cooled cauliflower in a freezer-safe bag. Seal it tightly and store it for up to three months. For the tortillas, stack them and wrap them in foil or plastic wrap. When you're ready to eat, just thaw and reheat. This way, you can easily enjoy your vegan tacos anytime! You can use lettuce leaves, like romaine or butter lettuce. This creates a fresh, low-carb taco. Other options include rice paper wraps or gluten-free tortillas. Both options hold the filling well and taste great. Yes, you can make these tacos gluten-free. Simply choose corn tortillas or look for gluten-free wraps. Always check labels to ensure they are safe for your diet. To achieve extra crispy cauliflower, make sure to spread the florets in a single layer on the baking sheet. Use enough olive oil to coat them well. You can also add a sprinkle of cornstarch to the seasoning. This helps create a crunchy texture when roasting. For the full recipe, please check online resources. You’ll find all the details you need to make these tasty tacos. In this post, we covered how to make tasty vegan cauliflower tacos. We explored the key ingredients, seasoning, and fresh toppings. I shared step-by-step instructions for preparation and roasting. You learned tips for perfect tacos and explored fun variations. We also looked at storage, reheating, and answers to common questions. These tacos are easy, healthy, and full of flavor. Enjoy trying new twists and sharing with friends!

Satisfying Vegan Cauliflower Tacos Recipe

Looking for a delicious and filling meal that fits your vegan lifestyle? Look no further! My satisfying vegan cauliflower tacos

- 1 lb (450 g) boneless chicken thighs, cut into bite-sized pieces - 2 tablespoons soy sauce - 2 tablespoons honey - 1 tablespoon fish sauce - 2 cloves garlic, minced - 1 tablespoon fresh ginger, grated - 1 tablespoon red curry paste - 1 tablespoon lime juice - 1 teaspoon brown sugar - 1 red bell pepper, cut into 1-inch chunks - 1 yellow bell pepper, cut into 1-inch chunks - Fresh cilantro, chopped, for garnish For this dish, I love using boneless chicken thighs. They stay juicy and tender when cooked. The marinade is key. It has soy sauce for saltiness, honey for sweetness, and fish sauce for depth. Garlic and ginger add a lovely aroma. The red and yellow bell peppers not only bring color but also crunch. Fresh cilantro gives a bright finish. - Skewers (wooden or metal) - Mixing bowl - Grill or grill pan Using the right tools makes cooking easier. I recommend wooden skewers, but metal ones work too. A good mixing bowl helps combine the marinade well. A grill or grill pan gets the chicken that perfect char. For the best results, soak wooden skewers in water first. This keeps them from burning. You can find the [Full Recipe] online for complete instructions and tips as you make these skewers. To make the marinade, start by mixing soy sauce, honey, and fish sauce in a bowl. These ingredients create a perfect blend of salty and sweet. Next, add minced garlic and grated ginger for a burst of flavor. These aromatics will enhance every bite. Finally, stir in red curry paste and lime juice for extra zest. This marinade packs a punch that makes the chicken shine. Now, coat your chicken pieces in the marinade. Make sure every piece gets a good cover. For the best results, let the chicken marinate for at least 30 minutes. If you have extra time, two hours brings out even more flavor. This step ensures your chicken becomes tender and tasty. First, prepare your grill or grill pan. Heat it to medium-high for great searing. If using wooden skewers, soak them in water for 30 minutes. This step stops them from burning. Once marinated, thread the chicken and colorful bell peppers onto the skewers. Alternate between chicken and peppers for a vibrant look. Next, grill the skewers for about 10-12 minutes. Turn them often to cook evenly. Watch for nice grill marks and check that the chicken reaches 165°F (75°C). After grilling, let the skewers rest for a few minutes. This helps keep them juicy. Finally, sprinkle fresh cilantro on top for a lovely finish. For the full recipe, check out the details above. To keep your chicken juicy, marinating is key. The marinade adds flavor and moisture. I recommend marinating the chicken for at least 30 minutes. For the best taste, aim for two hours. This allows the flavors to soak in. When cooking, make sure to check the temperature. The chicken should reach 165°F (75°C) to be safe and delicious. When serving, arrange skewers on a bright platter. This makes the dish eye-catching. You can also garnish with lime wedges. Sprinkle sesame seeds on top for extra texture. Drizzle any leftover marinade over the skewers. Make sure to boil it first for safety. This not only adds flavor but also enhances the visual appeal. If you use wooden skewers, soak them in water for 30 minutes. This helps prevent burning on the grill. Always handle raw chicken with care. Wash your hands and surfaces after touching it. Use separate plates for raw and cooked chicken. Keeping these tips in mind ensures a safe and tasty meal. For the complete recipe, check the [Full Recipe]. {{image_4}} You can switch out chicken for other proteins. Tofu works well for a vegan option. Shrimp also adds a nice touch with its sweet flavor. For vegetables, try zucchini or mushrooms. Both will add a different taste and texture to your skewers. Mixing and matching proteins and veggies can keep things fresh and fun. Want to tweak the taste? You can adjust the sweetness by adding more honey or sugar. If you prefer more heat, add extra red curry paste or some chili flakes. Fresh herbs like basil or mint can enhance the dish’s flavor. Try adding lemongrass for a unique twist. Each change will make your skewers special and delightful. Experimenting is part of the fun! For the full recipe, check out the Sweet and Spicy Thai Chicken Skewers. To keep your sweet and spicy Thai chicken skewers fresh, store them properly. Place leftover skewers in an airtight container. This will prevent them from drying out. You can also wrap them in plastic wrap for added protection. Store them in the fridge. They will stay good for about three days. It’s best to eat them sooner for the best taste. When it's time to enjoy your leftover skewers, reheating them right is key. You can use a microwave or an oven. If using a microwave, place them on a microwave-safe plate. Heat them for about 1-2 minutes. If you want a crispy texture, the oven is a better choice. Preheat the oven to 350°F (175°C) and bake them for about 10-15 minutes. To keep the flavor and texture, cover them with foil while reheating. This way, they won’t dry out. Enjoy your delicious skewers again! For the full recipe, check out the details. For the best flavor, marinate chicken for at least 30 minutes. If you have time, let it sit for up to 2 hours. This longer marinade allows the chicken to soak up all the tasty flavors. Yes, you can cook these skewers in the oven. Preheat your oven to 400°F (200°C). Place the skewers on a baking sheet lined with foil. Bake for about 15-20 minutes, turning halfway, until the chicken is done. These skewers pair well with: - Jasmine rice - Coconut rice - A fresh salad - Grilled veggies - Peanut sauce for dipping The chicken is done when it reaches an internal temperature of 165°F (75°C). You can also check for doneness by looking for a golden color on the outside. The juices should run clear when you cut into the chicken. The Sweet and Spicy Thai Chicken Skewers recipe combines tasty ingredients like chicken thighs, soy sauce, garlic, and colorful bell peppers. You learned how to marinate the chicken for great flavor, grill it perfectly, and present it nicely. Remember to try different proteins and veggies for fun twists. Follow safety tips to enjoy your skewers worry-free. This dish is not only easy to make but also full of flavor. Make it a meal everyone will love and share your creations!

Sweet and Spicy Thai Chicken Skewers Delightful Recipe

Looking to spice up your next meal? Sweet and Spicy Thai Chicken Skewers are the answer! With tender chicken marinated

To make creamy mushroom risotto, gather these ingredients: - 1 cup Arborio rice - 4 cups vegetable broth - 2 cups assorted mushrooms (such as cremini, shiitake, and button), sliced - 1 small onion, finely chopped - 2 cloves garlic, minced - ½ cup heavy cream - ½ cup finely grated Parmesan cheese - 2 tablespoons extra virgin olive oil - 2 tablespoons unsalted butter - Salt and freshly ground black pepper to taste - Fresh parsley, chopped (for garnish) Choosing the right ingredients is vital for great risotto. Arborio rice is a must. It absorbs liquid and gives that creamy texture. You can mix mushroom types for depth of flavor. Fresh mushrooms taste best and add a nice texture. Use a good-quality vegetable broth. It enhances the overall taste of the dish. Heavy cream brings richness, while Parmesan adds a salty kick. Always pick fresh ingredients. Look for mushrooms that are firm and dry. Avoid any that look slimy or shriveled. The onion should feel heavy for its size. Fresh garlic is also key; it should be firm and free of sprouts. Lastly, check the cream and cheese for freshness. High-quality ingredients make your risotto shine. If you want to explore more, check the Full Recipe for additional tips. Start by gathering all your ingredients. You'll need Arborio rice, assorted mushrooms, onion, garlic, heavy cream, Parmesan cheese, olive oil, and butter. Have your vegetable broth warming on the stove. This makes the cooking easier. Next, finely chop your onion and mince the garlic. Slice the mushrooms, making sure they are all roughly the same size. This helps them cook evenly. Heat the olive oil and butter in a large skillet over medium heat. Add the chopped onion and cook for about five minutes. You want it soft and clear. Then, add the minced garlic and sliced mushrooms. Stir for about eight minutes, until the mushrooms are tender and golden. Now, add the Arborio rice to the skillet. Stir it for one to two minutes. You want the rice to get a bit toasty. This step is key for flavor. Begin adding the warm vegetable broth, one ladle at a time. Keep stirring! Wait until most of the broth is absorbed before adding more. This should take around 18 to 20 minutes. The rice should be creamy but still firm. Once the rice is just right, turn down the heat. Stir in the heavy cream and the remaining tablespoon of butter. Mix until everything is creamy and smooth. Remove the skillet from the heat. Fold in the grated Parmesan cheese. This adds a nice cheesy flavor. Taste your risotto and add salt and pepper if needed. Let the risotto sit for a few minutes. This helps it thicken a bit. When ready to serve, ladle it into bowls and top with fresh parsley and extra Parmesan. Enjoy this delicious creamy mushroom risotto! For the complete recipe, check out the Full Recipe. To make your risotto creamy, use Arborio rice. This rice has a higher starch content, which gives risotto its rich texture. Always add warm broth gradually. Stir often to help release the starch. When the rice is nearly done, stir in heavy cream and butter. This final touch boosts creaminess. One common mistake is adding too much broth at once. This can lead to uneven cooking. Avoid using cold broth, as it can cool down the rice and disrupt cooking. Don't rush the stirring process. Stirring helps the rice release its starch, making it creamy. Lastly, watch the heat. Too high can burn the rice, while too low can make it mushy. Use a large skillet for even cooking. A wooden spoon is best for stirring because it won't scratch the pan. A ladle helps add broth slowly. A thermometer can ensure your broth is at the right temperature. Finally, a good knife is key for chopping ingredients like mushrooms and onions. For the full recipe, check out the [Full Recipe]. {{image_4}} You can easily add protein to your creamy mushroom risotto. Chicken or shrimp work well. Simply sauté them in the skillet before adding the onions. For a vegetarian twist, add tofu or chickpeas. These choices boost nutrition and flavor. To elevate the taste, consider adding herbs or spices. Fresh thyme or rosemary adds a lovely depth. A splash of white wine enhances the dish's richness. You can also try a touch of truffle oil for a gourmet flair. These options make each bite exciting and unique. Seasonal vegetables can transform your risotto. In spring, add peas or asparagus for a fresh taste. Summer brings zucchini and corn, while fall calls for pumpkin or butternut squash. Winter is perfect for kale or spinach. Each season offers its own bounty, making your risotto vibrant and colorful. For the full recipe, check out the Creamy Mushroom Risotto Delight. After enjoying your creamy mushroom risotto, let it cool down. Place it in an airtight container. Store it in the fridge. It will stay fresh for about three days. Keep it away from strong-smelling foods to avoid flavor transfer. When you're ready to eat the leftovers, take them out. Add a splash of broth or water to the risotto. This helps bring back the creaminess. Heat it gently in a saucepan over low heat. Stir often until it is warm. You can also use a microwave. Just heat it in short bursts, stirring in between. If you want to save risotto for later, freezing is a good option. First, let the dish cool completely. Then, scoop portions into freezer-safe bags. Remove as much air as possible before sealing. Label the bags with the date. You can freeze it for up to three months. When ready to eat, thaw in the fridge overnight and reheat as mentioned above. For the full recipe, check the earlier section. Risotto stays fresh in the fridge for about 3 to 4 days. Make sure to store it in an airtight container. This keeps it from drying out and helps keep the flavor. When you reheat it, add a little broth or water to bring back its creamy texture. You can use brown rice, but the texture will change. Brown rice takes longer to cook and won’t be as creamy. Arborio rice has more starch, which gives risotto its classic creamy feel. If you decide to use brown rice, be ready for a chewier bite and a longer cooking time. You can add many tasty ingredients to make your risotto unique. Here are some ideas: - Cooked chicken or shrimp for protein - Peas or spinach for color and nutrition - Fresh herbs like thyme or rosemary for depth of flavor - A splash of white wine for acidity and brightness Feel free to get creative and mix in what you love. You can find the full recipe for creamy mushroom risotto in the earlier sections! In this blog post, we explored key ingredients for tasty risotto. We covered preparation, cooking steps, and helpful tips to avoid mistakes. You learned how to achieve creaminess and the best tools to use. Seasonal variations add excitement, and knowing how to store leftovers extends enjoyment. Remember, fresh ingredients make all the difference. Use the guidelines for reheating and freezing. Experiment with flavors and enjoy every bite. Making risotto can be fun and rewarding!

Creamy Mushroom Risotto Simple and Savory Recipe

Are you ready to create a creamy mushroom risotto that’s both simple and delicious? This dish brings comfort and flavor

Here’s what you need to make fluffy pancakes with blueberries: - 1 cup all-purpose flour - 2 tablespoons granulated sugar - 1 tablespoon baking powder - 1/2 teaspoon salt - 1 cup whole milk (or almond milk) - 1 large egg - 2 tablespoons unsalted butter - 1 cup fresh blueberries - 1 teaspoon pure vanilla extract - Maple syrup for serving These ingredients come together to create a tasty breakfast treat. The flour gives the pancakes structure. Sugar adds a hint of sweetness. Baking powder makes them rise and stay fluffy. The milk helps keep the batter moist. The egg binds everything together. Butter adds richness. Blueberries provide juicy bursts of flavor. Finally, the vanilla brings warmth to every bite. You can use almond milk if you prefer a dairy-free option. The key is to have fresh blueberries for the best taste. Make sure you have all these ingredients ready before you start cooking. For more details, check the Full Recipe. Sifting flour, sugar, baking powder, and salt is key. It removes lumps and adds air. This makes your pancakes light and fluffy. Use a fine sieve or sifter. Combine everything in a large mixing bowl. Make sure to mix well until all ingredients are uniform. Next, whisk the wet ingredients. In a separate bowl, combine milk, egg, melted butter, and vanilla. Mix until it looks smooth and creamy. This step brings rich flavor to the pancakes. Room temperature ingredients work best. They blend easily and help create the fluffiest texture. Now, mix the wet and dry ingredients. Pour the wet mix into the dry bowl. Use a wooden spoon or spatula to stir. Be gentle and don’t overmix. Some lumps are okay; they help keep pancakes fluffy. After mixing, fold in the blueberries. This adds a burst of flavor in every bite. For cooking, preheat a non-stick skillet over medium heat. Lightly grease it with butter or cooking spray. Pour about 1/4 cup of batter for each pancake. Cook for 2-3 minutes. Watch for bubbles and set edges. Then, flip gently with a spatula. Cook for another 1-2 minutes until golden brown. Remove the pancakes and keep them warm if needed. Serve them hot, topped with extra blueberries and maple syrup. This makes for a delightful breakfast treat. For the detailed process, refer to the Full Recipe. To make fluffy pancakes, you must avoid overmixing the batter. Overmixing makes the pancakes dense. Mix just until the dry and wet ingredients are combined. Lumps in the batter are okay. They help keep the pancakes light and airy. Using room temperature ingredients also matters. Cold milk or eggs can slow down the chemical reactions needed for fluffiness. So, take your milk and egg out ahead of time. This simple step makes a big difference in texture. The temperature of your pan is key. Preheat your skillet on medium heat. A hot pan helps the pancakes rise and brown nicely. If it’s too hot, the outside will burn before the inside cooks. To know when to flip your pancakes, watch for bubbles. When bubbles form on the surface and the edges look set, it’s time to flip. This ensures they cook evenly and stay fluffy. For a beautiful pancake stack, try to stack them high on a warm plate. Sprinkle extra blueberries on top for color and flavor. A light dusting of powdered sugar adds elegance. Serve with a small bowl of maple syrup on the side. This allows guests to dip their pancakes, making it a fun experience. The Full Recipe gives you all you need to create this perfect breakfast treat! {{image_4}} You can easily adjust this fluffy pancake recipe to fit dietary needs. For a dairy-free option, swap whole milk for almond milk. Almond milk gives a nice flavor and keeps the pancakes soft. If you need gluten-free pancakes, use a gluten-free flour blend instead of all-purpose flour. This makes them safe for those with gluten sensitivities while still tasting great. Want to change up the flavors? You can add lemon zest to the batter. This gives the pancakes a fresh, citrus twist that brightens every bite. You can also try adding different fruits like strawberries or bananas. Spices like cinnamon or nutmeg can add warmth and depth to the flavor. Just mix in your choices and enjoy a new breakfast treat! You can store leftover pancakes easily. First, let them cool down to room temperature. Then, stack the pancakes with parchment paper in between each one. This step keeps them from sticking together. Place the stack in an airtight container or a resealable plastic bag. You can refrigerate them for up to three days. If you want to keep them longer, freeze the pancakes. For freezing, wrap each pancake in plastic wrap, then place them in a freezer bag. They can last for up to two months in the freezer. To reheat pancakes, you want to keep them fluffy. The best method is using a microwave. Place a pancake on a microwave-safe plate. Cover it with a damp paper towel. Heat for about 20-30 seconds. Check if it’s warm enough. If not, add a few more seconds. Another good option is using a skillet. Preheat the skillet on low heat and add a little butter. Place the pancake in the skillet for about 1-2 minutes on each side. This method makes them crispy on the outside and warm inside. Enjoy your pancakes again as if they were just made! You can find the Full Recipe to make these delightful pancakes fresh anytime. Yes, you can use frozen blueberries. They will work well in this recipe. Frozen berries may soften more than fresh ones. This can add extra juice to your pancakes. To prevent too much juice, add the frozen blueberries straight to the batter without thawing them. This way, they keep their shape better. If you like a burst of flavor, frozen blueberries can be a great choice. To make pancakes fluffy, follow these simple tips: - Use fresh baking powder. Old powder may not rise well. - Do not overmix the batter. A few lumps are okay. - Use room temperature ingredients. They mix better and create air bubbles. - Let the batter rest for about five minutes. This helps the gluten relax. - Cook on medium heat. Too high heat can burn the pancakes before they rise. If you want a vegan option, try these substitutes: - 1/4 cup applesauce can replace one egg. - 1/4 cup mashed banana works well too. - 1 tablespoon ground flaxseed mixed with 2.5 tablespoons water is another choice. These options keep the pancakes moist but may change the taste slightly. You can keep leftover pancakes in the fridge for about 3 days. Store them in an airtight container. For longer storage, freeze them. They can last up to 2 months in the freezer. To reheat, place them in the toaster or microwave. Enjoy your pancakes warm! For the full recipe, check out the main article. You now have a complete guide to making fluffy pancakes with blueberries. I shared the key ingredients, step-by-step instructions, and tips to get those pancakes just right. You can enjoy delicious variations and know how to store or reheat leftovers effectively. With this knowledge, your pancake game is strong. Get ready to wow your family and friends with tasty, fluffy pancakes. Happy cooking!

Fluffy Pancakes with Blueberries Perfect Breakfast Treat

Get ready to elevate your breakfast game with my Fluffy Pancakes with Blueberries! These pancakes are soft, delicious, and packed

To make a great spicy chickpea curry, you need: - 2 cans (15 oz each) of chickpeas, thoroughly drained and rinsed - 1 medium onion, finely chopped - 3 cloves garlic, minced - 1 inch piece of fresh ginger, minced - 2 medium ripe tomatoes, diced - 1 can (14 oz) of creamy coconut milk - 2 tablespoons of fragrant curry powder - 1 teaspoon ground cumin - 1 teaspoon turmeric powder - 1/2 teaspoon cayenne pepper (adjust to personal spice preference) - 2 tablespoons olive oil - Salt, to taste - Fresh cilantro leaves, for garnish - Cooked rice or warm naan bread, for serving Choosing fresh ingredients makes your curry taste better. Here are some tips: - Chickpeas: Pick canned chickpeas that are firm and without dents. - Onion: Look for smooth, firm onions with no soft spots. - Garlic and Ginger: Choose plump cloves of garlic and fresh ginger that feel heavy. - Tomatoes: Use ripe tomatoes that smell sweet and have a vibrant color. - Coconut Milk: Select a can with a good seal and no bulging. Chickpeas are the star of this dish. They add protein and fiber, making the curry filling. Their nutty flavor pairs well with spices. When you cook them, they soak up all the tasty sauce. This makes each bite delicious and satisfying. Plus, chickpeas are great for your health. They help keep your heart strong and can aid digestion. Using chickpeas is an easy way to boost nutrition in your meals. To make spicy chickpea curry, gather your ingredients first. You need chickpeas, onion, garlic, ginger, tomatoes, coconut milk, and spices. This will make your cooking smooth and fun. Prepare the veggies by chopping them finely. This helps them cook evenly. Make sure to rinse the chickpeas well to remove any canning liquid. 1. Heat the Oil: In a large pot, heat the olive oil over medium heat. Wait until it shimmers. 2. Sauté the Aromatics: Add the onion to the pot. Stir it often until it turns soft and clear, about 5 minutes. Then, add the garlic and ginger. Cook for 2 more minutes until the smell fills your kitchen. 3. Add the Spices: Toss in the curry powder, cumin, turmeric, and cayenne pepper. Stir this mix for about 1 minute. This helps the spices release their flavors. 4. Incorporate the Tomatoes: Add the diced tomatoes next. Cook them for about 5 minutes. They should break down and add moisture to your curry. 5. Pour in the Chickpeas: Carefully add the drained chickpeas. Mix them well with the spices and tomatoes. 6. Engage with Coconut Milk: Slowly pour in the coconut milk. Gently bring the mixture to a simmer. Let it cook for 15 to 20 minutes. Stir it now and then until the curry thickens. 7. Taste and Season: After cooking, taste your curry. Adjust salt and spice to your liking. This step makes sure the flavors are just right. 8. Serve: Remove the pot from heat. Serve the curry hot, garnished with fresh cilantro. Enjoy it with rice or warm naan bread. - Skipping the Rinsing Step: Always rinse the chickpeas. This removes excess sodium and improves flavor. - Not Tasting Before Serving: Always taste your curry before serving. Adjusting flavors makes a big difference. - Overcooking the Aromatics: Don’t let the garlic and ginger burn. They should be fragrant but not dark. - Using Low-Quality Spices: Use fresh spices for the best taste. Old spices lose their flavor and aroma. Using this step-by-step guide makes cooking simple and fun. For the full recipe, check out the complete details! To boost flavor, use fresh herbs like cilantro. They add brightness. A squeeze of lime juice can also add zest. Experiment with different spices based on your taste. Try adding garam masala or curry leaves for a unique twist. Always taste and adjust seasoning as you go. This will ensure every bite is full of flavor. For a creamy curry, use low heat when simmering. This lets the coconut milk blend well. Cook the garlic and onions until soft, but do not burn them. This step builds a great base. Stir the chickpeas gently to avoid mashing them. A slight crunch adds a nice texture to your dish. Use a large pot or Dutch oven for even cooking. A wooden spoon helps in stirring without scratching the pot. A sharp knife makes chopping onions and ginger easy. A can opener is a must for those chickpeas! Finally, have measuring spoons handy for accurate spice amounts. These tools will make the cooking process smoother and more enjoyable. For the full recipe, check out the detailed steps above. {{image_4}} This spicy chickpea curry is already vegan. You can enjoy it with no meat or dairy. If you want to add more veggies, try adding spinach or bell peppers. These add color and nutrition. You can also swap chickpeas for lentils for a different taste. Just adjust the cooking time as needed. Want to change things up? You can add proteins like chicken or shrimp. Cook the meat first in the pot before adding the onions. Once the meat is cooked, follow the same steps for the curry. This keeps the flavor strong. If you prefer tofu, add it after the chickpeas. Let it simmer to soak up the spices. Many people have different diets. If you need to avoid coconut milk, use almond milk or vegetable broth. This keeps the dish creamy but lowers the fat. For a gluten-free option, ensure the curry powder is gluten-free. You can also add different beans if you can't find chickpeas. Black beans or kidney beans work great too. For the full recipe, check the section above. After you enjoy your spicy chickpea curry, store any leftovers in an airtight container. Let the curry cool to room temperature first. This helps keep moisture out. Place the container in the fridge. Your curry can last for about 3 to 4 days. Make sure to label the container with the date you made it. This way, you’ll remember how fresh it is. If you want to save the curry for later, freezing is a great option. Use freezer-safe containers or bags. Divide the curry into smaller portions for easy thawing. Leave some space in the container for the curry to expand as it freezes. You can store it for up to 3 months. When ready to eat, just defrost it overnight in the fridge. Reheating the curry is simple. You can use the microwave or stovetop. If using the microwave, heat the curry in short bursts. Stir it every minute to ensure even heating. For the stovetop, pour the curry into a pot over low heat. Stir often to avoid sticking. Add a splash of water or coconut milk if it feels too thick. Enjoy your curry warm, just like fresh! For the full recipe, check out the [Full Recipe]. You can serve spicy chickpea curry with rice or naan. Both are great choices. Rice soaks up the sauce well. Naan wraps around the curry nicely. You may also add a side salad. A simple cucumber salad adds freshness. Yogurt can cool the heat, too. Try serving it with pickled vegetables for a tangy crunch. Yes, you can make spicy chickpea curry in advance. It tastes even better the next day. Just let it cool and store it in the fridge. Use an airtight container for best results. Reheat it on the stove or in the microwave. It’s quick and easy. This makes it a great meal prep option. Chickpeas are packed with protein and fiber. They help keep you full longer. They support muscle growth and digestion. Chickpeas also contain vitamins and minerals. These include iron, magnesium, and folate. Their low glycemic index helps regulate blood sugar. Eating chickpeas can improve heart health. They are a smart choice for a healthy diet. For the full recipe, check out the link! In this blog post, we explored the key ingredients and steps to make spicy chickpea curry. You learned how to pick fresh ingredients and the role of chickpeas in your dish. We discussed cooking tips, common mistakes, and various ways to customize your curry. Finally, we covered storage methods to keep your meal fresh. Preparing this curry can be simple and fun. With the right guidance, you can make a dish that impresses your taste buds and your guests. Enjoy your cooking!

Spicy Chickpea Curry Flavorful and Easy Recipe

If you’re craving a warm, hearty meal that packs a punch, you’re in the right place! My Spicy Chickpea Curry

Older posts
Newer posts
← Previous Page1 … Page75 Page76 Page77 … Page90 Next →

dsad

© 2025 recipetorch • Built with GeneratePress

Our Policies

  • Copyright Policy
  • Cookie Policy
  • GDPR Policy
  • Privacy Policy
  • Disclaimer
  • Terms Of Use

More Information

  • Home
  • About
  • Contact
  • Appetizers
  • Dessert
  • Dinner
  • Drinks
©2025, recipetorch About Back To Top