Skip to content
DisclaimerTerms Of UseGDPR PolicyCookie Policy

recipetorch

  • Home
  • Drinks
  • Appetizers
  • Dinner
  • Dessert
  • About
  • Contact
  • Privacy Policy
DisclaimerTerms Of UseGDPR PolicyCookie Policy

Nicole

To make Cajun Shrimp and Steak Alfredo, you need: - 8 oz fettuccine pasta - 1 lb shrimp, peeled and deveined - 1 lb flank steak, sliced into thin strips - 2 tablespoons Cajun seasoning - 3 tablespoons olive oil, divided - 4 cloves garlic, minced - 1 cup heavy cream - 1 cup grated Parmesan cheese - Salt and pepper, to taste - Fresh parsley, chopped (for garnish) You can change some ingredients to suit your taste or needs. For pasta, try penne or gluten-free pasta. If you want a different protein, chicken or tofu work well. For a dairy-free option, use coconut cream and nutritional yeast instead of heavy cream and Parmesan. When buying shrimp, look for ones that smell fresh and are firm to the touch. Clear, shiny shells mean they are fresh. For flank steak, choose a cut that is bright red with some marbling. This marbling gives the meat flavor. Use a good Parmesan cheese for the best taste. Aged Parmesan has a stronger flavor, which enhances the dish. Before you start cooking Cajun Shrimp and Steak Alfredo, it’s key to prep all your ingredients. This makes cooking smooth and fun. Gather everything you need. It saves time and helps you avoid mistakes. Chop your garlic, measure your cream, and season your proteins. Having everything ready keeps your kitchen tidy and organized. 1. Prepare the Pasta: Boil salted water in a large pot. Add the fettuccine and cook until al dente. Reserve 1 cup of pasta water before draining. Set the pasta aside in a large bowl. 2. Season the Shrimp and Steak: In one bowl, mix the shrimp with 1 tablespoon of Cajun seasoning. In another bowl, coat the flank steak with the rest of the Cajun seasoning. Make sure they are well covered. 3. Cook the Steak: Heat 1 tablespoon of olive oil in a large skillet over medium-high heat. Add the steak in a single layer and cook for 3-4 minutes on each side until browned. Remove the steak and place it on a plate. 4. Sauté the Shrimp: In the same skillet, add another tablespoon of olive oil and the minced garlic. Sauté for about 30 seconds until fragrant. Then, add the shrimp and cook for 2-3 minutes until pink and opaque. Remove the shrimp and set aside with the steak. 5. Prepare the Alfredo Sauce: Lower the heat and pour in the heavy cream. Stir gently to warm the cream. Gradually add the Parmesan cheese while stirring until melted. If it’s too thick, use some reserved pasta water to thin it out. 6. Combine Everything: Add the drained fettuccine to the skillet with the Alfredo sauce. Toss well to coat the pasta evenly. Gently fold in the shrimp and steak, mixing them into the pasta. 7. Season and Serve: Taste the dish and adjust with salt and pepper if needed. Serve in bowls, garnished with chopped parsley for a fresh look. When you plate your Cajun Shrimp and Steak Alfredo, make sure every piece of pasta is nicely coated with sauce. This gives every bite a burst of flavor. Arrange the shrimp and steak on top for a beautiful presentation. Enjoy the rich, creamy sauce and the spicy kick from the Cajun seasoning. This dish is not just food; it’s an experience! For the complete cooking process, refer to the Full Recipe. To make your Cajun shrimp and steak Alfredo just right, adjust the spice levels. You can add more Cajun seasoning if you like heat. If you want it milder, reduce the amount. Start with one tablespoon and taste as you go. This way, the dish suits your taste. You can also add garlic powder or onion powder for extra depth. Want a smoky touch? Try adding smoked paprika. This adds another layer of flavor without overpowering the dish. A creamy Alfredo sauce is key to this dish. To avoid separation, heat the cream gently. Don’t boil it. Stir in the cheese slowly. This helps it melt evenly and keeps the sauce smooth. If the sauce gets too thick, use some reserved pasta water. This not only thins the sauce but also helps it cling to the pasta better. Aim for a coating that feels rich without being heavy. For a stunning look, serve your dish in shallow bowls. This allows the colors to shine. Sprinkle extra Parmesan cheese on top for a nice touch. Add a few whole shrimp or steak strips for a gourmet feel. Finish with a light drizzle of olive oil. This not only adds shine but enhances flavor too. You can also garnish with fresh parsley for a pop of color. These small touches make your meal feel special and inviting. For the full recipe, check the detailed instructions provided earlier. {{image_4}} You can change this dish in fun ways. Try adding vegetables like bell peppers or spinach. These add color and nutrients. You can also use different proteins. Chicken or scallops work well with the Cajun spices too. For pasta, fettuccine is great, but you can swap it for penne or gluten-free options. This keeps the dish fresh and exciting. If you need gluten-free options, use gluten-free pasta. There are many types available. For a dairy-free version, swap heavy cream with coconut milk or a nut-based cream. You can also use nutritional yeast instead of Parmesan cheese for a cheesy flavor without dairy. These changes let everyone enjoy this dish. Make this dish your own by adding local flavors. For example, you can use local spices or herbs that match your area. If you're in the Southwest, add some chipotle for a smoky kick. In the Northeast, a splash of white wine can brighten the sauce. These regional twists add a unique touch to Cajun Shrimp and Steak Alfredo. To store Cajun Shrimp and Steak Alfredo, first let it cool to room temperature. Place the dish in an airtight container. This helps keep the flavors fresh. You can refrigerate it for up to three days. If you want to keep it longer, freeze it. Use freezer-safe bags or containers. Make sure to remove as much air as possible. This prevents freezer burn. When reheating, you want to keep the dish creamy. Use a skillet over low heat for best results. Add a splash of milk or cream to help bring back the sauce's texture. Stir often to avoid sticking. You can also use the microwave. Heat in short bursts, stirring in between. This helps distribute the heat evenly. Leftovers can be stored in the fridge for about three days. If frozen, you can keep them for up to three months. After this time, the dish can lose flavor and texture. Always check for signs of spoilage before consuming. If it smells off or looks strange, it’s best to toss it. Yes, you can use frozen shrimp. They are convenient and save time. Just thaw them first. Place the shrimp in a bowl of cold water for about 15 minutes. This helps them cook evenly. Cooking frozen shrimp takes a bit longer. Keep an eye on them to ensure they turn pink and opaque. If you don't have Cajun seasoning, you can mix your own. Combine paprika, garlic powder, onion powder, thyme, and cayenne pepper. Adjust the spice levels to fit your taste. You can also use taco seasoning for a similar flavor profile. To add heat, consider using more cayenne pepper in your seasoning mix. You can also include sliced jalapeños or crushed red pepper flakes when cooking. Taste as you go to find the right balance. Remember, you can always add more spice, but it's hard to take it away. Yes, Cajun Shrimp and Steak Alfredo works well for meal prep. Cook the pasta and proteins in advance, then store them separately. Keep the Alfredo sauce in a jar. This way, you can assemble the dish fresh each time. Store everything in airtight containers in the fridge for up to three days. In this blog post, we explored the key ingredients for Cajun Shrimp and Steak Alfredo, from pasta to spices. I shared steps for prepping and cooking to ensure perfect flavors. We covered tips to adjust spice levels and make creamy sauces. You also learned about fun variations and how to store leftovers safely. Cooking this dish will be an enjoyable experience. With the right ingredients and techniques, you can create a delicious meal. Enjoy making it your own!

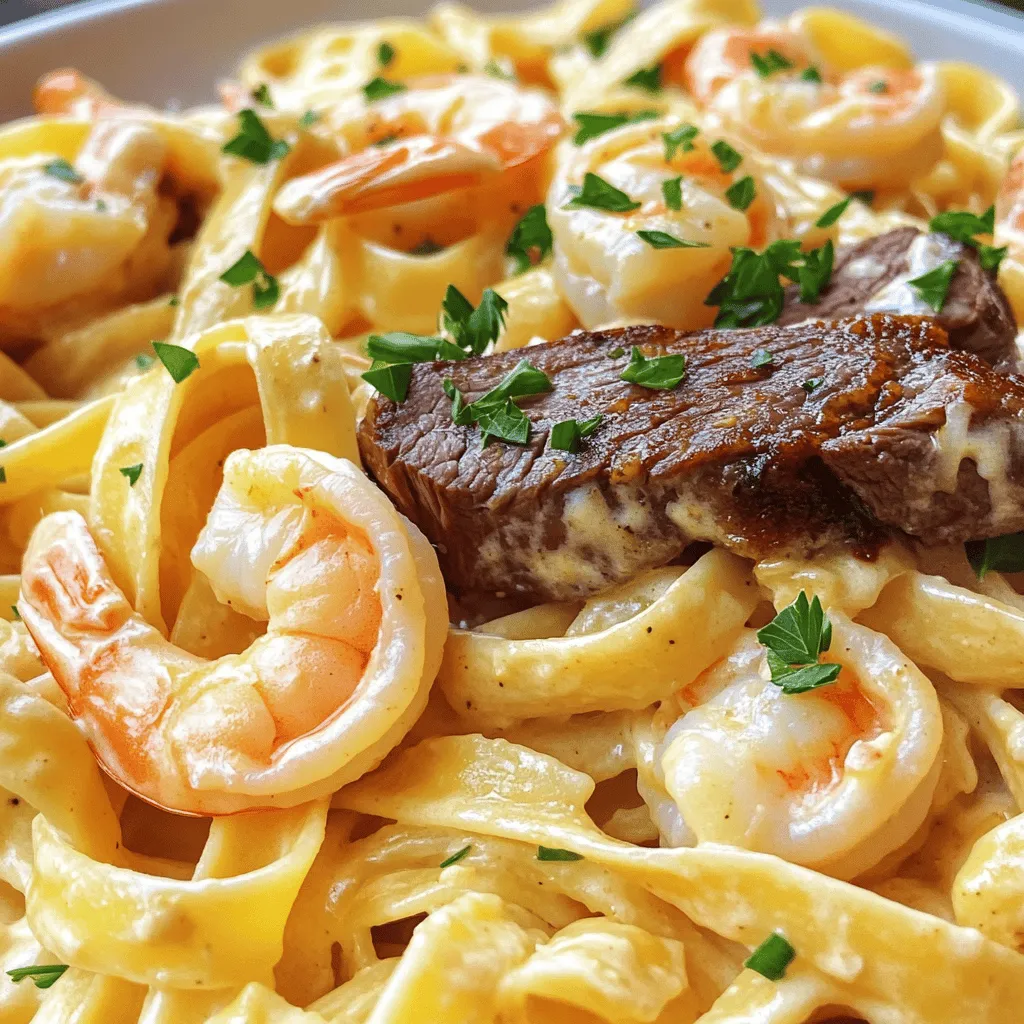
Cajun Shrimp and Steak Alfredo Flavorful Dinner Dish

Are you ready to elevate your dinner game? Cajun Shrimp and Steak Alfredo is a rich and zesty dish that

To make a great Buffalo Chicken Alfredo Pasta, you need some simple ingredients. Here’s what you’ll need: - 8 oz fettuccine pasta - 2 tablespoons olive oil - 1 lb chicken breast, diced into bite-sized pieces - 1 teaspoon garlic powder - 1 teaspoon onion powder - 1 teaspoon smoked paprika - Salt and pepper, to taste - 1/2 cup buffalo sauce (adjust to your spice preference) - 1 cup heavy cream - 1 cup freshly grated Parmesan cheese - 2 tablespoons chopped fresh parsley (for garnish) Each ingredient plays a key role in making this dish delicious. The fettuccine pasta serves as a great base. It holds the creamy sauce well. The chicken adds protein and heartiness. Seasonings like garlic powder and smoked paprika create depth. Buffalo sauce adds that spicy kick. The heavy cream and Parmesan cheese make the Alfredo sauce rich and smooth. Finally, parsley adds a fresh touch. When you gather these ingredients, you set the stage for a warm, comforting meal. You can adjust ingredients based on your taste. Want it spicier? Add more buffalo sauce. Prefer it creamier? Use extra heavy cream. The choice is yours, making this dish fun and flexible. You can find the full recipe details to guide you through the cooking process. To start, fill a large pot with water. Add a good amount of salt to the water. Bring it to a rolling boil. Carefully add the fettuccine. You want to cook it for about 8-10 minutes until it is firm yet tender, known as al dente. This gives the pasta a nice bite. After cooking, drain the pasta but don’t forget to reserve about 1/2 cup of that starchy pasta water. This water helps to adjust the sauce later. Next, let’s focus on the chicken. In a large skillet, heat 2 tablespoons of olive oil over medium-high heat. Wait until the oil is hot, then add the diced chicken. For a tasty kick, sprinkle in 1 teaspoon each of garlic powder, onion powder, and smoked paprika. Add salt and pepper to taste. Cook the chicken for about 6-8 minutes. Stir occasionally until it turns golden brown and is fully cooked. This gives the chicken a nice flavor and a great look. Now, let’s create the sauce. Lower the heat to medium-low. Pour in the buffalo sauce, coating the cooked chicken well. Let it simmer for about 2 minutes to mix the flavors. Next, we will make the Alfredo sauce. Move the chicken to one side of the skillet. Pour 1 cup of heavy cream into the other side. Stir it gently until it starts to simmer. Gradually whisk in 1 cup of grated Parmesan cheese. Keep stirring until it melts completely. You now have a creamy, rich sauce. It’s time to bring everything together. Carefully add the cooked fettuccine to the skillet. Toss it gently with the buffalo chicken and creamy sauce. If you find the sauce is too thick, use that reserved pasta water. Add it slowly, a little at a time, until you get the right consistency. Make sure to mix everything well so the pasta is fully coated. Don’t forget to taste it! Adjust the seasoning with more salt, pepper, or buffalo sauce if you like it spicy. For the full recipe, you can refer to the instructions listed above. Enjoy your flavorful comfort meal! To make your Buffalo Chicken Alfredo Pasta even tastier, try adding a few spices. Consider using cayenne pepper for more heat or a pinch of smoked paprika for a subtle smoky taste. You can also toss in some chopped green onions for a fresh touch. If you want to balance the heat from the buffalo sauce, add a splash of lemon juice. This makes the flavors pop and cuts through the richness of the cream. For this recipe, you really need a large skillet. It helps cook the chicken evenly and combine the sauce nicely. A whisk is great for mixing the cream and cheese, ensuring a smooth sauce. One common mistake is overcooking the chicken. Make sure to cook it just until golden brown. This keeps it juicy and tender. Serving matters! Use deep bowls for a nice look. A sprinkle of fresh parsley adds color and freshness. For a special touch, drizzle some extra buffalo sauce on top. You can also add a few slices of celery on the side for crunch. If you want to impress, layer the pasta and sauce in a baking dish and bake it for a few minutes. This gives it a beautiful, bubbly top. {{image_4}} You can make Buffalo Chicken Alfredo Pasta using different proteins. If you want a seafood twist, try shrimp. Simply sauté the shrimp for about 3-4 minutes until they turn pink. For a plant-based option, use tofu. Press the tofu to remove water, then cube it. Sauté it until golden brown for a tasty vegan choice. These swaps keep your meal exciting while catering to various diets. Fettuccine is classic, but other pasta types work great too. Penne, rigatoni, or even rotini can add fun shapes and textures. If you're gluten-free, use brown rice pasta or chickpea pasta. These alternatives taste amazing and keep the dish hearty. They make it easy for everyone to enjoy a comforting pasta meal. Buffalo sauce is key, but you can adjust it to suit your taste. For a milder flavor, use half the buffalo sauce and mix in some ranch dressing. This gives a creamy, cool balance. Feel free to add veggies like spinach or bell peppers to the sauce for extra nutrition. Different cheese types, like mozzarella or gouda, can also enhance the creaminess and add depth to your dish. To keep your Buffalo Chicken Alfredo Pasta fresh, store it in an airtight container. Make sure it cools down to room temperature before sealing it. This helps prevent moisture build-up and keeps the pasta from getting mushy. When stored properly, it stays fresh for about 3-4 days in the fridge. When it’s time to enjoy your leftovers, the best way to reheat is on the stove. Heat a skillet over low to medium heat. Add a splash of milk or cream to the pasta. This helps restore its creaminess. Stir frequently to avoid sticking or burning. You can also use the microwave. Just cover the dish and heat in short intervals, stirring in between. This keeps it from drying out. Fettuccine is the best pasta for this dish. It has a nice, thick texture that holds the creamy sauce well. You can also use penne or rigatoni if you prefer. These shapes catch the sauce and chicken bits, making every bite tasty. For a gluten-free option, look for gluten-free pasta that matches the shape you like. Yes, you can prepare Buffalo Chicken Alfredo ahead of time. Cook the pasta and chicken, then store them separately. Keep the sauce in another container. When you're ready to eat, just heat everything together. It’s best to eat it within two days for freshness. To make this dish less spicy, use less buffalo sauce. You can also mix in some cream or cheese to balance the heat. If you want it milder, try using a mild buffalo sauce. Another option is to add more heavy cream to the sauce, which will cool it down. Buffalo Chicken Alfredo can be kid-friendly with a few tweaks. If your kids don’t like spice, cut back on the buffalo sauce. You can offer it on the side for dipping. Serve the pasta with extra cheese on top for added flavor. Kids usually love creamy pasta dishes, so this one is a hit! For the complete detailed instructions on how to make Buffalo Chicken Alfredo Pasta, check the full recipe above. This blog post covers how to make Buffalo Chicken Alfredo Pasta. We discussed key ingredients, cooking steps, and tips for best results. Don’t forget the importance of reserving pasta water for a creamy sauce. You can make this dish fit your taste by customizing proteins and spices. Lastly, storage tips help you keep leftovers fresh. Enjoy creating this delicious meal and impressing your family and friends with your cooking skills. Happy cooking!

Buffalo Chicken Alfredo Pasta Flavorful Comfort Meal

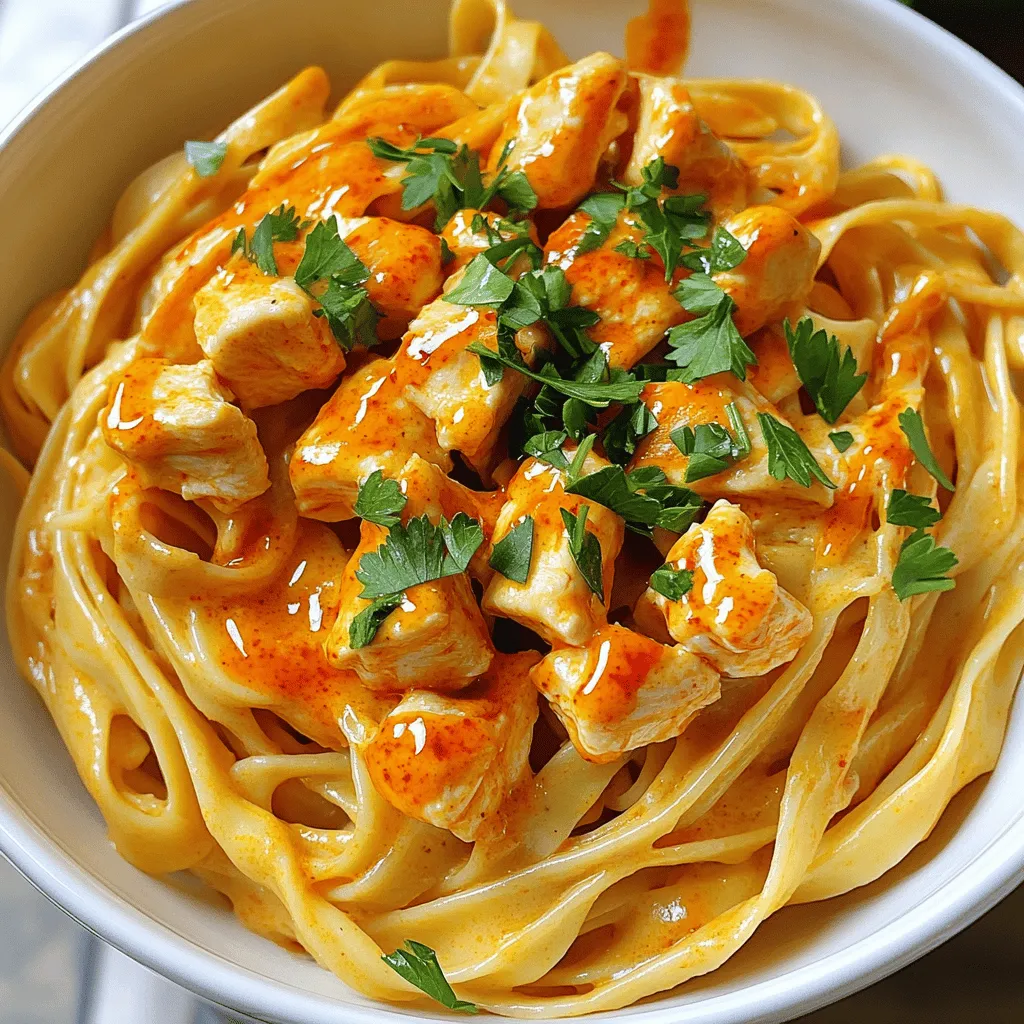
Are you ready to dive into a dish that brings comfort and flavor together? Buffalo Chicken Alfredo Pasta is the

For these tasty rolls, you will need: - 200g feta cheese, crumbled - 1 cup fresh spinach, chopped - 1/2 cup sun-dried tomatoes, finely chopped - 1 teaspoon dried oregano - 1/2 teaspoon garlic powder - 8 sheets of phyllo pastry - 1/2 cup melted butter or olive oil These ingredients blend well to create a rich, cheesy filling wrapped in crispy pastry. To make these rolls even better, consider adding: - 1/4 teaspoon red pepper flakes (for heat) - Salt and pepper to taste Adding red pepper flakes will give your rolls a nice kick. Adjust the salt and pepper to match your taste. For a little extra flair, try these: - Sesame seeds for garnish Sprinkling sesame seeds on top adds a delightful crunch and makes the rolls look appealing. You can also serve them with a side of tzatziki sauce or a lemon wedge for extra flavor. For a pop of color, a sprig of fresh parsley works well. For the full recipe, check out the details above. Start by preheating your oven to 375°F (190°C). This step is key for a crispy finish. Next, take a large bowl and mix the crumbled feta cheese, chopped spinach, and sun-dried tomatoes. Add the dried oregano, garlic powder, and red pepper flakes if you like some heat. Season this mixture with salt and pepper. Mix well so every bite is full of flavor. Now, lay one sheet of phyllo pastry on your clean surface. Use a pastry brush to coat it with melted butter or olive oil. Place another sheet on top and brush again. Repeat this process for two sheets. Then, cut the layered pastry into 4-inch wide strips. At the end of each pastry strip, spoon 1-2 tablespoons of your feta mixture. Leave about an inch of space on the sides for rolling. Start rolling from the end with the filling, folding in the sides as you go. This keeps the filling secure. Place each roll seam-side down on your lined baking sheet. Once you have all the rolls ready, brush the tops with leftover melted butter or olive oil. Sprinkle sesame seeds over them for added crunch. Bake in the oven for 20-25 minutes until they turn golden brown and crispy. For extra crispy rolls, make sure your phyllo is fresh and not damp. Layering two sheets gives a nice texture. Brush each layer well with butter or oil. Don't skip this step! It helps achieve that golden, crispy exterior. If you want to add more flavor, sprinkle more seasoning on top before baking. Let the rolls cool for a few minutes after baking. This step helps the flavors settle and makes them easier to handle. Enjoy making these delicious crispy oven-fried feta rolls! For detailed instructions, check out the Full Recipe. When making oven-fried feta rolls, avoid overfilling the pastry. Too much filling can make it hard to roll. Make sure to leave space at the edges. Also, do not skip brushing the phyllo with butter or oil. This helps it get crispy. Another mistake is not preheating the oven. It’s vital for even cooking. You can easily change the taste of these rolls. For a spicy kick, add more red pepper flakes. If you love herbs, try fresh basil or dill. You can swap spinach for other greens, like kale or arugula. Adding olives or roasted peppers can give a new twist. Experiment with flavors to find your favorite mix. Phyllo pastry can dry out fast, so work quickly. Keep the sheets covered with a damp cloth while you prepare. When layering, make sure to brush each sheet well. This helps keep the layers flaky. If you tear a sheet, don’t worry. Just patch it with another piece. It will still taste great! {{image_4}} You can change up the filling to make it even more fun. Try using ricotta cheese instead of feta. You could mix in zucchini, mushrooms, or bell peppers. These veggies add texture and flavor. Spinach is a great base, but you can also use kale or arugula. Both offer a unique taste and are packed with nutrients. If you want to make these rolls gluten-free, use gluten-free phyllo pastry. Many stores sell it now. You can also try using corn tortillas instead. Just be aware that the texture will be different. For the filling, ensure your feta cheese is gluten-free. Most brands are, but it's good to check. You can get creative with flavors! Add fresh herbs like basil or dill for a bright taste. Adding olives gives a nice salty kick. For a spicy twist, include jalapeños or hot sauce in the filling. You can even try sweet flavors by adding figs or honey. The options are endless, so mix and match as you like! Check out the full recipe to explore all these variations in depth. Enjoy experimenting! To keep your leftover feta rolls fresh, let them cool first. Place them in an airtight container. You can layer them with parchment paper to avoid sticking. Store them in the fridge for up to three days. Make sure to seal the container well to keep them from drying out. To reheat your feta rolls, preheat your oven to 350°F (175°C). Place the rolls on a baking sheet. Bake for about 10 minutes or until they are hot and crispy again. This method helps maintain their crunch. You can also use an air fryer at 350°F for about 5-7 minutes. If you want to freeze your feta rolls, first let them cool completely. Wrap each roll in plastic wrap, then place them in a freezer-safe bag. They can stay in the freezer for up to three months. To cook from frozen, bake them at 375°F (190°C) for about 25-30 minutes, or until golden brown. This way, you can enjoy your crispy feta rolls anytime! Check the [Full Recipe] for more details on preparation. Yes, you can swap feta with other cheeses. Goat cheese adds a tangy taste. Cream cheese gives a smooth feel. Try mozzarella for a mild flavor. Each choice makes the rolls unique. Just keep the cheese crumbly for best results. To prepare early, follow these steps. Make the filling and fill the phyllo rolls. Place them on a baking sheet. Cover with plastic wrap and chill in the fridge. You can bake them later. Just add a few extra minutes to the baking time. Serve these rolls hot and crispy. They pair well with tzatziki sauce for dipping. A fresh salad adds a nice crunch. You can also serve them with olives for a Mediterranean touch. These snacks are perfect for parties or cozy nights at home. Don’t forget to check out the Full Recipe for more tips! You learned how to make tasty oven fried feta rolls. We covered key ingredients, step-by-step instructions, and many tips. I shared ways to customize flavors and options for different diets. You also know how to store and reheat them for later. These rolls are easy to make and fun to serve. Enjoy your cooking and try your favorite flavors for delicious results. Happy cooking!

Oven Fried Feta Rolls Crispy and Flavorful Snack

If you’re looking for a snack that’s both crispy and packed with flavor, then oven-fried feta rolls are your new

When it comes to cast iron pizza pans, a few stand out. Here are my top picks: - Lodge Cast Iron Pizza Pan - Camp Chef Cast Iron Pizza Pan - Cuisinart Cast Iron Round Pizza Pan Each of these pans has unique features that make them great for crispy crusts. 1. Lodge Cast Iron Pizza Pan This pan heats evenly. It has a smooth surface, making it easy to release your pizza. Many users rate it 4.8 out of 5. It’s perfect for beginners and experts alike. 2. Camp Chef Cast Iron Pizza Pan This one is thicker, which helps with heat retention. It also has a built-in handle for easy lifting. Users often score it 4.7 out of 5. It’s great for outdoor cooking too. 3. Cuisinart Cast Iron Round Pizza Pan This pan is lightweight and easy to clean. It heats up quickly, making it ideal for busy cooks. Its rating is 4.6 out of 5. This pan is perfect for small kitchens. - Lodge Cast Iron Pizza Pan - Pros: Durable, great heat distribution, versatile. - Cons: Heavier than some pans. - Camp Chef Cast Iron Pizza Pan - Pros: Thick, great for grilling, easy to handle. - Cons: Takes longer to heat. - Cuisinart Cast Iron Round Pizza Pan - Pros: Lightweight, quick heating, easy to clean. - Cons: May not retain heat as well as thicker pans. Choosing the right cast iron pizza pan can change your pizza game. Each option here offers something special for your kitchen. For the best results, try the Full Recipe included in this article. If you're on a budget, there are great cast iron pizza pans available. Look for brands like Lodge or Utopia Kitchen. They offer solid performance without breaking the bank. A budget-friendly option usually costs around $20 to $30. These pans heat evenly and give a great crust. You can make delicious pizza without spending too much. For those willing to spend a bit more, mid-range pans offer added features. Brands like Camp Chef and Cuisinart are popular in this range. Prices typically range from $30 to $60. These pans often have better heat retention and a more durable finish. They are perfect for home cooks aiming for restaurant-quality pizza. You’ll notice a difference in the crust's crispiness with these pans. If you want the best, consider premium cast iron pans. Brands like Finex and Staub are top choices. These pans can cost $60 and up. They often feature unique designs and superior craftsmanship. With a premium pan, you get even heat distribution and a long-lasting surface. Your pizzas will turn out perfectly crispy every time. For serious pizza lovers, investing in a high-end pan is worth it. For a delicious pizza recipe, check out the Full Recipe. To start, preheat your oven to 475°F (245°C). This helps your pan get hot quickly. I always recommend placing the cast iron skillet inside as it warms up. This step is key for that crispy crust you want. After preheating, add a bit of olive oil to the pan. Make sure to coat it well. This prevents sticking and gives a nice flavor to your pizza. Next, roll out your dough to fit the skillet. I usually aim for about 12 inches in diameter. Carefully place it in the pan, pressing it up the sides. This creates the perfect crust shape. For a crispy crust, the heat is your best friend. Always ensure the skillet is really hot before adding the dough. You can also blind bake the crust for a few minutes before adding toppings. This step firms it up, making it less soggy. Use a combination of cheese and toppings. The cheese should be generous, helping to seal in the toppings’ moisture. I love using mozzarella and a sprinkle of parmesan for extra flavor. Also, don’t overload with toppings. Too many can make the crust soggy. After enjoying your pizza, let the pan cool slightly. Then, rinse it with hot water. Avoid using soap, as it can strip the seasoning. If stuck bits remain, use a scraper or a stiff brush to clean. Always dry it completely to prevent rust. Once clean, apply a thin layer of oil. This keeps the pan seasoned and ready for your next pizza night. Store it in a dry place. With proper care, your cast iron pan will last for years and make many great pizzas. Want to try making this delicious pizza? Check out the Full Recipe for a step-by-step guide! {{image_4}} To make a great cast iron pizza, you need fresh ingredients. Here’s what you’ll need: - 2 cups all-purpose flour - 1 teaspoon instant yeast - 1 teaspoon salt - 3/4 cup warm water (approximately 110°F) - 1 tablespoon olive oil (plus extra for greasing) - 1 cup pizza sauce (your choice: store-bought or homemade) - 2 cups shredded mozzarella cheese - A mix of your favorite toppings (e.g., pepperoni, bell peppers, onions, mushrooms, etc.) - Fresh basil leaves for a fragrant garnish - A pinch of red pepper flakes (optional, for a spicy kick) Making pizza in a cast iron pan is fun and easy. Follow these steps for a great dish: 1. In a large bowl, mix the flour, yeast, and salt. Stir until blended. 2. Gradually add warm water and olive oil. Stir until a shaggy dough forms. 3. Place the dough on a floured surface. Knead it for about 5 minutes. It should feel smooth and elastic. 4. Put the dough in a greased bowl. Cover it with a damp cloth. Let it rise in a warm place for about 1 hour until it doubles in size. 5. Preheat your oven to 475°F (245°C) with the cast iron skillet inside. This helps make the crust crispy. 6. After the dough rises, punch it down. Roll it out to fit your skillet. It should be about 12 inches wide. 7. Remove the hot skillet from the oven. Drizzle olive oil in the bottom. Place the rolled dough in the skillet, pressing it up the sides. 8. Spread the pizza sauce evenly over the dough, leaving some space around the edges. 9. Sprinkle the shredded mozzarella cheese on top of the sauce. Add your favorite toppings. 10. Return the skillet to the oven and bake for 12-15 minutes. Look for melted cheese and a golden crust. 11. When done, take the skillet out and let it cool for a few minutes. 12. Before serving, add fresh basil leaves and a pinch of red pepper flakes if you like it spicy. 13. Slice the pizza and enjoy while it’s hot! Serve your pizza right from the skillet. This gives a rustic feel. For added flavor, drizzle a bit of balsamic glaze over it just before slicing. Enjoy your homemade cast iron pizza! For a veggie lovers cast iron pizza, focus on fresh vegetables. I love using bell peppers, onions, and mushrooms. You can also add spinach and artichokes. The key is to slice them thin. This helps them cook evenly. A sprinkle of Italian herbs over the top adds great flavor. You can even toss in some olives for a salty touch. Use the full recipe as your base and layer your veggies on top of the cheese. Bake until everything is bubbly and delicious. If you're a meat lover, this pizza is for you. Start with pepperoni and Italian sausage as your main toppings. Bacon adds a smoky flavor that's hard to beat. Don't forget to sprinkle on some cooked ham or chicken. A mix of meats gives each bite a unique taste. Just like the veggie pizza, use the full recipe for the dough and sauce. Bake until the meat is cooked and the cheese is golden. Get creative with your toppings! Try unique options like figs and prosciutto for a sweet and salty mix. You can also use BBQ sauce instead of pizza sauce for a twist. Another fun idea is to use different cheeses. Goat cheese or blue cheese can give your pizza a rich flavor. You can even top it with arugula after baking for a fresh bite. The possibilities are endless! Experiment with your favorite ingredients. Cast iron pizza is all about personal taste. Enjoy making your own unique combinations! To choose the best cast iron pizza pan, look for a few key features. First, consider the size. A 12-inch pan is standard, but larger ones are great for family meals. Next, check the weight. Heavier pans hold heat better, giving you a crispy crust. Also, look for a well-seasoned surface. This helps prevent sticking and makes cleaning easy. Finally, choose a pan with sturdy handles. This way, you can safely lift it out of the oven. Yes, you can use a cast iron pan on the grill. It works great for making pizza outdoors. Just preheat the grill to a high temperature. Place your cast iron pan directly on the grill grates. This gives your pizza a nice, smoky flavor. Keep an eye on the cooking time. It may be shorter than in the oven. Always handle the pan with care, as it will be very hot. Storing a cast iron pizza pan is simple. First, make sure it is clean and completely dry. Moisture can cause rust. You can lightly oil the surface to keep it seasoned. Store it in a cool, dry place. Avoid stacking other pans on top of it to prevent scratches. If you have a lid, use it to protect the pan from dust. Proper storage helps your pan last for years of delicious pizzas. For a delightful pizza experience, try the full recipe for Best Cast Iron Pizza! We’ve covered the best cast iron pizza pans available today. You now know how to choose the right one and understand the pros and cons of each option. We also explored effective tips for using your pan, including prepping and cleaning it. The full recipe gives you everything needed for a perfect pizza, with variations to suit any taste. Cast iron pans are affordable and versatile tools in any kitchen. Enjoy making delicious pizzas that impress your family and friends. Your culinary adventure is just starting!

Best Cast Iron Pizza Pans for Perfectly Crispy Crusts

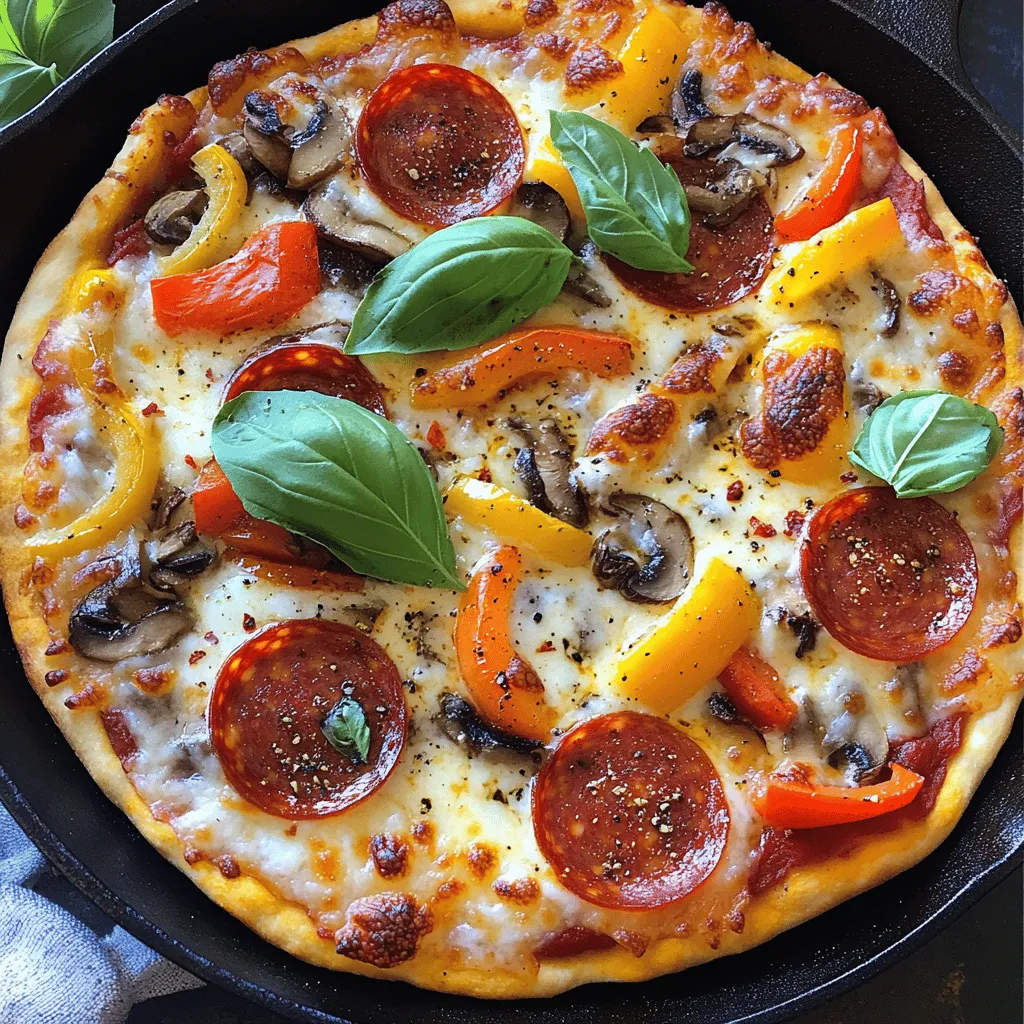
If you crave pizza with a perfectly crispy crust, cast iron pans are your secret weapon. I’ve tested various options

- 8 slices of soft white bread - 4 ounces cream cheese, softened - 1/4 cup powdered sugar - 1 teaspoon vanilla extract - 2 large eggs - 1/4 cup whole milk - 1 teaspoon ground cinnamon - 1 tablespoon butter - Maple syrup for drizzling - Fresh berries for garnish French toast roll-ups offer a fun twist on a classic breakfast. They are easy to make and fun to eat. You start with soft white bread, which makes a perfect base. The cream cheese adds a rich and smooth filling. Mixing in powdered sugar and vanilla gives it a sweet flavor. The eggs and milk create a custard to soak the roll-ups. Ground cinnamon gives a warm spice that makes them special. Butter is key to cooking them to golden perfection. Finally, maple syrup and fresh berries make for a delightful topping. This recipe is sure to impress. You can find the full recipe in the earlier section. 1. Start by laying out the slices of soft white bread. 2. Use a serrated knife to trim off the crusts. Cut each slice into rectangles. 3. In a medium bowl, mix the softened cream cheese with powdered sugar and vanilla extract. 4. Blend this mixture until it is smooth and creamy. 5. Take a slice of trimmed bread and spread about 1 tablespoon of the cream cheese mixture on it. 6. Roll the bread tightly from one end to the other. Repeat this with all the slices. 1. In a shallow bowl, whisk together the eggs, whole milk, and ground cinnamon. 2. Mix until the egg mixture is well-combined and frothy. 3. Preheat your skillet or griddle over medium heat. 4. Once hot, add 1 tablespoon of butter. Let it melt and coat the pan. 1. Dip each filled roll-up into the egg mixture. Make sure they are fully coated. 2. Let any extra batter drip off before placing them in the skillet. 3. Place the roll-ups in the skillet seam-side down. Cook for about 2-3 minutes on each side. 4. Look for a golden brown color on all sides. Turn them gently as needed. 5. Once cooked, remove the roll-ups from the skillet. Let them cool for a minute. 6. Optionally, dust them with powdered sugar. Serve warm with maple syrup and fresh berries. For the full recipe, check the section above. Enjoy your delicious French Toast Roll-Ups! To make great French toast roll-ups, focus on even filling. Spread the cream cheese mix evenly across the bread. This way, each bite has the same sweet taste. Avoid overfilling, as this can make rolling tricky. Sogginess is a common issue. To prevent this, do not soak the bread too long in the egg mixture. Just a quick dip is enough. The bread should be coated but not dripping. This keeps your roll-ups firm and delicious. For the best results, heat your skillet to medium. A hot skillet helps the roll-ups cook evenly. Use a non-stick pan to prevent sticking. Add a little butter for flavor and to help with browning. When cooking, place the roll-ups seam-side down. This keeps them closed. Cook for 2-3 minutes on each side until golden brown. Watch them closely to avoid burning. If they brown too fast, lower the heat. Get creative when serving! You can slice the roll-ups into bite-sized pieces for fun. Arrange them on a plate with fresh berries for color. Drizzle warm maple syrup over the top for extra sweetness. Other great toppings include whipped cream or chocolate sauce. You can also sprinkle some powdered sugar for a pretty finish. These roll-ups are perfect for brunch or breakfast gatherings. For the full recipe, check the original guide. {{image_4}} You can change up your French toast roll-ups by using different fillings. Nutella makes a rich choice. Fruit preserves, like strawberry or raspberry, add sweetness. You can also try peanut butter, banana, or even a mix of your favorite flavors. If you want a less sweet option, use Greek yogurt or almond butter. You can switch sweeteners too. Maple syrup or honey works well. You can even use agave nectar for a different taste. To make these roll-ups gluten-free, use gluten-free bread. Many brands offer soft options that taste great. For a vegan version, swap out the cream cheese for a dairy-free alternative. You can use cashew cream or coconut yogurt. Instead of eggs, use a mixture of mashed bananas or a flaxseed blend. Just mix one tablespoon of flaxseed meal with three tablespoons of water and let it sit until it thickens. These swaps keep the flavor while fitting different diets. You can add spices to match the season. In fall, try cinnamon and nutmeg for a warm flavor. For winter, a hint of peppermint extract can bring joy. In spring, add lemon zest for a fresh taste. For summer, top your roll-ups with fresh fruit. You can also sprinkle some chopped nuts for crunch. These small changes make your breakfast fun and festive throughout the year. To keep your French toast roll-ups fresh, store them in an airtight container. Place a piece of parchment paper between layers to avoid sticking. They stay good in the fridge for up to three days. When you want to enjoy your leftovers, the best way to reheat them is in a skillet. Heat the skillet over medium-low heat. Cook each roll-up for about 2 minutes on each side. This keeps them crispy and warm. You can also use a toaster oven. This method works well, too! To freeze your roll-ups, first, let them cool completely. Then, wrap each roll-up in plastic wrap. Place them in a freezer-safe bag. They can last up to two months in the freezer. To thaw, simply move them to the fridge overnight. Reheat them as mentioned before for a tasty treat! For the full recipe, check out the other sections. You can make French Toast Roll-Ups in advance. Prepare the roll-ups and cook them. Let them cool completely. Then, place them in an airtight container. Store them in the fridge for up to two days. You can also freeze them for longer storage. Just thaw in the fridge overnight before reheating. This way, you save time on busy mornings. The best fillings are both classic and fun. Cream cheese is a favorite, but you can try other options. Here are some ideas: - Nutella for a chocolate twist - Peanut butter and banana for a protein boost - Fruit preserves for sweetness - Fresh fruit like strawberries or blueberries Be creative! Mix and match your favorites for a new taste each time. Yes, you can! If you want to skip eggs, use a few substitutes. Here are some options: - 1/4 cup of unsweetened applesauce for each egg - 1/4 cup of silken tofu, blended until smooth - 1/4 cup of plant-based milk mixed with 1 tablespoon of cornstarch These will help bind your roll-ups and keep them moist. Serving French Toast Roll-Ups is easy and fun. Here are some ideas: - Drizzle with warm maple syrup for sweetness - Dust with powdered sugar for a pretty finish - Add fresh berries on the side for color and flavor - Serve with whipped cream or yogurt for extra creaminess These tips make your roll-ups look great and taste even better! Check out the Full Recipe for more details on making these delicious treats. French Toast Roll-Ups are a fun and tasty treat. We used simple ingredients like bread, cream cheese, and eggs. The step-by-step guide makes it easy to prepare and cook them perfectly. I shared tips to avoid common mistakes and ways to adapt the recipe for different diets. With various flavors and serving ideas, there’s something for everyone. Now, you can enjoy a delicious breakfast or snack that is quick and satisfying. Dive into making these roll-ups today and impress your family or friends!

French Toast Roll-Ups Delicious and Fun Breakfast Treat

Are you ready to bring a fun twist to your breakfast routine? French Toast Roll-Ups are a delightful way to

- 1 lb boneless, skinless chicken thighs - 3 tablespoons olive oil - 1 tablespoon Greek yogurt - Juice of 1 lemon - 3 cloves garlic, minced The main ingredients create the heart of your gyros. Chicken thighs are perfect because they stay juicy and tender. Olive oil adds richness. Greek yogurt gives a creamy touch and helps the marinade stick. Lemon juice brightens up the flavors, and garlic adds a nice kick. - 1 teaspoon dried oregano - 1 teaspoon paprika - Salt and pepper to taste These seasonings enhance the chicken's flavor. Oregano brings a classic Greek taste. Paprika adds warmth and color. Salt and pepper balance everything. Adjust these to fit your taste. - 4 pita breads - 1 cup shredded lettuce - 1 medium tomato, diced - ½ cucumber, thinly sliced - ½ red onion, thinly sliced - ½ cup tzatziki sauce Toppings make your gyros fresh and crunchy. Pita bread holds everything together. Lettuce adds a crisp texture. Tomatoes and cucumbers bring juiciness. Red onion gives a sharp bite. Tzatziki sauce is cool and creamy, tying all the flavors together. For the full recipe, check out the details above! - Combine olive oil, Greek yogurt, lemon juice, garlic, oregano, paprika, salt, and pepper in a bowl. - Mix well until all ingredients blend together. - Add chicken thighs, making sure they are well coated in the marinade. - Cover the bowl with plastic wrap. - Refrigerate for at least 1 hour. For best results, marinate overnight. Marinating the chicken is key. It adds flavor and makes the meat tender. I love letting it sit overnight for rich taste. - Preheat your grill or grill pan to medium-high heat. - Remove the chicken from the marinade and discard the leftover mix. - Grill the chicken for about 6-7 minutes on each side. - Check that the chicken's internal temperature reaches 165°F (75°C). - Once done, transfer the chicken to a plate and let it rest for 5 minutes. Grilling gives the chicken a nice char. This adds texture and extra flavor to your gyros. - Warm pita breads on the grill or in a skillet for about 1-2 minutes. - Start with a layer of shredded lettuce on the warm pita. - Add diced tomatoes, cucumber slices, and thinly sliced red onion. - Place the sliced grilled chicken on top. - Drizzle with tzatziki sauce and wrap tightly. Assembling the gyros is fun. Each bite is a mix of flavors and textures. You can customize it with your favorite toppings. For the full recipe, check out the link. Marinating chicken overnight makes it taste better. The longer it sits, the more flavor it absorbs. If you want, you can swap chicken for other meats. Try using lamb or beef for a tasty twist. Grilling chicken gives it a nice char and smoky flavor. Ensure your grill is hot before adding the chicken. If you’re cooking indoors, use a skillet on medium heat. You can also bake the chicken in the oven. Use a baking dish and cook at 375°F for about 25-30 minutes. Make your gyros look great with fresh herbs or lemon wedges. Serve them on a colorful platter for a nice touch. Pair your gyros with a simple salad or crispy fries. These sides balance the flavors and add crunch. For the full recipe, check out the details above. {{image_4}} You can switch up the protein in your gyros. If you want beef gyros, use ground beef. Lamb is another great choice. It adds a rich flavor. For a vegetarian option, try grilled mushrooms or eggplant. You can also use tempeh or tofu for a vegan alternative. These options keep the meal tasty and filling. Spice blends can change the taste of your gyros. Try adding cumin or coriander for a different touch. You can also use a mix of spices like za'atar or harissa for more zest. Don’t forget about toppings! Feta cheese adds a salty kick. Sliced olives give extra flavor. Pickled red onions can add a tangy crunch. Use whatever toppings you love to make it your own. While tzatziki is classic, feel free to mix it up. Try a spicy harissa sauce for a kick. A yogurt-based garlic sauce works great too. For a fresh twist, make a simple lemon and herb sauce. Just mix yogurt with lemon juice and fresh herbs. These sauces enhance the flavors and make your gyros pop. You can find the full recipe for the gyros above. To keep your gyros fresh, store leftovers in an airtight container. This helps maintain their flavor and texture. You can refrigerate them for up to three days. If you have leftover tzatziki sauce, store it separately in the fridge. It can last about five days. When reheating chicken, I recommend using a skillet. Heat it on medium until the chicken is warm. This method keeps the chicken juicy. For pitas, wrap them in a damp paper towel and microwave for 15-20 seconds. This warms them without making them dry. You can freeze cooked chicken and veggies if you need to store them longer. Place them in freezer-safe bags, removing as much air as possible. They can last up to three months in the freezer. To use, thaw in the fridge overnight. Reheat using the skillet method for best results. To make tzatziki sauce, you need just a few simple ingredients. Here’s a quick recipe: - 1 cup Greek yogurt - 1 small cucumber, grated and drained - 2 cloves garlic, minced - 1 tablespoon olive oil - 1 tablespoon lemon juice - Salt to taste 1. In a bowl, mix the Greek yogurt, grated cucumber, and minced garlic. 2. Add olive oil and lemon juice to the mixture. 3. Stir well and season with salt. 4. Chill in the fridge for at least 30 minutes. This sauce is creamy and fresh. It pairs perfectly with gyros! Yes, you can use boneless chicken breasts instead of thighs. Here are some pros and cons: Pros: - Chicken breasts are leaner, which reduces calories. - They cook quickly and are easy to find. Cons: - Breasts can dry out faster than thighs. - They may lack the rich flavor of thighs. Using thighs gives you juicier gyros. However, breasts work well if you prefer them. Greek Chicken Gyros are tasty and balanced. Here’s a quick overview of the nutrition facts: - Calories: About 400 per serving - Protein: 30 grams - Carbohydrates: 40 grams - Fat: 15 grams These figures can vary based on your toppings and sauces. Enjoy your gyros while keeping nutrition in mind! For the full recipe, check out the earlier section. In this blog post, I shared how to make delicious Greek Chicken Gyros. We covered the key ingredients, like chicken thighs and fresh veggies. I explained the steps from marinating to grilling and gave tips for better flavor. You can also explore variations and storage methods. Making gyros is simple and fun. Try different proteins and sauces for your own twist. Enjoy your tasty creation with family and friends!

Greek Chicken Gyros Flavorful and Easy Recipe Guide

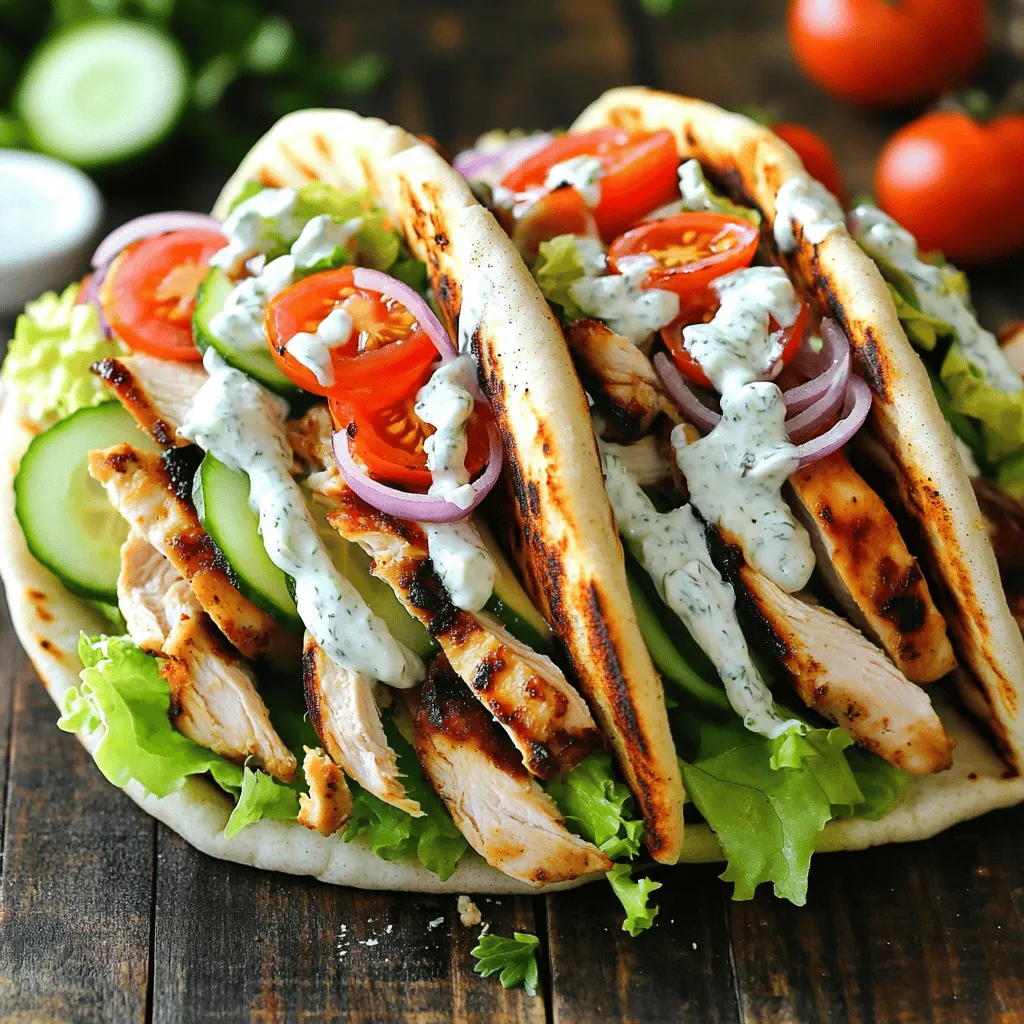
Ready to savor the flavors of Greece? In this guide, I’ll help you make easy, delicious Greek Chicken Gyros at

- 18 Golden Oreo cookies, finely crushed - 4 tablespoons unsalted butter, melted and slightly cooled - 16 oz cream cheese, softened to room temperature - 1 cup granulated sugar - 1 teaspoon pure vanilla extract - 2 large eggs, at room temperature - 1 cup fresh strawberries, hulled and chopped - 1 tablespoon fresh lemon juice - 1 tablespoon cornstarch - Whipped cream (for topping) - Extra strawberries, sliced, for garnish For the best taste, I recommend using Nabisco Golden Oreos. If you need a gluten-free option, use gluten-free cookies or almond flour for the crust. Cream cheese brands like Philadelphia work well. You can swap granulated sugar with coconut sugar for a different flavor. Each bar has about 250 calories. The macronutrient breakdown looks like this: - Fat: 15g - Carbohydrates: 28g - Protein: 4g This information is useful for anyone tracking their intake. Enjoy these bars as a treat, keeping in mind the balance of fun and nutrition. For the full recipe, check back to the earlier section! 1. Preheat your oven to 325°F (160°C). This helps cook your bars evenly. 2. Prepare an 8x8-inch baking pan. Line it with parchment paper. Leave some overhang to lift the bars out later. 1. In a medium bowl, mix 18 finely crushed Golden Oreo cookies with 4 tablespoons of melted butter. Stir until it looks like wet sand. 2. Press this mixture firmly into the bottom of the pan to form a crust. It should be even and compact. 3. Bake the crust for 10 minutes. This sets it nicely. Let it cool slightly while you make the filling. 1. In a large bowl, beat 16 ounces of softened cream cheese until smooth. This takes about 2-3 minutes. 2. Gradually add 1 cup of granulated sugar and 1 teaspoon of pure vanilla extract. Mix until creamy. 3. Add 2 large eggs one at a time. Mix on low speed after each egg. Don’t overmix; keep it smooth. 4. In a small bowl, combine 1 cup of chopped fresh strawberries, 1 tablespoon of lemon juice, and 1 tablespoon of cornstarch. Stir this mixture until the strawberries are coated. 5. Gently fold the strawberry mix into the cheesecake batter. Use a spatula to keep the strawberries intact. 6. Pour the filling over the cooled crust. Spread it out evenly with your spatula. 1. Bake the bars for 40-45 minutes. The edges should be set, but the center should still jiggle slightly. 2. After baking, remove the pan from the oven. Let it cool on a wire rack for about 1 hour. 3. Refrigerate the bars for at least 4 hours, or overnight if you can wait. This helps them set up nicely. 4. When ready, lift the bars out using the parchment overhang. Cut them into 9 equal squares. 5. Serve each bar with whipped cream on top and sliced strawberries for a treat that looks as good as it tastes. For the complete recipe, check the Full Recipe. To make your cheesecake smooth, avoid overmixing. After you add eggs, mix gently until just blended. This keeps the texture creamy. Use room temperature cream cheese. Cold cream cheese can create lumps. For a lovely presentation, slice the cheesecake into squares. Place them on a nice platter. Add a drizzle of strawberry sauce around the bars. Top each bar with whipped cream and fresh strawberries for a pop of color. One mistake is overbaking. If you bake too long, the cheesecake gets dry. Look for a slight jiggle in the center when done. Another tip is to check your crust. It should be firm but not hard. If it crumbles, it can ruin your bars. These tips will help you make the best Golden Oreo Strawberry Cheesecake Bars. For the full recipe, check the instructions above. {{image_4}} You can change the fruit in these bars. Try using blueberries or raspberries instead of strawberries. Each fruit brings its own flavor and color. For a fun twist, add a chocolate or caramel swirl. Simply melt chocolate or caramel and gently fold it into the cheesecake mix. This adds richness and a sweet surprise. If you want a vegan version, use dairy-free cream cheese and eggs. Replace eggs with flaxseed meal mixed with water. This keeps the texture smooth and tasty. You can also swap sugar with maple syrup or agave nectar for a sugar-free treat. Look for sugar-free cream cheese and ensure your cookies fit your diet. If you love these bars, try similar recipes. Look for other cheesecake bars like lemon or pumpkin. You can also find desserts using Golden Oreos. Think about Golden Oreo truffles or ice cream sandwiches. These recipes share that sweet, crunchy taste everyone loves. For the full recipe, check out the complete guide to making these delicious treats! Store leftover Golden Oreo strawberry cheesecake bars in the fridge. Place them in an airtight container to keep them fresh. They last about 5 days. Make sure to separate layers with parchment paper. This helps prevent sticking. If you cut them into squares, use a sharp knife for neat slices. You can freeze these cheesecake bars if you want to keep them longer. Wrap each piece in plastic wrap tightly. Then, place them in a freezer-safe bag. They will stay good for up to 3 months. When ready to eat, thaw them in the fridge overnight. This keeps them creamy and fresh. If you prefer to enjoy them warm, gently reheat in the microwave. Use a low setting and heat for just 10-15 seconds. Check often to avoid overheating. The goal is to warm them, not cook them again. Enjoy your cheesecake bars with a dollop of whipped cream for a sweet touch. Look for a few signs. The edges should be set, while the center may jiggle slightly. If you see this, it means they are ready. The bars will firm up as they cool. Trust your eyes; a golden hue on the edges shows they are cooked just right. Yes, you can prepare these bars ahead of time. Bake them and let them cool completely. Then, wrap them tightly and store them in the fridge. They taste even better after chilling overnight. This makes them a great option for parties or gatherings. For clean cuts, use a sharp knife. Dip the knife in hot water and wipe it dry before each cut. This method helps the knife glide through the bars easily. Cut into equal squares for a nice look. You can also use a ruler to measure if you like. No, these bars are not gluten-free. Golden Oreos contain wheat flour. If you need a gluten-free option, use gluten-free cookies. There are many brands that offer great alternatives. Be sure to check labels to ensure they meet your needs. Making Golden Oreo Strawberry Cheesecake Bars is fun and simple. We explored ingredients and steps needed, plus tips for perfect texture. Keeping your bars fresh is easy, whether storing or freezing. I shared ways to customize these desserts, ensuring they fit any diet or preference. With practice, you can create a treat that impresses everyone. Enjoy your sweet journey and share your delicious creations with friends!

Golden Oreo Strawberry Cheesecake Bars Delightful Treat

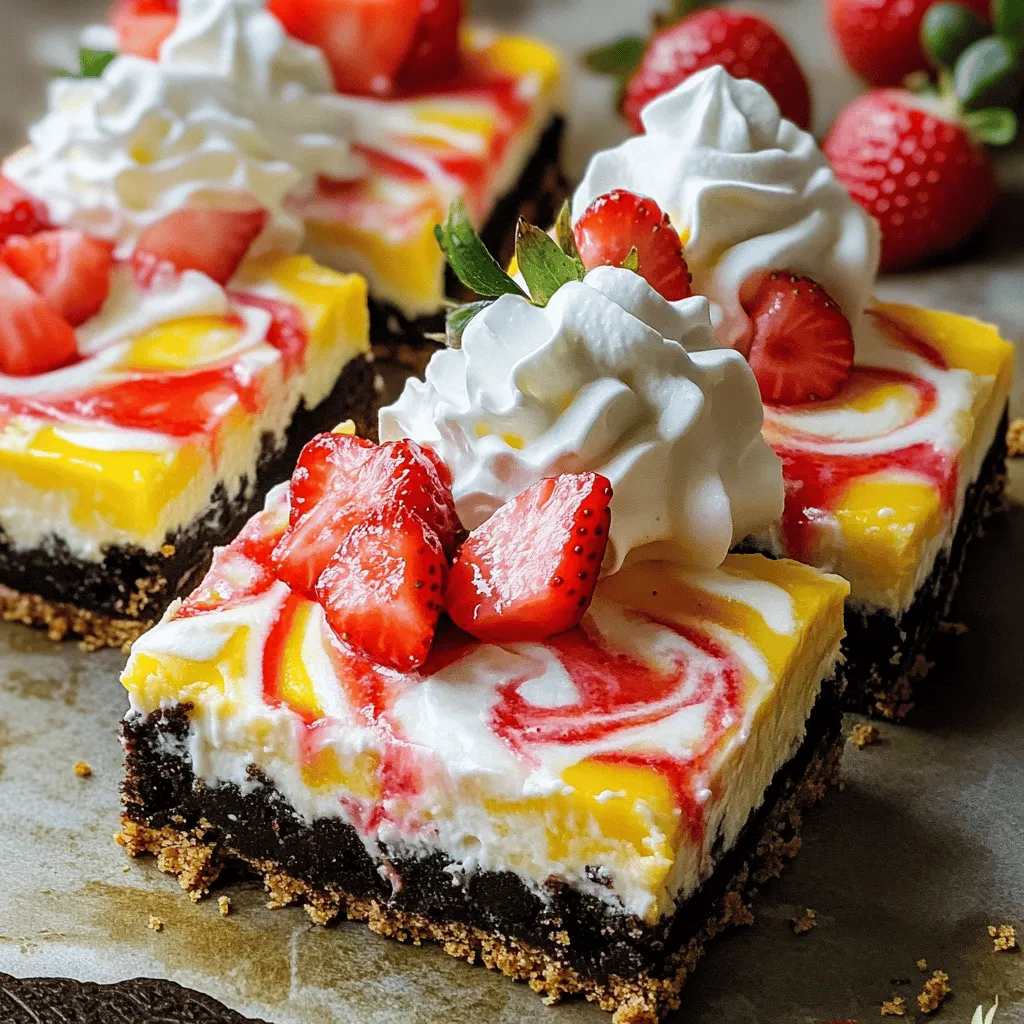
If you’re craving a dessert that’s both creamy and fruity, you’re in the right place! These Golden Oreo Strawberry Cheesecake

The main ingredients for shrimp chimichurri are fresh and vibrant. Here’s what you need: - 1 pound large shrimp, peeled and deveined - 1 cup fresh parsley, finely chopped - 1/2 cup fresh cilantro, finely chopped - 4 cloves garlic, minced - 1/4 cup red wine vinegar - 1/3 cup high-quality olive oil - 1 teaspoon red pepper flakes (adjust for spice preference) - Salt and freshly ground black pepper to taste - Zest and juice of 1 large lemon Using fresh herbs is key. They bring life and bright flavors to the dish. The combination of parsley and cilantro creates a balanced taste. Quality olive oil enhances the sauce and adds richness. Always opt for extra virgin olive oil when you can. It makes a big difference in taste. You can add some extra touches to customize your chimichurri. Consider these options: - A pinch of smoked paprika for a subtle smoky flavor. - A dash of cumin for warmth and depth. - Chopped red onion for a bit of crunch. When serving shrimp chimichurri, think about side dishes that complement it. Grilled vegetables or a fresh salad work well. You might also enjoy serving it with rice or quinoa for a hearty meal. Pairing with a light white wine or a cold beer can enhance the experience too. For the full recipe, check out the detailed instructions. Enjoy making this easy and flavor-packed dish! To start, mix the fresh herbs and garlic together. You need 1 cup of finely chopped parsley and 1/2 cup of finely chopped cilantro. Add 4 minced garlic cloves to the mix. Then, pour in 1/4 cup of red wine vinegar and 1/3 cup of high-quality olive oil. Sprinkle in 1 teaspoon of red pepper flakes for a kick and season with salt and black pepper. Stir everything well. Let the sauce sit at room temperature for at least 30 minutes. Waiting helps the flavors blend. You want the herbs to infuse their taste into the oil and vinegar for a vibrant sauce. Next, it’s time to marinate the shrimp. Take 1 pound of peeled and deveined shrimp and place it in a bowl. Pour half of the chimichurri sauce over the shrimp. Make sure to reserve the other half for later. Toss the shrimp gently to coat each piece well. Cover the bowl with plastic wrap and chill it in the fridge for at least 30 minutes. This marination time is key. It allows the shrimp to soak up all the tasty flavors from the chimichurri. Now, let’s cook the shrimp. Preheat your grill or grill pan to medium-high heat. If you use wooden skewers, soak them in water for about 15 minutes. This step keeps the skewers from burning. Thread the marinated shrimp onto the skewers, about 4-5 shrimp per skewer. Grill the shrimp for about 2-3 minutes on each side. They are ready when they turn opaque and feel slightly firm to the touch. Once cooked, place the grilled shrimp on a serving platter. Drizzle the reserved chimichurri sauce over the shrimp for added flavor. Enjoy this easy flavor-packed delight! For the full recipe, check out the complete guide. When picking shrimp, you can choose fresh or frozen. Fresh shrimp often has a sweet taste and a firm texture. Look for shrimp with a slight sheen and no strong odor. If you go for frozen, check for ice crystals, which can mean freezer burn. For size, larger shrimp are great for grilling. Sizes are labeled as "count per pound." For example, "16/20" means there are 16 to 20 shrimp in a pound. This size works well in Shrimp Chimichurri. Spice levels can change your dish. If you want more heat, add extra red pepper flakes. For less spice, reduce the amount. Balancing flavors is key. A splash of lemon juice brightens the dish. Try tasting the chimichurri sauce after mixing. Adjust the salt and acid until you love it. Plating is fun and can impress guests. Use a large, colorful plate to show off your shrimp. Drizzle chimichurri sauce over the shrimp for a vibrant look. You might add a sprinkle of fresh parsley or cilantro on top. For a great touch, serve with lemon wedges. This makes the dish look fresh and inviting. Try serving on a wooden board for a rustic feel. This enhances the beauty of your Shrimp Chimichurri. For the best experience, enjoy the dish right after cooking. The flavors will shine when served warm. {{image_4}} You can switch shrimp for other proteins. Fish like salmon or tilapia work well. Chicken also makes a great choice. Use chicken breast cut into pieces and marinate just like the shrimp. For a vegetarian twist, try using firm tofu or portobello mushrooms. Both soak up the chimichurri flavor beautifully. Chimichurri is flexible. You can change the herbs to suit your tastes. Try using basil or mint for a different flavor. Add some chopped jalapeños for a spicy kick. You can also mix in sun-dried tomatoes or roasted red peppers for a unique twist. Each change adds a fun flavor to the sauce. You don’t have to grill all the time. Baking shrimp is simple and tasty. Preheat your oven to 400°F. Spread the shrimp on a baking sheet and drizzle with chimichurri. Bake for about 8-10 minutes. You can also use a stovetop grill pan. Heat it over medium-high heat and cook the shrimp for 2-3 minutes on each side. Both methods give you a delicious meal. For the full recipe, check out the earlier sections to learn how to make this dish. To keep your shrimp chimichurri fresh, store it in an airtight container. This helps lock in flavors and prevent spoilage. Place it in the refrigerator right after serving. You can keep it for up to three days. After that, the shrimp may lose its taste and texture. You can freeze shrimp and chimichurri separately. First, cool the shrimp completely. Then, place it in a freezer-safe bag. Squeeze out as much air as you can before sealing. For chimichurri, use a jar or another suitable container. It will keep well for up to three months. When you're ready to enjoy it again, thaw the shrimp in the fridge overnight. For the chimichurri, simply let it sit at room temperature for about 30 minutes before using. When reheating, use safe methods to keep it tasty. The microwave works but can cook shrimp unevenly. Instead, try a skillet on low heat. This helps maintain its flavor and texture. Add a splash of oil or a bit of water if it seems dry. Heat until just warmed through; avoid overcooking. Enjoy your leftovers as if they were fresh! For the full recipe, check back to the main section. Yes, you can make Chimichurri sauce ahead of time. I recommend storing it in an airtight container in the fridge. It stays fresh for about a week. However, for the best flavor, use it within three days. As the sauce sits, the flavors mix and deepen. The garlic and herbs become more intense. This resting time makes your Chimichurri sauce even better. Shrimp Chimichurri pairs well with many sides. Here are some ideas: - Grilled vegetables, like zucchini or bell peppers - Rice or quinoa for a filling base - A fresh green salad topped with light dressing For drinks, try a crisp white wine. A chilled Sauvignon Blanc complements the dish nicely. You can also serve it with a light, fruity cocktail for a fun touch. Chimichurri sauce can be adjusted for heat. The red pepper flakes add spice, but you can control it. If you prefer less heat, use fewer flakes. If you love spice, add more! The flavor profile of Chimichurri is fresh and zesty. The herbs and garlic shine through. Adjust the spice levels to suit your taste, and enjoy the burst of flavors. Shrimp chimichurri combines fresh herbs and quality olive oil for vibrant flavors. You learned how to prepare the sauce and marinate shrimp for the best results. We explored herbs, sides, and cooking methods to enhance your dish. Remember to store leftovers properly and try different variations. With this knowledge, you can enjoy tasty and fun meals. Now, it's time to gather your ingredients and get cooking!

Shrimp Chimichurri Easy Flavor-Packed Delight

Welcome to my kitchen! Today, I’ll show you how to make Shrimp Chimichurri—a dish that’s tasty and easy. This meal

- 1 pound large shrimp, peeled and deveined - 1 cup long-grain white rice - 2 cups chicken broth (or vegetable broth for a vegetarian option) - 1 medium onion, diced - 1 bell pepper (red or green), diced - 2 cloves garlic, minced - 2 tablespoons Cajun seasoning - 1 teaspoon smoked paprika - 1/2 teaspoon salt - 1/2 teaspoon black pepper - 2 tablespoons olive oil - 1 cup frozen peas - 2 green onions, chopped (for garnish) - Fresh parsley, chopped (for garnish) Choosing fresh shrimp is key. Look for shrimp that smell like the sea. If you can’t find large shrimp, medium shrimp work too. The Cajun seasoning really gives this dish its kick. You can buy it or make your own blend with spices like paprika, cayenne, and oregano. The type of rice matters as well. Long-grain rice stays fluffy and separate, while other types may become sticky. You can make this dish vegetarian by using vegetable broth instead of chicken broth. For a gluten-free option, check that your Cajun seasoning is gluten-free. You can also swap the shrimp for tofu or chickpeas for a plant-based meal. If you prefer more veggies, add zucchini, carrots, or spinach. This way, you can enjoy a colorful and healthy meal that fits your taste! For the complete preparation details, check out the Full Recipe. Start by gathering all your ingredients. This makes the process smooth. Heat a large skillet over medium-high heat. Add olive oil once the skillet is hot. You want it shimmering. Next, toss in the diced onion and bell pepper. Sauté these for about 3 to 4 minutes. They should soften and smell great. After that, mix in the minced garlic. Sauté for one more minute. Be careful not to let it brown. Gently add the shrimp to the skillet. Sprinkle on the Cajun seasoning, smoked paprika, salt, and black pepper. Cook the shrimp for 2 to 3 minutes. They should turn pink and opaque. After that, stir in the long-grain white rice. This step helps the rice soak up all the flavors. Let it toast for one minute, stirring often. Now, pour in the chicken broth. Bring this mix to a rolling boil. Once it boils, reduce the heat to low. Cover the skillet with a lid. Let it simmer for 15 to 18 minutes. The rice needs to be tender and absorb most of the liquid. In the last 5 minutes, stir in the frozen peas. They will heat through while the rice finishes cooking. Once cooked, take the skillet off heat. Let it rest, covered, for 5 minutes. This step helps the flavors meld. Fluff the mixture with a fork to separate the rice and distribute the shrimp and peas. For the final touch, sprinkle chopped green onions and fresh parsley on top. This adds color and freshness. Serve it in bowls with extra parsley and lemon wedges for a zing. For the full recipe, check the earlier section. To make the best Cajun shrimp and rice, pay close attention to your rice. Use long-grain white rice for the right texture. Rinse the rice before cooking to remove excess starch. This helps prevent the rice from getting sticky. When cooking shrimp, don't overcook it. Shrimp cooks quickly. When it turns pink and opaque, it's done. Add the shrimp last to keep it tender. Letting the dish rest after cooking allows the flavors to blend well. Want to boost flavor? Add a splash of hot sauce or a squeeze of lemon juice before serving. This adds a nice kick. You can mix in other veggies like corn or diced tomatoes for extra taste. For a twist, try adding some diced sausage. It pairs well with the shrimp and rice. If you love spice, add more Cajun seasoning or diced jalapeños. One big mistake is cooking the rice too long. It should be tender but not mushy. Also, do not skip the broth. It adds rich flavor that plain water cannot match. Watch the heat when cooking shrimp. High heat helps it cook fast, but too high can dry it out. Lastly, be careful with salt. The Cajun seasoning might already be salty enough. Always taste before adding more. For the full recipe, check out the [Full Recipe]. {{image_4}} You can easily add more vegetables to your Cajun shrimp and rice dish. Try adding sliced zucchini, carrots, or corn. These veggies will add color and extra nutrients. You can mix them in when you sauté the onion and bell pepper. This tweak not only boosts flavor but also makes the meal more filling. If you like heat, add more spices to your shrimp. Use cayenne pepper or hot sauce to kick it up a notch. You might also try jalapeños for a fresh spicy taste. Just add them when cooking the onions. This will ensure they blend perfectly with the other flavors. Adjust the spice level to match your taste for a fun twist. Making this dish vegetarian or vegan is simple. Just swap shrimp for plant-based protein like tofu or tempeh. Use vegetable broth instead of chicken broth for flavor. You can also add beans for protein and texture. This way, you keep the dish hearty and satisfying, without losing any of its Cajun flair. For the full recipe, check the section above. To store leftovers, let the dish cool down first. Place it in an airtight container. Make sure it is well sealed to keep out air. You can store it in the fridge for up to three days. If you want to keep it longer, freezing is a great option. When you are ready to eat, you can reheat the dish easily. For the best results, use a skillet over medium heat. Add a splash of water or broth to keep it moist. Stir it often until it is hot. You can also use the microwave if you are in a hurry. Heat it in a microwave-safe bowl, covering it with a lid or a damp paper towel. Heat in short bursts, stirring in between. If you freeze your Cajun shrimp and rice, it can last for about three months. To freeze, let it cool completely. Then, pack it tightly in a freezer-safe container. When you want to eat it, move it to the fridge for a night to thaw. Once it is defrosted, you can reheat it as described above. This way, you can enjoy a quick, flavorful meal anytime! For the full recipe, check out [Full Recipe]. Yes, you can use frozen shrimp. Just make sure to thaw them first. Place the shrimp in a bowl of cold water for about 15 to 20 minutes. This method is quick and easy. Once thawed, peel and devein them if needed. Using frozen shrimp saves time and still gives you great flavor. I recommend using long-grain white rice. It cooks well and stays fluffy. You can also try jasmine or basmati rice for a slight twist. These varieties absorb flavors well and create a lovely texture. Avoid short-grain rice, as it can become sticky and clump together. To make this dish gluten-free, focus on the broth. Use gluten-free chicken or vegetable broth. Most Cajun seasonings are gluten-free, but always check labels for hidden gluten. This way, you can enjoy all the great flavors without worry. For the full recipe, check out the detailed steps above. To wrap up, we explored the key ingredients for Cajun shrimp and rice, detailed cooking steps, and shared helpful tips. Remember to consider substitutions for dietary needs. You can vary the dish with delicious twists or store leftovers properly. Follow the common pitfalls to ensure a tasty outcome every time. This dish is versatile and satisfying, whether you choose classic or creative options. Enjoy cooking and savoring your unique Cajun shrimp and rice creation.

Cajun Shrimp and Rice Skillet Flavorful Weeknight Dish

Ready for a quick and tasty dinner? This Cajun Shrimp and Rice Skillet is your answer! Packed with bold flavors,

To make banana bread cinnamon rolls, gather these ingredients: - 3 ripe bananas, thoroughly mashed - 1/2 cup granulated sugar - 1/4 cup brown sugar, packed firmly - 1/3 cup unsalted butter, melted and slightly cooled - 2 large eggs - 1 teaspoon vanilla extract - 1 teaspoon baking soda - 1/2 teaspoon salt - 1 1/2 cups all-purpose flour, sifted - 1/2 teaspoon ground cinnamon For the filling: - 1/4 cup brown sugar, packed - 1 tablespoon ground cinnamon - 2 tablespoons unsalted butter, softened to room temperature - 1/2 cup chopped walnuts or pecans (optional) For the glaze: - 1 cup powdered sugar - 2 tablespoons milk - 1/2 teaspoon vanilla extract You can swap ingredients if needed. Here are some options: - Use maple syrup instead of granulated sugar for natural sweetness. - Replace the all-purpose flour with gluten-free flour for a gluten-free option. - Applesauce can stand in for butter to make the rolls dairy-free. - Chia seeds mixed with water can replace eggs for a vegan version. Want to elevate your rolls? Consider these add-ins: - Add chocolate chips for a sweet twist. - Mix in dried fruit, like raisins or cranberries, for added texture. - Spice things up with a pinch of nutmeg or ginger. - Use a mix of nuts for a crunchy topping. These options can make your banana bread cinnamon rolls unique and fun! For the full recipe, check the instructions above. To start, you need to preheat your oven to 350°F (175°C). Grease a 9x13-inch baking dish with butter or cooking spray. In a large bowl, mash the 3 ripe bananas until smooth. Add in 1/2 cup of granulated sugar, 1/4 cup of brown sugar, 1/3 cup of melted butter, 2 large eggs, and 1 teaspoon of vanilla extract. Whisk these ingredients until well combined. Now, sprinkle 1 teaspoon of baking soda and 1/2 teaspoon of salt over the mixture. Carefully fold in 1 1/2 cups of sifted all-purpose flour. Mix until just combined. Avoid overmixing; this keeps your rolls light and fluffy. In a separate bowl, mix 1/4 cup of brown sugar and 1 tablespoon of ground cinnamon. This will be your filling. Set this aside for later. On a floured surface, roll out your banana bread dough into a rectangle, about 1/4 inch thick. Spread softened butter all over the dough. Sprinkle the cinnamon-sugar mixture evenly on top. If you like, toss in 1/2 cup of chopped walnuts or pecans for a crunch. Next, roll the dough tightly from one edge to the other. Use a sharp knife to cut the log into 12 equal pieces. Place the slices in the prepared baking dish, spacing them evenly. Bake the rolls for 25-30 minutes. They should be golden brown. A toothpick inserted in the center should come out clean. While the rolls cool for about 10 minutes, whisk together 1 cup of powdered sugar, 2 tablespoons of milk, and 1/2 teaspoon of vanilla extract in a bowl. Drizzle this glaze over the warm rolls. Enjoy the sweet, gooey goodness! For the complete recipe, you can refer to the Full Recipe section. To make your rolls light and fluffy, follow these key steps: - Use ripe bananas. They provide natural sweetness and moisture. - Don't overmix your dough. Mix just until combined. - Let the dough rest for a few minutes before rolling it out. This helps relax the gluten. - Roll to about 1/4 inch thick. A uniform thickness ensures even baking. Baking time and temperature can change based on your oven. Here's how to adjust: - Always preheat your oven to 350°F (175°C) for best results. - Start checking your rolls at 25 minutes. If they aren't golden brown, add a few more minutes. - If your rolls brown too fast, cover them lightly with foil. This keeps them from burning while cooking through. Sometimes issues arise while baking. Here’s how to fix them: - Rolls are too dense: This usually means the dough was overmixed. Next time, mix gently. - Burnt tops: If the edges darken too quickly, lower the oven's heat by 25°F (about 15°C). - Filling leaks out: Make sure your filling is evenly spread and the dough is rolled tightly. This keeps the filling inside. For the full recipe, check the details above. Enjoy baking! {{image_4}} You can easily make these rolls nut-free and dairy-free. Simply skip the nuts in the filling. Use a dairy-free butter for the dough and glaze. Coconut oil also works well. For milk, try almond or oat milk. This way, you can enjoy the same great taste without the nuts and dairy. Want to mix it up? Add chocolate chips to the dough for a sweet twist. You can also sprinkle in some nutmeg or cardamom for a warm spice flavor. If you love fruit, chopped apples or berries are great options. They add a juicy burst that pairs well with bananas. Experiment and find your favorite blend! While the glaze is sweet and tasty, you have other choices. Cream cheese frosting makes a rich and tangy topping. Whip cream cheese with powdered sugar and a splash of milk for a smooth spread. You can also drizzle melted chocolate over the rolls for a decadent finish. Each option gives a fun new taste to the rolls. To keep your banana bread cinnamon rolls fresh, place them in an airtight container. You can also wrap them in plastic wrap. Store them at room temperature for up to three days. If you want them to last longer, consider refrigerating them. In the fridge, they stay good for about a week. To freeze the rolls, let them cool completely first. Then, wrap each roll tightly in plastic wrap. Next, place them in a freezer bag or airtight container. They can stay frozen for up to three months. When you're ready to enjoy them, just take out the desired amount. To reheat, preheat your oven to 350°F (175°C). Place the rolls on a baking sheet. Cover them with foil to keep them moist. Heat for about 10-15 minutes. You can also use the microwave. Heat for 20-30 seconds per roll. Just make sure you don’t overheat them, or they might get tough. Yes, you can use frozen bananas. Just thaw them first. After thawing, mash them well. The texture may be different, but the flavor stays great. Using frozen bananas can help reduce waste, especially if you have overripe ones. Banana cinnamon rolls can last for about three days at room temperature. Keep them in an airtight container to maintain freshness. If you want to keep them longer, you can freeze them. They stay good in the freezer for up to three months. Absolutely! You can make the dough a day before. After mixing, cover it tightly and store it in the fridge. This will improve the flavors. Just let it warm up a bit before you roll it out. You can also freeze the dough for later use, which is handy for busy days. For the full recipe, check the section above. Enjoy your baking! This article covered how to make banana bread cinnamon rolls from start to finish. We explored key ingredients, possible substitutions, and fun add-ins for extra flavor. You learned step-by-step instructions for making and baking the rolls, along with tips for light, fluffy results. We also discussed variations, storage tips, and answered common questions. Banana bread cinnamon rolls are a tasty treat to enjoy anytime. You can customize them to fit your taste. Happy baking!

Banana Bread Cinnamon Rolls Delicious and Easy Treat

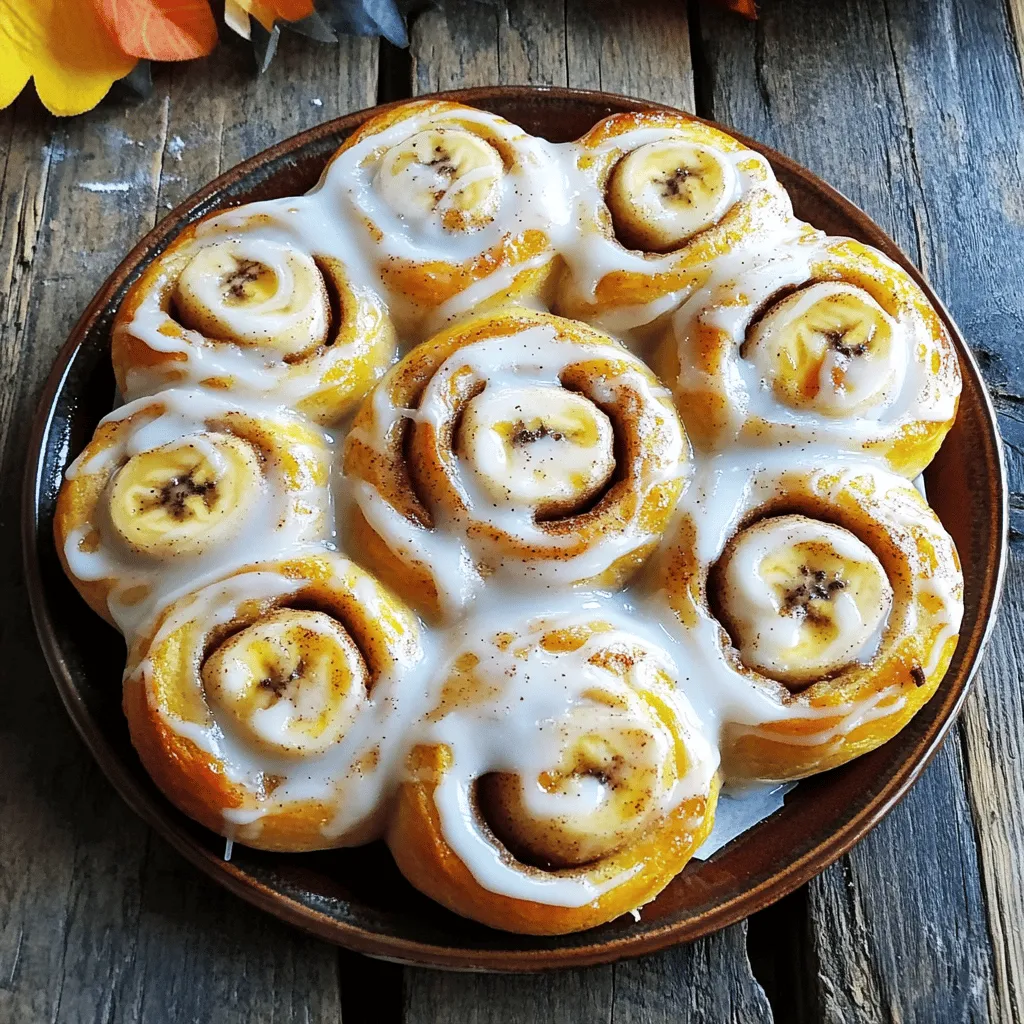
Are you ready to enjoy a treat that combines the best of two worlds? Banana Bread Cinnamon Rolls are a

Older posts
Newer posts
← Previous Page1 … Page72 Page73 Page74 … Page90 Next →

dsad

© 2025 recipetorch • Built with GeneratePress

Our Policies

  • Copyright Policy
  • Cookie Policy
  • GDPR Policy
  • Privacy Policy
  • Disclaimer
  • Terms Of Use

More Information

  • Home
  • About
  • Contact
  • Appetizers
  • Dessert
  • Dinner
  • Drinks
©2025, recipetorch About Back To Top