Skip to content
DisclaimerTerms Of UseGDPR PolicyCookie Policy

recipetorch

  • Home
  • Drinks
  • Appetizers
  • Dinner
  • Dessert
  • About
  • Contact
  • Privacy Policy
DisclaimerTerms Of UseGDPR PolicyCookie Policy

Nicole

- 1 cup coconut milk - 1 cup almond milk - 1/4 cup chia seeds - 2 tablespoons maple syrup or honey - 1 teaspoon pure vanilla extract - 1/2 teaspoon sea salt - 1 cup fresh strawberries - 2 tablespoons unsweetened shredded coconut For the best flavor, choose high-quality coconut milk. Canned coconut milk gives a rich, creamy base. If you prefer, you can swap almond milk for any milk you like. Chia seeds are the star here. They soak up the liquid and help thicken the pudding. Using maple syrup adds a nice sweetness. Honey works too, if you want a different taste. Add pure vanilla extract for extra flavor depth. Just a tiny bit of sea salt balances the sweetness. Fresh strawberries add a juicy, bright kick. Finally, sprinkle shredded coconut on top. It adds a crunchy texture and a hint of coconut flavor. This combination creates a delightful treat you’ll love. {{ingredient_image_2}} Start by grabbing a medium bowl. Pour in 1 cup of coconut milk and 1 cup of almond milk. I like using canned coconut milk for a creamier taste. Add 2 tablespoons of maple syrup for sweetness, or honey if you prefer. Next, add 1 teaspoon of pure vanilla extract and 1/2 teaspoon of sea salt. Whisk all these ingredients together until they blend smoothly. This step is key for a great base. Now, it's time to add the chia seeds. Gradually sprinkle in 1/4 cup of chia seeds while stirring the milk mixture. This helps prevent clumping. Keep stirring until the chia seeds are evenly mixed in. You want them spread out well in the mixture. This ensures that every spoonful is packed with those tiny powerhouses. Once the chia seeds are mixed in, cover the bowl tightly with plastic wrap or a lid. Place it in the fridge for at least 4 hours. For the best results, let it chill overnight. This waiting time allows the chia seeds to soak up the liquid. They will turn the mixture into a thick, pudding-like texture. When you're ready to serve, give it a good stir to break up any clumps. This will help create a smooth, creamy pudding that looks and tastes amazing. To get the best texture for your chia pudding, use good quality coconut milk. I suggest using canned coconut milk for a rich, creamy feel. Blend the coconut milk with almond milk, maple syrup, vanilla, and salt. Stir these well to mix. When you add the chia seeds, sprinkle them slowly while stirring. This stops them from clumping. Let the mixture sit in the fridge for at least four hours. Overnight is even better! This gives the seeds time to soak up the liquid and thicken the pudding. Serving can make a big difference! I love using clear glasses or bowls. This lets the colorful layers shine through. Start with a layer of chia pudding at the bottom. Then, add a layer of sliced strawberries. Top it off with a sprinkle of shredded coconut. For extra flair, add a mint leaf on top. It adds a pop of green and looks great for guests! If you prefer your pudding sweeter, you can adjust the maple syrup. Add a bit more to the base mixture. Honey works too if you want a different flavor. Taste the mixture before chilling. This way, you can find the perfect balance that fits your sweet tooth! Pro Tips Use Canned Coconut Milk: For an ultra-creamy texture, using canned coconut milk is highly recommended, as it has a richer consistency compared to other varieties. Chill Overnight: For the best texture, let the pudding chill overnight. This allows the chia seeds to fully absorb the liquid, resulting in a thicker, creamier pudding. Experiment with Sweeteners: Feel free to swap out maple syrup for honey or agave syrup to cater to your taste preferences or dietary needs. Layering Presentation: For an attractive presentation, layer the pudding and strawberries in clear glasses, and finish with a mint leaf for added color and freshness. {{image_4}} You can swap strawberries for other fruits. Try ripe mango, blueberries, or bananas. Each fruit adds its own flavor. For a tropical twist, use pineapple or passion fruit. Just chop them small and layer them on top. The color and taste will be bright and fun! This recipe is already dairy-free and vegan. The coconut and almond milk keep it creamy. If you want to change the flavor, use oat or soy milk. Both are great choices. They add a different taste while keeping it vegan. Toppings can make your pudding more exciting. Add nuts like almonds or walnuts for crunch. Seeds such as pumpkin or sunflower seeds add texture too. You can also sprinkle more coconut on top for extra flavor. Fresh mint leaves add a pop of color and freshness. Drizzle with honey or maple syrup if you like it sweeter. These small touches can change your dish into a showstopper! To keep your strawberry coconut chia pudding fresh, store it in the fridge. Use an airtight container. This helps prevent the pudding from absorbing other flavors in your fridge. Make sure to cover the top with plastic wrap if using a bowl. You can freeze chia pudding for later use. Scoop the pudding into individual portions in freezer-safe containers. Leave some space at the top, as the pudding may expand when frozen. To eat, thaw it in the fridge overnight. Stir well before serving. When stored properly in the fridge, your chia pudding lasts about 4-5 days. If you freeze it, it can last up to 2 months. Just remember, the texture may change slightly after freezing and thawing. Always check for any off smells or changes in color before eating. Yes, you can use other types of milk. Almond milk works well and adds a nice flavor. You can also try oat milk, soy milk, or even regular cow's milk. Each type brings its own taste. Feel free to experiment with what you enjoy most. Let the chia pudding sit for at least four hours. For the best results, leave it overnight. This time allows the chia seeds to soak up the liquid. They swell and create a creamy texture. You want that pudding-like consistency for the best experience. Chia seeds offer many health benefits. They are rich in fiber, which helps digestion. They also provide protein, making them a great snack. Chia seeds are high in omega-3 fatty acids, which are good for your heart. Plus, they are packed with antioxidants. Adding chia seeds to your diet is a smart choice for health. This blog post covered the key ingredients and steps to make a delicious chia pudding. We explored how to mix the base, add chia seeds, and chill the mixture. I shared tips for perfect texture and creative presentation ideas. Variations help you tailor the recipe with different fruits and toppings. We also discussed storage and answered common questions. Now you can enjoy chia pudding, knowing how to make it your own!

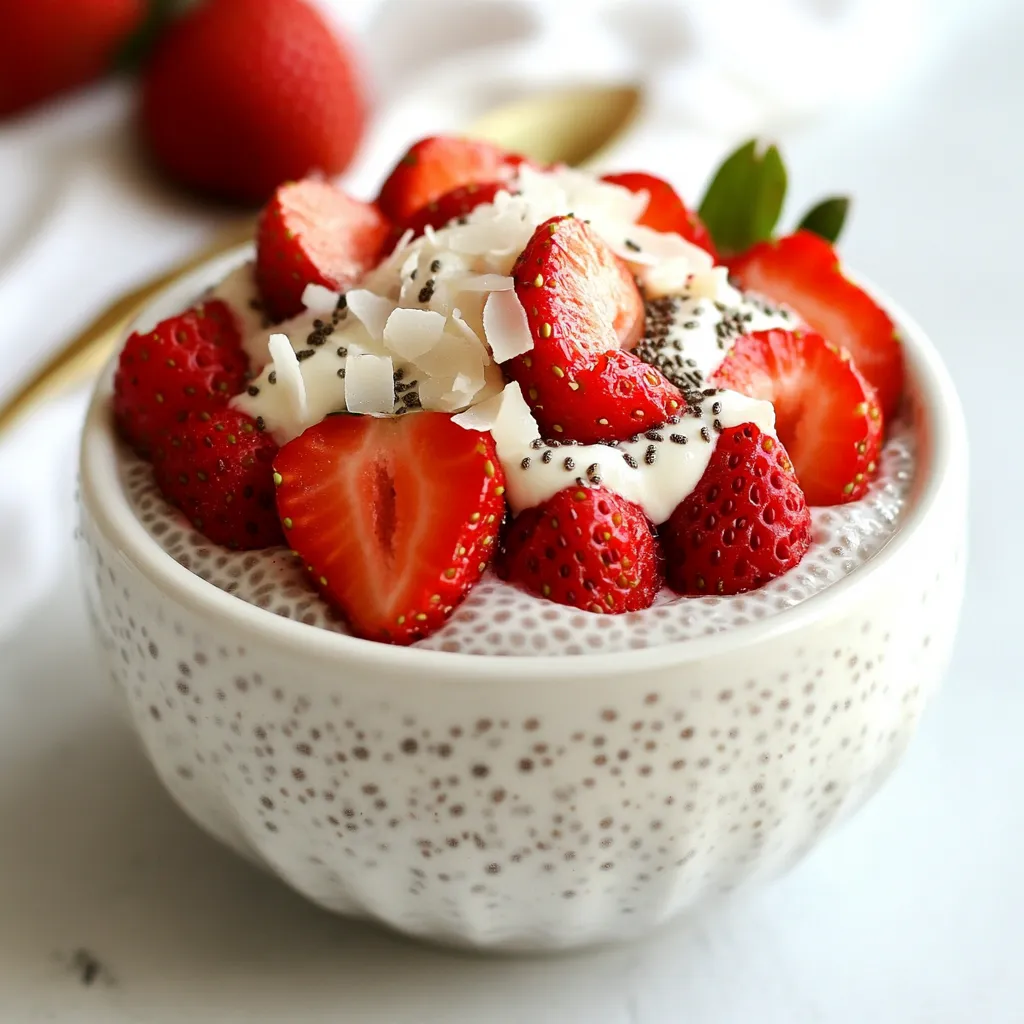
Strawberry Coconut Chia Pudding Refreshing Delight

Are you ready for a cool treat that’s both tasty and healthy? Strawberry Coconut Chia Pudding is a simple recipe

- 2 cups shredded cooked chicken - 1 cup cream cheese, softened to room temperature - 1 cup shredded sharp cheddar cheese - 1/2 cup sour cream - 1 cup salsa (choose your preferred spice level: mild or spicy) - 8 small corn or flour tortillas - 1 teaspoon garlic powder - 1 teaspoon onion powder - 1/2 teaspoon ground cumin - 1/2 teaspoon salt - 1/4 teaspoon freshly ground black pepper - Fresh cilantro, chopped, for garnish When picking your ingredients, freshness matters most. Look for bright, colorful veggies for your salsa. If you use chicken, make sure it is cooked and tender. For cream cheese, choose a brand that is rich and creamy. This will give your enchiladas a great texture. Use sharp cheddar cheese for a strong flavor. It adds a nice kick to the dish. For tortillas, pick ones that are soft. They should roll easily without breaking. Each serving of these enchiladas has about: - Calories: 450 - Protein: 30g - Carbohydrates: 30g - Fat: 25g - Fiber: 2g - Sugar: 3g Knowing the nutritional value helps you plan better meals. Adjust your sides to balance your plate. Enjoy these enchiladas with a side salad or some fresh fruit for a tasty meal. For the full recipe, check the earlier section. Start by mixing your filling. In a large bowl, combine 2 cups of shredded cooked chicken, 1 cup of cream cheese, and 1 cup of shredded sharp cheddar cheese. Add in 1/2 cup of sour cream, 1 teaspoon of garlic powder, 1 teaspoon of onion powder, 1/2 teaspoon of ground cumin, 1/2 teaspoon of salt, and 1/4 teaspoon of black pepper. Stir until the mixture is smooth and creamy. Next, take your tortillas. You can use either corn or flour tortillas. Place about 1/4 cup of the creamy chicken filling in the center of each tortilla. Roll the tortilla tightly around the filling and place it seam-side down in a greased baking dish. Repeat this for all tortillas. Now it's time to prepare for baking. Preheat your oven to 350°F (175°C). Lightly grease a 9x13 inch baking dish with non-stick spray. Once your tortillas are in the dish, pour salsa evenly over them. Make sure each enchilada gets a good coat of salsa. Cover the baking dish with aluminum foil. This helps keep the enchiladas moist. Bake in your preheated oven for 20 minutes. After this time, remove the foil and bake for another 10 minutes. You want the enchiladas to be bubbly and golden brown on top. After baking, let your enchiladas cool for a few minutes. This helps the flavors settle and makes them easier to serve. Just before serving, sprinkle some chopped fresh cilantro on top for a pop of color and flavor. Enjoy your Easy Cream Cheese Chicken Enchiladas with your favorite sides, like rice or beans, for a complete meal. To make the filling truly creamy, blend the chicken with the cream cheese. Use softened cream cheese for easy mixing. Adding sour cream helps create a rich texture. Mix until smooth, then stir in spices. This ensures the flavors spread evenly in every bite. Garnishing adds a fun touch! Fresh cilantro gives a pop of color and flavor. You can also try sliced jalapeños for heat. A dollop of sour cream on top makes it extra creamy. Serve with a side of rice or beans for a full meal. One mistake is overfilling the tortillas. This can cause them to tear. Make sure to roll them tightly but not too full. Another issue is skipping the foil when baking. Covering the dish keeps the enchiladas moist. Lastly, don't forget to let them cool a bit before serving. This helps the flavors come together nicely. For the full recipe, check out the complete guide. {{image_4}} If you want a healthier take on these enchiladas, swap some ingredients. You can use Greek yogurt instead of sour cream. It adds creaminess and cuts calories. Try using low-fat cream cheese for less fat. You can also use whole wheat tortillas instead of regular ones. This change adds fiber and nutrients. To change the spice level, use different salsas. If you like it hot, try a spicy salsa or add diced jalapeños. For a milder taste, stick with a mild salsa. You can also mix in some smoked paprika or chili powder for extra flavor. A dash of lime juice can brighten the dish too. For a vegetarian version, replace chicken with black beans or lentils. You can also add vegetables like spinach or bell peppers. Just make sure to cook them first. For gluten-free options, use corn tortillas. They work well and still taste great. This way, everyone can enjoy these tasty enchiladas! After you enjoy your Easy Cream Cheese Chicken Enchiladas, store any leftovers. Place them in an airtight container. Make sure to let them cool down first. This helps keep them fresh longer. Store them in the fridge for up to three days. If you want to keep them longer, consider freezing. When you're ready to eat the leftovers, take them out of the fridge. Preheat your oven to 350°F (175°C). Place the enchiladas in a baking dish and cover them with foil. This helps keep the moisture in. Heat them for about 15-20 minutes. Check if they are warm all the way through before serving. Freezing enchiladas is easy! Wrap each one tightly in plastic wrap. Then, place them in a freezer-safe bag. Label the bag with the date. You can freeze them for up to three months. When you're ready to eat them, let them thaw in the fridge overnight. Reheat them in the oven as mentioned above. This way, they taste fresh and delicious! For more detailed instructions, check the Full Recipe. To make Easy Cream Cheese Chicken Enchiladas from scratch, follow these simple steps: 1. Mix shredded cooked chicken, cream cheese, cheddar cheese, sour cream, garlic powder, onion powder, ground cumin, salt, and black pepper. 2. Preheat the oven to 350°F (175°C). 3. Grease a baking dish. 4. Place about 1/4 cup of the chicken mix in each tortilla and roll it up. 5. Place each rolled tortilla seam-side down in the dish. 6. Pour salsa over the enchiladas. 7. Cover with foil and bake for 20 minutes, then uncover and bake for another 10 minutes. 8. Let cool for a few minutes, then serve. You can find the full recipe with complete details above. Yes, you can prepare the enchiladas in advance. Simply assemble them and store in the fridge, covered, for up to 24 hours. This saves time for busy days. When ready, bake them straight from the fridge. You may need to add a few extra minutes to the baking time. You can serve many tasty sides with Easy Cream Cheese Chicken Enchiladas, such as: - Mexican rice - Refried beans - Fresh salad - Guacamole - Chips and salsa These options add flavor and texture, making your meal even better. Enjoy your delicious enchiladas! Easy Cream Cheese Chicken Enchiladas offer a simple and tasty meal. We covered the essential ingredients, step-by-step instructions, and helpful tips. You learned how to avoid mistakes and create variations. Proper storage and reheating tips will keep your dish fresh. Remember, you can make this dish your own! Enjoy experimenting with flavors and serving ideas. Now, gather your ingredients and start cooking. Your kitchen awaits!

Easy Cream Cheese Chicken Enchiladas Simple Recipe

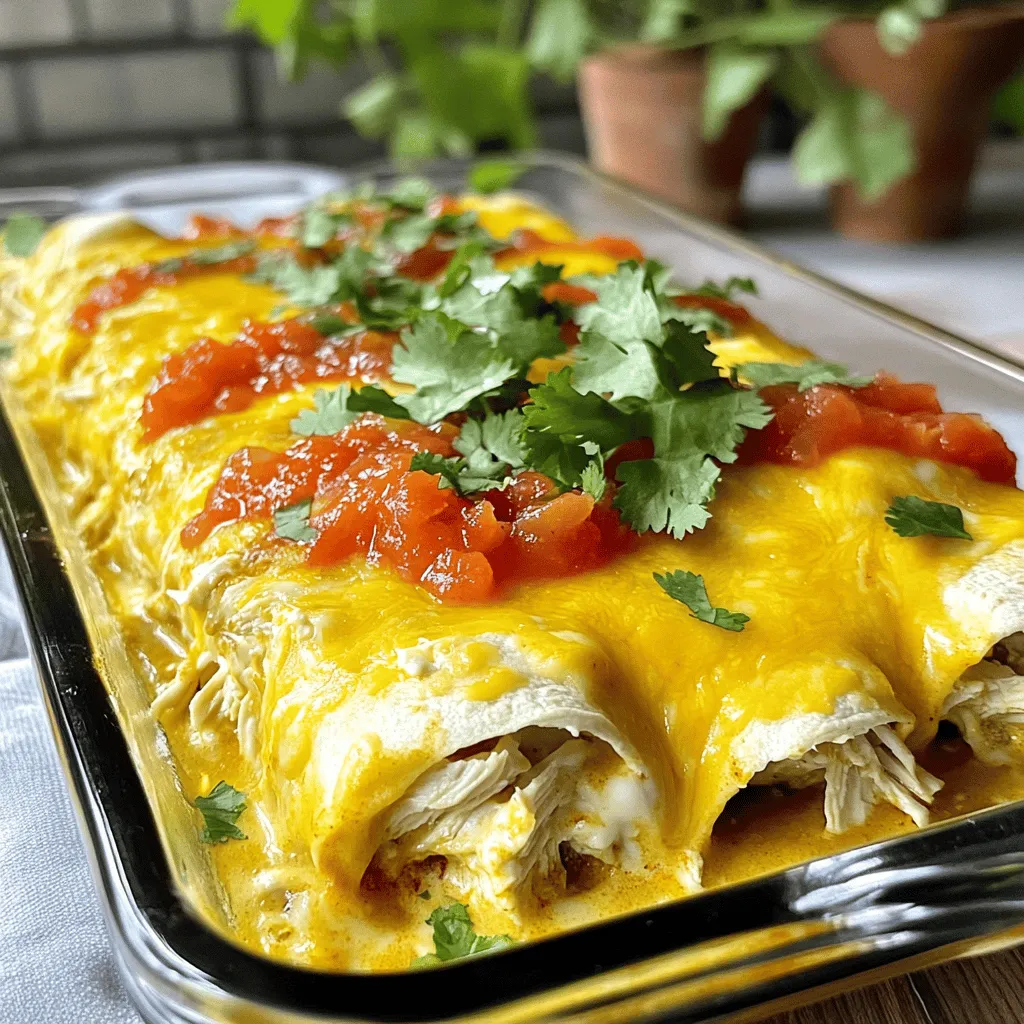
Are you ready to elevate your weeknight dinners? My Easy Cream Cheese Chicken Enchiladas recipe is a game-changer! With just

To make Vegan Chocolate Avocado Pudding, you need simple and fresh items. Each ingredient plays a key role in creating the rich and creamy texture you desire. Here’s what you need: - 2 ripe avocados - 1/3 cup unsweetened cocoa powder - 1/4 cup maple syrup - 1/2 cup almond milk - 1 teaspoon pure vanilla extract - A pinch of fine sea salt - Optional toppings: shredded coconut, chopped nuts, fresh berries Using ripe avocados is important. They provide the creaminess you want. Cocoa powder adds the rich chocolate flavor. Maple syrup acts as a sweetener. You can adjust it based on your taste. Almond milk keeps the pudding smooth and dairy-free. The vanilla extract deepens the flavor, while the sea salt enhances all the tastes. Feel free to get creative with optional toppings. Shredded coconut adds a nice texture. Chopped nuts bring a crunch, and fresh berries add color and a burst of flavor. This recipe is flexible, so make it your own! Check out the Full Recipe for more details on preparation. - Halve and pit the avocados. - Scoop out the flesh. To start, take your ripe avocados. Carefully cut them in half and remove the pit. This can be tricky, so be cautious. Use a spoon to scoop out the creamy flesh and place it in a food processor. The avocados need to be soft and ripe for the best flavor. - Add cocoa powder, maple syrup, almond milk, vanilla extract, and salt. Once you have the avocado in the food processor, it is time to mix in the other ingredients. Add 1/3 cup of unsweetened cocoa powder, 1/4 cup of maple syrup, and 1/2 cup of almond milk. Also, include 1 teaspoon of pure vanilla extract and a pinch of fine sea salt. These ingredients will bring out the chocolate flavor and balance the sweetness. - Blend until smooth. - Adjust sweetness and consistency. Now, blend the mixture on high speed. Keep blending until the pudding is smooth and creamy. If it feels too thick, add a little more almond milk to loosen it up. Taste the pudding and adjust the sweetness. You can add more maple syrup if you want. - Spoon into serving dishes. - Refrigerate for at least 30 minutes. Once blended, spoon the pudding into individual serving dishes. This is where the magic happens! Place them in the fridge for at least 30 minutes. This helps the flavors meld and makes the pudding firmer. Enjoy your rich and creamy vegan chocolate avocado pudding! For the full recipe, check the earlier section. To get the best texture for your pudding, start with almond milk. If your pudding is too thick, simply add a bit more almond milk. Blend again until smooth. For a creamy texture, use a high-speed blender. This ensures that all the ingredients mix well, giving you that velvety feel. Taste your pudding before serving. If it needs more sweetness, add a bit more maple syrup. You can also try using agave syrup or date syrup if you want different flavors. Both work well in this recipe. Presentation matters. Spoon the pudding into clear cups to show off its rich color. Top with shredded coconut, chopped nuts, or fresh berries for extra flavor. Each topping adds a special touch. Enjoy your pudding on its own or with a scoop of dairy-free ice cream for a fun dessert. For the full recipe, check out the complete guide above. {{image_4}} You can change this pudding to fit your taste. Adding peanut butter or almond butter gives it a rich, nutty flavor. Both options mix well with chocolate. You can also stir in spices like cinnamon or a pinch of chili powder. These spices add warmth and depth to the pudding, making each bite exciting. If you need a nut-free option, simply swap out almond milk. Coconut milk or oat milk works great too. These milks keep the pudding creamy and smooth. Always check for allergies when making changes. It’s key to ensure everyone can enjoy this treat. For a raw vegan version, use raw sweeteners like agave or date syrup. These keep the dish healthy and tasty. You can keep the pudding entirely raw by using fresh avocados and no heat in the process. This way, you enjoy all the nutrients from the ingredients. Feel free to explore these variations to make your own perfect Vegan Chocolate Avocado Pudding! For the full recipe, check out the details above. To keep your vegan chocolate avocado pudding fresh, use airtight containers. Glass containers work best. They do not absorb smells and keep the pudding tasty. If you don’t have glass containers, any BPA-free plastic container will do. Make sure the lid seals well to keep air out. Always let the pudding cool before sealing it. This helps prevent condensation, which can make the pudding watery. Vegan chocolate avocado pudding lasts in the fridge for 3 to 5 days. Store it in your airtight container to maintain its creamy texture. If you want to keep it longer, you can freeze it. Just scoop the pudding into freezer-safe bags or containers. It can freeze for up to 3 months. When you're ready to eat, thaw it in the fridge overnight. You may need to blend it again to restore its smoothness. Enjoy your sweet treat anytime! Yes, you can swap out maple syrup for other sweeteners. Agave nectar or honey works well, too. You can also use dates or coconut sugar. Just remember to adjust the amount based on how sweet you want it. Each sweetener brings a unique taste to the pudding. So, feel free to experiment and find your favorite! This pudding is quite healthy! Avocados are packed with good fats, vitamins, and fiber. They can help keep your heart healthy and boost your skin. The cocoa powder adds antioxidants, making this dessert not just tasty but good for you, too. When you enjoy this pudding, you're treating your body well while indulging your sweet tooth. Absolutely! You can make this pudding ahead of time. It stays fresh in the fridge for about three days. Just prepare it as the recipe shows, then cover it tightly. Before serving, give it a nice stir. If it seems too thick, add a splash of almond milk. It’s perfect for gatherings or just a sweet treat during the week. For the full recipe, check the earlier section! This blog post showed you how to make a tasty chocolate avocado pudding. You learned the key ingredients, simple steps, and helpful tips. I shared fun variations to try and how to store leftovers. This pudding is both delicious and healthy. It's easy to make and perfect for any event. Get creative with flavors and toppings to make it your own. Enjoy making this treat and impress your friends with your skills!

Vegan Chocolate Avocado Pudding Rich and Creamy Delight

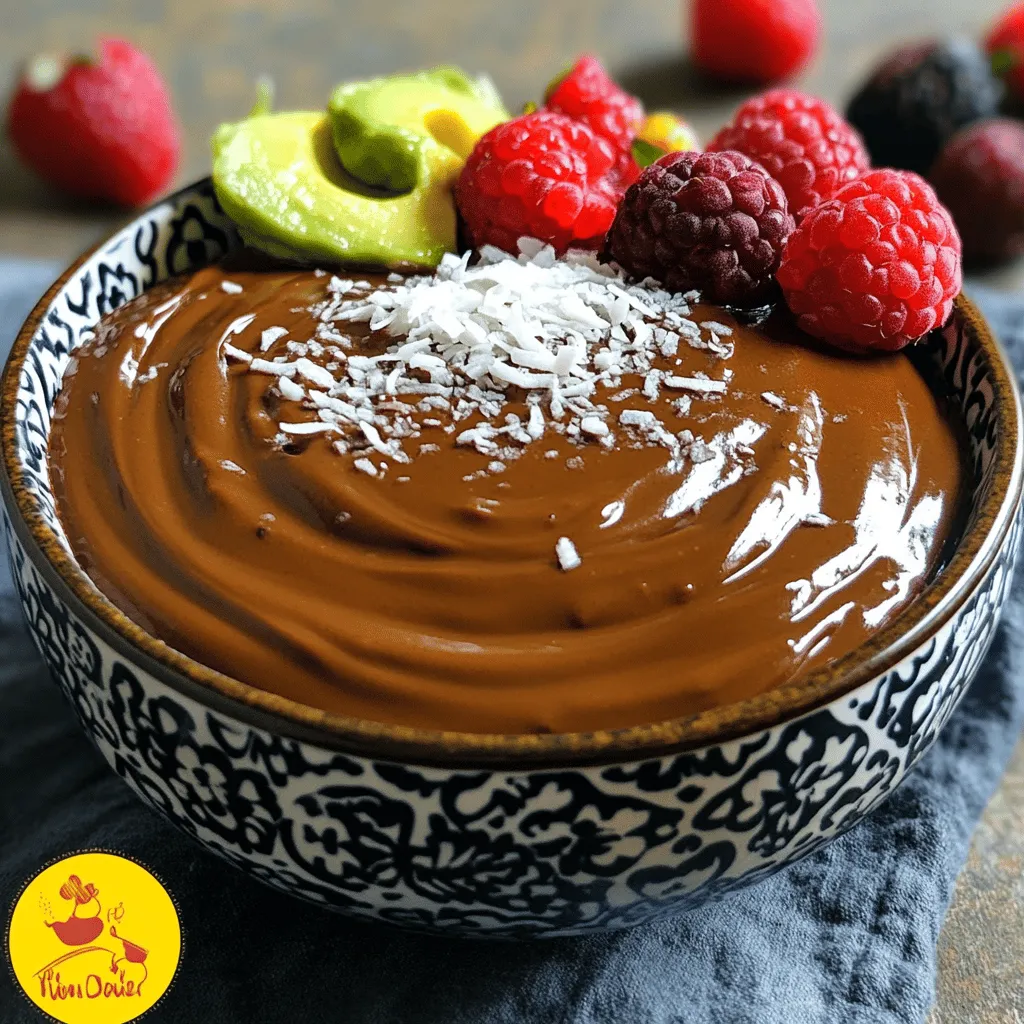
If you love rich desserts but want to keep things healthy, try my Vegan Chocolate Avocado Pudding. This creamy delight

- Essential ingredients: - 2 medium sweet potatoes, peeled and diced into small cubes - 1 can (15 oz) black beans, thoroughly rinsed and drained - 1 cup corn kernels (can be fresh, frozen, or canned) - 1 small red onion, finely chopped - 2 cloves garlic, minced - Spices and seasonings: - 1 teaspoon ground cumin - 1 teaspoon chili powder - Salt and freshly ground black pepper, to taste - Tortillas and cheese: - 8 small corn tortillas - 1 cup enchilada sauce (homemade or store-bought) - 1 cup shredded cheese (choose cheddar or Monterey Jack for maximum flavor) - Fresh cilantro leaves, for garnish This mix of ingredients creates a hearty, tasty meal. The sweet potatoes give a nice texture and sweetness. Black beans add protein and fiber, while corn brings a pop of color and crunch. Onion and garlic boost the flavor, making each bite rich and satisfying. The spices like cumin and chili powder give warmth without too much heat. The tortillas hold everything well, and the cheese melts beautifully over the top. This combination makes for a wonderful dish that is both healthy and filling. For the full recipe, check out the detailed instructions to bring these flavors together perfectly! 1. Preheat your oven to 400°F (200°C). This gets it hot for baking. 2. Boil water in a pot. Add diced sweet potatoes. Cook for 10-12 minutes until tender. Drain and set aside. 3. Heat 1 tablespoon of olive oil in a large skillet over medium heat. Add chopped red onion. Sauté for 3-4 minutes until soft. 4. Add minced garlic, ground cumin, chili powder, salt, and pepper. Stir and cook for 1 minute. The garlic should smell great. 1. Mix the drained black beans, corn, and the cooked sweet potatoes in the skillet. Stir well. Cook for 5 minutes. This blends all the flavors. 2. Warm corn tortillas in a dry skillet or microwave until they are soft. This makes them easy to roll. 3. Spread a thin layer of enchilada sauce on the bottom of a baking dish. This keeps the tortillas from sticking. 4. Take each tortilla. Add about 2 tablespoons of the filling in the center. Roll it up snugly and place seam-side down in the dish. Repeat until all tortillas are filled. 1. Once all tortillas are in the baking dish, pour the remaining enchilada sauce on top. Make sure they are well-coated. 2. Sprinkle shredded cheese over the sauce. 3. Bake in the preheated oven for 20 minutes. The cheese should melt and bubble. 4. Remove from the oven. Let it cool for a few minutes. Garnish with fresh cilantro before serving. For the complete recipe, check out the [Full Recipe]. To make great enchiladas, you need soft tortillas. Warm the corn tortillas in a dry skillet. Heat them for about 30 seconds on each side. This process makes them pliable. You can also microwave them for a few seconds. Just be careful not to overheat them. Layering enchilada sauce adds depth to the flavor. Spread a thin layer of sauce on the bottom of the baking dish. This keeps the tortillas from sticking. After filling the tortillas, pour more sauce on top. Make sure every inch is covered. This step keeps your enchiladas moist and tasty. Pair enchiladas with fresh sides for a great meal. A simple salad with lime dressing works well. You can also serve them with Mexican rice or guacamole. These sides add color and flavor to your dish. For a beautiful presentation, use a colorful platter. Place the enchiladas on the plate and drizzle with more sauce. Top with fresh cilantro for a pop of green. Add a dollop of sour cream on the side for creaminess. This makes your dish look and taste even better. For the full recipe, check out the Sweet Potato Black Bean Enchiladas section. {{image_4}} You can easily make these enchiladas gluten-free. Use corn tortillas, which are naturally gluten-free. If you want a vegan option, skip the cheese or use a plant-based cheese. You can also swap out the sweet potatoes. Try using butternut squash or zucchini for a different twist. For beans, pinto or kidney beans work well too. This gives you more flavors and textures to enjoy. To spice things up, add different spices. Smoked paprika or cayenne pepper can give your dish a nice kick. If you prefer a rich taste, use pepper jack cheese instead of cheddar. Fresh herbs can boost the flavor of your enchiladas. Chopped cilantro or green onions make a great topping. You might also try adding a squeeze of lime juice for brightness. Feel free to get creative! These variations can make your enchiladas unique every time you cook them. For the full recipe, check the details above. To keep your enchiladas fresh, store them in an airtight container. You can place them in the fridge. They stay good for up to 4 days. If you want to keep them longer, freezing is a great option. You can freeze enchiladas before or after baking. If freezing before baking, wrap them tightly in plastic wrap. Store them in a freezer-safe container. They can last for up to 3 months. If you bake them first, let them cool completely before wrapping. For reheating, place the frozen enchiladas in the oven at 350°F (175°C). Bake for 25-30 minutes until they are heated through. You can also add a bit more sauce to keep them moist. Enjoy the same great taste as when you first made them! How do I make these enchiladas spicier? To add some heat, try these tips: - Use more chili powder. - Add diced jalapeños to the filling. - Top with a spicy salsa or hot sauce. These changes will bring a nice kick to your dish. Can I use different beans instead of black beans? Yes! You can use other beans such as: - Pinto beans - Kidney beans - White beans Each type will change the flavor a bit, but they will still taste great. What can I serve with Sweet Potato Black Bean Enchiladas? These enchiladas pair well with: - A fresh green salad for crunch. - Mexican rice for added texture. - Guacamole or sour cream for creaminess. These sides will round out your meal nicely. In this blog post, we explored how to make delightful sweet potato black bean enchiladas. We covered ingredients, from sweet potatoes to spices, and all the steps to prepare, fill, and bake them. I shared tips for perfecting your enchiladas and suggested fun variations. Finally, we discussed storage tips to keep your leftovers fresh. These enchiladas are not only tasty but easy to make. I hope you feel inspired to try this recipe and enjoy the delicious flavors it offers.

Savory Sweet Potato Black Bean Enchiladas Recipe

Looking for a tasty and healthy dish? Try my Savory Sweet Potato Black Bean Enchiladas! Packed with nutrients and flavors,

To make crispy air fryer chicken wings, you need some key ingredients. Here’s what you should gather: - 2 pounds chicken wings - 1 tablespoon baking powder - 1 teaspoon garlic powder - 1 teaspoon onion powder - 1 teaspoon smoked paprika - ½ teaspoon cayenne pepper (adjust to your spice level) - Salt and black pepper, to taste - 2 tablespoons olive oil - Fresh parsley, chopped (for garnish) These ingredients work together to create that perfect crispy texture. The blend of seasonings is what makes these wings so tasty. I use garlic powder and onion powder for a nice base. Smoked paprika adds a rich, smoky flavor that you’ll love. The cayenne pepper gives a kick, but you can adjust it to suit your taste. Don’t forget to add salt and black pepper to enhance all the flavors. You can make your wings even better with some add-ons. Consider using your favorite dipping sauce like ranch or blue cheese. These sauces pair well with the crispy wings. You can also add a squeeze of lemon juice for a fresh twist. Feel free to get creative and add more flavors to suit your taste! For the full recipe, check the section titled Full Recipe. Start by patting the chicken wings dry. Use paper towels to soak up moisture. This step helps the wings turn out crispy. If the wings are wet, they won’t crisp up well. Dry wings also help the seasonings stick better. In a large bowl, mix the baking powder, garlic powder, onion powder, smoked paprika, cayenne pepper, salt, and black pepper. Stir until the mix is even. This blend gives a great flavor to the wings. Add the dried chicken wings into the bowl. Drizzle the olive oil over them. Toss everything together. Make sure the wings are fully coated with the seasonings. Preheat the air fryer to 400°F (200°C). This takes about 5 minutes. Preheating is key for a good cook. Place the seasoned wings in the air fryer basket in a single layer. This helps them cook evenly. Cook for 25-30 minutes. Shake the basket halfway through cooking. If you want them extra crispy, add 5-10 more minutes. Keep an eye on them. Once golden brown, take them out and let them rest for a few minutes. Garnish with parsley and serve with your favorite dipping sauce. Enjoy the full recipe for more details! To get the best crispy wings, dry them well. Use paper towels to remove all moisture. This step makes a big difference in texture. Next, use baking powder in your seasoning mix. It helps create a nice crunch. Make sure your air fryer is preheated. This locks in moisture and gives you an even cook. Lastly, don't crowd the basket. Cook in batches if needed to let air flow. Here are some quick dos and don’ts for air frying. Do: - Preheat your air fryer for best results. - Shake the basket halfway through cooking. - Use a light coating of oil for even crisping. Don’t: - Overcrowd the wings; this prevents them from crisping. - Add too much oil; it can make wings soggy. - Skip the seasoning; this adds great flavor. You can easily change the spice level in this recipe. For mild wings, reduce the cayenne pepper. If you like heat, add more! You can also try different spices, like chili powder or hot sauce. Mix them into the seasoning blend to create your perfect flavor. Remember to taste as you go. This way, you ensure the spice levels fit your preferences! {{image_4}} You can change the taste of your chicken wings easily. Think about using different spices. For a sweet twist, try adding honey and soy sauce. This mix gives a nice glaze. If you love heat, use chili powder and hot sauce. For a tangy flavor, toss wings in buffalo sauce after cooking. You can also try a lemon-pepper mix for a bright and zesty taste. While the air fryer makes wings crispy, you can cook them other ways, too. Baking in the oven is a solid choice. Just spread the wings on a baking sheet and bake at 400°F. Grill them over medium heat for a smoky flavor. Lastly, you can fry them in oil for classic crispiness. Each method offers a unique taste and texture. Not just chicken can be used in this recipe. You can use turkey wings for a bigger bite. They cook similarly and taste great. For a lighter option, try using cauliflower. It makes a tasty veggie wing when coated and air-fried. You can also use shrimp for a seafood twist. Adjust cooking times based on what you choose. Enjoy experimenting with these delicious options! To store leftover chicken wings, let them cool first. Place the wings in an airtight container. You can keep them in the fridge for up to three days. If you want to keep them longer, freezing is a great option. To reheat your chicken wings and keep them crispy, use the air fryer. Preheat your air fryer to 350°F (175°C). Place the wings in a single layer and heat for about 5-7 minutes. This method helps restore the crunch. You can also reheat them in the oven at the same temperature. Just place them on a baking sheet. If you want to freeze chicken wings, wrap them tightly. Use plastic wrap or aluminum foil, then place them in a freezer bag. Make sure to remove as much air as possible. Frozen wings can last up to three months. When ready to eat, thaw them in the fridge overnight before reheating. Enjoy the taste of fresh wings anytime! For the best results, cook the wings for 25-30 minutes at 400°F (200°C). I recommend shaking the basket halfway through. This helps the wings cook evenly. If you like them extra crispy, add 5-10 minutes to the cooking time. Keep a close watch to avoid burning. Yes, you can use frozen chicken wings. However, you need to adjust the cooking time. Frozen wings take about 30-35 minutes to cook. Make sure to check their internal temperature. They should reach 165°F (75°C) for safety. The best way to season these wings is to use a mix of spices. I suggest using baking powder, garlic powder, onion powder, smoked paprika, and cayenne pepper. This blend gives the wings a great flavor and helps them crisp up nicely. Feel free to adjust the cayenne to match your spice level. Yes, you can cook other foods in the air fryer. Just make sure they have similar cooking times. Foods like veggies or fries can pair well with chicken wings. Be aware that cooking different foods together may change the flavors. To make crispy air fryer chicken wings, you need simple ingredients. Here’s what you need: - 2 pounds chicken wings - 1 tablespoon baking powder - 1 teaspoon garlic powder - 1 teaspoon onion powder - 1 teaspoon smoked paprika - ½ teaspoon cayenne pepper (adjust based on your spice preference) - Salt and black pepper, to taste - 2 tablespoons olive oil - Fresh parsley, finely chopped (for garnish) - Optional: Your favorite dipping sauce (such as ranch or blue cheese) Now, let’s go through the steps to create these delicious wings. 1. Prep the Chicken Wings: Start by drying the chicken wings with paper towels. This is very important. The drier the wings, the crispier they will be! 2. Season the Wings: In a bowl, mix the baking powder, garlic powder, onion powder, smoked paprika, cayenne pepper, salt, and black pepper. Whisk until it’s all blended well. 3. Coat the Wings: Add the dried wings to the bowl. Drizzle with olive oil. Toss the wings well, making sure they are evenly covered in the seasoning mix. 4. Preheat the Air Fryer: Turn on your air fryer and set it to 400°F (200°C). Let it preheat for about 5 minutes. This step locks in moisture and helps cook them evenly. 5. Cook the Wings: Place the wings in the air fryer basket. Arrange them in a single layer. If your air fryer is small, you may need to cook them in batches. Cook for 25-30 minutes, shaking the basket halfway through. 6. Check for Crispiness: If you want extra crunch, cook them a bit longer. Add another 5-10 minutes if needed. Watch them closely to get your desired crispiness. 7. Garnish and Serve: After they are golden brown and crispy, take them out. Let them rest for a few minutes. Sprinkle with fresh parsley for a nice touch. Serve with your favorite dipping sauce for a tasty treat! This recipe gives you crispy, flavorful wings that everyone will love. Enjoy your cooking! Crispy air fryer chicken wings are easy and fun to make. We explored the key ingredients, seasonings, and optional dips that boost flavor. I shared step-by-step instructions to ensure perfect cooking. You learned tips for crispiness, spice adjustments, and storage advice. Don't forget the recipe variations to keep things fresh. Follow the outlined details for yummy wings every time. With these tips and tricks, you'll wow your friends and family!

Crispy Air Fryer Chicken Wings Flavorful and Easy Recipe

Are you ready to make the crispiest chicken wings that will impress everyone? This easy air fryer recipe will turn

- 8 oz spaghetti or linguine - 1 lb large shrimp, peeled and deveined - 4 tablespoons unsalted butter - 4 cloves garlic, minced - 1 teaspoon red pepper flakes (adjust to taste) - 1 lemon, juiced and zested - 1 cup cherry tomatoes, halved - 1/4 cup fresh parsley, chopped - Salt and freshly ground black pepper to taste - Grated Parmesan cheese for serving (optional) When I make Garlic Butter Shrimp Pasta, I focus on fresh ingredients. The shrimp should be large and juicy. I love using spaghetti or linguine for the perfect noodle-to-sauce ratio. Now, let's talk about the aromatics. Garlic and butter are key. The garlic gives depth, while the butter adds a rich flavor. Together, they create a base that makes the dish shine. For extra flavor, I like to add red pepper flakes. Adjust the amount based on your spice level. A squeeze of fresh lemon juice brightens the dish. Cherry tomatoes add a sweet burst. They soften as they cook, bringing a nice texture to the pasta. Garnishing with fresh parsley adds color and freshness. I often sprinkle grated Parmesan on top for an extra layer of flavor. These ingredients make a simple yet flavorful dish that impresses every time! You can find the full recipe [here](#). To cook pasta well, follow these steps. First, boil a large pot of salted water. Add your spaghetti or linguine and cook until it is al dente. This means it should be firm but not hard. It usually takes about 8-10 minutes. Always check the package for exact times. Before draining, save 1 cup of that starchy pasta water. This water helps thicken your sauce later. For the garlic butter sauce, start by melting butter in a large skillet. Use medium heat to avoid burning. Once it starts to foam, the butter is ready. Next, add your minced garlic and red pepper flakes. Sauté them for 1-2 minutes. Stir often and watch closely. You want the garlic fragrant, but not brown. Brown garlic can taste bitter. Now it's time to cook the shrimp. Raise the heat to medium-high. Add the shrimp to the skillet and season with salt and pepper. Cook the shrimp for about 3-4 minutes. They should turn pink and opaque when done. This shows that they are cooked perfectly. Once the shrimp are ready, stir in the halved cherry tomatoes. Add the lemon juice and zest at this point too. Cook for another 2 minutes. This softens the tomatoes and mixes the flavors. Then, add the drained pasta to the skillet. Toss everything gently to mix well. If it looks dry, add some reserved pasta water. Do this a few tablespoons at a time until the sauce is just right. Lastly, take the skillet off the heat. Fold in your fresh parsley and taste it. Adjust the seasoning with more salt or pepper if needed. Serve your dish hot, garnished with parsley and maybe some grated Parmesan cheese. For the full recipe, check out the details above. - Adjusting spice levels with red pepper flakes: Start with a small amount. You can always add more as you cook. This way, you control the heat. If you like it spicy, try two teaspoons. - Enhancing flavors with fresh herbs: Fresh herbs like parsley make a big difference. They bring freshness and brightness to the dish. Add them at the end for the best flavor. - Overcooking shrimp: Shrimp cook fast. Cook them just until they turn pink and opaque. This keeps them juicy and tender. Overcooked shrimp get rubbery, so watch the clock. - Not reserving enough pasta water: Always save some pasta water. It helps bind the sauce to the pasta. If your sauce feels dry, add a little water to make it creamy. - Pairing with wine or side dishes: A crisp white wine like Sauvignon Blanc pairs well. You can also serve with a light salad. Garlic bread is another great side to soak up sauce. - Creative serving ideas: Serve the pasta in deep bowls. Add a lemon wedge for a pop of color. A sprinkle of extra parsley on top makes it look fresh and inviting. For the full recipe, check out Garlic Butter Shrimp Pasta Delight. {{image_4}} If you want to change things up, consider these options: - Alternative proteins for shrimp: You can use chicken, scallops, or even tofu. Each adds a unique flavor and texture. If using chicken, slice it thinly for quick cooking. Scallops bring a sweet taste that pairs well with garlic. Tofu is great for a vegetarian twist; just press it to remove excess moisture. - Gluten-free pasta options: If you need gluten-free pasta, try rice noodles or chickpea pasta. Both options cook well and hold sauce nicely. They also add different flavors to the dish, making it fun to explore. You can enhance your dish easily: - Incorporating different herbs and spices: Fresh basil, thyme, or oregano can brighten the taste. Add them towards the end of cooking for the best flavor. You can also try adding a pinch of smoked paprika for a smoky touch. - Adding vegetables for more nutrition: Toss in spinach, zucchini, or bell peppers. These add color and make the dish more filling. Cook them briefly with the shrimp so they stay vibrant and crisp. Want to try something new? Here are some ideas: - Creamy garlic butter version: Add a splash of heavy cream or cream cheese to the sauce. This creates a rich, velvety texture that makes every bite delightful. - Adding white wine for depth of flavor: Pour in a bit of white wine after cooking the shrimp. Let it simmer for a few minutes. This will add a nice acidity and depth, making the dish even more special. These variations keep your garlic butter shrimp pasta exciting and fresh! For more details, check the Full Recipe to get started on this delicious journey. To keep your garlic butter shrimp pasta fresh, store it in the fridge. Use a tight container to avoid air exposure. It will stay good for about 3 days. If you want to save it longer, consider freezing. Place the pasta in a freezer-safe bag or container. Make sure to remove as much air as possible. Frozen, it can last up to 2 months. When it's time to reheat, I suggest using a skillet. This helps keep the pasta creamy. Add a splash of water or broth to the skillet. Heat on low and stir often. This method prevents it from drying out. Avoid using the microwave as it can overcook the shrimp. Just heat until warm, and enjoy your tasty dish again! Cooking garlic butter shrimp pasta takes about 20 minutes. You need 10 minutes to prep and 10 minutes to cook. Start by boiling water for the pasta. While the pasta cooks, you can make the garlic butter sauce. Everything comes together quickly! Yes, you can make garlic butter shrimp pasta ahead of time. Cook the pasta and shrimp, then store them separately. Keep the sauce in an airtight container. When you are ready to eat, just reheat everything gently. This method keeps the dish fresh and tasty! Garlic butter shrimp pasta has some healthy elements. Shrimp is high in protein and low in calories. The dish also includes fresh tomatoes and parsley, which add vitamins. However, it does have butter and cheese, so enjoy it in moderation. You can use frozen shrimp for this recipe. First, thaw the shrimp in cold water for about 15-20 minutes. Drain them well before cooking. Using frozen shrimp can save time and is a convenient option. Just make sure they are peeled and deveined! In this post, I covered how to make garlic butter shrimp pasta. We went over the ingredients, step-by-step cooking, and storage tips. Remember to avoid common mistakes, like overcooking shrimp or skimping on pasta water. You can customize the dish with different proteins and flavors. By following these guidelines, you can create a tasty meal that's easy to enjoy. Now, grab your ingredients and get cooking! Your delicious garlic butter shrimp pasta awaits.

Garlic Butter Shrimp Pasta Simple and Flavorful Dish

Craving a dish that’s both simple and bursting with flavor? Look no further! Garlic Butter Shrimp Pasta is a delightful

To make gluten-free blueberry muffins, you need the following ingredients: - 2 cups almond flour - 1/2 cup coconut flour - 1/2 cup granulated sugar (or coconut sugar) - 2 teaspoons baking powder - 1/2 teaspoon baking soda - 1/4 teaspoon salt - 3 large eggs - 1/2 cup unsweetened applesauce - 1/4 cup almond milk - 1 teaspoon pure vanilla extract - 1 ½ cups fresh blueberries - Zest of 1 lemon (optional) These ingredients not only taste great but also come with health perks. Almond flour is high in protein and healthy fats. It helps keep you full longer. Coconut flour adds fiber, which is good for digestion. Eggs provide protein and essential nutrients like vitamin D. Applesauce is a great substitute for oil. It keeps the muffins moist and adds natural sweetness. Blueberries are rich in antioxidants and good for heart health. This combination makes these muffins a tasty and healthy treat. If you need to change any ingredients, here are some options: - Almond flour: You can use sunflower seed flour for nut-free muffins. - Coconut flour: Try oat flour if you want a different taste. - Sugar: Use maple syrup or honey for a natural sweetener. - Eggs: Flaxseed meal mixed with water can replace eggs for a vegan option. - Dairy alternatives: Use soy milk or oat milk in place of almond milk. For the full recipe, check the section above. Enjoy baking these delicious gluten-free blueberry muffins! To start, preheat your oven to 350°F (175°C). Grab a muffin tin and line it with paper liners or grease it with non-stick spray. This will help your muffins pop out easily. Next, take a large bowl. Add the almond flour, coconut flour, granulated sugar, baking powder, baking soda, and salt. Whisk these dry ingredients until they are mixed well and clump-free. In another bowl, crack the eggs and whisk them with the applesauce, almond milk, vanilla extract, and lemon zest (if you’re using it). Mix until smooth. Pour the wet mixture into the dry ingredients. Stir gently until just combined. Don’t overmix. This keeps your muffins light and fluffy. Now, fold in the blueberries with a spatula. Make sure they are evenly spread but keep them whole for the best flavor. Scoop the batter into the muffin cups, filling each about two-thirds full. This allows space for rising. Bake in the preheated oven for 18-22 minutes. Mixing is crucial for great muffins. First, always whisk the dry ingredients well. This helps to spread the baking powder and soda evenly. When combining wet and dry ingredients, use a gentle hand. Overmixing can make your muffins dense. It’s okay if a few lumps remain. When adding blueberries, fold them in carefully. This keeps them intact and juicy. If you use frozen blueberries, you can skip thawing them. Just add them straight in! To tell if your muffins are ready, use a toothpick. Insert it into the center of one muffin. If it comes out clean, they are done. Another sign is the golden brown color on top. The muffins should look puffy and firm. Once they are baked, let them cool in the pan for about 5 minutes. Then, move them to a wire rack. This helps them cool evenly and keeps the bottoms from getting soggy. Enjoy these muffins fresh from the oven or save them for later! To make the best gluten-free blueberry muffins, follow a few key tips. First, measure your flour accurately. Use a scale if possible, as this gives you the most precision. Next, remember to whisk your dry ingredients well. This step helps mix the baking powder and baking soda evenly. When mixing wet and dry ingredients, do not overmix. Just stir until combined to keep your muffins light. Finally, bake them in a preheated oven at the right temperature. This step ensures even cooking and a good rise. There are several common mistakes to watch for. One mistake is using too much flour. This can make the muffins dense. Another is skipping the eggs, as they help bind the ingredients together. Not letting batter rest can also lead to less fluffy muffins. Lastly, avoid opening the oven door too soon. This can cause the muffins to collapse. Keep these tips in mind for the best results. Using the right tools can make a big difference. A good mixing bowl is essential for combining ingredients. A whisk helps mix dry ingredients thoroughly. Use a spatula for folding in blueberries gently. A muffin tin with liners helps with easy removal. An ice cream scoop is perfect for portioning the batter evenly. To check for doneness, a toothpick is a must. Each of these tools will help you create perfect muffins from the full recipe. {{image_4}} You can add fun flavors to your gluten-free blueberry muffins. Try mixing in chopped nuts like walnuts or pecans for crunch. You can also add spices to change the taste. Cinnamon gives warmth and pairs well with blueberries. Nutmeg adds a sweet touch. Just a pinch can make a big difference. Experiment to find your favorite mix! If you want to make these muffins dairy-free, it's easy! Instead of regular milk, use almond milk or coconut milk. Both options keep the muffins moist. You can also use dairy-free yogurt instead of applesauce. This swap keeps the texture creamy while avoiding dairy. Feel free to try different brands to see what you like best. Not everyone likes the same level of sweetness. If you want a less sweet muffin, cut back on the sugar. You can use just 1/3 cup of sugar and still enjoy a tasty treat. For extra sweetness, add a bit of honey or maple syrup. Just remember to reduce the other liquids slightly if you do. This keeps your muffins from getting too wet. For a fun twist, mix in a little lemon zest for a bright, fresh flavor! To keep your gluten-free blueberry muffins fresh, store them in an airtight container. This helps to maintain their moisture and flavor. Place a paper towel at the bottom of the container to absorb any excess moisture. You can also stack them with parchment paper between layers to prevent sticking. Store the muffins at room temperature for up to three days. For longer storage, consider freezing them. If you want to freeze your muffins, let them cool completely first. Wrap each muffin tightly in plastic wrap, then place them in a freezer-safe bag. You can freeze them for up to three months. To reheat, take a muffin out and let it thaw at room temperature. You can warm it in the microwave for about 15-20 seconds or in a preheated oven at 350°F (175°C) for about 5-7 minutes. This will help restore their soft texture. Gluten-free blueberry muffins are best enjoyed fresh, but they can last a bit longer. If stored properly, they stay good for about three days at room temperature. In the freezer, they can last up to three months. Always check for any signs of spoilage, like an off smell or visible mold, before enjoying your muffins. Yes, you can make these muffins vegan. To do this, you will replace the eggs. Use a flaxseed meal instead. Mix 1 tablespoon of flaxseed meal with 3 tablespoons of water for each egg. Let it sit for 5 minutes until it thickens. This acts as a good binder. To make your muffins fluffier, try a few tricks. First, make sure to sift your dry ingredients. This adds air and helps with texture. Second, beat the eggs until they are frothy. This will add extra lift. Lastly, do not overmix the batter. Mix just until combined for the best rise. If you need a substitute for almond flour, try using oat flour. It provides a similar texture and flavor. You can also use a gluten-free all-purpose flour blend. Make sure it has xanthan gum to help bind the mix. This will keep your muffins light and tasty. For the full recipe, check out the Gluten-Free Blueberry Bliss Muffins 🫐 section. You learned about key ingredients for delicious muffins and their health perks. Gluten-free swaps fit right in too. We explored step-by-step baking, mixing tips, and knowing when muffins are ready. I shared tricks to perfect your muffins and common pitfalls to dodge. We covered flavor variations, storage methods, and answered your burning questions. Now, you can bake muffins with confidence. Happy baking!

Gluten-Free Blueberry Muffins Flavorful and Easy Recipe

Are you ready for a tasty treat that fits your gluten-free diet? These gluten-free blueberry muffins are not only flavorful

- 1 tablespoon coconut oil - 1 medium onion, finely chopped - 3 cloves garlic, minced - 1 tablespoon fresh ginger, grated - 1 cup dried red lentils, thoroughly rinsed These ingredients form the base of your coconut curry lentil soup. The coconut oil adds a rich flavor and helps sauté the onions, garlic, and ginger. The onion brings sweetness, while garlic and ginger provide warmth and depth. Dried red lentils cook quickly and give the soup a hearty texture. - 1 tablespoon red curry paste - 1 (14 oz) can of coconut milk - 4 cups vegetable broth - 1 tablespoon soy sauce (or tamari for gluten-free) - Juice of 1 lime These flavor builders elevate the dish. Red curry paste gives it a spicy kick. Coconut milk adds creaminess, balancing the heat. Vegetable broth enhances the soup's umami. Soy sauce adds saltiness, and lime juice brightens all the flavors. - 2 cups fresh spinach, roughly chopped - Fresh cilantro leaves, for garnish - Sliced chili peppers (optional, for added heat) - Salt and black pepper to taste These optional add-ins allow you to customize your soup. Fresh spinach adds nutrition and color. Cilantro gives a fresh finish. Chili peppers can spice things up if you like heat. Finally, salt and black pepper help you adjust the flavor to your liking. For the full details on how to bring these ingredients together, check out the Full Recipe. 1. Sauté the Aromatics: Start by heating 1 tablespoon of coconut oil in a large pot over medium heat. Add 1 medium onion, finely chopped. Sauté the onion for about 5 minutes until it becomes soft and clear. This step gives your soup a great start. 2. Add Flavor with Garlic and Ginger: Next, stir in 3 cloves of minced garlic and 1 tablespoon of fresh ginger, grated. Also, add 1 tablespoon of red curry paste. Cook this mix for 2 minutes. You will smell the wonderful spices filling your kitchen! 3. Incorporate Lentils: Now, add 1 cup of dried red lentils, rinsed well. Stir them into the onion and spice mix. Ensure all lentils get coated in the flavors. 4. Add Liquids and Bring to a Boil: Pour in 1 (14 oz) can of coconut milk and 4 cups of vegetable broth. Stir everything together and bring it to a rapid boil. This step combines all the flavors beautifully. 5. Simmer for Tenderness: Once it boils, lower the heat and let it simmer uncovered for about 20 to 25 minutes. Stir occasionally until the lentils are soft and cooked through. This step is crucial for a tasty soup. 6. Finish with Greens and Seasonings: Stir in 2 cups of chopped fresh spinach and 1 tablespoon of soy sauce. Cook for another 5 minutes. The spinach will wilt and blend into the soup. After that, squeeze the juice of 1 lime into the mixture and add salt and black pepper to taste. 7. Serve and Garnish: Ladle your warm soup into bowls. Top with fresh cilantro leaves for a pop of color. If you like heat, add sliced chili peppers on top. For a full recipe with more details, check the [Full Recipe]. Enjoy your Coconut Curry Lentil Soup! You can adjust the cooking time for lentils based on type. Red lentils cook fast, about 20-25 minutes. For green or brown lentils, aim for 30-40 minutes. Always check for tenderness before serving. Enhance flavor during cooking by adding spices early. Sauté the onion, garlic, and ginger to unlock their full taste. Consider adding a splash of soy sauce while the soup simmers. This boosts the umami taste. Presentation matters! Serve your soup in deep bowls. Add lime wedges on the side; they give a fresh kick. Drizzle some coconut milk on top for a creamy look. Pair the soup with warm naan or rice. A side salad adds crunch and freshness. Top your soup with crispy chili flakes for some heat. Lentils are packed with protein and fiber. They help keep you full longer. They also support heart health and digestion. Coconut milk adds healthy fats. It can boost your energy and keep your skin glowing. For a low-calorie option, use light coconut milk. This keeps the flavor while reducing calories. {{image_4}} Want your soup a bit milder? Use less red curry paste. You can start with one teaspoon instead of one tablespoon. This lets you control the heat level. If you like it spicy, add sliced chili peppers. They bring an extra kick. You can also try different curry pastes. Green curry paste or yellow curry paste works well too. Each has a unique flavor that changes the dish. Need a gluten-free option? Use tamari instead of soy sauce. This keeps the soup safe for those with gluten issues. For a vegan alternative, check the broth. Some vegetable broths contain animal products. Choose a brand that’s clearly labeled vegan. This way, you keep it plant-based and delicious. Add more nutrition with extra veggies. Carrots and bell peppers are great choices. They add color and crunch. You can also use seasonal vegetables, like zucchini in summer or sweet potatoes in fall. Just chop them small so they cook well. This gives your soup a hearty feel. Plus, it makes it even more flavorful. To keep your Coconut Curry Lentil Soup fresh, store it properly. If you have leftovers, refrigerate them. Use a sealed container. This keeps the soup safe and tasty for up to five days. If you want to save it longer, freeze the soup. Use freezer-safe containers or bags. This way, it can last for about three months. You can reheat the soup in different ways. The microwave is fast and easy. Just pour your soup into a bowl and heat for two minutes. Stir it halfway to ensure even heating. The stovetop is another great option. Pour the soup into a pot and heat over medium. Stir often until it’s warm. To keep the soup's texture, do not boil it. Boiling can make the lentils mushy. Instead, heat it gently. If the soup seems too thick after reheating, add a little water or broth. This helps restore its creamy texture. For best results, check your soup often while reheating. Enjoy your warm, flavorful Coconut Curry Lentil Soup! For the full recipe, refer back to the section above. How long does Coconut Curry Lentil Soup last in the fridge? Coconut Curry Lentil Soup can last about five days in the fridge. Just make sure to store it in an airtight container. This keeps the soup fresh and tasty. If you want to eat it later, freeze it for up to three months. Can I use different types of lentils? You can use other lentils, but the cooking time will change. Red lentils cook fast and break down, making the soup creamy. Green or brown lentils take longer to cook and stay firmer. Adjust your cooking time if you choose different lentils. What’s the best way to thicken the soup? If you want a thicker soup, blend part of it. Use an immersion blender for a quick mix. This creates a nice, creamy texture. You can also add more lentils or reduce the liquid while cooking. Can I make this soup ahead of time? Yes, you can make this soup ahead of time. It tastes even better the next day as the flavors blend. Just store it in the fridge after it cools down. Reheat it gently when you are ready to eat. Is Coconut Curry Lentil Soup safe for a gluten-free diet? Yes, this soup is gluten-free if you use tamari instead of soy sauce. Always check labels to ensure no gluten sneaks in. The main ingredients, like lentils and coconut milk, are naturally gluten-free. What are the vegan-friendly aspects of this recipe? Coconut Curry Lentil Soup is naturally vegan. It uses no animal products and gets its creaminess from coconut milk. It’s a great option for those who want a hearty, plant-based meal. Enjoy this soup guilt-free! For the full recipe, check out the detailed instructions above. In this post, I covered how to make a delicious Coconut Curry Lentil Soup. We discussed essential ingredients like coconut oil and dried lentils, along with flavor builders like curry paste and coconut milk. I shared steps to prepare and complete the dish, plus tips for perfecting your soup. Don't forget to try different spice adjustments and veggie add-ins. Store leftovers properly for the best taste. Enjoy exploring this simple yet tasty recipe that can be tailored to your needs and preferences!

Coconut Curry Lentil Soup Hearty and Flavorful Dish

Are you ready for a warm, comforting dish that’s both hearty and flavorful? Coconut Curry Lentil Soup brings together rich

To make mouthwatering teriyaki chicken bowls, gather these ingredients: - 1 lb chicken breast, diced into bite-sized pieces - 1 cup brown rice - 2 cups water (for cooking the rice) - 1 cup fresh broccoli florets - 1 medium red bell pepper, sliced into thin strips - 1 medium carrot, julienned - 3 green onions, finely chopped (for garnish and flavor) - 1 tablespoon sesame oil - 1/4 cup low-sodium soy sauce - 2 tablespoons honey (or maple syrup for a vegan option) - 1 tablespoon rice vinegar - 1 teaspoon freshly grated ginger - 1 clove garlic, minced - Sesame seeds, for garnish You can swap out some ingredients if needed: - Chicken: Use tofu or chickpeas for a vegetarian option. - Rice: Quinoa or cauliflower rice works well, too. - Vegetables: Feel free to add snap peas, spinach, or any veggies you like. - Soy Sauce: Coconut aminos or tamari can replace soy sauce for a gluten-free option. - Honey: Maple syrup or agave syrup suits vegan diets. These tools will help make the process easy: - Medium pot for cooking rice - Large skillet or wok for chicken and veggies - Whisk for mixing the teriyaki sauce - Cutting board and knife for chopping ingredients - Measuring cups and spoons for accurate portions With these ingredients and tools, you are ready to make your own teriyaki chicken bowls. For the full recipe, check the detailed cooking steps provided earlier. To start, rinse 1 cup of brown rice under cold water. This step removes excess starch. Next, add the rinsed rice to a medium pot with 2 cups of water. Bring it to a boil. Once boiling, reduce the heat to low. Cover the pot with a lid and let it simmer for 30-35 minutes. The rice is ready when it's tender and the water is absorbed. Fluff it gently with a fork before serving. In a medium bowl, combine 1/4 cup low-sodium soy sauce, 2 tablespoons honey, 1 tablespoon rice vinegar, 1 teaspoon freshly grated ginger, and 1 clove minced garlic. Whisk these ingredients together until well mixed. This sauce adds a sweet and savory taste to your dish. Set it aside for later. Heat 1 tablespoon of sesame oil in a large skillet over medium heat. Once hot, add 1 lb of diced chicken breast. Cook the chicken for 5-7 minutes until it turns golden brown. While the chicken cooks, blanch 1 cup of broccoli florets in boiling water for 2 minutes. Then, transfer them to ice water to stop cooking. Drain and set aside. Next, add sliced 1 medium red bell pepper and 1 medium julienned carrot to the skillet. Stir-fry with the chicken for 3-4 minutes. Pour the teriyaki sauce over the chicken and vegetables. Stir everything to coat well. Let it simmer for 2-3 minutes. Now, you can assemble your bowls. Place the fluffy brown rice in serving bowls. Top with the teriyaki chicken and vegetables. Don’t forget to garnish with chopped green onions and sesame seeds. Enjoy your delicious creation! To achieve tender chicken, start with fresh chicken breast. Cut it into small pieces for quick cooking. Use medium heat when sautéing to avoid overcooking. Cook the chicken until it’s golden brown. This gives a nice texture while keeping it juicy. Marinades boost flavor and make your chicken yum. For a simple teriyaki marinade, mix soy sauce, honey, rice vinegar, grated ginger, and minced garlic. Let your chicken soak in this mix for at least 30 minutes. This step adds depth and makes your dish shine. Presentation matters! Use a large bowl for your rice. Top it with the chicken and veggies. Sprinkle green onions and sesame seeds for color. Serve with chopsticks and a lime wedge for extra flair. This adds a fun twist that impresses your guests. For more details, check the Full Recipe. {{image_4}} You can make this dish vegan easily. Instead of chicken, use tofu or tempeh. Both options soak up flavors well. Cube the tofu or tempeh and cook it until golden. Use the same teriyaki sauce to keep that sweet and savory taste. For extra protein, add edamame or chickpeas. You can also use maple syrup in place of honey for sweetness. Feel free to customize the veggies in your teriyaki bowl. Broccoli, bell peppers, and carrots are great, but try other choices too. Snap peas or zucchini add a fresh crunch. Mushrooms give a nice earthy flavor, while baby corn adds fun texture. Mix and match your favorites to keep it exciting. If you love spice, add some heat to your teriyaki bowls. You can stir in red pepper flakes or sriracha into the teriyaki sauce. Another option is to add sliced jalapeños to the skillet while cooking. This will make your dish sizzle with flavors. Adjust the spice to your taste, and enjoy the heat! To store leftover teriyaki chicken bowls, let them cool first. Use airtight containers to keep them fresh. Make sure to separate the rice and chicken mix to prevent sogginess. Store them in the fridge for up to three days. You can also freeze them for longer storage. Just be sure to label the containers with the date. When it's time to reheat, use a microwave or stovetop. For the microwave, place the bowl in for about one to two minutes. Stir halfway to heat evenly. If using the stovetop, add a splash of water to the pan. Heat on low, stirring often, until warmed through. This keeps the chicken moist and the rice fluffy. To save time during the week, prep your ingredients ahead. Cook the rice and chicken in bulk. Store them in separate containers. Chop the veggies and keep them ready to toss in. You can also make the teriyaki sauce ahead. This way, on busy days, all you need to do is combine and heat. Enjoy a quick, home-cooked meal anytime! You can use tofu, shrimp, or beef instead of chicken. Tofu works well for a plant-based option. You can cube firm tofu and sauté it just like chicken. Shrimp cooks fast and adds a different flavor. Thinly sliced beef also pairs nicely with teriyaki sauce. Yes, you can make the teriyaki sauce ahead. Mix the soy sauce, honey, rice vinegar, ginger, and garlic. Store it in an airtight container in the fridge for up to a week. This saves time on busy days and lets the flavors deepen. To make your Teriyaki Chicken Bowls healthier, use brown rice instead of white rice. Add more veggies like spinach, snap peas, or bell peppers. You can also reduce the honey in the sauce or use a sugar substitute. This keeps the flavor while cutting calories. For the full recipe, check out the detailed steps above. This guide covered everything you need for delicious teriyaki chicken bowls. We explored key ingredients and their substitutions, plus the best tools to use. You learned the step-by-step process to cook brown rice, make teriyaki sauce, and prepare chicken with veggies. We shared tips for tender meat, flavors, and presentation. You now know variations for vegan bowls and spicy twists. Lastly, we discussed how to store and reheat your meal. Whether you're meal prepping or cooking for friends, these bowls will impress everyone. Dive in, enjoy, and make your own perfect bowls!

Mouthwatering Teriyaki Chicken Bowls Simple Recipe

Are you ready to savor a delightful dish that’s easy to make? In this post, I’ll share my simple recipe

To make a tasty Instant Pot Chicken Tikka Masala, you need a few key items: - 1 pound boneless, skinless chicken thighs, cut into 1-inch pieces - 1 tablespoon vegetable oil - 1 medium onion, finely chopped - 4 cloves garlic, minced - 1 tablespoon fresh ginger, minced - 2 teaspoons ground cumin - 2 teaspoons ground coriander - 1 teaspoon ground turmeric - 1 teaspoon garam masala - 1 teaspoon chili powder (adjust according to your spice preference) - 1 can (15 oz) tomato puree - 1 cup coconut milk - Salt, to taste - Fresh cilantro leaves, for garnish - Cooked basmati rice or warm naan, for serving You can enhance your Chicken Tikka Masala with a few extra touches: - A squeeze of fresh lime juice brightens the dish. - Add a pinch of smoked paprika for a subtle smoky flavor. - Use Greek yogurt for creaminess; mix it in just before serving. - Toss in some peas for color and sweetness. - Try adding more spices like fenugreek or cardamom for depth. These simple additions can change the dish and make it truly yours. Enjoy experimenting! If you want the full recipe, check out the detailed instructions! Set your Instant Pot to the Sauté function. Pour in the vegetable oil and let it heat until it shimmers. This step warms up the pot and gets it ready for cooking. Add the finely chopped onion to the pot. Sauté for about 3 to 4 minutes. You want the onion to turn translucent and slightly golden. Next, mix in the minced garlic and ginger. Cook for another minute until they smell great. Now, it’s time to add the spices. Sprinkle in the ground cumin, coriander, turmeric, garam masala, and chili powder. Stir for about 30 seconds to toast the spices. This brings out their full flavor. Then, add the chicken pieces. Stir well to coat them in the spices and sauté for 3 to 4 minutes until they are lightly browned. Carefully pour in the tomato puree and coconut milk. Stir everything together and add salt to taste. Close the lid of the Instant Pot, making sure the vent is sealed. Set it to Manual or Pressure Cook on high for 10 minutes. This cooks the chicken and melds the flavors. Once the cooking is done, let the pot release pressure naturally for 5 minutes. After that, carefully vent any remaining steam. Open the lid and stir the chicken tikka masala. Adjust the seasoning if needed. Serve hot over basmati rice or with warm naan. Garnish with fresh cilantro for a burst of flavor. Enjoy your delicious meal! For the Full Recipe, check the link provided. To get the best flavor in your Instant Pot Chicken Tikka Masala, focus on the spices. Start by adjusting the spice levels. If you love heat, add more chili powder. For a milder taste, reduce it. Marinate your chicken for at least 30 minutes. This lets the spices soak in. You can use yogurt with spices to tenderize the meat. The yogurt makes the chicken juicy and flavorful. Cooking times can change based on the chicken cut. Use boneless chicken thighs for tender results. If you prefer chicken breast, reduce the cooking time to 8 minutes. Always check if the chicken is fully cooked. You want it to reach 165°F for safety. This ensures that the dish remains tasty and safe to eat. Serving is as important as cooking. For a great look, use shallow bowls. Spoon the Chicken Tikka Masala in the center. Add a sprinkle of fresh cilantro on top. It adds color and flavor. You can also serve with a lime wedge. This gives a fresh zest when squeezed over the dish. Pair it with fluffy basmati rice or warm naan for a perfect meal. {{image_4}} You can make a vegetarian or vegan version of Chicken Tikka Masala. For this, swap the chicken for plant-based proteins. Good choices include chickpeas, tofu, or cauliflower. If you choose tofu, press it first to remove extra water. This helps it soak up the flavors. Chickpeas add a nice texture and protein too. Cauliflower florets work well and cook quickly in the Instant Pot. Use the same spices and cooking method for great taste. Want a low-carb version? Use chicken thighs or breasts as your base. Replace coconut milk with unsweetened almond milk for fewer carbs. You can also skip the rice or naan. Instead, serve the dish over cauliflower rice. This keeps the meal light but still full of flavor. Adjust the spices to your taste, but keep the cooking time the same. You can easily change the heat level in your Chicken Tikka Masala. For a mild dish, reduce the chili powder. Start with half a teaspoon and taste as you go. If you prefer more heat, add more chili powder or even some cayenne pepper. You can also add fresh chilies during cooking for an extra kick. Adjusting the spice helps you make the dish just right for your taste buds. After you enjoy your Chicken Tikka Masala, store leftovers wisely. To keep it fresh: - Refrigerate: Place leftover chicken tikka masala in an airtight container. It will stay good for 3-4 days in the fridge. - Freeze: For longer storage, freeze it. Use freezer-safe containers or bags. It can last up to 3 months frozen. Remember to label them with the date. When you’re ready to eat again, reheating is key. You want to keep that yummy flavor and texture: - Stovetop: Heat it in a pan over medium heat. Stir often until it’s hot. Add a splash of coconut milk if it seems dry. - Microwave: Place in a microwave-safe bowl. Cover and heat in short bursts, stirring in between. This helps it heat evenly. - Instant Pot: You can also use your Instant Pot. Set it to Sauté and heat for a few minutes, stirring gently. These simple steps will help your Chicken Tikka Masala taste just as good as the first time! For the complete details on making this dish, check out the Full Recipe. Making Instant Pot Chicken Tikka Masala takes about 30 minutes from start to finish. This includes prep and cooking time. The Instant Pot cooks the chicken quickly, which makes this dish a fantastic option for busy nights. Yes, you can use frozen chicken in this recipe. Just make sure to increase the cooking time to 15 minutes. When using frozen chicken, it might take longer for the Instant Pot to come to pressure. Chicken Tikka Masala pairs well with several sides. Here are some great options: - Fluffy basmati rice - Warm naan bread - A fresh cucumber salad - Roasted vegetables Yes, this recipe is highly customizable. You can adjust ingredients to fit various diets. For a vegan option, replace chicken with chickpeas or tofu. For a low-carb dish, serve it over cauliflower rice instead of basmati rice. You can find the Full Recipe for Instant Pot Chicken Tikka Masala [here](#). This link contains all the details you need to make this dish at home. Chicken Tikka Masala is a simple yet flavorful dish. We explored key ingredients, from chicken to spices and garnishes. I shared easy steps to prepare it in your Instant Pot. You learned tips for flavor and cooking time adjustments, along with creative serving ideas. Plus, we looked at variations for different diets and storage tips. In the end, this dish is not just delicious but also flexible. Experiment, enjoy, and make it your own!

Instant Pot Chicken Tikka Masala Flavorful and Easy

Are you ready to make an easy and tasty dinner? With my Instant Pot Chicken Tikka Masala, you can whip

Older posts
Newer posts
← Previous Page1 … Page71 Page72 Page73 … Page90 Next →

dsad

© 2025 recipetorch • Built with GeneratePress

Our Policies

  • Copyright Policy
  • Cookie Policy
  • GDPR Policy
  • Privacy Policy
  • Disclaimer
  • Terms Of Use

More Information

  • Home
  • About
  • Contact
  • Appetizers
  • Dessert
  • Dinner
  • Drinks
©2025, recipetorch About Back To Top