Skip to content
DisclaimerTerms Of UseGDPR PolicyCookie Policy

recipetorch

  • Home
  • Drinks
  • Appetizers
  • Dinner
  • Dessert
  • About
  • Contact
  • Privacy Policy
DisclaimerTerms Of UseGDPR PolicyCookie Policy

Nicole

- 2 cups all-purpose flour - 1 teaspoon baking soda - 1 teaspoon baking powder - 1 teaspoon ground cinnamon - 1/2 teaspoon ground nutmeg - 1/2 teaspoon salt These dry ingredients make the base of our bread. The flour gives it structure. Baking soda and baking powder help it rise. Cinnamon and nutmeg add warmth and spice. Salt enhances all the flavors. - 1 cup canned pumpkin puree - 1/2 cup vegetable oil - 1 cup packed brown sugar - 1/2 cup granulated sugar - 3 large eggs - 1/2 cup chopped walnuts (optional) These wet ingredients bring moisture and flavor. Canned pumpkin adds richness and a vibrant color. Vegetable oil keeps the bread soft. The sugars sweeten the bread, while the eggs bind everything together. Walnuts add a nice crunch if you like. - 1/2 cup caramel sauce The caramel sauce is the star of the show. It drizzles on top to give a sweet finish. You can use store-bought or homemade. Either way, it makes the bread extra special. First, preheat your oven to 350°F (175°C). This step ensures even baking. While the oven heats, prepare your loaf pan. Grease it with butter or oil and dust it with flour. You can also line it with parchment paper for easy removal after baking. In a large mixing bowl, combine 1 cup of canned pumpkin puree, 1/2 cup of vegetable oil, 1 cup of packed brown sugar, and 1/2 cup of granulated sugar. Use a whisk to mix these ingredients well until the mixture is smooth. This base gives the bread its rich flavor. Next, add 3 large eggs to your pumpkin mixture, one at a time. Whisk well after each addition to blend them fully. In a separate bowl, sift together 2 cups of all-purpose flour, 1 teaspoon of baking soda, 1 teaspoon of baking powder, 1 teaspoon of ground cinnamon, 1/2 teaspoon of ground nutmeg, and 1/2 teaspoon of salt. This helps distribute the leavening agents evenly. Gradually add the dry mixture to the wet ingredients. Stir gently with a spatula until combined. It’s okay if some lumps remain. If you like, fold in 1/2 cup of chopped walnuts for an added crunch. Now, pour the batter into your prepared loaf pan. Smooth the top with a spatula. Place the pan into the preheated oven and bake for 60 to 70 minutes. To check for doneness, insert a toothpick into the center. It should come out clean if the bread is ready. After baking, take the bread out of the oven. Let it cool in the pan for about 10 minutes. Then, carefully transfer the bread to a wire rack to cool completely. Once cooled, warm 1/2 cup of caramel sauce slightly. Drizzle it generously over the top of the bread for a sweet finish. Enjoy your delicious pumpkin drizzle bread! - Avoiding overmixing: Mix the batter gently. Overmixing can make the bread tough. Stop mixing when you see a few lumps. It’s okay if it isn’t perfectly smooth. - Checking for doneness: Use a toothpick to test the bread. Insert it in the center. If it comes out clean, the bread is ready. If it has batter on it, bake longer. - Using fresh spices vs. ground spices: Fresh spices pack more flavor. If you can, use freshly grated nutmeg. It makes a big difference in taste. Ground spices work, but they lose some flavor over time. - Incorporating nuts and dried fruits: Adding chopped walnuts gives a nice crunch. You can also add dried cranberries or raisins for a sweet twist. Just fold them in gently with the batter. - Serving suggestions with garnishes: Slice the bread thickly and lay it on a wooden board. Drizzle extra caramel on top. A dollop of whipped cream makes it even more special. - Storing for optimal freshness: Keep the bread in an airtight container. It stays fresh for a few days at room temperature. You can also wrap it well and freeze it for later. {{image_4}} You can easily customize the flavor of your pumpkin drizzle bread. One great option is to add chocolate chips. They provide a rich touch that pairs well with pumpkin. You can also try different nuts, like pecans or almonds, for added crunch. Another idea is to use seasonal spices. For instance, consider adding ginger or allspice. These spices enhance the warmth of the bread and make it even cozier. If you need gluten-free options, you can swap all-purpose flour for a gluten-free blend. Many blends work well in quick breads like this one. For a vegan version, replace the eggs with flaxseed meal or applesauce. Use plant-based oil instead of vegetable oil. This way, everyone can enjoy this tasty treat, regardless of dietary needs. Pair your pumpkin drizzle bread with warm drinks like coffee or tea. The flavors complement each other perfectly. This bread works well for fall gatherings, Thanksgiving, or cozy family breakfasts. You can also serve it as a dessert after dinner. A scoop of vanilla ice cream on the side makes it even more delightful! To keep your pumpkin drizzle bread fresh, store it correctly. You can keep it at room temperature for up to three days. Just wrap it in plastic wrap or foil. This method keeps the bread soft and tasty. If your kitchen is warm, consider using the fridge. The cold air slows spoilage. However, the bread may dry out a bit in the fridge. For best results, use airtight containers. A plastic or glass container works well. You can also use a zip-top bag. Make sure to squeeze out as much air as you can. This keeps the bread moist longer. Freezing is great for long-term storage. To freeze your pumpkin bread, let it cool completely first. Wrap it tightly in plastic wrap, then in aluminum foil. This double layer prevents freezer burn and keeps flavors intact. When you want to enjoy it again, thaw it at room temperature. This may take a few hours. If you're in a hurry, you can use the microwave. Just use a low power setting. Avoid thawing in the oven, as it may dry out the bread. To maintain flavor and texture, avoid leaving the bread in the freezer for too long. Ideally, consume it within three months. After that, it may lose some taste and moisture. To check if your pumpkin bread is done, use the toothpick test. Insert a toothpick into the center of the bread. If it comes out clean, your bread is ready. If some batter sticks to the toothpick, it needs more time. You can also look for signs of doneness. The bread should be golden brown on top. It should feel firm to the touch. If it springs back when pressed lightly, it is done. Yes, you can use fresh pumpkin. Start by choosing a sugar pumpkin for the best flavor. Cut it in half and scoop out the seeds. Roast the pumpkin halves in the oven until soft. This usually takes about 45 minutes. Once cooled, scoop out the flesh and blend it until smooth. Using fresh pumpkin can change the flavor a bit. It tends to have a fresher and more vibrant taste. However, canned pumpkin gives you more consistency. Making caramel sauce is simple. Begin by combining sugar and water in a pot. Heat it over medium heat until the sugar dissolves. Then, let it boil without stirring. Watch closely as it turns a deep amber color. Once it reaches that color, remove it from heat. Slowly add cream while stirring. Be careful, as it will bubble up. Let it cool before drizzling over your pumpkin bread. This homemade caramel adds a rich touch. We explored the key ingredients needed for your pumpkin drizzle bread, from dry and wet components to the perfect caramel topping. I guided you through step-by-step instructions for making the bread, baking tips, and delightful variations. Remember, enjoy experimenting with flavors or dietary options. Store it right to keep it fresh. With these tips, your pumpkin drizzle bread will be a hit. Now, it's time to bake and savor this tasty treat!

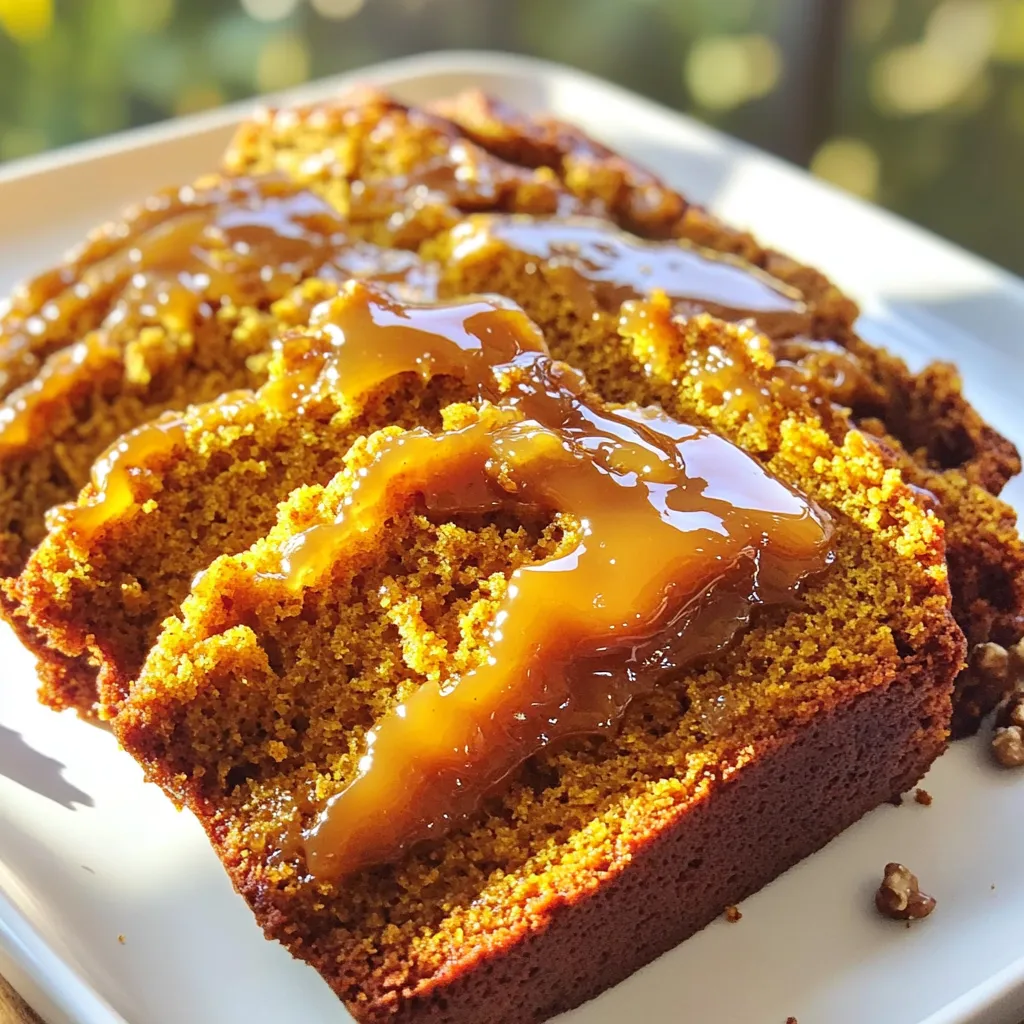
Pumpkin Drizzle Bread with Caramel Delightful Recipe

Get ready to savor fall with my Pumpkin Drizzle Bread with Caramel! This easy recipe combines warm spices and moist

To make sweet potato nachos, gather these main ingredients: - 2 large sweet potatoes, sliced into 1/4 inch thick rounds - 2 tablespoons extra virgin olive oil - 1 teaspoon smoked paprika - 1 teaspoon garlic powder - Sea salt and freshly ground black pepper to taste - 1 cup black beans, thoroughly rinsed and drained - 1 cup corn (freshly cooked or canned) - 1 cup shredded sharp cheddar cheese (or your favorite vegan cheese) You can enhance your nachos with these optional toppings: - 1 ripe avocado, diced - 1/2 cup sour cream or Greek yogurt (for a tangy touch, optional) - Fresh cilantro, chopped, for a vibrant garnish - Lime wedges, for a zesty finish Sweet potatoes are full of vitamins and fiber. They keep you full and satisfied. Black beans add protein, making this dish hearty. Corn gives sweetness and crunch. Cheese offers calcium and flavor. Avocado adds healthy fats, while Greek yogurt provides probiotics. These nachos are a smart choice for a snack or meal! First, I preheat my air fryer to 375°F (190°C). I grab two large sweet potatoes and slice them into 1/4 inch thick rounds. I find that thicker slices cook better and stay crispier. Next, I toss the sweet potato rounds in a large bowl with: - 2 tablespoons extra virgin olive oil - 1 teaspoon smoked paprika - 1 teaspoon garlic powder - Sea salt and freshly ground black pepper to taste I make sure every slice gets a good coat. The smell of smoked paprika and garlic is fantastic! Once my sweet potatoes are ready, I arrange them in the air fryer basket. I place them in a single layer for even cooking. If my air fryer is small, I do this in batches. I air fry them for about 10-12 minutes. Halfway through, I flip them to make sure they get golden and crispy on both sides. After the sweet potatoes finish cooking, I transfer them to a large serving plate. I layer them with: - 1 cup black beans, thoroughly rinsed and drained - 1 cup corn (freshly cooked or canned) - 1 cup shredded sharp cheddar cheese (or vegan cheese) I sprinkle the cheese evenly over everything. Next, I return the platter to the air fryer for another 3-5 minutes. I keep an eye on it to ensure the cheese melts perfectly without burning. After that, I take the platter out and top it with: - 1 ripe avocado, diced - 1/2 cup sour cream or Greek yogurt (optional) - Fresh cilantro, chopped Finally, I serve these tasty nachos right away with lime wedges for a zesty finish. To get that amazing crispiness, slice the sweet potatoes thinly. Aim for 1/4 inch thick rounds. This size helps them cook evenly. Toss them well with olive oil, smoked paprika, garlic powder, salt, and pepper. Make sure every slice gets a nice coating. Air fry them in a single layer. If your air fryer is small, cook in batches. Flip them halfway through for even cooking. They should be golden and crispy after about 10-12 minutes. You can easily switch out ingredients for your taste. If you don’t have black beans, try pinto beans or chickpeas. Corn can be fresh or canned, so use what you have. For cheese, any kind works, even a vegan option. If you want a different flavor, try feta or pepper jack cheese. Don't forget, you can use Greek yogurt instead of sour cream for a healthier choice. Serve your nachos right away for the best crunch. I love to use a wooden board for a rustic look. Offer small bowls with extra toppings like jalapeños, diced tomatoes, or salsa. Lime wedges are a must; they add a zesty kick. You can also sprinkle some fresh cilantro on top for color and flavor. This makes for a fun and interactive meal! {{image_4}} You can make tasty vegan sweet potato nachos easily. Simply swap the cheese for your favorite vegan cheese. Use a brand that melts well. You can also add more veggies. Try diced bell peppers or chopped spinach. These add flavor and color. You’ll still enjoy the crunch and zest. For a kick, make spicy sweet potato nachos. Add diced jalapeños to the toppings. You can mix hot sauce into the olive oil for a spicy twist. Consider using pepper jack cheese for more heat. You can also top with spicy salsa. This makes each bite full of flavor. Change up the cheese for new tastes. Use mozzarella for a gooey texture. Feta cheese adds a salty bite. You can even mix different cheeses for depth. Each cheese will give your nachos a unique flavor. Experiment until you find your favorite combo. Enjoy the fun of creating different versions! After enjoying your sweet potato nachos, store any leftovers in an airtight container. Make sure to let them cool first. I recommend keeping the toppings, like avocado and sour cream, separate. This way, they stay fresh and do not make the nachos soggy. You can enjoy the leftovers for up to three days. To reheat your sweet potato nachos, the air fryer is your best friend. Preheat it to 350°F (175°C). Place the nachos in the basket for about 5 minutes. Check to see if they are heated through and crispy again. If you don't have an air fryer, an oven works too. Just set it to 350°F (175°C) and bake for 10 minutes. Freezing sweet potato nachos is possible but tricky. I suggest freezing just the sweet potato rounds. After cooking them, let them cool completely. Then, place them in a single layer on a baking sheet to freeze. Once frozen, transfer them to a freezer bag. They can last up to three months. When ready to enjoy, air fry them straight from the freezer. Add fresh toppings afterward for the best taste. You can make sweet potato nachos in the oven. Preheat your oven to 400°F (200°C). Slice your sweet potatoes into rounds, just like in the air fryer recipe. Toss them with olive oil, smoked paprika, garlic powder, sea salt, and black pepper. Spread them on a baking sheet in a single layer. Bake for about 20 minutes, flipping halfway through. Once they are crispy, layer them with black beans, corn, and cheese. Bake again until the cheese melts, about 5-7 minutes. Yes, you can use other potatoes. Regular white potatoes or Yukon gold potatoes work well. They will have a different taste but still taste great! Just follow the same steps for slicing and seasoning. Remember, the cooking time may vary based on the potato type. Keep an eye on them while they cook. Sweet potato nachos pair well with many dips. Here are a few favorites: - Guacamole for a creamy, fresh taste. - Salsa for a zesty kick. - Queso for a cheesy delight. - Sour cream or Greek yogurt adds tang. Feel free to mix and match! This blog post covered how to make delicious sweet potato nachos. We explored ingredients, both main and optional. I provided step-by-step instructions to guide you through the cooking process. Tips and tricks showed how to achieve that perfect crunch. Variations let you experiment with flavors. Finally, I shared storage info to keep your nachos fresh. Sweet potato nachos are easy to make and fun to customize. Try different toppings and enjoy this healthy twist on a classic dish!

Sweet Potato Nachos Air Fryer Crispy and Flavorful

Get ready to elevate your snack game with my Sweet Potato Nachos Air Fryer recipe! These crispy and flavorful bites

- 1 pound beef stew meat - 4 cups beef broth - 2 cups carrots - 2 cups potatoes - 1 cup green beans - 1 cup corn kernels - 1 large onion - 3 cloves garlic The main ingredients make this soup hearty and filling. Beef stew meat gives a rich flavor. The beef broth adds depth and warmth. Carrots and potatoes bring sweetness and texture. Green beans and corn add color and crunch. Onion and garlic round out the flavor profile. - 2 teaspoons dried thyme - 1 teaspoon dried rosemary - 1 tablespoon Worcestershire sauce - Salt and pepper Herbs and seasonings elevate the soup. Dried thyme adds an earthy note. Rosemary gives a pine-like flavor. Worcestershire sauce offers a savory kick. You can adjust salt and pepper to fit your taste. - 2 tablespoons olive oil - Equipment needed (slow cooker, large skillet) Olive oil is crucial for searing the beef. It adds richness to the soup. For equipment, a slow cooker makes this easy. A large skillet helps with initial cooking. These tools help you create a comforting meal with little fuss. First, heat 2 tablespoons of olive oil in a large skillet over medium-high heat. When the oil glimmers, add 1 pound of beef stew meat. Sear the beef in a single layer for 4-5 minutes. Turn the meat occasionally until it is brown on all sides. Once browned, remove the beef from the skillet and set it aside on a plate. In the same skillet, reduce the heat to medium. Add 1 large onion, finely chopped, and 3 cloves of minced garlic. Sauté for about 2-3 minutes. Cook until the onion turns soft and fragrant. Now, transfer the seared beef, onion, and garlic into the slow cooker. Pour in 4 cups of beef broth. Then, add 2 cups of sliced carrots, 2 cups of diced potatoes, 1 cup of chopped green beans, and 1 cup of corn kernels. Next, sprinkle in 2 teaspoons of dried thyme, 1 teaspoon of dried rosemary, and drizzle 1 tablespoon of Worcestershire sauce over everything. Stir gently to mix all the ingredients well. Place the lid on the slow cooker. You can cook the soup on low for 7-8 hours or on high for 4-5 hours. Check for doneness when the beef is fork-tender and the vegetables are soft. To boost your soup's flavor, try adding spices and herbs. Here are some great options: - 1 teaspoon paprika for a smoky taste. - 1 teaspoon oregano for a warm, earthy flavor. - Fresh herbs like basil or parsley for freshness. If you want a different twist, substitute the Worcestershire sauce with soy sauce. This will add a savory note. You can also try adding a splash of vinegar for brightness. If you don't want beef, turkey or chicken works well. These meats add a lighter flavor. You may also use plant-based meat for a vegetarian option. For vegetables, feel free to mix it up. You can use: - Zucchini instead of potatoes. - Peas or bell peppers for a pop of color. - Spinach or kale for added nutrients. These swaps will keep your soup exciting and fresh. Serving your soup can make a big difference. Use warm bowls for a cozy touch. Garnish with freshly chopped parsley. This adds a nice green color. For a great pairing, serve with crusty bread. It’s perfect for dipping and soaking up the soup's rich flavors. {{image_4}} You can change the veggies based on what you like or have at home. For a fresh twist, try using seasonal vegetables. In spring, add peas or asparagus. In fall, consider squash or sweet potatoes. You can also add legumes or grains. Chickpeas or lentils work well. They add protein and fiber, making the soup heartier. If you like heat, add some peppers. Jalapeños or crushed red pepper flakes can spice up your soup. Start with a small amount and taste it. You can always add more spice later. Adjust the spice levels to fit your taste. This will keep everyone happy and satisfied. For a low-carb option, skip the potatoes. Instead, use cauliflower. It adds bulk and keeps the soup creamy. You can also thicken the soup differently. Use xanthan gum or a small amount of cream. These options keep the soup rich without the carbs. To keep your soup fresh, store it in airtight containers. Place the soup in the fridge within two hours of cooking. This helps prevent bacteria growth. The soup can last in the fridge for about three to four days. If you want to save it for longer, consider freezing it. For freezing, pour the cooled soup into freezer-safe bags. Remove as much air as you can before sealing. This helps avoid freezer burn. The soup can last in the freezer for up to three months. When it's time to enjoy your soup again, reheat it gently. You can do this on the stove or in the microwave. If using the stove, heat over low heat, stirring often. This helps keep the flavors strong. For the microwave, warm it in short bursts, stirring in between. To avoid mushy vegetables, add fresh veggies when reheating. This adds a nice crunch and fresh taste to your soup. In the fridge, your soup lasts about three to four days. If frozen, it stays good for about three months. Always check for any strange smells or signs of spoilage before eating. To boost the flavor of your soup, use fresh herbs. Fresh thyme and rosemary add depth. You can also add a splash of lemon juice before serving. This brightens the taste. For a richer broth, use homemade beef stock if you can. Adding a bay leaf while cooking helps too. Yes, you can. Set your slow cooker on low. It can cook overnight for about 8 to 10 hours. This allows the beef to become tender and flavors to mix well. Just make sure to check the liquid level. Add more broth if needed. This soup is full of nutrients. Beef provides protein and iron, which are good for muscle and blood health. Carrots add beta-carotene, good for vision. Potatoes give energy through carbs. Green beans and corn add fiber, great for digestion. Overall, this soup is balanced and hearty. Yes, it is easy to adjust. For gluten-free, use gluten-free broth and check labels on Worcestershire sauce. To make it dairy-free, no adjustments are needed. You can swap beef for turkey or chicken if preferred. Enjoy this soup your way! This blog post covers all you need to know about making delicious beef vegetable soup. I shared the main ingredients, step-by-step cooking instructions, and helpful tips for flavor and storage. You can easily make this dish your own with different vegetables or seasonings. Remember, enjoy this soup fresh or store it for later. Feel free to experiment with variations to suit your taste. Cooking can be fun, and this soup is a perfect cozy meal to try. Enjoy your cooking adventure!

Slow Cooker Beef Vegetable Soup Comforting and Easy Dish

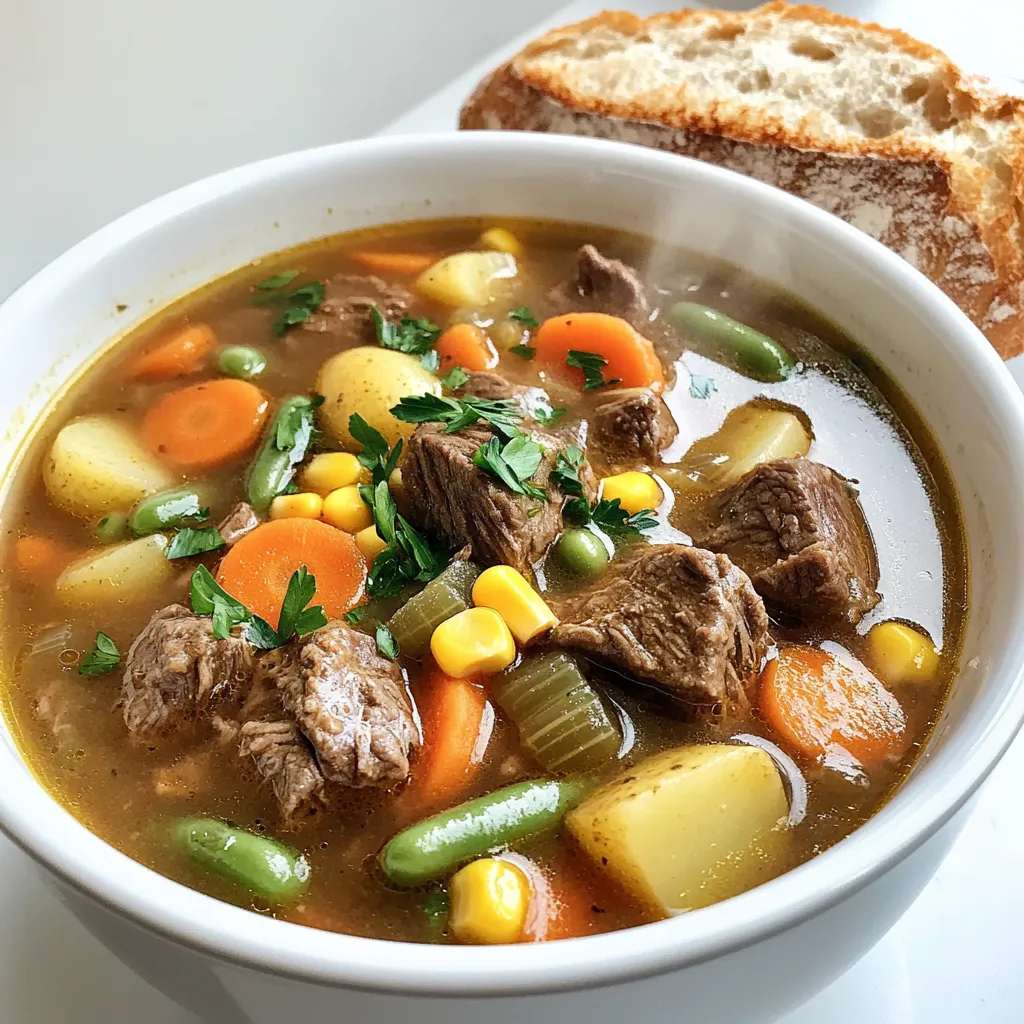
If you’re craving a warm, hearty meal, this Slow Cooker Beef Vegetable Soup is perfect for you. Packed with tender

To make this dish, gather these key ingredients: - 1 pound large shrimp, peeled and deveined - 1 pound Andouille sausage, cut into 1/2-inch rounds - 2 cups baby potatoes, halved - 1 bell pepper (any color), sliced into strips - 1 red onion, thinly sliced - 4 cloves garlic, minced - 2 tablespoons Cajun seasoning - 2 tablespoons olive oil - Sea salt and freshly cracked black pepper, to taste Each ingredient adds its own flavor. The shrimp brings sweetness, and the sausage gives a nice spice. The veggies add color and texture. While the dish is tasty on its own, a few garnishes can enhance it: - Fresh parsley, roughly chopped (for garnish) - Lemon wedges (for serving) The parsley adds a touch of freshness. Squeezing lemon over the dish brightens the flavors. To make cooking easy, use these tools: - Large baking sheet - Mixing bowl - Sharp knife and cutting board - Spoon or spatula for mixing Having the right tools helps in mixing and baking. It makes the cooking process smooth and fun. First, preheat your oven to 400°F (200°C). A hot oven is key for roasting. While it heats, gather your ingredients. You need shrimp, sausage, potatoes, bell pepper, onion, garlic, olive oil, Cajun seasoning, salt, and pepper. Make sure your shrimp are peeled and deveined. Cut the sausage into 1/2-inch rounds. Halve the baby potatoes and slice the bell pepper and onion. In a large mixing bowl, combine the shrimp, sausage, halved potatoes, bell pepper, onion, and minced garlic. Drizzle the olive oil over everything. Sprinkle the Cajun seasoning, salt, and pepper. Use your hands or a big spoon to mix it well. You want every piece to be coated in oil and seasoning. This step is crucial for flavor. Now, spread the mixture on a large baking sheet. Make sure there is space between the pieces. This helps everything cook evenly. Slide the baking sheet into your hot oven. Bake for 20 to 25 minutes. Stir halfway through to ensure even cooking. The shrimp should turn pink and the potatoes should be tender. Once cooked, take the baking sheet out of the oven. Let it cool for a few minutes. Before serving, sprinkle fresh parsley over the top. This adds a nice pop of color. Serve with lemon wedges on the side for a zesty touch. Enjoy the flavors and the fun of this dish! To make a great Cajun seasoning, mix equal parts paprika, garlic powder, and onion powder. Add cayenne pepper for heat, and dried thyme and oregano for depth. Adjust to your taste. You can also try adding smoked paprika for a unique twist. This blend adds a bold flavor to your shrimp and sausage. To ensure even cooking, cut all your ingredients into similar sizes. This way, they cook at the same rate. Spread them out on the baking sheet. Avoid overcrowding, as this can lead to steaming instead of roasting. Stir halfway through cooking for best results. If you like it mild, start with less Cajun seasoning. You can always add more later. For more heat, mix in extra cayenne or use spicy sausage. Remember, flavors can develop during cooking, so taste as you go. Use fresh lemon juice at the end to balance the heat and brighten the dish. {{image_4}} You can switch shrimp for chicken or firm fish. Chicken thighs work well and stay juicy. For fish, try salmon or cod. Both options soak up the Cajun flavors nicely. You could also use tofu for a meatless option. Just make sure to cut it into cubes for even cooking. Feel free to change up the veggies. Instead of bell peppers, try zucchini or asparagus. Carrots add a nice sweetness too. You can even toss in some corn or cherry tomatoes for a pop of color. Each swap brings new tastes and textures that make the dish unique. Make this dish keto-friendly by using cauliflower instead of potatoes. Cauliflower rice can also replace the baby potatoes if you want a lighter option. Use turkey sausage instead of Andouille for fewer carbs. This way, you still enjoy the rich flavors without adding extra carbs. To keep your leftover Cajun shrimp and sausage bake fresh, store it in an airtight container. Make sure to let it cool to room temperature before sealing. You can keep it in the fridge for up to three days. If you want to keep it longer, freezing is a better option. When it's time to eat your leftovers, reheat them in the oven for the best taste. Preheat your oven to 350°F (175°C). Place the dish on a baking sheet and cover it with foil. Heat for about 15-20 minutes, or until it’s warm. This helps keep the shrimp tender and the sausage juicy. You can also use a microwave, but the oven gives a better texture. If you want to freeze the dish, first let it cool completely. Then, portion it into freezer-safe bags or containers. Squeeze out as much air as possible before sealing. You can freeze it for up to three months. When you are ready to enjoy it, thaw it in the fridge overnight before reheating. Yes, you can use frozen shrimp. Just make sure to thaw them first. Place them in a bowl of cold water for about 15-20 minutes. Once thawed, pat them dry with a paper towel. This step ensures they will cook evenly in the oven. You can serve this dish with several sides. Here are a few ideas: - Warm crusty bread to soak up the juices. - A simple green salad for a fresh crunch. - Steamed rice or quinoa to add some grain. - Coleslaw for a cool, creamy side. For smaller shrimp, reduce the baking time to about 15-20 minutes. For larger shrimp, you may need to bake them for 25-30 minutes. Always check the shrimp for a pink color and firm texture to confirm they are cooked. Yes, you can make a vegetarian dish by swapping shrimp and sausage for plant-based options. Use veggies like mushrooms, zucchini, or eggplant. Add a protein like tofu or chickpeas for a hearty meal. Just season them with Cajun spices and follow the same baking process. This blog post covered how to make a delicious Sheet Pan Cajun Shrimp Sausage Bake. We discussed the must-have ingredients, along with fun garnishes. I shared tips on preparing and baking your dish for the best taste. You learned about spice adjustments and different variations you can try. Lastly, I provided storage tips to keep your leftovers fresh. With these insights, you can enjoy a tasty meal that fits your style. Happy cooking!

Savory Sheet Pan Cajun Shrimp Sausage Bake Recipe

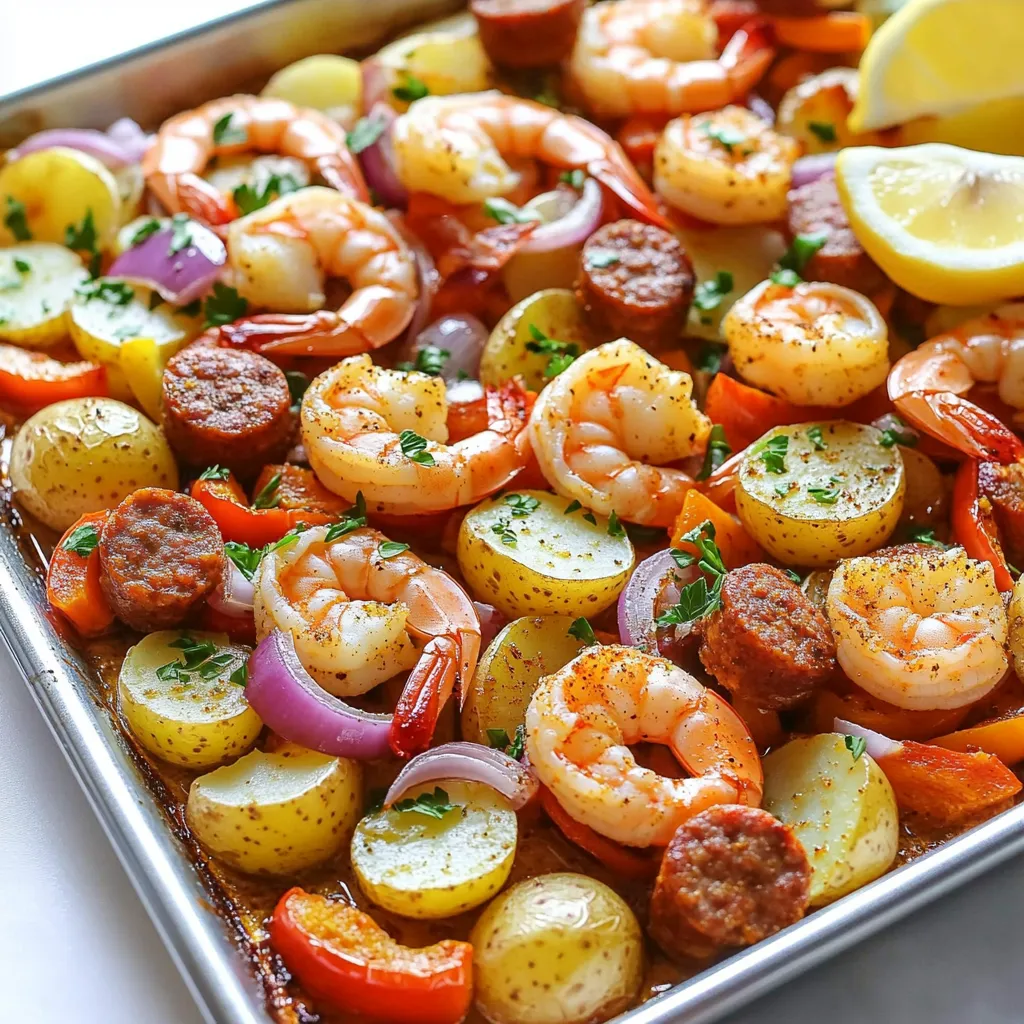
Are you ready to spice up your dinner routine? This Savory Sheet Pan Cajun Shrimp Sausage Bake is a quick

- 1 cup rolled oats - 1 ½ cups unsweetened almond milk (or alternative milk options) - 1 medium apple, peeled and diced - 1 teaspoon ground cinnamon - 1 tablespoon pure maple syrup (or honey) - ½ teaspoon pure vanilla extract - ¼ cup Greek yogurt (optional) - 2 tablespoons chopped walnuts or pecans (optional) - Pinch of ground nutmeg (optional) To create Apple Pie Overnight Oats, gather these simple ingredients. Rolled oats are your base. Use unsweetened almond milk or any milk you like. A medium apple adds sweetness and texture. Ground cinnamon gives that classic apple pie taste. Pure maple syrup or honey adds natural sweetness. For added creaminess, Greek yogurt is a great choice but not necessary. If you want crunch, sprinkle in chopped walnuts or pecans. A pinch of ground nutmeg is optional but adds a lovely warmth. Each ingredient plays a key role in flavor and texture. The oats soak up the milk, making them soft and delicious. The apple and spices bring the pie flavor to life. You will love how easy and tasty this breakfast is! {{ingredient_image_2}} Start by grabbing a medium bowl. Combine 1 cup of rolled oats with 1 ½ cups of unsweetened almond milk. Next, add 1 medium apple, peeled and diced into small cubes. Sprinkle in 1 teaspoon of ground cinnamon for that warm flavor. If you enjoy a touch of sweetness, mix in 1 tablespoon of pure maple syrup. For creaminess, add ½ teaspoon of pure vanilla extract and ¼ cup of Greek yogurt if you like. Now, it’s time to stir! Mix everything very well. You want to make sure the oats soak up the milk and spices. Once well combined, carefully pour the mixture into two jars or containers. Distribute the apple pieces evenly so every bite is tasty. Seal the jars tightly. Place them in the fridge and let them chill. You can leave them overnight or at least 4 hours. This chilling time helps the oats become soft and flavorful. When morning comes, take the jars out of the fridge. Give the oats a good stir. If they seem too thick, add a splash of your favorite milk to thin them out. For the final touch, top with 2 tablespoons of chopped walnuts or pecans for some crunch. You can also sprinkle a bit more cinnamon on top for extra flavor. Enjoy your healthy breakfast! - Choosing the right type of oats: I use rolled oats for this recipe. They soak up milk well. This gives them a soft texture without getting mushy. Quick oats may not work as well. They absorb liquid too fast and can become too soggy. - Importance of chilling time: Chilling your oats is key! Let them sit in the fridge overnight. This helps the oats absorb flavors. They become creamy and delicious. If you can’t wait overnight, chill them for at least 4 hours. - Adding Greek yogurt for creaminess: I love adding Greek yogurt. It makes the oats rich and creamy. This addition boosts protein too. You can skip it if you want a lighter dish. - Experimenting with different nut toppings: Try topping your oats with nuts. Chopped walnuts or pecans add crunch. You can also use almonds or hazelnuts. Each nut offers a different taste. - Nutritional advantages of oats: Oats are a great source of fiber. They help keep you full longer. They also support heart health and digestion. Eating oats often can lower cholesterol levels. - Benefits of apples in breakfast: Apples add natural sweetness. They are high in vitamins and antioxidants. Eating apples may improve brain health. Plus, the fiber in apples helps with digestion. Pro Tips Choose the Right Oats: Use rolled oats for this recipe as they absorb liquid well and create a creamy texture. Avoid instant oats, which may become mushy. Sweetness Adjustment: Taste the mixture before refrigerating. Depending on the sweetness of your apples, you may want to adjust the amount of maple syrup or honey. Flavor Variations: Feel free to add other spices like allspice or ginger for a unique twist, or include dried fruits such as raisins or cranberries for added texture. Make Ahead: These overnight oats can be prepared up to three days in advance. Just keep them in sealed jars in the refrigerator for a convenient breakfast option. {{image_4}} You can change the flavor of your Apple Pie Overnight Oats easily. Try adding different fruits to mix things up. Pears add a nice sweetness. Berries bring a tart twist. You can also experiment with spices. Pumpkin spice gives a warm, cozy flavor. Cardamom adds a unique taste that surprises the palate. Each swap offers a new taste adventure. If you want a vegan option, choose plant-based milk. Almond milk works well, but oat or soy milk are great too. For sweeteners, use coconut sugar or agave syrup instead of honey or maple syrup. If gluten is a concern, you can use gluten-free oats. This way, everyone can enjoy this tasty breakfast. You can easily scale this recipe for larger servings. Just double or triple the ingredients as needed. If you want to meal prep, make this recipe in batches. Store them in jars for the week ahead. This way, you have a quick and healthy breakfast ready to go. To keep your apple pie overnight oats fresh, use airtight containers. Glass jars work well. They let you see the layers and colors, which makes them more appealing. You can also use plastic containers if you prefer. Store the containers in the fridge. The oats stay good for up to five days. This makes them perfect for meal prep. Just remember, the longer they sit, the softer the oats get. When you are ready to eat, decide if you want your oats warm or cold. If you like them warm, microwave them for about 30 seconds. Stir and check the temperature. If they are still cold, heat them a little more. If you prefer cold oats, just take them straight from the fridge. Sometimes, the mixture may seem thick after sitting. If this happens, stir in a splash of milk. This helps to adjust the texture and makes them creamy again. Enjoy your tasty and healthy breakfast! Yes, you can use quick oats. Quick oats cook faster and absorb liquid well. However, they may become mushy. I prefer rolled oats for a chewier texture. Apple Pie Overnight Oats last about 3 to 5 days in the fridge. Make sure to store them in airtight containers. This keeps them fresh and tasty. Absolutely! You can make these oats ahead for meal prep. Just prepare them in jars, and they will be ready for busy mornings. You can use any milk you like. Almond milk is my favorite. Other great options include oat milk, soy milk, or coconut milk. Each adds its unique taste. Adding sweeteners is optional. I love the flavor of pure maple syrup. You can skip it if you prefer less sweetness or use honey instead. You learned how to make delicious Apple Pie Overnight Oats. With simple ingredients and easy steps, you can enjoy a healthy breakfast. Remember to let your oats chill overnight for the best flavor. Feel free to mix in different fruits or spices to suit your taste. These oats can help you stay full and energized all morning. With proper storage, you can enjoy them for days. Now, it’s time to get creative in the kitchen and make your perfect breakfast!

Apple Pie Overnight Oats Tasty and Healthy Breakfast

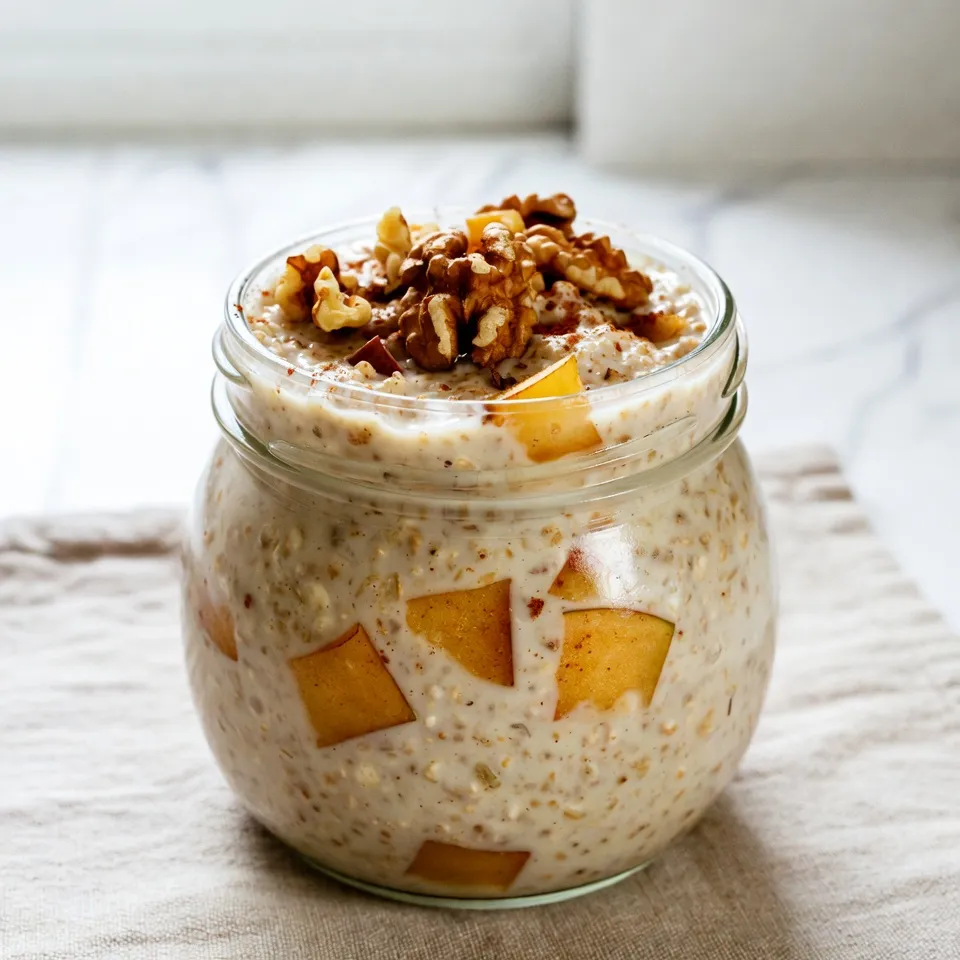
Are you looking for a tasty and healthy breakfast option? Let’s dive into Apple Pie Overnight Oats! This quick, no-cook

- 1 cup sushi rice (or jasmine rice) - 1 lb shrimp, peeled and deveined - 4 cloves garlic, minced - 1 small onion, finely chopped - 1 red bell pepper, diced - 1 cup peas and carrots (fresh or frozen) - 3 tablespoons soy sauce - 1 tablespoon sriracha (adjust to taste for spiciness) - 2 eggs, lightly beaten - 2 tablespoons sesame oil - 2 green onions, chopped (for garnish) To make Spicy Garlic Shrimp Fried Rice, start with your main ingredients. Sushi or jasmine rice works best. I love using fresh shrimp; it gives the dish a nice taste. You need garlic and onion for flavor, along with red bell pepper and peas and carrots for color and crunch. Soy sauce adds saltiness, and sriracha gives it a spicy kick. The eggs make it rich, while sesame oil adds a touch of nuttiness. - Salt and pepper - Optional garnishes (green onions) For seasoning, simple salt and pepper do the trick. You can also add green onions on top for a fresh touch. This adds flavor and makes the dish look pretty. To make the best fried rice, start with sushi rice. Rinse it well under cold water. This removes extra starch. Keep rinsing until the water runs clear. Next, combine the rinsed rice with 2 cups of water in a medium pot. Bring it to a boil over medium-high heat. Once boiling, lower the heat to low and cover it tightly. Let it simmer for 15 minutes. After that, take it off the heat and leave it covered for 10 minutes. Finally, fluff the rice with a fork and set it aside. Now, let’s prepare the shrimp. Heat 1 tablespoon of sesame oil in a large skillet over medium-high heat. When the oil is hot, add 4 cloves of minced garlic. Sauté it for about 30 seconds until it is fragrant. Then, add 1 pound of peeled and deveined shrimp. Cook them for 2-3 minutes until they turn pink and opaque. Lightly season with salt and pepper. Once done, remove the shrimp from the skillet and keep them warm. In the same skillet, add the remaining tablespoon of sesame oil. Heat it over medium-high heat. Add 1 small finely chopped onion and 1 diced red bell pepper. Sauté for about 3-4 minutes until they are tender. After that, add 1 cup of peas and carrots. Cook for another 2 minutes until they are heated through. Next, push the veggies to one side of the skillet. Pour 2 lightly beaten eggs into the empty space. Let them cook without stirring until they start to set. Once they do, scramble the eggs and mix them with the vegetables. Now, it’s time to add the rice! Gently fold the fluffy rice into the skillet. Mix it well with the veggies and eggs. Pour 3 tablespoons of soy sauce and 1 tablespoon of sriracha over the mixture. Stir until everything is coated evenly and heated through. Taste it and adjust salt, pepper, or sriracha to your liking. Finally, return the cooked shrimp to the skillet. Stir everything together for another 1-2 minutes until the shrimp are heated. When serving, transfer the fried rice to a platter or bowls. Garnish with chopped green onions for a fresh touch. Enjoy this hot and flavorful meal! Using cold rice is key for great fried rice. Freshly cooked rice can be too sticky. Cold rice separates better and gives you that ideal fried texture. Prepare your rice a day ahead or chill leftovers. Adjust spice levels based on your taste. If you want more heat, add extra sriracha. For less spice, reduce the sriracha and add more soy sauce. Use a wok or a large skillet for best results. A wok heats evenly and helps fry the rice well. If you use a skillet, make sure it has a non-stick surface. Adjust the heat as you cook. Start at medium-high to sauté the garlic and shrimp. Lower the heat slightly when adding vegetables to avoid burning. Get creative with plating for a beautiful meal. Use a ring mold to shape the fried rice. This makes a nice round mound on the plate. Arrange the shrimp on top for a colorful look. Drizzle a bit of sriracha around the plate for added flair. Garnish with green onions for a fresh finish. {{image_4}} You can switch shrimp for other proteins. Chicken works well and cooks quickly. Tofu is a great choice for a vegetarian meal. Just make sure to press and cube the tofu first. This helps it absorb flavors better. You can also use cooked beef or pork if you like. To add more depth, consider using different sauces. Teriyaki or oyster sauce can add a sweet touch. You can also mix in spices like ginger or chili flakes for more heat. Feel free to add your favorite veggies too. Broccoli, snap peas, or mushrooms can make the dish even better. If you want a healthier option, try brown rice. It has more fiber and a nuttier taste. Cauliflower rice is another great choice. It makes the meal low-carb and light. For those with gluten issues, ensure your soy sauce is gluten-free. This way, everyone can enjoy this tasty dish. To keep your Spicy Garlic Shrimp Fried Rice fresh, store it in a proper container. Use an airtight container to keep out moisture and odors. This meal lasts about 3 to 4 days in the fridge. Always let it cool to room temperature before sealing it up. When you’re ready to eat, reheat your fried rice on the stove. Use a skillet over medium heat to warm it up evenly. Add a splash of water or soy sauce to avoid dryness. Stir often to prevent sticking. You can also use the microwave but be careful. Stir every minute to keep it from getting soggy. If you want to save some for later, freezing is a great choice. Portion the rice into freezer-safe bags or containers. Make sure to remove as much air as possible. It stays good for up to 2 months in the freezer. When you’re ready to eat, thaw it overnight in the fridge. Reheat it in a skillet or microwave, stirring well to ensure even heating. I suggest using sushi rice or jasmine rice. Both types give great texture. - Sushi Rice: This rice is sticky, which helps it hold together. It makes a nice base for fried rice. - Jasmine Rice: This rice is fluffy and has a lovely aroma. It also works well in fried rice. Both rice types are good, but I prefer sushi rice for its stickiness. Yes, you can meal prep this dish. It saves time on busy days. - Cook the Rice: You can cook the rice a day ahead. Store it in the fridge. - Prep the Shrimp and Veggies: You can chop and season shrimp and veggies in advance. Keep them in airtight containers. - Combine and Cook: When ready to eat, just mix and cook everything together. This way, you make a quick meal in no time. You can adjust the heat easily with sriracha and spices. - Sriracha: Start with one tablespoon. Add more for extra heat. - Other Spices: You can try adding chili flakes or hot sauce. Taste as you go to find your perfect level of spice. Absolutely! It stores well and reheats nicely. - Storage: Use airtight containers for leftovers. You can keep them in the fridge for up to three days. - Reheating: Microwave the fried rice until hot. Stir well to avoid sogginess. This dish makes a great meal batch, perfect for busy weeks. This guide covers making Spicy Garlic Shrimp Fried Rice, from ingredients to storage tips. You learned about the best rice, seasoning methods, and cooking techniques. I shared ways to personalize your dish using different proteins and vegetables. Storing and reheating leftovers ensures you enjoy this meal multiple times. Fried rice is simple yet delicious. With the right tips, it can be a delightful meal that fits your taste. Now, it’s time for you to try making this dish and enjoy it!

Spicy Garlic Shrimp Fried Rice Flavorful and Simple Meal

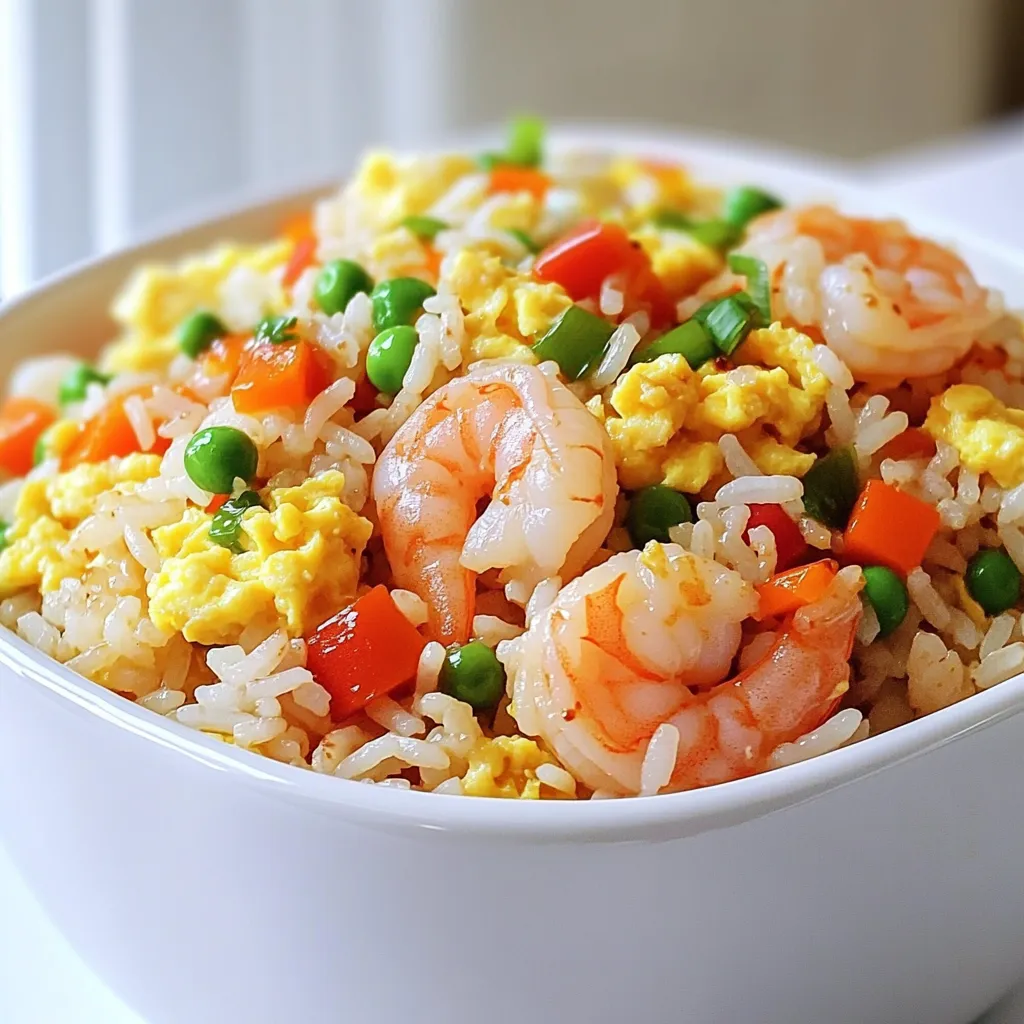
Are you ready to spice up your dinner? This Spicy Garlic Shrimp Fried Rice is both easy and delicious. With

- 1 cup pumpkin puree - 2 oz cream cheese - 1/2 cup granulated sugar - 1/2 teaspoon vanilla extract - 1/2 teaspoon ground cinnamon - 1/4 teaspoon ground nutmeg - 1/2 cup unsweetened cocoa powder - 2/3 cup all-purpose flour - 1/2 teaspoon baking powder - 1/2 teaspoon salt - 3/4 cup granulated sugar - 1/2 cup melted butter - 2 large eggs - 1 teaspoon vanilla extract These ingredients create a perfect mix of flavors and textures. The pumpkin cheesecake filling is creamy and sweet with a hint of spice. It pairs well with the rich, fudgy brownie layer. Each bite is a delightful blend of chocolate and pumpkin goodness. When gathering your ingredients, ensure your cream cheese is soft. This step makes mixing easier. Use fresh spices for the best flavor. The combination of cinnamon and nutmeg adds warmth to the cheesecake. For the brownie layer, use high-quality cocoa powder. It gives a deep chocolate taste that enhances the overall dessert. Melt the butter gently to keep it smooth. This tip helps you achieve a glossy brownie batter. Feel free to customize the ingredients to your taste. You can add a pinch of salt to enhance sweetness. Or, try different spices to make it your own. The goal is to create a dessert that you will love. First, preheat your oven to 350°F (175°C). This step is key for even baking. Next, prepare your mini muffin tin. You can line each cup with paper liners or grease them with butter or non-stick spray. This will help the brownie bites come out easily. In a mixing bowl, combine the pumpkin puree, softened cream cheese, 1/2 cup of sugar, 1/2 teaspoon of vanilla extract, ground cinnamon, and ground nutmeg. Blend all the ingredients until smooth. I like to use a hand mixer for this, but a whisk works too. Set this creamy filling aside for now. In a large bowl, mix the melted butter with 3/4 cup of granulated sugar. Whisk these together until combined and slightly glossy. Then, add in the eggs and 1 teaspoon of vanilla extract. Whisk again until it looks smooth. Now, sift the unsweetened cocoa powder, all-purpose flour, baking powder, and salt into the wet mixture. Stir gently with a spatula or wooden spoon until just combined. Be careful not to overmix, as this keeps the texture fudgy. To assemble, spoon about 1 teaspoon of the brownie batter into each muffin cup. Next, add 1 teaspoon of the pumpkin cheesecake filling on top. Finally, add another teaspoon of brownie batter to each cup. Make sure the cheesecake filling shows a bit above the batter. Place the muffin tin in your preheated oven and bake for 18-20 minutes. To check for doneness, insert a toothpick into the center of a brownie bite. It should come out mostly clean, with a few moist crumbs attached. After baking, let the brownie bites cool in the tin for about 10 minutes. Then, gently move them to a wire rack to cool completely. This helps keep them from getting soggy. Enjoy! How to check for doneness? To check if your brownie bites are done, use a toothpick. Insert it into the center of a bite. If it comes out mostly clean with a few moist crumbs, they are ready. This method works well for keeping the bites fudgy. Importance of not overmixing Mixing too much can ruin the texture. When you combine the dry and wet ingredients, stir gently. You want a smooth mix, but overmixing leads to tough bites. Keep that fudgy feel! Dusting with powdered sugar Once your brownie bites cool, dust them with powdered sugar. This adds a touch of elegance. It also makes them look more inviting. A simple sprinkle can make a big difference! Serving suggestions Serve each bite with a dollop of whipped cream. You can also add a sprinkle of cinnamon on top. This enhances the flavor and brings warmth. Try adding chocolate shavings for extra flair! Occasion ideas for serving These brownie bites are perfect for fall gatherings. Serve them at Thanksgiving or Halloween parties. They also work well for cozy nights in or casual get-togethers. Pairing with beverages Enjoy these bites with warm coffee or spiced tea. The flavors of pumpkin and spice pair well with both. You can also serve them with hot chocolate for a sweet treat! {{image_4}} You can make these brownie bites even better. Try adding chocolate chips. They add a rich and sweet touch. Just sprinkle a half cup into the brownie batter before you mix. You can also swap spices. Instead of cinnamon, use ginger or allspice. Each spice brings its own warm flavor. If you need a gluten-free option, use almond flour instead of all-purpose flour. It gives the bites a nutty flavor. For those who want a vegan treat, replace eggs with flax eggs. Mix one tablespoon of ground flaxseed with three tablespoons of water. Let it sit for five minutes. This mix works great in the recipe. These brownie bites fit right in for Thanksgiving or Halloween. For Halloween, add spooky decorations like candy eyes or orange sprinkles. You can also change toppings for special events. Try crushed nuts, caramel drizzle, or a dollop of whipped cream. This way, every season brings a new twist to your dessert! To keep your pumpkin cheesecake brownie bites fresh, store them in an airtight container. You can stack them carefully, but separate layers with parchment paper to avoid sticking. This method helps maintain their soft texture. If you plan to eat them within a few days, keep them at room temperature. For longer storage, place them in the fridge. If you want to save some brownie bites for later, freezing works great. First, let them cool completely. Then, wrap each bite in plastic wrap. Place the wrapped bites in a freezer-safe bag or container. This method keeps them fresh for up to three months. When you're ready to enjoy, take them out and let them thaw in the fridge overnight. For a quick thaw, you can leave them at room temperature for a couple of hours. To reheat brownie bites, use the oven for the best results. Preheat your oven to 350°F (175°C). Place the bites on a baking sheet and heat them for about 5-7 minutes. This method keeps their texture nice and fudgy. You can also use the microwave, but be careful. Heat them in short bursts of 10-15 seconds to avoid drying them out. Serve them warm for a cozy treat or enjoy them cold for a refreshing snack. Yes, you can make these brownie bites ahead of time. To prepare, follow the recipe and bake them as usual. Once they cool, store them in an airtight container. Keep them in the fridge for up to three days. This way, you can enjoy them fresh and tasty later. If you don't have pumpkin puree, you can use sweet potato puree. Mashed bananas or applesauce also work well. Each will give a different flavor, but they add moisture and sweetness. Choose what you have on hand for a fun twist! These brownie bites last about three days in the fridge. If you want them to last longer, freeze them. They can stay fresh in the freezer for up to three months. Just make sure to wrap them tightly to prevent freezer burn. Yes, you can use ricotta cheese instead of cream cheese. It will change the texture a bit but still tastes great. You could also try mascarpone for a richer flavor. Each cheese brings something unique to the dessert! We covered the key ingredients for pumpkin cheesecake brownie bites and how to make them. You learned to layer both fillings, bake them, and present them well. Remember, you can adapt recipes for your taste or needs, whether seasonal or dietary. Proper storage keeps them fresh for days. These brownie bites are great for any gathering or treat. Enjoy making them!

Pumpkin Cheesecake Brownie Bites Delightful Dessert

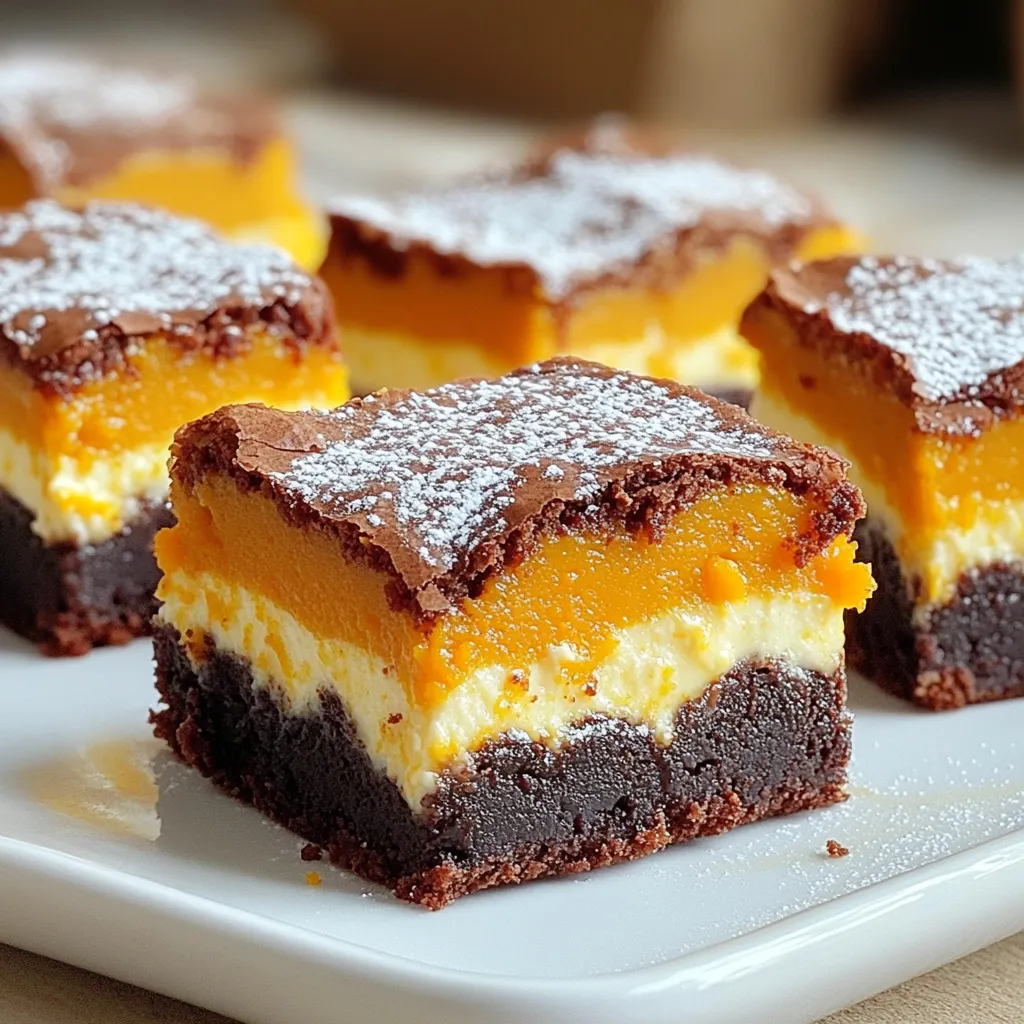
Get ready for a treat that combines two of your favorite desserts: cheesecake and brownies! These Pumpkin Cheesecake Brownie Bites

- 1 cup unsalted butter - 1 1/4 cups granulated sugar - 1 cup packed brown sugar - 4 large eggs - 1 teaspoon vanilla extract - 3/4 cup all-purpose flour - 1 cup cocoa powder - 1 teaspoon baking powder - 1/2 teaspoon salt - 1 tablespoon instant coffee granules - 1/2 cup semisweet chocolate chips - 1/2 cup salted caramel sauce - Sea salt flakes for garnish The unsalted butter gives the brownies a rich flavor and smooth texture. Using both granulated and brown sugar adds depth to the sweetness. The large eggs help bind the ingredients together while adding moisture. Vanilla extract enhances the overall taste, making it more inviting. Cocoa powder is the heart of brownies, providing that deep, chocolatey flavor. All-purpose flour helps create the structure. Baking powder ensures the brownies rise and remain soft. Salt balances the sweetness and enhances all flavors. Instant coffee granules give these brownies their mocha kick. They boost the chocolate flavor without making the brownies taste like coffee. Semisweet chocolate chips add extra chocolatey goodness, making each bite a delight. The salted caramel sauce is what makes these brownies truly special. It creates a sweet and salty experience that is hard to resist. For a dairy-free version, swap unsalted butter with coconut oil or a vegan butter substitute. Use a plant-based milk alternative in place of eggs, such as flaxseed meal or applesauce. If you want a gluten-free option, replace all-purpose flour with almond flour or a gluten-free flour blend. For a lower-sugar treat, try using a sugar substitute that measures cup-for-cup like erythritol or monk fruit sweetener. These substitutions allow everyone to enjoy these delicious brownies while meeting their dietary needs. {{ingredient_image_2}} Start by preheating your oven to 350°F (175°C). This step is key for even baking. Next, take a 9x13 inch baking pan. Lightly grease it or line it with parchment paper. This helps the brownies come out easily later. In a medium saucepan, melt 1 cup of unsalted butter over low heat. Once it’s melted, remove it from the heat. Stir in 1 1/4 cups of granulated sugar and 1 cup of packed brown sugar. Mix well until it’s smooth. Now, add 4 large eggs one at a time. Stir well after each egg. Add 1 teaspoon of vanilla extract next. In another bowl, whisk together 3/4 cup of all-purpose flour, 1 cup of cocoa powder, 1 teaspoon of baking powder, 1/2 teaspoon of salt, and 1 tablespoon of instant coffee granules. Gradually add this dry mix into the wet ingredients, stirring gently. Don’t overmix! Finally, fold in 1/2 cup of semisweet chocolate chips. Pour half of the brownie batter into the prepared pan. Spread it out evenly using a spatula. Drizzle half of the salted caramel sauce over this layer. Then, carefully pour the rest of the brownie batter on top. Use the spatula again to spread it evenly. With a knife, make swirls between the layers. This creates a lovely marbled effect. Finish by drizzling the remaining salted caramel sauce over the top. Sprinkle sea salt flakes generously on the surface for that perfect salty touch. Place the pan in the preheated oven and bake for 25-30 minutes. Check if it’s done by inserting a toothpick in the center. It should come out with a few moist crumbs, not wet batter. Once done, let the brownies cool in the pan for at least 15 minutes. This helps them set. After cooling, slice into squares and enjoy! To get brownies that are rich and fudgy, use less flour. Stick to 3/4 cup. This keeps the brownies moist. It helps to avoid overmixing too. Mix just until you see no flour. Bake them until a toothpick shows moist crumbs. This gives a gooey center. Remember, the brownies will continue to cook a bit after you take them out. If you want a strong coffee taste, use fresh coffee beans. Grind them right before use. You can also double the amount of instant coffee granules. If you love mocha, try adding a splash of brewed coffee. This makes the flavor pop. Pairing the coffee with chocolate brings out its richness. If your brownies turn out dry, you may have overbaked them. Keep a close eye on baking time. If they look set, take them out. For brownies that are too gooey, they might need more time in the oven. Use a toothpick to check. If it comes out too wet, bake a few more minutes. Lastly, if they stick to the pan, always grease or line it with parchment. This step is key for easy removal. Pro Tips Use High-Quality Ingredients: The flavor of your brownies greatly depends on the quality of your cocoa powder and chocolate chips. Opt for high-quality brands for the best results. Don't Overbake: Keep an eye on your brownies while baking. They should be taken out when a toothpick inserted comes out with a few moist crumbs. This ensures they remain fudgy and decadent. Let Them Cool: Allow the brownies to cool in the pan for at least 15 minutes before slicing. This helps them set and makes cutting easier without crumbling. Experiment with Flavors: Feel free to add nuts, or different types of chocolate, or even a hint of orange zest for a unique twist on classic brownie flavors. {{image_4}} To make gluten-free salted caramel mocha brownies, swap the all-purpose flour for gluten-free flour. Look for a blend that works well in baking. This change keeps the texture rich and fudgy while allowing those with gluten sensitivities to enjoy these treats. For a vegan version, replace the eggs with flax eggs. Mix one tablespoon of ground flaxseed with three tablespoons of water. Let it sit until it thickens. Use dairy-free butter and substitute the chocolate chips for a dairy-free kind. This way, you still get rich flavors without any animal products. You can enhance your brownies by adding nuts. Chopped walnuts or pecans add a nice crunch. If you want more flavor, try adding a teaspoon of almond extract or a pinch of cinnamon. These additions pair well with chocolate and caramel, creating a unique twist on the classic recipe. To keep your salted caramel mocha brownies fresh, store them in an airtight container. This helps prevent drying out. You can stack the brownies with layers of parchment paper between them. This keeps them from sticking together. Keep them at room temperature for up to three days. If you want to store them longer, consider freezing. Freezing brownies is easy and keeps them fresh for a long time. First, let the brownies cool completely. Then, cut them into squares. Wrap each square tightly in plastic wrap. Place the wrapped brownies into a freezer-safe bag. They can last up to three months in the freezer. When you're ready to enjoy them, simply thaw at room temperature. To reheat your brownies, use the microwave for a quick fix. Heat them for about 10-15 seconds. This warms them without drying them out. If you prefer the oven, preheat it to 350°F (175°C). Place the brownies on a baking sheet and warm them for about 5-10 minutes. The goal is to get them soft and gooey again, just like when they were fresh. If you don’t have instant coffee, use espresso powder. It gives a rich flavor. You could also use brewed coffee, but reduce the liquid in the recipe. A strong coffee will work best to keep the mocha taste. The brownies are done when a toothpick comes out with a few moist crumbs. Bake them for about 25-30 minutes. Keep an eye on them as ovens may vary. If the toothpick has wet batter, give them more time. Absolutely! Homemade salted caramel sauce adds a personal touch. Just make sure it is thick enough to swirl into the brownie batter. It should pour easily, but not be too runny. Leftover brownies last up to five days when stored in an airtight container. For longer storage, freeze them. They will keep well for about three months in the freezer. Just thaw and enjoy! In this blog post, we explored the key ingredients and steps for making delicious salted caramel mocha brownies. I shared tips for achieving a fudgy texture and variations for different diets. You can easily adapt the recipe to suit your tastes or needs. Remember, baking is all about practice. Don't be afraid to experiment. Enjoy your creations, and savor each bite of your homemade brownies. Happy baking!

Salted Caramel Mocha Brownies Rich and Decadent Treat

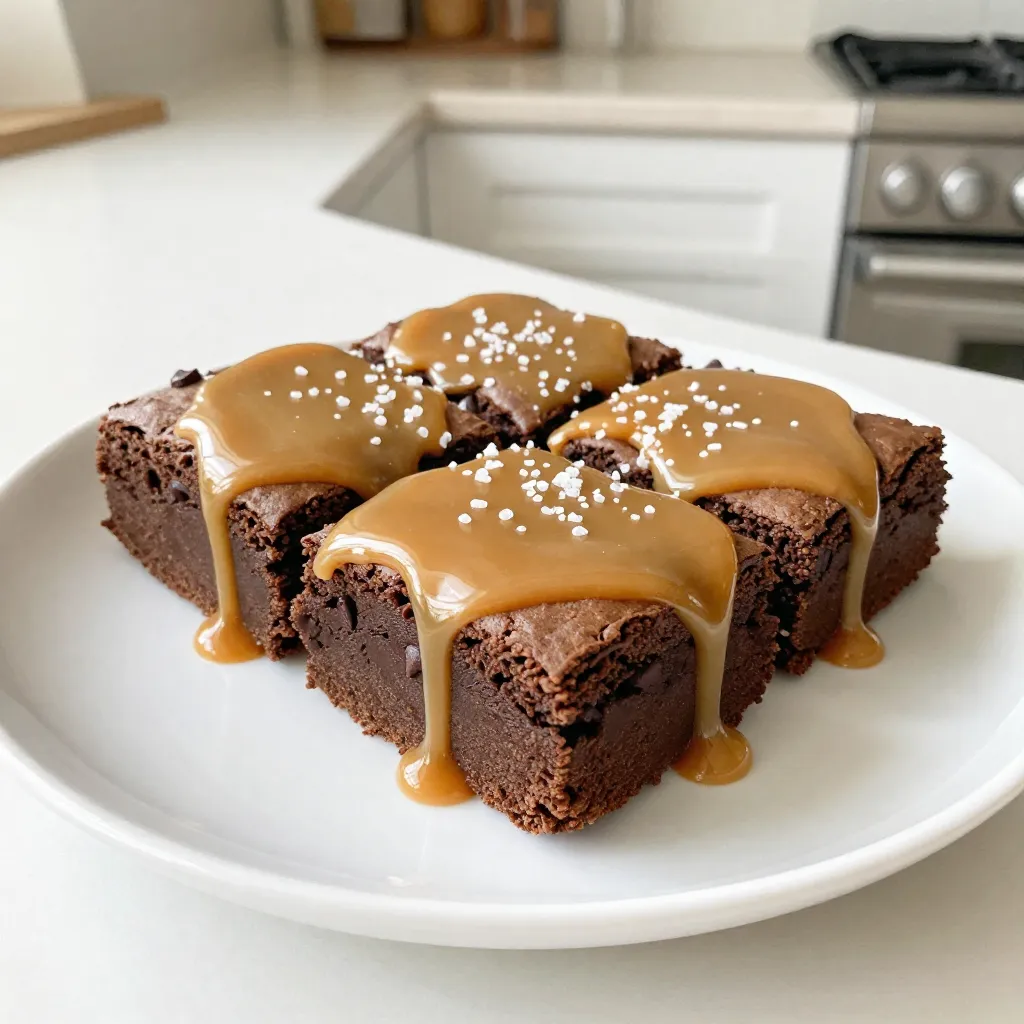
Indulge your sweet tooth with these salted caramel mocha brownies! This rich and decadent treat brings together the deep flavors

- 1 cup cottage cheese - 1/2 cup creamy peanut butter - 1/4 cup maple syrup (or honey) - 1 teaspoon vanilla extract - 1/4 teaspoon salt - 1/4 cup milk (dairy or almond milk) The key to a great Peanut Butter Cottage Cheese Mousse lies in its simple ingredients. First, cottage cheese gives a creamy base. The creamy peanut butter adds rich flavor and protein. Maple syrup or honey sweetens the dish perfectly. A splash of vanilla extract brings warmth. Salt enhances all these flavors. Finally, milk lightens the mousse. You can use dairy or almond milk based on your needs. - 1/4 cup dark chocolate chips - Chopped peanuts Garnishes make the mousse even more special. Dark chocolate chips add a sweet bite. Chopped peanuts give a nice crunch. Both toppings are optional, but they elevate the dish. You can mix and match garnishes to suit your taste. Enjoy your mousse with or without them! - Combine cottage cheese, peanut butter, maple syrup, vanilla, and salt in a blender. - Blend until smooth and creamy, scraping sides as needed. To start, gather all your ingredients. Place the cottage cheese, creamy peanut butter, maple syrup, vanilla extract, and salt into your blender. I prefer using a high-speed blender for this. It creates a richer texture. Blend on high until everything mixes well. Pause to scrape down the sides for even blending. This step is key to getting a smooth mousse. - Gradually add milk, blending to desired thickness. - Adjust milk quantity for looser or firmer mousse. Next, it’s time to reach the perfect texture. While blending, slowly pour in the milk. This helps the mousse become fluffy and light. If you want a thicker mousse, use less milk. For a lighter version, add more milk. Keep blending until you're happy with the consistency. - Taste and adjust sweetness with additional maple syrup if needed. - Transfer mousse to bowls and refrigerate for at least 30 minutes. After blending, taste your mousse. If you want more sweetness, add a bit more maple syrup. Blend briefly to mix it in. Then, carefully spoon the mousse into individual bowls or cups. Place the bowls in the fridge for at least 30 minutes. Chilling lets the flavors meld and helps the mousse set perfectly. Enjoy the wait! To make your mousse even better, think about sweetness and texture. You can tweak the sweetness by adding a bit more maple syrup. Taste your mousse first, and then decide. If you want a richer taste, try adding cocoa powder. It pairs well with peanut butter and gives a nice chocolate flavor. You can also mix in some cinnamon for warmth. Serving your mousse in cute parfait glasses makes it look special. For a fun texture, layer the mousse with crushed graham crackers. This adds a nice crunch. You can also sprinkle cocoa powder on top for a lovely touch. If you want a bit of flair, add dark chocolate chips or chopped peanuts on top before serving. These add color and texture and make your dessert even yummier. {{image_4}} You can easily change this recipe to fit different diets. For a vegan version, swap the cottage cheese with silken tofu. It blends well and gives a nice texture. You can also use agave syrup instead of maple syrup or honey. For keto fans, just choose a low-carb sweetener like erythritol. You can use coconut milk instead of regular milk for a creamy touch without dairy. Want to get creative with your mousse? You can mix in fruits like bananas or strawberries for a fresh taste. If you love chocolate, add cocoa powder to the blender. You can also try using almond or cashew butter instead of peanut butter for a new flavor. For a tropical twist, mix in coconut flakes and top with some fresh pineapple. The options are endless! To store your peanut butter cottage cheese mousse, place it in an airtight container. This keeps it fresh for up to three days in the fridge. If you want to enjoy the mousse later, make sure to cover it well. This helps maintain the mousse's light and creamy texture. If it gets a bit thick, stir in a little milk before serving. This will help bring back its smoothness and flavor. You can freeze the mousse if you want to save it longer. First, spoon it into freezer-safe containers, leaving some space at the top. The mousse can last for up to two months in the freezer. To thaw, move it to the fridge overnight. This gives it time to soften and return to the right texture. Stir it well after thawing to make it creamy again. Enjoy your mousse anytime! Yes, you can use dairy-free options! Silken tofu works well and gives a creamy texture. You can also try almond or cashew yogurt. These options keep the mousse smooth and tasty. Just ensure your choice is plain and unsweetened for the best flavor. The mousse stays fresh for about 3 to 5 days in the fridge. Make sure to store it in an airtight container to keep it from drying out. If you see any changes in texture or smell, it's best to throw it away. If you do not have maple syrup, honey is a great choice. You can also use agave nectar or brown sugar. Just remember to adjust the amount to match your taste. Each option adds a unique flavor to the mousse. This article covered how to make a tasty mousse. We listed the main ingredients and optional garnishes. I shared easy steps to prepare, chill, and serve your mousse. You can adapt it for different diets or flavors, too. Remember, you can store leftovers properly and even freeze them if needed. With this simple guide, you can enjoy a delicious treat anytime. Happy cooking!

Peanut Butter Cottage Cheese Mousse Deliciously Simple

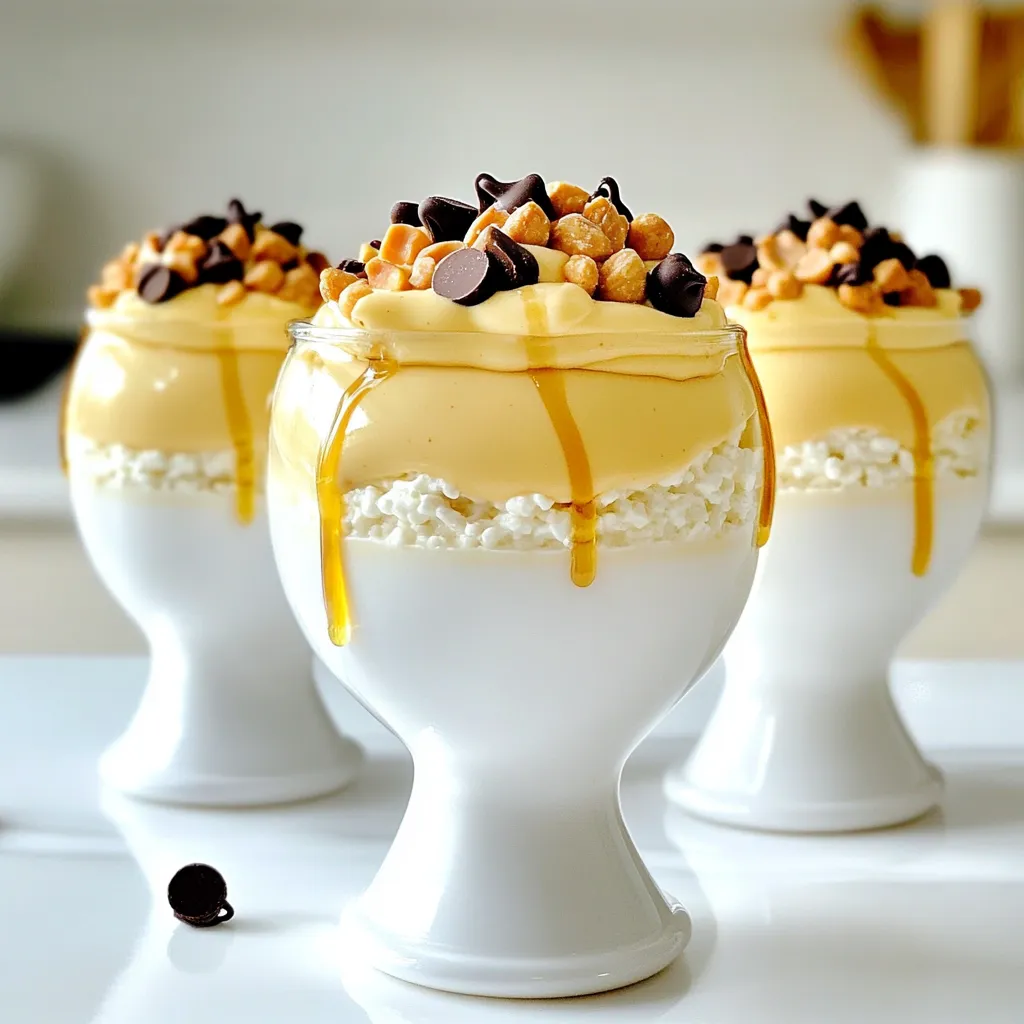
Are you ready to enjoy a tasty dessert that’s both simple and healthy? This Peanut Butter Cottage Cheese Mousse is

- 2 large onions - 1 cup all-purpose flour - 2 large eggs, beaten - 1 cup panko breadcrumbs - 1 teaspoon garlic powder - 1 teaspoon paprika - Salt and pepper to taste - Cooking spray - ½ cup Greek yogurt - 1 tablespoon mayonnaise - 2 cloves garlic, finely minced - 1 teaspoon fresh lemon juice - Salt to taste I love making onion rings at home. They are crispy, tasty, and easy to prepare. You need two large onions for this recipe. Slice them into ¼-inch thick rings. This width gives you the right balance of crunch and softness. For the coating, gather some simple ingredients. You will need all-purpose flour, eggs, and panko breadcrumbs. The panko breadcrumbs create a great crunch. You can add garlic powder and paprika for flavor. Don't forget to sprinkle salt and pepper in the flour. For the garlic dip, mix Greek yogurt and mayonnaise. This gives the dip a nice creamy texture. Mince two cloves of garlic and add them to the mix. A touch of fresh lemon juice brightens the flavor. Finally, add salt to taste. Having these ingredients ready will set you up for a fun cooking session. Enjoy the process and get ready to indulge in some crispy delights! - Preheat air fryer to 375°F (190°C) - Warm up for 5 minutes First, you need to get your air fryer ready. Preheating it to 375°F helps the onion rings cook evenly. Let it warm up for about 5 minutes. This step is key to achieving that perfect crunch. - Peel and slice onions into ¼-inch thick rings - Set up the breading station Next, grab two large onions. Peel them carefully, then slice them into ¼-inch thick rings. Make sure each ring is separate. Now, it’s time to set up your breading station. You’ll need three bowls for this. 1. In the first bowl, mix flour with a pinch of salt and pepper. 2. In the second bowl, beat the two eggs until smooth. 3. In the third bowl, combine panko breadcrumbs with garlic powder, paprika, and a little salt. Mix them well. - Coat onion rings in flour, beaten egg, and breadcrumb mixture - Arrange in air fryer and spray with cooking spray - Cook for 10-12 minutes, flipping halfway Now comes the fun part! Take each onion ring and coat it in flour. Make sure it’s fully covered. Next, dip it into the beaten egg, letting any extra drip off. Finally, coat it with the breadcrumb mix. Press the crumbs on gently to make them stick. Place the coated onion rings in a single layer in the air fryer basket. To make them crispy, lightly spray the tops with cooking spray. Cook the onion rings for about 10-12 minutes. Flip them halfway through. They should turn a lovely golden brown and be super crispy! While they cook, you can prepare the garlic dip. This simple dip will elevate your onion rings to a new level. Just mix Greek yogurt, mayonnaise, minced garlic, lemon juice, and salt in a bowl. Stir it all together. Once the onion rings are done, take them out, and let them cool a bit. You’re ready to enjoy a crunchy treat with a zesty dip! To get the best crunch, I always use panko breadcrumbs. They add a nice texture. Before cooking, lightly spray the onion rings with oil. This helps them crisp up nicely in the air fryer. Make sure to coat the onion rings evenly in flour and breadcrumbs. This ensures every bite is crunchy. When you press the crumbs onto the rings, do it firmly. This helps the coating stick well and stay on during cooking. For a beautiful presentation, arrange the crispy onion rings on a bright platter. Place the zesty garlic dip in a small bowl at the center. To make it look even better, garnish with fresh parsley or chives. You can also pair these rings with other dips like spicy mayo or ranch. They complement the flavors really well! {{image_4}} You can easily customize your onion rings. Adding spices can change the taste. Try cayenne for a spicy kick. You might also add herbs like oregano or thyme for a fresh flavor. Mixing in cheese with the breadcrumbs works wonders too. Parmesan or cheddar adds a rich taste. The cheese melts and creates a tasty crust. Don’t stop at the garlic dip! Spicy mayo is a great option. Just mix mayo with hot sauce for heat. Ranch dressing is another fan favorite. It’s creamy and pairs well with the crunchiness. You could also use yogurt as a base. Mix it with herbs or spices for a twist. These sauces can make your meal even more fun! To keep your onion rings fresh, store them in airtight containers. This helps maintain their taste and texture. You can stack them in layers, but add parchment paper between layers to prevent sticking. Properly stored, these onion rings will last for up to 2 days in the fridge. The best way to reheat onion rings is in the air fryer. Set the air fryer to 350°F (175°C). Place the onion rings in a single layer. Heat them for about 5 minutes. This method will help restore their crispy texture. To keep them crispy, avoid using the microwave. The microwave can make them soggy. Instead, using the air fryer is a smart choice. For extra crunch, lightly spray the onion rings with cooking spray before reheating. Yes, you can use different onions. Sweet onions work well for a milder taste. Red onions add color and a bit of zing. Yellow onions are great for that classic flavor. Just slice them into rings the same way. Each type brings its unique taste, so feel free to experiment! To make gluten-free onion rings, swap the all-purpose flour for a gluten-free flour blend. You can also use gluten-free breadcrumbs instead of panko. Make sure all your ingredients are certified gluten-free. This way, you can enjoy the same crispy goodness without the gluten! Air fryer onion rings pair great with various dips. Try serving them with ketchup, ranch, or spicy mayo. They also work well as a side for burgers or sandwiches. You can even serve them as a fun snack for game day. The options are endless! Yes, you can prepare onion rings ahead of time. After breading, place them on a tray and cover with plastic wrap. Store them in the fridge for a few hours. Just remember to cook them right before serving for the best crunch! Making air fryer onion rings is simple and fun. We covered the ingredients, step-by-step, tips, and variations. You can enjoy crispy rings with garlic dip or other sauces. Remember, using panko makes them extra crunchy. Store leftovers correctly to keep them fresh. Try adding your twist with spices or cheese to make them special. Enjoy experimenting with flavors and pairings. You’ll impress your friends and family with your tasty creations. Now, get cooking and savor every bite!

Air Fryer Onion Rings with Garlic Dip Delight

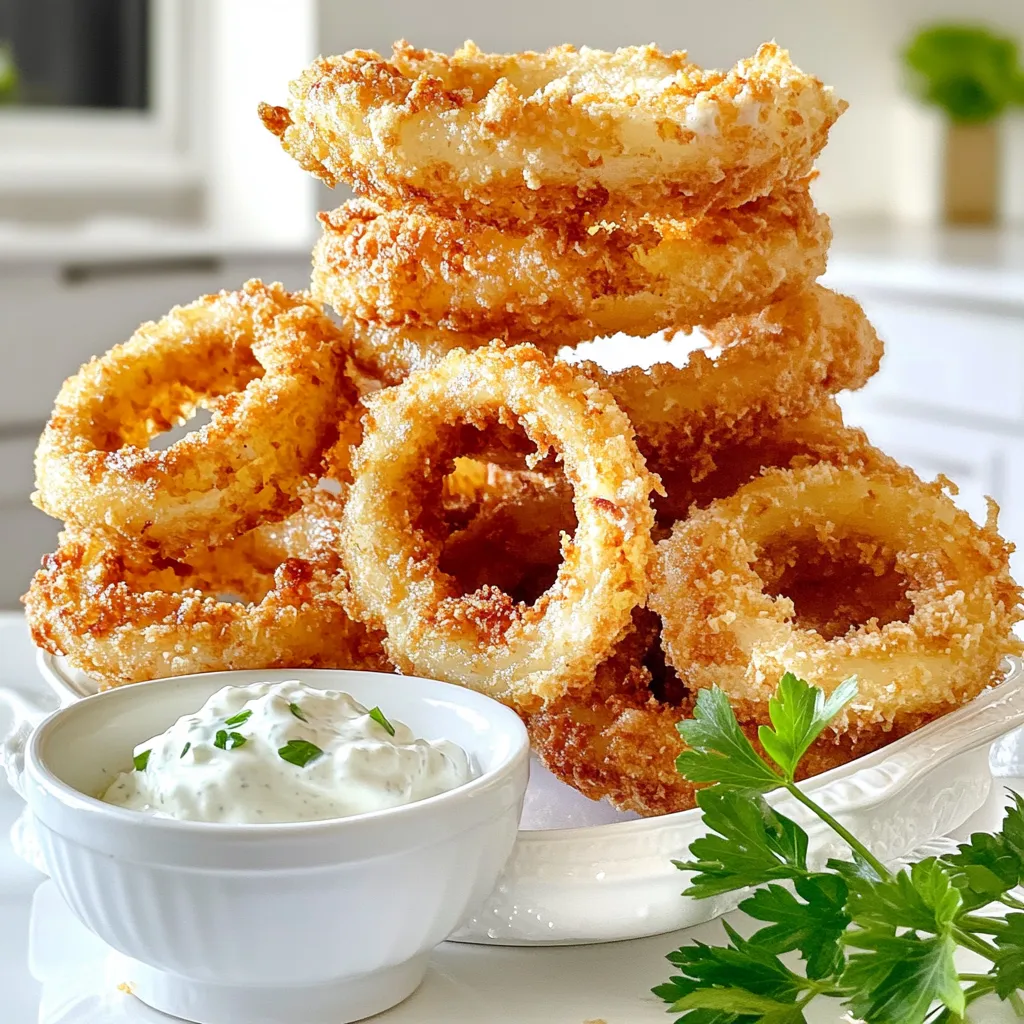
Craving a crunchy snack that’s easy and delicious? Let me show you how to make Air Fryer Onion Rings with

Older posts
Newer posts
← Previous Page1 … Page6 Page7 Page8 … Page120 Next →

dsad

© 2026 recipetorch • Built with GeneratePress

Our Policies

  • Copyright Policy
  • Cookie Policy
  • GDPR Policy
  • Privacy Policy
  • Disclaimer
  • Terms Of Use

More Information

  • Home
  • About
  • Contact
  • Appetizers
  • Dessert
  • Dinner
  • Drinks
©2026, recipetorch About Back To Top