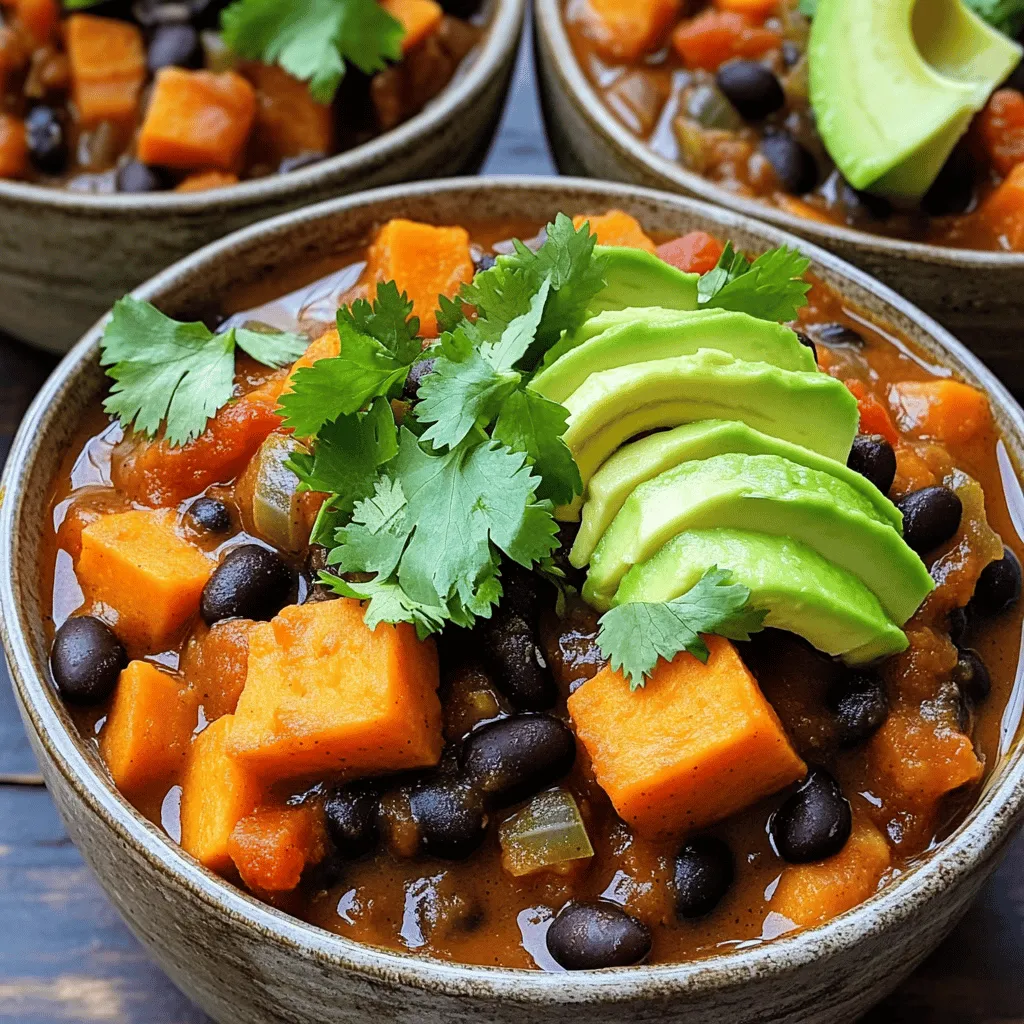
Savory Sweet Potato Black Bean Chili Recipe Delight
Are you ready to enjoy a warm, hearty meal that bursts with flavor? My Savory Sweet Potato Black Bean Chili
Are you ready to enjoy a warm, hearty meal that bursts with flavor? My Savory Sweet Potato Black Bean Chili
![To make a tasty creamy honey pepper mac and cheese, gather these ingredients: - 8 oz elbow macaroni - 2 tablespoons unsalted butter - 2 tablespoons all-purpose flour - 2 cups whole milk - 1 cup sharp cheddar cheese, shredded - 1 cup mozzarella cheese, shredded - 1/4 cup cream cheese, softened - 2 tablespoons honey - 1 teaspoon freshly cracked black pepper - 1 teaspoon smoked paprika - Salt, to taste - 1/4 cup panko breadcrumbs (optional, for topping) - Fresh parsley, chopped, for garnish Each ingredient plays a key role in creating the rich and creamy texture of this dish. The elbow macaroni serves as a perfect base. The blend of sharp cheddar and mozzarella gives a great flavor. Cream cheese adds depth to the sauce. Honey brings a sweet touch and counteracts the pepper's heat. Smoked paprika adds a unique twist. Finally, the panko breadcrumbs give a nice crunch if you choose to bake it. For a fresh finish, sprinkle some chopped parsley on top. You can find the full recipe in the article. Enjoy cooking! First, grab a large pot. Fill it with water and add salt. Bring the water to a boil. Once boiling, add 8 oz of elbow macaroni. Cook it for about 8-10 minutes. Make sure the pasta is al dente, or firm to the bite. Drain the pasta and set it aside. Now, use the same pot. Add 2 tablespoons of unsalted butter and melt it over medium heat. When the butter is melted, sprinkle in 2 tablespoons of all-purpose flour. Whisk this mix for 1-2 minutes. You want it to be light and golden. This mix is called a roux. Next, slowly add 2 cups of whole milk to the roux. Keep whisking to break up lumps. Bring the mix to a simmer, cooking for about 5-7 minutes. The sauce should thicken enough to coat a spoon. Then, lower the heat to medium-low. Stir in 1 cup of sharp cheddar, 1 cup of mozzarella, and 1/4 cup of cream cheese. Mix until the cheese melts into a smooth sauce. Now, take the cooked pasta and add it to the cheese sauce. Stir gently to coat every piece of pasta with the cheese. Make sure it’s all covered in creamy goodness. If you want a crunchy top, preheat your oven to 350°F (175°C). Transfer the mac and cheese to a greased baking dish. Sprinkle 1/4 cup of panko breadcrumbs on top. Bake for 15-20 minutes. Look for a golden brown topping and bubbly cheese. To make it pretty, garnish with fresh parsley before serving. This adds color and a fresh touch to your creamy honey pepper mac and cheese. Enjoy this delightful dish! For the complete recipe, check out the Full Recipe. To make the best cheese sauce, use fresh cheese. Fresh cheese melts better. Shred your own cheese instead of buying pre-shredded. Pre-shredded cheese has additives that can affect texture. Keep your heat low when adding cheese. This helps it melt without clumping. Start by whisking your roux well. Cook it until it turns light golden. When you add milk, do it slowly. Whisk continuously to break up lumps. If lumps form, use an immersion blender for a smooth sauce. This tool works wonders for quick fixes. If you want to change the flavor, try different cheeses. Gruyere gives a nutty taste. Fontina melts beautifully and adds creaminess. For a sharp kick, use pepper jack cheese. You can mix cheese types for a unique flavor. Always balance strong cheeses with milder ones for a harmonious dish. For the full recipe, check out the [Full Recipe]. {{image_4}} You can make Creamy Honey Pepper Mac and Cheese even better by adding protein. Cooked chicken is a great choice. It adds flavor and makes the dish hearty. You can also use shrimp or cooked bacon for a fun twist. Add them in after mixing the pasta and cheese sauce. This way, the flavors blend nicely. If you want to keep it vegetarian, there are tasty options. Try adding cooked spinach or broccoli. They bring color and nutrients. You can also mix in cherry tomatoes for a sweet burst. Add these veggies right before you combine them with the cheese sauce. They will warm up and add great texture. To boost the flavor, try extra spices. A pinch of cayenne pepper gives it a nice kick. You can also add garlic powder for depth. For a smoky flavor, consider using smoked gouda cheese. Drizzle more honey on top before serving for added sweetness. These changes can take your dish to the next level. For the full recipe, check the link. To keep your creamy honey pepper mac and cheese fresh, allow it to cool first. Once cool, transfer it to an airtight container. Store it in the refrigerator for up to three days. Make sure to seal it well to prevent any odors from the fridge from sneaking in. When you are ready to enjoy your leftovers, you can reheat them in a few ways. Use the microwave for a quick fix. Place your serving in a bowl and cover it with a damp paper towel to keep it moist. Heat for about 1-2 minutes, stirring halfway through. If you prefer, you can reheat it on the stove. Add a splash of milk to a pan, then warm it over medium heat, stirring often until hot. If you want to store your creamy honey pepper mac and cheese for longer, freezing is an option. Place the cooled dish in a freezer-safe container. You can freeze it for up to three months. To reheat, let it thaw overnight in the fridge. Then, use the microwave or stovetop methods to warm it back up. For best results, avoid freezing with the panko topping, as it can become soggy when reheated. For the full recipe, check out the earlier sections! Yes, you can use any pasta that you like. Penne, fusilli, or shells all work well. Just ensure that the pasta cooks to al dente. This way, it holds the cheese sauce better. The shape of the pasta can change the dish's texture and look. If your cheese sauce is too thick, add a bit of milk. Pour in small amounts while stirring until you reach your desired creaminess. Heat it gently as you mix. This helps to keep the sauce smooth and silky, making it easier to coat the pasta. Absolutely! You can prepare the mac and cheese in advance. Just make the dish up to the baking step. Cover it tightly and store it in the fridge for up to two days. When you’re ready to serve, bake it straight from the fridge. It may need a few extra minutes in the oven. To add heat, try adding more black pepper or some cayenne pepper. You can also mix in diced jalapeños or crushed red pepper flakes. Start with a little and taste as you go. This way, you can control the spice level to suit your taste buds. The best cheese for mac and cheese is sharp cheddar. It gives a great flavor. You can also mix in mozzarella for creaminess or Gruyère for a nutty taste. Using a blend of cheeses makes the dish rich and tasty. For a full list of ingredients, check the Full Recipe. This blog post guides you through making a delicious mac and cheese. We covered the key ingredients, easy steps, and helpful tips. Whether you prefer a classic dish or add fun twists, this recipe suits all. Store leftovers properly and explore variations for new flavors. Enjoying this meal can spark joy in any kitchen. Dive in and try it for yourself!](https://recipetorch.com/wp-content/uploads/2025/05/0792e52b-78a1-4173-9179-ba746386c65c.webp)
Discover a new twist on a classic comfort food with my Creamy Honey Pepper Mac and Cheese! This dish combines
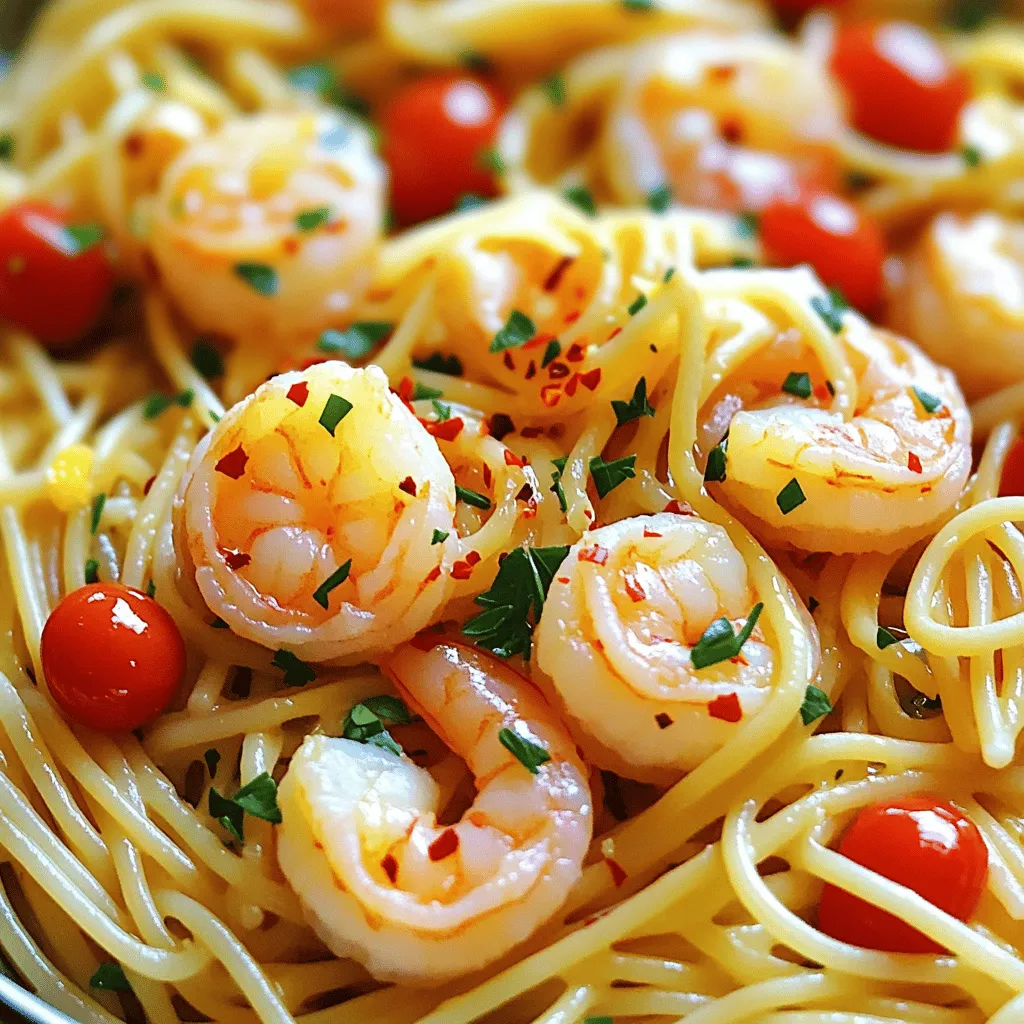
Looking for a quick, tasty dinner? Lemon Garlic Shrimp Pasta is your answer! This vibrant dish combines juicy shrimp, aromatic
![For the Peach Upside Down Mini Cakes, you will need a few simple ingredients. These items create a delicious and easy treat that everyone will love. Here’s what you need: - 2 ripe peaches, pitted and thinly sliced - 1/4 cup packed brown sugar - 2 tablespoons unsalted butter, plus extra for greasing - 1 cup all-purpose flour - 1 teaspoon baking powder - 1/4 teaspoon fine salt - 1/2 teaspoon ground cinnamon - 1/4 cup granulated sugar - 1/3 cup milk - 1 large egg, at room temperature - 1 teaspoon pure vanilla extract These ingredients work together to create a tasty, sweet, and fruity cake. The brown sugar and butter give a lovely caramel flavor, while the peaches add natural sweetness. You can also use the Full Recipe for detailed steps on how to combine these ingredients perfectly. Each mini cake is a small bite of heaven! Start by preheating your oven to 350°F (175°C). This step is key for even baking. While the oven warms up, grab a 6-cup muffin tin and grease it with some extra butter. This helps the cakes pop out easily when they’re done. Next, melt 2 tablespoons of unsalted butter in a small saucepan over medium heat. Once it melts, add 1/4 cup of brown sugar. Stir it constantly until the mix is smooth and bubbly. This mixture creates a sweet base for the cakes. Now, let’s layer those peaches! Take your thinly sliced peaches and arrange them on top of the buttery brown sugar mix in each muffin cup. Make sure each slice is pretty and shows off its curves. In a mixing bowl, whisk together 1 cup of all-purpose flour, 1 teaspoon of baking powder, 1/4 teaspoon of fine salt, and 1/2 teaspoon of ground cinnamon. In another bowl, combine 1/4 cup of granulated sugar, 1/3 cup of milk, 1 large egg, and 1 teaspoon of pure vanilla extract. Mix until everything is smooth. Now, slowly add the dry mix to the wet mix. Stir gently until just combined. Don’t worry about lumps; they are fine. Carefully pour the batter over the peaches, filling each muffin cup about three-quarters full. This allows room for the cakes to rise. Place the muffin tin in the preheated oven and bake for about 20-25 minutes. To check if they are done, insert a toothpick into the center of a cake. If it comes out clean, they are ready! Once baked, let the mini cakes cool in the tin for about 10 minutes. Then, use a knife to slide around the edges of each cake. Invert them onto a wire rack or plate to reveal those stunning caramelized tops. Enjoy these delightful treats! For the complete recipe, refer to the [Full Recipe]. To get light and fluffy cakes, avoid overmixing the batter. When you combine dry and wet ingredients, stir gently. A few small lumps in the batter are okay. Overmixing can make your cakes dense and tough. Let the cakes cool for a few minutes in the tin. This step helps the flavors meld together. After cooling, gently use a knife to loosen the edges. Then, invert the cakes onto a plate. Serve the mini cakes warm for the best taste. Dust them lightly with powdered sugar for a sweet finish. A sprig of fresh mint on top adds a nice color. For an extra treat, pair the cakes with a scoop of vanilla ice cream. The creamy ice cream contrasts beautifully with the warm, fruity cakes. You can also drizzle caramel sauce over the top for added sweetness. These small details make your Peach Upside Down Mini Cakes look and taste amazing. Don't forget to check the Full Recipe for all the steps to make these delightful treats! {{image_4}} You can make these mini cakes even more fun. Swap out peaches for other fruits. Cherries and apples work great too. They add a different taste and look. Pineapple also gives a tropical twist. Each fruit brings its own flavor. Try adding spices for more depth. Cinnamon is a classic choice. You can also add nutmeg or allspice. Just a pinch can change the flavor. Vanilla extract enhances sweetness and aroma. You might even like almond extract for a nutty flavor. If you need gluten-free options, you can easily adapt this recipe. Use gluten-free flour instead of all-purpose flour. Almond flour or a gluten-free blend works well. This keeps the texture light and fluffy without wheat. For those looking for vegan options, replace the egg. A flaxseed egg is an easy swap. Mix one tablespoon of ground flaxseed with three tablespoons of water. Let it sit for a few minutes until it thickens. You can also substitute milk with almond or soy milk. This keeps the cakes moist and tasty. These small changes make the recipe fit various diets while staying delicious. For the full recipe, check the details in the earlier sections. Enjoy experimenting! To keep your Peach Upside Down Mini Cakes fresh, store them in an airtight container. This helps lock in moisture and flavor. You can leave them at room temperature for up to two days. If you want to keep them longer, place them in the fridge. They can last for about a week in the cold. Refrigeration can change the cake's texture. It might become a bit denser, but still delicious. If you like them warm, just reheat before serving. When it comes to reheating, you have two good options: the microwave and the oven. Microwave: Place one mini cake on a microwave-safe plate. Heat it for about 15-20 seconds. Check if it’s warm enough. If not, heat for another 10 seconds. Oven: Preheat your oven to 350°F (175°C). Wrap the mini cakes in foil and place them on a baking sheet. Heat them for about 10 minutes. This method helps keep the cakes soft and tasty. Enjoy your sweet treats warm! Can I use canned peaches instead of fresh? Yes, you can use canned peaches. Just make sure to drain them well. Canned peaches may be softer, so keep that in mind. They can still taste great in this recipe. How do I know when the cakes are done baking? You can check by inserting a toothpick in the center of a cake. If it comes out clean, the cakes are done. They should also look golden on top and spring back when gently pressed. Can I make these mini cakes ahead of time? Yes, you can make them a day in advance. Just store them in an airtight container. Reheat them in the oven before serving for the best taste. What can I serve with Peach Upside Down Mini Cakes? These mini cakes are delightful on their own. For extra flavor, serve them with whipped cream or vanilla ice cream. Fresh mint or a drizzle of honey adds a nice touch too. How to fix if the cakes stick to the pan? If the cakes stick, run a knife around the edges first. Then, gently tap the pan upside down on a plate. If they still stick, place the pan in warm water for a minute to loosen them up. In this post, we explored the simple yet delicious recipe for Peach Upside Down Mini Cakes. You learned about the key ingredients, step-by-step instructions, and essential tips for perfecting your cakes. Remember to avoid overmixing and to customize your flavors. Whether you enjoy them fresh or stored, these cakes promise great taste. Keep experimenting with different fruits and dietary options to find your favorite version. Happy baking!](https://recipetorch.com/wp-content/uploads/2025/05/5a0017b2-648e-43db-b41b-ca0559a5672a.webp)
Have you ever craved a treat that’s both simple and delightful? Peach Upside Down Mini Cakes are the answer! These

Are you ready to take your taste buds on a wild ride? Crispy Rice and Spicy Tuna Bites are the

If you’re craving a dessert that combines the rich flavor of brown butter, gooey marshmallows, and melty chocolate, you’re in

Looking for a fun twist on breakfast? Try my Cinnamon Roll French Toast Bites! These easy treats mix two favorites
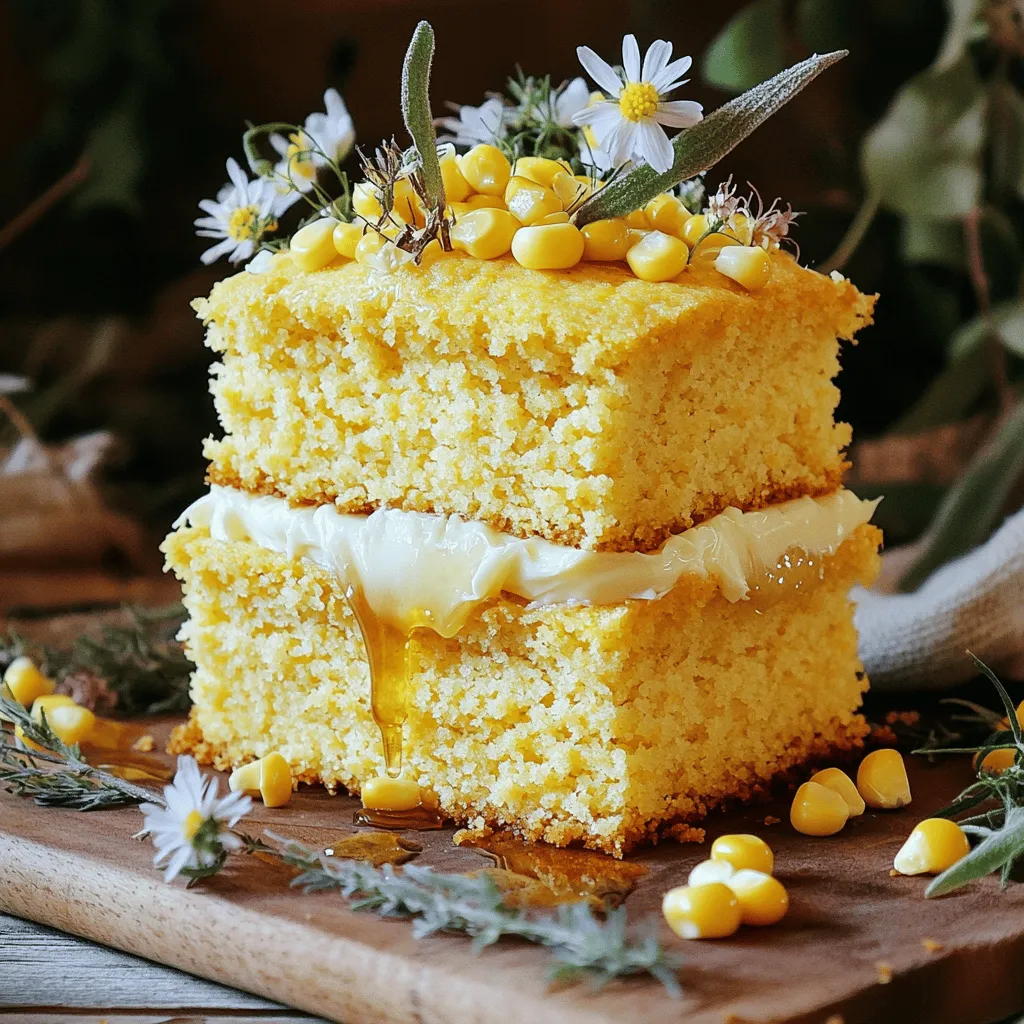
Are you ready to elevate your dessert game? This Layered Cornbread Cake with Honey Butter is the perfect blend of
![For a tasty Honey Garlic Skillet Chicken Thighs, you need these key ingredients: - 4 bone-in, skin-on chicken thighs - 1 tablespoon olive oil - Salt and pepper, to taste - 4 cloves garlic, minced - 1/4 cup honey - 2 tablespoons soy sauce - 1 tablespoon apple cider vinegar - 1 teaspoon fresh ginger, grated - 1 teaspoon sesame seeds (optional) - Fresh parsley, chopped for garnish These ingredients create a sweet and savory dish that’s hard to resist. The honey gives a lovely sweetness, while the soy sauce adds depth. Minced garlic and ginger enhance the flavor, making each bite burst with taste. You can customize this dish with optional ingredients to suit your taste. You might add sesame seeds for crunch or some fresh herbs for more flavor. If you like spice, consider adding crushed red pepper flakes. This way, you can make it your own. For the full recipe, check out the detailed cooking steps and tips to perfect your dish. To prepare the chicken thighs, start by drying them with paper towels. This step is key for crisp skin. After drying, season both sides with salt and pepper. This adds flavor and helps create a nice crust when cooking. For crispy skin, make sure your skillet is hot enough before adding the chicken. If it’s too cool, the chicken will steam instead of sear. Also, avoid moving the chicken while it cooks. Let it sit to develop that golden, crispy texture. Now, let’s cook! Heat olive oil in a large skillet over medium-high heat. Once the oil shimmers, carefully place the chicken thighs skin-side down. Sear for 5-7 minutes without moving them. You want the skin to turn brown and crispy. After searing, flip the chicken thighs and cook for another 5 minutes. While this cooks, whisk together minced garlic, honey, soy sauce, apple cider vinegar, and grated ginger in a small bowl. This makes a tasty glaze. Once the chicken is nice and brown, pour the honey garlic mixture over the thighs. Lower the heat to medium-low. Simmer the chicken in the sauce for about 10-15 minutes. Baste the chicken often with the glaze. This keeps it moist and flavorful. Always check that the internal temperature reaches 165°F (75°C) to make sure it’s safe to eat. When fully cooked, transfer the chicken thighs to a platter and drizzle the sauce over them. For a lovely touch, you can sprinkle sesame seeds and garnish with fresh parsley. For the full recipe, refer to the complete instructions. Enjoy your delicious dish! To make your honey garlic skillet chicken thighs shine, follow these tips: - Pat the Chicken Dry: Always dry the chicken thighs with paper towels. This helps the skin get crispy. - Use a Hot Skillet: Preheat the skillet until the oil shimmers before adding the chicken. This ensures a great sear. - Avoid Crowding the Pan: Cook in batches if needed. Crowding makes it hard to get a good crispy skin. - Baste Frequently: While simmering, spoon the sauce over the chicken often. This keeps it juicy and flavorful. Beware of common mistakes: - Don’t Flip Too Soon: Let the chicken sear for 5-7 minutes without moving it. This builds great flavor. - Check the Internal Temperature: Always ensure it reaches 165°F (75°C) to be safe and tasty. You can boost the flavor of your dish with these ideas: - Add Spices and Herbs: Consider using thyme or rosemary. They pair well with the honey garlic taste. - Make the Sauce Thicker: To thicken the sauce, simmer it longer. You can also add a cornstarch slurry. - Make the Sauce Thinner: If you prefer a thinner sauce, add a splash of chicken broth or water. Mix well before serving. Feel free to experiment! Each tweak can lead to a new favorite dish. For the full recipe, check the original post. {{image_4}} You can easily swap some ingredients in this recipe. If you want a lighter option, use skinless chicken thighs. They will still taste great but contain less fat. For a sweeter flavor, you can try maple syrup instead of honey. If you like heat, add a pinch of red pepper flakes to the sauce. This gives a nice kick to balance the sweetness. You can cook this dish in different ways. If you prefer oven-baked chicken, preheat your oven to 425°F. Sear the chicken in the skillet first, then move it to the oven to finish cooking. This method keeps the chicken juicy and tender. For a slow cooker option, brown the chicken thighs in a skillet. Then, place them in the slow cooker. Pour the honey garlic sauce over the chicken and cook on low for 4-6 hours. This method makes the meat super tender and full of flavor. Explore these variations to find what suits your taste best. For more ideas and to see the full recipe, check out the [Full Recipe]. To keep your honey garlic skillet chicken thighs fresh, store leftovers right away. Let the chicken cool completely before placing it in the fridge. Use airtight containers to prevent moisture loss and keep flavors intact. I recommend glass or plastic containers with tight lids. This helps the chicken stay juicy and tasty for up to four days. When it's time to enjoy those leftovers, reheating properly is key. The best method is to use a skillet. Heat a little oil over medium heat, then add the chicken. Cover the skillet to help it warm evenly. This helps keep the skin crisp and the meat juicy. You can also use the microwave, but be careful. Microwave reheating can make the chicken rubbery. If you use the microwave, heat it in short bursts and check often to maintain its quality. What can I serve with honey garlic chicken? You can serve honey garlic chicken with rice, mashed potatoes, or steamed veggies. These sides soak up the sauce well and balance the flavors nicely. How do I know when the chicken is fully cooked? Use a meat thermometer to check the chicken's temperature. The safe internal temperature is 165°F (75°C). The juices should run clear when cut. Can I use boneless chicken thighs for this recipe? Yes, boneless chicken thighs work well in this dish. They will cook faster than bone-in thighs, so adjust the cooking time accordingly. Can I make the honey garlic sauce ahead of time? Absolutely! You can mix the honey, soy sauce, garlic, and ginger in advance. Store it in the fridge for up to three days. What is the best way to achieve crispy skin on chicken thighs? To get crispy skin, pat the chicken dry with paper towels. Season it well and let it sear without moving it. This helps form a nice crust. How long can I keep leftovers in the fridge? Store leftovers in an airtight container for up to three days. Make sure to let them cool before sealing. In this guide, we covered everything for making Honey Garlic Skillet Chicken Thighs. We explored key ingredients, preparation tips, and cooking steps. You learned methods to avoid common mistakes and enhance flavors. I shared ways to adapt the recipe for your taste, along with storage and reheating tips. You now have the knowledge to create this tasty dish. Enjoy the process and impress your friends and family. Happy cooking!](https://recipetorch.com/wp-content/uploads/2025/05/17330f8a-e6c9-44b8-aa6d-de019cb7c9df.webp)
Are you ready to make a dish that bursts with flavor and is easy to prepare? Honey Garlic Skillet Chicken
![To make creamy garlic sauce baby potatoes, gather these ingredients: - 1.5 pounds baby potatoes - 4 cloves garlic, minced - 1 cup heavy cream - 1 tablespoon olive oil - 1 teaspoon dried thyme - 1 teaspoon garlic powder - 1/2 teaspoon paprika - Salt and pepper to taste - Fresh parsley, chopped (for garnish) When choosing baby potatoes, look for firm ones. They should have smooth skin without blemishes. Color is also important; choose potatoes that are vibrant, not dull. The size should be uniform for even cooking. If you can, go for organic potatoes. They taste better and are often fresher. If you don’t have heavy cream, you can use sour cream or Greek yogurt. These will give a nice tang. For a lighter option, try using half-and-half. If you can't find baby potatoes, you can cut larger potatoes into smaller pieces. You can also swap dried thyme with fresh herbs like rosemary or parsley for a fresh twist. Start by washing the baby potatoes. Use cool water to remove all dirt. Once clean, dry them with a towel. This helps the sauce stick better later. Fill a large pot with water and add salt. Bring the water to a rolling boil. Carefully add the baby potatoes. Cook them for 15 to 20 minutes. They should be tender and easy to pierce with a fork. After cooking, drain the potatoes in a colander. Let them cool for a moment, then slice each potato in half. In a large skillet, warm olive oil over medium heat. Add minced garlic and sauté for about one minute. Stir often to keep the garlic from burning. Slowly pour in the heavy cream, mixing in dried thyme, garlic powder, paprika, and salt and pepper. Let this simmer for about 3 to 4 minutes until it thickens slightly. Next, add the halved baby potatoes to the skillet. Toss them gently in the creamy garlic sauce. Cook for another 5 to 7 minutes to heat through. Finally, remove from heat and garnish with fresh parsley. For the full experience, check the Full Recipe. Enjoy serving these creamy garlic sauce baby potatoes! To get that perfect creamy sauce, use heavy cream. It gives a rich texture. Gradually add the cream to the garlic. This lets the sauce thicken nicely. Stir often to avoid burning. Simmer for a few minutes until it coats the back of a spoon. If it’s too thick, add a splash of water or broth. Cook baby potatoes for 15-20 minutes. Test them with a fork. They should feel soft but not mushy. Start timing when you add them to boiling water. Drain them once tender. This keeps them from overcooking. Halve them while warm for better sauce absorption. Add more garlic if you love its taste. Fresh herbs like basil or chives can brighten the dish. A sprinkle of lemon juice gives a nice zing. For heat, try red pepper flakes. Adjust salt and pepper to your liking. You can check the [Full Recipe] for other ideas! {{image_4}} You can add cheese to make this dish even better. I love using Parmesan or cheddar. Just sprinkle grated cheese into the creamy sauce. Stir until it melts and blends well. This makes the dish rich and savory. If you want to try something different, use feta or goat cheese. Both add a nice tangy bite. If you love heat, try a spicy version. Just add red pepper flakes to the sauce. Start with a pinch, then taste it. You can always add more if you want it spicier. This adds a great kick to the creamy garlic flavor. I often pair it with a squeeze of lemon juice to balance the heat. Herbs can change the taste of your creamy garlic sauce baby potatoes. For a fresh twist, try adding fresh basil or dill. They brighten the dish and add freshness. You can also use rosemary or oregano for a more earthy flavor. Just chop them finely and add them to the sauce. Experiment with different herbs to find your favorite blend. For the complete recipe, check the full recipe section. To store leftover creamy garlic sauce baby potatoes, let them cool first. Place them in an airtight container. Make sure to cover them well to keep moisture in. Store them in the fridge for up to three days. If you notice any strange smells or colors, it’s best to toss them out. When you’re ready to reheat, use a skillet or microwave. If using a skillet, add a splash of cream or milk. Heat on low to avoid burning. Stir gently to keep the sauce smooth and creamy. In the microwave, heat in short bursts. Stir in between to help heat evenly. You can freeze creamy garlic sauce baby potatoes, but the texture may change. To freeze, place cooled potatoes in a freezer-safe bag. Remove as much air as possible. They will last for up to two months. When ready to eat, thaw in the fridge overnight. Reheat as mentioned above for best results. You can serve these potatoes with many dishes. They pair well with grilled chicken or fish. A fresh salad also adds a nice crunch. For a hearty meal, serve them with steak or pork chops. If you want a vegetarian option, try them with roasted vegetables. You can even enjoy them as a side with pasta dishes. This creamy garlic sauce adds flavor to anything on your plate. To check if the baby potatoes are done, use a fork. If the fork goes in easily, they are ready. You should cook them for about 15-20 minutes. Keep an eye on them so they don’t get too soft. Overcooked potatoes can become mushy. If you’re unsure, taste one! It should be tender and creamy inside. Yes, you can use non-dairy options! Almond milk or coconut cream can replace heavy cream. For a creamy texture, try cashew cream. Just make sure to adjust the flavors. You may need a bit more seasoning to get the right taste. This way, everyone can enjoy the dish, no matter their diet. In this blog post, we explored how to make creamy garlic sauce baby potatoes. We covered important ingredients, tips for choosing fresh potatoes, and substitutions. You learned step-by-step how to prepare, cook, and create a rich sauce. The tips provided help ensure your dish turns out perfect every time. Don’t forget the variations to spice things up. Lastly, proper storage advice helps you enjoy leftovers later. These simple ideas will help you impress your family and friends! Enjoy your cooking!](https://recipetorch.com/wp-content/uploads/2025/05/777a2c77-7529-4682-8b86-01153d7035db.webp)
Looking for a tasty side dish? My Creamy Garlic Sauce Baby Potatoes are just the ticket! These small wonders pack
