
Chocolate Dipped Pretzel Rods Tasty Simple Treat
If you love sweet and salty snacks, you’re in for a treat! Chocolate dipped pretzel rods are easy to make
If you love sweet and salty snacks, you’re in for a treat! Chocolate dipped pretzel rods are easy to make
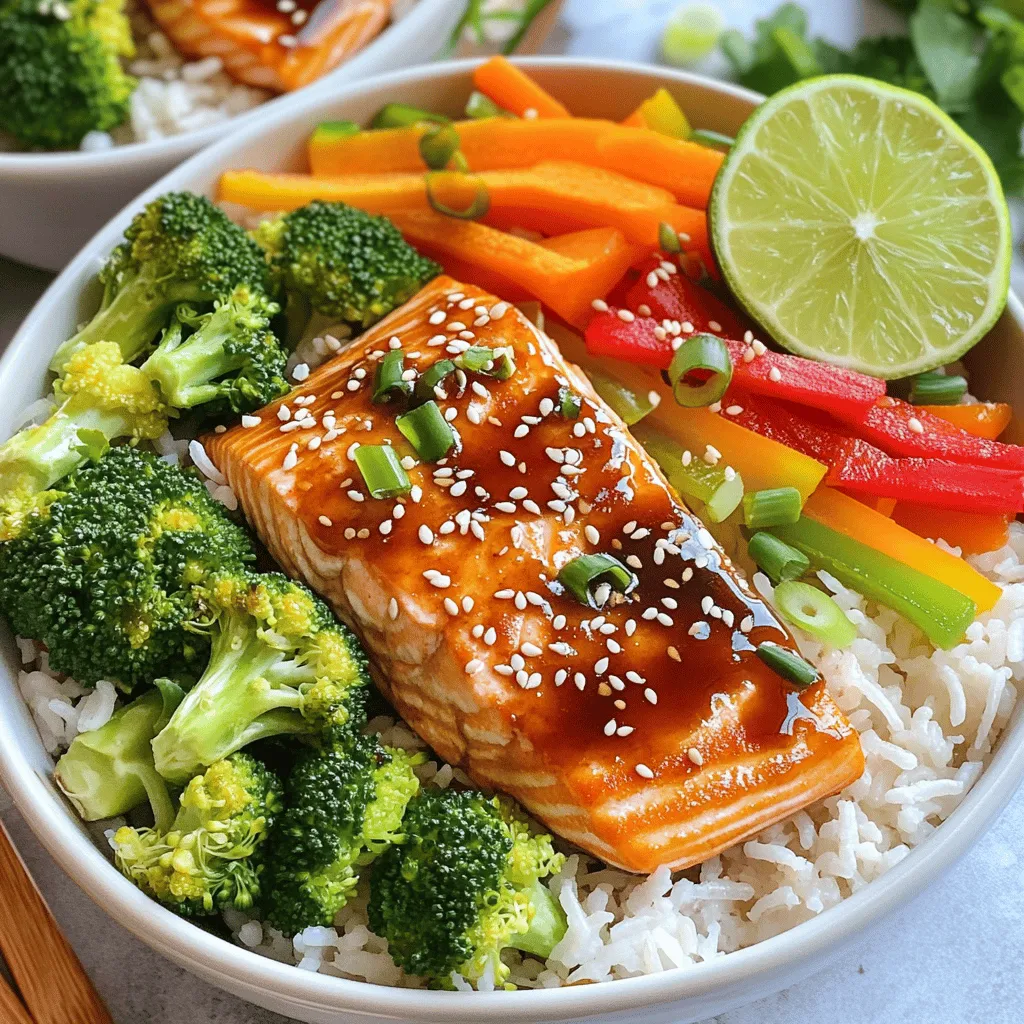
Looking for a quick and tasty dinner? Try these Teriyaki Salmon Bowls! This recipe combines fresh salmon and vibrant veggies,
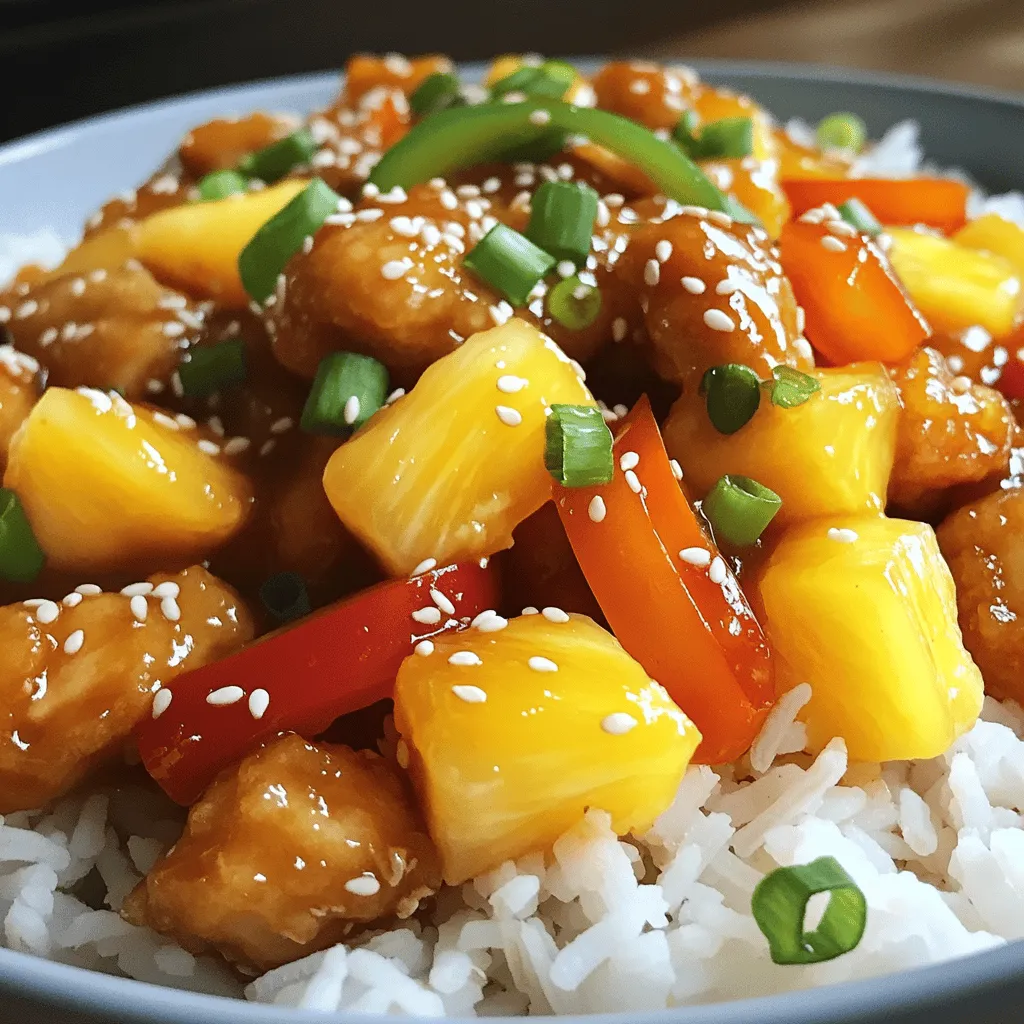
Are you ready to dive into the world of flavor with my Savory Sweet and Sour Chicken Stir Fry Recipe
![- 2 ripe avocados - 1/2 cup unsweetened cocoa powder - 1/4 cup maple syrup or honey - 1/4 cup almond milk or plant-based milk - 1 teaspoon pure vanilla extract - A pinch of sea salt - Fresh berries (raspberries, strawberries) - Shaved dark chocolate To make a chocolate avocado mousse, you need a few simple items. First, you want to use ripe avocados. They bring a creamy texture. Next, unsweetened cocoa powder adds rich chocolate flavor. Maple syrup or honey provides sweetness. Almond milk or any plant-based milk keeps it smooth. Pure vanilla extract enhances the flavor. Finally, a pinch of sea salt balances everything. For a pretty touch, you can add fresh berries on top. Raspberries or strawberries work nicely. Shaved dark chocolate is another great garnish. It adds a touch of elegance and extra taste. If you're looking for the full recipe, you can find it here: [Full Recipe]. - Step 1: Process the avocados and dry ingredients First, take your ripe avocados and peel them. Remove the pits, and add them to a food processor. Then, add 1/2 cup of unsweetened cocoa powder, 1/4 cup of maple syrup (or honey), 1/4 cup of almond milk, 1 teaspoon of pure vanilla extract, and a pinch of sea salt. - Step 2: Blend until smooth and creamy Turn on the food processor and blend the mixture at high speed. Keep blending for about 1 to 2 minutes. Stop halfway to scrape down the sides. This step makes sure everything mixes well and gives you a smooth texture. - Step 3: Taste and adjust sweetness Once blended, taste your mousse. If you want it sweeter, drizzle in a bit more maple syrup. Blend again for just a few seconds to mix it in. - Step 4: Spoon into serving dishes Now it’s time to serve! Carefully spoon the mousse into small cups or dishes. Fill each one evenly for a nice look. - Step 5: Chill for ideal texture Place the filled cups in the fridge. Let them chill for at least 30 minutes. This helps the mousse firm up and enhances the flavors. - Step 6: Garnish before serving When you’re ready to eat, add some fresh berries on top. You can also sprinkle shaved dark chocolate for a fancy touch. Enjoy your delicious chocolate avocado mousse! For the full recipe, check out the detailed instructions above. To get the perfect mousse, blending time matters. Blend the mixture on high speed for 1-2 minutes. This helps create a smooth and creamy texture. Halfway through, stop and scrape down the sides of the bowl. This ensures all ingredients blend well. You want every bite to be rich and velvety. Sweetness is key for a great mousse. After blending, taste it. If you want more sweetness, add a bit more maple syrup. Blend again briefly to mix it in. You can also play with flavors. Try adding a bit of espresso for a coffee kick. A hint of citrus zest, like orange or lemon, can brighten the taste. Be bold and experiment! Choosing the right serving dishes is important. Clear glass cups show off the mousse's rich color. They make it look fancy. To finish, use garnishes wisely. Fresh berries like raspberries or strawberries add color and taste. Shaved dark chocolate gives it a special touch. These details make your mousse look as good as it tastes. For more tips, check the Full Recipe for ideas! {{image_4}} You can easily make chocolate avocado mousse vegan. Just use maple syrup and almond milk. If you want a non-vegan option, honey works great too. For sweeteners, consider agave or stevia. They can lower the sugar content and still taste sweet. Adding peanut butter gives a new twist to the mousse. It adds creaminess and a nutty flavor. You can also experiment with spices. A touch of cinnamon warms the flavor. If you like heat, try a pinch of chili powder for a unique kick. Pair your mousse with different fruits. Fresh berries like strawberries or raspberries add brightness. You can also use mango or banana for a tropical touch. Creating layered desserts is another fun idea. Layer the mousse with yogurt or granola for added texture. This makes your dessert not just tasty but also visually appealing. For the full recipe, check out the Chocolate Avocado Mousse instructions above. To keep your chocolate avocado mousse fresh, refrigerate any leftovers. Place the mousse in an airtight container. This helps prevent it from absorbing any unwanted flavors from your fridge. If you do not have an airtight container, cover the mousse tightly with plastic wrap. Make sure the wrap touches the surface of the mousse to reduce air exposure. In the fridge, your mousse will stay fresh for about 3 days. After that, the texture and flavor can change. Signs of spoilage include a brown color, an odd smell, or a watery surface. If you notice any of these signs, it’s best to throw it away. Enjoy your mousse while it’s fresh for the best taste! Can I make chocolate avocado mousse in advance? Yes, you can make this mousse ahead of time. It keeps well in the fridge for up to three days. Just cover it tightly to keep it fresh. Chilling enhances the flavor and texture. The mousse will stay creamy and delicious. How can I make my mousse sweeter? To sweeten your mousse, add more maple syrup or honey. Blend it in for an even taste. You can also mix in some powdered sugar if you like. Adjust the sweetness to fit your taste buds. Everyone enjoys their own level of sweetness. Is this dessert high in calories? Chocolate avocado mousse is lower in calories than many desserts. Avocados are healthy fats, while cocoa powder adds flavor without extra sugar. A serving is filling and satisfying. Enjoy this treat without feeling guilty. What are the health benefits of avocado? Avocados are packed with nutrients. They provide healthy fats, fiber, and vitamins. These nutrients can help improve heart health and digestion. They also support skin health and provide energy. Eating avocados can boost your overall well-being. Can I freeze chocolate avocado mousse? Yes, you can freeze chocolate avocado mousse. Freeze it in a sealed container for up to a month. When ready to enjoy, thaw it in the fridge overnight. The texture may change slightly, but it will still taste great. Enjoy this rich dessert later! In this post, I covered how to make a delicious chocolate avocado mousse. You learned about the key ingredients, steps for preparation, and serving ideas. I also shared tips for the perfect texture and how to customize your mousse to fit your taste. This dessert is easy, healthy, and fun to make. You can enjoy it in many ways. So grab those ripe avocados and start experimenting! You’ll be amazed at how tasty this treat can be.](https://recipetorch.com/wp-content/uploads/2025/05/5f6d0f54-b32e-477c-8221-fcbca009cf6f.webp)
Are you ready to indulge in a dessert that’s both rich and healthy? Chocolate avocado mousse is your answer! This
. Using fresh garlic adds a strong taste that pairs well with the earthy Brussels sprouts. The Parmesan brings a nice salty touch. You can adjust the amount of garlic and cheese to fit your taste. Don't forget the balsamic vinegar! It gives a tangy kick, making the dish even better. Fresh parsley adds a bright color and fresh taste. Use these ingredients to create a delightful meal that everyone will love. - Preheat oven to 425°F (220°C). - Prepare Brussels sprouts by halving each one carefully. - Combine Brussels sprouts with garlic in a bowl. - Drizzle olive oil and seasonings, then toss to coat well. - Spread Brussels sprouts on a baking sheet evenly. - Roast for 20-25 minutes, stirring halfway for even cooking. - Add Parmesan cheese and return to oven for five minutes. - Drizzle balsamic vinegar on top after roasting, if desired. For the full recipe, check here: [Full Recipe]. To get the best results, spread the Brussels sprouts in a single layer on your baking sheet. This helps them roast evenly. If they're crowded, they may steam instead. Stir the sprouts halfway through cooking. This step promotes even browning and crispiness. To boost the flavor, add a squeeze of fresh lemon juice just before serving. This brightens the dish and adds a nice zing. You can also try different spices. A dash of smoked paprika or cayenne can add a fun twist. Serve your Garlic Parmesan Roasted Brussels Sprouts on a colorful platter. This makes the dish pop. Consider using a rustic bowl to show off the golden cheese and green parsley. A light sprinkle of fresh parsley adds color and freshness to the dish. {{image_4}} You can change the cheese in this recipe for a new twist. Feta cheese brings a tangy flavor. It adds a nice creaminess to the Brussels sprouts. Goat cheese works well, too. Its earthy taste complements the sprouts perfectly. If you're looking for a vegan option, try almond-based cheese. It melts nicely and has a mild flavor. Cashew cheese is another great choice. It can give a rich and creamy texture without dairy. Adding nuts can make these Brussels sprouts even better. Walnuts add a nice crunch and a hint of bitterness that balances the dish. Simply chop them and sprinkle over the sprouts before roasting. You can also mix in other veggies. Carrots add a sweet flavor and vibrant color. Slice them thinly and toss them with the Brussels sprouts for a colorful side dish. For the full recipe, check out the Garlic Parmesan Roasted Brussels Sprouts . To keep your Garlic Parmesan Roasted Brussels Sprouts fresh, start by letting them cool. Place them in an airtight container. This helps keep moisture out and flavor in. You can use glass or plastic containers. Glass containers are great for reheating. If you have a lot of leftovers, use multiple smaller containers. This way, you can enjoy them in portions. When you're ready to enjoy your leftovers, reheating is key. The best way to reheat is in the oven. Preheat your oven to 350°F (175°C). Spread the Brussels sprouts on a baking sheet. Heat them for about 10-15 minutes. This helps them regain their crispiness. You can also use a microwave, but they might not stay crispy. Heat for 2-3 minutes, checking every minute. Enjoy your delicious dish again! For the full recipe, check out the Garlic Parmesan Roasted Brussels Sprouts Delight Recipe. Yes, you can use frozen Brussels sprouts. However, you need to adjust the cooking time. Frozen sprouts may take longer to roast. Start with 25-30 minutes at 425°F. Check for tenderness and crispiness. Make sure to spread them out on the baking sheet. This helps them roast evenly. These Brussels sprouts pair well with many dishes. You can serve them with grilled chicken or fish. They also complement pasta dishes nicely. Try them with a hearty steak or a warm quinoa salad. You can even enjoy them as a snack with your favorite dip. Roasted Brussels sprouts last about 3 to 4 days in the fridge. Store them in an airtight container to keep them fresh. Reheat them gently in the oven or microwave. This helps restore some of their crispiness. Enjoy them in salads or as a side dish all week. Roasting Brussels sprouts is simple and rewarding. You learned how to prepare, season, and roast them for a tasty dish. I shared tips for perfect roasting and exciting variations, like using different cheeses or adding nuts. Remember to store leftovers properly and reheat well for the best flavor. Enjoy your healthy and delicious side dish, and don’t be afraid to get creative!](https://recipetorch.com/wp-content/uploads/2025/05/65cdf020-7a3c-4bed-8164-ffda92a710b1.webp)
Roasted Brussels sprouts are a game-changer for any meal. In this Garlic Parmesan Roasted Brussels Sprouts Delight Recipe, I’ll show
![- 1.5 lbs boneless chicken thighs, cut into bite-sized pieces - 1 medium onion, finely chopped - 4 cloves garlic, minced - 1-inch piece of fresh ginger, grated - 1 can (14 oz) crushed tomatoes - 1 cup creamy coconut milk - 2 tablespoons garam masala spice blend - 1 teaspoon ground cumin - 1 teaspoon turmeric powder - 1 teaspoon paprika - 1 teaspoon chili powder (adjust to taste for spiciness) - 2 tablespoons vegetable oil - Salt and freshly ground black pepper to taste - Fresh cilantro leaves, chopped, for garnish - Steamed basmati rice or warm naan bread for serving - Red bell pepper - Peas - Additional spices for flavor enhancement When making this dish, choose fresh ingredients. The chicken thighs are juicy and tasty. The onion, garlic, and ginger add depth to the flavor. The spices create warmth and richness. Crushed tomatoes and coconut milk give the sauce a creamy texture. You can add red bell pepper or peas for extra color and nutrition. Try extra spices for a personalized touch. For the full recipe, follow my detailed steps. This will ensure your Instant Pot Chicken Tikka Masala turns out perfect every time! 1. Sauté Aromatics: Start by setting your Instant Pot to 'Sauté'. Add 2 tablespoons of vegetable oil. Once the oil is hot, toss in 1 medium onion, finely chopped. Cook for about 3-4 minutes. The onions should turn soft and clear. 2. Add Garlic and Ginger: Next, mix in 4 cloves of minced garlic and 1-inch grated ginger. Stir this for a minute. You want it to smell great! 3. Spice it Up: Now, add your spices. Sprinkle in 2 tablespoons of garam masala, 1 teaspoon of ground cumin, 1 teaspoon of turmeric, 1 teaspoon of paprika, and 1 teaspoon of chili powder. Stir for 1-2 minutes. This brings out the spice flavors. 4. Cook Chicken: Add 1.5 lbs of chicken thighs, cut into pieces. Stir well to coat each piece in the spices. Cook for 3-4 minutes. The chicken should brown a bit on the outside. 5. Add Tomatoes and Coconut Milk: Pour in 1 can of crushed tomatoes and 1 cup of coconut milk. Mix everything together well. Season with salt and black pepper to taste. This makes the base rich and creamy. 6. Pressure Cook: Close the Instant Pot lid. Make sure the valve is set to 'sealing'. Select 'Pressure Cook' and set the timer for 10 minutes. This cooks the chicken perfectly. 7. Natural Release: After the timer goes off, let the pressure release naturally for about 10 minutes. This helps keep the chicken tender. Then, switch the valve to 'venting' to release any remaining pressure. 8. Final Touches: Open the lid and stir the sauce well. If you prefer a thicker sauce, switch the Instant Pot back to 'Sauté' mode. Let it simmer for 5 minutes, stirring often. 9. Serve: Dish out your chicken tikka masala. Garnish with fresh cilantro. Serve it with warm naan or steaming basmati rice for a great meal. For the full recipe, check out the details above. Enjoy your cooking! - To keep chicken tender and juicy, use thighs instead of breasts. Thighs have more fat and flavor. Cook them until just done, not overcooked. - To perfect the sauce's thickness, let it simmer after cooking. Use the 'Sauté' function to reduce the sauce. Stir often to avoid burning. - If you want a meatless meal, replace chicken with tofu or chickpeas. Both options absorb the spices well and taste great. - For a different flavor, try using yogurt instead of coconut milk. It gives a tangy taste that complements the spices. - Pair your dish with fluffy basmati rice or warm naan. Both soak up the sauce and add texture. - Add lime wedges on the side for a zesty finish. The lime's acidity brightens the dish and balances the spices. For the complete recipe, check out the [Full Recipe]. {{image_4}} You can easily change the spice level of your chicken tikka masala. To add heat, simply adjust the chili powder. If you like it spicy, use more chili powder. For a milder dish, reduce the amount. You can also boost the flavor by adding more garam masala. This spice mix gives depth to the dish. It enhances the overall taste without adding extra heat. If you want a different taste, try butter chicken tikka masala. It uses the same method but adds butter and cream. This version is richer and very creamy. You can also make a vegetarian tikka masala. Instead of chicken, use tofu or chickpeas. This makes a hearty meal that everyone can enjoy. You can find many regional twists on chicken tikka masala. In Southern India, you might see coconut milk and curry leaves added. This gives the dish a unique flavor. Northern Indian versions often use yogurt for marinating the chicken. This makes the chicken extra tender. Each region offers a new taste and experience. Try them all and find your favorite! To store your chicken tikka masala, use an airtight container. This helps keep your dish fresh. It’s best to refrigerate it within two hours of cooking. You can store it for up to four days. For freezing, allow the dish to cool first. Use freezer-safe containers or bags to prevent freezer burn. Make sure to label each container with the date. You can freeze it for up to three months. When you’re ready to eat, thaw it overnight in the fridge. You can reheat your chicken tikka masala in the microwave or on the stovetop. For the microwave, use a microwave-safe dish. Heat in short intervals, stirring in between. This helps heat it evenly. If you use the stovetop, place it in a pan over medium heat. Stir often to keep the sauce smooth. Either way, ensure it is heated through for the best flavor and texture. Cooking Chicken Tikka Masala in the Instant Pot takes about 40 minutes total. You spend around 15 minutes prepping the ingredients. Then, the actual cooking time is just 10 minutes under pressure. This method saves time while giving you a rich, flavorful dish. Yes, you can make Chicken Tikka Masala on the stovetop. To do this, cook the onions, garlic, and spices in a large pot. Then, add the chicken and cook until browned. Next, add the tomatoes and coconut milk. Simmer the mixture for about 25-30 minutes. This method requires more attention but still yields tasty results. I love serving Chicken Tikka Masala with: - Steamed basmati rice - Warm naan bread - A side salad with cucumbers and tomatoes - Raita, a yogurt-based sauce for cooling These sides balance the flavors and enhance the meal experience. Chicken Tikka Masala can be spicy but it’s adjustable. The chili powder level controls the heat. If you prefer less spice, start with a smaller amount. You can always add more later. The dish has a nice warmth but is not overwhelmingly hot for most people. In this post, we explored Chicken Tikka Masala made in the Instant Pot. We discussed key ingredients, cooking methods, tips for a great meal, and fun variations. You can customize spice levels and add different ingredients to suit your taste. Remember, cooking should be fun and creative. Feel free to experiment with flavors. Enjoy your cooking and share your delicious results!](https://recipetorch.com/wp-content/uploads/2025/05/3b9b70ae-d26f-4b5c-b607-636ebeedfa06.webp)
Are you ready to enjoy a flavorful and easy meal? This Savory Instant Pot Chicken Tikka Masala is your ticket
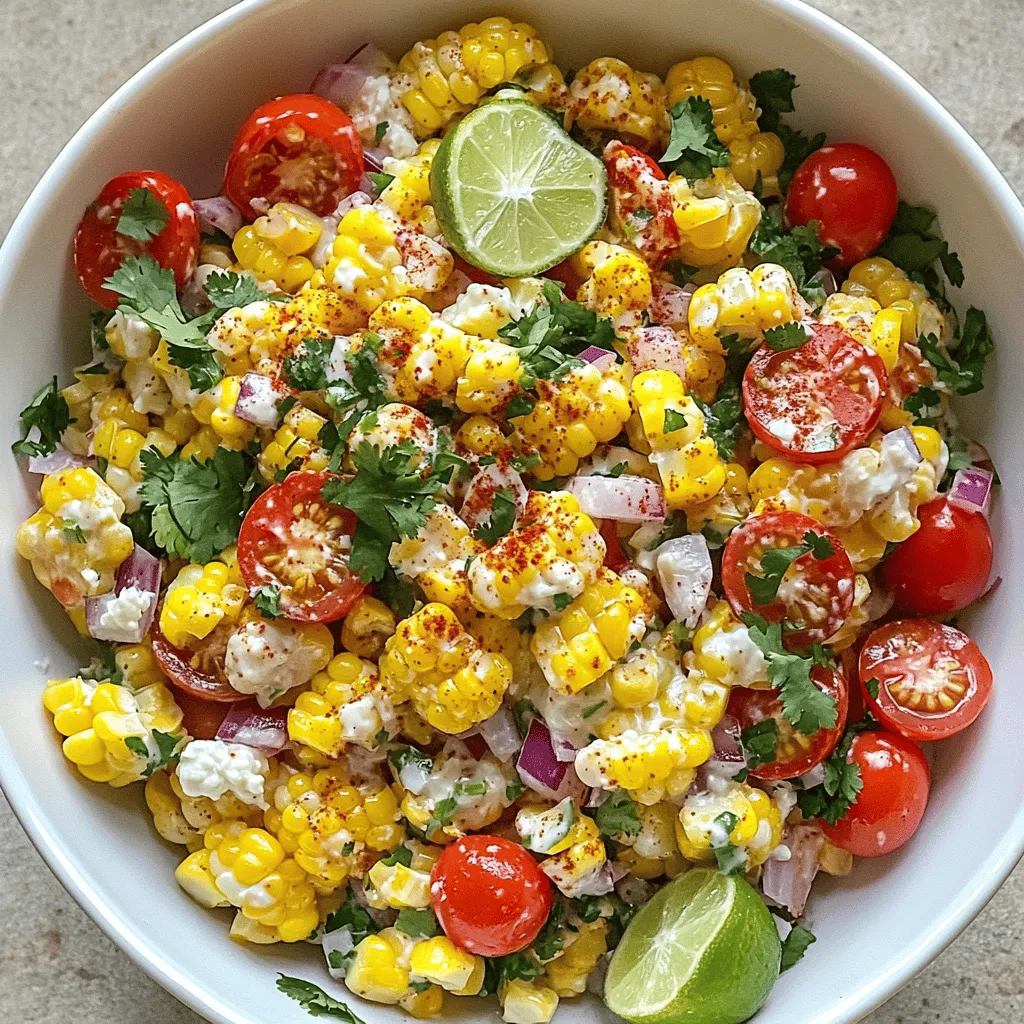
Craving a vibrant and tasty dish? Let me share my Mexican Street Corn Salad recipe with you! This dish bursts
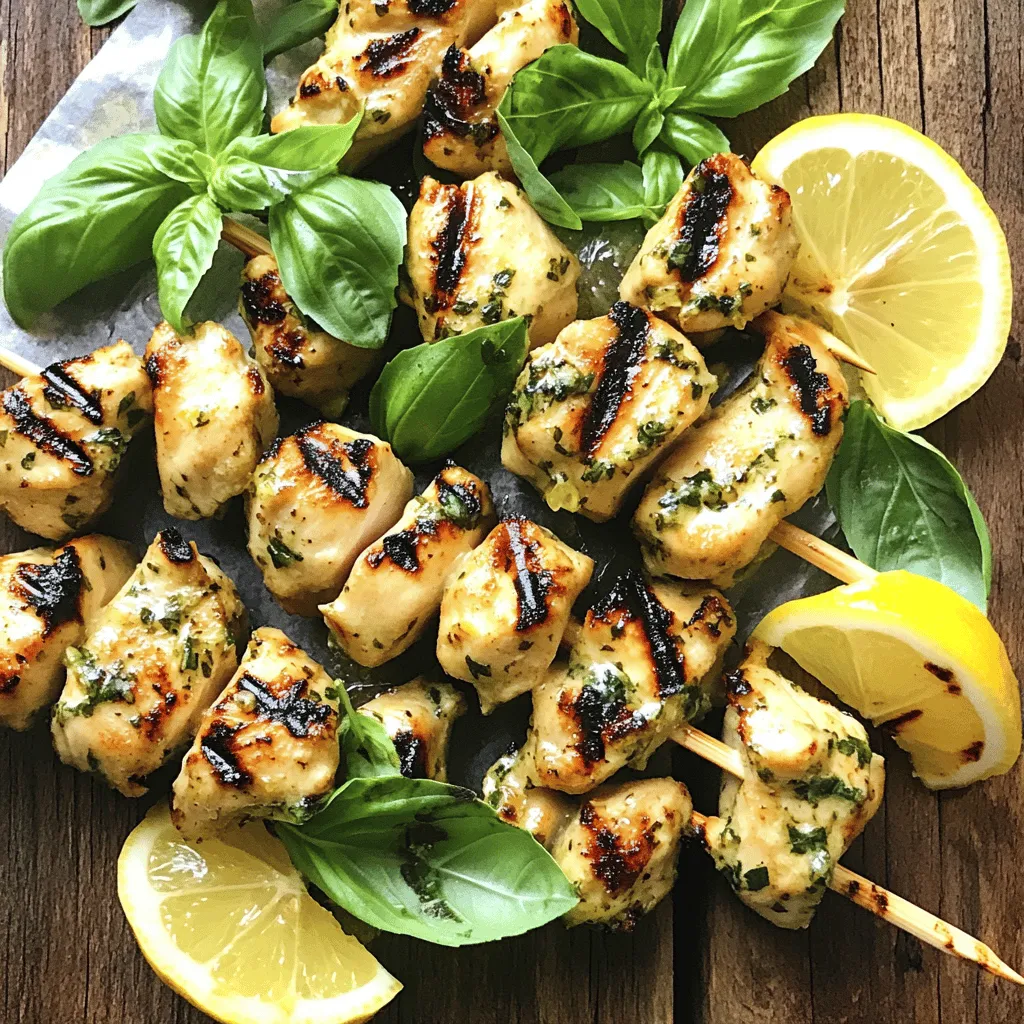
Are you ready to elevate your grilling game? My Lemon Basil Chicken Skewers are a delicious way to enjoy fresh
![- 3 ripe bananas, mashed - 1/3 cup melted coconut oil - 1/2 cup brown sugar - 1 large egg, beaten - 1 teaspoon vanilla extract - 1 teaspoon baking soda - Pinch of salt - 1 1/2 cups all-purpose flour - 1/2 cup Nutella - Optional: 1/2 cup chopped walnuts or chocolate chips Ripe bananas are key. The riper, the better. They add natural sweetness and moisture. Use coconut oil for a light, nutty taste. Brown sugar gives a rich, caramel flavor. The egg binds the mix, while vanilla adds warmth. Baking soda helps the bread rise. A pinch of salt balances the sweetness. All-purpose flour creates the base. Nutella is the star. It adds creamy chocolate goodness. If you want crunch, add walnuts or chocolate chips. These optional mix-ins make it even better. With these simple ingredients, you create magic. Follow the [Full Recipe] for perfect results. 1. Preheat your oven to 350°F (175°C). Prepare a 9x5-inch loaf pan by greasing it with cooking spray or lining it with parchment paper. 2. In a large bowl, mash the ripe bananas until they are smooth. Mix in the melted coconut oil until creamy. 3. Add the brown sugar, beaten egg, and vanilla extract to the banana mix. Stir well to combine everything into a smooth batter. 1. Sprinkle the baking soda and a pinch of salt over the mixture. Stir gently to mix without overdoing it. 2. Gradually add the all-purpose flour to the wet mix. Fold it in with a spatula until no flour is visible. It's okay if there are a few lumps. 3. If you want, fold in chopped walnuts or chocolate chips for extra flavor and crunch. 4. Pour half of the banana batter into the prepared loaf pan. Smooth it out evenly with a spatula. 5. Spoon generous dollops of Nutella on top of the first layer. Use a spatula to spread it gently, but don’t mix it in too much. 6. Pour the rest of the banana batter over the Nutella layer. Make sure it is fully covered, then smooth the top. 7. With a butter knife, gently swirl the Nutella through the top layer of batter. This will create a beautiful marbled look. 8. Bake in your preheated oven for 55-65 minutes. Check if it's done by inserting a toothpick into the center. It should come out clean or with a few moist crumbs. 9. Let the bread cool in the pan for about 10 minutes. Carefully transfer it to a wire rack to cool completely. You can find the Full Recipe for this delightful treat above! To make your banana bread perfect, focus on texture first. Use very ripe bananas. They should be brown and soft for the best flavor. Mash them well. The more mashed they are, the smoother your bread will be. Next, watch your baking times. Set your oven to 350°F (175°C). Bake your bread for 55 to 65 minutes. Check it with a toothpick. If it comes out clean, it’s done! Swirling Nutella can be tricky. After pouring in half the batter, add dollops of Nutella. Use a knife to swirl it gently through the batter. Don’t mix it all in; let it create a pretty pattern. Presentation makes a big difference! Slice your warm banana bread into thick pieces. Serve it with extra Nutella for dipping. Dust the top with powdered sugar for a nice touch. Pair your banana bread with coffee or milk. It also goes well with a scoop of vanilla ice cream. If you have leftovers, they taste great at room temperature. You can also toast slices for a warm treat later. For the full recipe, check out the details above. Enjoy your baking! {{image_4}} You can change up the Nutella banana bread with fun flavors. Try using a different nut butter, like almond or peanut. Each nut butter adds its own taste. You can also explore spreads, like cookie butter or sunflower butter, for a unique twist. If you want to sweeten your bread differently, consider using honey or maple syrup. These options give a nice flavor while keeping it sweet. You can even add spices like cinnamon or nutmeg to enhance the taste. Just a pinch can create warmth and depth in every bite. Making this banana bread fit your diet is easy. For gluten-free options, use almond flour or a gluten-free blend. These flours work well and still give great texture. Always check for a good gluten-free brand to ensure it bakes well. If you prefer vegan, swap the egg for flaxseed meal mixed with water. This change binds the bread just like an egg does. Use plant-based milk instead of coconut oil if desired. It keeps the moistness while being dairy-free. For those looking to cut back on sugar, use ripe bananas. They add natural sweetness. You can also use stevia or erythritol as sugar substitutes. These choices can help you enjoy your treat while staying on track with your diet. Explore these variations to make your Nutella banana bread even more delightful! Try the Full Recipe for a delicious experience. To keep your Nutella banana bread fresh at room temperature, wrap it tightly in plastic wrap. This keeps moisture in and prevents it from getting stale. Place it in a cool, dry spot in your kitchen. It can last about 2-3 days this way. If you want to refrigerate it, use an airtight container. This will keep the bread from drying out and absorbing other smells. It’s best enjoyed within a week. Just remember to let it come back to room temperature before serving for the best taste. For long-term storage, freezing is the best option. Slice the banana bread first. This makes it easier to thaw only what you need. Wrap each slice in plastic wrap, then place them in a freezer bag. Be sure to label the bag with the date. Your bread can stay fresh in the freezer for up to three months. When you're ready to enjoy a slice, thaw it in the fridge overnight. For a quick method, you can use the microwave. Heat it for about 15-30 seconds. This will warm it up nicely. If you prefer it crisp, pop it in the toaster for a few minutes. Enjoy this delicious treat from the comfort of your home! Can I use unripe bananas? You can use unripe bananas, but ripe ones work best. Ripe bananas have more sweetness and moisture. They also mash easier, giving your bread a better texture. What are the best mixing techniques? Mix ingredients gently to keep the bread light. Start by mashing the bananas well. Then, mix in the oil, sugar, and egg. When adding flour, fold it in slowly with a spatula. This helps avoid overmixing, which can make the bread tough. How do I prevent the bread from being too dense? To avoid dense bread, do not overmix your batter. After adding flour, mix just until it disappears. Also, make sure your baking soda is fresh. If it's old, it may not rise well. Calorie count and nutritional breakdown One slice of Nutella banana bread has about 200 calories. It contains carbs, fats, and some protein. The bananas add fiber and potassium, making it a tasty treat. Ingredient substitutions and their effects on nutrition You can swap coconut oil with applesauce for fewer calories. Using whole wheat flour boosts fiber but may change the texture. Nutella adds sugar, so consider using less or a lighter spread. Tips for healthier variations in this recipe For a healthier option, reduce sugar or use honey. You can also add nuts for protein. If you're feeling adventurous, try adding spices like cinnamon for extra flavor without added sugar. For the full recipe, check out Nutella Swirled Banana Bliss. You now know how to make Nutella banana bread from start to finish. You learned about the key ingredients and the step-by-step process. We covered tips for the best results, serving ideas, variations for taste, and storage methods. This recipe is simple and fun. It offers many ways to customize your bread. Enjoy trying out your own unique twists or share it with friends! Happy baking!](https://recipetorch.com/wp-content/uploads/2025/05/7948d07e-9228-44bb-80e8-15a8499487fa.webp)
Are you ready to bake something truly special? Nutella Banana Bread is not just a treat; it’s a delightful mix
![- Overview of Main Ingredients - 8 oz fettuccine pasta - 2 tablespoons olive oil - 1 pound boneless, skinless chicken breasts, cut into bite-sized pieces - 1 tablespoon Cajun seasoning - 1 teaspoon garlic powder - 1 teaspoon onion powder - 1/2 teaspoon smoked paprika - Salt and pepper to taste - 1 cup heavy cream - 1 cup grated Parmesan cheese - 1 cup cherry tomatoes, halved - 2 cups fresh spinach - 2 green onions, sliced (for garnish) These ingredients bring together a rich blend of flavors. The fettuccine pasta forms a perfect base for the creamy sauce. The chicken adds protein and heartiness to the dish. Cajun seasoning gives it a spicy kick, while garlic and onion powders add depth. Heavy cream creates the luscious sauce, and Parmesan cheese makes it creamy and cheesy. Cherry tomatoes add freshness, and spinach brings in color and nutrients. - Optional Ingredients for Customization - You can swap fettuccine for penne or linguine if you like. - For more heat, try adding cayenne pepper or crushed red pepper flakes. - Feel free to toss in other veggies, like bell peppers or zucchini. - For a lighter version, use half-and-half instead of heavy cream. These options let you tailor the dish to your taste. You can get creative while keeping the core flavors intact. For the full recipe, refer to the detailed instructions. Enjoy making this delightful meal! To cook the fettuccine, start with a large pot. Fill it with 4-6 quarts of salted water. Bring the water to a rolling boil. Add the fettuccine and cook it for 8-10 minutes. You want it to be al dente, which means it should still have a little bite. Once cooked, drain the pasta but save 1/2 cup of the cooking water. Set the pasta aside to cool. For perfect pasta, remember these tips: - Use plenty of water to prevent sticking. - Stir the pasta a few times while it cooks. - Don’t forget to add salt to the water. It adds flavor. Next, let’s sauté the chicken. Heat 2 tablespoons of olive oil in a large skillet over medium heat. Once the oil is hot, add 1 pound of bite-sized chicken pieces. Sprinkle on 1 tablespoon of Cajun seasoning, 1 teaspoon of garlic powder, 1 teaspoon of onion powder, and 1/2 teaspoon of smoked paprika. Don’t forget salt and pepper to taste. Cook the chicken for 5-7 minutes. Make sure to stir occasionally. This helps the chicken brown evenly and cook through. Now, it’s time to make the sauce. Lower the heat to medium-low. Gradually pour in 1 cup of heavy cream while stirring. This helps mix the cream with the chicken. Let it simmer for 2-3 minutes. This will thicken the sauce slightly. To add flavor, slowly whisk in 1 cup of grated Parmesan cheese until it melts. This creates a nice creamy texture. Then, fold in 1 cup of halved cherry tomatoes and 2 cups of fresh spinach. Cook just until the spinach wilts, about 1-2 minutes. If the sauce is too thick, add some reserved pasta water, a little at a time. Carefully add the drained fettuccine to the skillet. Toss it in the creamy sauce until each piece is coated. This is where magic happens! Taste the dish and adjust the seasoning if needed. When serving, plate the pasta in bowls or a serving dish. For a nice touch, sprinkle sliced green onions on top. This adds color and freshness. For presentation, consider adding extra Parmesan cheese and a dash of Cajun seasoning. You can also arrange whole cherry tomatoes and spinach leaves on the side for a vibrant look. Enjoy this full recipe for a quick and flavorful meal! Common Mistakes to Avoid When making creamy Cajun chicken pasta, avoid overcooking the chicken. It should be juicy and tender, not dry. Use a meat thermometer to check for doneness. Aim for 165°F. Also, don't forget to season properly. Taste as you cook to make sure the flavors are just right. Enhancing the Flavor Profile To boost the flavor, try adding fresh herbs like parsley or basil. They bring a fresh taste that brightens the dish. You can also add a splash of lemon juice for acidity. This will help balance the richness of the cream. Lastly, consider using smoked sausage or shrimp for added depth. Skillet vs. Oven Options A skillet is the best choice for this dish. It allows you to sauté the chicken quickly. This keeps the meat tender and full of flavor. While you can use the oven, it takes longer and can dry out the chicken. A quick cook on high heat gives you great results. Adjusting Cooking Times for Different Proteins If you swap chicken for shrimp, reduce cooking time. Shrimp only needs 3-4 minutes to cook fully. For a vegetarian option, use mushrooms or tofu. Both will take about the same time as chicken. Just ensure they are golden brown for the best flavor. For the full recipe, check out the detailed steps above. {{image_4}} Vegetarian Version You can easily turn this dish into a vegetarian delight. Instead of chicken, use mushrooms or chickpeas. Both options add great texture and flavor. Use vegetable broth to cook the pasta for extra taste. Swap the heavy cream for cashew cream or coconut cream for a rich, creamy texture. This keeps the dish hearty and satisfying. Dairy-Free Options To make this recipe dairy-free, replace the heavy cream with almond or oat milk. Use a dairy-free cheese for that creamy finish. Nutritional yeast is a great substitute for Parmesan, giving a cheesy flavor without dairy. This way, you still enjoy a creamy texture and great taste in each bite. One-Pot Version For a quick cleanup, try a one-pot method. Sauté the chicken and spices in a large pot. Add the pasta, cream, and vegetables all at once. This cuts down on dishes and keeps all the flavors together. Just make sure to adjust the liquid as needed for cooking the pasta evenly. Slow Cooker Adaptation A slow cooker is perfect for a hands-off approach. Place the chicken, spices, and cream in the slow cooker. Add the pasta during the last 30 minutes of cooking. This method allows the flavors to develop fully. Plus, you’ll come home to a warm, delicious meal waiting for you. For the full recipe, check out the Spicy Creamy Cajun Chicken Pasta. To keep your creamy Cajun chicken pasta fresh, store it in an airtight container. This helps prevent odors and keeps the pasta moist. Let the pasta cool before sealing it to avoid condensation. In the fridge, it lasts about 3-4 days. If you want to keep it longer, consider freezing it. In the freezer, it stays good for about 2-3 months. Just remember to thaw it in the fridge overnight before reheating. When reheating, you want to keep the flavors intact. The best method is to use a skillet over medium heat. Add a splash of water or cream to help loosen the sauce. Stir often to heat it evenly. Alternatively, you can use the microwave. Place it in a microwave-safe dish, cover it, and heat it in short bursts. Stir between each burst to ensure even heating. Avoid overheating, as this can dry out the pasta. For the full recipe, check out the details above! To add heat to your creamy Cajun chicken pasta, use extra Cajun seasoning. You can also add crushed red pepper flakes or diced jalapeños. Mix these in while cooking the chicken. Start with a small amount, then taste and adjust as needed. This way, you control the spice level. Yes, you can use many types of pasta! Fettuccine is great, but penne and rotini work well too. They hold sauce nicely. Choose one that you enjoy. Whole wheat or gluten-free options are also available if needed. Adding veggies boosts flavor and nutrition. Consider bell peppers, zucchini, or mushrooms. You can also add peas or asparagus for a little crunch. Just sauté them with the chicken for a few minutes. This adds color and taste to the dish. You can prepare this dish in advance! Cook the chicken and sauce, then store them separately from the pasta. This keeps everything fresh. When you’re ready to eat, just reheat the chicken and sauce. Cook the pasta fresh for the best texture. This dish pairs well with garlic bread or a fresh salad. A Caesar or green salad adds crunch and balance. You can also serve it with roasted vegetables for a wholesome meal. Pairing enhances flavors and makes the meal more filling. For the full recipe, check out the [Full Recipe]. This blog post covered a delicious Cajun chicken pasta recipe. We discussed main and optional ingredients, ensuring you can customize it. You learned how to cook pasta, sauté chicken, and make a creamy sauce. We explored tips, tricks, and variations, so you can find the right fit. Storing and reheating leftovers was also covered for your convenience. In the end, don’t hesitate to experiment and make this dish your own. Your kitchen awaits!](https://recipetorch.com/wp-content/uploads/2025/05/ccf756c6-7761-4117-864f-d634bc67f5e6.webp)
Looking for a quick and tasty meal? Let me introduce you to Creamy Cajun Chicken Pasta! This dish blends zesty
