![To create a delicious Vegetable Fried Rice, you need fresh and vibrant ingredients. Here’s what you will need: - 2 cups cooked rice (preferably day-old for the perfect texture) - 1 cup mixed vegetables (a colorful mix of diced carrots, green peas, bell peppers, and corn) - 1 small onion, finely diced - 2 cloves garlic, minced - 1-inch piece of fresh ginger, grated - 2 tablespoons soy sauce (or tamari for a gluten-free option) - 1 tablespoon sesame oil - 1 teaspoon olive oil - 2 green onions, thinly sliced - Salt and pepper to taste - Sesame seeds for garnish (optional) Having these ingredients ready makes cooking easy. Using day-old rice is key. It helps the rice fry better and gives it a nice texture. Fresh vegetables add flavor and color. You can mix and match your favorite veggies, too! When you gather these items, you set yourself up for success. The soy sauce and sesame oil provide great umami flavors. The garlic and ginger add a fragrant kick. Don't forget to taste and adjust salt and pepper as you go along. You can find the full recipe for this vibrant dish in the earlier sections. Enjoy your cooking! 1. Heat olive oil and sauté onions Start by heating 1 teaspoon of olive oil in a large skillet or wok over medium-high heat. Once the oil shimmers, add 1 small, finely diced onion. Sauté the onion for 2 to 3 minutes until it becomes soft and translucent. 2. Add garlic and ginger Next, incorporate 2 cloves of minced garlic and 1-inch piece of grated fresh ginger. Stir these into the pan and cook for about 1 minute. This step fills your kitchen with a wonderful aroma. 3. Incorporate mixed vegetables Now, add 1 cup of mixed vegetables. This can be a colorful mix of diced carrots, green peas, bell peppers, and corn. Stir-fry the vegetables for 4 to 5 minutes. You want them to be bright and tender-crisp. 4. Cook and combine with rice Push the cooked veggies to one side of the skillet, creating space. Add 2 cups of cooked rice to this empty area. Pour 2 tablespoons of soy sauce and 1 tablespoon of sesame oil over the rice. Mix everything together and stir-fry for about 5 minutes. Ensure the rice is heated and well-coated with flavor. You can find the Full Recipe for all details on this vibrant dish. Enjoy the process and watch your Vegetable Fried Rice come to life! - Using day-old rice: Day-old rice is best. It dries out a bit, making it easier to fry. Fresh rice is often too moist. It clumps and does not fry well. - Seasoning adjustments: Adjust your seasonings to fit your taste. More soy sauce adds saltiness. Add a pinch of sugar for balance. A splash of vinegar can give a nice kick. - Cooking on high heat for better texture: High heat is key. It helps the rice and veggies get crispy. Keep stirring to avoid burning while achieving that great texture. - Overcrowding the pan: Do not crowd the pan. This traps steam and makes everything soggy. Cook in batches if you have a lot of rice or veggies. - Undercooking vegetables: Make sure to cook your veggies fully. They should be tender but still bright. This keeps them tasty and colorful. - Not reheating rice properly: Reheat rice the right way. If rice is cold, it can stick together. Use a splash of water when reheating to create steam. This helps separate the grains. {{image_4}} You can swap vegetables based on what you have at home. Try using: - Broccoli - Zucchini - Peas - Spinach These add great color and flavor. You can also change the rice. For a healthy twist, use: - Quinoa - Cauliflower rice Both options give a new texture. If you want more flavor, try different sauces. You can add: - Sriracha for heat - Hoisin for sweetness These sauces can make your fried rice unique and tasty. Making this dish fit your diet is easy. For vegan options, stick to vegetables and rice. Use soy sauce or tamari for flavor. If you need gluten-free choices, choose tamari instead of soy sauce. Most vegetables are naturally gluten-free. This way, everyone can enjoy a delicious meal. For the full recipe, check out the [Full Recipe]. To keep your vegetable fried rice fresh, store it in an airtight container. This method helps prevent moisture loss and keeps out odors from your fridge. Let the rice cool to room temperature before sealing it up. You can store it in the fridge for about 3 to 5 days. Labeling the container with the date can help you track freshness. You can reheat your fried rice using a microwave or stovetop. For the microwave, place the rice in a bowl and cover it with a damp paper towel. Heat it in short bursts, stirring in between, until hot. If you choose the stovetop, add a splash of water or oil to a skillet. Heat over medium until warm, stirring to avoid sticking. To keep the rice from becoming soggy, don’t add too much liquid. Stir frequently to ensure even heating. This way, you’ll enjoy a tasty meal that feels just made! For the complete recipe, see the Full Recipe section. To enhance the taste of your vegetable fried rice, focus on seasoning. Start with high-quality soy sauce for a savory depth. You can also add oyster sauce or fish sauce for more umami. Fresh herbs like cilantro or basil elevate the dish too. A dash of sesame oil adds a nutty flavor. Spice it up with chili flakes or fresh chili for a kick. Try adding proteins like tofu or eggs for extra richness. Yes, you can use frozen vegetables! They are a great time-saver. Just make sure to thaw them first. Pat them dry with a towel to remove excess moisture. This keeps your fried rice from getting soggy. Frozen veggies are often picked at peak freshness, so you’ll still get great flavor. The best rice for fried rice is day-old rice. It has a drier texture, which helps it fry better. Freshly cooked rice can be too sticky. If you don’t have day-old rice, you can cool freshly cooked rice by spreading it on a tray. This helps it dry out a bit. Jasmine or basmati rice works well too, but avoid short-grain rice. To store leftover fried rice, place it in an airtight container. Keep it in the fridge for up to three days. When you’re ready to reheat, use a microwave or stovetop. For the microwave, add a splash of water and cover. Heat in short bursts, stirring in between. On the stovetop, add a little oil to a pan. Heat over medium until warmed through. This prevents it from getting dry. You now know the key ingredients for making tasty vegetable fried rice. We covered preparation steps, tips to avoid mistakes, and ways to make it your own. Remember to use day-old rice for the best texture and don’t overcrowd your pan. Feel free to experiment with different veggies or sauces. Whether you’re a beginner or a pro, this dish is easy to master. Enjoy your meal and share it with others. Happy cooking!](https://recipetorch.com/wp-content/uploads/2025/05/4b950250-58f9-40bd-ac39-6a199e1383f6.webp)
Vegetable Fried Rice Easy and Flavorful Dish
Are you craving a delicious, simple meal? Vegetable fried rice is your answer! This colorful dish combines tasty vegetables and
Are you craving a delicious, simple meal? Vegetable fried rice is your answer! This colorful dish combines tasty vegetables and
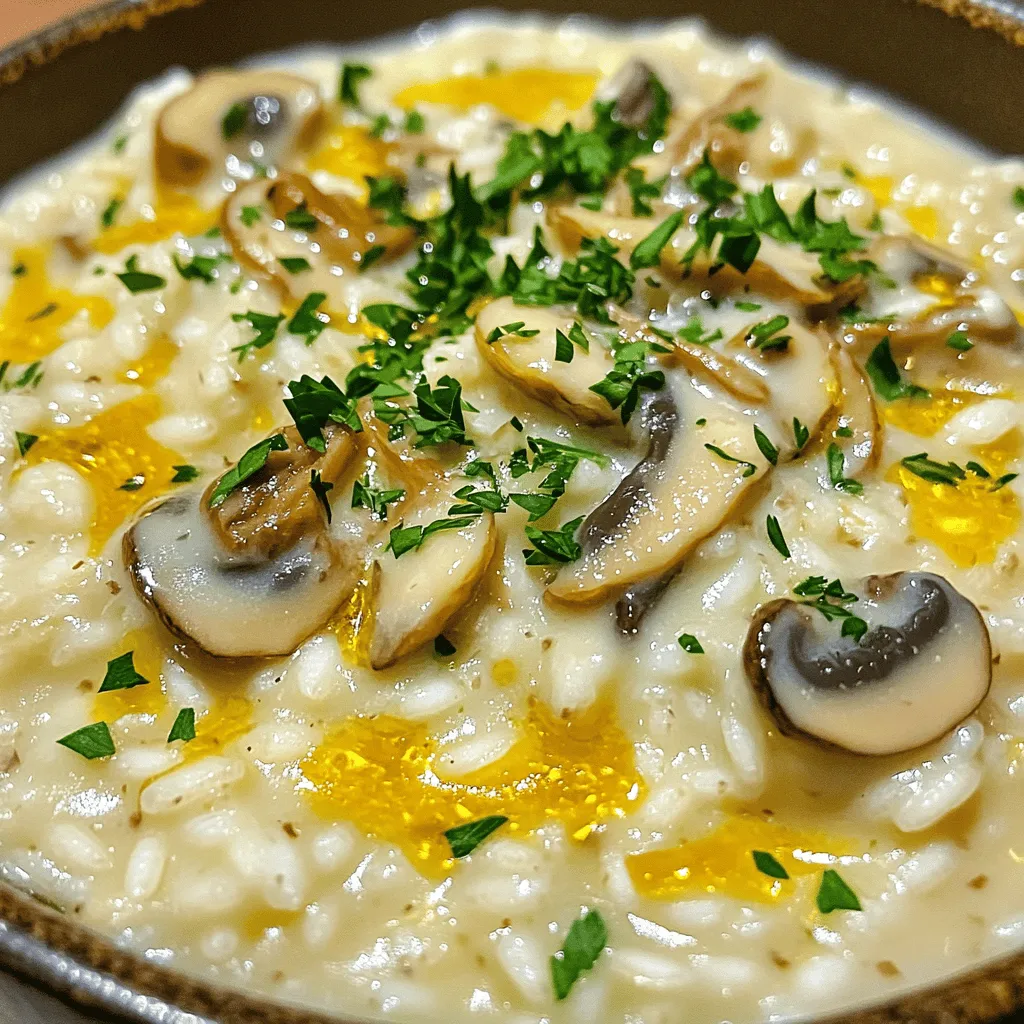
Are you ready to dive into the world of Mushroom Risotto? This dish is a creamy, flavorful delight that warms
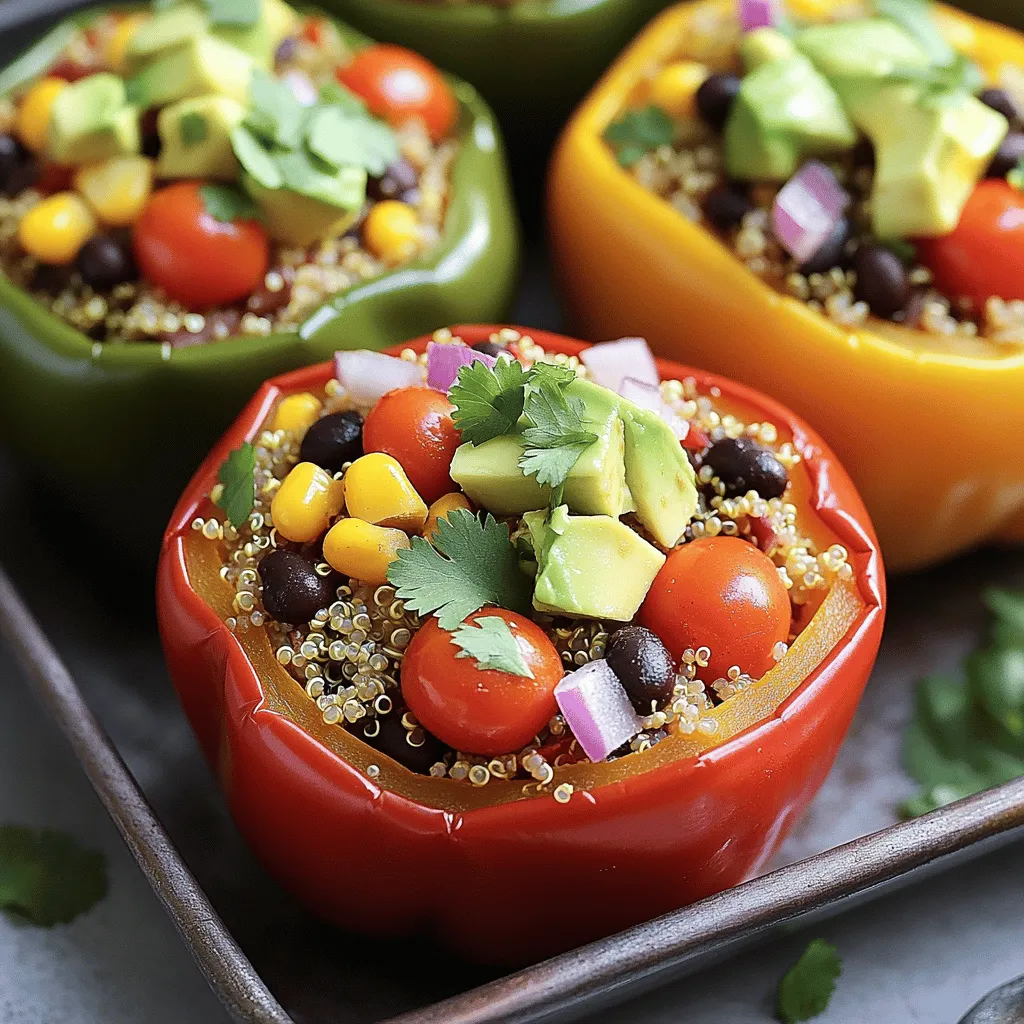
Are you ready to enjoy a tasty and healthy meal? Stuffed bell peppers with quinoa are colorful, fun, and packed
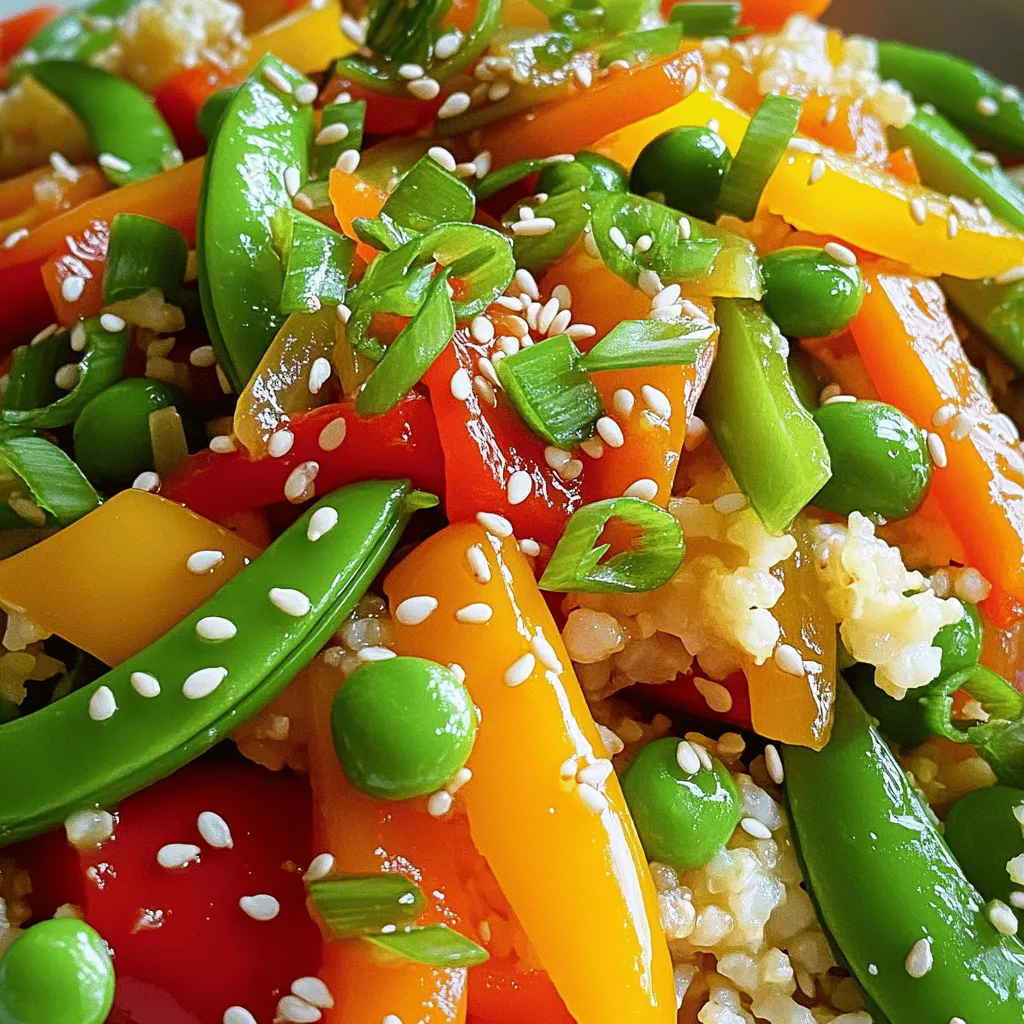
Ready to spice up your dinners with a healthy twist? My Cauliflower Rice Stir-Fry is a colorful veggie delight that
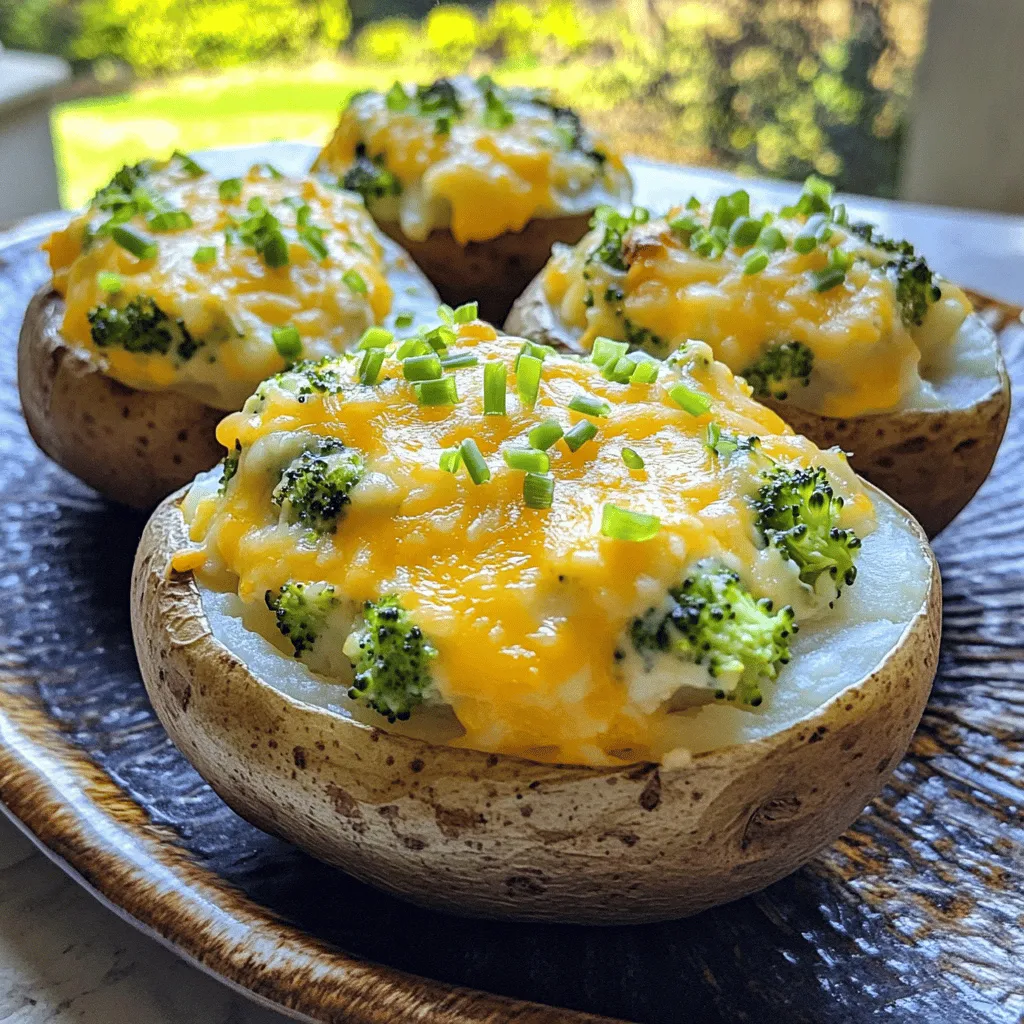
Are you ready to elevate your dinner game? These Broccoli Cheddar Stuffed Potatoes are not just a treat; they’re a
![To make this dish, you need some key items: - 1 pound large shrimp, peeled and deveined - 4 tablespoons unsalted butter - 4 cloves garlic, finely minced - Zest of 1 medium lemon - Juice of 1 medium lemon - 1 teaspoon red pepper flakes (adjust according to your heat preference) - 2 tablespoons fresh parsley, chopped (plus extra for garnish) - Salt and freshly ground black pepper, to taste - Lemon wedges, for garnishing These ingredients create a fresh and bright flavor. The garlic and lemon work together to make the shrimp shine. You can add a few items to boost flavor: - A splash of white wine for depth - A pinch of paprika for color - Fresh herbs like thyme or basil for an aromatic touch These extras can elevate your dish and make it even more special. If you don’t have an ingredient, don’t worry! Here are some swaps: - Use olive oil instead of butter for a lighter option. - Swap fresh parsley with cilantro for a different taste. - Frozen shrimp can replace fresh shrimp; just thaw them first. These substitutions keep your dish flexible and approachable. Check the [Full Recipe] for more details on cooking! 1. Start by gathering all your ingredients. You will need: - 1 pound large shrimp, peeled and deveined - 4 tablespoons unsalted butter - 4 cloves garlic, finely minced - Zest of 1 medium lemon - Juice of 1 medium lemon - 1 teaspoon red pepper flakes - 2 tablespoons fresh parsley, chopped - Salt and freshly ground black pepper - Lemon wedges for garnish 2. Next, prepare your cooking space. Set out a large skillet on the stove. 3. Make sure you have a cutting board and knife ready for the garlic and parsley. 1. Heat your skillet over medium heat. Add the butter and let it melt completely. 2. Once the butter foams, add the minced garlic and red pepper flakes. Sauté for about 1 minute. The garlic should smell great but stay golden, not brown. 3. Now, turn the heat to medium-high. Add the shrimp to the skillet. Season with salt and black pepper. 4. Cook the shrimp for 2-3 minutes. Stir them often. They will turn pink and opaque when done. 5. After cooking, add the lemon zest and juice. Stir to coat the shrimp well. Let it cook for another 1-2 minutes to blend the flavors. 6. Take the skillet off the heat. Sprinkle the chopped parsley over the shrimp and mix gently. 1. Serve the shrimp right away. Garnish with lemon wedges for a fresh touch. 2. For a nice look, place the shrimp on a large platter. Arrange lemon wedges around it. 3. If you want a fuller meal, serve the shrimp over rice or with some crusty bread. This way, you can soak up that tasty garlic butter sauce. You can find the full recipe above for more details! To get shrimp just right, start with fresh shrimp. Look for firm, shiny shells. Cook them quickly over medium-high heat. This keeps them tender. Cook until they turn pink, about 2-3 minutes. Stir them gently to avoid overcooking. Overcooked shrimp can become rubbery. To boost flavor, add herbs and spices. Fresh parsley adds a bright touch. For heat, use red pepper flakes. You can adjust the amount based on your taste. A hint of lemon zest also brightens the dish. It gives a fresh and zesty kick. Serve your shrimp in a large, shallow dish. This makes it look appealing. Arrange lemon wedges around the shrimp for color. Sprinkle extra parsley on top for a fresh look. For a complete meal, serve it over rice or with crusty bread. This helps soak up the tasty garlic butter sauce. {{image_4}} If you love heat, this spicy version is for you. Simply add more red pepper flakes, or include a dash of hot sauce. You can also mix in some diced jalapeños for extra kick. The spice levels can vary based on your taste. Serve it with a side of cool yogurt dip to balance the heat. For a richer dish, make it creamy. Add half a cup of heavy cream after cooking the shrimp. Stir it in with the lemon juice and zest. This creates a luscious sauce that pairs well with pasta or rice. You’ll enjoy a smooth, velvety texture in every bite. Turn your shrimp dish into a full meal by adding pasta. Cook your favorite pasta, like spaghetti or fettuccine, according to the package. Once the shrimp is ready, toss it with the drained pasta. This adds heartiness and makes it filling. Top with extra parsley and a squeeze of lemon for freshness. Explore these variations to keep your meals exciting. You can find the full recipe to perfect your Lemon Garlic Butter Shrimp. To keep your Lemon Garlic Butter Shrimp fresh, store it in an airtight container. Let the shrimp cool before sealing. This helps prevent moisture buildup. Place it in the fridge if you plan to eat it within a few days. When you want to reheat your shrimp, use a skillet for best results. Heat it over medium-low heat. Add a tiny bit of butter or oil to prevent sticking. Stir gently until the shrimp warms through. You can also use a microwave, but be careful. Heat it in short bursts to avoid overcooking. Lemon Garlic Butter Shrimp lasts about 3 days in the fridge. For longer storage, freeze it. Place the shrimp in a freezer-safe bag. Press out as much air as you can before sealing. This can keep the shrimp good for about 2 months. When ready to eat, thaw it overnight in the fridge before reheating. Enjoy delicious meals anytime! For the full recipe, check out the earlier sections. Cooking shrimp is quick and easy. It takes about 2 to 3 minutes. When they turn pink and opaque, they are ready to eat. Overcooking makes them tough, so watch closely. Yes, you can use frozen shrimp. Just thaw them first. Place them in cold water for about 15-20 minutes. This will help them cook evenly. You have many options! Serve it over rice, quinoa, or pasta. Crusty bread is great for soaking up the sauce. A fresh salad or steamed veggies pairs well too. Yes, this recipe works well for meal prep. Store the shrimp in airtight containers. They will last in the fridge for about 2 to 3 days. Reheat gently to keep them tender. You can find the Full Recipe for more details on preparation and serving. Lemon garlic butter shrimp is easy and tasty. You need fresh shrimp and simple ingredients. Follow the steps to prepare, cook, and serve. Try the tips to cook shrimp perfectly and add extra flavor. You can also make fun variations, like spicy or creamy versions. Remember to store leftovers well for later use. This dish is great for any meal and meal prep. Enjoy cooking and impress your friends with this dish!](https://recipetorch.com/wp-content/uploads/2025/05/391609d7-d643-44f8-bcff-5894c84a2a57.webp)
Looking for a quick and tasty meal? You’ll love my Lemon Garlic Butter Shrimp! This dish is simple yet packed
![To make this tasty maple pecan granola, gather the following ingredients: - 2 cups rolled oats - 1 cup pecans, roughly chopped - 1/2 cup pumpkin seeds - 1/2 cup unsweetened coconut flakes - 1/2 cup pure maple syrup - 1/4 cup coconut oil, gently melted - 1 teaspoon vanilla extract - 1 teaspoon ground cinnamon - 1/2 teaspoon sea salt - 1/2 cup dried cranberries (optional, for added sweetness) This granola is more than just tasty; it is also healthy. The rolled oats provide fiber. This helps with digestion and keeps you full longer. Pecans add healthy fats and protein, which are good for your heart. Pumpkin seeds are rich in minerals like zinc and magnesium. Coconut flakes bring in some healthy fats and a touch of sweetness without added sugar. Maple syrup gives natural sweetness and antioxidants, unlike refined sugars. If you include cranberries, they add vitamins and a burst of flavor. Together, these ingredients work to give you energy and nutrients. Maple pecan granola stands out for its delightful crunch and rich taste. The mix of sweet maple and nutty pecans creates a perfect balance. It is easy to customize. You can add nuts or dried fruits based on your taste. The granola has a lovely golden color, making it visually appealing. This recipe also suits different diets; it can be gluten-free or vegan. You can enjoy it as a snack, breakfast, or a topping for yogurt. For complete cooking steps, check the Full Recipe. First, set your oven to 350°F (175°C). While it heats, grab a large baking sheet. Line it with parchment paper. This helps the granola not stick. In a big mixing bowl, combine the rolled oats, chopped pecans, pumpkin seeds, coconut flakes, ground cinnamon, and sea salt. Stir until they mix well. In another small bowl, whisk together the pure maple syrup, melted coconut oil, and vanilla extract. This mixture should be smooth and blended. Pour the wet mix over the dry ingredients. Use a large spoon to stir until everything is coated. Next, spread the mixture onto the lined baking sheet. Press it down gently. This helps the granola clump. Bake it for 25-30 minutes. Halfway through, take it out and stir gently. This ensures even browning. Once it turns golden brown and smells great, take it out. Let it cool completely in the pan. It will get crunchy as it cools. If you want, fold in dried cranberries for extra sweetness after cooling. Store the granola in an airtight container. It stays fresh for up to two weeks. For the complete recipe, check out the Full Recipe. To get that perfect crunch in your granola, follow these steps. First, use rolled oats. They hold together well and crisp up nicely. Next, press the mixture down on the baking sheet. This helps it clump together as it bakes. Bake at 350°F for 25-30 minutes. Stir halfway to ensure even browning. Let it cool completely before breaking it apart. It will harden as it cools. If you want to change up the sweetness, try different options. Honey works well and adds a lovely flavor. Agave syrup is another choice; it’s milder but still sweet. Brown rice syrup is a great vegan option. You can even try maple syrup mixed with a bit of molasses for a richer taste. Just keep the amount similar to what the recipe calls for. There are many ways to enjoy maple pecan granola. Try it with yogurt and fresh fruit for breakfast. It also makes a great snack on its own. Sprinkle some over ice cream or pancakes for a tasty treat. You can even use it as a crunchy topping on desserts. The options are endless! For the full recipe, check out the section above. {{image_4}} You can change the nuts in your granola. Try almonds, walnuts, or hazelnuts. Each nut gives a unique taste. Almonds add a sweet crunch, while walnuts bring a rich flavor. Mix and match to find your favorite blend. Dried fruits add color and taste. Add raisins, apricots, or blueberries for a fruity twist. You can also add spices like nutmeg or ginger for warmth. If you want some fun, mix in chocolate chips. They will melt slightly and add a sweet touch. Making this granola gluten-free is simple. Use certified gluten-free oats in your recipe. For a vegan option, ensure the maple syrup is pure. This recipe is already vegan-friendly since it uses coconut oil instead of butter. You can enjoy a tasty treat that fits your diet! For the complete details, check the Full Recipe. To keep your maple pecan granola fresh, store it in an airtight container. This will keep out moisture and air. You can use glass jars, plastic bins, or resealable bags. Make sure the container is completely sealed. Label it with the date for easy tracking. When stored properly, your granola lasts about two weeks at room temperature. If you want it to last longer, you can freeze it. In the freezer, it can last up to three months. Just remember to let it thaw before eating. If your granola loses its crunch, don’t worry! You can refresh it easily. Spread it on a baking sheet and bake it at 350°F (175°C) for about 5-10 minutes. Keep an eye on it to avoid burning. This will help restore its delightful crunch. Enjoy it fresh as you dive into the recipe for Maple Pecan Granola Delight! To make Maple Pecan Granola, start by gathering your ingredients. You will need rolled oats, pecans, pumpkin seeds, coconut flakes, maple syrup, coconut oil, vanilla extract, cinnamon, and sea salt. Follow the [Full Recipe] for detailed steps. Preheat your oven to 350°F (175°C). Mix the dry ingredients in a big bowl. In a small bowl, whisk the wet ingredients until smooth. Combine both mixtures and spread them on a baking sheet. Bake for 25-30 minutes, stirring halfway. Let it cool before enjoying. Each ingredient in Maple Pecan Granola offers great health benefits. - Rolled oats provide fiber, which helps with digestion. - Pecans are rich in healthy fats and antioxidants. - Pumpkin seeds add protein and magnesium. - Coconut flakes supply healthy fats and natural sweetness. - Maple syrup offers a natural sweetener with minerals. - Coconut oil aids in energy and heart health. - Vanilla extract can improve mood and add flavor. - Cinnamon helps regulate blood sugar levels. - Sea salt balances electrolytes in the body. Together, these ingredients create a tasty and nutritious treat. Yes, you can buy Maple Pecan Granola at many grocery stores. Look for it in the cereal aisle or health food section. You may also find it online through various retailers. However, making your own at home allows you to control the ingredients and customize the flavors. Plus, it’s fresh and easy to prepare! Maple pecan granola is a tasty and healthy choice. We covered its ingredients, benefits, and unique traits. I shared how to make it step by step, from preheating to serving. You can trust my tips for a perfect crunch and your options for flavors. Remember to store it right to keep it fresh. This granola is easy to customize, making it suitable for all diets. Enjoy making your own and explore the many ways to enjoy it!](https://recipetorch.com/wp-content/uploads/2025/05/930ebc82-a54d-49bf-8b1f-20c28f29d0aa.webp)
Looking for a snack that’s both tasty and good for you? Look no further! My Maple Pecan Granola packs flavor
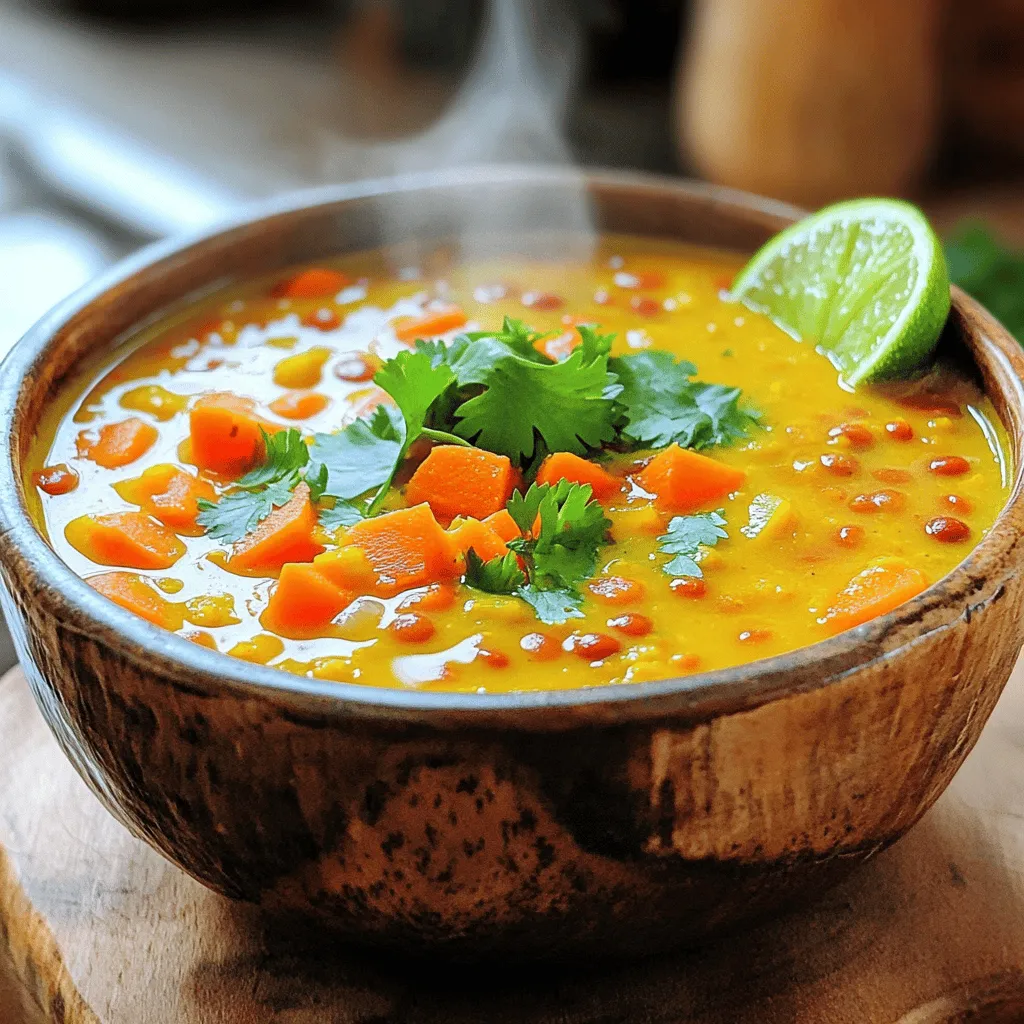
Looking for a dish that warms the soul? My Coconut Curry Lentil Soup is a rich and comforting choice. With

If you love desserts that burst with flavor and are easy to make, you’re in for a treat! This Strawberry

Looking for a quick, healthy breakfast? Blueberry Lemon Overnight Oats are your answer! With just a few simple ingredients, you
