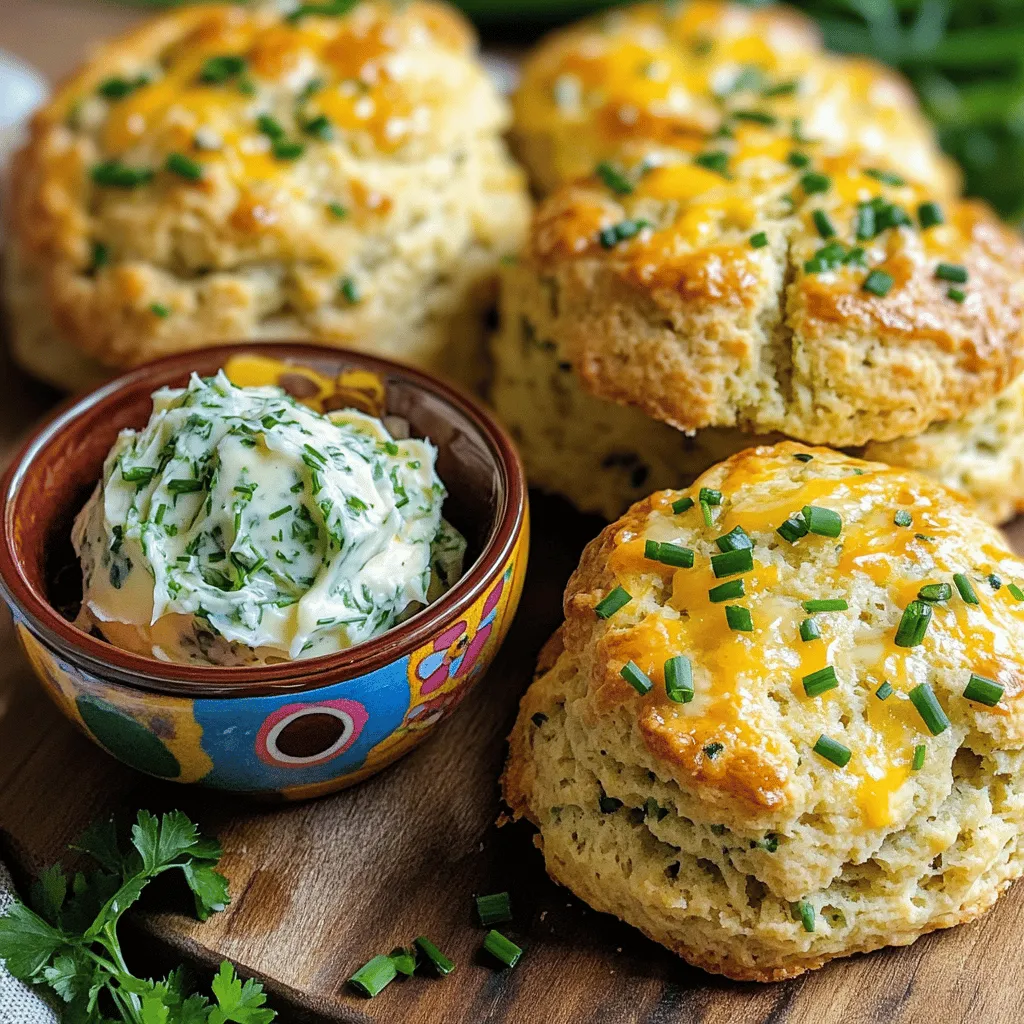
Savory Herb and Cheese Scones Flavorful Baking Delight
If you’re looking for a tasty treat that’s easy to make, you’re in the right place! These savory herb and
If you’re looking for a tasty treat that’s easy to make, you’re in the right place! These savory herb and
![To make a creamy mushroom risotto, you will need the following ingredients: - 1 ½ cups Arborio rice - 4 cups vegetable broth - 1 cup cremini mushrooms, sliced - 1 cup shiitake mushrooms, sliced - 1 medium onion, finely chopped - 2 cloves garlic, minced - 1 cup heavy cream - ½ cup grated Parmesan cheese (or substitute with nutritional yeast for a vegan option) - 2 tablespoons olive oil - 2 tablespoons unsalted butter (or plant-based butter for a vegan version) - Salt and freshly ground black pepper, to taste - Fresh parsley, finely chopped (for garnish) You can customize this recipe based on your taste or dietary needs. Here are some options: - Vegan: Replace heavy cream with coconut cream and dairy cheese with nutritional yeast. - Mushrooms: Swap shiitake or cremini for button mushrooms or portobellos. - Broth: Use chicken broth instead of vegetable broth for more flavor. - Cheese: Try different cheeses like feta or goat cheese for a unique twist. To prepare this risotto, you will need a few basic kitchen tools: - Large skillet for cooking the risotto - Medium saucepan for warming the broth - Ladle for adding broth gradually - Wooden spoon for stirring - Knife and cutting board for chopping ingredients This list should help you gather everything you need to create a delicious creamy mushroom risotto. For detailed cooking steps, check out the Full Recipe. First, you need to prepare the broth. In a medium saucepan, gently heat the vegetable broth over low heat. Keeping it warm helps the rice cook evenly. Next, in a large skillet, pour in the olive oil and one tablespoon of butter. Heat this over medium heat. Add the finely chopped onion. Sauté it for about five minutes. You want the onion to be soft and clear. Now, let's add the garlic. Mince two cloves and toss them in with the onions. Cook for another minute until you smell that lovely aroma. This mix of onion and garlic is the base for your risotto. Time to cook the mushrooms! Add the sliced cremini and shiitake mushrooms to the skillet. Stir them often for about eight to ten minutes. You want the mushrooms to turn golden brown. This step is key for rich flavor. Season them with a pinch of salt and freshly ground black pepper. The seasoning brings out the best in the mushrooms. Now, we’ll toast the rice. Stir in 1 ½ cups of Arborio rice with the mushroom mix. Let it toast for two to three minutes while stirring. This helps develop a nice flavor. Next, begin adding the warm vegetable broth, one ladleful at a time. Stir constantly. Wait until most of the liquid is absorbed before adding more. Continue this for about 20 to 25 minutes. You want the rice to be creamy and cooked al dente. When the rice is ready, reduce the heat to low. Gently mix in one cup of heavy cream, the remaining tablespoon of butter, and ½ cup of grated Parmesan cheese. Stir well to combine. Season with salt and black pepper to taste. Let it rest for a few minutes. This will help the risotto thicken. Follow these steps closely, and you'll create a creamy mushroom risotto that's both easy and flavorful. For the complete set of instructions, check the Full Recipe. To make a creamy risotto, start with Arborio rice. This rice has a high starch content. The starch helps create that smooth texture we all love. Stirring often is key. When you add broth, do it slowly and wait until it's mostly absorbed before adding more. This process takes time. Don't rush it. You will see the rice swell and turn creamy. Lastly, finish with heavy cream and Parmesan cheese. This step adds richness that makes every bite special. Flavor is vital in risotto. Use fresh herbs like parsley for a bright taste. You can also add garlic for depth. A splash of white wine can elevate the flavors too. If you want an earthy touch, try adding truffle oil at the end. For a twist, consider a squeeze of lemon. It brightens the dish and balances the richness. Feel free to mix in your favorite vegetables or proteins. They can add extra texture and taste, making the dish even more enjoyable. One common mistake is not using warm broth. Cold broth will shock the rice and stop the cooking process. Another pitfall is not stirring enough. Stirring helps release the rice's starch. If you don't stir, your risotto can turn out sticky or grainy. Lastly, avoid overcooking the rice. The perfect risotto should be al dente, or firm to the bite. If you overcook, it becomes mushy. Follow these tips, and you’ll make a perfect creamy mushroom risotto every time. For the complete process, check out the Full Recipe. {{image_4}} You can make creamy mushroom risotto vegan easily. Just swap the heavy cream with coconut milk or a nut-based cream. Use nutritional yeast instead of Parmesan cheese for a cheesy flavor. For butter, plant-based butter works well, or you can use olive oil. This way, you keep the dish rich and creamy without any dairy. Adding proteins and veggies can make your risotto heartier. You can stir in cooked chicken, shrimp, or even tofu for a protein boost. For veggies, think spinach, peas, or asparagus. Toss them in towards the end of cooking. This keeps them bright and fresh. You can also mix in some sun-dried tomatoes or roasted red peppers for added flavor. Mushrooms are the star of this dish. You can mix and match your favorites. Try using portobello, oyster, or even wild mushrooms. Each type brings its own taste and texture. A blend makes your risotto even more exciting. Just remember to cook them well to enhance their rich flavors. This combination can turn an already delicious dish into a gourmet experience. For a complete guide to making this dish, check out the Full Recipe. To keep your risotto fresh, let it cool first. Once cooled, place the risotto in an airtight container. This method helps to seal in flavors. Store it in the fridge for up to three days. If you have a lot leftover, consider portioning it out for easy meals later. When you are ready to enjoy your risotto again, use the stovetop for the best results. Place the risotto in a pan over low heat. Add a splash of broth or water to help it rehydrate. Stir often until it warms through. This keeps it creamy and delicious. You can also use the microwave if you're short on time. Just cover it with a damp paper towel and heat in short bursts. Freezing risotto is a great option for meal prep. First, let it cool completely. Then, portion the risotto into freezer-safe bags or containers. Remove as much air as possible to prevent freezer burn. You can freeze it for up to three months. When you want to eat it, thaw it in the fridge overnight. Reheat it on the stovetop with a little broth, and you’ll have a tasty meal ready to enjoy! For the full recipe, check out the details above. To make risotto creamy, you need to stir it often. The stirring releases starch from the rice. This starch makes the dish smooth and rich. Use Arborio rice for the best results. It has a high starch content that helps achieve that creamy texture. Adding heavy cream and cheese at the end also boosts creaminess. You can use other types of rice, but the results will differ. Regular rice lacks the starch that makes risotto creamy. It will not absorb the liquid the same way. Long-grain rice, like basmati, will be too dry. If you want a creamy texture, stick with Arborio rice. It is specially made for risotto and gives the best flavor and texture. Creamy mushroom risotto pairs well with many dishes. You can serve it with grilled chicken or fish for protein. A fresh salad adds a nice crunch and balance. Roasted vegetables also complement the flavors well. For a lighter meal, serve it with steamed green beans or asparagus. Enjoy with a glass of white wine for a perfect dinner experience. For the full recipe, check out the [Full Recipe]. This blog post covered making creamy mushroom risotto. We explored key ingredients, optional swaps, and essential tools. I shared step-by-step instructions, from prepping broth to adding cream. You learned tips for perfect creaminess and common mistakes to avoid. Variations included vegan options and fun add-ins. I also explained how to store leftovers and reheat them well. I hope this guide helps you enjoy cooking and sharing delicious risotto.](https://recipetorch.com/wp-content/uploads/2025/05/a6b246cb-0ca8-42d2-a803-8285f551268b.webp)
If you’re craving a comforting dish that’s both easy and delicious, you’ve come to the right place. Creamy Mushroom Risotto
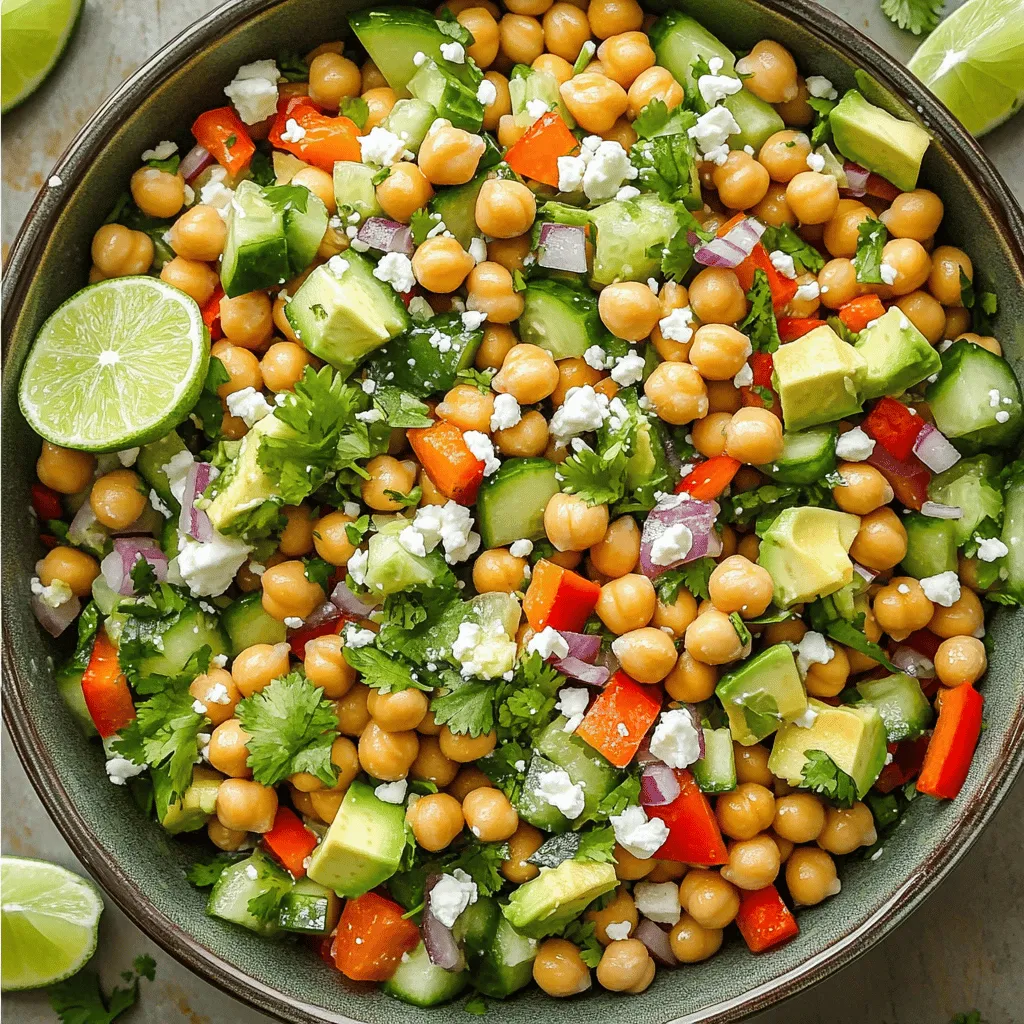
Looking for a quick, healthy, and tasty dish? The Spicy Chickpea Salad is the answer! Packed with vibrant veggies and
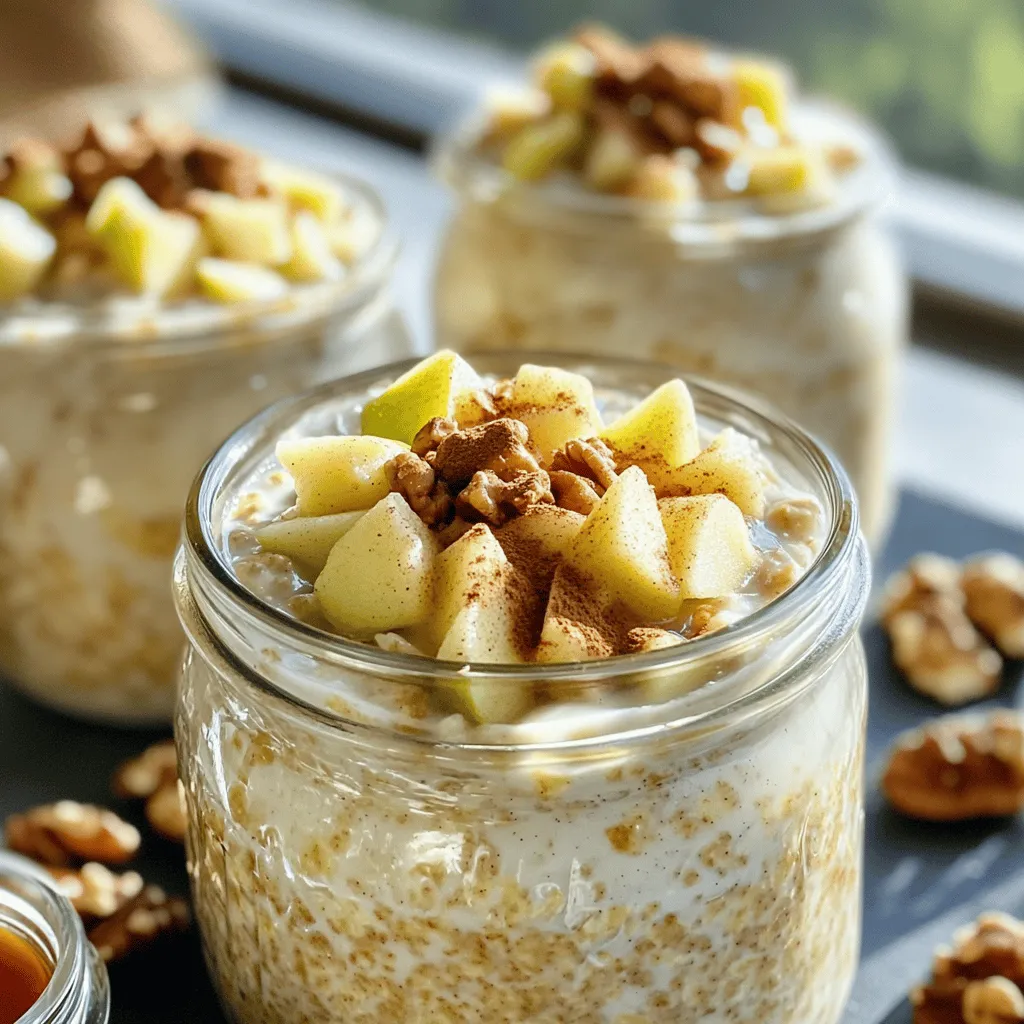
Looking for a quick and healthy breakfast? Apple Cinnamon Overnight Oats are your answer! This simple recipe is packed with
![- 1/2 cup (113g) unsalted butter: This adds richness and helps the cake stay moist. You can use salted butter for a slight taste change. - 1 cup (170g) semi-sweet chocolate chips: These give the cake its deep chocolate flavor. Dark chocolate chips are a great swap if you want a richer taste. - 2 large eggs: Eggs help bind the ingredients and create a fluffy texture. You can use egg substitutes if needed, like flaxseed meal mixed with water. - 2 large egg yolks: These add creaminess and enhance the cake's richness. You can skip them, but the texture will change. - 1/4 cup (50g) granulated sugar: Sugar sweetens the cake and aids in browning. Brown sugar works as a tasty alternative. - 2 tablespoons all-purpose flour: Flour gives structure to the cake. For a gluten-free option, use almond flour or a gluten-free blend. - 1/4 teaspoon salt: Salt balances the sweetness and enhances flavor. You can omit it if you prefer. - 1 teaspoon vanilla extract: This adds a warm aroma and flavor. Almond extract provides a nice twist if you want something different. - Powdered sugar, for dusting: This adds a sweet touch on top. You can skip it for a simpler look. - Ice cream or whipped cream, for serving (optional): These add creaminess and contrast to the warm cake. Fresh berries also make a great pairing. By using the right ingredients, you can make this cake a hit. Check out the Full Recipe for clear steps to follow! Greasing and flouring ramekins is key. This step helps your cakes slide out easily. I use unsalted butter for greasing. Then, I sprinkle flour or cocoa powder inside. This adds a non-stick layer. Preheat your oven to 425°F (220°C). A hot oven ensures the cakes bake evenly. For melting chocolate and butter, I use a microwave-safe bowl. Combine 1/2 cup of butter and 1 cup of chocolate chips. Microwave in 30-second bursts. Stir after each round. This method works well for a smooth mix. You want it creamy with no lumps. In a separate bowl, whisk two large eggs and two yolks. Add 1/4 cup of sugar to the mix. Whisk until it becomes light and frothy. This usually takes about 2-3 minutes. You want to see little bubbles forming. That shows you’re on the right track! Now, it’s time to mix! Gradually pour the melted chocolate into the egg mix. Stir gently to combine. This keeps the batter light. Be careful not to overmix. You want a smooth mixture without losing air. Divide the batter among your ramekins. Fill each about 3/4 full. This gives the cakes room to rise. Bake in the preheated oven for 12-14 minutes. The edges should feel set, while the center remains soft. After baking, cool the cakes for about 1 minute. Use a knife to run around the edges. This helps release the cakes. Invert them onto plates gently. Dust with powdered sugar for a touch of style. Pair with ice cream or whipped cream for extra delight. Enjoy your delicious creation! For the complete recipe, check out the [Full Recipe]. To get that oozy center, timing is key. Bake your cakes for 12 to 14 minutes. If you bake them too long, the center sets and you miss the lava. Check them at the 12-minute mark. Gently shake the ramekin. If it wiggles, you’re good! If it looks too firm, give it another minute. Common pitfalls include overmixing and baking too long. Overmixing can make your cakes dense. You want a light, airy batter. Just fold in the flour gently. If you have leftover cakes, let them cool completely. Wrap them in plastic wrap or store them in an airtight container. This keeps them fresh in the fridge for up to three days. To reheat, place the cake on a plate. Heat it in the microwave for about 20-30 seconds. Check to see if the center is warm and gooey again. If not, heat in small intervals until it is just right. Chocolate pairs well with many flavors. Try adding a splash of espresso for a boost. Vanilla ice cream is a classic, but a berry compote adds a nice twist. Consider adding a bit of orange zest to the batter. This gives your cake a bright, fresh taste. Nuts or sea salt can also create a nice contrast to the sweetness. Get creative with add-ins to make your lava cake unique! For the full recipe, check out the Easiest Chocolate Lava Cake section for detailed instructions. {{image_4}} To make a gluten-free chocolate lava cake, swap all-purpose flour for almond flour or gluten-free flour. Both options work well, but almond flour adds a nutty taste. If you choose gluten-free flour, check if it has a binding agent like xanthan gum. This will help your cake hold its shape. You may need to adjust the baking time. Keep an eye on the cakes after 10 minutes. Gluten-free cakes may bake faster, so check for that gooey center! You can add a fun twist to your lava cake! Try mixing in a teaspoon of espresso powder for a rich coffee flavor. You can also add some orange zest for a bright citrus note. If you want to switch up the chocolate, use dark or milk chocolate instead of semi-sweet. Each type of chocolate gives a different taste and texture. Choose what you like best! Baking in different ramekins or pans is fun, too! If you want mini lava cakes, use smaller ramekins. Just remember to adjust your baking time. Smaller cakes may need only 8 to 10 minutes in the oven. For larger cakes, like a full-size cake, increase the baking time to about 15 to 18 minutes. Always check for that soft center; it’s the best part! To store leftover chocolate lava cakes, you need to keep them fresh. Here are my best tips: - Wrap each cake in plastic wrap. This will keep moisture in. - Place the wrapped cakes in a sealed container. This adds another layer of protection. - If you have extra room, use a cake dome. It will shield them from air and odors. Storing them this way helps maintain their gooey center. You can enjoy them later without losing flavor. If you want to keep your lava cakes longer, freezing works well. Here's how to do it right: - Cool the cakes completely before freezing. Warm cakes can create ice crystals. - Wrap each cake tightly in plastic wrap. This stops freezer burn. - Then, place them in a freezer-safe bag or container. Label them with the date for easy tracking. When you're ready to enjoy them, follow these thawing and reheating tips: - Thaw the cakes in the fridge overnight. This keeps them from getting soggy. - To reheat, place the cakes in a microwave for 30 seconds. Check to see if they are warm but not hot. This method helps keep the center soft and melty, just like fresh. You can enjoy your chocolate lava cakes anytime! For more details, check the Full Recipe. You can tell when your lava cake is done by looking at its edges. The edges should be set, firm, and slightly puffed. The center, however, should still look soft and wobbly. This means it has that gooey lava you want. A good rule of thumb is to bake for 12-14 minutes. If you insert a toothpick, it should come out with some moist batter, not completely clean. Yes, you can prepare the lava cake batter ahead of time. Mix the batter and store it in the fridge for up to 24 hours. Just remember to bring it back to room temperature before baking. This way, you can enjoy a warm dessert with little fuss. If you bake it from cold, add a minute or two to the baking time. Serving suggestions can elevate your lava cake experience. Here are a few ideas: - Vanilla ice cream - Whipped cream - Fresh berries, like raspberries or strawberries - A drizzle of chocolate or caramel sauce - Mint leaves for a fresh touch These toppings complement the rich chocolate flavor and add a fun twist. If your lava cake is overcooked, it will not have the gooey center you desire. To avoid this, check your oven's temperature with an oven thermometer. If the cake is undercooked, bake it a minute longer next time. If the cakes stick to the ramekins, ensure you grease and flour them well before filling. Don't be afraid to experiment to find the perfect bake time for your oven. You can always learn and improve with each attempt. For the complete process, check out the Full Recipe. In this article, we explored how to create the perfect chocolate lava cake. We covered ingredients, step-by-step instructions, and tips for success. Remember to use the right techniques for melting chocolate and whisking eggs. Timing is key for that gooey center. Whether you want gluten-free options or fun flavor twists, you have many ways to customize. With these insights, you can impress anyone with your baking skills. Enjoy your delicious creations and the smiles they bring!](https://recipetorch.com/wp-content/uploads/2025/05/ddd4484f-19d7-4457-a53b-9202a9f049cf.webp)
Craving something decadent and sweet? You’re in the right place! This Easiest Chocolate Lava Cake recipe ensures you get that
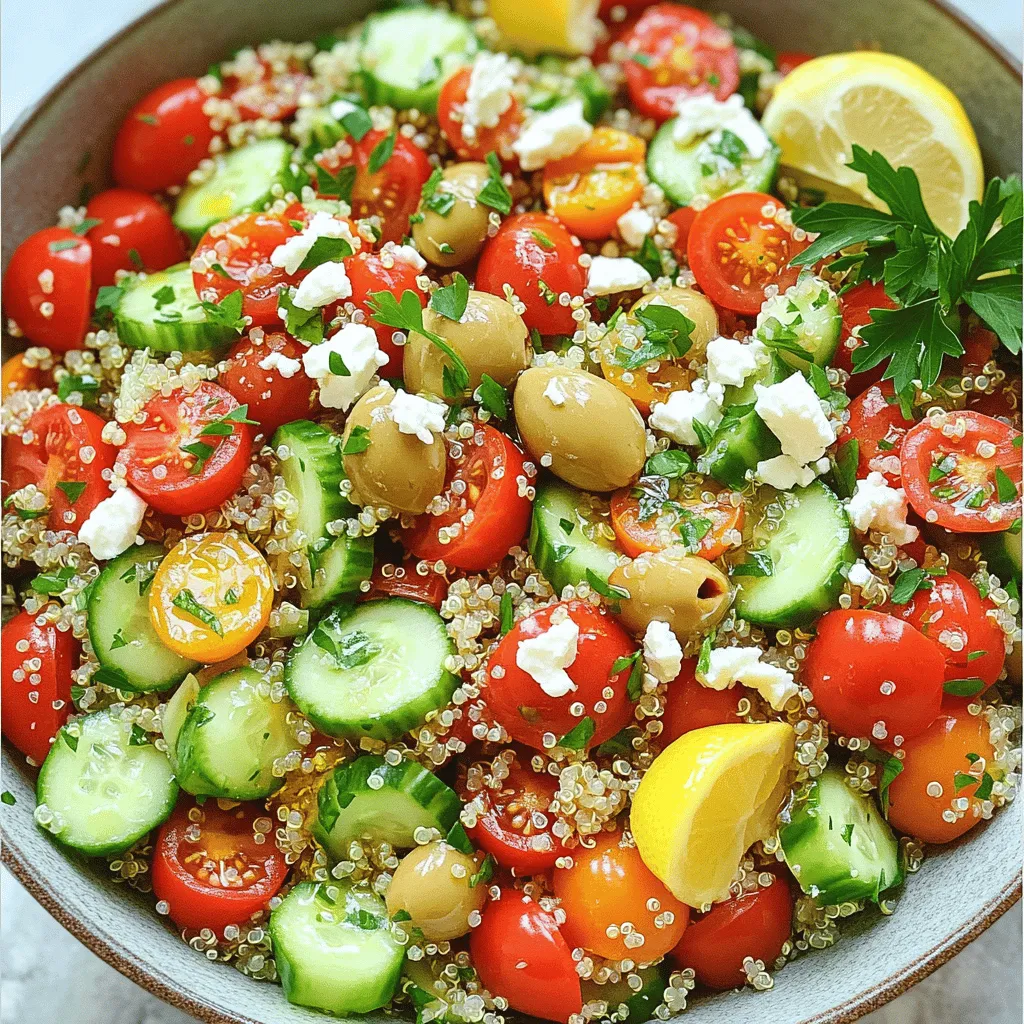
Are you ready to savor a dish that bursts with color and flavor? My Mediterranean Quinoa Salad is your fresh
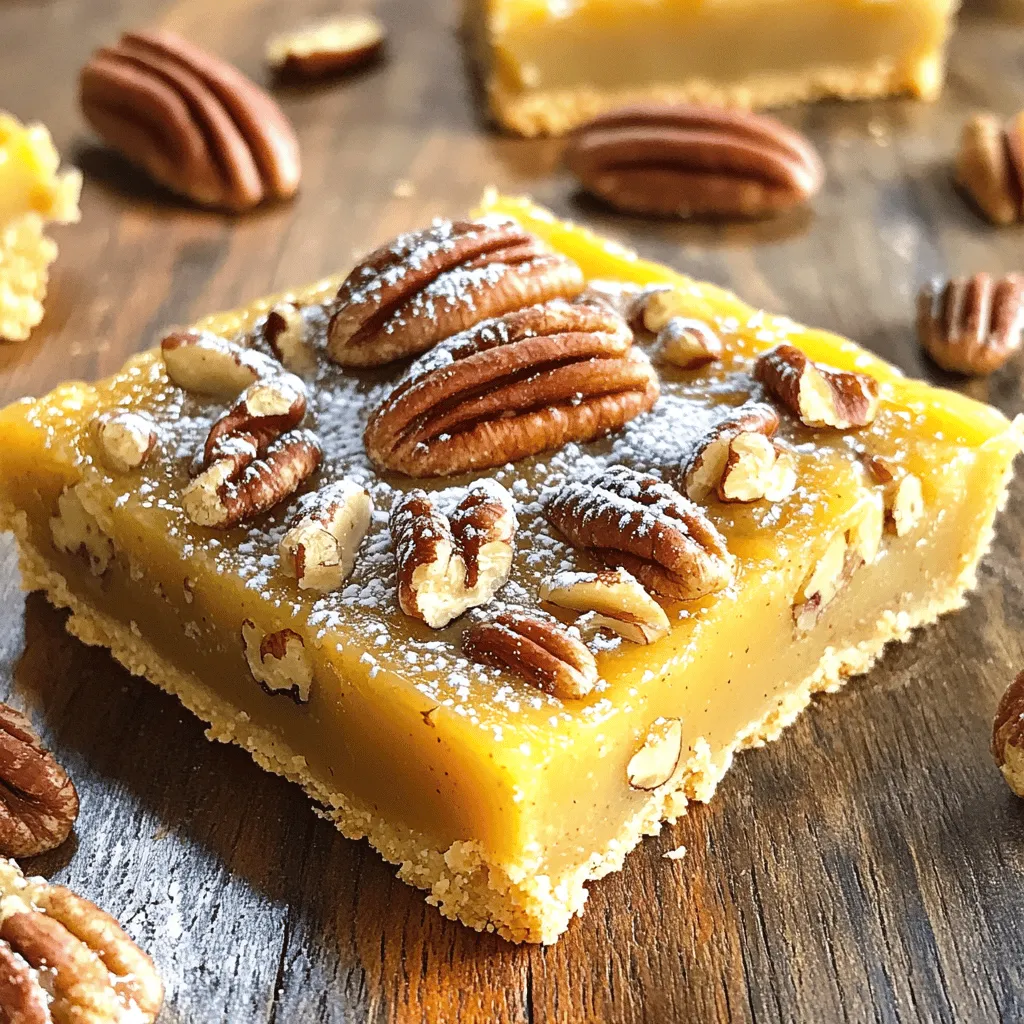
If you crave a sweet treat that surprises and delights, look no further than these Maple Pecan Pie Bars. They
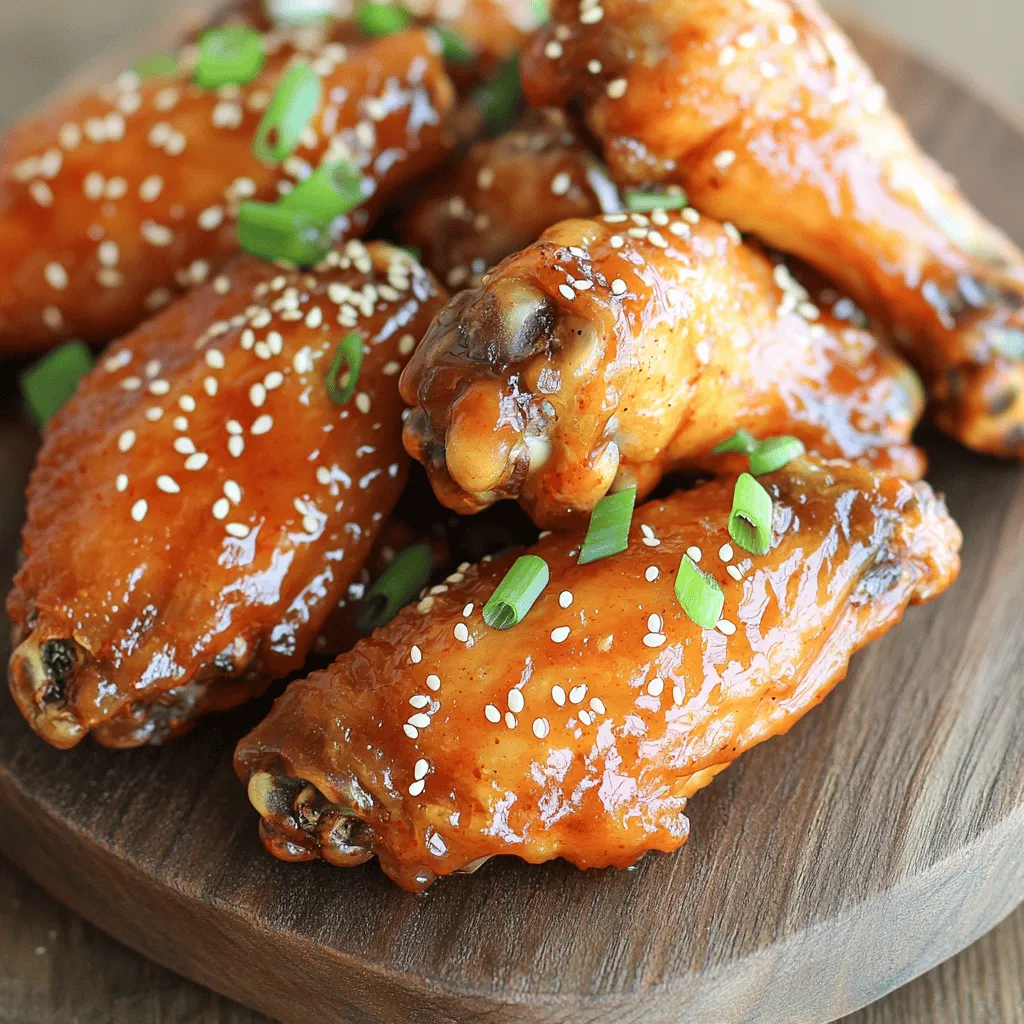
Get ready for a flavor adventure with my Sweet and Spicy Chicken Wings! These wings are the perfect mix of
![- 1 pound large shrimp, peeled and deveined - 1 cup unsweetened shredded coconut - 1 cup panko breadcrumbs - 1/2 cup all-purpose flour - 2 large eggs For crispy coconut shrimp, I always pick large shrimp. They fry up perfectly and get nice and crunchy. Peeling and deveining them is easy, and it makes a big difference in taste. - 1 teaspoon garlic powder - 1 teaspoon paprika - 1/2 teaspoon salt - 1/4 teaspoon cayenne pepper (optional for spice) Seasonings are key for flavor. I love adding garlic powder and paprika for depth. If you like heat, cayenne adds a spicy kick. Adjust to your taste! - Vegetable oil, for frying - Fresh lime wedges, for serving The right oil is important. I use vegetable oil because it has a high smoke point. Fresh lime wedges brighten the dish and give it a fresh twist. Serve them on the side for a zesty finish. You can find the full recipe in the sections above. Enjoy making this crispy coconut shrimp delight! First, pat the shrimp dry with paper towels. This step is key. Moisture makes the shrimp soggy. Dry shrimp will fry up crispy and light. Next, set up your breading area. You’ll need three shallow dishes. This will help you coat the shrimp easily. Now, let’s create the breading stations. In the first dish, mix the flour with garlic powder, paprika, salt, and cayenne pepper. This blend adds flavor to the shrimp. In the second dish, beat the eggs until they look frothy. For the third dish, mix the shredded coconut with panko breadcrumbs. This mixture gives the shrimp a crunchy coat. To coat each shrimp, start with the flour. Dip it in the flour mixture and shake off the extra. Next, move it to the egg. Let the excess egg drip off before moving to the last dish. Roll the shrimp in the coconut-panko mix. Press gently so the coating sticks well. Now, we need to heat the oil. Pour vegetable oil into a large skillet. Aim for about 1/2 inch deep. Heat it over medium until it reaches about 350°F (175°C). To check if it's ready, drop in a small piece of bread. If it sizzles, it’s good to go! Carefully add the coated shrimp to the hot oil in small batches. Avoid overcrowding the pan. Fry each shrimp for about 2-3 minutes on each side. Look for a golden brown color. Once done, use a slotted spoon to move the shrimp to a plate lined with paper towels. This helps drain any extra oil. Enjoy your crispy coconut shrimp with fresh lime wedges for that zesty finish! If you want the full recipe, check out the [Full Recipe]. To get that perfect crispiness, start by pat drying the shrimp. Remove any moisture with paper towels. This step is key. Wet shrimp won't fry well. They will steam instead of crisping up. Next, keep an eye on your oil temperature. Heat your oil to about 350°F (175°C). If the oil is too cool, the shrimp will absorb too much oil. If it's too hot, the outside will burn before cooking inside. One common mistake is overcrowding the frying pan. If you add too many shrimp at once, the oil cools down. This causes uneven cooking and soggy shrimp. Fry in small batches for the best results. Another mistake is incorrect breading techniques. Make sure to coat each shrimp evenly. Each shrimp needs to be fully covered in flour, egg, and coconut-panko mix. This ensures a crunchy texture. For a complete meal, serve your crispy coconut shrimp with a fresh salad or steamed veggies. Both pair well and add color to your plate. Dipping sauces can enhance the flavor. Try a sweet chili sauce for a hint of heat. A tangy mango salsa also works well. Fresh lime wedges add a zesty touch and brighten up the dish. For the full recipe, check out the Crispy Coconut Shrimp Delight! {{image_4}} You can spice up your crispy coconut shrimp with different flavors. Adding spices can really enhance the taste. Try mixing in some chili powder for heat or smoked paprika for depth. If you like a bit of sweetness, a dash of cinnamon can work wonders too. You can also swap breadcrumbs. Instead of panko, use crushed cornflakes for a crunchier texture. Regular breadcrumbs or even crushed potato chips can add a unique twist. Each type brings its own flavor and crunch to the dish, making every bite exciting. Making this recipe fit specific diets is easy. For a gluten-free option, use almond flour instead of regular flour. Look for gluten-free breadcrumbs or make your own by grinding gluten-free crackers. If you want a vegan version, you can replace the eggs with a mixture of flaxseed and water. Mix one tablespoon of ground flaxseed with three tablespoons of water, and let it sit for a few minutes. This acts as a binding agent. Use chickpea flour instead of all-purpose flour for coating. These swaps make it easy to enjoy this dish without sacrificing flavor. How you present your crispy coconut shrimp can make a big difference. Arrange the shrimp on a big platter, garnished with fresh herbs like cilantro or parsley. A slice of pineapple or mango can add color and freshness. For side dishes, consider serving with a zesty coleslaw or a tropical fruit salad. These pair nicely with the shrimp. You can also serve your shrimp with a spicy dipping sauce, like sweet chili sauce or a tangy mango salsa. This adds another layer of flavor that makes the meal even more enjoyable. For the full recipe, check out the Crispy Coconut Shrimp Delight section! To keep your crispy coconut shrimp fresh, store them in an airtight container. Make sure the shrimp cool completely before placing them inside. This step helps prevent sogginess. I recommend using glass or plastic containers with tight lids. If you do not have these, use a resealable plastic bag. Just remove as much air as possible before sealing. To reheat your shrimp without losing that crunchy texture, use an oven. Preheat it to 375°F (190°C). Place the shrimp on a baking sheet in a single layer. Bake for about 8-10 minutes or until they heat through. You can also use an air fryer for a crispier finish. Set it to 375°F (190°C) and cook for 5-7 minutes. If you want to keep them moist, cover them with foil for the first half. If you want to freeze the breaded shrimp, prepare them before frying. Lay them on a baking sheet in a single layer and freeze until solid. Then, transfer them to a freezer-safe bag or container. They will stay fresh for about three months. To cook from frozen, do not thaw. Fry the shrimp directly from the freezer. Adjust the cooking time by adding 1-2 minutes. This method keeps them crispy and delicious. For the full recipe, check out the instructions above. For this crispy coconut shrimp, I recommend using large shrimp. They provide a great bite and hold up well during cooking. Look for shrimp labeled as "16/20" or "21/25." These numbers indicate the count per pound, and they offer a nice size for frying. Fresh shrimp is best, but frozen shrimp works too. Just make sure to thaw them properly before cooking. If you want a healthier version, you can bake the shrimp instead. Preheat your oven to 400°F (200°C). Line a baking sheet with parchment paper. Arrange the breaded shrimp on the sheet and spray lightly with cooking spray. Bake for about 15-20 minutes, flipping halfway through. This method gives you a crispy texture without all the oil. Yes, you can prepare the shrimp ahead of time. After breading, place the shrimp on a baking sheet and chill them in the fridge for up to an hour. This helps the coating stick better. If you want to store them longer, you can freeze the breaded shrimp. Just remember to separate them with parchment paper before freezing. When ready, fry or bake them straight from the freezer. Many seafood restaurants offer crispy coconut shrimp. Popular chains like Red Lobster and Bonefish Grill serve their own versions. Prices can range from $10 to $20 depending on the restaurant. Local seafood spots may also have unique takes on the dish. Always check online menus or ask around for recommendations in your area. This blog post covered everything you need for crispy coconut shrimp. We explored the main ingredients, seasonings, and key cooking essentials. I shared step-by-step instructions for preparation and frying. You learned tips for the perfect crispiness and common mistakes to avoid. We also discussed variations and storage options. These insights will help you create a delicious dish that impresses. Enjoy making your coconut shrimp and feel free to experiment with flavors. The kitchen is your canvas!](https://recipetorch.com/wp-content/uploads/2025/05/a6f38903-75f3-48f1-9b74-ab4b1556efc6.webp)
Crispy Coconut Shrimp are a tasty treat that’s sure to please! If you love crunchy flavors with a hint of
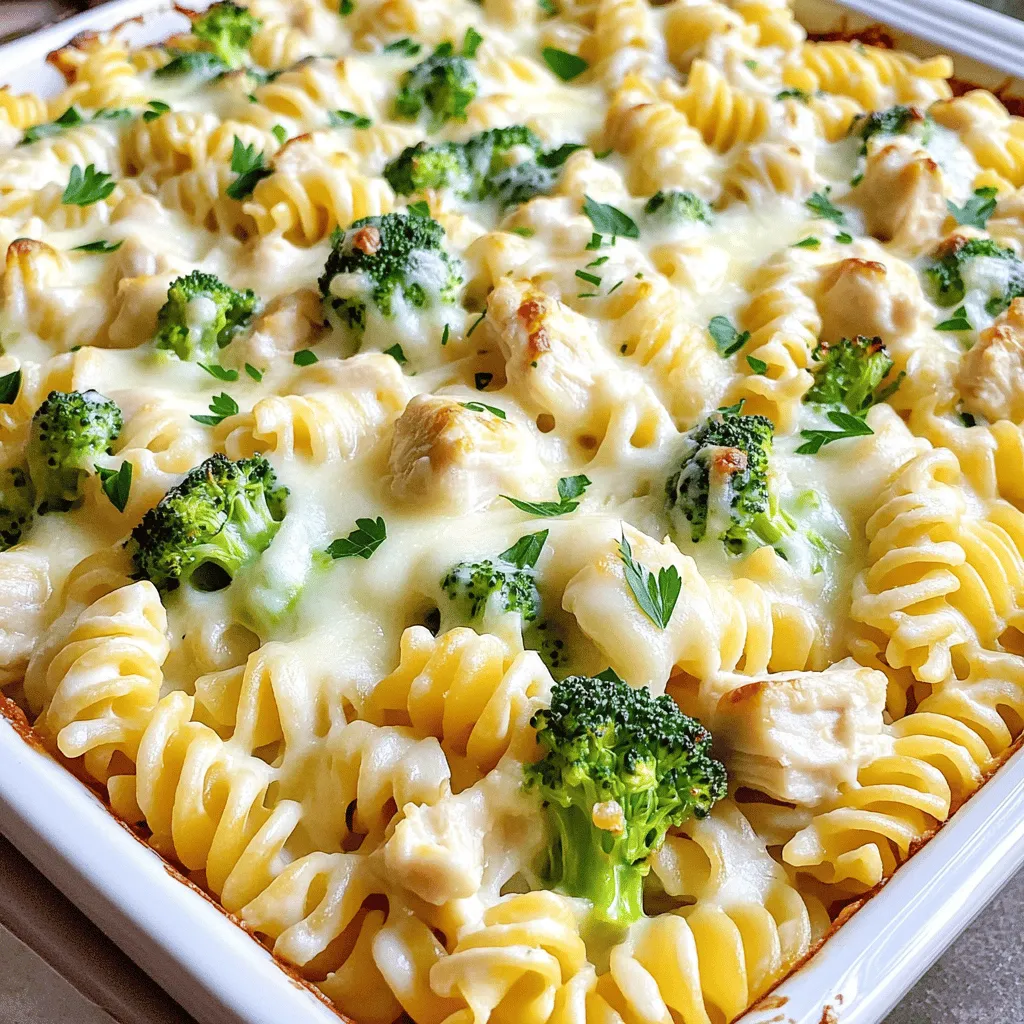
Craving comfort food that’s easy and delicious? Look no further! My Easy Chicken Alfredo Bake is a hit for the
