
Creamy Mushroom Risotto Flavorful and Simple Dish
If you crave a creamy, comforting dish, my Creamy Mushroom Risotto is perfect for you. This simple yet flavorful meal
If you crave a creamy, comforting dish, my Creamy Mushroom Risotto is perfect for you. This simple yet flavorful meal
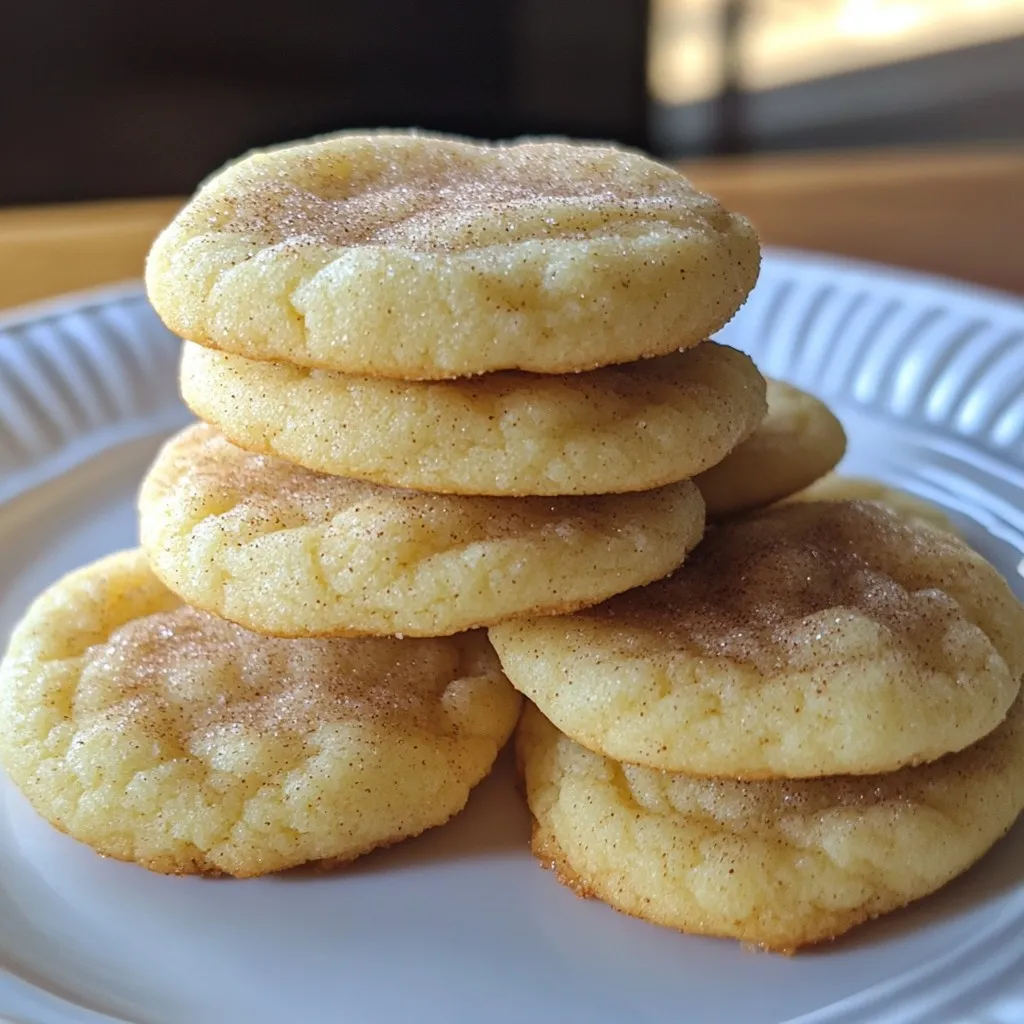
If you crave a tasty treat that’s soft and chewy, you’re in the right place. Today, I’m sharing my classic
![- 1 medium head of cauliflower, cut into bite-sized florets - 1 cup all-purpose flour - 1 cup water - 1 teaspoon garlic powder - 1 teaspoon onion powder - 1/2 teaspoon smoked paprika - 1/2 teaspoon black pepper - 1/2 teaspoon salt - 1 cup buffalo sauce (store-bought or homemade) - 2 tablespoons olive oil - Fresh parsley, chopped (for garnish) When making buffalo cauliflower bites, focus on fresh ingredients. The cauliflower is the star. Choose a medium head for the best size. Cut it into bite-sized pieces. This makes them easy to eat and ensures even cooking. Next, you'll need the batter components. The flour gives the bites their crunch. The water helps mix everything smoothly. Seasoning is key. Garlic powder and onion powder add depth. Smoked paprika gives a hint of smokiness. Black pepper and salt enhance the flavors. Buffalo sauce is where the heat comes in. You can use store-bought or make your own. Just mix it with olive oil for extra richness. Finally, fresh parsley adds a pop of color when you serve the bites. For the full details on how to make these tasty treats, check out the Full Recipe. This dish is fun, flavorful, and a great snack for any occasion! 1. Preheat the Oven: First, set your oven to 450°F (232°C). This high heat helps make the bites crispy. Prepare your baking sheet by lining it with parchment paper. This makes clean-up easy and keeps the bites from sticking. 2. Mixing the Batter: In a large bowl, combine the flour, garlic powder, onion powder, smoked paprika, black pepper, and salt. Mix these dry ingredients well. Slowly add water while stirring. You want the batter to be smooth and thick, just like pancake batter. 1. Coating the Cauliflower: Grab each cauliflower floret and dip it into the batter. Make sure every piece is fully covered. Let any extra batter drip off. Then, place the florets on the prepared baking sheet. Space them out so they cook evenly. 2. Bake the Cauliflower: Put the baking sheet in your hot oven. Bake for about 20 minutes. Check for a golden color and a crispy look. This step is key for the right texture. 3. Buffalo Sauce Toss: While the cauliflower bakes, mix the buffalo sauce and olive oil in a small bowl. After 20 minutes, take the cauliflower out. Toss it in the buffalo sauce until every piece is coated. 4. Final Bake: Return the coated cauliflower to the oven. Bake for another 10-15 minutes. Look for them to be crispy and slightly caramelized. This adds extra flavor and crunch. 5. Serve and Garnish: Once done, take the baking sheet out. Sprinkle freshly chopped parsley on top for color and a fresh taste. Serve your buffalo cauliflower bites right away. Pair them with creamy ranch or zesty blue cheese for more flavor! Make sure to check the [Full Recipe] for complete details. To make a great batter, focus on consistency. You want it thick, but not too thick. It should stick to your cauliflower well. If it’s too runny, add a little more flour. If it's too thick, add a splash of water. Adding spices can give your batter a flavor boost. Try a pinch of cayenne for heat or a dash of paprika for smokiness. You can also mix in herbs like oregano or thyme for a fresh taste. This little step can make a big difference. Crispiness is key for buffalo cauliflower bites. To achieve this, make sure to space the florets on the baking sheet. If they are too close, they will steam instead of bake. Also, preheat your oven well. A hot oven helps create that nice crunch. To avoid sogginess, keep an eye on your baking time. Bake until the bites are golden brown. If they look soft, give them a few more minutes. You can also broil them for a minute at the end. This step adds extra crispiness without drying them out. {{image_4}} You can change the taste of your Buffalo cauliflower bites with simple swaps. First, try different spices. For a kick, add cayenne or chili powder. If you want a milder taste, use paprika or cumin. Fresh herbs like thyme or rosemary can also add a wonderful twist. You can also switch up the sauce. Instead of buffalo sauce, try BBQ sauce for a sweet and smoky flavor. Teriyaki sauce gives a nice sweet and savory combo. Each sauce changes the bite's vibe, so feel free to experiment with what you love. If you need gluten-free options, swap the all-purpose flour for a gluten-free blend. These blends usually work well in batters. You can also use almond flour or chickpea flour for a unique taste. For vegan substitutions, just use plant-based milk instead of water. This adds creaminess to your batter. Ensure your buffalo sauce is vegan-friendly too. Many brands offer delicious vegan options that keep the flavor bold without the dairy. For the full recipe, check out the details above and get started on this tasty snack! To keep your Buffalo Cauliflower Bites fresh, store them properly. First, let the bites cool completely. This step prevents steam from making them soggy. Use an airtight container to keep them fresh. Glass or plastic containers work well. If you have a lot, layer them with parchment paper. This method helps avoid sticking. For best quality, consume them within three days. After that, they may lose their crispness. Reheating Buffalo Cauliflower Bites can be tricky. You want to keep them crispy. One simple method is to use the oven. Preheat your oven to 350°F (175°C). Line a baking sheet with parchment paper. Spread the bites in a single layer. Bake for about 10-15 minutes. This method restores some crispiness. You can also use an air fryer. Set it to 350°F (175°C) and cook for about 5-7 minutes. Check them often to avoid burning. Both methods work great without adding extra oil. Enjoy your tasty bites again, just like fresh! How can I make these gluten-free? To make gluten-free Buffalo cauliflower bites, use gluten-free flour. You can find many brands at the store. This swap keeps the taste while making it safe for those with gluten issues. Ensure your buffalo sauce is also gluten-free. Can I use frozen cauliflower? Yes, you can use frozen cauliflower. Just thaw and drain it well before using. This helps avoid excess water in the batter. Frozen cauliflower may not be as crispy, but it still tastes great! What dipping sauces pair well? You can pair these bites with many sauces. Creamy ranch and zesty blue cheese are popular choices. You could also try a spicy aioli or a sweet chili sauce for a twist. How long can I store the bites? You can store the bites in the fridge for up to three days. Keep them in an airtight container to maintain freshness. Reheat in the oven for best results to regain crispiness. Check out the Full Recipe for more details! You've learned how to make delicious buffalo cauliflower bites. We covered the key ingredients, steps for prep and cooking, and tips to perfect your dish. Explore variations to keep things fun and easy, including gluten-free and vegan options. Proper storage and reheating methods will keep your bites fresh. Enjoy your tasty creation and share it with others. Use what you learned to impress your friends and family!](https://recipetorch.com/wp-content/uploads/2025/05/902b93fc-5a8b-497f-9545-d91dd28d84c0.webp)
Looking for a tasty snack that’s both healthy and fun? Buffalo Cauliflower Bites are the perfect answer! They pack bold
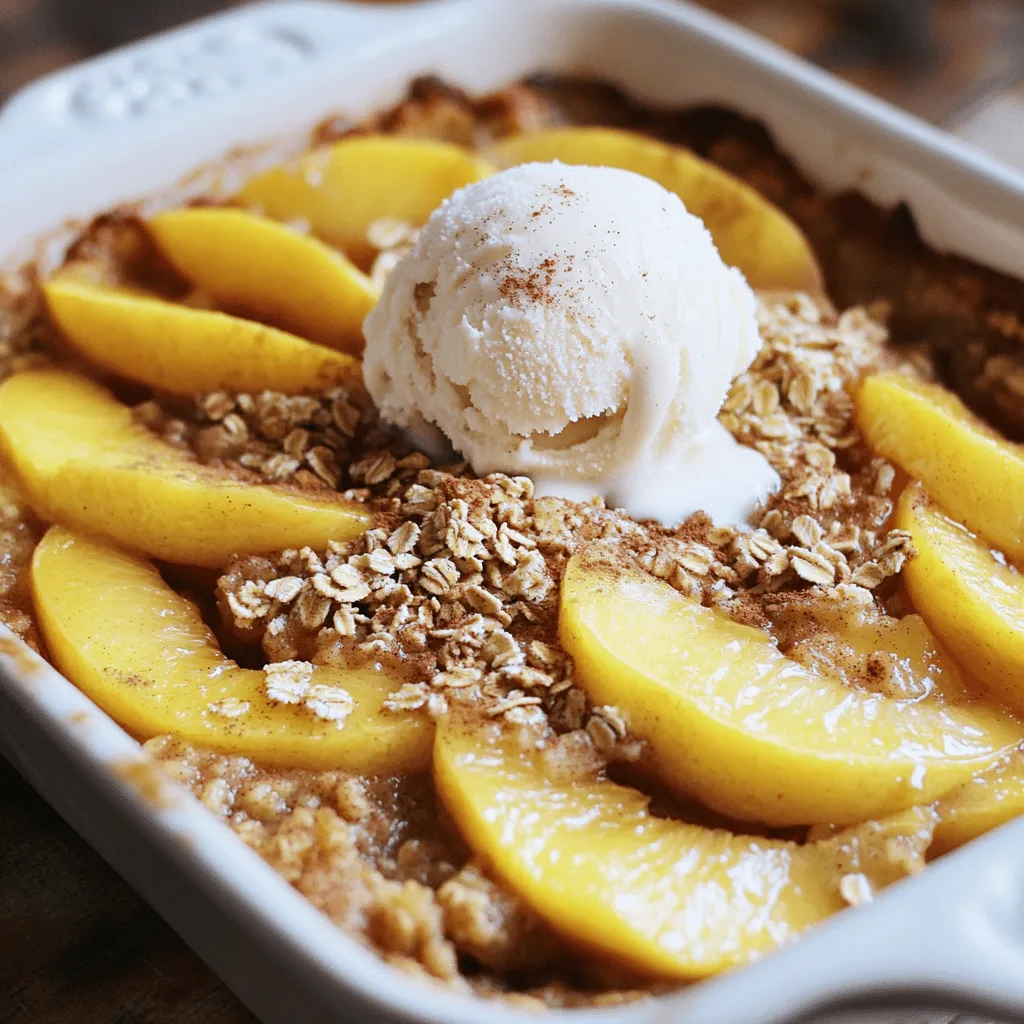
Are you ready to enjoy a sweet and warm Peach Crisp with Oat Topping? This easy recipe is a delightful

Looking for a delicious, plant-based meal? Try my Vegan Cauliflower Tacos! They’re easy to make and packed with flavor. With
![To make lemon basil chicken skewers, gather these ingredients: - 1 lb (450g) boneless chicken breast, cut into 1-inch cubes - 2 tablespoons extra virgin olive oil - Juice and zest of 1 large lemon - 1/4 cup fresh basil leaves, finely chopped - 3 cloves garlic, finely minced - 1 teaspoon honey, preferably local - Salt and freshly ground black pepper, to taste - 1 red bell pepper, cut into 1-inch pieces - 1 yellow bell pepper, cut into 1-inch pieces - Bamboo or metal skewers (if using bamboo, soak in water for 30 minutes prior to use) You can add a few optional ingredients to enhance the taste: - Cherry tomatoes for sweetness - Red onion for a bit of sharpness - Zucchini slices for more veggies - A dash of chili flakes for heat Quality matters when choosing ingredients. Here are some tips: - Select fresh, organic chicken for the best flavor and texture. - Look for ripe, juicy lemons. They should feel heavy for their size. - Use fresh basil, as dried basil won’t give the same bright taste. - Choose high-quality olive oil, as it adds richness to the marinade. - Freshly minced garlic gives a stronger flavor than pre-minced. Using these quality ingredients will make your lemon basil chicken skewers shine. For a detailed guide, check the Full Recipe. To start, gather your ingredients. In a large bowl, mix together the olive oil, lemon juice, and zest. This creates a bright and tangy base. Next, add the finely chopped basil and minced garlic. The fresh basil brings a lovely aroma. Stir in a teaspoon of honey for a hint of sweetness. Don’t forget a pinch of salt and pepper to taste. This marinade is the key to juicy chicken. Now, take your cubed chicken breast and add it to the marinade. Make sure each piece gets coated well. This is where the flavor seeps in. Cover the bowl with plastic wrap. Place it in the fridge for at least 30 minutes. For even better taste, let it marinate for up to 2 hours. The longer it sits, the better it gets! Once your chicken is ready, it’s time to skewer. First, grab your skewers. If you use bamboo ones, soak them in water for 30 minutes. This helps prevent burning. Now, take the marinated chicken and thread it onto the skewers. Alternate the chicken with pieces of red and yellow bell pepper. This adds color and sweetness. Aim for a fun and vibrant look. Each skewer should be packed, but not too tight. This allows even cooking. For the full recipe, check [Full Recipe]. Preheating your grill is key. I like to set my grill to medium-high heat. This ensures the grill is hot enough for perfect cooking. Let it heat for about 10 minutes. If you see smoke, it means it’s ready. A good grill gets nice grill marks on the chicken. Now, it's time to grill those skewers! Carefully place them on the hot grill. Cook each side for about 3 to 4 minutes. I recommend using tongs to turn them. This helps avoid burning and keeps them juicy. You want the chicken to reach a safe temperature of 165°F (75°C). This is important for health and taste! Checking for doneness is simple. Use a meat thermometer to check the chicken. If it reads 165°F (75°C), your skewers are done! If you don’t have a thermometer, cut into a piece of chicken. It should be white inside, not pink. After cooking, let the skewers rest for a few minutes. This helps the juices settle, making each bite even better. For the full recipe, check the instructions provided earlier. {{image_4}} To get the best taste, marinate the chicken well. Use a big bowl for the marinade. Whisk the olive oil, lemon juice, and zest together. Add the basil, garlic, honey, salt, and pepper. Mix until smooth. Then, add the chicken cubes. Make sure each piece is coated. Cover the bowl and put it in the fridge. For great flavor, let it marinate for at least 30 minutes. You can even let it sit for two hours if you want more zest. Preheat your grill to medium-high heat. This step is key for nice grill marks. When grilling, cook the skewers for about 10-12 minutes. Turn them often to cook evenly. Check the chicken’s internal temperature with a meat thermometer. It should reach 165°F (75°C) for safety. After grilling, let the skewers rest for a few minutes. This helps juicy flavors stay in the chicken, making each bite tender. For a vibrant look, arrange the skewers on a big platter. Add fresh lemon wedges to brighten the dish. You can also sprinkle more basil on top for a nice touch. For extra flavor, serve with a yogurt dip or tzatziki. This adds a cool contrast to the warm chicken. These tips will make your lemon basil chicken skewers a hit! For the full recipe, check the earlier sections. You can swap chicken for shrimp or tofu. Shrimp cooks quickly and adds a nice flavor. Use large shrimp, and marinate them like the chicken. For tofu, use firm or extra-firm. Press it to remove water, then cut it into cubes. Marinate just like the chicken. Both options make the dish fresh and fun. For a veggie-only option, skip the meat. Use a mix of colorful veggies. Bell peppers, zucchini, mushrooms, and cherry tomatoes work well. Cut them into similar sizes for even cooking. Marinate the veggies in the same lemon basil mix for great flavor. Thread them onto skewers and grill until they're tender. This way, everyone can enjoy this tasty dish! Feel free to get creative with the marinade. Try adding soy sauce for a savory twist. Or mix in some ginger for a zingy kick. You can also use balsamic vinegar to add depth. Each tweak offers a new taste experience. Just keep the lemon and basil for that signature flavor. Check out the Full Recipe for more ideas to inspire your cooking. After enjoying your lemon basil chicken skewers, store any leftovers right away. Place them in an airtight container. This keeps the chicken fresh and tasty. Try to cool the skewers before sealing them. They will stay good in the fridge for up to three days. If you need longer storage, consider freezing them. To reheat your skewers, use an oven or a skillet. This method helps keep the chicken juicy. Preheat your oven to 350°F (175°C). Place the skewers on a baking sheet lined with foil. Heat for about 10-15 minutes. If using a skillet, add a splash of water and cover it. Heat over medium until warmed through. Avoid using a microwave, as it may dry out the chicken. For long-term storage, freezing is a great option. Wrap each skewer tightly in plastic wrap. Then, place them in a freezer bag. Be sure to remove as much air as possible. These skewers can last up to three months in the freezer. When you're ready to eat, thaw them overnight in the fridge. Then, follow the reheating instructions for best results. Today, we covered how to make great skewers from start to finish. We discussed key ingredients and marinating tips for deep flavor. Cooking methods ensure your skewers are tasty and safe to eat. Plus, we explored fun variations and how to store leftovers properly. Using these steps, you can create delicious skewers that please everyone. Adopt these tips and enjoy great meals. Cooking can be simple and joyful!](https://recipetorch.com/wp-content/uploads/2025/05/c687b463-afe3-4d5c-9cb5-f09eb81048b5.webp)
Are you ready to impress your friends and family with a simple yet delicious meal? My Lemon Basil Chicken Skewers
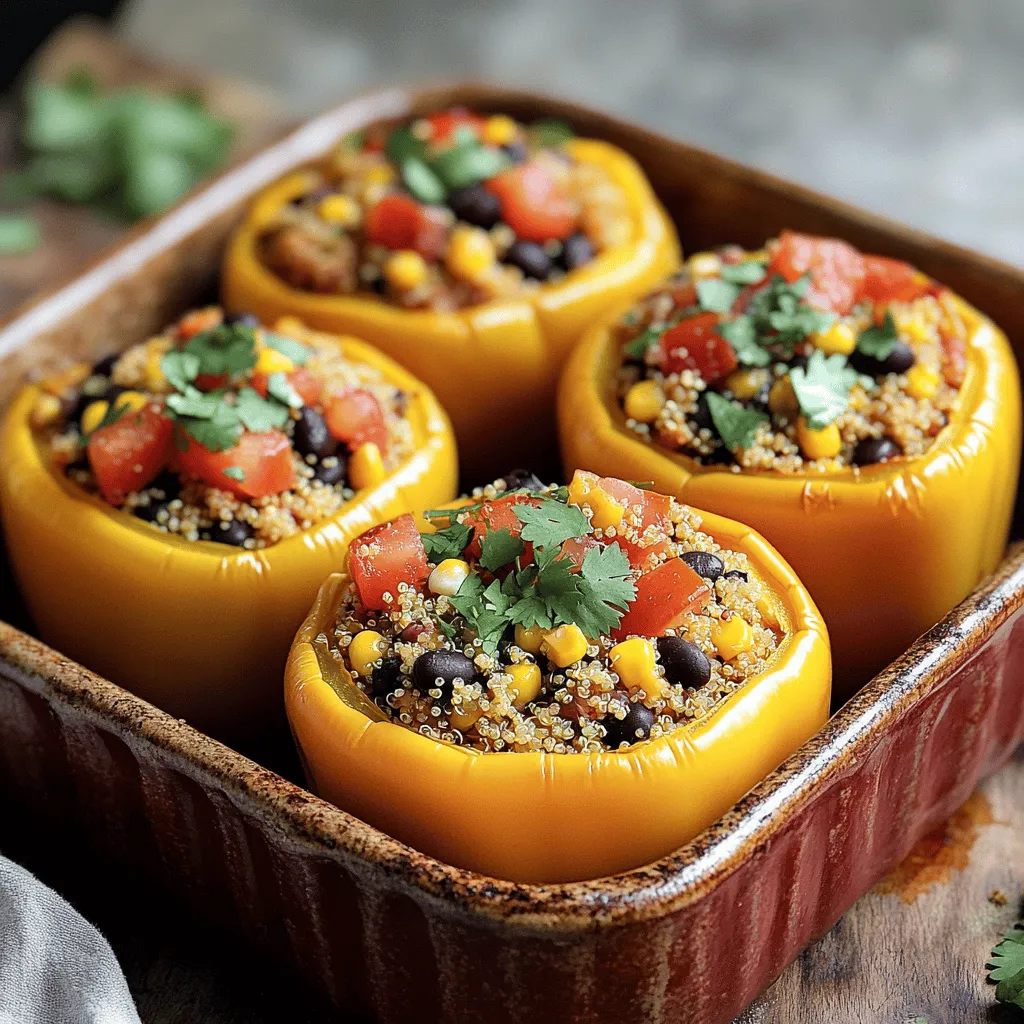
Looking for a healthy and tasty meal? Stuffed bell peppers with quinoa are a perfect choice! These vibrant peppers are
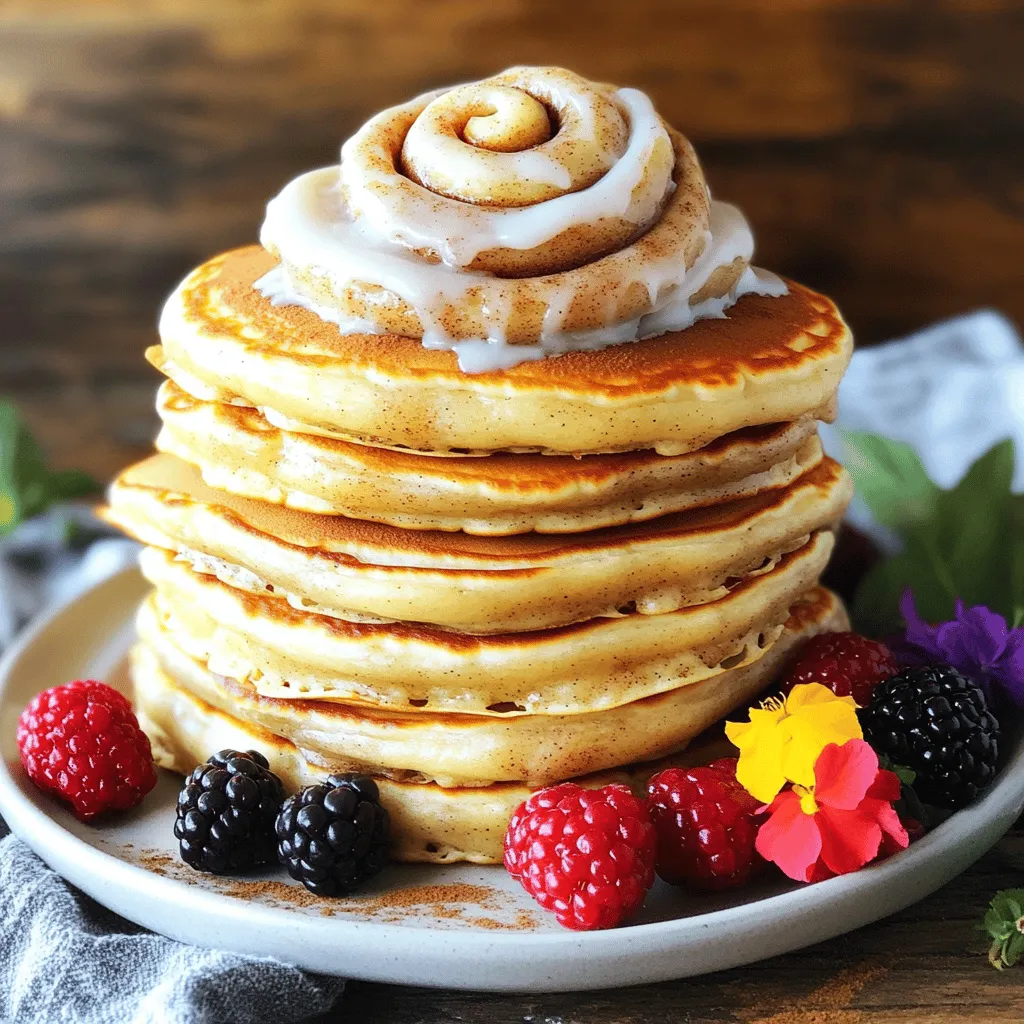
Welcome to the delicious world of Cinnamon Roll Pancakes! If you love the warm, sweet taste of cinnamon rolls but
![This salad shines with its bright colors and fresh flavors. Here are the main ingredients: - 1 cup quinoa, thoroughly rinsed - 2 cups water - 1 cup cherry tomatoes, halved - 1 red bell pepper, diced into bite-sized pieces - 1 yellow bell pepper, diced into bite-sized pieces - 1 cup cucumber, diced - 1 cup corn (fresh or frozen) - 1 cup black beans, drained and rinsed under cold water - 1 ripe avocado, diced - 1/4 cup red onion, finely chopped - 1/4 cup fresh cilantro, chopped for garnish These ingredients not only make the salad colorful but also pack it with nutrients. The dressing ties all the flavors together. You’ll need: - 3 tablespoons freshly squeezed lime juice - 2 tablespoons extra virgin olive oil - Salt and freshly ground black pepper to taste This simple mix adds a zesty kick and enhances the freshness of the veggies. You can customize your salad with these tasty toppings: - Extra avocado slices for creaminess - Crumbled feta cheese for a salty bite - Chopped nuts or seeds for crunch These toppings boost flavor and bring new textures to your salad experience. For the full recipe, check the instructions and enjoy creating this vibrant dish! To cook quinoa, start by rinsing 1 cup of quinoa under cold water. This step removes any bitter taste. Then, place the quinoa in a medium saucepan with 2 cups of water. Bring it to a boil on medium-high heat. Once boiling, reduce the heat to low. Cover the pot and let it simmer for about 15 minutes. When the water is gone, fluff the quinoa with a fork. Let it cool before using it in your salad. While the quinoa cooks, wash and chop the vegetables. Dice 1 red bell pepper and 1 yellow bell pepper into small pieces. Cut 1 cup of cucumber into bite-sized chunks. Halve 1 cup of cherry tomatoes to add color. Chop 1/4 cup of red onion finely for a nice crunch. Lastly, rinse 1 cup of black beans under cold water. This ensures they taste fresh and clean. In a large bowl, mix the cooled quinoa with the prepared vegetables. Add the halved cherry tomatoes, diced peppers, cucumber, and black beans. Then, include 1 cup of corn and 1 ripe avocado, diced. Toss everything gently to mix. Next, make a simple dressing. In a small bowl, whisk together 3 tablespoons of lime juice, 2 tablespoons of olive oil, salt, and pepper. Pour this dressing over the salad. Toss once more to coat all ingredients nicely. For a lovely finish, sprinkle 1/4 cup of chopped cilantro on top. Now, your Rainbow Veggie Quinoa Salad is ready to serve! For the full recipe, check the details above. Enjoy the colors and flavors of this fresh dish! To make your Rainbow Veggie Quinoa Salad shine, focus on your dressing. The lime juice adds bright acidity. The olive oil brings richness. Together, they create a perfect balance. I suggest tasting as you mix. This way, you can adjust the salt and pepper. A tiny pinch of salt can enhance all the flavors. Presentation matters! Use a large, colorful bowl to show off the salad. When serving, layer the ingredients for a rainbow effect. Place the diced avocado on top for a creamy touch. A sprinkle of fresh cilantro adds a nice pop of color. You can also use lime wedges for a fresh touch on the side. Many people skip rinsing quinoa. This can lead to a bitter taste. Always rinse it under cold water before cooking. Another mistake is overcooking the quinoa. It should be fluffy, not mushy. Lastly, don’t toss the salad too hard. Gently fold the ingredients to keep the veggies intact. For those who want the complete guide, check out the Full Recipe for all steps and details. {{image_4}} You can boost this salad with protein. Grilled chicken adds a savory touch. Simply slice it into pieces and mix it in. For a plant-based option, try cubed tofu. Just press it to remove moisture, then sauté until golden. Both choices enhance flavor and make the salad filling. Feel free to switch up the veggies based on the season. In spring, add peas or asparagus for a fresh crunch. Summer calls for zucchini or radishes, while autumn might bring in roasted sweet potatoes or Brussels sprouts. Winter favorites include kale or hearty root vegetables. Adjusting the veggies keeps it exciting. Transform the salad into a grain bowl or wrap for a new experience. For a grain bowl, layer the quinoa, veggies, and protein in a bowl. Top with your favorite dressing. If you choose a wrap, use large lettuce leaves or whole grain tortillas. Just scoop the filling and roll it up. Both options are fun and easy! To keep your Rainbow Veggie Quinoa Salad fresh, store it in an airtight container. This helps prevent the salad from drying out or absorbing odors from the fridge. If you plan to enjoy it later, separate the dressing. Store it in a small jar or container. Add the dressing just before serving to keep everything crisp. When stored properly, the salad lasts about 3 to 5 days in the fridge. Quinoa can stay good for about 4 to 5 days. Most vegetables, like bell peppers and cucumbers, can last around 3 days. Keep in mind that avocados may brown faster, so it's best to eat those pieces within a day or two. You won't need to reheat your Rainbow Veggie Quinoa Salad, as it tastes great cold or at room temperature. If you prefer warm quinoa, warm it gently in the microwave or on the stove, but avoid reheating the whole salad. The fresh veggies and dressing are best served cold. For the complete recipe, check out the [Full Recipe]. Yes, you can make this salad ahead of time. It tastes great cold and stays fresh. Just keep it in the fridge for up to three days. To keep the avocado from browning, add it just before serving. This way, the salad remains colorful and fresh. If you want a substitute for quinoa, try using couscous or bulgur. Both are easy to cook and have a nice texture. You can also use rice or farro for a different taste. Each option will change the flavor but still pair well with the veggies. Absolutely! This salad is perfect for meal prepping. You can pack it in containers for lunch or dinner. Just remember to store the dressing separately. This keeps the salad crisp and fresh until you’re ready to eat. To meet different dietary needs, swap out ingredients. For gluten-free diets, use quinoa or rice. For vegan options, ensure the dressing is plant-based. If you need more protein, add chickpeas or grilled chicken. Customize it to fit your lifestyle. You can find the full recipe for this Rainbow Veggie Quinoa Salad in the recipe section. It gives detailed steps, so you can create this colorful dish with ease. Enjoy making it! This blog post covered how to make a Rainbow Veggie Quinoa Salad. You learned about the main ingredients and dressings, plus optional toppings for taste. We went through each step, from cooking the quinoa to combining everything. I shared tips for great flavor and common mistakes to avoid. You can also try different proteins or veggies. Store any leftovers correctly to keep them fresh. With these insights, I hope you feel ready to create your own tasty salad. Enjoy every bite!](https://recipetorch.com/wp-content/uploads/2025/05/30f087cb-f2f6-459c-be46-617ae9199e60.webp)
Looking for a healthy yet easy dish that pops with color? My Rainbow Veggie Quinoa Salad is just what you

Are you ready to indulge in a warm, gooey treat that’s perfect for sharing? With my S’mores Dip recipe, you
