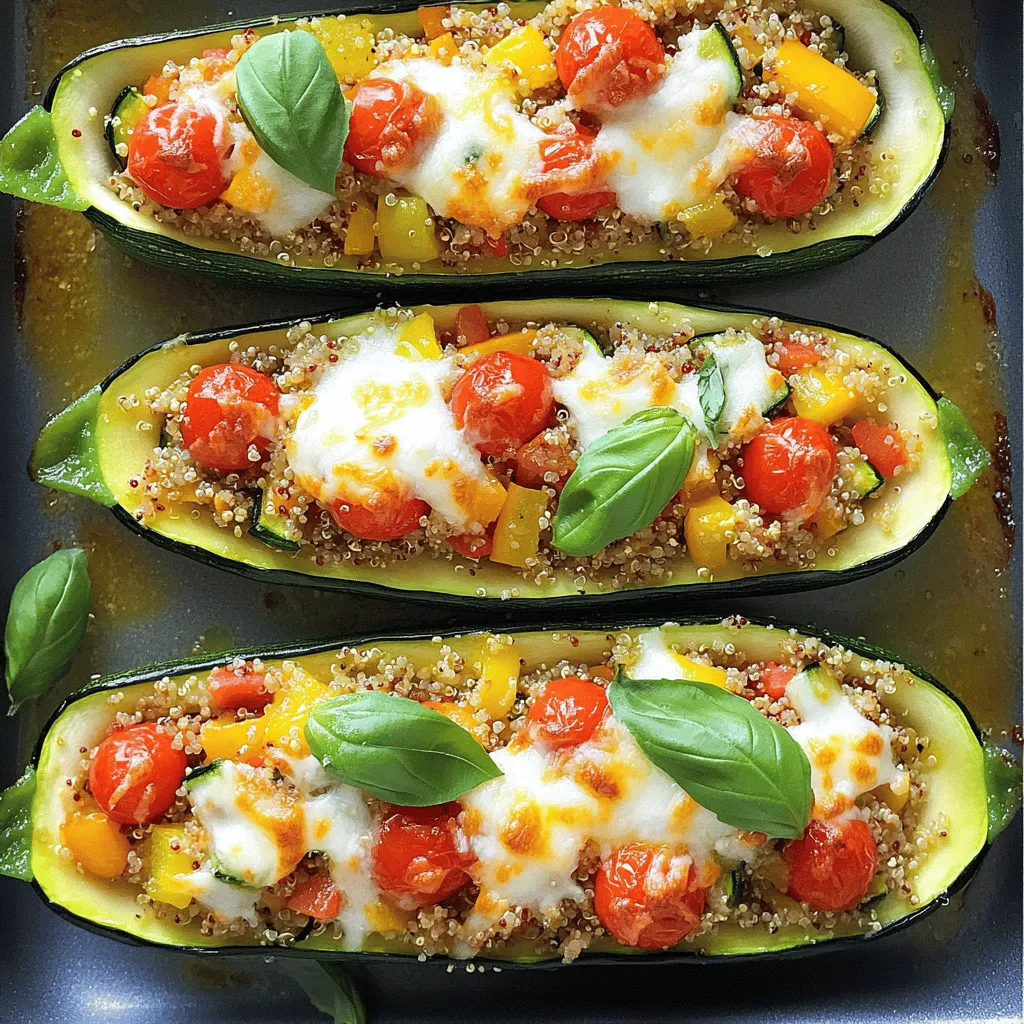
Vegetarian Stuffed Zucchini Flavorful and Easy Recipe
Looking for a delicious way to enjoy the flavors of summer? My Vegetarian Stuffed Zucchini recipe is simple and bursting
Looking for a delicious way to enjoy the flavors of summer? My Vegetarian Stuffed Zucchini recipe is simple and bursting
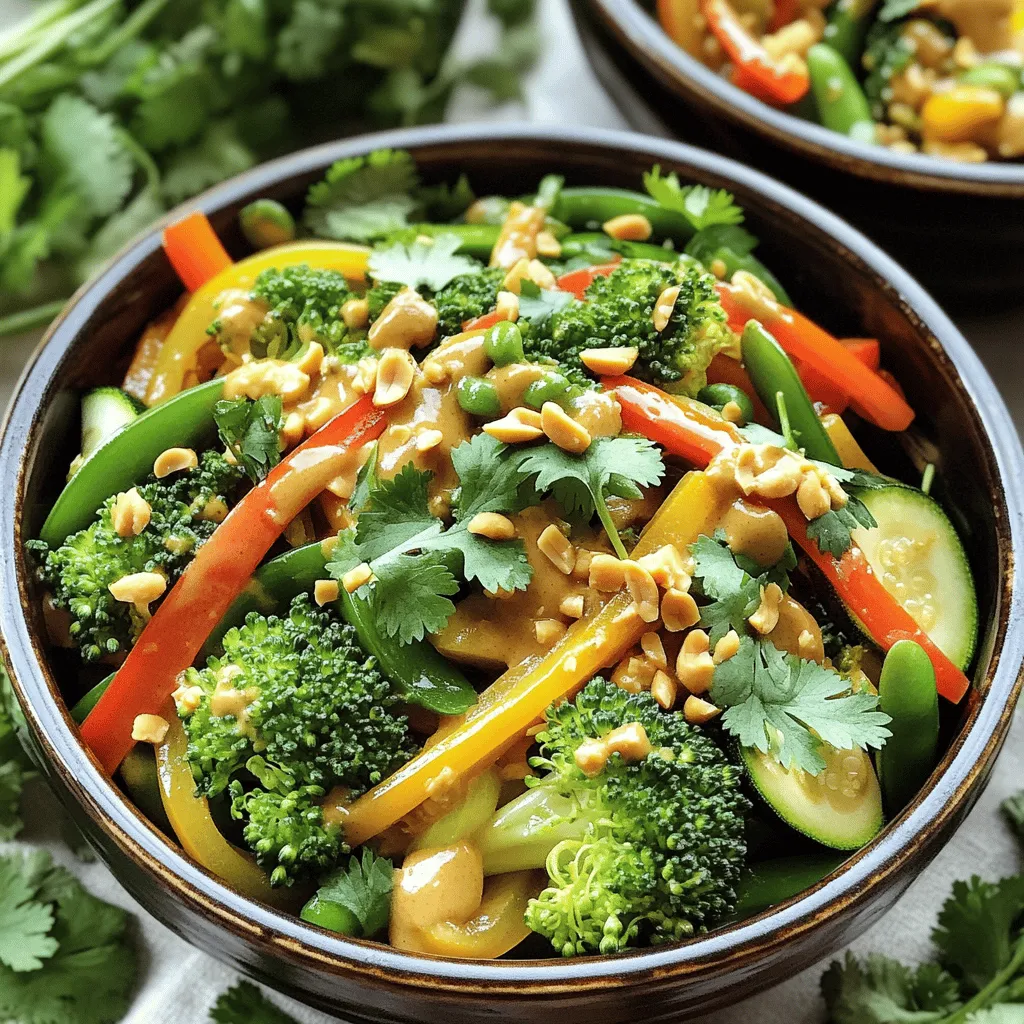
Looking for a quick and tasty meal? This Vegetable Stir-Fry with Peanut Sauce is packed with flavor and nutrition. You’ll
. To boost flavor, use fresh herbs. Fresh basil adds a bright taste. You can also try adding a splash of balsamic vinegar. This gives a nice depth. For a richer taste, roast your tomatoes before adding them. This brings out their sweetness. One mistake is overcooking the garlic. Cook it just until fragrant. If you burn it, the soup can taste bitter. Another common error is not seasoning properly. Always taste your soup before serving. Adjust the salt and pepper as needed. When sautéing onions, keep the heat medium. This helps them cook evenly. Stir them often to avoid burning. Once they are soft, add garlic. Cook for only a minute. This method builds a great base for your soup. For the full recipe, check out the Creamy Tomato Basil Dream Soup. {{image_4}} If you want a dairy-free version, use coconut cream instead of heavy cream. It adds a nice coconut flavor. You can also use almond milk for a lighter soup. Just remember to adjust the seasoning. A little extra salt may help balance the taste. You can boost the nutrition by adding more veggies. Carrots, bell peppers, or spinach work great. Chop them finely and sauté them with the onions. This adds color and health benefits. You can also add zucchini for a lovely texture. For those who love spice, add crushed red pepper flakes. Start with a pinch and taste as you go. You can also blend in some jalapeños for a bolder kick. This twist makes the soup exciting. It pairs well with a slice of crusty bread. Try these variations to make the soup your own. For the full recipe, check the link above! To store your creamy tomato basil soup, first let it cool down. Then, pour it into an airtight container. Keep it in the fridge for up to three days. Label the container with the date. This way, you know when to eat it. You can freeze this soup for later. Use freezer-safe containers or bags. Make sure to leave some space at the top for expansion. The soup can last up to three months in the freezer. When ready to enjoy, move it to the fridge overnight to thaw. When you want to reheat the soup, do it gently. Pour it into a pot and warm it over low heat. Stir often to prevent sticking. If the soup is thick, add a splash of vegetable broth or water to thin it. This keeps it creamy and delicious. For a quick option, use the microwave. Heat it in short bursts, stirring in between. Enjoy your soup warm and fresh! You can find the full recipe to make this delicious soup right here. Yes, you can use fresh tomatoes. Use about 2 pounds of ripe tomatoes. First, score the tomatoes and blanch them in boiling water for a minute. Then, place them in cold water to peel easily. After that, chop them up and add them to your pot. The flavor will be bright and fresh, perfect for this soup. If you want a dairy-free option, use coconut cream. It gives a rich, creamy texture. You can also try cashew cream. Simply blend soaked cashews with water until smooth. This will add a nice flavor without dairy. The soup will last about 3 to 5 days in the fridge. Store it in an airtight container. Make sure it cools down before putting it in the fridge. This way, you keep it fresh for your next meal. To make it vegan, you simply need to swap out the heavy cream for coconut cream or cashew cream. The rest of the ingredients are already vegan-friendly. This way, everyone can enjoy the delicious flavors. Tomato basil soup goes well with many dishes. Here are some great options: - Grilled cheese sandwiches - Garlic bread - Fresh salad with greens - Crispy croutons on top of the soup These sides will make your meal even better! For the full recipe, check out the [Full Recipe]. This blog post covered making creamy tomato basil soup from start to finish. We explored essential ingredients, tools, and step-by-step instructions for a tasty meal. I shared tips to avoid common mistakes and variations for different diets. Now you can cook this soup with confidence. Enjoy your flavorful dish and impress your friends and family!](https://recipetorch.com/wp-content/uploads/2025/05/65aef44b-68c0-465c-a155-94ce3578b6a0.webp)
Looking for a cozy dish that warms both heart and tummy? This Creamy Tomato Basil Soup is your answer! With

Are you ready to impress your taste buds with a quick and easy dinner? This Instant Pot Chicken Tikka Masala
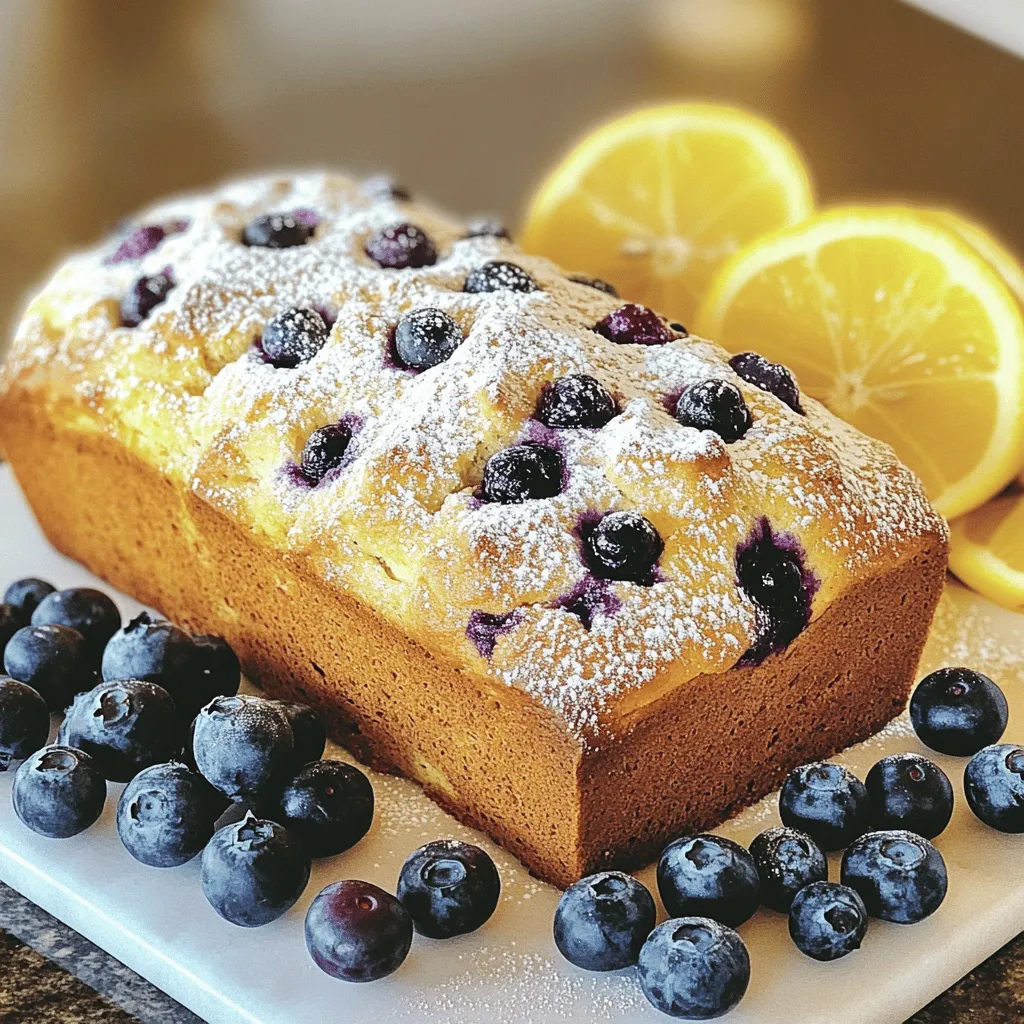
Are you ready to bake something delicious? This Lemon Blueberry Bread is not just full of vibrant flavors; it’s also
![- 1 large head of cauliflower - 1 cup all-purpose flour (or chickpea flour) - 1 cup unsweetened almond milk - 1 teaspoon garlic powder - 1 teaspoon onion powder - 1 teaspoon smoked paprika - 1 cup buffalo sauce - 2 tablespoons extra virgin olive oil - Fresh parsley for garnish The main ingredients for this dish are simple yet effective. You start with one large head of cauliflower. Make sure you cut it into bite-sized florets. This helps with even cooking and crispiness. Next, you need one cup of flour. You can use all-purpose flour or chickpea flour if you want a gluten-free option. Both work well in this recipe. The last main ingredient is one cup of unsweetened almond milk. This gives your batter a nice, creamy texture. For seasoning, garlic powder, onion powder, and smoked paprika are key. The garlic and onion powders add depth. Smoked paprika gives a lovely, smoky flavor. Just one teaspoon of each is enough to make a big impact. Lastly, for the additional ingredients, you will need one cup of buffalo sauce. You can buy this or make your own. The two tablespoons of extra virgin olive oil help the sauce stick to the cauliflower. Don't forget fresh parsley for garnish. It adds a pop of color and freshness to your dish. If you're eager to dive into the full process, check out the Full Recipe for all the steps! - Preheat your oven to 450°F (232°C). - Line a baking sheet with parchment paper. - Cut the cauliflower into bite-sized florets. - In a large bowl, whisk the flour, almond milk, garlic powder, onion powder, and smoked paprika. - Add a pinch of salt and pepper to taste. - Ensure the batter is smooth and lump-free. - Dip each cauliflower floret into the batter. - Make sure each piece is fully coated. - Let any extra batter drip off. - Place the florets on the prepared baking sheet, spaced apart. - Bake for 25-30 minutes. Flip the florets halfway for even crispiness. - In a bowl, mix buffalo sauce and olive oil. - Once the cauliflower is golden and crisp, toss it in the buffalo sauce. - Return the coated wings to the oven for another 10 minutes. - Garnish with chopped parsley and serve with vegan ranch dressing or celery sticks. For the complete process and measurements, check the Full Recipe. To get the best crispiness, space the florets well on the baking sheet. If they touch, they will steam instead of bake. Flipping the cauliflower halfway through is key. This helps both sides crisp up nicely. I usually set a timer to remind me. You can boost the flavor with extra spices. Try adding cayenne for heat or smoked paprika for depth. Let the buffalo sauce sit for a few minutes before tossing. This helps it stick better to the wings. A good coating makes all the difference. These wings taste amazing with vegan ranch dressing. It adds a creamy, cool touch. I also love serving them with celery sticks. They give a crunchy contrast and enhance the snack experience. {{image_4}} You can choose between homemade and store-bought sauces. Homemade sauce gives you full control. You can adjust flavors to your taste. Store-bought sauces save time and still taste great. Try different hot sauces like sriracha or chipotle for a twist. Each sauce brings a unique kick to your wings. If you need a gluten-free option, use chickpea flour instead of all-purpose flour. It adds a nutty flavor and works well. For a low-carb twist, try cauliflower rice instead of florets. This gives you a different texture and keeps it light. Both options let you enjoy this dish without worry. Want to spice things up? Add herbs like thyme or rosemary for a fresh taste. You can also mix in spices like cumin or chili powder for an extra kick. To create a smoky version, add smoked paprika or liquid smoke to your batter. These small changes can make a big difference in flavor. After you make Vegan Cauliflower Buffalo Wings, you will want to store any leftovers correctly. First, let them cool completely. Place them in an airtight container. This helps keep them fresh. You can store them in the fridge for up to three days. If you notice any moisture, use a paper towel to absorb it. This keeps your wings crispy longer. When it's time to enjoy your wings again, reheating them properly is key. The oven is the best way to keep them crispy. Preheat your oven to 400°F (204°C). Place the wings on a baking sheet and heat for about 10-15 minutes. If you use a microwave, the wings may become soggy. If you choose the microwave, heat them in short bursts. Check them often to avoid overcooking. You can also freeze your cauliflower wings for later. If you want to freeze them before baking, coat them in the batter. Then, place the coated wings on a baking sheet and freeze until solid. Once frozen, transfer them to a freezer-safe bag. They can stay frozen for up to three months. If you want to freeze them after baking, let them cool first. Follow the same steps for freezing. To reheat frozen wings, thaw them in the fridge overnight. Then bake them in the oven at 400°F (204°C) for about 15-20 minutes. This ensures they regain their crispy texture. Enjoy your Vegan Cauliflower Buffalo Wings anytime! For the full recipe, check out the [Full Recipe]. Yes, you can prepare some parts ahead. Cut the cauliflower into florets and store them in the fridge. You can also make the batter in advance. Just keep it covered to prevent drying out. When you are ready, coat the florets and bake them fresh. This way, you save time and enjoy a hot snack. The spice level can vary. The buffalo sauce has a kick, but you can adjust it. If you want less heat, mix in some olive oil or choose a milder sauce. For more heat, add extra hot sauce or spices like cayenne pepper. This dish can fit your taste perfectly. There are many fun options! Pair the wings with vegan ranch dressing for dipping. Celery sticks or carrot sticks add a nice crunch. You can also serve them with a fresh salad or sweet potato fries. These sides make the meal even better. Enjoy your delicious snack! You learned how to make delicious Vegan Cauliflower Buffalo Wings. We covered the main ingredients, the easy steps, and tips for perfect wings. You can switch up flavors and store leftovers easily. These wings are fun, tasty, and great for sharing. Enjoy experimenting with different sauces and sides. Your cooking will impress everyone at the table. Try this recipe to experience a new favorite dish!](https://recipetorch.com/wp-content/uploads/2025/05/1fb5161e-4a00-4965-a9ce-6c7e4edd1919.webp)
Are you craving a tasty snack that packs a punch? Look no further! These Vegan Cauliflower Buffalo Wings are your
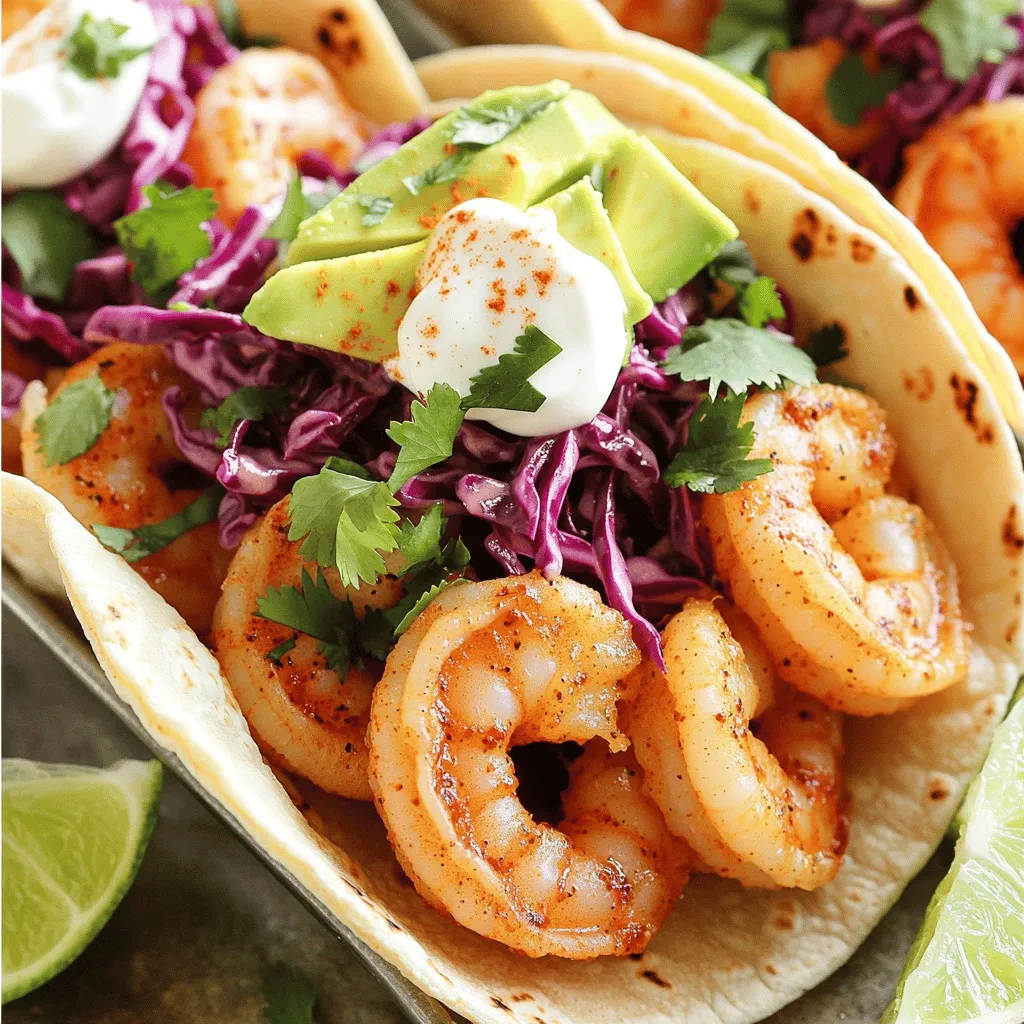
Craving a dish that packs a punch? My Spicy Garlic Shrimp Tacos are just what you need. This easy recipe
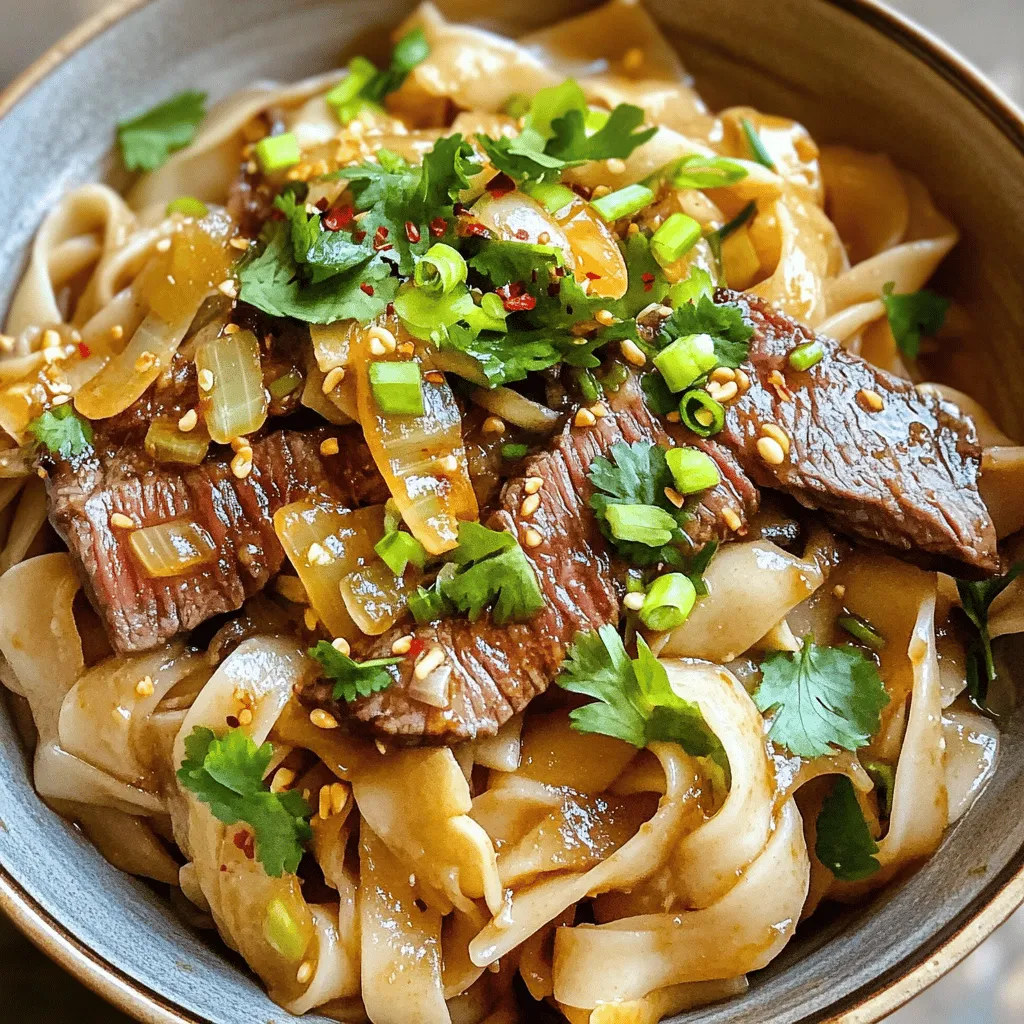
Craving a quick dinner that’s bursting with flavor? You’re in for a treat! Garlic Butter Steak Noodles combine hearty steak,
![This crunchy pecan chicken salad is fresh and packed with flavor. You can serve it as a light lunch or a delicious side dish. The mix of chicken, grapes, and pecans makes it special. It takes only 15 minutes to prep and 30 minutes to chill. You will love how easy it is to make. Here’s what you need: - 2 cups cooked chicken breast, shredded or diced - 1 cup celery, finely chopped - 1/2 cup red grapes, halved - 1/2 cup pecans, roughly chopped - 1/4 cup red onion, finely diced - 1/2 cup Greek yogurt - 2 tablespoons mayonnaise - 1 tablespoon Dijon mustard - 1 tablespoon honey - Salt and freshly ground black pepper to taste - Fresh parsley, chopped (for garnish, optional) To make this salad, you will need: - A large mixing bowl - A small mixing bowl - A whisk - A spatula or wooden spoon - Plastic wrap or a lid for storage - A knife for chopping Having these tools ready will make the process smooth and easy. Enjoy creating this delightful dish! Start with cooked chicken breast. You can use leftover chicken or rotisserie chicken. Shred or dice it into bite-sized pieces. Next, chop the celery finely. This adds a nice crunch. Halve the red grapes for sweetness. Roughly chop the pecans for a nutty flavor. Finally, dice the red onion for a little bite. In a large mixing bowl, combine the chicken, celery, grapes, pecans, and onion. Mix them well so everything is even. Grab a small bowl for the dressing. Whisk the Greek yogurt, mayonnaise, Dijon mustard, and honey together. Add a pinch of salt and some black pepper. Keep whisking until the mix is smooth and creamy. Taste it and adjust the seasoning if needed. This dressing brings it all together with rich flavor. Pour the creamy dressing over the chicken and veggies. Use a spatula or wooden spoon to stir gently. Make sure everything is well coated. Taste the salad again. If you want more flavor, add more salt or pepper. Cover the bowl with plastic wrap or a lid. Refrigerate it for at least 30 minutes. Chilling helps the flavors mix better. Before serving, give the salad a gentle toss. If you like, top with fresh parsley for a nice touch. You can find the full recipe [here]. To make your pecan chicken salad pop, use fresh ingredients. Fresh herbs like parsley add brightness. A squeeze of lemon juice can brighten the dish even more. If you like a bit of heat, try adding a dash of cayenne pepper. Mix in some diced apples for sweetness and crunch. Experimenting with flavors helps you find your perfect blend! One common mistake is overcooking the chicken. Cook it just until it’s done, so it stays juicy. Another mistake is skipping the chilling step. Chilling helps all the flavors mix well. Also, don’t forget to taste your salad before serving. Adjust the salt and pepper to your liking. When serving, use a large bowl to show off the salad. You can use lettuce leaves as a base for a fancy touch. A sprinkle of chopped pecans on top adds texture and looks nice. For color, add a few grape halves or parsley on top. A well-presented dish makes your meal more inviting and fun to eat! {{image_4}} You can switch up the ingredients in pecan chicken salad to suit your taste. For a twist, try using apples instead of grapes. Apples add a crisp texture and a touch of sweetness. You can also use walnuts or almonds if you want a different nut flavor. Instead of Greek yogurt, you might try sour cream for a tangy taste. For a spicier kick, add jalapeños or red pepper flakes. Each of these changes keeps the salad fresh and exciting. If you need a low-carb version, skip the grapes and use diced cucumbers. You can swap regular mayo for a vegan option to make it plant-based. If you're gluten-free, this salad is naturally safe. Just check your mayonnaise and mustard labels to ensure they fit your diet. For those watching calories, use a light yogurt or mayonnaise. These options let everyone enjoy the salad without worry. Serve pecan chicken salad in many fun ways. Try it in a lettuce wrap for a crunchy bite. You can also spoon it into avocado halves for a healthy twist. For a picnic, pack it in jars for easy serving. If you want a fancy touch, serve it on a bed of mixed greens. Pair it with whole-grain crackers for added crunch. These ideas make your meal feel special and fun. For the full recipe, check the list above. I recommend storing the pecan chicken salad in an airtight container. This keeps it fresh and tasty. Make sure it cools down before sealing it. Place it in the fridge right away. It can last up to three days. If you notice any change in color or smell, it’s best to throw it out. To freeze leftovers, first divide the salad into smaller portions. Use freezer-safe bags or containers. Make sure to remove as much air as possible. When you want to eat it, thaw it in the fridge overnight. It’s best to use it within three months for the best taste. You should not reheat chicken salad since it’s best served cold. If you want to enjoy it warm, consider adding it to a baked potato or on a warm tortilla. This way, you can enjoy the flavors without losing quality. Always check the texture and taste before serving. Pecan chicken salad will last for about three to five days in the fridge. Make sure to store it in an airtight container to keep it fresh. The flavors will meld together and taste even better after a day or two. Yes, you can make pecan chicken salad ahead of time. In fact, it tastes great when made a day in advance. Just store it in the fridge until you're ready to serve it. This way, you save time and enjoy a delicious meal. If you need a substitute for Greek yogurt, try sour cream or plain yogurt. You can also use cottage cheese for a different texture. These options maintain creaminess and flavor while keeping the salad light. Pecan chicken salad can be a healthy choice. It has lean protein from chicken and healthy fats from pecans. The fresh veggies add vitamins and fiber. Just watch the amount of mayonnaise you use to keep it lighter. Yes, you can use different nuts in this recipe. Almonds, walnuts, or pistachios work well too. Each nut adds a unique taste and crunch. Feel free to mix it up based on your preferences. For the full recipe, check out the earlier section! This blog post shared the full journey of making pecan chicken salad. We covered essential ingredients, tools, and step-by-step instructions. Tips and tricks helped you avoid mistakes and enhance flavor. We explored various swaps for dietary needs and creative serving ideas. Lastly, we discussed the best ways to store this dish. In conclusion, making and enjoying this salad is easy. You can customize it to suit your taste, diet, and style. I hope you try it and share your thoughts!](https://recipetorch.com/wp-content/uploads/2025/05/88be46f7-a798-4891-b235-0a5e4f6259a7.webp)
Are you ready to make a dish that’s a true crowd-pleaser? Pecan Chicken Salad is fresh, tasty, and easy to

If you crave a meal that’s both tasty and easy to make, Greek Chicken Pita Pockets are perfect for you.
