Vegan Thai Green Curry Flavorful Plant-Based Dish
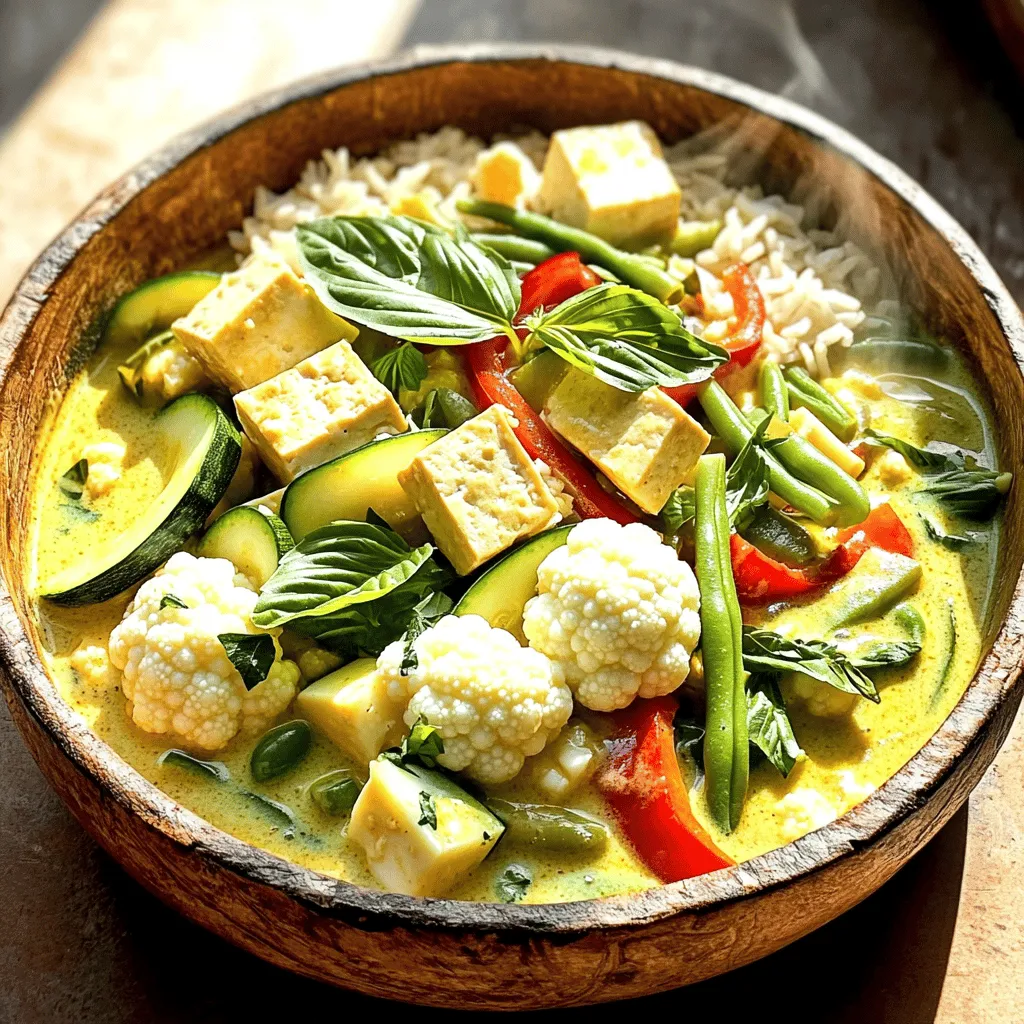
Are you ready to dive into a vibrant, vegan dish that bursts with flavor? My Vegan Thai Green Curry is
Are you ready to dive into a vibrant, vegan dish that bursts with flavor? My Vegan Thai Green Curry is
![- 4 boneless chicken breasts - 1 cup fresh or frozen cherries, pitted - 1/4 cup chicken broth - 2 tablespoons honey - 2 tablespoons balsamic vinegar - 1 teaspoon fresh thyme leaves (or 1/2 teaspoon dried thyme) - Salt and pepper to taste - 2 tablespoons olive oil - 1 tablespoon corn starch (optional, for thickening) To make cherry glazed pork chops, you need fresh ingredients that pack flavor. I love using boneless chicken breasts for this dish. They cook quickly and stay juicy. Fresh or frozen cherries are key for that sweet-tart glaze. Chicken broth adds depth to the sauce. For a touch of sweetness, honey blends well with the tart cherries. Balsamic vinegar gives the glaze a nice tang. Fresh thyme adds a lovely herbal note. Don't forget your seasoning! Salt and pepper enhance every bite. Olive oil helps sear the chicken to perfection. If you like your glaze thick, corn starch will do the trick. You can find the full recipe [here]. To start, season the chicken breasts with salt and pepper. This adds great flavor. You can also try adding garlic powder or paprika for extra taste. Let the chicken sit for a few minutes after seasoning. This helps the flavors soak in better. Next, heat olive oil in a large skillet over medium-high heat. When the oil is hot, place the chicken breasts in the skillet. Sear them for about 5 to 7 minutes on each side. You want them to be golden brown. Make sure the internal temperature reaches 165°F for safe eating. Once done, take the chicken out and set it aside on a plate. In the same skillet, add the pitted cherries, chicken broth, honey, balsamic vinegar, and thyme. Stir everything well. Bring the mix to a simmer over medium heat. Let it cook for about 5 to 8 minutes. This helps the cherries soften and the sauce thicken slightly. If you want a thicker glaze, mix the cornstarch with a tablespoon of water to make a slurry. Stir this into the cherry mix in the skillet. Let it simmer for another 2 to 3 minutes. You’ll know it’s ready when the sauce coats the back of a spoon. Now, return the seared chicken breasts to the skillet. Spoon the cherry glaze over the chicken. Let everything cook together for another 2 to 3 minutes. This step allows the chicken to soak up the cherry flavors. For a great finish, plate the chicken and drizzle extra glaze on top. It makes for a beautiful presentation. Serve with mashed potatoes or green beans for a colorful meal. This dish is sure to impress! For the complete instructions, check the Full Recipe. - Recommended skillet options: Use a heavy skillet. Cast iron or stainless steel works great. These materials heat evenly and give a nice sear. Avoid non-stick pans for this recipe; they don’t create the same flavor. - Temperature control tips: Start with medium-high heat to sear the chicken. This gives a nice brown crust. After adding the glaze, lower the heat to medium to simmer. This keeps the chicken juicy and tender. - Additional spices to consider: Try adding garlic powder or smoked paprika for depth. A pinch of cinnamon can add warmth, too. Experiment with these spices to find your favorite flavor. - Alternative sweeteners to use: If you want less sugar, use maple syrup or agave nectar. Both can replace honey without losing flavor. They also add a unique twist to the glaze. - Creative serving ideas: Serve the cherry-glazed chicken on a bright plate. Pair it with creamy mashed potatoes or fluffy rice. This contrast makes the meal pop visually. - Garnishing options for visual appeal: Add a sprig of fresh thyme or parsley on top. This adds color and makes the dish look fancy. A drizzle of extra glaze around the plate can also enhance the look. {{image_4}} You can switch up the fruit for the glaze. Peaches or apricots work great. You can even try apples or pineapple for a fun twist. If you want to swap chicken, use pork loin or turkey. Both pair well with cherry flavors. You can cook your cherry-glazed dish in different ways. Grilling adds a smoky flavor. It also gives nice grill marks. Pan-searing is fast and keeps the meat juicy. The oven-baking method is great for a hands-off approach. Just set it and let it cook! If you need a gluten-free option, use gluten-free broth. Check the labels on your ingredients. For those wanting low-sugar options, swap honey with a sugar substitute. This will keep the glaze tasty without the extra sugar. You can find the full recipe for cherry-glazed chicken chops [Full Recipe]. To keep your cherry glazed pork chops fresh, store them in an airtight container. Place them in the fridge right after they cool down. This helps keep the flavors locked in. You can keep them for about three to four days. After that, the taste may fade. Always check for any signs of spoilage before eating. Freezing the cherry glazed pork chops is easy. Here’s how you do it: 1. Cool Down: Let the chops cool completely. 2. Wrap: Wrap each chop in plastic wrap or aluminum foil. 3. Seal: Place the wrapped chops in a freezer-safe bag. Squeeze out the air to prevent freezer burn. 4. Label: Write the date on the bag. This helps you track how long they’ve been frozen. You can freeze them for up to three months. To thaw, place them in the fridge overnight before cooking. This keeps them safe and tasty. When reheating your cherry glazed pork chops, keep them moist. Here are some methods: - Microwave: Place the chops on a microwave-safe plate. Cover them with a damp paper towel. Heat on medium power for about 1-2 minutes. Check if they are warm enough. Add more time if needed. - Stovetop: Heat a skillet over low heat. Add a splash of broth or water to keep them juicy. Place the chops in the skillet and cover. Heat for about 5-7 minutes, flipping once. This method helps keep the glaze intact. Using these tips, you can enjoy your cherry glazed pork chops again with great flavor! For the complete recipe, check the Full Recipe section above. You want to create a balanced meal with cherry glazed pork chops. Here are some great side dishes: - Creamy mashed potatoes - Steamed green beans - Roasted sweet potatoes - A fresh garden salad - Garlic bread These sides complement the sweet and tangy flavor of the cherry glaze. Yes, you can make the glaze ahead of time. - Store it in an airtight container. - Keep it in the fridge for up to three days. - Reheat it gently before using. This saves you time when you cook the pork chops. To check if the chicken is done, look for these signs: - The juices run clear when you cut into it. - The meat is no longer pink inside. - The internal temperature should reach 165°F. These checks ensure safe and tasty chicken. Yes, boneless chicken thighs work well too. - They have more fat, which adds flavor. - You may need to adjust cooking times slightly. - Cook until they reach 165°F for safety. Thighs will give a richer taste to the dish. Cherry glaze is quite versatile! Use it in these recipes: - Glazed chicken wings for a party. - Drizzle over grilled salmon for a twist. - Use it on roasted vegetables for extra flavor. - Try it with duck for a gourmet touch. Cherry glaze enhances many dishes with its sweet and tart flavor. For the full recipe, check out the detailed instructions above! In this article, I shared how to make cherry glazed chicken. I covered the main ingredients, step-by-step cooking tips, and variations. You can use this recipe to impress your family and friends. Remember, using the right techniques boosts flavor and presentation. Don’t shy away from trying new fruits or cooking methods. Keep exploring and enjoy the process. With these methods, your meals will shine every time!](https://recipetorch.com/wp-content/uploads/2025/06/5ffaeec7-0425-4ede-9313-0557d228c0cf.webp)
Are you ready to elevate your dinner game? This Cherry Glazed Pork Chops recipe combines sweet cherries with savory chicken
![- 1 lb ground beef - 1 tablespoon olive oil - 1 small onion, finely chopped - 2 cloves garlic, minced - 1 tablespoon chili powder - 1 teaspoon ground cumin - 1 teaspoon smoked paprika - Salt and pepper, to taste - 8 taco shells (choose between corn or flour) - 1 cup shredded lettuce - 1 cup diced fresh tomatoes - 1/2 cup shredded cheese (cheddar or Mexican blend) - 1/4 cup fresh cilantro, chopped - 1 ripe avocado - 1/2 cup sour cream or Greek yogurt - 1 tablespoon fresh lime juice - Salt and pepper, to taste - Sliced jalapeños, additional cheese - Mexican rice or beans as a side dish When I make these beef tacos, I focus on fresh, quality ingredients. The ground beef is the star here. It soaks up all the spices, making every bite flavorful. I always use ripe avocados for the crema. Their creaminess balances the taco's heat perfectly. The spices I choose add depth. Chili powder brings warmth, while smoked paprika gives a hint of smokiness. Don't skip the lime juice in the crema. It brightens the flavors so well. Feel free to customize your tacos! Add sliced jalapeños if you like heat. Extra cheese never hurts, either. Serving these with Mexican rice or beans adds heartiness to your meal. For the full recipe, check out the complete instructions. Start by heating olive oil in a large skillet over medium heat. Add the finely chopped onion and minced garlic. Sauté them for about 3-4 minutes. You want the onion to turn soft and fragrant. Next, add 1 lb of ground beef to the skillet. Use a spatula to break it apart as it cooks. Stir occasionally until the beef is browned. Once browned, drain any excess fat from the skillet. Now, let’s add some flavor. Sprinkle in 1 tablespoon of chili powder, 1 teaspoon of ground cumin, and 1 teaspoon of smoked paprika. Don’t forget to add salt and pepper to taste. Stir well to mix everything. Let it cook for another 2-3 minutes. This helps the spices blend into the beef. In a blender or a bowl, combine 1 ripe avocado, 1/2 cup of sour cream, and 1 tablespoon of fresh lime juice. Add a pinch of salt and pepper. Blend until the mixture is smooth and creamy. Taste it and adjust the seasoning if needed. This creamy topping will make your tacos extra special. Next, warm your taco shells. You can use the oven or microwave to do this. Once heated, fill each taco shell with a generous portion of the seasoned beef. Top it off with shredded lettuce, diced tomatoes, and shredded cheese. Finally, add a dollop of your avocado crema on top. Plate your delicious tacos right away. Serve with extra avocado crema on the side for dipping. For a complete meal, consider adding sides like Mexican rice or beans. Enjoy your tasty beef tacos with friends and family! To make your beef tasty, start with good seasoning. Use chili powder, cumin, and smoked paprika. These spices add depth and warmth. Mix them well into your cooked beef. Avoid overcooking the beef. Cook it until it is just brown. This keeps it juicy and tender. If you cook too long, it will lose flavor and texture. Choose a ripe avocado for the best crema. A ripe avocado feels slightly soft when you press it. If it’s too hard, wait a few days. Blend it with sour cream or Greek yogurt. This adds creaminess and tang. For a twist, try adding garlic or cilantro. These flavors make the crema unique and fresh. When building your tacos, spread toppings evenly. Start with beef, then add lettuce and tomatoes. This helps each bite have balanced flavor. To keep taco shells crispy, warm them just before serving. Avoid filling them too early, as moisture makes them soggy. Enjoy your tacos fresh and full of flavor! For the full recipe, check out [Full Recipe]. {{image_4}} Want to kick up the heat? You can add jalapeños or hot sauce to your tacos. Slice fresh jalapeños and scatter them on top. For hot sauce, drizzle your favorite brand over the finished tacos. You can also use spicy seasoning. Try adding cayenne pepper or a spicy taco blend to the beef while it cooks. This will give your dish a nice, fiery flair. If you prefer no meat, there are great substitutes. Swap the beef for black beans, lentils, or crumbled tofu. Each option offers a different taste and texture. For a vegan avocado crema, replace sour cream with cashew cream or silken tofu. Blend it with lime juice and seasoning for a creamy, zesty finish. You can choose between corn or flour shells. Corn shells are crisp and have a rich flavor, while flour shells are soft and chewy. Both work great! If you want to try something new, make homemade taco shells. Just take flour tortillas and fry them in hot oil until crispy. This adds an extra touch to your beef tacos with avocado crema. For the full recipe, check out the details above! To keep your leftover beef fresh, place it in an airtight container. Make sure it cools down first. Store it in the fridge for up to three days. When you are ready to eat, reheat it in a skillet over medium heat. Stir often until it's hot. You can also use a microwave, but be careful not to overcook it. To store avocado crema, transfer it to a small bowl. Cover it tightly with plastic wrap. Press the wrap directly onto the crema to limit air exposure. This helps prevent browning. You can keep it in the fridge for 1-2 days. If it does brown, you can scrape off the top layer to find the green goodness below. Yes, you can freeze beef tacos. However, I recommend freezing the beef separately from the taco shells. Place the beef in a freezer-safe bag, squeezing out air. It can last up to three months in the freezer. To thaw, move it to the fridge overnight. Reheat it on the stove or in the microwave. For taco shells, freeze them in their original packaging for best results. Heat them in the oven before serving. Enjoy your delicious beef tacos with avocado crema anytime! Making beef tacos with avocado crema takes about 30 minutes. You spend 15 minutes prepping. Cooking takes the other 15 minutes. This is fast for a tasty meal. Yes, you can use other meats! Chicken or turkey work great. If you prefer, try plant-based options like lentils or tofu. Each choice adds its own unique taste. You can add many tasty toppings! Consider sliced jalapeños for heat. Fresh lime juice brightens up the flavor too. You might also like adding avocado slices or extra cheese. Marinades can give your meat a new twist. Try different spices for fun flavors. Beef tacos are simple and fun to make. We covered the main ingredients, seasoning tips, and how to prepare avocado crema. You can personalize your tacos with various toppings and sides. Don't forget how to keep leftovers fresh. Enjoy getting creative with flavors and textures. Whether spicy or mild, everyone will love these tacos. With practice, you'll master this dish for any occasion. Now, it's time for you to make your own delicious tacos!](https://recipetorch.com/wp-content/uploads/2025/06/1a7410ea-c7c9-48f3-9a3e-9cddb48a20cd.webp)
Are you ready for a taco night that will impress everyone? My Beef Tacos with Avocado Crema are both tasty
![- 1 large head of cauliflower - 3 tablespoons olive oil - 1 teaspoon garlic powder - 1 teaspoon smoked paprika - 1/2 teaspoon ground cumin - 1/2 teaspoon salt - 1/4 teaspoon black pepper - 1/2 cup tahini - 2 tablespoons fresh lemon juice - 2 tablespoons water (to adjust tahini consistency) - Fresh parsley, finely chopped - Pomegranate seeds (optional) Roasted cauliflower steaks are a joy to prepare. First, pick a large head of cauliflower. This ensures thick, juicy steaks. Next, you'll want to gather a few simple ingredients to pack in flavor. Olive oil, garlic powder, and smoked paprika are your best friends here. The spices add depth and warmth. Ground cumin, salt, and black pepper help balance the taste. For a creamy finish, you’ll create a tahini sauce. This sauce has a rich, nutty flavor. Combine tahini with fresh lemon juice for brightness. Add some water to make it smooth and easy to drizzle. When garnishing, fresh parsley adds color and freshness. Pomegranate seeds give a pop of sweetness. They also make the dish look stunning. Trust me, these simple components come together to create a savory and flavorful dish that you'll want to share with everyone. For the complete details, check the Full Recipe. - Preheat your oven to 425°F (220°C). - Line a baking sheet with parchment paper to prevent sticking. - Remove the outer leaves from the cauliflower head. - Trim the stem so the cauliflower sits flat. - Slice the cauliflower into 1-inch thick steaks. - You should get 2-3 good-sized steaks from one head. - In a small bowl, whisk together: - 3 tablespoons olive oil - 1 teaspoon garlic powder - 1 teaspoon smoked paprika - 1/2 teaspoon ground cumin - 1/2 teaspoon salt - 1/4 teaspoon black pepper - Mix until fully combined. This will give the cauliflower great flavor. - Use a brush or spoon to coat both sides of the cauliflower steaks with the oil mixture. - Arrange the steaks on the lined baking sheet. - Roast the cauliflower for 20-25 minutes. - After 10-12 minutes, flip the steaks to ensure even cooking. - They should be golden brown and tender when done. - In a separate bowl, combine: - 1/2 cup tahini - 2 tablespoons fresh lemon juice - Gradually stir in 2 tablespoons water until smooth. - Add more water for your desired consistency. - Once the cauliflower steaks are roasted, drizzle the tahini sauce over them. - Garnish with freshly chopped parsley and pomegranate seeds for color. - This dish looks and tastes amazing! For the complete recipe, check out the [Full Recipe]. To get the best roasted cauliflower steaks, timing is key. Keep an eye on them as they cook. Aim for 20-25 minutes in the oven. They should be golden brown when done. To check for doneness, poke them with a fork. If they’re tender, they’re ready. For a crispy texture, flip the steaks halfway through cooking. This helps them cook evenly and crisp up nicely. You can change the flavor of your cauliflower steaks by swapping out the spices. Try curry powder for a warm, earthy taste. For an Italian twist, use dried oregano and basil. You can also experiment with different sauces. Instead of tahini, try a yogurt sauce or a spicy salsa. Each option gives a new flavor to enjoy. Plating matters when serving roasted cauliflower steaks. Arrange them artfully on a large platter. Drizzle extra tahini sauce over the top for a nice touch. For a pop of color, use fresh parsley and pomegranate seeds. This not only makes your dish look great but also adds flavor and crunch. Get creative! {{image_4}} Grilling adds a smoky flavor to your cauliflower. Start by preheating your grill to medium-high. Brush the cauliflower steaks with olive oil and season as you like. Grill for about 5-7 minutes per side. You want nice grill marks and a tender texture. This method gives your dish a whole new taste. You can add your favorite spices for extra flavor. Transform your roasted cauliflower into tacos for a fun meal. Slice the grilled or roasted cauliflower into smaller pieces. Warm corn or flour tortillas. Fill each tortilla with the cauliflower and any other toppings you enjoy. Try adding fresh salsa, avocado, or a drizzle of tahini sauce. This handheld meal is tasty and perfect for lunch or dinner. Making this dish vegan and gluten-free is easy. The main ingredients are already suitable for both diets. Use gluten-free tortillas for tacos. Check the tahini to ensure it has no added ingredients that may contain gluten. You can also swap out spices to cater to personal tastes. This way, everyone can enjoy the dish. To keep your roasted cauliflower steaks fresh, store them in an airtight container. They stay good in the fridge for up to 4 days. Make sure they cool to room temperature first. For longer storage, you can freeze them. Wrap each steak tightly in plastic wrap, then place them in a freezer bag. They can last up to 3 months in the freezer. When you reheat cauliflower steaks, you want to keep them crispy. Use an oven or an air fryer for the best results. Preheat your oven to 350°F (175°C). Place the steaks on a baking sheet and heat for about 10 minutes. If using an air fryer, set it to 350°F and heat for 5 to 7 minutes. Avoid using a microwave, as it can make them soggy. Enjoy your flavorful dish again with every bite! Roasted cauliflower steaks last about 3 to 5 days in the fridge. Store them in an airtight container. This keeps them fresh and tasty. If you want them to last longer, consider freezing them. Just be aware that freezing may change their texture. Yes, you can make the tahini sauce ahead of time. Store it in the fridge for up to a week. Just remember to stir it well before using it. It may thicken in the fridge, so add a bit of water if needed. This makes it easy to prepare your dish quickly. Cauliflower is low in calories and high in nutrients. It is rich in vitamins C and K. It also has fiber, which helps with digestion. Cauliflower is a good source of antioxidants, which protect your cells. Eating cauliflower may support heart health and weight loss. When picking cauliflower, look for a head that is firm and heavy. The florets should be tightly packed and free from brown spots. Green leaves should be fresh and vibrant. A good cauliflower head will have a creamy white color. Avoid any heads with soft spots or dark patches. Absolutely! You can use other vegetables like broccoli or eggplant. Just cut them into thick slices. Adjust the cooking time as needed. Some veggies may need less time in the oven. Experiment with flavors to find your favorite combination. You learned how to make roasted cauliflower steaks with tahini sauce. Each step, from prepping to serving, builds flavor and texture. I shared tips to perfect your roast and offered variations for unique tastes. These steaks can fit various diets and are perfect for meal prep. Enjoy your delicious and healthy dish! Keep experimenting with spices and presentation to make it your own. Your kitchen can be a creative space. Keep trying new ideas, and your meals will always shine!](https://recipetorch.com/wp-content/uploads/2025/06/a57f6b9e-a2f7-4d61-9907-81d819f3a90d.webp)
If you’re ready to spice up your plant-based meals, try roasted cauliflower steaks! This savory dish is not only tasty,

Craving a delicious meal that’s simple and quick? You’re in the right place! This Lemon Herb Grilled Chicken recipe is
![- 12 ounces of spaghetti or linguine - 2 ripe avocados - 1 clove garlic - 1 tablespoon lemon juice - 1/4 cup fresh basil leaves - 1/4 cup grated Parmesan cheese or nutritional yeast - Salt and black pepper - Cherry tomatoes - Red pepper flakes When making creamy avocado pasta, start with fresh and ripe ingredients. The main players here are the avocados, which give the dish its creamy texture. Choose avocados that are slightly soft to the touch. This means they are ripe and ready to blend. You can use spaghetti or linguine for the base of this dish. Both types of pasta work well and hold the sauce nicely. Cook them al dente for the best texture. The optional ingredients add depth to your dish. Fresh basil brings a burst of flavor, while Parmesan or nutritional yeast offers a cheesy taste. Season with salt and black pepper to enhance all the flavors. For garnishing, halved cherry tomatoes add color and freshness. If you like some heat, sprinkle red pepper flakes on top. You can also find the full recipe to guide you through the process. Enjoy crafting this simple and delicious meal! - Start by boiling salted water in a large pot. - Add spaghetti or linguine to the boiling water. - Cook until al dente, about 8 to 10 minutes. - Once done, drain the pasta but keep about 1 cup of the pasta water for later. - In a blender, combine the ripe avocados and minced garlic. - Add freshly squeezed lemon juice for a zesty touch. - Toss in fresh basil leaves and grated Parmesan cheese. - Season with salt and black pepper, then blend until smooth. - If the sauce is too thick, slowly add some reserved pasta water to reach your preferred texture. - Place the hot pasta in a large mixing bowl. - Pour the creamy avocado sauce over the pasta. - Use tongs or a spatula to mix until every strand is coated. - If the sauce seems too thick, add more reserved pasta water a little at a time until it clings nicely to the pasta. This simple and quick process gives you a delicious creamy avocado pasta. For the complete recipe, check the [Full Recipe]. To make your creamy avocado pasta even tastier, try adding fresh herbs. Basil is a classic choice, but you can also use parsley or cilantro. These herbs add a bright taste and make your dish feel fresh. You can also balance the creaminess of the avocado sauce. A squeeze of lemon juice adds a nice tang. It helps cut through the richness and brightens the overall flavor. Plating your dish well makes it more appealing. Serve the pasta in deep bowls or on shallow plates. This way, the vibrant green sauce stands out. For a pop of color, add halved cherry tomatoes on top. They add freshness and look great. You can also sprinkle some extra grated cheese or nutritional yeast for fun. A lime wedge adds a zesty touch, too. You don’t need fancy tools for this recipe. A large pot for boiling pasta and a mixing bowl are enough. For the sauce, a blender or food processor works best. Make sure it blends the avocado to a smooth texture. If you don’t have either, a fork can work. Just mash the avocado and mix well. These tips will help you create a dish that looks great and tastes even better. For the full recipe, check out the details above! {{image_4}} For a completely plant-based version, simply swap out a few ingredients. Use nutritional yeast instead of cheese. You can also add some silken tofu for extra creaminess. A squeeze of lime juice will brighten the dish. Here are the main ingredients for your vegan creamy avocado pasta: - 12 ounces spaghetti or linguine - 2 ripe avocados - 1 clove garlic - 1 tablespoon lemon juice - 1/4 cup fresh basil leaves - 1/4 cup nutritional yeast - Salt and black pepper to taste - 2 tablespoons extra virgin olive oil This vegan twist keeps all the flavor while being kind to our planet. Adding protein can make this meal heartier. Grilled chicken or shrimp works great. Just cook them separately, then toss them with the pasta. Here are some seasonal veggies to add for extra color and nutrients: - Spinach or kale for greens - Peas for sweetness - Roasted bell peppers for a smoky touch These additions not only enhance flavor but also increase the nutritional value of your meal. Want to spice things up? Add some fresh chopped jalapeños or crushed red pepper flakes. This brings a nice heat to your creamy pasta. For a unique twist, try adding citrus zest or chopped nuts. Here are some suggestions: - Zest of one lime for a zesty kick - Chopped walnuts for crunch - Toasted pine nuts for richness These flavors elevate your dish and make it even more enjoyable. For the full recipe, check out the detailed instructions to guide you in making this delightful meal. Store leftovers in an airtight container. Glass containers work best for keeping food fresh. You can also use plastic containers if glass is not available. Do not let the pasta sit out too long. It’s best to eat it within three days for optimal taste. Reheat in a pan over low heat. This helps keep the pasta creamy. You can add a splash of water to loosen the sauce. Avoid using a microwave, as it can make the pasta tough. Stir often to prevent any parts from burning. To freeze the avocado sauce, place it in a freezer-safe bag. Remove as much air as possible before sealing. This keeps the sauce fresh for up to three months. When ready to use, thaw it in the fridge overnight. To maintain flavor and texture, add fresh herbs after thawing. You can skip cheese in this dish. Use nutritional yeast for a cheesy flavor. Blend it with the avocados for richness. You can also add mashed cashews or tahini. Both options add creaminess without dairy. Yes, you can make the avocado sauce early. Store it in an airtight container. Add a thin layer of olive oil on top to slow browning. Keep it in the fridge for up to two days. Pair creamy avocado pasta with a fresh salad. A light arugula or spinach salad works great. For wine, try a crisp white like Sauvignon Blanc. It complements the creamy dish well. Avocado sauce turns brown due to oxidation. To prevent this, add lemon juice right away. Keep the sauce covered and chill it quickly. Also, using a vacuum-sealed container can help keep it green longer. Creamy avocado pasta is simple and delicious. You need just a few ingredients, like spaghetti and ripe avocados. Blend them with garlic, lemon juice, and maybe Parmesan for extra flavor. Don’t forget to add your favorite herbs or veggies. In conclusion, this dish is perfect for many occasions. With easy steps and fun variations, you can impress any guest. Enjoy creating your own unique version, and happy cooking!](https://recipetorch.com/wp-content/uploads/2025/06/7ee2493e-19de-4903-bfd4-b0027b3c0aaa.webp)
Looking for a quick and tasty meal? Creamy Avocado Pasta is your answer! This simple dish combines ripe avocados with
![- 1 lb (450g) boneless, skinless chicken thighs, thinly sliced - 2 cups fresh Thai basil leaves, packed - 1 large red bell pepper, sliced into thin strips Chicken thighs are juicy and tender. They absorb flavors well and stay moist during cooking. Thai basil adds a unique, fragrant taste. It has a slight peppery flavor that elevates the dish. The red bell pepper gives a sweet crunch and bright color. - 2 tablespoons soy sauce - 1 tablespoon oyster sauce - 1 tablespoon fish sauce Soy sauce brings saltiness and depth to the dish. Oyster sauce adds a rich, umami flavor. Fish sauce gives a salty, savory kick, making the dish more complex and flavorful. - Additional protein like tofu or shrimp - Extra vegetables like broccoli or snap peas - Spice variations with more chilies or hot sauce You can add different proteins for variety. Tofu is a great vegetarian option. Shrimp cooks quickly and pairs well with the sauce. Adding extra vegetables boosts nutrition. Broccoli or snap peas add color and texture. If you love heat, try extra chilies or hot sauce. For the full recipe, check out the Spicy Thai Basil Chicken details. - Slicing the Chicken: Start by slicing 1 pound of boneless chicken thighs into thin pieces. Thin slices cook faster and soak up more flavor. - Mince Garlic and Chilies: Take 4 cloves of garlic and finely mince them. Slice 2-3 red Thai chilies. You can adjust the number based on your spice preference. - Prep Vegetables: Slice 1 large red bell pepper into thin strips. This adds color and crunch to your dish. - Heating the Oil: In a large skillet or wok, heat 2 tablespoons of vegetable oil over medium-high heat. Wait until the oil shimmers before adding other ingredients. - Stir-frying Ingredients: Add the minced garlic and sliced chilies to the hot oil. Stir them for about 30 seconds until they become fragrant. Then, increase the heat to high and add the sliced chicken. Stir-fry for 5-7 minutes until the chicken is browned and fully cooked. - Combining Sauces: Add the sliced red bell pepper to the skillet. Stir-fry for another 2-3 minutes. In a small bowl, mix 2 tablespoons soy sauce, 1 tablespoon oyster sauce, 1 tablespoon fish sauce, 1 teaspoon sugar, and 1/2 cup chicken broth. Pour this sauce over the chicken and vegetables, stirring well. - Adjusting Seasoning: Taste the dish and adjust the seasoning if needed. You can add more soy sauce or sugar to balance flavors. - Wilting Thai Basil: Remove the skillet from heat. Gently fold in 2 cups of fresh Thai basil leaves. The residual heat will wilt them perfectly. - Serving Suggestions: Serve your Spicy Thai Basil Chicken over cooked jasmine rice. For a special touch, top it with fresh basil leaves. Enjoy this flavor-packed meal! For a complete guide, check out the Full Recipe. - Balancing Spice Levels: Adjust the number of Thai chilies. More chilies mean more heat. Start with one and taste as you go. If you want less spice, remove the seeds. - Importance of Fresh Ingredients: Fresh Thai basil makes a big difference. It adds a bright and peppery taste. Use it right before serving to keep its flavor strong. - Alternative Seasoning Tips: If you don’t have fish sauce, try soy sauce or a mix of soy and vinegar. For a different twist, add a splash of lime juice. - Best Pan for Stir-frying: A wok is ideal for stir-frying. It heats evenly and allows for quick cooking. A large skillet works too if you don’t have a wok. - High Heat Cooking Methods: Use high heat to cook the chicken quickly. This helps keep it tender and juicy. Make sure your pan is hot before adding ingredients. - Avoiding Overcooked Vegetables: Add vegetables later in the cooking process. This keeps them crisp and colorful. Stir-fry for just a couple of minutes to retain their crunch. - Prep Tips for Quick Cooking: Slice the chicken and veggies ahead of time. This makes cooking fast and easy. Keep everything organized in bowls for quick access. - Time-saving Hacks: Use pre-minced garlic or store-bought sauces if you’re short on time. These can cut down the prep time without losing flavor. - Staggering Cooking Steps: Cook the chicken first, then add the bell peppers. This gives each ingredient time to shine. Lastly, add the basil to finish the dish beautifully. For the complete recipe, check out the [Full Recipe]. {{image_4}} You can switch up the protein in Spicy Thai Basil Chicken to suit your taste. - Using Ground Chicken: Ground chicken works well for this dish. It cooks quickly and absorbs flavors nicely. - Vegetarian Substitutes: For a veggie option, use tofu or tempeh. These ingredients soak up the sauce and keep the dish hearty. - Seafood Variations: Shrimp or scallops can make great substitutes. They cook fast and add a nice twist to the dish. You can easily adjust the spice level to match your preference. - Mild Version for Sensitive Palates: If you like it mild, leave out the chilies. Use bell peppers for crunch and flavor. - Adding More Chilies for Extra Heat: For a fiery kick, add more red Thai chilies. You can also use chili flakes for a different flavor. - Spice Blends to Customize Flavor: Try adding a pinch of curry powder or a dash of cayenne. This can elevate the taste and add depth. Get creative with how you serve this dish. - Rice Alternatives: Instead of jasmine rice, try brown rice or quinoa. They add a nutty flavor and more fiber. - Wraps and Bowls: Serve the chicken in lettuce wraps or bowls. This makes for a fun and interactive meal. - Incorporating into Other Dishes: You can add the chicken to fried rice or noodles. This makes for a quick meal that’s packed with flavor. For the complete recipe, refer to the [Full Recipe]. For best quality, store your Spicy Thai Basil Chicken in an airtight container. This keeps it fresh and prevents odors from other foods. Place it in the fridge within two hours of cooking. You can enjoy the leftovers for up to three days. If you want to save leftovers for later, freezing is a great choice. First, let the dish cool completely. Then, scoop it into freezer-safe bags or containers. Try to remove as much air as possible before sealing. The chicken can stay good in the freezer for about three months. To thaw, move the container to the fridge overnight. This method keeps the chicken moist. If you're in a hurry, you can use the microwave's defrost setting. When you're ready to eat, there are a few ways to reheat your chicken. The best way is to use a skillet. Heat it over medium heat, then add the chicken. Stir slowly to keep it from sticking. You can also add a splash of water or broth to keep it juicy. If you're in a rush, the microwave works too. Place the chicken in a bowl, cover it with a lid, and heat for 1-2 minutes. Check to make sure it’s hot all the way through. These methods help maintain the flavor and texture of your Spicy Thai Basil Chicken. For the full recipe, check the earlier section! Can I use chicken breasts instead of thighs? Yes, you can use chicken breasts. They will cook faster and have less fat. Just slice them thinly for even cooking. How can I make this dish less spicy? To reduce the heat, use fewer Thai chilies. You can also remove the seeds. Adding more bell pepper can help balance the spice. What’s the best rice to serve with it? Jasmine rice is ideal. Its fluffy texture pairs well with the flavors of Spicy Thai Basil Chicken. Can I prepare this dish ahead of time? Yes, you can prep the ingredients and store them in the fridge. Cook it fresh for the best taste. What other dishes pair well with Spicy Thai Basil Chicken? Serve it with spring rolls or Thai cucumber salad for a full meal. Coconut soup also makes a great side. How to adjust the recipe for more servings? Simply multiply the ingredients by the number of servings you need. Keep the cooking time similar, but check for doneness. Where to find fresh Thai basil? Look for fresh Thai basil at Asian grocery stores or farmers' markets. You can also grow it at home. What can I substitute for fish sauce? Soy sauce or tamari can work as a substitute. For a more authentic taste, use a little extra salt. Is oyster sauce necessary for this recipe? While oyster sauce adds depth, you can skip it if needed. Increase soy sauce for flavor if you do. For a complete guide, check out the Full Recipe. This blog post covers how to make Spicy Thai Basil Chicken. We discussed ingredients like chicken thighs, Thai basil, sauces, and optional add-ons. You learned the step-by-step process, including prep and cooking tips. We shared ways to adjust heat and create variations with proteins and servings. Lastly, we covered storage methods to keep your leftovers fresh. Cooking should be fun and rewarding. With these steps, you can enjoy a delicious dish tailored to your taste. Happy cooking!](https://recipetorch.com/wp-content/uploads/2025/06/20ab1adb-22f5-4b81-bb27-9f970e0eade7.webp)
Get ready to spice up your dinner with my flavor-packed Spicy Thai Basil Chicken! Using juicy chicken thighs and aromatic

Are you ready to elevate your salad game with a fresh twist? This Walnut and Blue Cheese Salad combines earthy

If you’re craving a creamy, savory dish, you’re in for a treat! My Saffron Risotto with Peas is not just
![To make a great egg drop soup, you need a few key items. Here’s what you’ll need: - 4 cups vegetable or chicken broth - 2 large eggs - 1 tablespoon cornstarch - 2 tablespoons water - 2 green onions, finely chopped - 1 cup fresh baby spinach - 1 teaspoon freshly grated ginger - 1 clove garlic, minced - 1 teaspoon sesame oil - Salt and white pepper, to taste - 1 teaspoon chili oil (optional, for garnish) These ingredients create a warm, tasty soup that comforts anyone. To give your egg drop soup a unique twist, consider adding fresh baby spinach and ginger. The spinach adds a vibrant green color and extra vitamins. Ginger brings a warm, spicy note that enhances the flavor. You can also use chili oil as a garnish for a spicy kick. If you don’t have an ingredient on hand, don’t worry! You can easily swap items. For the broth, use vegetable broth for a vegetarian option. Instead of eggs, try silken tofu for a vegan version. If you lack green onions, use chives or leeks instead. Cornstarch can be replaced with arrowroot powder for a gluten-free option. This flexibility makes the recipe easy to customize! For the full recipe, check [Full Recipe]. Start by heating 4 cups of vegetable or chicken broth in a medium pot. Use medium heat and bring it to a gentle simmer. When the broth simmers, add 1 teaspoon of freshly grated ginger and 1 clove of minced garlic. Stir the broth gently. This helps mix the flavors well. Next, combine 1 tablespoon of cornstarch with 2 tablespoons of water in a small bowl. Whisk until smooth. Gradually pour this mixture into the simmering broth, stirring constantly. This prevents lumps from forming. Let the broth simmer for a few more minutes until it thickens slightly, then lower the heat to keep it warm. In a separate bowl, beat 2 large eggs lightly with a fork. Once the broth is warm, slowly drizzle the beaten eggs into the pot while stirring in a circular motion. This technique helps create delicate ribbons of egg in the soup. Watch as the eggs swirl and form a silky texture. This step is crucial for that classic egg drop soup look. Add 2 tablespoons of finely chopped green onions and 1 cup of fresh baby spinach to the pot. Stir the soup gently and let the spinach wilt for about 1-2 minutes. Finally, drizzle in 1 teaspoon of sesame oil for added flavor. Season the soup with salt and white pepper to taste. For a spicy kick, you may garnish with 1 teaspoon of chili oil, if desired. This will elevate your soup and give it a unique twist. Enjoy your comforting bowl of Egg Drop Soup made with love. For the complete process, check the Full Recipe. To beat eggs well, crack them into a bowl first. Use a fork or whisk. Stir them gently but quickly. You want to mix the yolks and whites until they look uniform. This makes ribbons when you add them to the soup. If you want fluffier eggs, use a splash of water. It helps them puff up nicely. To thicken your soup, mix cornstarch with water first. This creates a smooth paste. Stir it slowly into the hot broth while it simmers. This keeps lumps from forming. Remember to let the soup simmer for a few minutes after adding the cornstarch. This helps it thicken without losing flavor. When serving, use pretty bowls to make it special. A sprinkle of green onions adds color. You can also add sesame seeds for crunch. If you like spice, drizzle a bit of chili oil on top. It looks great and adds flavor. Enjoy your beautiful egg drop soup! {{image_4}} To add heat, try spicy egg drop soup. Start with the basic recipe. After adding the eggs, drizzle in a teaspoon of chili oil. This oil brings warmth and flavor. For more spice, use two teaspoons. The heat from the chili oil pairs well with the silky soup. If you like it hot, adjust the chili oil to your taste. For a vegetarian soup, swap out the eggs for tofu. Use firm tofu for a great texture. Cut it into small cubes. Add the cubes after the broth thickens. Let them heat through for a few minutes. This keeps the tofu soft but firm. The tofu adds protein while keeping it plant-based. You can enjoy this version without losing flavor. You can boost nutrition by adding more vegetables. Consider adding carrots, peas, or bell peppers. Chop these veggies into small pieces. Add them to the broth after it simmers. Let them cook until tender. This not only adds color but also makes the soup more filling. It’s a great way to sneak in some extra nutrition. You can mix and match veggies based on what you have. For more details, check out the Full Recipe. Storing leftover egg drop soup is simple. Allow the soup to cool down first. Then, pour it into an airtight container. Make sure to seal the container well. This will keep the soup fresh and safe to eat. You can store it in the fridge for up to three days. If you want to keep it longer, freezing is a great option. When you're ready to eat your leftover soup, reheating is easy. Pour the soup into a pot. Heat it over medium-low heat. Stir occasionally to help it warm evenly. If the soup seems thick, add a splash of broth or water. This will bring it back to its silky texture. Avoid boiling, as this can change the eggs. Heat until steaming, and it's ready to enjoy! Freezing egg drop soup is a great way to save it for later. First, let the soup cool completely. Then, use a freezer-safe container or a ziplock bag. If using a bag, remove as much air as possible. This helps prevent freezer burn. Label the container with the date. You can freeze the soup for up to three months. When you're ready to eat, thaw it in the fridge overnight before reheating. For the full recipe, check out the Silky Egg Drop Soup with a Twist. The secret lies in the broth. Use high-quality vegetable or chicken broth for great flavor. Simmer it gently and add fresh ginger and garlic for a warm kick. Whisk the cornstarch with water well to avoid lumps. When you add the eggs, stir gently in a circle for silky ribbons. This simple technique makes your soup shine. Yes, you can! While traditional recipes use just eggs, feel free to add cooked chicken, shrimp, or tofu. Cooked chicken adds heartiness, while shrimp gives a nice, sweet flavor. Tofu is a great choice for a vegetarian option. Just remember to add any proteins near the end to keep them tender. Homemade egg drop soup lasts about three to four days in the fridge. Store it in an airtight container to keep it fresh. However, the texture may change slightly after a few days. The eggs might not stay as silky, but the taste remains good. Always reheat it gently on the stove or in the microwave for the best flavor. For the full recipe, check out the Silky Egg Drop Soup with a Twist. This article outlined how to make egg drop soup with ease. I shared key ingredients, useful tips, and tasty variations. Each step helps you create a rich, flavorful broth and achieve that silky texture. Cooking is fun, and soups are great for families. Remember to keep leftovers safe and easily reheatable. Enjoy making your own soup and experimenting with flavors. You can impress your friends and family with this classic dish. Happy cooking!](https://recipetorch.com/wp-content/uploads/2025/06/a3e1b960-3d58-4862-bb36-1274655a88a1.webp)
Craving a warm, comforting bowl of egg drop soup? You’re not alone! This dish is simple to make and full
