Skip to content
DisclaimerTerms Of UseGDPR PolicyCookie Policy

recipetorch

  • Home
  • Drinks
  • Appetizers
  • Dinner
  • Dessert
  • About
  • Contact
  • Privacy Policy
DisclaimerTerms Of UseGDPR PolicyCookie Policy

Nicole

- 1 cup sushi rice - 8 ounces sushi-grade tuna - 2 tablespoons sriracha sauce - 1 tablespoon mayonnaise - 1 ripe avocado - 1 small cucumber - 1 medium carrot - 2 green onions - 1 tablespoon rice vinegar - 1 teaspoon sugar - ½ teaspoon salt - 1 tablespoon sesame seeds - Seaweed sheets When making Spicy Tuna Sushi Bowls, these ingredients shine. Sushi rice is the base. It gives a nice texture and flavor. Sushi-grade tuna is key for freshness and safety. I recommend using high-quality tuna for the best taste. Sriracha adds heat, while mayonnaise provides creaminess. You can use Kewpie mayonnaise for extra flavor. Fresh additions make each bowl pop. Avocado offers creaminess, cucumber gives a refreshing crunch, and carrot adds color. Green onions provide a mild bite that rounds out the dish. For seasoning, rice vinegar, sugar, and salt balance the flavors in the rice. Sesame seeds add a nutty crunch, while seaweed sheets give a lovely finish. You can find the Full Recipe to guide you in making this delicious dish. - Rinsing the rice: Start by rinsing 1 cup of sushi rice under cold water. Keep rinsing until the water runs clear. This helps remove excess starch. - Cooking the rice: In a pot, combine the rinsed rice with 1 ¼ cups of water. Bring it to a boil. Once boiling, reduce the heat to low. Cover the pot and let it simmer for 15 minutes. The water should be fully absorbed. - Seasoning the rice: After cooking, remove the pot from heat. Let it sit for 10 minutes, still covered. In a bowl, mix 1 tablespoon rice vinegar, 1 teaspoon sugar, and ½ teaspoon salt. Microwave briefly to dissolve sugar. Fluff the rice and drizzle the vinegar mix over it. Gently fold it in. - Combining tuna with sriracha and mayonnaise: In a bowl, combine 8 ounces of sushi-grade tuna, 2 tablespoons sriracha, and 1 tablespoon mayonnaise. Mix until the tuna is well-coated in the spicy sauce. - Dividing the rice into bowls: Take the seasoned rice and divide it into two bowls as the base. - Adding spicy tuna and fresh toppings: Top each bowl with the spicy tuna mix. Then, add fresh toppings like avocado slices, julienned cucumber, and spiralized carrot for color. - Finishing touches with garnishes: Sprinkle chopped green onions and toasted sesame seeds over the bowls. Add strips of seaweed on top. Serve with a small dish of soy sauce for dipping. This process creates a dish that is both vibrant and delicious! For a more detailed guide, refer to the Full Recipe. Rinsing sushi rice matters. It removes extra starch. This step helps keep the rice fluffy. To rinse, place rice in a bowl. Run cold water over it, then stir gently. When the water runs clear, it's ready to cook. For cooking, use a rice cooker or stovetop. Combine 1 cup of rinsed rice with 1 ¼ cups of water. Bring to a boil, then cover and simmer. Let it sit for ten minutes after cooking. This resting time makes the rice tender. You can adjust the spice in your tuna mix. If you love heat, add more sriracha. For a milder taste, use less. Mixing in a bit of soy sauce can balance the spice. You can also try different sauces. A drizzle of ponzu adds a tangy twist. Alternatively, use a creamy spicy mayo for richness. Make your sushi bowls look stunning. Start with the rice as a base. Arrange the spicy tuna on top. Then layer your veggies in a colorful way. Use a mix of green avocado, bright orange carrot, and crisp cucumber. Choose colorful dishes to enhance the look. A white bowl often makes the colors pop. Lastly, use chopsticks for a fun, authentic experience. For the final touch, sprinkle sesame seeds and seaweed strips over the bowls. This makes them look even more appealing. {{image_4}} You can change the protein in your spicy tuna sushi bowls for a new twist. Salmon is a great substitute. It offers a rich flavor and buttery texture. If you prefer a plant-based option, tofu works well too. Just press and marinate it in soy sauce for extra taste. These swaps keep the dish fresh and fun. To make your bowls more exciting, try adding fruits. Diced mango or pineapple gives a sweet contrast to the spice. This fruity touch brightens each bite and adds a tropical feel. You can also incorporate pickled vegetables. Pickled radishes or carrots add tang and crunch, enhancing the overall flavor. Sushi rolls and sushi bowls are both delicious but differ in style. Sushi rolls are wrapped and need more skill to make. Sushi bowls, however, are simpler and quicker to assemble. You can enjoy them cold or warm, depending on your mood. I love serving mine cold, especially on hot days. Each option offers a unique dining experience. For the full recipe, check the details provided. To keep your spicy tuna sushi bowls fresh, follow these steps: - Store in an airtight container: This helps prevent air from drying out the ingredients. - Cool before sealing: Let the bowls cool to room temperature. This avoids steam buildup, which can make your sushi soggy. - Refrigerate promptly: Place the container in the fridge within two hours of making the bowls to ensure food safety. You can enjoy your sushi bowls cold or warm. Here are some tips: - Microwave: If you choose to heat, use a microwave on low power. Heat for short bursts to avoid cooking the tuna. - Cold servings: Enjoying the bowls cold can keep all the fresh flavors intact. This is often how sushi is best served, preserving the texture of the fish. Leftover spicy tuna sushi bowls can last: - In the fridge: 1 to 2 days if stored properly. - After that: The quality may decline, especially for the fish. Always check for any off smells or changes in texture before eating. You can find the Full Recipe for more details on making these delicious bowls! Use sushi-grade tuna for sushi bowls. This type of tuna is safe to eat raw. Regular tuna is not the same. It may not be fresh enough for sushi. Sushi-grade tuna comes from a trusted source. It has a bright color and firm texture. Always check for freshness when buying. Regular rice has a different texture and flavor. Sushi rice is stickier and can hold its shape. It also absorbs flavors better. Regular rice may not give the same experience. For the best sushi bowls, stick with sushi rice. To reduce spice, use less sriracha in the mix. You can also add more mayonnaise. This will cool down the heat. Another option is to add more avocado or cucumber. Both ingredients help balance the spice. Raw tuna is safe if it is sushi-grade. Sushi-grade tuna is frozen to kill parasites. Always buy from a reliable source. Look for freshness and a clean smell. If you're unsure, ask the fishmonger for advice. You can prep components in advance. Cook the rice and store it in the fridge. Also, mix the spicy tuna and keep it cold. Cut veggies like avocado may brown. Add them just before serving for the best look. You can find the Full Recipe for Spicy Tuna Sushi Bowls in this article. It guides you step by step, ensuring a delicious meal. You learned how to make delicious Spicy Tuna Sushi Bowls. We covered key ingredients, from sushi rice to fresh toppings. I guided you through simple steps for preparing the rice and mixing the spicy tuna. With tips on customization and storage, you can enjoy these bowls anytime. Remember, balance flavors and textures for the best experience. Enjoy your sushi bowl creations!

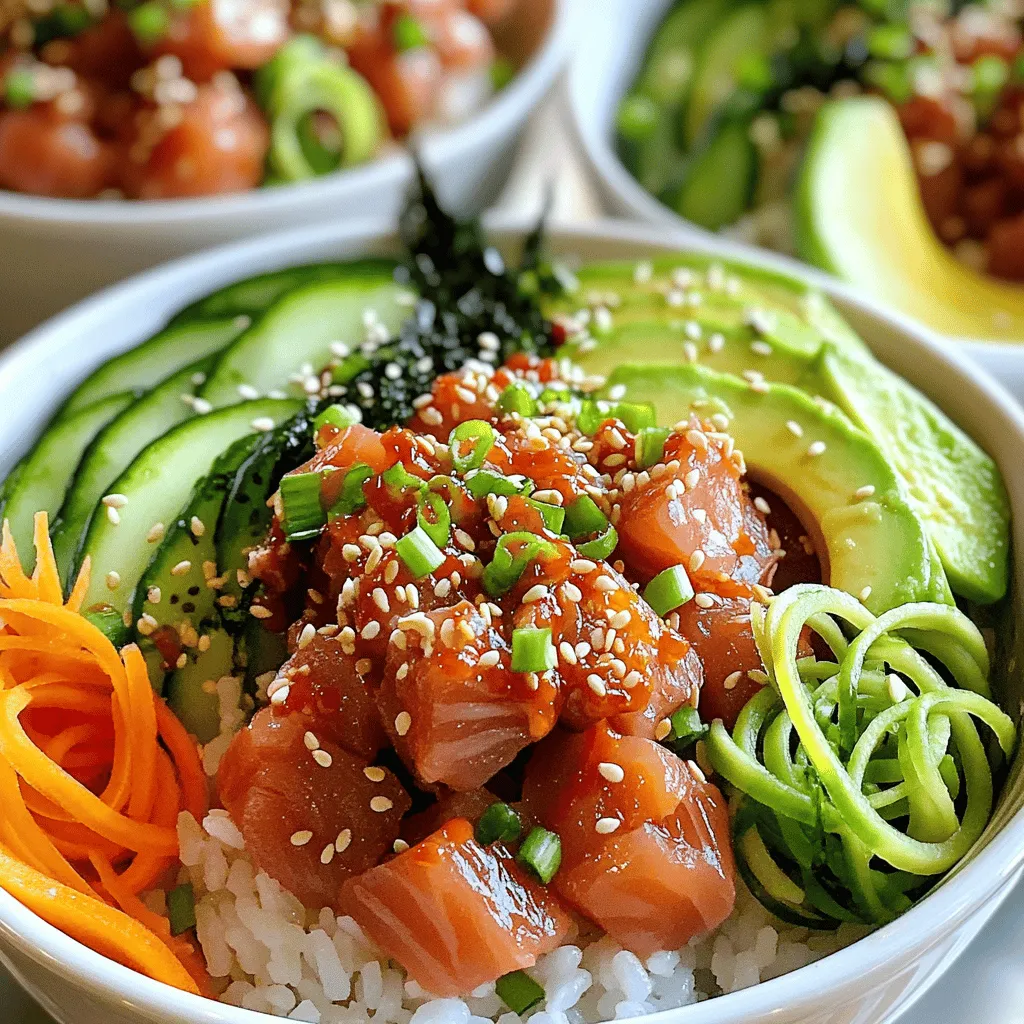
Spicy Tuna Sushi Bowls Flavorful and Fresh Delight

Are you ready to dive into a bowl of pure delight? Spicy Tuna Sushi Bowls mix fresh flavors with a

- 1 loaf of fresh sourdough bread (or any round artisan bread) - 1/2 cup unsalted butter, melted - 4 cloves of garlic, finely minced - 1 cup grated Parmesan cheese - 1 tablespoon fresh parsley, finely chopped - 1 teaspoon dried oregano - 1 teaspoon sea salt - 1/2 teaspoon freshly ground black pepper - Additional grated Parmesan cheese - Extra parsley for garnish In Garlic Parmesan Pull Apart Bread, the ingredients shine. Start with a fresh loaf of sourdough. Alternatively, use any round artisan bread. The bread gives a perfect texture for pulling apart. Next, you need melted butter. I recommend unsalted butter for a balanced flavor. Add minced garlic, which brings a rich taste. Fresh garlic is key to a great aroma and flavor. Cheese is important in this recipe. Grated Parmesan cheese adds a salty, nutty flavor. The cheese melts beautifully, making every bite creamy and rich. Fresh parsley, oregano, sea salt, and black pepper add depth and freshness. These spices enhance the overall taste. For garnishes, consider adding more Parmesan cheese on top. Extra parsley adds a nice color and fresh touch. These optional garnishes make your bread even more appealing and delicious. Remember, the quality of your ingredients matters. Fresh, high-quality items lead to the best results. Enjoy preparing this delightful dish! - Preheat the oven to 350°F (175°C). - Prepare a baking sheet lined with parchment paper. - Make deep cuts in a grid pattern about 1-inch apart. - Pull apart sections to create pockets. - Apply the garlic butter mixture into each pocket. - Distribute grated Parmesan cheese evenly. - Wrap the bread in aluminum foil and bake for 15-20 minutes. - Remove the foil and bake for an additional 10 minutes. As you bake this bread, you'll fill your kitchen with a warm, inviting aroma. The garlic and cheese blend perfectly, making it hard to resist. Each step is simple, but the results are impressive. Enjoy pulling apart each cheesy piece! - Make sure not to cut through the base of the loaf. This keeps the bread intact. - Ensure pockets are well-filled with garlic butter and cheese. This adds great flavor. - Serve warm with marinara for dipping. The sauce adds a tasty touch. - Pair with soups or salads for an elevated meal. This makes a great side. - Use a rustic wooden board for serving. This adds charm to your dish. - Consider garnishing with additional herbs for color. Fresh parsley looks lovely. {{image_4}} You can easily change the cheese in this recipe. Try mozzarella for a creamier taste. Cheddar adds a sharp flavor that many love. Both options work well in pull-apart bread. Don’t be afraid to play with spices too. Thyme gives a fresh note, while rosemary adds a warm, earthy taste. These small changes make your bread unique. If you need a gluten-free option, look for gluten-free bread. Many brands offer great alternatives that still taste amazing. For those who follow a vegan diet, use dairy-free butter and cheese. There are many tasty vegan cheeses today that melt well. These swaps let everyone enjoy this delicious treat. For a savory twist, add cooked bacon bits to the mix. The salty bacon pairs well with garlic and cheese. You can also try adding sun-dried tomatoes. Their sweet, tangy flavor elevates the bread. Roasted red peppers add a lovely color and taste. These enhancements make your pull-apart bread even more special. You should store any leftovers in an airtight container. This keeps the bread fresh. It is best consumed within 2-3 days for the best taste. After that, it may lose its flavor and texture. To freeze the bread, wrap it tightly in plastic wrap. Then, add a layer of aluminum foil on top. This helps prevent freezer burn. When you want to eat it, thaw it in the fridge overnight. Before serving, reheat it in the oven. The best way to reheat the bread is in the oven. This restores the crispy crust and warm center. Avoid using a microwave, as it can make the bread soggy. Instead, bake it at 350°F (175°C) for about 10 minutes to enjoy its deliciousness again. - Follow the step-by-step instructions outlined above for the Full Recipe. - Yes, any round artisan bread works well, including ciabatta or focaccia. - Keep leftovers in an airtight container in the refrigerator for up to 3 days. Garlic Parmesan Pull Apart Bread is simple and fun to prepare. You need fresh artisan bread, garlic, butter, and cheese. Follow the steps to create delicious pockets filled with flavor. Remember, you can customize with different ingredients. This dish pairs well with dips, soups, or salads, making it a great addition to any meal. Enjoy the warm, cheesy goodness that brings friends and family together. Don’t hesitate to try your own twists. Cooking should be all about creativity and flavor.

Garlic Parmesan Pull Apart Bread Delightful Recipe

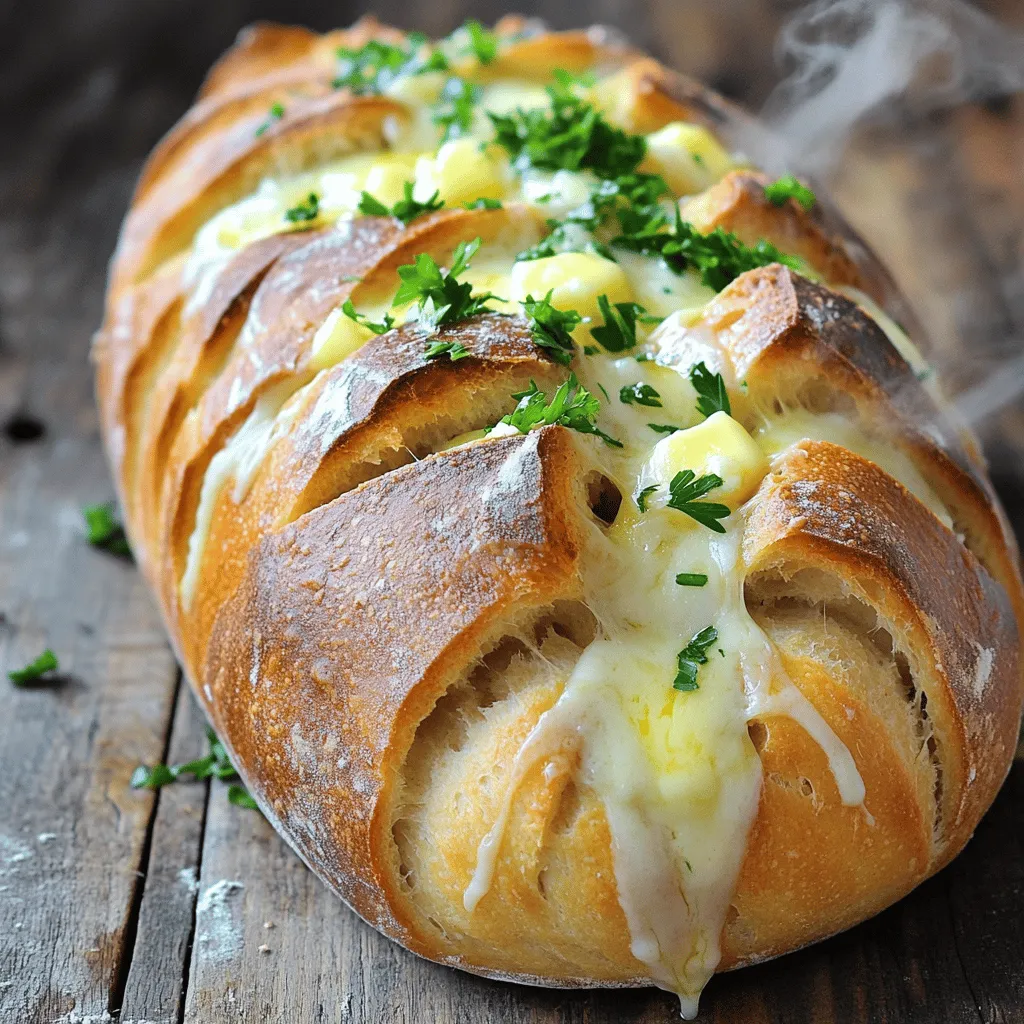
If you love warm, cheesy bread, then you’re in for a treat! Garlic Parmesan Pull Apart Bread is the ultimate

To create a delicious One-Pot Spaghetti Primavera, gather the following ingredients: - 8 oz spaghetti - 2 tablespoons extra virgin olive oil - 1 small onion, finely diced - 2 garlic cloves, minced - 1 cup bell peppers, sliced - 1 cup zucchini, diced - 1 cup cherry tomatoes, halved - 1 cup fresh broccoli florets - 2 cups low-sodium vegetable broth - 1 teaspoon Italian seasoning blend - 1/4 teaspoon red pepper flakes (optional) - Sea salt and black pepper to taste - Fresh basil for garnish - Optional: Grated Parmesan cheese These ingredients will help you make a tasty meal, full of bright flavors. The fresh vegetables add color and nutrition. The spaghetti cooks right in the broth, soaking up all that flavor. You’ll love how easy it is to prepare. If you want the full method, check the Full Recipe. 1. Start by heating the extra virgin olive oil in a large pot over medium heat. 2. Once the oil is hot, add the finely diced onion. Sauté it for about 3-4 minutes until it is soft and clear. 3. Next, add the minced garlic. Stir it for another minute. You will smell its rich aroma fill the kitchen. 4. Now, add the colorful vegetables: bell peppers, zucchini, cherry tomatoes, and broccoli. Sauté these for 5-6 minutes. Stir occasionally until they soften. 5. Carefully pour in the vegetable broth. Sprinkle in the Italian seasoning and red pepper flakes if you're up for some heat. Season with sea salt and black pepper to taste. 1. Increase the heat to bring the mixture to a gentle boil. 2. Once it boils, add the spaghetti. Stir well to ensure all the strands are covered in the broth. 3. Lower the heat to medium-low and cover the pot with a lid. Let the spaghetti cook for 10-12 minutes. Stir occasionally until the pasta is al dente and absorbs most of the broth. 4. After cooking, take the pot off the heat. Keep it covered for another 2-3 minutes. This helps any remaining liquid absorb fully into the pasta. 5. Fluff the spaghetti gently with a fork. Taste it and adjust the seasoning if needed. 6. Serve hot, garnished with chopped fresh basil and a sprinkle of Parmesan cheese if desired. For the full recipe, check out the detailed instructions above. Enjoy your meal! To get the best out of your One-Pot Spaghetti Primavera, here are some useful tips: - Stir occasionally to prevent sticking: Stirring the pasta every few minutes helps keep it from sticking together. This keeps your dish creamy and enjoyable. - Adjust seasoning for personal taste: Always taste as you cook. You can add more salt, pepper, or Italian seasoning to suit your palate. Don’t be afraid to experiment! A beautiful dish makes food taste even better. Consider these ideas for presentation: - Serving suggestions with additional garnishes: Serve your pasta in nice bowls. Top it with fresh basil and a sprinkle of Parmesan cheese. This adds color and flavor. - Drizzling olive oil for enhanced flavor: A light drizzle of olive oil on top makes the dish shine. It adds depth to the taste and makes it look gourmet. For a fun twist, add a lemon wedge for guests to squeeze over their pasta. These tips will help you make a meal that is both delicious and beautiful. You can find the full recipe to guide you in making this tasty dish! {{image_4}} You can swap out vegetables in this dish. Seasonal choices keep it fresh. In spring, use asparagus and peas. In summer, add corn and green beans. Fall brings squash and mushrooms. Winter calls for Brussels sprouts and kale. You can also add protein for more substance. Chicken, shrimp, or tofu work well. Simply cook them with the onion and garlic for added flavor. To make this dish gluten-free, use gluten-free spaghetti. Many brands offer great options. For a vegan version, skip the Parmesan cheese. You can use nutritional yeast for a cheese-like flavor. Add more vegetables or plant-based protein to keep it filling. This way, everyone can enjoy a delicious meal. To keep your One-Pot Spaghetti Primavera fresh, store it in an airtight container. This helps prevent the pasta from drying out. You can refrigerate it for up to three days. When you are ready to eat, reheat gently in a pan. Add a splash of water or broth to keep it moist. Stir often to heat it evenly. You can also microwave it, but cover the dish to avoid splatters. If you want to save some for later, freezing is a great option. First, let the pasta cool completely. Then, place it in a freezer-safe container or bag. Remove as much air as possible to avoid freezer burn. You can freeze it for up to three months. When you’re ready to eat, thaw it in the fridge overnight. Reheat on the stove or in the microwave. To maintain flavor and texture, add a little olive oil or broth when reheating. This keeps the dish tasty and fresh. Can I use different types of pasta? Yes, you can use other pasta shapes. Try penne, fusilli, or even whole wheat. Just adjust the cooking time based on the shape you choose. This keeps the meal interesting and allows you to use what you have. How do I store One-Pot Spaghetti Primavera? Store the pasta in an airtight container. It stays fresh in the fridge for three days. If you want to keep it longer, consider freezing it. Just make sure to cool it first. Can I make this recipe ahead of time? You can prep the veggies and store them in the fridge. Cook the pasta just before serving for the best taste and texture. This way, you have a quick meal ready in no time. For the full recipe, check the section above. This blog post showed you how to make a tasty One-Pot Spaghetti Primavera. We covered all the ingredients and steps for a quick, veggie-packed meal. I also shared tips for cooking and presenting your dish, as well as variations to suit your needs. Remember, this recipe is flexible. You can swap out veggies and adjust flavors to your liking. Enjoy your cooking adventure, and don't hesitate to make it your own!

One-Pot Spaghetti Primavera Flavorful and Easy Meal

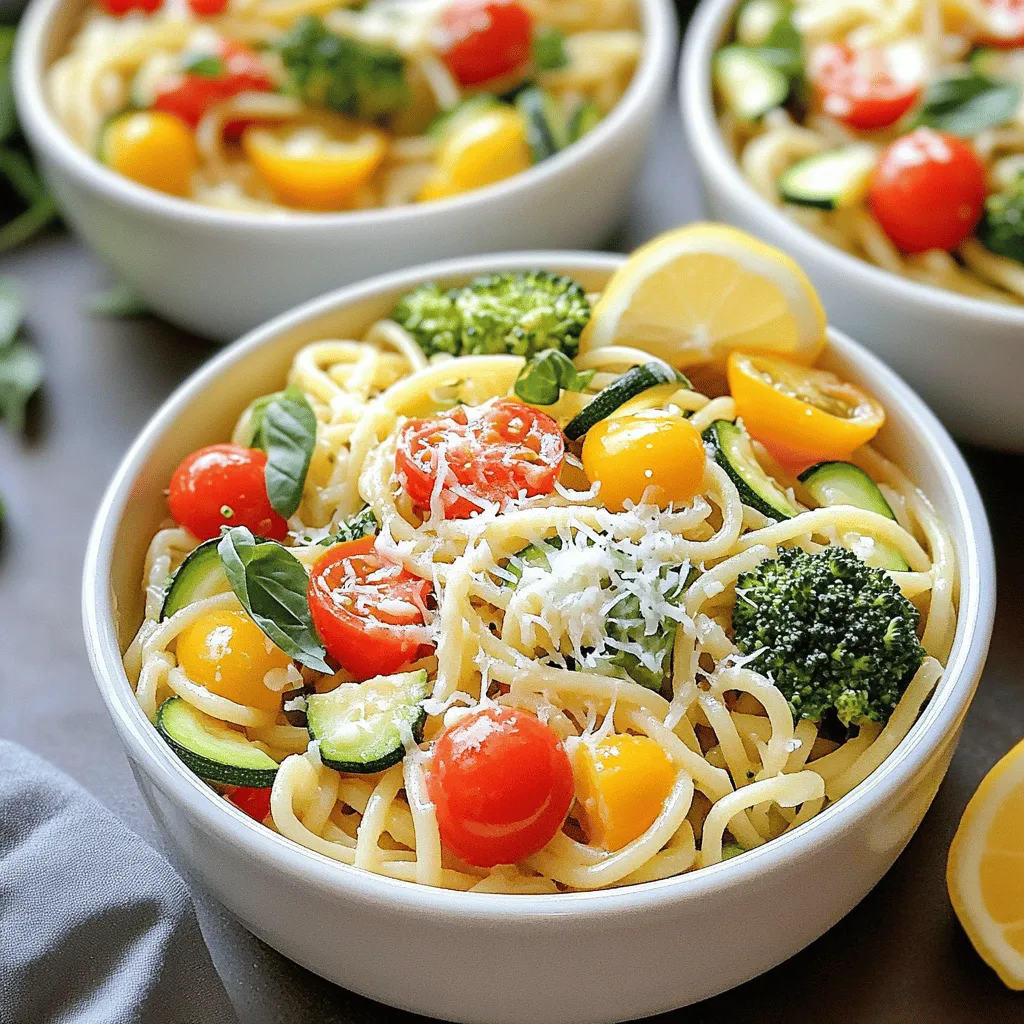
Looking for a quick, colorful meal that’s packed with flavor? One-Pot Spaghetti Primavera is your answer! In just one dish,

- 2 cups all-purpose flour - 1/2 cup granulated sugar - 1 tablespoon baking powder - 1/2 teaspoon salt - 1/2 cup cold unsalted butter, cut into small cubes - 1 cup fresh blueberries (or use frozen if fresh is not available) - Zest of 1 lemon - 1/2 cup buttermilk, chilled - 1 large egg - 1 teaspoon vanilla extract - 2 tablespoons fresh lemon juice - Coarse sugar, for sprinkling on top To make blueberry lemon scones, you need fresh and simple ingredients. All-purpose flour forms the base of the dough. Sugar adds sweetness, while baking powder helps the scones rise. Salt balances the flavors. The cold unsalted butter is key. It gives the scones a flaky texture. Fresh blueberries burst with flavor. Lemon zest brings a bright tang. Buttermilk adds richness and moisture. The large egg binds the mixture. Vanilla extract enhances the taste, and fresh lemon juice adds zest. Finally, coarse sugar tops the scones for a crunchy finish. Gather these ingredients, and you're ready to create a delightful treat! {{ingredient_image_2}} 1. First, preheat your oven to 400°F (200°C). This step is crucial for even baking. 2. Next, line a baking sheet with parchment paper. This helps prevent sticking. 3. In a large mixing bowl, combine 2 cups of all-purpose flour, 1/2 cup of granulated sugar, 1 tablespoon of baking powder, and 1/2 teaspoon of salt. 4. Whisk these dry ingredients together until you feel they are well blended and airy. 1. Now, take 1/2 cup of cold unsalted butter, cut into small cubes. 2. Add the butter cubes into the flour mixture. Use your fingertips or a pastry cutter to mix until it looks like coarse crumbs. 3. You want the bits of butter to be no larger than a pea. 4. Carefully fold in 1 cup of fresh blueberries and the zest of 1 lemon. Make sure the fruit stays whole. 1. In a small bowl, whisk together 1/2 cup of chilled buttermilk, 1 large egg, 1 teaspoon of vanilla extract, and 2 tablespoons of fresh lemon juice. 2. Pour this buttermilk mixture into your flour mixture. 3. Stir gently with a wooden spoon until the dough just comes together. It should stay slightly sticky and lumpy. 1. Transfer the dough onto a lightly floured surface. 2. Pat it into a circle about 1-inch thick. 3. Cut the dough into 8 wedges, or use a round cutter for individual scones. 4. Place the shaped scones onto your prepared baking sheet. 5. Brush the tops with a splash of buttermilk. Sprinkle coarse sugar on top for a crunchy finish. 1. Bake the scones in your preheated oven for 15-20 minutes. 2. They should turn golden brown, and a toothpick inserted in the center should come out clean. 3. Once baked, remove the scones from the oven. Transfer them to a wire rack to cool for a few minutes before serving. To get the best scones, avoid over-mixing the dough. Over-mixing makes scones tough. You want a soft, tender bite. When you mix the wet and dry ingredients, stir gently. The dough should look a bit rough and lumpy. Cutting the butter is key. Use cold butter that is cut into small cubes. This helps create flaky layers. Blend the butter into the flour until it looks like coarse crumbs. You should see small bits of butter, no larger than a pea. This will make your scones light and airy. Adjusting the lemon zest and juice can change the taste. If you want a stronger lemon flavor, add more zest or juice. Zest brings brightness, while juice adds a tangy kick. You can also try different berries. Blueberries are great, but raspberries or blackberries work too. Each berry adds its own twist. You can mix and match for fun flavors. Dust your warm scones with powdered sugar before serving. This adds a sweet touch that looks nice. Pair your scones with lemon curd or clotted cream. The creamy texture balances the tartness of the lemon. It makes for a delightful treat. You can create your own flavor combos for guests too. Pro Tips Use Cold Butter: Ensure your butter is very cold to achieve flaky, tender scones. This helps create steam during baking, resulting in a light texture. Don’t Overmix: Mix the dough just until combined. Overmixing can lead to tough scones. The dough should be slightly lumpy for the best results. Chill the Dough: If possible, chill the shaped scones in the refrigerator for about 15 minutes before baking. This helps them hold their shape and enhances the flaky texture. Experiment with Flavors: Feel free to add other ingredients like chopped nuts or different fruits. Almonds or raspberries can be a delicious twist on this classic scone recipe. {{image_4}} You can switch up the fruits in your scones to match the seasons. In spring, try fresh strawberries or cherries. In fall, diced apples or pears work great. Each fruit brings its own flavor and charm. You can even mix berries for a colorful treat. Adding spices can elevate your scones too. Cinnamon gives warmth, while nutmeg adds sweetness. Just a pinch can change the taste. Try mixing these spices into the dry ingredients for a cozy twist. If you're gluten-free, do not worry! You can use gluten-free flour blends. Look for a blend that includes xanthan gum for the best texture. This helps your scones rise well. For a vegan option, swap the butter for coconut oil or vegan butter. You can replace the egg with a flax egg. To make a flax egg, mix one tablespoon of ground flaxseed with three tablespoons of water. Let it sit for a few minutes until it thickens. This will help bind the dough. With these variations, everyone can enjoy blueberry lemon scones! To keep your scones fresh at room temperature, place them in an airtight container. This helps prevent them from drying out. You can enjoy them within two days. If you want a warm scone, simply reheat it in the oven for a few minutes. This brings back that lovely texture. If you want to save your scones for later, freezing is a great option. Wrap each scone tightly in plastic wrap. Then, place them in a freezer bag. They can last up to three months in the freezer. When you're ready to eat a scone, take it out and let it thaw. For the best taste, reheat it in an oven set at 350°F (175°C). Bake for about 10 minutes. This makes them taste fresh and delicious again! Your scones are done when they turn a golden brown color. This means the top is nice and crisp. To be extra sure, I recommend using the toothpick test. Just insert a toothpick into the center. If it comes out clean, your scones are ready. Yes, you can use frozen blueberries! They work well in this recipe. Just remember to add them straight from the freezer. Do not thaw them beforehand. This helps keep your dough from turning blue. You’ll still get that yummy burst of flavor in each bite. To make light and flaky scones, focus on how you mix your dough. When combining the butter and flour, use your fingertips or a pastry cutter. You want to mix until it looks like coarse crumbs. Also, avoid over-mixing when you add the wet ingredients. Stir just until everything comes together. This keeps air in your dough, giving you that perfect texture. Serve your scones warm for the best taste. Dust them lightly with powdered sugar for a sweet touch. You can also pair them with lemon curd or clotted cream. This adds a rich flavor that balances the lemon zest. Arrange them on a nice plate, and watch everyone enjoy! This blog post has covered how to make delicious blueberry lemon scones. We discussed the key ingredients needed, like flour, fresh blueberries, and buttermilk. I walked you through each step, from mixing to baking and cooling the scones. I also shared tips for achieving the perfect texture and flavor, as well as variations and storage methods. Now you have all the tools to create scones that everyone will enjoy. Happy baking!

Blueberry Lemon Scones Delightful and Simple Recipe

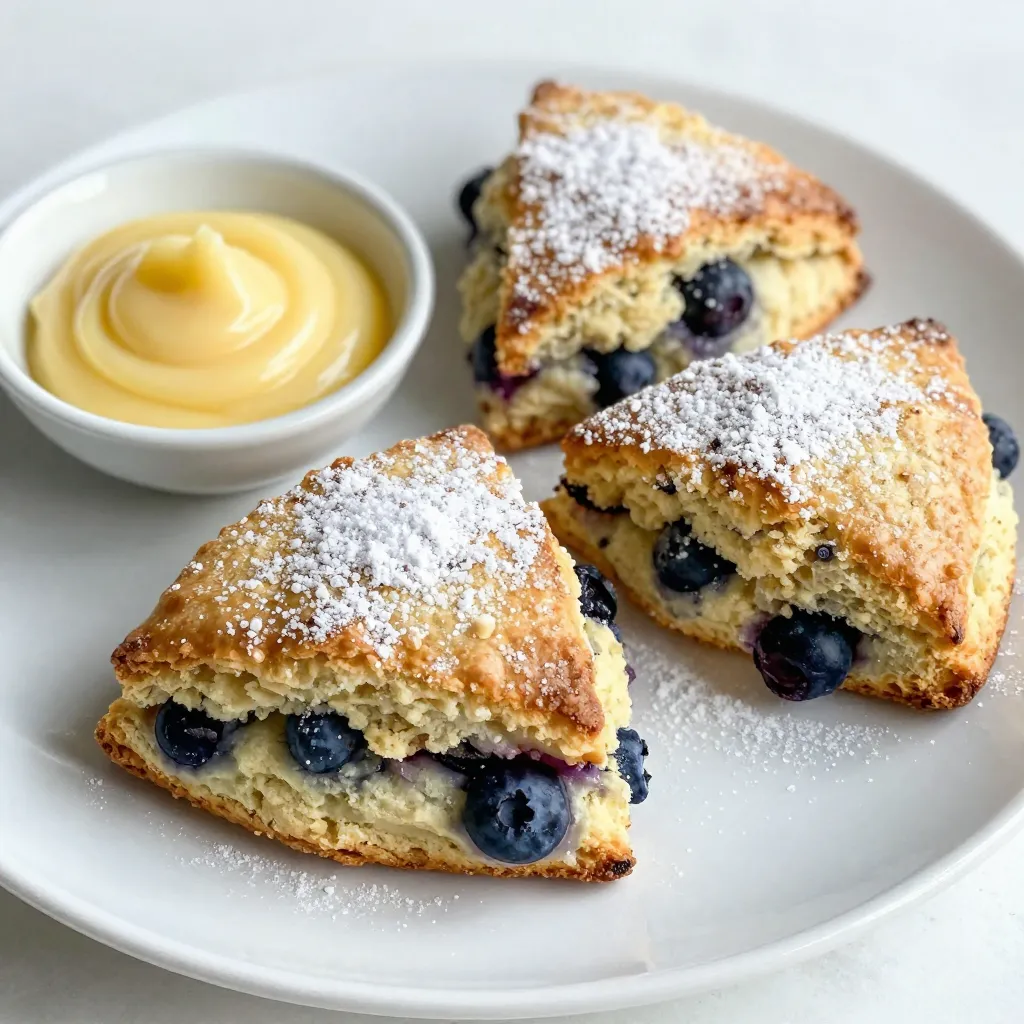
Looking for a treat that’s both easy and tasty? These Blueberry Lemon Scones will delight your taste buds! With fresh

- 4 cups Rice Krispies cereal - 2 cups mini marshmallows - 1 cup graham cracker crumbs, plus extra for topping - 1 cup chocolate chips (use milk or dark based on preference) - 3 tablespoons unsalted butter - 1 teaspoon vanilla extract - A pinch of salt - Additional mini marshmallows for topping Gather these ingredients to make your S'mores Rice Krispie Treats. Rice Krispies cereal gives the treat its crunch. The mini marshmallows add a soft sweetness, while the graham cracker crumbs bring the classic s'mores flavor. Choose chocolate chips you like best, whether milk chocolate or dark. Unsalted butter helps everything stick together. A splash of vanilla extract boosts the flavor, and a pinch of salt balances the sweetness. Finally, add more mini marshmallows on top to make it look nice and taste even better. Each ingredient plays a role in creating a snack that is fun and tasty. The mix of textures and flavors makes these treats a hit with family and friends. You can easily find these items at your local grocery store. {{ingredient_image_2}} 1. Start by taking a large saucepan. Melt 3 tablespoons of unsalted butter over low heat. Stir gently to keep the butter from browning. 2. Once the butter melts, add 2 cups of mini marshmallows. Stir constantly until the marshmallows are smooth and melted. 3. After the marshmallows melt, add 1 teaspoon of vanilla extract and a pinch of salt. Mix well to combine. 4. Remove the saucepan from the heat to stop cooking. Quickly stir in 1 cup of graham cracker crumbs and 4 cups of Rice Krispies cereal. 5. Mix until every Rice Krispies piece is coated in the gooey marshmallow mix. 6. Finally, gently fold in 1 cup of chocolate chips. This gives a sweet taste in every bite. 1. Grease a 9x13-inch baking dish with butter or non-stick spray. 2. Carefully transfer the mixture into the baking dish. Use a spatula to press it down firmly for a smooth layer. 3. To finish, sprinkle extra mini marshmallows and graham cracker crumbs on top for added flavor and texture. 1. Let the S'mores Rice Krispie Treats cool at room temperature for about 30 minutes. This helps them firm up nicely. 2. Once they are set, slice them into squares for serving. 3. For a fun twist, place the treats under a broiler for 1-2 minutes. This lightly toasts the marshmallows on top. Watch closely to avoid burning. Enjoy the delicious toasted flavor! - Ensuring the right temperature: Melt the butter over low heat. This prevents it from burning. When you add marshmallows, stir until fully melted. A smooth mixture is key! - Mixing tips for even distribution: After melting, quickly mix in graham cracker crumbs and Rice Krispies. Stir until all pieces are coated. This helps every bite taste great. - Pressing the mixture evenly: Use a spatula to press the mixture into the baking dish. Make sure it is flat and packed down. This helps the treats hold together. - Overheating the butter or marshmallows: If you cook them too long, they might burn. This ruins the flavor and texture. Keep the heat low and watch closely. - Skipping the cooling time: Let the treats cool for about 30 minutes. This helps them set properly. If you cut them too soon, they may fall apart. - Presentation ideas for gatherings: Arrange the squares on a nice platter. Garnish with graham cracker pieces and extra chocolate chips. This makes them look festive and inviting. - Pairing with beverages: These treats go well with milk or hot cocoa. You can also serve them with coffee for a fun twist. Enjoy them as a sweet snack! Pro Tips Use Fresh Ingredients: Ensure your marshmallows and chocolate chips are fresh for the best flavor and texture in your treats. Press Firmly: When transferring the mixture to the baking dish, press down firmly to create a dense texture that will hold together well. Storage Tips: Store your S'mores Rice Krispie Treats in an airtight container to keep them soft and chewy for longer. Experiment with Flavors: Try adding different flavor extracts or mix-ins, like peanut butter chips or crushed nuts, for a unique twist on the classic recipe. {{image_4}} You can change the flavor of S'mores Rice Krispie Treats easily. Try using dark chocolate or white chocolate instead of regular chocolate chips. Each type brings a new taste. You can also mix in peanut butter chips for a nutty twist. For toppings, add chopped nuts or dried fruits. Chopped strawberries or banana slices add a fun fruity touch. If you need gluten-free options, use gluten-free Rice Krispies. This way, everyone can enjoy the treats. For a vegan version, swap the butter with coconut oil. Use dairy-free chocolate chips and vegan marshmallows. These changes keep the treat tasty while meeting dietary needs. For holidays, you can add themed sprinkles. Use red and green for Christmas or orange and black for Halloween. You can also make them festive by mixing in crushed peppermint or pumpkin spice. For themed parties, try adding colorful candies to the top. These small changes make your treats exciting and fun for any occasion. To keep your S'mores Rice Krispie Treats fresh, store them at room temperature. Place them in an airtight container. This keeps them soft and chewy. If you live in a humid area, wrapping them in plastic wrap is a good idea. You can also refrigerate the treats. Just make sure to cover them well. This can help them last longer. The cool air will keep them from getting too sticky. When stored properly, these treats stay fresh for about one week at room temperature. If you refrigerate them, they can last up to two weeks. However, keep an eye on them. Signs of spoilage include a hard texture or any strange smells. If they feel dry or crumbly, it's best to toss them. Freezing S'mores Rice Krispie Treats is easy. Cut them into squares first. Then, wrap each square tightly in plastic wrap. Place them in a freezer-safe bag or container. Make sure to remove as much air as possible to prevent freezer burn. To thaw, simply take them out and let them sit at room temperature for about 30 minutes. You can also reheat them in the microwave for a few seconds if you prefer a warm treat. Enjoy! To cut Rice Krispie Treats cleanly, use a sharp knife. Lightly grease the knife to prevent sticking. Cut the treats while they are still slightly warm for best results. For a neat look, press down gently and pull the knife straight up. This method keeps the edges smooth and tidy. Arrange the squares on a nice platter for a great presentation. Yes, you can make these treats ahead of time. Prepare them and let them cool completely. Then, store them in an airtight container. They stay fresh for about three days at room temperature. If you want, you can even freeze them. Just wrap them well in plastic wrap and foil. Thaw them on the counter before serving. If your treats turn out hard or crumbly, they might have too much cereal. To fix this, melt a bit more butter and marshmallows. Mix this into the treats until they become soft again. If they are too dry, adding a little extra marshmallow can help. Remember to mix gently to keep the texture light and airy. Yes, this recipe is naturally nut-free. You can use alternative toppings like crushed cookies or dried fruits. For a bit of crunch, add seeds or coconut flakes instead of nuts. Always check labels if you buy pre-made ingredients to ensure they are nut-free. This way, everyone can enjoy the treats! You’ve learned how to make delicious S'mores Rice Krispie Treats step by step. We covered ingredients, preparation, and fun variations. Remember to avoid common mistakes and follow storage tips for freshness. Try new flavors and find ways to make these treats fit your needs. With a few simple steps, you can enjoy tasty treats that everyone loves. Now it’s your turn to create and share these fun snacks!

S’mores Rice Krispie Treats Delightful Family Snack

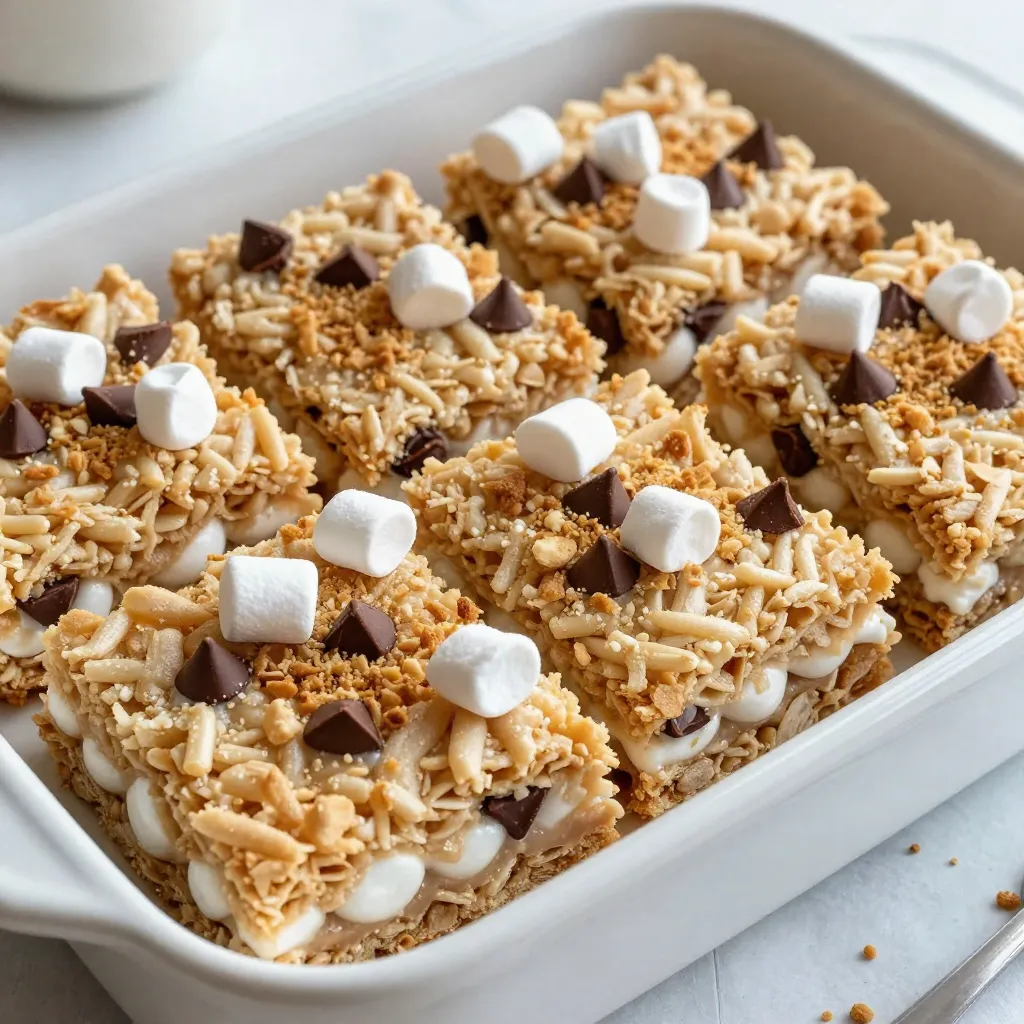
Looking for a fun family treat that’s easy to make? S’mores Rice Krispie Treats are the perfect snack! With just

- 3 ripe bananas, peeled and sliced, then frozen - 1/4 cup creamy peanut butter - 1 tablespoon honey or maple syrup (optional) - 1 teaspoon vanilla extract - 1/4 cup almond milk (or your preferred milk) - A pinch of sea salt To make Peanut Butter Banana Nice Cream, gather these simple ingredients. The ripe bananas give the nice cream its sweet base. Freezing them helps create a creamy texture. The creamy peanut butter adds rich flavor and creaminess. If you want extra sweetness, honey or maple syrup works great. The vanilla extract brings a warm, inviting taste. Almond milk, or your favorite milk, thins the mixture just right. A pinch of sea salt balances the flavors. With these ingredients, you have a delicious treat that’s easy to make. {{ingredient_image_2}} Let’s start by getting the bananas ready. Remove the frozen banana slices from the freezer. Let them sit at room temperature for about 5 minutes. This slight thawing helps them blend more smoothly. It makes a big difference in the texture of your nice cream. Next, grab your blender or food processor. Add the softened banana slices to it. Then, pour in the creamy peanut butter. If you like your nice cream sweeter, add honey or maple syrup. Don’t forget the vanilla extract and a pinch of sea salt. These flavors work together to create a tasty treat. Now comes the fun part: blending! Blend the mixture on high speed. You want it to become silky smooth and creamy. Sometimes, you may need to pause and scrape down the sides. If it looks too thick, slowly add almond milk. This will help you get the creaminess you want. After blending, take a small taste. If you want it sweeter, blend in a little more honey or maple syrup. This is your nice cream, so make it as sweet as you like! Once your mixture is perfectly blended, carefully transfer it to a freezer-safe container. Use a spatula to smooth the top. Seal the container tight, then place it in the freezer. Let it freeze for about 1 to 2 hours for a firmer texture. When it’s ready, scoop the nice cream into chilled bowls. Enjoy your cool and creamy treat! To get the best texture for your nice cream, thaw the bananas a bit. Frozen bananas blend better when they are not rock hard. Let them sit out for about five minutes. This little trick helps make your nice cream silky and smooth. If you skip this step, your blender may struggle, and you might not get the creamy texture you want. You can change how sweet your nice cream is based on your taste. I like to start with one tablespoon of honey or maple syrup. If you want it sweeter, add a bit more. Always taste the mixture before you freeze it. This way, you can adjust to your liking. Remember, the ripeness of the bananas also affects sweetness. Riper bananas will add more natural sweetness. Presentation is key when serving nice cream. Use chilled bowls to keep it cool and creamy. Top each bowl with dark chocolate shavings or chopped nuts for extra flavor and crunch. You can also drizzle a bit of peanut butter on top. These simple touches make your nice cream look and taste even better! Pro Tips Use Overripe Bananas: The riper the bananas, the sweeter and creamier your nice cream will be. Look for bananas with brown spots for the best flavor! Experiment with Nut Butters: While peanut butter is delicious, try using almond butter or cashew butter for a unique twist on your nice cream. Adjust Consistency: If you prefer a softer nice cream, enjoy it right after blending. For a firmer texture, let it freeze longer. Garnish Creatively: Enhance your presentation with fresh fruit, shredded coconut, or a drizzle of chocolate sauce for added flavor and visual appeal. {{image_4}} You can make this nice cream even better by adding flavors. - Cocoa Powder: Mix in 2 tablespoons of cocoa powder for a chocolate twist. This adds richness and depth. - Berries: Blend in a cup of frozen berries for a fruity touch. Strawberries or blueberries work great. If you're not a fan of peanut butter, no worries! - Almond Butter: Use almond butter for a nutty flavor. This option is smooth and creamy. - Cashew Butter: Cashew butter offers a mild taste. It blends well and keeps it creamy. You can easily make this a vegan dish. - Check Ingredients: Ensure you use maple syrup instead of honey. All other ingredients are already vegan-friendly. Enjoy a guilt-free treat! To store your nice cream, use a freezer-safe container. Make sure to seal it tightly. This helps keep out air and prevents ice crystals. When you freeze nice cream, it may become harder. To avoid this, smooth the top before sealing. You can also press plastic wrap directly on the surface. This helps keep it creamy. Your peanut butter banana nice cream can stay fresh for up to two weeks in the freezer. After that, it may lose some flavor and texture. If you store it longer, check for ice crystals. These can affect the taste. If your nice cream gets too hard, don’t worry! Take it out of the freezer and let it sit for about 5 to 10 minutes. This short thawing time helps bring back the creaminess. You can also blend it again. Add a splash of almond milk to help it smooth out. This will make it easy to scoop and enjoy! Yes, you can! This nice cream is very flexible. You can swap bananas for other fruits. Here are some great options: - Mango: For a tropical twist. - Strawberries: For a fruity and fresh flavor. - Peaches: For a sweet and juicy treat. - Blueberries: For a burst of color and antioxidants. Experimenting with these fruits can lead to new and exciting flavors! Absolutely! This recipe is perfect for meal prep. You can make nice cream in advance and store it. Here’s how: - Freeze bananas: Slice and freeze your bananas a day ahead. - Blend and store: Prepare the nice cream and place it in a container. - Quick desserts: Just scoop it out when you want a treat. This way, you always have a sweet snack ready to go! Serving nice cream is all about the details. Here are some tips: - Optimal temperature: Let the nice cream sit for a minute before scooping. This makes it easier to serve. - Chilled bowls: Use chilled bowls for a refreshing experience. - Garnishes: Top with dark chocolate shavings or nuts for a nice look. These tips will make your nice cream even more inviting and fun to eat! This blog post covered how to make a delicious nice cream using just a few ingredients. We walked through preparing the bananas, blending them with peanut butter and other goodies, and freezing the mix. You can customize this treat with different flavors and toppings. I emphasize the importance of letting bananas thaw for creamy texture. Store your nice cream well for the best taste later. Enjoy this quick, fun, and tasty dessert that you can make anytime!

Peanut Butter Banana Nice Cream Simple Frozen Treat

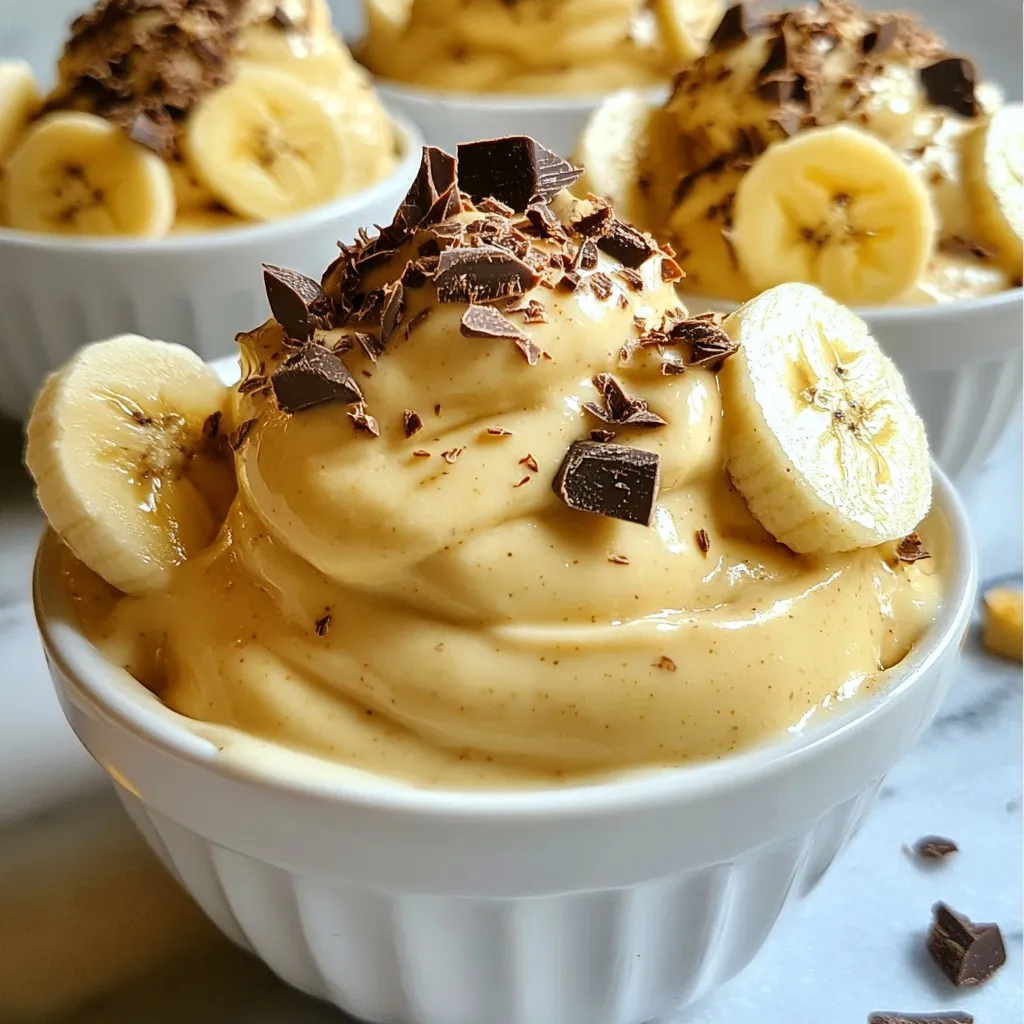
Craving a cool, healthy treat? Look no further! This Peanut Butter Banana Nice Cream is simple, delicious, and perfect for

- 1 cup fresh or frozen blueberries - 1 ripe banana, sliced - 1 cup coconut milk - 1/2 cup Greek yogurt - 1 tablespoon honey or maple syrup - 1 tablespoon chia seeds - Ice cubes (if using fresh blueberries) This blueberry coconut smoothie is simple to make. You start with blueberries, which give the drink a sweet, fruity flavor. Bananas add creaminess and natural sweetness. Coconut milk gives it a rich, tropical taste. Greek yogurt makes it thick and helps with protein. Chia seeds add a nice crunch and extra nutrition. They are full of fiber and omega-3s, which are good for your heart. Honey or maple syrup can sweeten your smoothie. If you like it sweeter, you can add more. If you use fresh blueberries, toss in some ice cubes. This helps chill your smoothie. Frozen blueberries keep it cool, so you can skip the ice. The balance of these ingredients creates a delicious treat. You can enjoy this smoothie any time of day. For the complete recipe, check out the Full Recipe. To start, you need to prepare your base. If you are using fresh blueberries, grab a handful of ice cubes. This will help keep your smoothie nice and cold. If you choose frozen blueberries, you can skip the ice since they will chill the drink perfectly. Make sure all your ingredients are ready. This includes your banana, coconut milk, Greek yogurt, and any sweeteners you want to add. Now, it’s time to blend! Put the blueberries, sliced banana, coconut milk, Greek yogurt, and honey or maple syrup into the blender. If you want a health boost, add chia seeds at this stage. Blend on high speed for 30 to 60 seconds. Check if the mixture is smooth and creamy. Sometimes, you might need to pause and scrape down the sides of the blender to mix everything well. After blending, taste your smoothie. If you want it sweeter, you can add more honey or maple syrup. Blend again for a few seconds to mix in the sweetener. When it’s ready, pour the smoothie into two tall glasses. To make it look special, top each glass with a few whole blueberries or a sprinkle of chia seeds. You can even add a slice of banana on the rim or a sprig of mint for some flair. Enjoy your Blueberry Coconut Bliss Smoothie! For the complete recipe, check the Full Recipe section. When choosing bananas and blueberries, look for ripe options. Ripe bananas have a few brown spots. This means they will be sweeter and creamier. For blueberries, choose plump berries with a deep blue color. Avoid any with green or mushy spots. You can add extra flavors too. A splash of vanilla extract gives a nice touch. Protein powder is another great option. It makes your smoothie more filling and nutritious. Chia seeds are a fantastic addition to your smoothie. They are small but mighty. They provide fiber, protein, and omega-3 fatty acids. They can help with digestion and heart health. If you want to swap Greek yogurt, try dairy-free yogurt. Coconut yogurt is a great choice. It adds creaminess and keeps the tropical vibe. You can also use silken tofu for added protein without dairy. To adjust the thickness, add more coconut milk or yogurt. If you want a thinner smoothie, pour in some extra coconut milk. For a thicker texture, add more yogurt. For a creamy blend, start by blending the bananas first. This helps break them down before adding other ingredients. If it gets stuck, pause and scrape the sides. This way, everything mixes well. {{image_4}} You can easily make this smoothie dairy-free. Instead of Greek yogurt, use coconut yogurt. Coconut yogurt adds a lovely flavor and keeps the texture creamy. If you want a sweeter taste, adjust the honey or maple syrup. You can also use unsweetened coconut milk for a lighter option. This way, your smoothie remains delicious without any dairy. Want to make the smoothie healthier? Add leafy greens! Spinach or kale blends well with blueberries. You won’t even taste them. Greens boost vitamins and minerals. They add fiber and help with digestion. Plus, the bright color of the smoothie stays vibrant. It’s a fun way to sneak in some veggies. Feel free to mix in other fruits! Strawberries, mango, or even pineapple can add new flavors. Each fruit brings its own taste and sweetness. Pair fruits that balance each other, like tart with sweet. This adds depth to your smoothie. You can create endless flavor combinations for a fresh treat every time. To keep your blueberry coconut smoothie fresh, use airtight containers. Glass jars work great. Store the smoothie in the fridge for up to two days. After that, it may lose its taste and texture. If you have extra smoothie, freezing is a smart option. Pour the smoothie into ice cube trays or small containers. This way, you can grab just what you need later. To use, let the cubes sit out for about 10 minutes. Alternatively, place them in the fridge overnight to thaw. When you thaw a smoothie, it might look a little different. To fix this, just blend it again. Add a splash of coconut milk if it seems thick. This helps restore its smooth texture. If you notice separation, don't worry. A quick blend will bring it all back together. Aim for a creamy finish, just like when you first made it! Yes, you can use frozen blueberries. Frozen berries have many benefits. They are often picked at peak ripeness, which means they are sweet and packed with nutrients. Using frozen blueberries also helps chill your smoothie without needing ice. This makes your drink creamy and smooth. To make this smoothie vegan, swap out dairy products. Use dairy-free yogurt instead of Greek yogurt. For milk, choose canned coconut milk or carton coconut milk. Instead of honey, try maple syrup or agave syrup as a sweetener. These options keep your smoothie tasty and plant-based. This smoothie is full of health benefits. Blueberries are rich in antioxidants. They help fight free radicals in your body. Coconut milk is a great source of healthy fats. It gives energy and supports heart health. Together, these ingredients create a nutritious treat that’s good for you. Yes, you can add protein powder. It boosts protein levels in your drink. Use plant-based protein powders like pea or hemp. Aim for one scoop, or about 20 grams of protein. This addition makes your smoothie filling and great for recovery after workouts. Enjoy your Blueberry Coconut Bliss Smoothie with these simple tips for a tasty experience! For the full recipe, check the recipe section. This smoothie recipe is both simple and versatile. We explored each ingredient, from fresh blueberries to Greek yogurt, and how to blend them perfectly. I shared tips to enhance flavor and nutritional value, plus fun variations to keep things exciting. Proper storage methods ensure you can enjoy leftovers, too. Remember, smoothies should be both delicious and nutritious. Experiment with other fruits and greens to find your favorite combo. With this guide, you can create the ideal smoothie for any occasion. Enjoy your healthy drink!

Blueberry Coconut Smoothie Simple and Delicious Treat

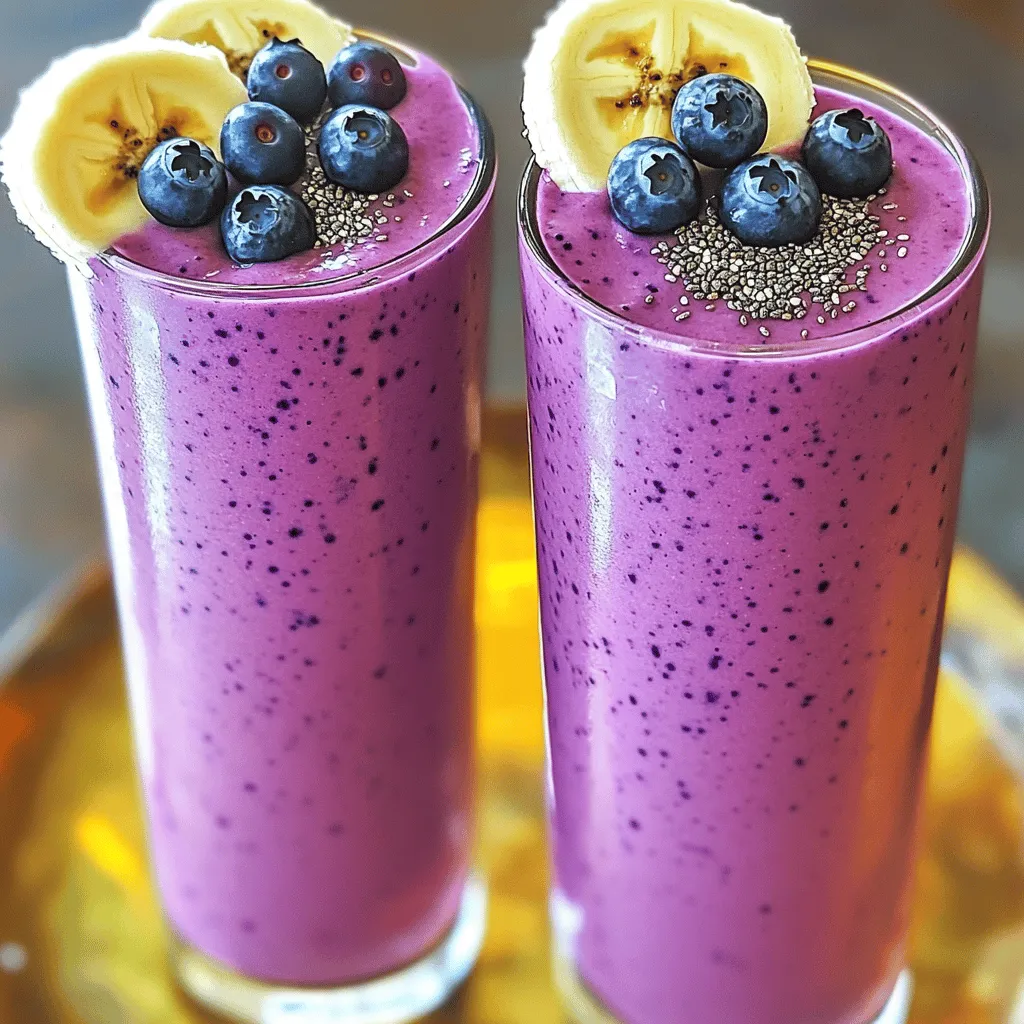
Looking for a tasty treat that’s simple to make? This Blueberry Coconut Smoothie is the answer! Packed with fresh blueberries,

To make a tasty pistachio crusted salmon, you will need: - 4 salmon fillets (approximately 6 oz each) - 1 cup shelled pistachios, finely chopped - 2 tablespoons Dijon mustard - 1 tablespoon honey - 2 tablespoons extra virgin olive oil - 1 teaspoon garlic powder - 1 teaspoon freshly grated lemon zest - Salt and freshly ground black pepper to taste These ingredients work together to create a flavorful dish. The salmon brings rich taste and protein, while the pistachios add crunch and depth. You can enhance your meal with some sides. Consider these options: - Fresh parsley, finely chopped (for garnish) - Sautéed spinach - Roasted vegetables - Extra honey drizzle for sweetness These garnishes and sides not only look good but also boost flavor. They help make your plate vibrant and appealing. Choosing the right salmon is key. Here are some tips: - Look for bright, moist fillets. - The flesh should be firm to the touch. - Check for a clean, ocean-like smell. - Avoid salmon with brown spots or discoloration. Fresh salmon guarantees a tasty meal. When you have good quality fish, your dish shines. Remember, the best meals start with the best ingredients! Start by preheating your oven to 400°F (200°C). This step helps cook the salmon evenly. Next, line a baking sheet with parchment paper. This keeps the fish from sticking and makes cleanup easy. Take your salmon fillets and place them skin-side down on the sheet. This method ensures even cooking and prevents them from sticking. In a small bowl, combine Dijon mustard, honey, olive oil, garlic powder, and lemon zest. Add a pinch of salt and pepper. Whisk these together until smooth. This mixture adds flavor and helps the pistachios stick. Once mixed, spread it generously over the top of each salmon fillet. Make sure to cover them well. Then, take your finely chopped pistachios and press them onto the mustard-coated salmon. Use enough nuts to create a nice crust. This coating is what makes the dish special and adds a crunchy texture. Now it's time to bake the salmon. Place the baking sheet in the preheated oven. Bake for 12-15 minutes. Check the salmon at the 12-minute mark. It should be opaque and flake easily with a fork when done. Once cooked, remove the salmon from the oven. Let it rest for 3-5 minutes. This resting time helps keep the fish juicy. For a nice touch, sprinkle freshly chopped parsley on top just before serving. This adds color and freshness to your dish. If you want more sweetness, drizzle a little extra honey on top. This whole process makes a delicious meal that looks great on your plate. For the full recipe, check out the details above! To get that crispy crust, you need to use finely chopped pistachios. This helps them stick better. Press the nuts firmly onto the salmon. This ensures they form a nice layer. Bake your salmon at 400°F (200°C). This high heat crisps up the nuts quickly. Do not open the oven door while it cooks. This keeps the heat in, which helps the crust stay crunchy. The oven is my favorite way to cook salmon. It cooks evenly and gives a great texture. You can also grill it for a smoky flavor. If you like, pan-searing is another option. Just make sure to use a non-stick pan. This way, the salmon will release easily. Whatever method you choose, always check the internal temperature. It should reach 145°F (63°C) for safe eating. To boost the flavor, add herbs like dill or thyme to the mustard mix. These herbs add freshness and depth. You can also sprinkle a bit of paprika for a hint of spice. For sides, roasted veggies or a light salad work well. They balance the richness of the salmon. Try serving it with lemon wedges to add zing. This dish pairs nicely with a crisp white wine, too. If you want the full steps, check out the Full Recipe. {{image_4}} You can change the pistachios for other nuts. Walnuts, almonds, or hazelnuts work great. Each nut gives a unique taste. For a sweeter touch, use pecans. Just chop them finely and follow the same steps. This keeps the dish fresh and fun. Instead of the mustard mix, try other flavors. A soy sauce blend adds a savory twist. Mix soy sauce, ginger, and a splash of lime. For a spicy kick, use chili paste. These options change the dish without much effort. You can also use honey and balsamic vinegar for a sweet glaze. Each choice brings its own flair. You can serve this salmon in many ways. For a fancy dinner, plate it with risotto and asparagus. For a casual meal, pair it with rice and steamed broccoli. If it’s a barbecue, serve it with a fresh salad. Each setting lets you enjoy the flavors differently. This flexibility makes the dish special for any event. After cooking your pistachio crusted salmon, let it cool. Store leftovers in an airtight container. This keeps the salmon fresh. Use the salmon within two days for the best taste. If you place it in the fridge, it will stay safe to eat. To reheat, I recommend using the oven. Preheat it to 350°F (175°C). Place the salmon on a baking sheet. Cover it with foil to keep it moist. Heat for about 10 minutes or until warm. You can also use a microwave, but it may dry out the salmon. Heat it for 30 seconds at a time until warm. If you want to keep the salmon longer, freeze it. Wrap each piece tightly in plastic wrap. Then, place it in a freezer bag. Squeeze out the air to prevent freezer burn. This way, you can freeze the salmon for up to three months. When ready to eat, thaw it in the fridge overnight. Then, reheat it using the instructions above. For a detailed guide, check the Full Recipe. Salmon is cooked when it turns opaque and flakes easily with a fork. This usually takes about 12-15 minutes at 400°F (200°C). You can also check the thickest part of the fillet. If it reaches an internal temperature of 145°F (63°C), it’s safe to eat. Yes, you can use other fish like trout or halibut. Just be aware that cooking times may change. Thinner fillets will cook faster, while thicker ones may need more time. Adjust based on the type of fish and its thickness. I love pairing this salmon with sautéed spinach or roasted vegetables. You can also serve it with a light salad or wild rice. These sides add color and nutrition to your plate. For a touch of sweetness, drizzle honey on top just before serving. To make this recipe gluten-free, ensure all your ingredients are certified gluten-free. The Dijon mustard and honey usually do not contain gluten, but always check the labels. This way, everyone can enjoy this tasty dish! You can also use gluten-free breadcrumbs if you want a crunchier topping. You now have a clear guide to making pistachio crusted salmon. We covered ingredients, preparation, cooking tips, and variations. Remember to choose fresh salmon for the best taste. Achieving the perfect crispy crust enhances the dish's appeal. Don't hesitate to try different nuts and flavors. This recipe is flexible for any meal or occasion. Store leftovers properly for later enjoyment. I hope this guide inspires you to create a delicious salmon dish. Enjoy your cooking and happy eating!

Pistachio Crusted Salmon Perfectly Cooked Delight

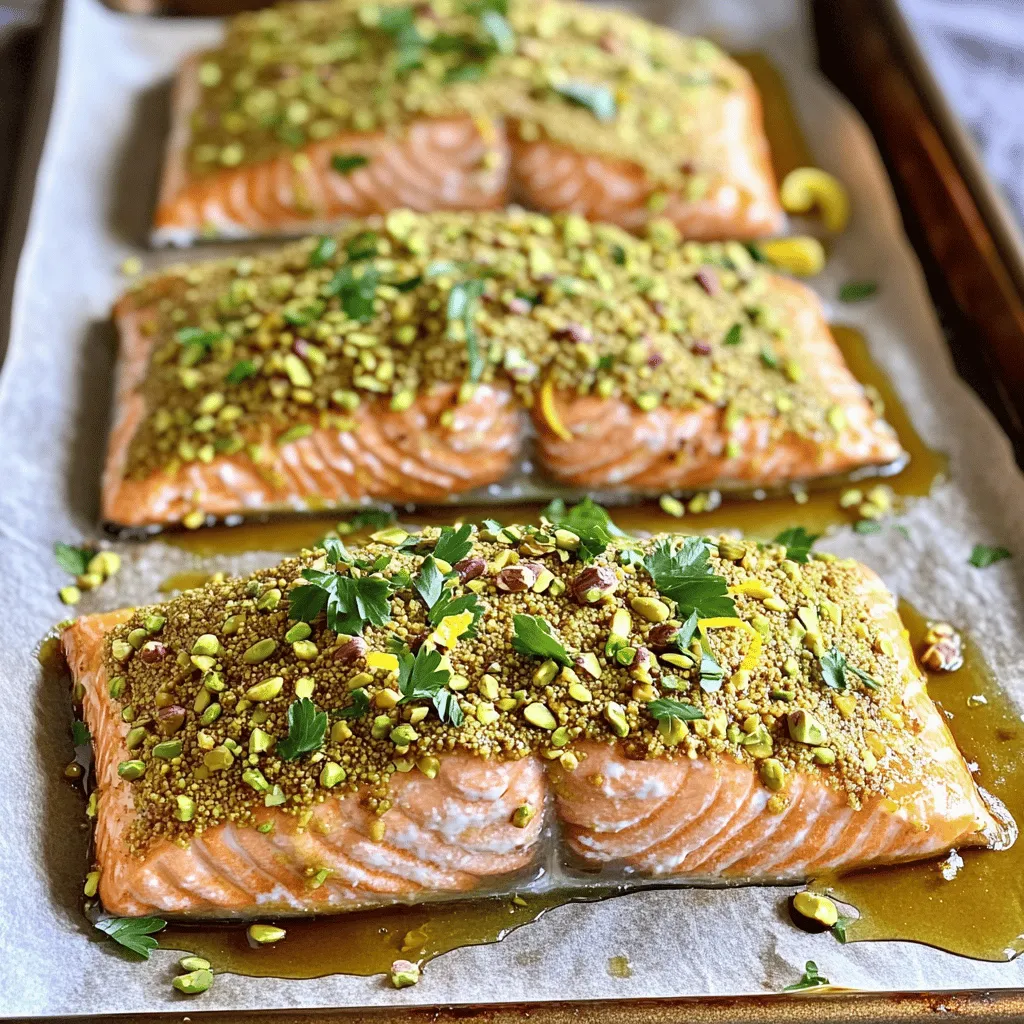
Pistachio crusted salmon is a dish that brings joy to your table. This recipe combines crunchy nuts and tender fish,

To make roasted garlic butter mushrooms, you'll need some simple yet flavorful ingredients. Here’s the list I recommend: - 500g baby bella mushrooms - 4 tablespoons unsalted butter - 1 whole bulb of garlic - 2 tablespoons fresh parsley - 1 tablespoon fresh thyme leaves - 1 teaspoon crushed red pepper flakes (optional) - Salt and pepper to taste - Zest of 1 lemon Each ingredient plays a role in creating that rich, savory taste. The baby bella mushrooms bring a nice earthiness. The butter and garlic combine to create a creamy, aromatic sauce. Fresh herbs like parsley and thyme add brightness. Lemon zest gives a pop of freshness that balances the dish. When I prepare this, I love to focus on quality. Fresh herbs and good-quality butter make a big difference. Sourcing your ingredients sustainably not only helps the planet but also boosts flavor. For a detailed guide on how to combine these ingredients, check the Full Recipe. - Preheat your oven to 400°F (200°C). - In a medium saucepan, melt 4 tablespoons of unsalted butter over low heat. Add 1 whole bulb of peeled garlic cloves. Let them simmer for about 10 minutes. This will soften the garlic and blend its flavor into the butter nicely. - In a large bowl, mix 500g of cleaned baby bella mushrooms with the garlic butter. - Add 2 tablespoons of finely chopped fresh parsley, 1 tablespoon of fresh thyme leaves, and 1 teaspoon of crushed red pepper flakes if you like heat. - Season with salt, pepper, and the zest of 1 lemon. Toss everything gently to coat each mushroom well. - Line a baking sheet with parchment paper. Spread the mushroom mixture evenly over the sheet. - Roast the mushrooms in your preheated oven for 25 to 30 minutes. Stir them halfway through to ensure even cooking. The mushrooms should be tender and golden brown when done. For the full recipe, check out the Garlic Bliss Roasted Mushrooms section. To get the best garlic flavor, simmer the garlic in butter for about 10 minutes. This step softens the garlic and lets its taste infuse into the butter. If you like a stronger garlic taste, you can add more cloves. Just be careful, too much can overpower the dish. Look for mushrooms that are golden brown and tender to know they are done. If they are soggy, it might be because they sat in too much liquid. To avoid that, dry the mushrooms well before cooking. Make sure to spread them in a single layer on the baking sheet, so they roast nicely. For an elegant finish, serve the roasted mushrooms in a shallow bowl. Drizzle any leftover garlic butter from the baking sheet over the top. Garnish with chopped parsley and a sprinkle of lemon zest for a bright touch. This makes the dish not only tasty but also beautiful to look at. {{image_4}} You can change up the herbs for new tastes. Try using fresh rosemary or dill. Both herbs add unique flavors. Rosemary brings a woodsy note, while dill adds a fresh twist. Mix and match herbs to find your favorite combo. Want to make this dish heartier? You can add cooked chicken or shrimp. Simply toss them in with the mushrooms before roasting. For a vegetarian option, try chickpeas or tofu. These proteins soak up garlic butter flavor well. To add some heat, sprinkle in chili powder or a splash of sriracha. This will kick up the flavor. If you prefer a milder taste, skip the spices or use less. Adjusting spice levels helps suit everyone’s palate. Try these variations to make roasted garlic butter mushrooms your own. For the full recipe, check the section above! To keep your roasted garlic butter mushrooms fresh, store them in an airtight container. This helps lock in flavors and moisture. Let the mushrooms cool before sealing them. You can keep them in the fridge for up to three days. After that, they may lose their taste and texture. When reheating, the oven is best. It helps keep the mushrooms crisp. Preheat your oven to 350°F (175°C). Place the mushrooms on a baking sheet and heat for about 10 minutes. This way, they stay tasty and warm. If you need a quick fix, use the microwave. Place the mushrooms in a microwave-safe dish. Cover them to avoid drying out. Heat for 1-2 minutes, checking often. Just remember, they might lose some texture this way. For the best flavor and texture, always reheat gently. Avoid high heat, as it can make them soggy. Enjoy your delicious leftovers! You can find the full recipe for garlic bliss roasted mushrooms to make a fresh batch anytime. Yes, you can use different types of mushrooms. Portobello and shiitake mushrooms are great options. Portobello mushrooms have a meaty texture, which adds depth to the dish. Shiitake mushrooms offer a rich, earthy flavor. Try mixing different mushrooms for a unique taste experience. Absolutely! To make this dish vegan, use vegan butter instead of regular butter. Look for brands that melt well. For garlic, you can still use fresh garlic or try roasted garlic for a sweeter taste. These swaps keep the dish flavorful while meeting vegan needs. You can enhance the flavor by adding more herbs or spices. Fresh basil or oregano can work well. For a bolder taste, try adding balsamic vinegar or soy sauce. Marinating the mushrooms before roasting will also help. Let them soak in the garlic butter mix for at least 30 minutes. This allows the flavors to penetrate deeper into the mushrooms. This blog post showed you how to make delicious garlic butter roasted mushrooms. We covered the key ingredients, simple steps, and helpful tips for perfecting your dish. Remember to check the mushrooms for doneness and adjust flavors to your liking. You can even add proteins or swap herbs for a new twist. Keep your leftovers fresh and enjoy experimenting with different flavors. These mushrooms will surely impress at any meal. Happy cooking!

Roasted Garlic Butter Mushrooms Tasty and Simple Dish

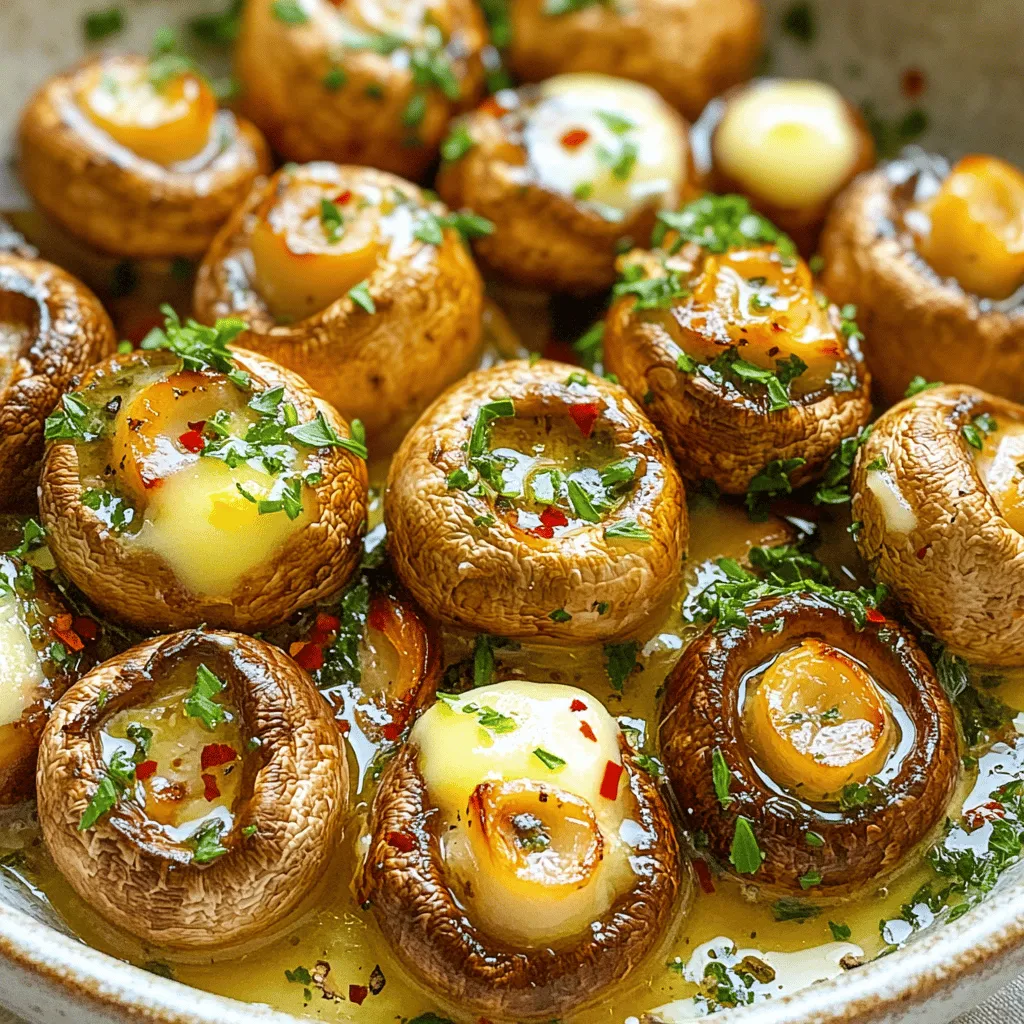
If you’re looking for a quick, tasty side dish, you’ve hit the jackpot! Roasted Garlic Butter Mushrooms are simple to

- 1 small head of purple cauliflower - 1 small head of orange cauliflower - 1 small head of green cauliflower (or broccoli) - 1 cup cherry tomatoes - 1 cup corn kernels - 1/2 red onion - 1/4 cup fresh parsley - Salt and freshly ground pepper - 3 tablespoons extra virgin olive oil - 2 tablespoons apple cider vinegar - 1 tablespoon honey (or maple syrup) - Optional: 1/4 cup crumbled feta cheese Gathering fresh produce is the key to this salad’s vibrant look. I love using colorful cauliflowers. Each type brings a unique taste. Purple cauliflower has a sweet flavor. Orange cauliflower is milder. Green cauliflower, or broccoli, adds crunch. Cherry tomatoes add juiciness and a burst of flavor. Corn kernels provide sweetness and a nice texture. Use fresh corn for the best taste, but frozen works too. Next, we need aromatics. Red onion gives a bit of bite. Fresh parsley adds a bright note. Salt and freshly ground pepper enhance all flavors. The dressing is simple but tasty. Extra virgin olive oil adds richness. Apple cider vinegar brings tanginess. Honey or maple syrup adds sweetness. If you want to elevate the dish, add feta cheese. It gives a creamy texture and a slight saltiness. These ingredients come together in the Rainbow Cauliflower Salad. With the full recipe, you can create this colorful dish easily. First, let’s get our cauliflower ready. Fill a large pot with water and bring it to a boil. This should take just a few minutes. Next, add the cauliflower florets. I like to do this in batches. Blanch each type—purple, orange, and green—for about 2-3 minutes. You want them bright, yet still crisp. Once done, it’s time for a quick shock! Transfer the florets to an ice bath. This is a bowl filled with ice water. The cold water stops the cooking right away. After about 5 minutes, drain the florets well. Gently pat them dry with a kitchen towel. This step keeps the salad from getting soggy. Now, let’s put the salad together. In a big mixing bowl, combine the blanched cauliflower, halved cherry tomatoes, corn, finely diced red onion, and chopped parsley. Toss them gently. You want everything to mix nicely without breaking the cauliflower. Next, we’ll make the dressing. In a smaller bowl, whisk together the olive oil, apple cider vinegar, honey, salt, and pepper. Do this until it blends well and gets a bit creamy. This dressing adds great flavor to our salad. Drizzle the dressing over the salad mixture. Toss it gently again. Make sure every piece gets some dressing. If you like feta, sprinkle it on top now. This adds a creamy, tangy taste that pairs well with the fresh veggies. Serve the salad right away for the best flavor. If you want, you can chill it for about 30 minutes. This helps the flavors mix even more. For a stunning presentation, use a large, shallow bowl. Garnish with extra parsley and a sprinkle of feta on top. This makes the dish look even more vibrant. For the full recipe, check out the details above! When I pick cauliflower, I look for vibrant colors. Bright purple, orange, and green heads catch my eye. They should feel firm and heavy in your hands. Avoid any with brown spots or soft spots. Seasonal varieties taste best. Look for them at local farmers' markets. To boost flavor, add fresh herbs like basil or mint. These herbs bring a new taste to the salad. You can also try a lemon vinaigrette. It adds a bright, zesty kick that pairs well. For creaminess, swap the olive oil dressing with a yogurt-based one. For serving, use a large, shallow bowl. This way, all the colors pop. Layer the ingredients for a beautiful display. Garnish with extra parsley and a sprinkle of feta cheese on top. This adds both color and texture. For a fun twist, serve in individual cups for a party! For the full recipe, check out the Rainbow Cauliflower Salad. {{image_4}} You can change the salad based on what's fresh. Add seasonal vegetables like zucchini or bell peppers. These veggies not only taste great but also add more color. You can also swap in fruits. Try diced apples or berries for a sweet twist. These fruits make the salad lively and bright. If you want a vegan version, skip the feta cheese. Instead, add more fresh herbs or nuts for flavor. You can also use avocado for creaminess. For gluten-free options, this salad is already safe. Just check your dressing to ensure it's gluten-free. To make it a grain salad, mix in cooked quinoa. This addition adds protein and makes it more filling. When serving, use a large, shallow bowl. This way, the colors pop. For gatherings, you can layer the salad in a jar. It looks stunning and is easy to serve. For the full recipe, check out Rainbow Cauliflower Salad. To store leftover rainbow cauliflower salad, place it in an airtight container. Make sure to cover it well to keep it fresh. You can store it in the fridge for up to three days. After that, the vegetables may lose their crunch and flavor. Can you freeze cauliflower salad? Yes, you can freeze it, but keep in mind that freezing changes the texture. To freeze, put the salad in a freezer-safe container. Make sure to leave some space at the top for expansion. When you are ready to eat it, thaw the salad overnight in the fridge. To refresh your salad, add a splash of olive oil and a squeeze of lemon juice. This helps bring back the flavors. Toss in some fresh herbs like parsley or basil for extra taste. If the salad seems dry, you can add a little more dressing. This will make it taste fresh again. Enjoy your colorful dish! For the Full Recipe, check out the detailed steps above. Yes, you can use just one type of cauliflower. This makes prep easy and quick. For example, purple cauliflower brings a nice color to your dish. Orange cauliflower adds a sweet flavor. Green cauliflower, or broccoli, is a great choice too. Each type has its own charm, so pick what you like best! Making the salad ahead is simple. You can prepare the cauliflower a day early. Just blanch it, cool it, and store it in the fridge. Chop the other veggies, like tomatoes and onions, and put them in a separate container. Mix the dressing and keep it in a jar. On serving day, combine everything for fresh flavor! Cauliflower is packed with nutrients. It has vitamins C, K, and B6. It also provides fiber for good digestion. Eating cauliflower may help with weight loss, too. Plus, it has antioxidants that fight bad stuff in our bodies. Enjoying cauliflower is a smart choice for health! This blog post covered how to make a vibrant cauliflower salad. We explored key ingredients like fresh cauliflower and seasonings. I shared clear instructions for preparing and assembling the salad. You learned tips for enhancing flavors and making it visually appealing. Finally, I discussed storage options for leftovers and how to keep your salad fresh. Enjoy experimenting with variations and personal touches to make this salad your own. Embrace creativity in the kitchen, and savor the delicious, healthy results!

Rainbow Cauliflower Salad Flavorful and Colorful Dish

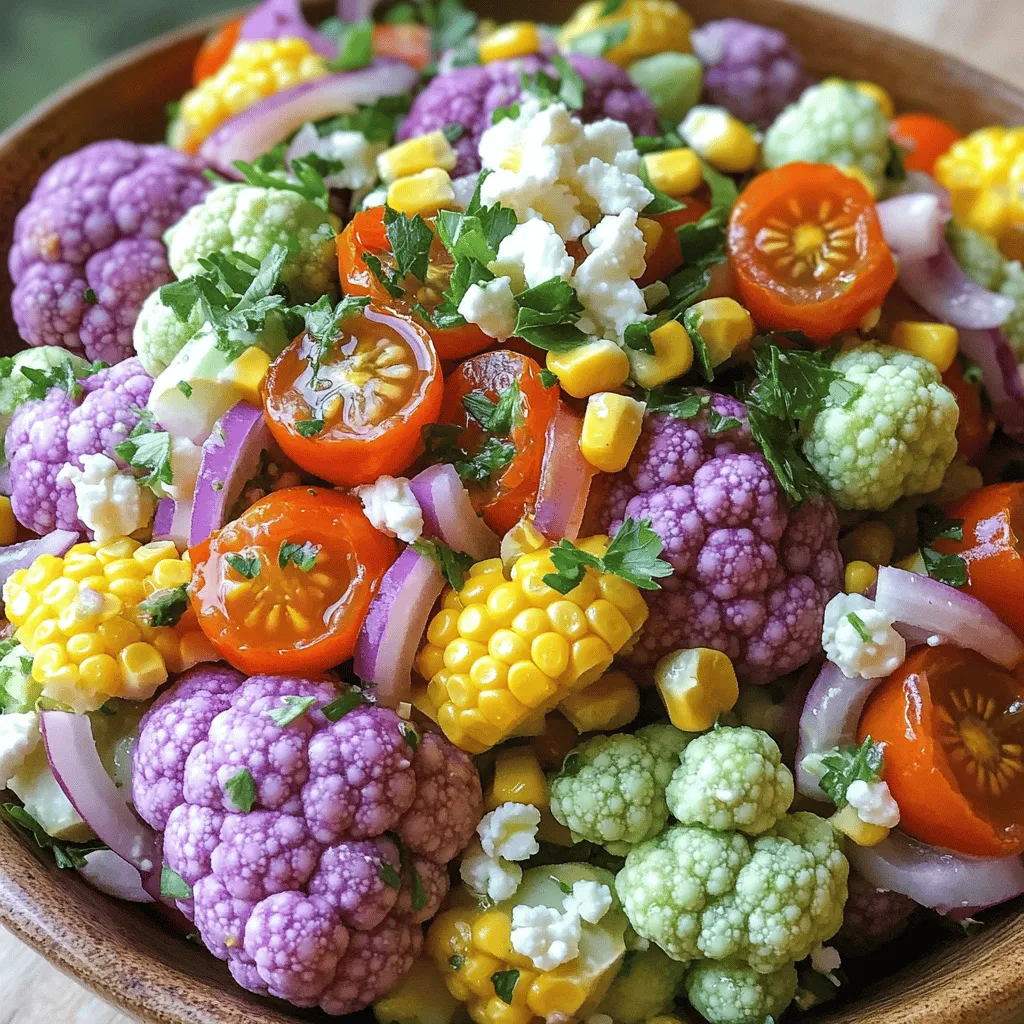
Are you ready to brighten your meal with a Rainbow Cauliflower Salad? This colorful dish not only looks stunning but

Older posts
Newer posts
← Previous Page1 … Page42 Page43 Page44 … Page120 Next →

dsad

© 2026 recipetorch • Built with GeneratePress

Our Policies

  • Copyright Policy
  • Cookie Policy
  • GDPR Policy
  • Privacy Policy
  • Disclaimer
  • Terms Of Use

More Information

  • Home
  • About
  • Contact
  • Appetizers
  • Dessert
  • Dinner
  • Drinks
©2026, recipetorch About Back To Top