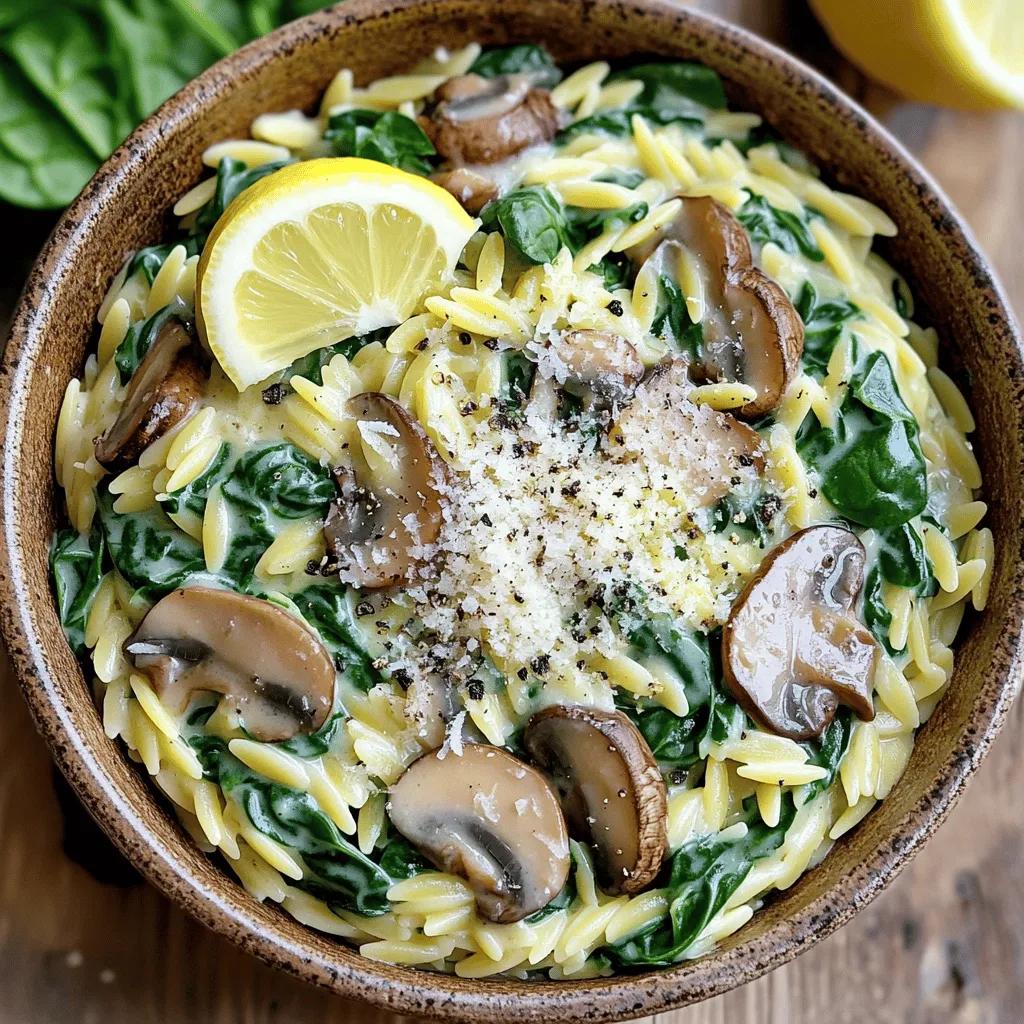
Creamy Spinach Mushroom Orzo Flavorful Dinner Delight
Ready to impress your family with a simple yet delightful dish? Creamy Spinach Mushroom Orzo is your answer! This flavorful
Ready to impress your family with a simple yet delightful dish? Creamy Spinach Mushroom Orzo is your answer! This flavorful
![- 1 cup cooked quinoa - 1 can (15 oz) chickpeas, thoroughly drained and rinsed - 1 ripe red bell pepper, finely diced - 1 cup freshly shredded carrots - 1 creamy avocado, sliced into wedges - 2 cups vibrant mixed greens (such as spinach and arugula) - 1/4 cup green onions, finely chopped - 1/4 cup roasted peanuts, coarsely chopped The base of this bowl is made with cooked quinoa and chickpeas. Quinoa gives a nutty taste while being rich in protein. Chickpeas add texture and more protein. Fresh veggies like bell pepper and carrots bring crunch and color. Avocado adds creaminess, while greens provide a fresh touch. Finally, green onions and peanuts add zest and crunch. - 1/4 cup smooth peanut butter - 2 tablespoons soy sauce (or tamari for a gluten-free option) - 1 tablespoon fresh lime juice - 1 tablespoon pure maple syrup - 1 teaspoon sriracha (adjust according to your spice preference) - 1-2 tablespoons water (to achieve your desired sauce consistency) This sauce ties the bowl together. The peanut butter gives creaminess. Soy sauce adds saltiness, and lime juice brings bright flavor. Maple syrup adds a touch of sweetness, while sriracha gives a spicy kick. You can adjust the spice level by adding more or less sriracha. Adding water helps make the sauce smooth and pourable. - Servings per recipe: 2 - Key nutritional information per serving: - Calories: 550 - Protein: 20g - Fiber: 15g This recipe makes two servings, perfect for sharing or meal prep. Each serving packs a punch of nutrients. You get healthy fats from avocado and peanuts, protein from quinoa and chickpeas, and lots of fiber. Enjoy this bowl for a hearty, healthy meal. For the complete details on how to make this delicious dish, check out the Full Recipe. 1. In a small bowl, add the smooth peanut butter, soy sauce, lime juice, maple syrup, and sriracha. 2. Whisk these ingredients together until the mix is smooth and creamy. 3. If the sauce feels too thick, add one to two tablespoons of water. 4. Keep adding water slowly until you reach a consistency you like. Set this sauce aside for later. 1. In a large mixing bowl, combine the cooked quinoa, drained chickpeas, diced red bell pepper, and shredded carrots. 2. Gently mix the ingredients so everything combines well. 3. Drizzle half of the zesty spicy peanut sauce over the mixture. 4. Toss gently to coat all the ingredients evenly with the sauce. 1. Start by layering vibrant mixed greens in serving bowls or plates. 2. Spoon the quinoa and chickpea mixture over the greens. This creates a colorful display. 3. Arrange sliced avocado, chopped green onions, and roasted peanuts on top. This adds both texture and flavor. 4. Lastly, drizzle the remaining zesty spicy peanut sauce over the bowl. You can also serve it on the side for dipping. For a stunning look, use a large, shallow bowl to show off the layers. You can also add toasted sesame seeds or a lime wedge to brighten it up! Enjoy your beautifully crafted Buddha bowl! To make your sauce just right, start by adjusting the spice. If you like it hot, add more sriracha. If you prefer mild, cut back. Taste as you go to find your perfect heat level. When choosing veggies, look for fresh and colorful options. Bright bell peppers and crisp carrots not only add flavor but also make your bowl look great. Fresh ingredients taste better and keep your dish lively. Meal prep can save you time. Cook extra quinoa at the start of the week. Store it in the fridge for quick use. This makes assembly a breeze on busy days. I also recommend cooking chickpeas from scratch. If you do this, soak them overnight. This small step makes a big difference in taste and texture. For crunch, try different nuts or seeds. Almonds or sunflower seeds can add a fun twist. Each option gives a new flavor and texture to your bowl. Crispy toppings like baked chickpeas or fried onions can also enhance your dish. They add a satisfying crunch that pairs perfectly with the creamy sauce. Enjoy experimenting with textures to make your bowl your own! {{image_4}} You can swap chickpeas for other beans. Black beans or kidney beans work great. Each type brings a new taste and texture to the bowl. You can also try lentils for a different twist. For a gluten-free sauce, use tamari instead of soy sauce. This small change keeps the flavor while making it safe for gluten-sensitive diets. You can also use coconut aminos for a sweeter sauce. Using seasonal vegetables makes your bowl fresh and exciting. In spring, add asparagus or peas. In fall, roasted sweet potatoes or Brussels sprouts shine. Each season offers unique flavors to enhance your dish. You can also change the sauce ingredients. For a zestier kick, try adding ginger or garlic. If you want it sweeter, add a touch more maple syrup. This keeps the dish interesting each time you make it. Get creative with fusion ideas! For a Thai twist, use coconut milk in the sauce. You might add fresh herbs like basil or cilantro for extra flavor. If you lean Mediterranean, use olive oil and lemon juice instead of the peanut sauce. You can also switch up your grain base. Brown rice or farro adds a hearty touch. Quinoa is great, but these options bring new textures and tastes to your bowl. For the full recipe, check out the details above. Enjoy creating your spicy peanut chickpea Buddha bowl! Store any leftovers in an airtight container. Keep it in the fridge to maintain freshness. The Buddha bowl lasts about 3 to 4 days. If you want to keep it longer, consider freezing some parts. For freezing, separate the components. Freeze the quinoa and chickpeas together. Keep veggies like bell pepper and avocado in the fridge. When you’re ready to eat, thaw the quinoa and chickpeas in the fridge overnight. Reheat them in a pan or microwave until warm. To prep for the week, wash and chop your veggies in advance. Store them in separate containers to keep them fresh. Make the zesty spicy peanut sauce ahead of time. Assemble your bowls when you’re ready to eat for the best taste and texture. This way, you enjoy a fresh meal without the fuss! For the Full Recipe, check the earlier section to get started on your delicious journey. Buddha bowls pack a punch of nutrition. Chickpeas are full of protein and fiber. They help keep you full and satisfied. Quinoa is another star ingredient. It is a complete protein, meaning it has all nine essential amino acids. Quinoa also offers good carbs and vitamins. Together, these ingredients support healthy digestion and energy levels. Absolutely! You can mix and match your favorite ingredients. If you don’t have chickpeas, try black beans or lentils. You can swap quinoa for brown rice or farro. Feel free to add other veggies, like cucumbers or sweet potatoes. You can also change the nuts. Try almonds or sunflower seeds for a twist. The heat level comes from sriracha in the sauce. You can adjust it to your taste. If you want it less spicy, add less sriracha. You can also use a milder hot sauce or skip it completely. For a creamy touch, add more peanut butter to balance the spice. Yes, this recipe can be gluten-free. Use tamari instead of soy sauce for the sauce. All the fresh ingredients are naturally gluten-free. Just check labels for any packaged items to ensure they are safe. Enjoy this bowl without worry about gluten! For the complete recipe, check out [Full Recipe]. This blog post highlighted how to create a delicious Buddha bowl. We covered the main ingredients, such as quinoa, chickpeas, and fresh veggies. We also shared a zesty peanut sauce recipe and tips for serving and storing. You can adapt this dish with different flavors and textures. In conclusion, a Buddha bowl is nutritious and fun to make. Enjoy the process of customizing your bowl to fit your taste. Happy cooking!](https://recipetorch.com/wp-content/uploads/2025/07/2228d468-3ebe-49b6-9c49-7fca391b4522.webp)
Welcome to your new favorite meal: the Spicy Peanut Chickpea Buddha Bowl! This vibrant dish packs a serious flavor punch
![To make this easy chicken and rice casserole, you will need the following: - 2 cups cooked white rice - 1 lb boneless, skinless chicken breasts, diced into bite-sized pieces - 1 can (10.5 oz) cream of mushroom soup - 1 cup shredded sharp cheddar cheese - 1 cup frozen mixed vegetables (peas, carrots, corn blend) - 1/2 cup low-sodium chicken broth - 1 teaspoon garlic powder - 1 teaspoon onion powder - Salt and freshly ground black pepper, to taste - 1 tablespoon extra virgin olive oil - Fresh parsley, finely chopped (for garnish) You can swap some ingredients if you need to. Here are a few ideas: - Use brown rice instead of white rice for a healthier option. - Swap cream of mushroom soup with cream of chicken soup if you prefer. - Change the cheese to mozzarella or pepper jack for a different flavor. - Replace chicken with cooked turkey or tofu for a vegetarian dish. - Use fresh veggies instead of frozen if you have them on hand. Choosing fresh ingredients can make your dish even better. Here are some tips: - For chicken, look for meat that is pink and firm with no bad smell. - Choose rice that is dry and free of any holes or discoloration. - Select fresh vegetables that are bright in color and firm to the touch. - When buying cheese, opt for blocks over pre-shredded for better melting. - Always check the expiration dates on canned goods like soup. With these ingredients and tips, you can create a tasty chicken and rice casserole. For the full recipe, check out the details above. First, gather all your ingredients. You need: - 2 cups cooked white rice - 1 lb boneless, skinless chicken breasts, diced into bite-sized pieces - 1 can (10.5 oz) cream of mushroom soup - 1 cup shredded sharp cheddar cheese - 1 cup frozen mixed vegetables - 1/2 cup low-sodium chicken broth - 1 teaspoon garlic powder - 1 teaspoon onion powder - Salt and pepper, to taste - 1 tablespoon extra virgin olive oil - Fresh parsley for garnish Next, preheat your oven to 350°F (175°C). This step makes sure your casserole cooks evenly. In a large skillet, heat the olive oil over medium heat. Once hot, add the diced chicken. Cook until the chicken is no longer pink, about 5-7 minutes. Season the chicken with garlic powder, onion powder, salt, and pepper. Stir well to coat the chicken evenly. In a large mixing bowl, combine the cooked rice, cream of mushroom soup, cheddar cheese, frozen veggies, and chicken broth. Mix everything well until all ingredients blend together. Now, add the cooked chicken from the skillet into this mixture. Gently stir until the chicken is evenly distributed throughout. Pour the entire mixture into a greased 9x13-inch casserole dish. Spread it out evenly to help it cook uniformly. Cover the dish tightly with aluminum foil. Place it in the preheated oven and bake for 25 minutes. This allows the flavors to meld together. After 25 minutes, carefully remove the foil and bake for another 10-15 minutes. Look for a golden brown and bubbly top. When done, take it out and let it cool for about 5 minutes. Garnish with chopped parsley before serving. Enjoy your Easy Chicken and Rice Casserole, simple and satisfying! To get the best texture in your casserole, use cooked white rice. This rice stays fluffy and absorbs flavors well. If you use raw rice, it may become mushy. Always sauté the chicken until it’s fully cooked. This step keeps the chicken juicy and tender. Mixing in the cheese at the right time melts it perfectly. Add garlic powder and onion powder for depth. These spices boost the savory notes in your dish. A pinch of salt and fresh black pepper brings everything together. You can try adding herbs like thyme or rosemary for an extra kick. For a creamy touch, use cream of mushroom soup, which adds richness and flavor. Prep your ingredients ahead of time. Dice the chicken and chop veggies the night before. This makes cooking faster. Use frozen mixed vegetables to save time on chopping. You can also use leftover chicken or rotisserie chicken for quick use. This way, your casserole comes together in no time, allowing you to enjoy a delicious meal without a lot of fuss. For the complete recipe, check out the [Full Recipe]. {{image_4}} To make a vegetarian version of this casserole, swap the chicken for hearty vegetables. You can use mushrooms, zucchini, and bell peppers. This adds flavor and texture. Use vegetable broth instead of chicken broth. Replace cream of mushroom soup with a homemade or store-bought vegetarian option. You can also add more cheese or use plant-based cheese for a rich taste. If you like heat, add spices to kick up the flavor. Try mixing in some diced jalapeños or crushed red pepper flakes. You can also use spicy sausage instead of chicken for a bold twist. A dash of hot sauce in the mix gives it an extra kick. Just remember to adjust the other seasonings so they balance out the heat. You can easily change the protein in this dish. Use diced turkey or cooked shrimp for a different taste. If you want a plant-based option, chickpeas or lentils work well too. These swaps keep the dish filling and tasty. Just ensure your substitutes are cooked before mixing them in. For added flavor, marinate the proteins ahead of time. These variations make the Easy Chicken and Rice Casserole fun and adaptable. Explore these ideas and enjoy your cooking journey! For the full recipe, check out the Cheesy Chicken Rice Delight . Once you finish your meal, cool the casserole to room temperature. Then, cover it tightly with plastic wrap or aluminum foil. You can also transfer it to an airtight container. This keeps the dish fresh. Store it in the fridge. It will last for 3 to 4 days. If you want to save some for later, freezing works well. Make sure the casserole cools completely first. Then, cut it into portions for easy reheating. Wrap each piece in plastic wrap, then aluminum foil to prevent freezer burn. You can freeze it for up to 3 months. Label your packages with the date. To reheat, simply take out a portion from the fridge or freezer. If it's frozen, let it thaw overnight in the fridge. Preheat your oven to 350°F (175°C). Place the casserole in an oven-safe dish and cover it with foil. Bake for about 20-25 minutes until heated through. You can also use the microwave for faster results. Just heat in short intervals, stirring in between. Enjoy your cheesy chicken rice delight again! For more details, refer to the Full Recipe. Homemade chicken and rice casserole can last about 3-4 days in the fridge. Make sure to store it in an airtight container. If you want to keep it longer, consider freezing it. It will stay good for about 2-3 months in the freezer if wrapped well. Yes, you can make this casserole ahead of time. Prepare the dish up to the baking step, cover it, and store it in the fridge. When ready, simply bake it as directed. This saves time on busy nights. Several side dishes go well with chicken and rice casserole. Here are a few ideas: - A simple green salad with vinaigrette - Steamed broccoli or green beans - Roasted carrots or zucchini - Garlic bread for some crunch Yes, you can make this dish gluten-free. Use gluten-free cream of mushroom soup and check your chicken broth for gluten. These swaps keep the flavors strong without gluten. You can use brown rice, but it requires some changes. Brown rice takes longer to cook, so you might need to pre-cook it for about 20-25 minutes before adding it to the casserole. This helps ensure everything cooks evenly in the oven. For the full recipe, check the instructions above. In this post, we explored the key ingredients for chicken and rice casserole. We covered how to pick fresh items, make substitutions, and follow clear steps to cook it right. Tips and variations made the meal adaptable for everyone. Lastly, we discussed storage and answered common questions. I hope you feel ready to make a delicious casserole packed with flavor. Enjoy your cooking!](https://recipetorch.com/wp-content/uploads/2025/07/e35371e0-4269-4e73-b740-661275c23c0d.webp)
If you’re looking for a warm, filling meal that’s easy to whip up, you’re in the right place! This Easy

Are you ready to spice up your dinner routine? Buffalo Chicken Stuffed Sweet Potatoes are a fun take on a
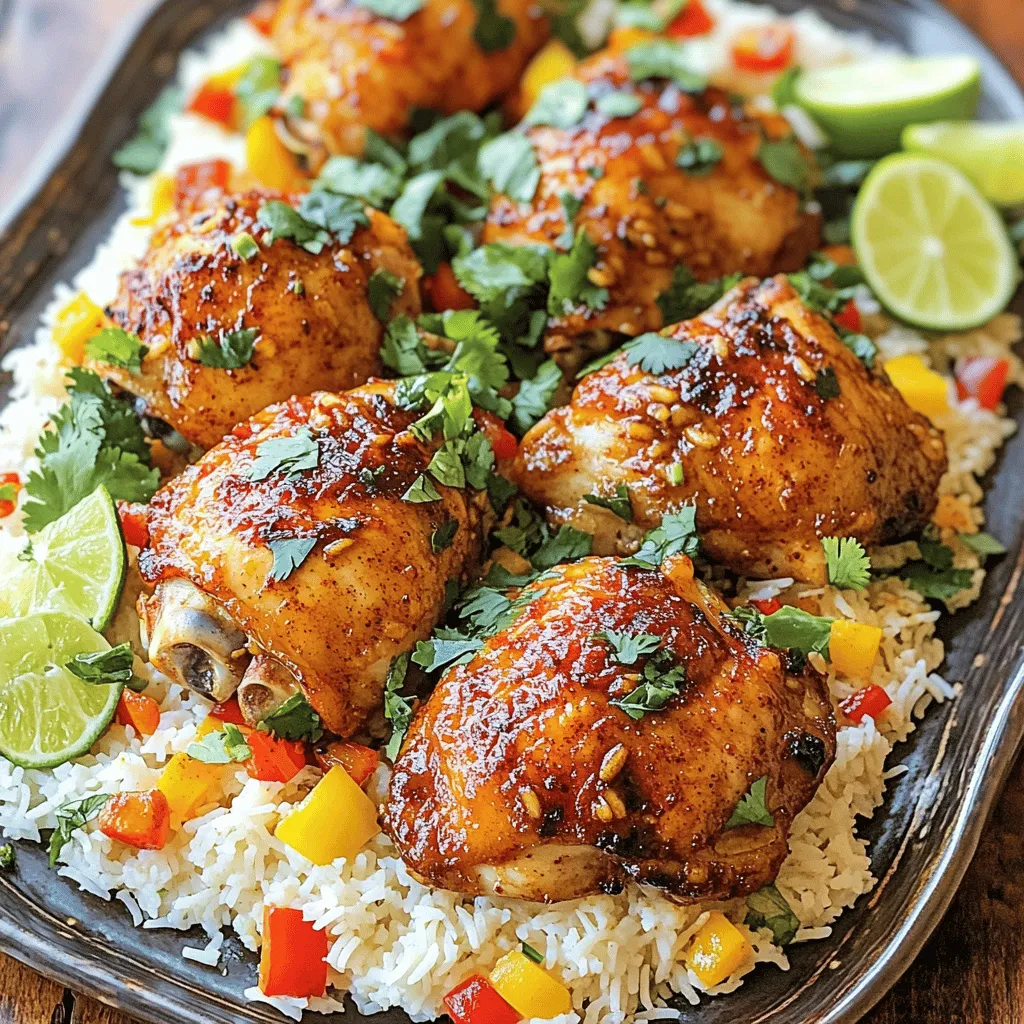
Are you ready to dive into a taste explosion? Jerk Chicken and Rice is more than just a meal; it’s
![- 2 ripe avocados - 1 cup fresh corn kernels - 1 small red onion - 1 medium tomato - 1 jalapeño pepper (optional) - 1/4 cup fresh cilantro - 2 tablespoons lime juice - Sea salt and black pepper When you gather these ingredients, you set the stage for a tasty dip. Each item plays a key role in creating a fresh and zesty flavor. - Calories per serving: About 150 calories. - Breakdown of macronutrients: - Carbohydrates: 20g - Protein: 3g - Fats: 8g This salsa is not just yummy; it also brings good nutrition. The calories come mainly from the healthy fats in avocados. - Nutritional benefits of avocados: Avocados are rich in heart-healthy fats. They provide fiber and vitamins like E and K. These nutrients support skin health and digestion. - Health benefits of fresh corn: Fresh corn is a great source of fiber, which helps digestion. It also contains vitamins B and C, which boost energy and immunity. Using fresh and ripe ingredients makes this salsa both delicious and healthy. For the full recipe, check [Full Recipe]. - Cooking corn on the cob: Start by boiling a pot of salted water. Once boiling, add the corn on the cob. Cook for 3-5 minutes until the kernels feel tender. Remove the corn and let it cool. Once cool, slice the kernels off the cob and place them in a large bowl. This fresh corn brings a sweet crunch to your salsa. - Dicing avocados and vegetables: Dice the ripe avocados into bite-sized pieces. Chop the red onion and tomato finely. If you like some heat, mince the jalapeño. Be sure to keep your avocado pieces nice and chunky. This adds a lovely texture to the salsa. - Order of mixing ingredients: Add the diced avocados and chopped vegetables into the bowl with corn. Gently fold these ingredients together. This keeps the avocado intact and prevents it from mashing up too much. - Tips for maintaining avocado texture: To keep your avocados fresh, mix gently and avoid stirring too vigorously. This way, you’ll have beautiful green chunks that pop in every bite. - Importance of lime juice: Squeeze fresh lime juice over the salsa. This adds a bright flavor and keeps the avocados from browning. Lime juice is key to a zesty kick! - Recommended resting time for flavors: Let your salsa sit for about 15 minutes at room temperature. This time allows the flavors to blend beautifully. You’ll notice a big difference in taste after it rests. For the full recipe, check out the detailed steps in the Full Recipe section. To pick the best avocados, feel for ripeness. Gently press the skin. If it yields slightly, it's ready. Dark green or black skin can mean ripeness. Avoid ones with deep dents or brown spots. Store avocados at room temperature if they are hard. Once ripe, keep them in the fridge. This slows down spoilage. Eat them within a few days for the best flavor. You can boost the flavor of your salsa by adding spices. Cumin or smoked paprika can add warmth. Fresh herbs like dill or basil also work well. For a spicy kick, add minced jalapeño. Adjust the amount based on your heat preference. Remember, you can always add more heat, but you cannot take it out! For a fun gathering, serve your Avocado Corn Salsa in a bright bowl. Use a colorful plate to catch the eye. Garnish with extra cilantro leaves and lime wedges. This adds a fresh touch and color. Serve it with tortilla chips or use it as a topping for grilled meats or tacos. It makes everything taste better! {{image_4}} You can make avocado corn salsa heartier by adding proteins. Consider incorporating black beans or chickpeas. They boost fiber and protein in your dip. Simply rinse and drain canned beans before mixing them in. If you like seafood, shrimp is a great option too. Cook the shrimp until pink and tender, then chop and add them. This gives a tasty twist to your salsa. To change the flavor profile, try adding Southwest-inspired ingredients. Chopped bell peppers or corn can enhance the taste. You might also add cumin for a warm spice. For a Mediterranean twist, use feta cheese and olives. The salty flavors will balance well with the avocado's creaminess. Fresh herbs like basil or oregano will add brightness to your dish. You can switch up how you prepare the corn for added depth. Grilling the corn gives a smoky taste. Brush the corn with olive oil, then grill until charred. Cut the kernels off the cob once cooled. Roasted peppers are another great addition. Roast them until soft and slightly charred, then chop them finely. This will add a rich flavor to your salsa. For the full recipe, check out the [Full Recipe]. To keep your Avocado Corn Salsa fresh, store leftovers in the refrigerator. Use airtight containers to seal in flavor and moisture. This step helps prevent the avocados from browning quickly. Avocado Corn Salsa lasts about 2 to 3 days in the fridge. Keep an eye out for signs that it has gone bad. If you see browning on the avocados or a sour smell, it's time to toss it. Can you freeze Avocado Corn Salsa? I recommend not freezing it. Freezing can change the texture of the avocados. However, if you really want to freeze it, try freezing just the corn and onions. When you thaw them, mix in fresh avocados and other ingredients for the best taste. Yes, you can make this salsa ahead of time. To keep it fresh, follow these steps: - Prep the ingredients: Chop all the fresh items, like avocados and tomatoes. - Mix everything: Combine them but hold off on adding lime juice. - Store properly: Place it in an airtight container. Use plastic wrap to cling to the salsa. - Add lime juice later: When you are ready to serve, add the lime juice. This keeps the colors bright. Yes, you can create a tasty salsa without corn. Here are some ideas: - Use diced bell peppers: They add crunch and sweetness. - Try black beans: They give protein and a nice texture. - Add diced mango: This offers sweetness and pairs well with avocado. Avocado Corn Salsa pairs well with many dishes. Here are some tasty options: - Tortilla chips: Perfect for dipping at parties or gatherings. - Grilled chicken or fish: This salsa adds a fresh touch to your main dish. - Tacos: Use it as a topping for extra flavor. - Burgers: It makes a great side or topping for your burger. Yes, frozen corn works well in this recipe. Here are some tips for using it: - Thaw the corn first: Let it sit at room temperature or use a microwave. - Drain excess water: Make sure it is dry to avoid watery salsa. - Add it at the end: Mix it in last to keep it crisp. For the full recipe, check out the [Full Recipe]. In this article, we explored how to make Avocado Corn Salsa. We discussed the simple ingredients, preparation steps, and key benefits of each. The tips and tricks provided can elevate your salsa and keep it fresh. Consider the variations for a unique spin or to fit your taste. Remember, storing your salsa properly helps maintain its flavor. With these insights, you can now enjoy a delicious, healthy dish at your next gathering. Dive in and let your creativity shine!](https://recipetorch.com/wp-content/uploads/2025/07/e3d6aa6d-4667-4073-a55f-a5ab01bcada9.webp)
If you’re looking for a fresh and zesty dip, you’ve landed in the right place! I’m excited to share my
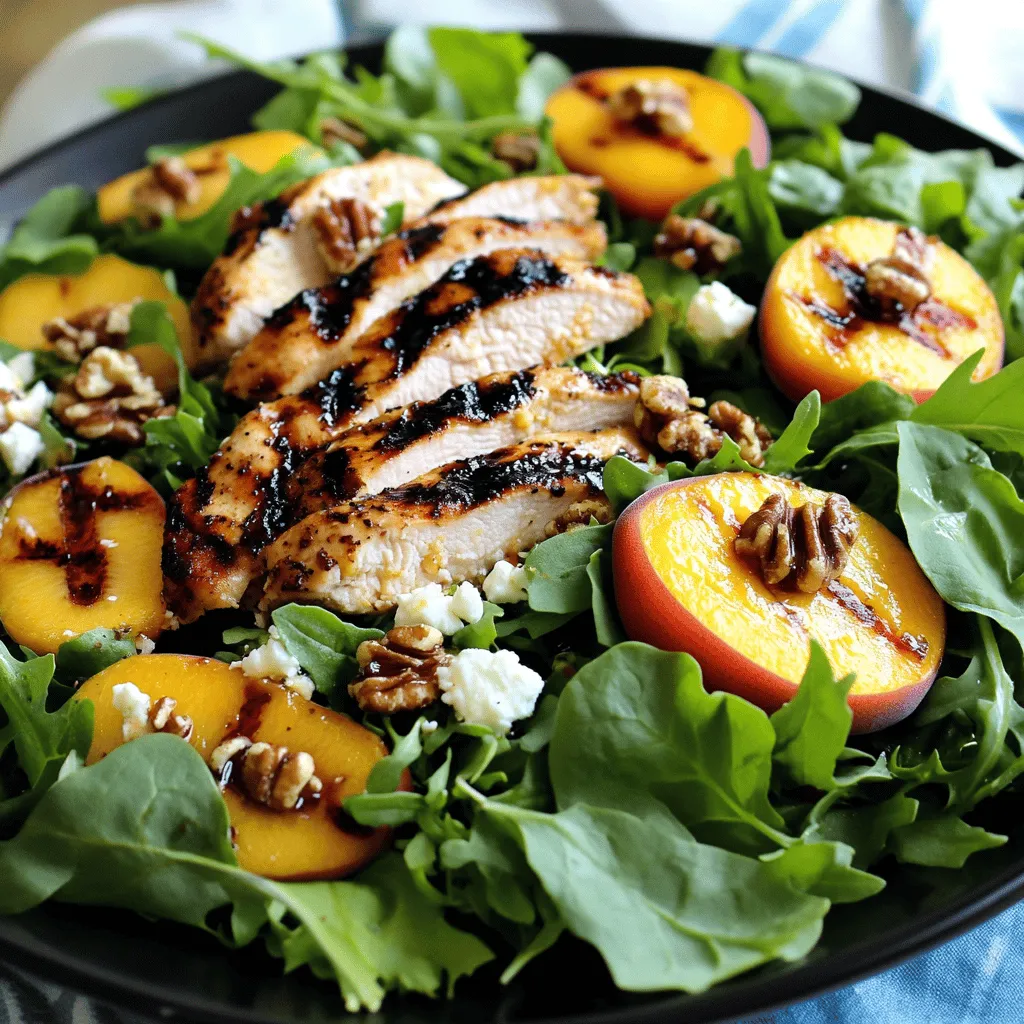
Looking for a fresh meal that bursts with flavor? Try my Grilled Peach Chicken Salad! This dish combines juicy grilled
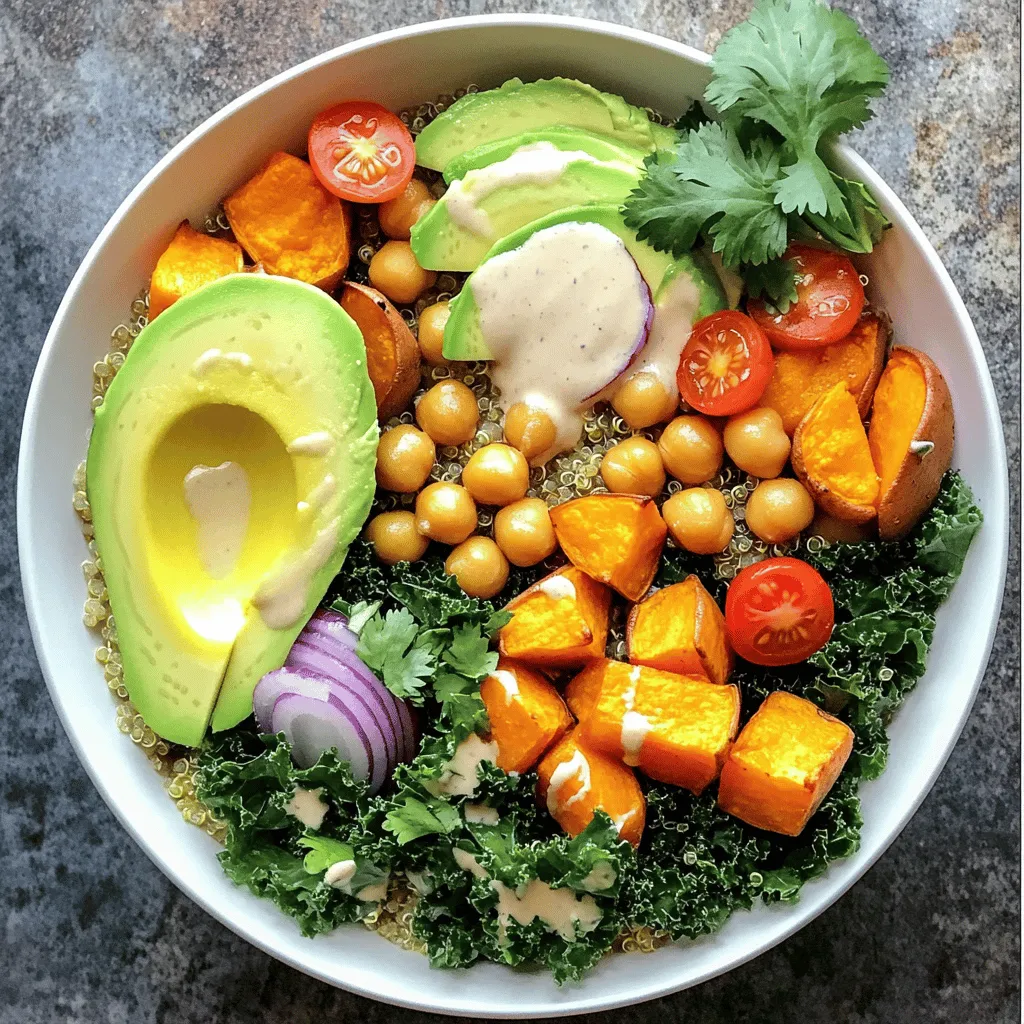
Craving a meal that’s both delicious and packed with nutrients? Look no further! This Vegan Power Bowl is your answer.
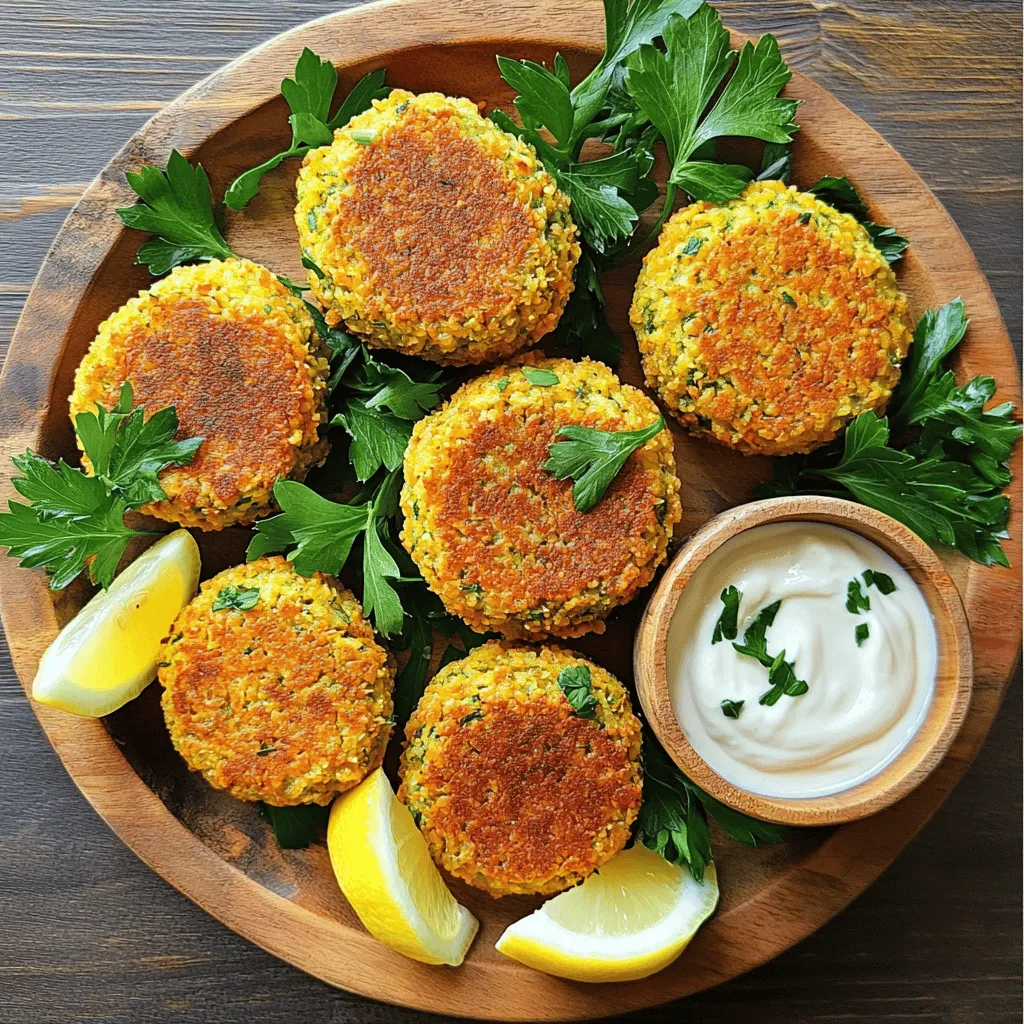
Are you ready for a tasty treat that’s both healthy and fun? Crispy baked falafel is here to delight your
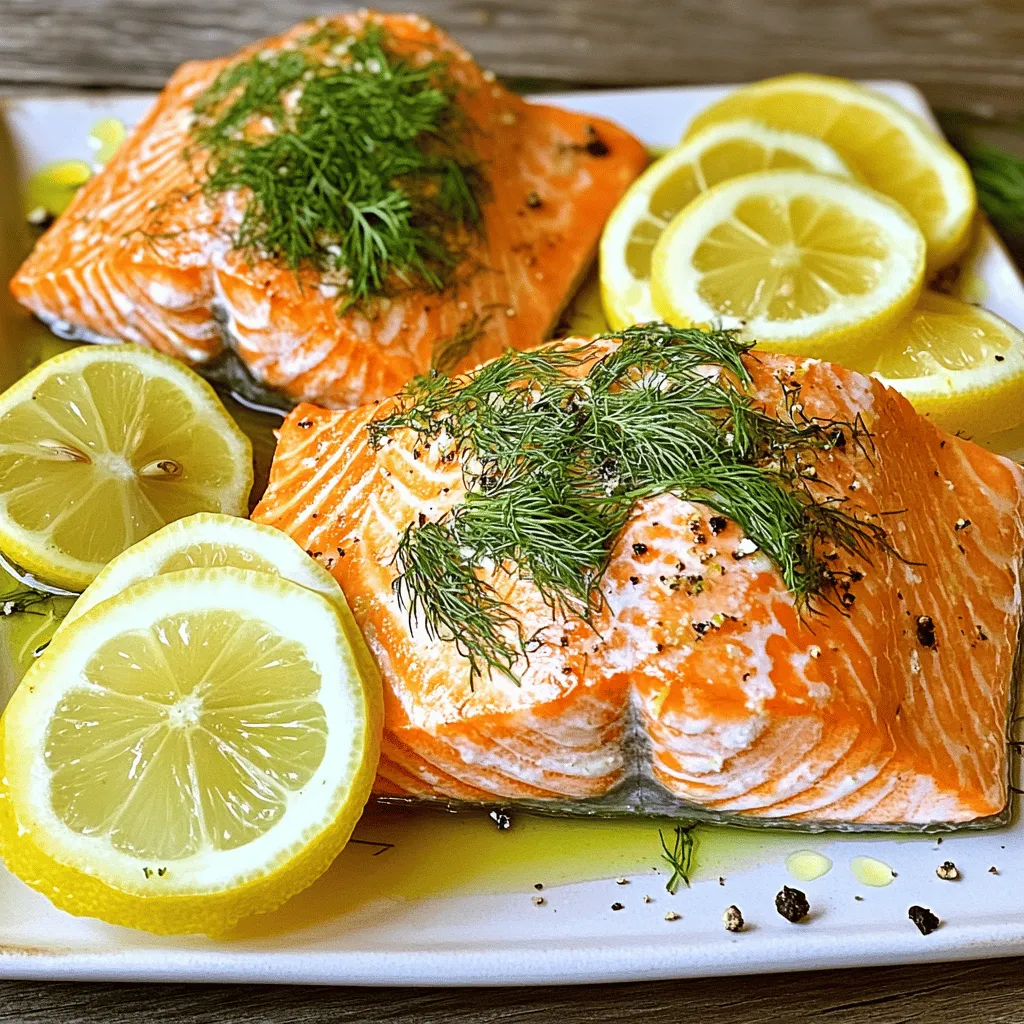
If you’re craving a tasty, easy-to-make dish, Lemon Dill Roasted Salmon is for you! This delightful recipe features fresh flavors
