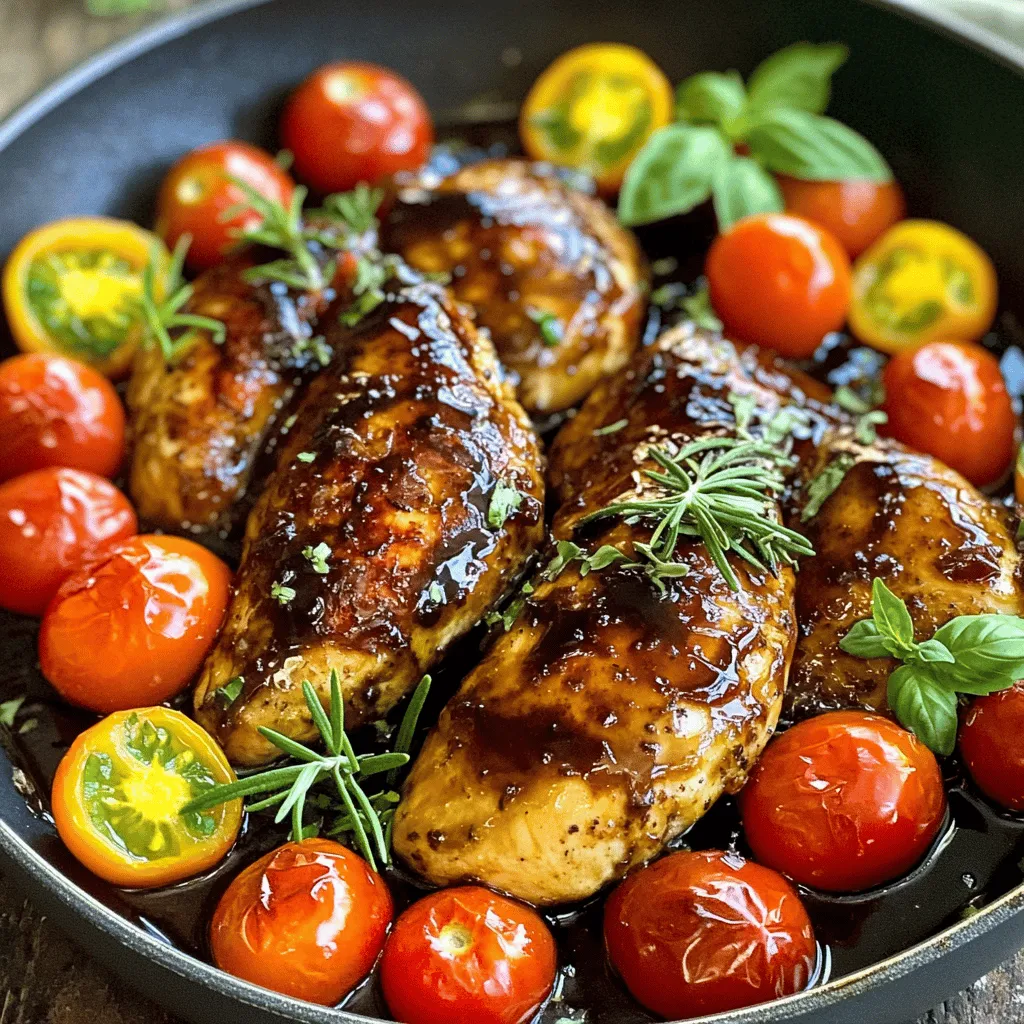
Balsamic Glazed Chicken Simple Flavorful Recipe
Looking to impress at dinner with a dish that’s easy and delicious? Balsamic Glazed Chicken is your answer! This simple
Looking to impress at dinner with a dish that’s easy and delicious? Balsamic Glazed Chicken is your answer! This simple
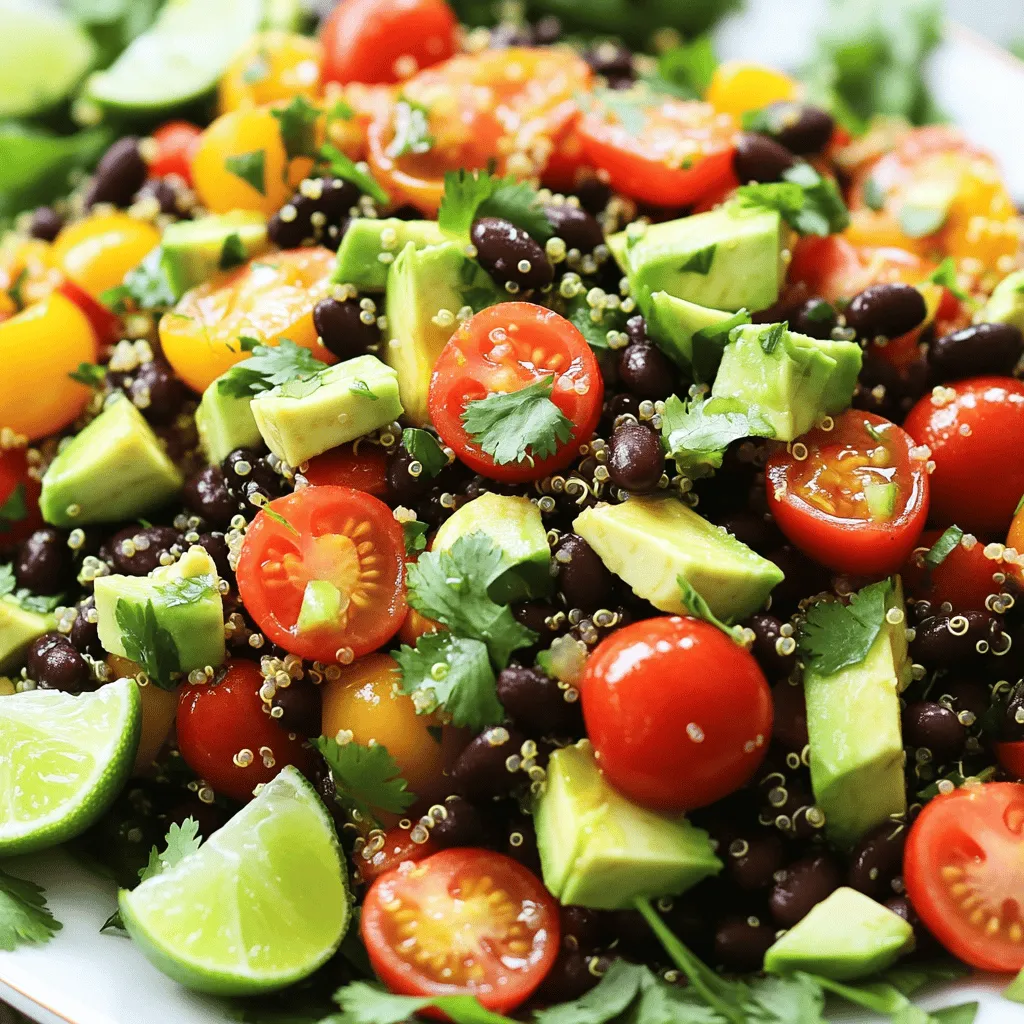
Are you ready to elevate your meal game? This Zesty Quinoa Black Bean Salad mixes fresh flavors with simple steps
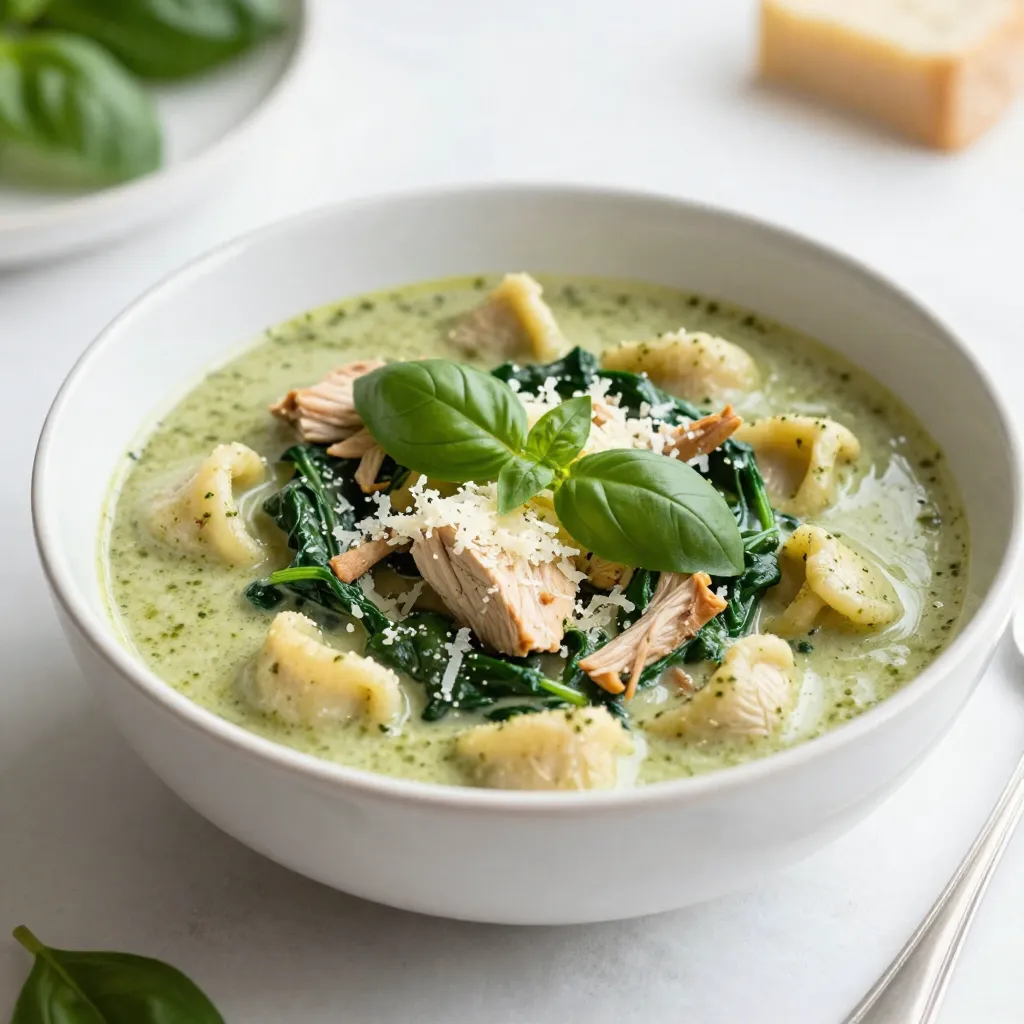
Craving a warm and hearty meal? My Creamy Pesto Chicken Gnocchi Soup is just what you need! This simple delight

Craving a cozy, cheesy meal that’s quick and easy to whip up? Look no further! My Cheesy Broccoli Rice Casserole
![- 1 medium cauliflower, cut into bite-sized florets - 2 tablespoons olive oil - 1 teaspoon smoked paprika - 1 teaspoon ground cumin - 1/2 teaspoon garlic powder - 1/2 teaspoon chili powder - Salt and freshly cracked black pepper to taste - 8 small corn or flour tortillas The main star of these tacos is the cauliflower. It gives a nice bite and flavor. Olive oil helps the spices stick and adds richness. The spices—smoked paprika, cumin, garlic powder, and chili powder—bring warmth and depth. Salt and pepper enhance all the flavors. Don't forget the tortillas to hold everything together. You can use corn or flour, based on your taste. - 1 ripe avocado, thinly sliced - 1 cup red cabbage, finely shredded - 1/4 cup fresh cilantro, roughly chopped - 1 lime, cut into wedges for serving Fresh toppings are key to making these tacos shine. The creamy avocado complements the roasted cauliflower. Red cabbage adds a nice crunch and color. Fresh cilantro brings a burst of brightness. Squeezing lime juice on top adds a zesty kick. These toppings make the dish feel fresh and balanced. - Crumbled feta cheese or vegan cheese for topping - Other salsa or sauce ideas You can customize your tacos with optional ingredients. Feta cheese adds a salty, creamy touch. Vegan cheese is a great choice for plant-based eaters. Consider adding your favorite salsa or sauce for extra flavor. This flexibility makes the dish fun and personal. For the full recipe, check out the detailed instructions to guide you through the process. - Preheat the oven to 425°F (220°C). - In a large bowl, add bite-sized cauliflower florets. - Drizzle the florets with two tablespoons of olive oil. - Sprinkle in one teaspoon of smoked paprika and one teaspoon of ground cumin. - Add half a teaspoon of garlic powder and half a teaspoon of chili powder. - Season with salt and freshly cracked black pepper to taste. - Toss everything well to coat the florets evenly. - Line a baking sheet with parchment paper for easy cleanup. - Spread the seasoned florets in a single layer on the sheet. - Roast in the preheated oven for 25-30 minutes. - Flip the florets halfway through for even cooking. - Look for a golden brown color and tender texture. - While the cauliflower roasts, warm the tortillas. - Heat a dry skillet over medium heat. - Place each tortilla in the skillet for about 30 seconds on each side. - Keep the warm tortillas covered in a clean towel. - Once the cauliflower is ready, remove it from the oven. - Layer roasted cauliflower onto each tortilla. - Add sliced avocado, shredded red cabbage, and fresh cilantro. - Squeeze fresh lime juice over the tacos for extra flavor. - Optionally, top with crumbled feta cheese or vegan cheese. Enjoy your delicious roasted cauliflower tacos! For the full recipe, check the section above. To get even browning and tenderness, follow some simple steps. First, you should cut the cauliflower into bite-sized florets. This helps them cook evenly. Next, spread the florets on a baking sheet in a single layer. Make sure they aren’t touching. If they are too close, they will steam instead of roast. You can add more spices to boost flavor. Try chili flakes for heat or a dash of lime juice for zest. Marinades also work great. A mix of olive oil, lime, and garlic can give the cauliflower a fresh taste. To keep your tortillas warm, wrap them in a clean kitchen towel. You can also place them in a warm oven. This way, they stay soft and ready for the filling. If you want to make ahead, roast the cauliflower earlier. You can store it in the fridge for a few days. Just reheat it in the oven or on the stove before serving. For easy assembly, prep your toppings first. Slice the avocado and shred the cabbage. Keep everything in separate bowls. This way, you can quickly put together the tacos when you’re ready. For the full recipe, check out the [Full Recipe]. {{image_4}} You can use different tortillas for your tacos. Corn tortillas have a nice, earthy taste. Flour tortillas are softer and more pliable. Each type brings its own flair. You can also add beans or protein alternatives. Try black beans for protein or lentils for a hearty bite. This makes the meal more filling and nutritious. Want to kick it up a notch? Make spicy roasted cauliflower! Just add extra chili spices like cayenne or chipotle. This gives the tacos a nice heat. You can also try different sauces. Tahini adds a creamy, nutty flavor. A tahini dressing can make the dish even richer. Experiment with what you like best! If you want a twist, swap avocado for guacamole or salsa. Both options add creaminess and zest. You can also try other vegetables. Roasted bell peppers, corn, or pickled onions work well too. They bring color and crunch to your tacos. The options are endless, so have fun with your toppings! For the full recipe, check out the earlier sections. To keep leftover roasted cauliflower fresh, place it in an airtight container. Make sure to cool it before sealing. Store it in the fridge for up to three days. For the tacos, I recommend keeping the components separate. This way, the tortillas do not get soggy. Wrap the tortillas in foil or parchment paper to keep them fresh. You can freeze roasted cauliflower! Spread it on a baking sheet and freeze for about an hour. Once frozen, transfer it to a freezer bag. Make sure to remove as much air as possible. This helps prevent freezer burn. When you want to eat it, thaw the cauliflower in the fridge. Reheat it in the oven or skillet to restore its texture. Roasted cauliflower lasts for about three to five days in the fridge. Assembled tacos are best eaten within a day. Look for signs of spoilage like an off smell or slimy texture on the cauliflower. For tortillas, check for any mold or unusual spots. Fresh toppings like avocado should be used within a day for the best flavor. For a complete guide, check the full recipe. Yes, you can use frozen cauliflower for this recipe, but there are pros and cons. Pros: - Frozen cauliflower is often pre-cut and ready to use. - It can save you time on prep. - It is usually frozen at peak freshness, keeping nutrients intact. Cons: - Frozen cauliflower can become mushy when cooked. - It may not get as crispy as fresh cauliflower. - The flavor may be less vibrant compared to fresh. If you choose frozen, make sure to thaw and drain it well to avoid extra moisture. To make these tacos gluten-free, choose corn tortillas. They are a great option for a gluten-free diet. You can also find gluten-free flour tortillas at many stores. Just check the label to ensure they meet your needs. Another option is to use lettuce wraps. This keeps your tacos fresh and light while avoiding gluten. If you want to swap out the avocado, here are some tasty alternatives: - Guacamole: It offers a similar creamy texture and flavor. - Hummus: This adds creaminess and a different flavor profile. - Coconut yogurt: It can give a creamy touch with a hint of sweetness. - Cashew cream: This is a nut-based option that is rich and creamy. These options can elevate your tacos while still keeping them delicious and satisfying. For the full recipe, visit the link to see how to make these tasty roasted cauliflower tacos! Roasted cauliflower tacos are a simple and tasty dish. We covered main ingredients, fresh toppings, and optional extras you might enjoy. I shared step-by-step instructions for roasting and assembling. Tips and tricks helped improve your cooking skills and meal prep. We also explored variations and how to store leftovers. These tacos are not just easy to make; they can be tailored to your taste. Try them out and discover your favorites!](https://recipetorch.com/wp-content/uploads/2025/07/26d32713-da78-4e7d-b74c-46f0322eafbc.webp)
Craving a tasty meal that’s quick to make? Look no further than roasted cauliflower tacos! This flavorful recipe combines crispy
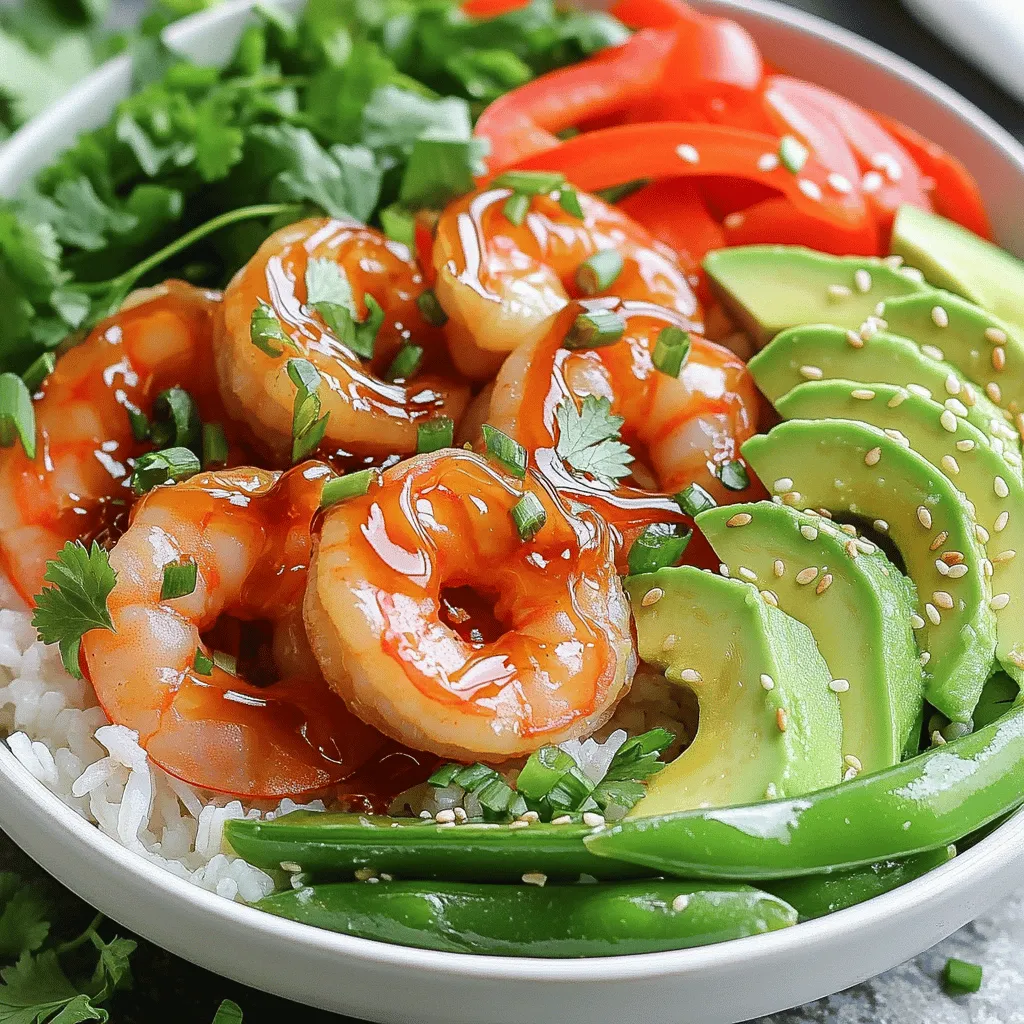
Are you ready to spice up your dinner routine? My Sriracha Honey Shrimp Bowls are not just delicious; they’re easy
![To make delicious pumpkin chocolate chip muffins, you need the right ingredients. Here’s what you will need: - 1 cup canned pumpkin puree - 1/2 cup packed brown sugar - 1/4 cup granulated sugar - 1/3 cup vegetable oil - 2 large eggs - 1 teaspoon pure vanilla extract - 1 1/2 cups all-purpose flour - 1 teaspoon baking soda - 1/2 teaspoon baking powder - 1/2 teaspoon fine salt - 1 teaspoon ground cinnamon - 1/2 teaspoon ground nutmeg - 1/4 teaspoon ground ginger - 1 cup semi-sweet chocolate chips - Optional: 1/2 cup chopped walnuts or pecans Using quality ingredients makes a big difference in taste. The pumpkin puree brings moisture and flavor. The sugars add sweetness and help with browning. The spices give your muffins a warm, cozy taste. I often choose semi-sweet chocolate chips for their rich flavor. If you want a crunch, add chopped nuts. They pair well with the soft muffin texture. For the best results, measure your ingredients accurately. Fresh spices also enhance the flavors. You can find the full recipe [here]. Each ingredient plays a part in making your muffins irresistible! First, set your oven to 350°F (175°C). This temperature helps the muffins rise just right. While the oven heats, prepare your muffin tin. You can line each cup with paper liners or spray them lightly with cooking oil. This step keeps the muffins from sticking. In a large bowl, combine the canned pumpkin puree, brown sugar, granulated sugar, vegetable oil, eggs, and vanilla extract. Whisk these ingredients together until smooth. Make sure there are no lumps. A well-mixed blend ensures your muffins are rich and moist. In another bowl, sift the all-purpose flour, baking soda, baking powder, salt, cinnamon, nutmeg, and ginger. Sifting helps incorporate air into the flour. This aeration makes your muffins light and fluffy. Mix the dry ingredients well to ensure even flavor throughout. Gradually add the dry mix to the wet mixture. Stir gently with a spatula. It’s key not to overmix, as this can lead to dense muffins. Just mix until combined. A few flour streaks are okay. Spoon the batter into your prepared muffin cups. Fill each cup about two-thirds full. This fill level allows the muffins to rise without spilling over. Place the muffin tin in the oven. Bake for 18 to 22 minutes. To check if they are ready, insert a toothpick into the center of a muffin. It should come out clean or with a few moist crumbs. After baking, take the muffin tin out of the oven. Let the muffins cool in the pan for about 5 minutes. Then, transfer them to a wire rack to cool completely. This step helps keep their texture. For serving, you can try dusting them with powdered sugar or adding a scoop of whipped cream cheese. Enjoy the flavors! To get a fluffy texture, start with room temperature ingredients. Cold eggs or pumpkin can lead to dense muffins. Make sure to mix gently. Overmixing can harm the texture. Blend just until you see no dry flour. Adding spices can elevate your muffins. Think about using allspice or cloves for warmth. I also like to use high-quality chocolate. Choose chocolate with at least 60% cocoa for a rich flavor. Higher quality chocolate melts better, making every bite special. Serve your muffins warm on a nice plate. A rustic wooden platter adds charm. Dust a bit of powdered sugar on top for style. You can also add a dollop of whipped cream cheese. This creates a lovely pairing with the spiced muffins. {{image_4}} You can make these muffins healthier with a few simple swaps. First, consider using whole wheat flour instead of all-purpose flour. Whole wheat flour adds fiber and nutrients, making your muffins more filling. You can also reduce the sugars. Try using just 1/4 cup of brown sugar instead of 1/2 cup. This change still keeps them sweet but cuts down on extra sugar. To change up the flavor, think about adding fruits or nuts. Chopped apples or pears work well and add moisture. If you want a crunch, add walnuts or pecans. You can also explore different types of chocolate. Try dark chocolate chips for a richer taste or even white chocolate for a sweeter twist. These small changes can make a big difference in your muffins! Make your muffins festive by adding seasonal spices. For fall, you can mix in some cloves or allspice for a warm flavor. During the holidays, consider adding cranberries or even a cream cheese filling. These additions not only make your muffins stand out but also add fun flavors that match the season. You can find the full recipe for these delicious muffins and more ideas to try! To keep your pumpkin chocolate chip muffins fresh, store them in an airtight container. Place a paper towel inside to absorb any moisture. This helps keep the muffins soft. Store them at room temperature for the best flavor and texture. Freezing muffins is easy. First, let them cool completely. Then, wrap each muffin in plastic wrap. Place the wrapped muffins in a freezer bag or container. Squeeze out as much air as possible before sealing. To thaw, simply leave them in the fridge overnight. To reheat, microwave for about 15-20 seconds or place in a warm oven for a few minutes. At room temperature, these muffins last about 3 to 5 days. If you notice any mold or a dry texture, it’s time to toss them. Always check for signs of spoilage. Fresh muffins should smell great and taste sweet and moist. Enjoy them while they're at their best! To make gluten-free pumpkin chocolate chip muffins, you can use gluten-free flour. I recommend a blend that includes rice flour, tapioca flour, and almond flour for the best results. You can also add a teaspoon of xanthan gum to help with texture. This works well in the recipe without changing the taste much. Yes, you can use fresh pumpkin! To prepare fresh pumpkin, start by cutting a small pumpkin in half. Remove the seeds and strings. Roast the halves cut-side down in a baking dish at 400°F for about 45 minutes. Once soft, scoop out the flesh and puree it until smooth. This fresh puree adds a lovely flavor to your muffins. If you want to swap out chocolate chips, try using dried fruit like cranberries or raisins. You could also use white chocolate chips for a different taste. Chopped nuts like walnuts or pecans add a nice crunch, too. These options can make your muffins unique while still being delicious. Absolutely! To make mini muffins, fill each cup about halfway. Bake them at the same temperature, but check for doneness around 12 to 15 minutes. A toothpick inserted should come out clean. Mini muffins are perfect for snacks or parties! Yes, these muffins freeze well! To freeze, let them cool completely. Place them in an airtight container or freezer bag. They can last up to three months in the freezer. Just remember to label the container with the date for easy tracking. The best way to reheat muffins is in the oven. Preheat it to 350°F and place the muffins on a baking sheet. Heat for about 5 to 10 minutes until warm. This keeps the muffins moist and brings back their fresh-baked flavor. Enjoy them with a pat of butter or cream cheese! This blog post covered how to make delicious pumpkin muffins from scratch. We discussed key ingredients, step-by-step instructions, and tips to enhance flavor and texture. You learned about various storage methods to keep your muffins fresh, along with options for healthier variations. With these simple recipes and ideas, you can enjoy tasty treats all year. Don’t hesitate to experiment and make these muffins your own. Happy baking!](https://recipetorch.com/wp-content/uploads/2025/07/243228be-46c5-46ed-a0fc-ef599cd80a37.webp)
When the leaves change and the air gets crisp, I crave something warm and cozy. That’s where Pumpkin Chocolate Chip
![- 1 lb (450g) boneless chicken thighs, diced into bite-sized pieces - 1 cup plain yogurt - 2 tablespoons freshly squeezed lemon juice - 2 teaspoons garam masala - 1 teaspoon ground cumin - 1 teaspoon sweet paprika - 1 teaspoon ground turmeric - 1 teaspoon coriander powder - 1 tablespoon ginger-garlic paste - 2 tablespoons vegetable oil - 1 medium onion, finely chopped - 1 can (14 oz) crushed tomatoes - 1 cup creamy coconut milk - Salt and freshly ground black pepper to taste To make Chicken Tikka Masala, you need a few key ingredients. The boneless chicken thighs give the dish a tender, juicy bite. The marinade, made with yogurt and spices, adds depth and flavor. You want to use spices like garam masala, cumin, and turmeric to make it truly special. - Fresh cilantro - Lime wedges Garnishes elevate your dish. Fresh cilantro adds a pop of color and freshness. Lime wedges bring a zesty brightness that balances the creamy sauce. You can serve this dish with these garnishes to impress your family and friends. For the full recipe, check the link above. To make a tasty marinade, start by mixing these ingredients in a bowl: - 1 cup plain yogurt - 2 tablespoons freshly squeezed lemon juice - 2 teaspoons garam masala - 1 teaspoon ground cumin - 1 teaspoon sweet paprika - 1 teaspoon ground turmeric - 1 teaspoon coriander powder - A pinch of salt and pepper Whisk them together until smooth. The yogurt helps the chicken stay juicy and adds flavor. Next, add 1 pound of diced boneless chicken thighs to the marinade. Make sure every piece is covered well. Cover the bowl tightly with plastic wrap and let it chill in the fridge for at least 30 minutes. If you have time, marinate it overnight. This gives the chicken more flavor. In a large skillet, pour in 2 tablespoons of vegetable oil and heat it over medium heat. When the oil is hot, add 1 finely chopped medium onion. Cook the onion for about 5 to 7 minutes. You want it to turn golden brown and soft. Now, take the marinated chicken out of the fridge. Let any extra marinade drip off before adding it to the skillet. Cook the chicken for about 8 to 10 minutes. Stir it often to make sure it cooks evenly. The chicken should be golden and fully cooked. Once the chicken is done, pour in 1 can of crushed tomatoes. Stir everything together well. Let the mixture simmer for about 10 minutes. This helps the flavors blend nicely. After that, add 1 cup of creamy coconut milk. Mix it in until everything is smooth. Keep simmering the dish for another 10 to 15 minutes. This will thicken the sauce and finish cooking the chicken. Finally, taste your dish. Adjust the seasoning with salt and freshly ground black pepper to your liking. Just before serving, sprinkle fresh chopped cilantro on top for a burst of color and flavor. For the full recipe, check out the [Full Recipe]. - Overcooking the chicken: Cook just until golden to keep it juicy. Overcooked chicken can be dry and tough. Keep an eye on it while cooking. - Not letting the marinade develop flavor: Marinating for at least 30 minutes helps the chicken soak up the spices. For the best taste, try marinating overnight. - Suggestions for additional spices: If you like more heat, add a pinch of cayenne pepper or crushed red pepper flakes. For depth, try a bit of smoked paprika. - Using fresh vs. dried herbs: Fresh cilantro adds brightness. If you only have dried herbs, use them, but remember to use less. Dried herbs are stronger. - Ideal accompaniments like naan and rice: Serve Chicken Tikka Masala with warm naan or fluffy basmati rice. Both soak up the sauce nicely. For extra flavor, drizzle with lime juice before serving. For the complete recipe, check out the [Full Recipe]. {{image_4}} You can easily make this dish vegetarian. Instead of chicken, use paneer or chickpeas. Paneer gives a nice texture and absorbs flavors well. Chickpeas add protein and a hearty bite. Both options pair wonderfully with the rich sauce. If you want to try something different, swap chicken for shrimp or tofu. Shrimp cooks quickly and takes on the spices beautifully. Tofu is a great choice for a plant-based option. Use firm tofu and press it to remove excess water. This helps it soak up the flavors. Adjusting the spice level in Chicken Tikka Masala is simple. If you prefer milder dishes, reduce the garam masala and chili powder. For more heat, add fresh chopped chilies or extra chili powder. Taste as you go to find your perfect flavor balance. You control the heat! To store leftovers, let the Chicken Tikka Masala cool first. Place it in an airtight container. Make sure to refrigerate it within two hours of cooking. The dish can last for up to three days in the fridge. When you want to enjoy it again, check for any signs of spoilage. If it looks or smells off, it’s best to toss it. Freezing Chicken Tikka Masala is easy and keeps it fresh. Use a freezer-safe container or heavy-duty freezer bags. Leave some space at the top, as the sauce may expand when frozen. Label the container with the date. You can freeze it for up to three months. To keep the chicken tender, freeze it without the garnish. To reheat your Chicken Tikka Masala, use a saucepan on low heat. Stir it often to heat evenly. Add a splash of water or coconut milk if the sauce looks too thick. You can also use the microwave. Heat it in short bursts, stirring in between. This way, you keep the flavor and texture just right. Enjoy it with warm naan or rice for a full meal! Chicken Tikka Masala is a popular Indian dish. It features marinated chicken cooked in a rich, creamy sauce. The sauce combines tomatoes, spices, and coconut milk. Each bite bursts with flavor, making it a favorite for many. Yes, you can prepare Chicken Tikka Masala ahead of time. Make the dish, then cool it to room temperature. Store it in an airtight container in the fridge. It stays fresh for up to three days. For longer storage, freeze it for up to three months. Thaw it in the fridge before reheating. This meal makes a great option for busy weeknights. You can easily change the spice level. For less heat, reduce the amount of garam masala and paprika. You can also omit the ginger-garlic paste. For more heat, add crushed red pepper or cayenne pepper. Start with a small amount, then taste as you go. This way, you can find your perfect balance. This post covered how to make Chicken Tikka Masala. You learned about key ingredients, like chicken and spices, and how to marinate and cook them. I shared tips to avoid mistakes and options for different proteins. You can even adapt the dish for more spice or a vegetarian version. Overall, Chicken Tikka Masala is versatile and tasty. Enjoy your meal and feel free to experiment!](https://recipetorch.com/wp-content/uploads/2025/07/2b6003cd-8136-4c75-80df-b2b6b78a8f15.webp)
Craving a flavorful Chicken Tikka Masala that’s easy to make at home? You’re in the right spot! In this delightful

Looking for a fresh, tasty dish that’s easy to make? Look no further than the Cucumber Tomato Avocado Salad! This
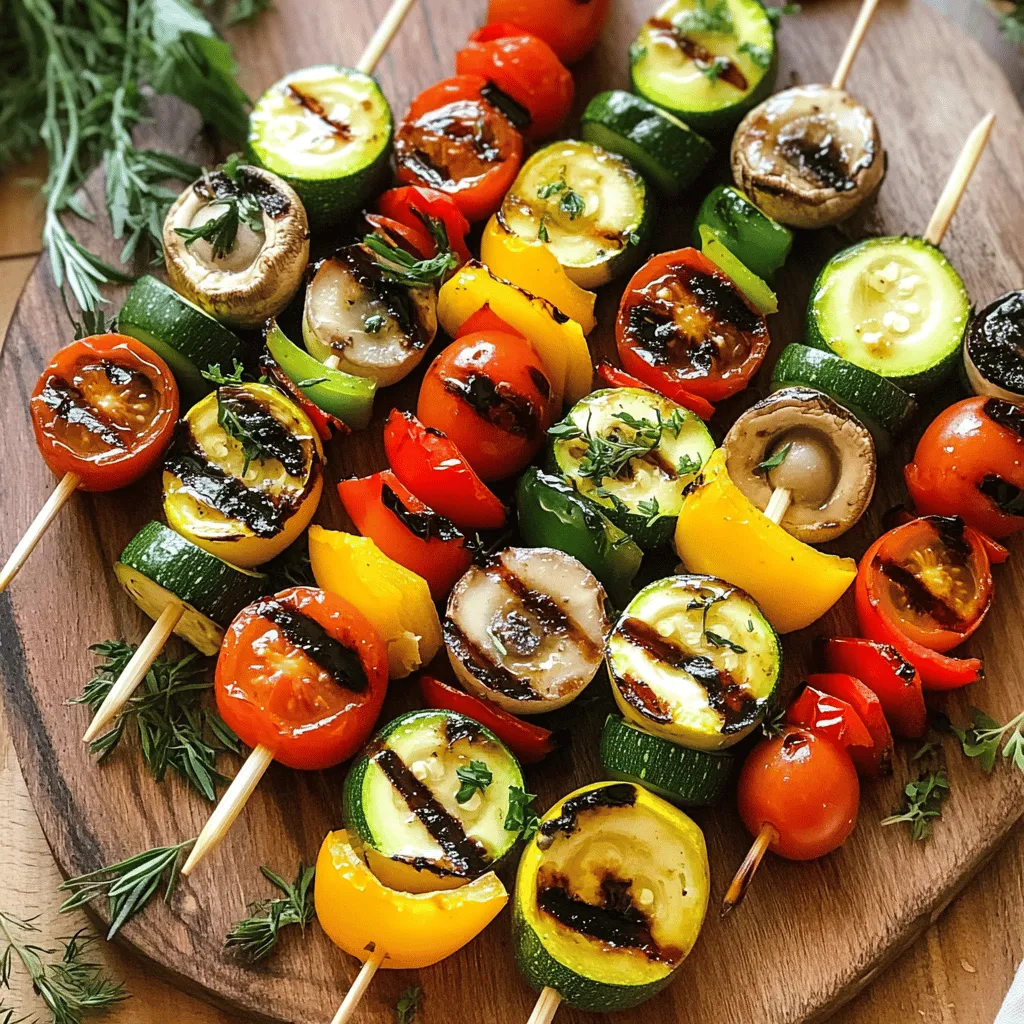
Looking for a simple and tasty way to enjoy veggies? Grilled veggie skewers are the answer! In this blog post,
