
Peach Cobbler Mug Cake Quick and Tasty Dessert Recipe
Craving something sweet but short on time? You’re in the right place! This Peach Cobbler Mug Cake is a quick
Craving something sweet but short on time? You’re in the right place! This Peach Cobbler Mug Cake is a quick

Are you ready to whip up a tasty and easy Zucchini Mushroom Quiche? This recipe is both flavorful and simple,

Are you ready to spice up your snack game? Honey Sriracha Roasted Okra is not just a tasty treat; it’s

Looking for a tasty way to start your day? You’ll love my Zucchini and Tomato Breakfast Casserole! This dish combines
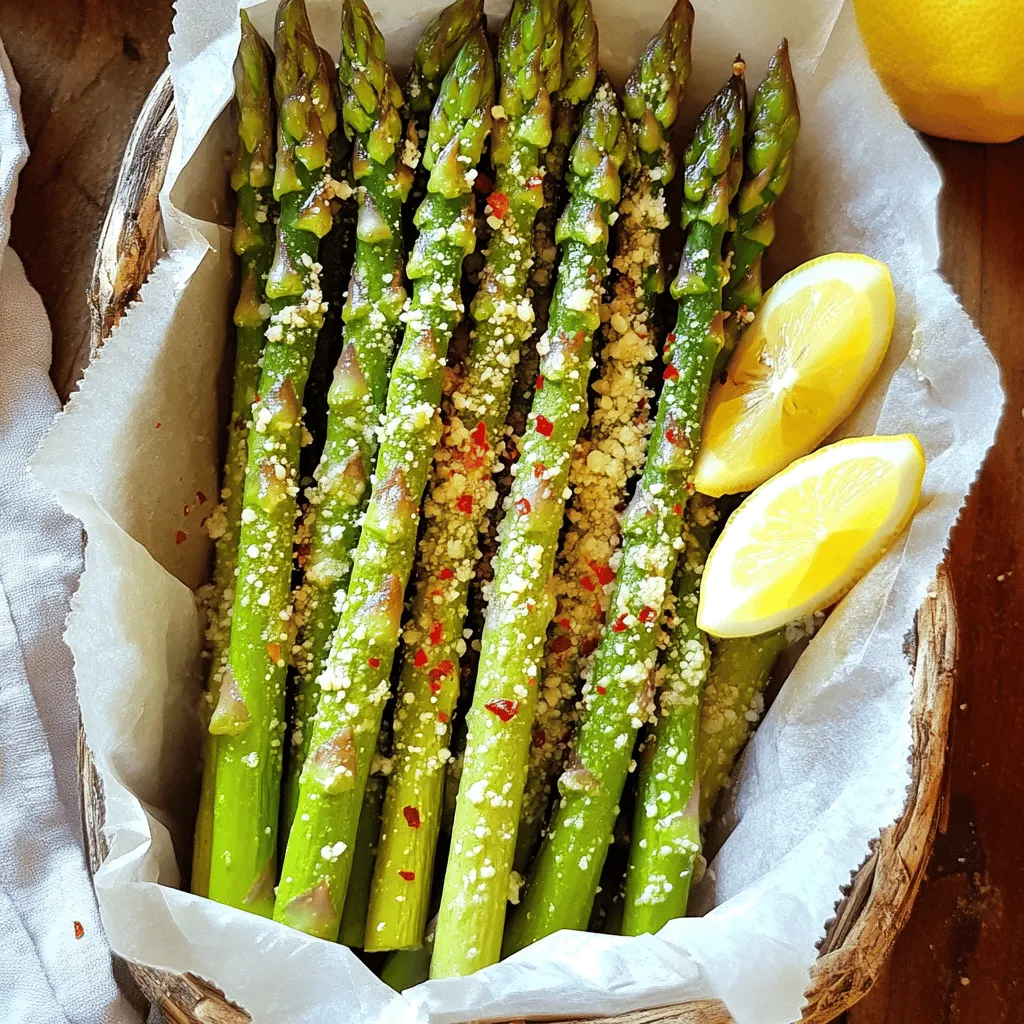
Are you ready to transform your snack game? Garlic Parmesan Asparagus Fries are a tasty and simple treat that deliver

If you think sushi is only for experts, think again! In this guide, I’ll show you how to make easy
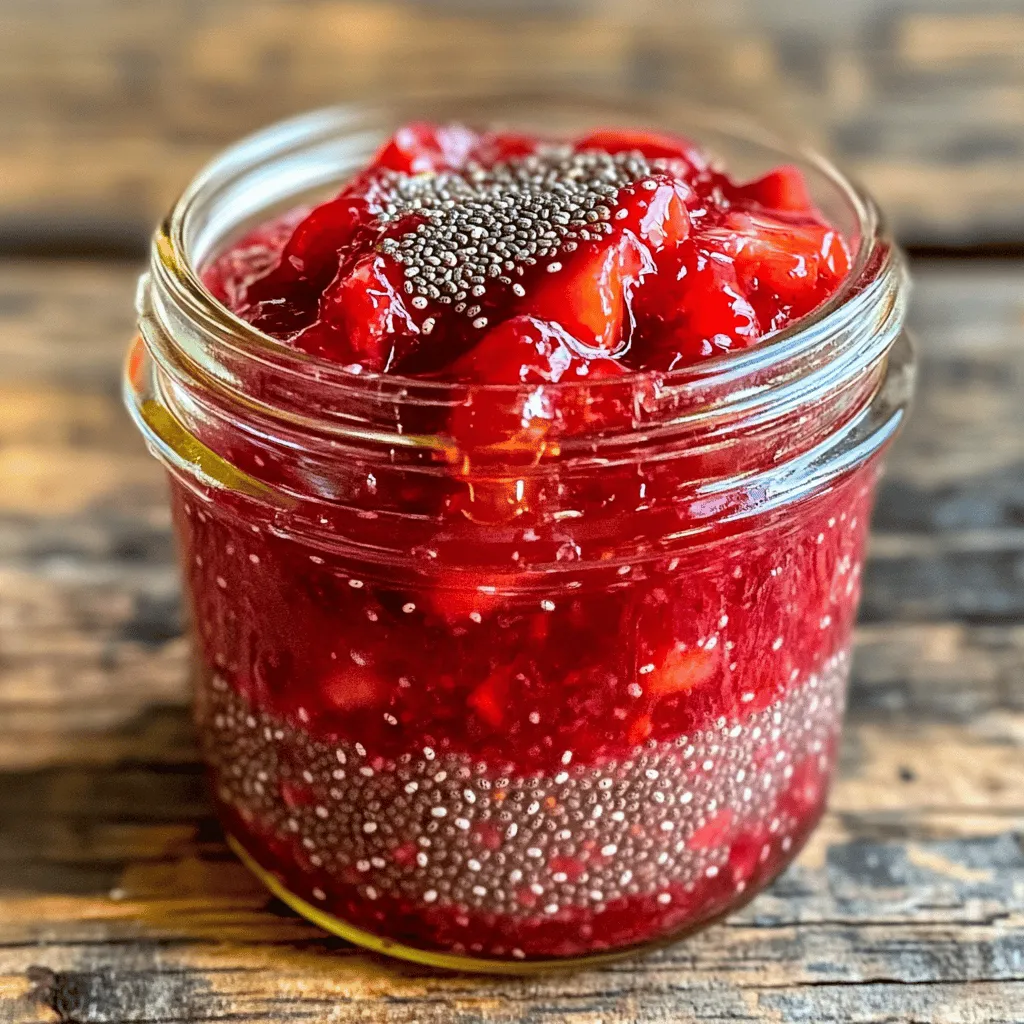
Are you ready to elevate your breakfast game? Making Strawberry Chia Seed Jam is simple and delicious! In this post,
![To make Greek lemon potato wedges, you need the following: - 4 large Russet potatoes, thoroughly washed and cut into wedges - 1/4 cup extra virgin olive oil - 3 tablespoons freshly squeezed lemon juice - 2 teaspoons dried oregano - 1 teaspoon garlic powder - 1 teaspoon onion powder - 1 teaspoon sea salt - 1/2 teaspoon freshly cracked black pepper - 1/4 cup grated Parmesan cheese (optional, for a cheesy twist) - Fresh parsley, finely chopped (for garnish) Choose firm potatoes with smooth skin. Avoid potatoes with spots or wrinkles. Look for Russet potatoes for crispiness. They have a high starch content, which gives a fluffy inside. Always check for freshness by feeling them. If they feel light or soft, skip them. Fresh potatoes cook better and taste great. You can add different flavors for a twist. Try fresh herbs like rosemary or thyme. For heat, add a pinch of cayenne pepper. You can also use a mix of cheeses for a richer taste. Consider mixing in some lemon zest for more zing. These options let you customize your wedges to fit your taste. For the full recipe, check out the complete details above. To start, grab four large Russet potatoes. Wash them well under running water. Cutting them into wedges is next. Aim for even sizes so they cook evenly. You want them to be about 1 inch thick. This size helps them get crispy on the outside while staying soft inside. Now, let’s make the marinade. In a big bowl, mix together the olive oil and lemon juice first. Add the dried oregano, garlic powder, onion powder, sea salt, and black pepper next. Whisk everything together until it looks smooth. This mixture will coat the wedges and add tons of flavor. After coating the wedges, place them on a baking sheet. Make sure they are in a single layer. Leave space between each wedge. This helps them get that crispy texture. If you like cheese, sprinkle Parmesan on top now. Bake them in the oven at 425°F (220°C) for about 30 to 35 minutes. Flip the wedges halfway through. They should be golden brown and crispy when done. Let them cool for a few minutes before serving. Don't forget to garnish with fresh parsley! For the full recipe, check the link. To get the best crispy texture for your potato wedges, follow these steps: - Cut the potatoes evenly. This ensures they cook at the same rate. - Soak the wedges in cold water for 30 minutes. This removes excess starch. - Dry the wedges well with a towel before adding oil. Moisture can make them soggy. - Use a high heat when baking. Preheat your oven to 425°F (220°C). - Arrange the wedges in a single layer. This helps them crisp up nicely. - Flip them halfway through baking. This promotes even browning on all sides. Greek Lemon Potato Wedges pair well with many dishes. Consider these ideas: - Serve with grilled chicken or lamb. The lemon complements these meats. - Pair with a fresh Greek salad for a light meal. The flavors work well together. - Add a dollop of tzatziki sauce on the side. The coolness balances the zest. - Try with roasted vegetables for a hearty side dish. The flavors blend beautifully. Making these wedges ahead of time is easy. Here’s how: - Prepare the marinade and coat the potato wedges. - Place them in an airtight container. Store in the fridge for up to 24 hours. - When ready to cook, preheat your oven and bake as instructed. - You can also freeze uncooked wedges. Just thaw and bake when needed. For the full recipe, don’t forget to check out the detailed instructions! {{image_4}} You can change the herbs and spices for a new taste. Try fresh rosemary or thyme for a different flavor. You can also use smoked paprika for a little heat. If you want a bit of sweetness, add some cumin. These choices make the dish unique while keeping it tasty. If you want a vegan version, skip the cheese. The lemon and spices still give great flavor. You can use nutritional yeast for a cheesy taste without dairy. It adds a nutty flavor that pairs well with the potatoes. Want to make it colorful? Add veggies like bell peppers or zucchini. Cut them in similar sizes to the potato wedges. Toss them in the same lemon marinade. This adds nutrition and makes your dish more vibrant. It’s a fun way to get even more flavor and color on your plate. For the full recipe, check out the details above. To store leftover potato wedges, let them cool first. Place them in an airtight container. This keeps them fresh for about three days. If you plan to eat them later, store them in the fridge. Avoid leaving them out at room temperature for too long, as this can make them soggy. When you want to reheat the wedges, the oven is your best friend. Preheat your oven to 400°F (200°C). Spread the wedges on a baking sheet. Heat them for about 10-15 minutes. This method helps keep them crispy. You can also use an air fryer for extra crunch. Just remember to not overcrowd the basket. If you want to freeze the wedges, let them cool completely first. Arrange them in a single layer on a baking sheet. Freeze them for about an hour until firm. Then transfer them to a freezer bag. Make sure to remove as much air as possible. They can last up to three months in the freezer. When ready to eat, bake them from frozen for a quick and easy snack. It takes about 30 to 35 minutes to cook these wedges. Preheat your oven to 425°F (220°C). Bake until they turn golden brown and crispy. Flipping them halfway helps in even cooking. Yes, you can use other potatoes. While Russet potatoes work well, Yukon Gold or red potatoes are also great. They add different textures and flavors. Just make sure to cut them into similar sizes for even cooking. These wedges pair well with many dishes. Serve them with grilled chicken, fish, or lamb. They also go great with a fresh salad or a yogurt dip. You can even enjoy them as a snack by themselves! Yes, these wedges are a healthier snack option. They contain olive oil, which is a good fat. The potatoes are rich in vitamins and minerals. Just watch your portion size, especially if you add cheese! You can prep the potatoes and marinate them in advance. Keep them in the fridge for a few hours. When ready, bake them fresh for a crispy treat. This makes meal prep easy and fun. Cut the potatoes into wedges of even size. This ensures they cook evenly. Use a sharp knife for safety and ease. Rinse them after cutting to remove excess starch for extra crispiness. Check for a golden brown color and crispy texture. You can also pierce a wedge with a fork. If it goes in easily, the potato is cooked through and ready to eat. Absolutely! You can add various spices like paprika or cayenne for a kick. Fresh herbs like thyme or rosemary also work well. Feel free to experiment to find your favorite flavor combination. For the full recipe, visit the [Full Recipe]. Greek lemon potato wedges are a delight made from fresh, simple ingredients. You learned how to select the best potatoes and create a tasty marinade. We explored tips for achieving that perfect crispy texture too. You can make these wedges your own by trying different herbs or adding veggies. With the right storage and reheating methods, you can enjoy leftovers later. Explore these wedges with various sides for a complete meal. Dive into making these delicious potatoes, and share your creations with others!](https://recipetorch.com/wp-content/uploads/2025/07/c56c8bf7-e7cd-46cc-ba8b-8c9c36dda256.webp)
Are you ready to transform your snack game? Greek Lemon Potato Wedges are the perfect blend of zesty flavor and
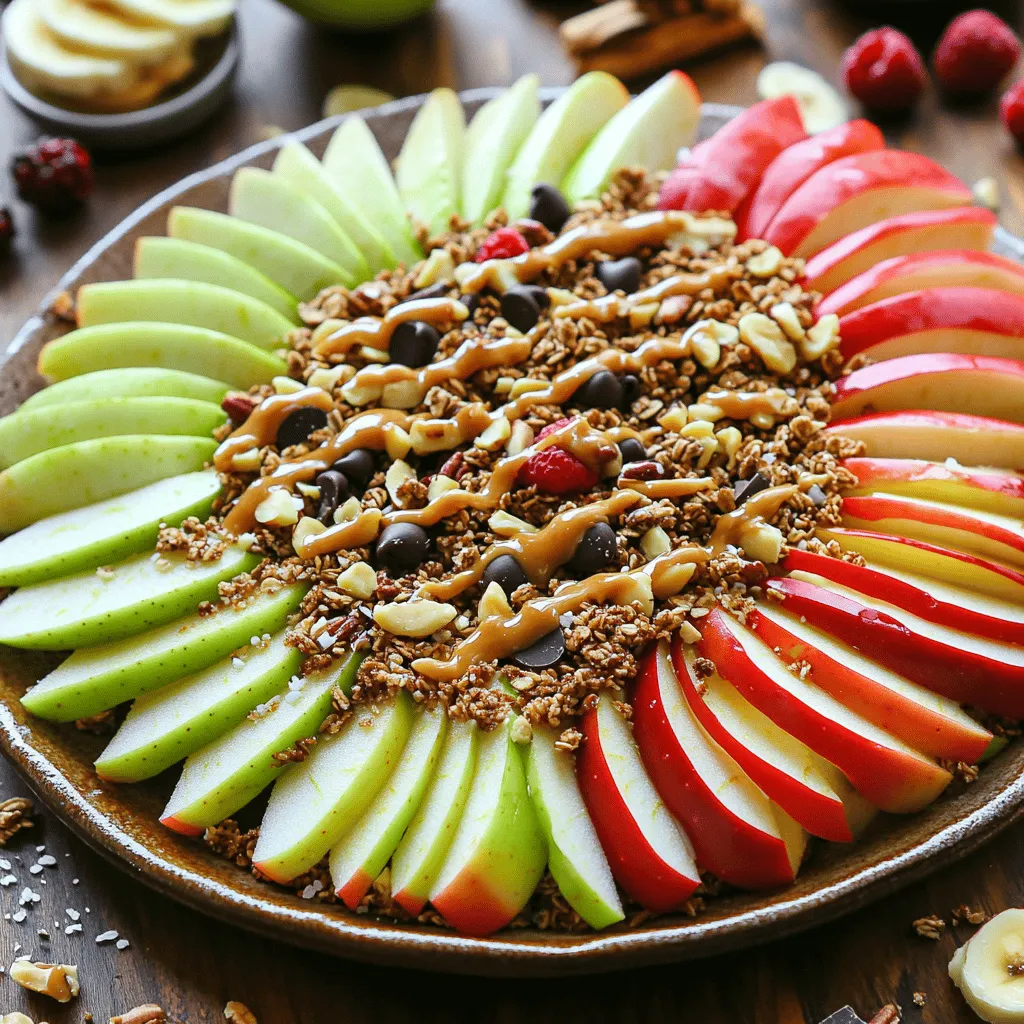
Looking for a quick and tasty snack that’s good for you? Healthy Apple Nachos are the perfect choice! They’re easy
![- 1 cup rolled oats - 1/2 cup almond butter - 1/4 cup honey or maple syrup - 1/2 cup ground flaxseed - 1/3 cup mini chocolate chips - 1/4 cup shredded coconut (optional) - 1 teaspoon pure vanilla extract - A pinch of sea salt The main ingredients in no-bake energy bites are simple and easy to find. Rolled oats provide a great base. They give texture and fiber. Almond butter adds healthy fat and protein, making these bites satisfying. Honey or maple syrup acts as a natural sweetener. Ground flaxseed adds omega-3 fatty acids, boosting the nutrition. Mini chocolate chips bring a touch of sweetness and fun. Shredded coconut is optional and adds a nice chew. A pinch of sea salt enhances all these flavors. - Dried fruits (raisins, cranberries, etc.) - Nuts and seeds (chia seeds, walnuts, etc.) - Protein powder You can change up the flavors with fun add-ins. Dried fruits like raisins or cranberries can add sweetness. Nuts and seeds, such as chia seeds or walnuts, add crunch and nutrition. If you want more protein, add a scoop of protein powder. These choices make your energy bites unique every time. - Nut-free alternatives (sunflower seed butter) - Vegan options (using maple syrup and plant-based protein) If you have dietary needs, there are easy swaps. Use sunflower seed butter instead of almond butter to make them nut-free. For a vegan option, stick with maple syrup and choose plant-based protein. These swaps keep the bites delicious for everyone. For the full recipe, check the details above. - Start by placing 1 cup of rolled oats and 1/2 cup of ground flaxseed in a large bowl. Stir them well so they mix evenly. - Next, in another bowl, combine 1/2 cup of almond butter, 1/4 cup of honey or maple syrup, 1 teaspoon of vanilla extract, and a pinch of sea salt. Whisk until smooth and creamy. - Pour the wet mix over the dry mix. Stir it all together until everything is well combined and moist. - Now, take portions of the mixture and roll them into small balls, about 1 inch wide. If the mix is sticky, wet your hands slightly to help with rolling. - Place the formed balls onto a baking sheet lined with parchment paper. Make sure they have space to avoid sticking. - Put the baking sheet in the refrigerator for at least 30 minutes. This helps the bites firm up nicely. - To serve, arrange the energy bites on a wooden board or in a colorful bowl. - For a fun touch, drizzle melted chocolate over the bites just before serving. This makes them even more tempting! For the complete recipe, check the [Full Recipe]. To get the right mix for your energy bites, focus on the moisture. The mixture should feel sticky but not runny. If it seems too dry, add a dash of almond butter or honey. This will help combine the oats and flaxseed well. When rolling, if the mix sticks to your hands, slightly dampen them. This simple trick makes rolling easy and keeps your hands clean. Feel free to make your energy bites unique by playing with flavors. You can add spices like cinnamon or nutmeg for warmth. Want a different crunch? Toss in sunflower seeds or chopped nuts. To make them gluten-free, use certified gluten-free oats. If you prefer low-sugar options, swap honey for mashed banana or unsweetened applesauce. This keeps the taste great while lowering sugar content. Boost your energy bites with extra nutrition. Add chia seeds or hemp seeds for a protein kick. You can also mix in superfoods like spirulina or cacao nibs. Focus on balancing energy by adding fiber-rich ingredients. This helps you feel full longer. The right mix of protein and fiber makes these bites a smart snack choice. {{image_4}} Energy bites are fun and easy to change up! You can mix flavors to keep things exciting. Here are some great ideas. - Chocolate Peanut Butter Energy Bites: Use your almond butter or switch to peanut butter. Add cocoa powder for a rich chocolate taste. - Coconut Almond Joy Energy Bites: Add shredded coconut and a little almond extract. This brings a tropical twist to your bites. - Matcha Green Tea Energy Bites: Mix in matcha powder for a bright green color and a health boost. It adds a unique flavor that many love. - Pumpkin Spice Energy Bites for fall: Stir in pumpkin puree and pumpkin spice. This makes a warm, cozy snack perfect for autumn. - Summery Coconut Lime Energy Bites: Mix in lime zest and juice with shredded coconut. This gives a refreshing tang, great for hot days. - Fun colors using natural food coloring: Add a few drops of natural dye to make the bites colorful. Kids will love the bright snacks! - Incorporating whole fruits for extra sweetness: Toss in small pieces of dried fruit like raisins or cranberries. This adds natural sweetness and chewiness. Explore these variations to find your favorites! Check out the Full Recipe for the base energy bite mix, then let your creativity run wild. To keep your no-bake energy bites fresh, store them in the fridge. Use an airtight container to seal them well. This will help prevent moisture and keep them tasty. I like to use glass containers, as they are easy to clean and eco-friendly. Make sure you label the container with the date you made them. If you want to save some energy bites for later, freezing is a great option. To freeze, place the bites on a baking sheet in a single layer. Once frozen, transfer them to an airtight container or freezer bag. This way, they won’t stick together. When you’re ready to eat them, let them thaw in the fridge for a few hours or at room temperature for about 30 minutes. They can stay fresh in the freezer for up to three months. In the fridge, no-bake energy bites last about a week. In the freezer, they can last up to three months. Check for any signs that they have gone bad, like an off smell or visible mold. If they look or smell strange, it’s best to toss them. Enjoy your Nutty Chocolate Bliss Energy Bites with confidence knowing they are fresh and safe! No-bake energy bites last up to a week in the fridge. Store them in an airtight container. If you freeze them, they can last for three months. Just thaw them before you eat. Yes, you can use any nut butter you like. Almond butter works great, but peanut butter is a classic choice. You can also try cashew butter or sunflower seed butter if you want a nut-free option. Absolutely! These energy bites are perfect for meal prep. They are easy to make and store well. Just whip up a batch on the weekend, and you have healthy snacks ready for the week. You can use maple syrup or agave nectar instead of honey. Both options add sweetness and stickiness. They work well to bind the ingredients together. No-bake energy bites are packed with nutrition. They offer fiber from oats and flaxseed, healthy fats from nut butters, and protein. They can give you lasting energy without a sugar crash. Plus, they are easy to customize with your favorite mix-ins. For the full recipe, check out Nutty Chocolate Bliss Energy Bites! You now have all the tools to make tasty no-bake energy bites. We covered the key ingredients, like oats and almond butter, and shared easy steps to put them together. Don't forget to mix in your favorite add-ins for more flavor. Store them properly to keep them fresh and enjoy delicious bites anytime. Remember, you can always customize for your taste or diet needs. Keep this guide handy as you create your own energy bites, and have fun experimenting!](https://recipetorch.com/wp-content/uploads/2025/07/5e9e225e-7158-4fe1-812e-7bf562a40cda.webp)
Are you looking for a quick snack that energizes without the oven? No-Bake Energy Bites are the perfect solution. This
