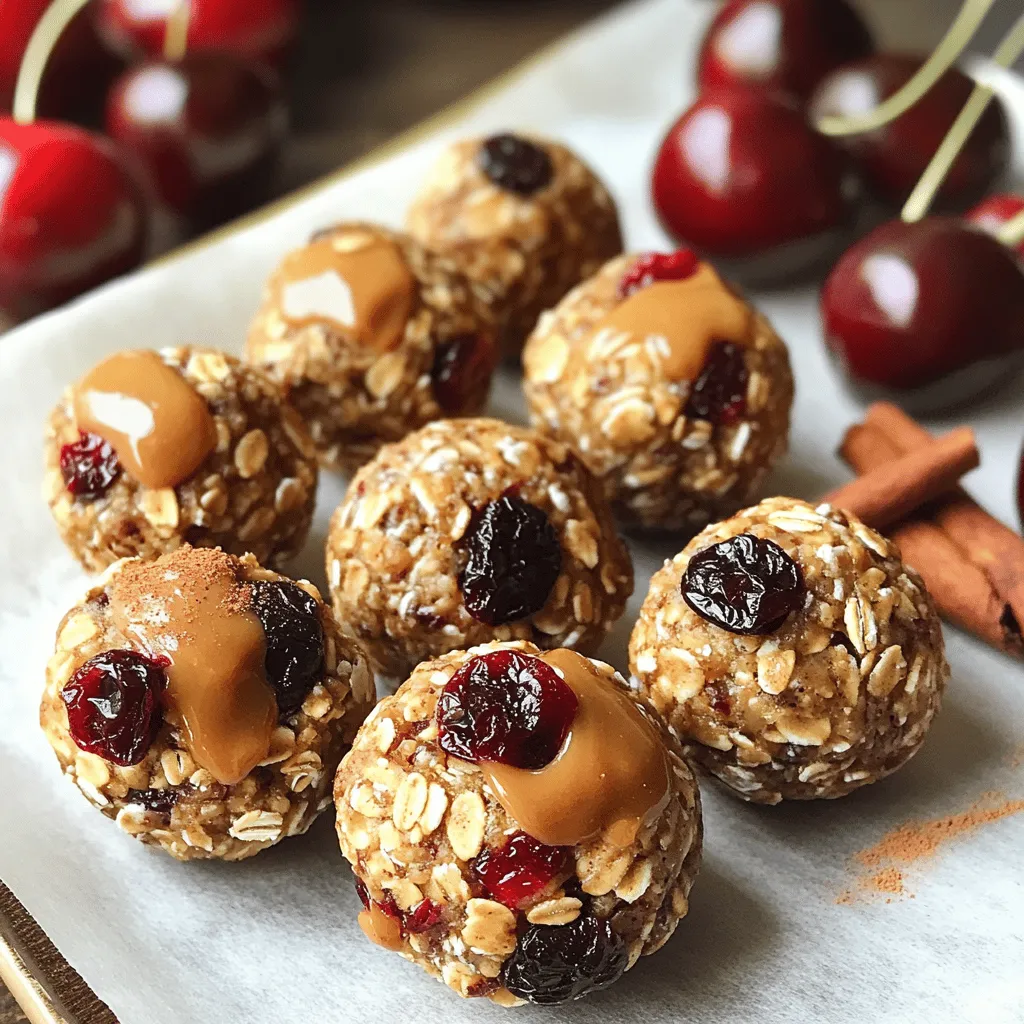
![- 2 cups rolled oats - 1 cup unsweetened almond milk - 1 cup pitted cherries, chopped - 1/2 cup unsweetened shredded coconut - 1/4 cup honey or maple syrup - 1/4 cup chopped nuts - 1 teaspoon vanilla extract - 1 teaspoon baking powder - 1/2 teaspoon ground cinnamon - A pinch of salt These ingredients create a tasty base for our Cherry Coconut Oatmeal Cups. The rolled oats provide fiber and a hearty texture. Almond milk keeps it dairy-free and adds creaminess. Cherries give a sweet and tart flavor, while shredded coconut adds a nice chew. I love using honey or maple syrup for natural sweetness. Chopped nuts bring a satisfying crunch. Vanilla extract enhances the flavor, and baking powder helps with rising. Ground cinnamon adds warmth, and a pinch of salt balances everything out. - Different types of nuts (e.g., pecans, hazelnuts) - Sweetener alternatives (e.g., agave syrup, stevia) Feel free to swap nuts. Pecans or hazelnuts can add unique flavors. If you want to change the sweetness, try agave syrup or stevia. These swaps can make the recipe fit your taste perfectly. For the full recipe, check the section above. Enjoy creating your own Cherry Coconut Oatmeal Cups! - Preheat your oven to 350°F (175°C). - Prepare a muffin tin by greasing it or using liners. - In a large bowl, mix together: - 2 cups rolled oats - 1/2 cup unsweetened shredded coconut - 1 teaspoon baking powder - 1/2 teaspoon ground cinnamon - A pinch of salt - In another bowl, whisk: - 1 cup unsweetened almond milk - 1/4 cup honey or maple syrup - 1 teaspoon vanilla extract - Pour the wet mixture into the dry mix. - Stir gently until combined, being careful not to overmix. - Fold in: - 1 cup chopped cherries - 1/4 cup chopped nuts - Spoon the mixture into muffin cups. Fill each about three-quarters full. - Bake for 20 to 25 minutes until golden. - Let cool for 5 minutes in the tin before moving to a wire rack. You can find the Full Recipe for more details and tips! The right oven temperature for these Cherry Coconut Oatmeal Cups is 350°F (175°C). This heat helps them bake evenly. Bake for 20 to 25 minutes. Look for a golden brown top. Use a toothpick to check for doneness. If it comes out clean, your cups are ready! For a lovely presentation, place the oatmeal cups on a bright platter. You can sprinkle extra shredded coconut on top. A few fresh cherries can add a pop of color. These cups pair well with yogurt or a drizzle of honey. You can also serve them with nut butter for added creaminess. Yes, you can prep these cups in advance! Mix the dry ingredients and store them. Then, combine them with wet ingredients when you're ready to bake. For storing leftovers, place them in an airtight container. They last about a week in the fridge. You can also freeze them for up to three months. Just thaw and reheat before enjoying. For the [Full Recipe], check the earlier section. {{image_4}} You can change the flavor of your Cherry Coconut Oatmeal Cups easily. Here are some ideas: - Adding spices: Try adding nutmeg or cardamom. These spices will give your cups a warm, cozy taste. - Substituting fruits: Swap out cherries for blueberries or bananas. Each fruit brings a different flavor and texture to the cups. You can also adjust the recipe to fit different diets: - Gluten-free options: Use gluten-free oats instead of regular oats. This way, anyone can enjoy these tasty treats. - Vegan adaptations: Replace honey with maple syrup. This keeps your recipe plant-based and just as sweet. Feel free to explore these variations. They let you make the Cherry Coconut Oatmeal Cups your own! For the complete recipe, check out the Full Recipe section. To keep your Cherry Coconut Oatmeal Cups fresh, use airtight containers. Glass or plastic containers work well. If you want to save space, you can stack them. Make sure to allow the cups to cool completely before sealing. This prevents moisture build-up and keeps them tasty. For short-term storage, place the containers in the fridge. The oatmeal cups stay fresh for up to five days. If you want to keep them longer, freezing is a great option. How long do they last in the fridge? In the fridge, the oatmeal cups last about five days. You can enjoy them for breakfast or snacks. Can they be frozen? Yes, they can! You can freeze them for up to three months. Just wrap each cup tightly in plastic wrap and place them in a freezer-safe bag or container. When you’re ready to eat, thaw them in the fridge overnight. You can also warm them in the microwave for a quick treat. Can I use quick oats instead of rolled oats? Yes, you can use quick oats. They will change the texture a bit. Quick oats may make the cups softer and less chewy than rolled oats. Are these oatmeal cups suitable for meal prep? Absolutely! These cups are great for meal prep. You can make them ahead of time. Store them in the fridge for a quick breakfast or snack. Are Cherry Coconut Oatmeal Cups gluten-free? Yes, if you use certified gluten-free oats, they are gluten-free. Always check labels to be sure. How can I reduce sugar in the recipe? You can cut back on honey or maple syrup. You can also use mashed bananas or unsweetened applesauce as sweeteners. Both options keep the flavor tasty. What can I pair with Cherry Coconut Oatmeal Cups? These cups go well with yogurt or fresh fruit. You can also enjoy them with a cup of tea or coffee. Can I reheat them after storing? Yes, you can reheat them in the microwave or oven. Heat them for a short time until warm. Enjoy your delicious Cherry Coconut Oatmeal Cups! You now have a simple way to make Cherry Coconut Oatmeal Cups. We covered the ingredients, steps, and tips to make this recipe shine. You can easily customize these cups to fit your tastes or dietary needs. Remember to store them correctly for lasting freshness. Enjoying healthy snacks just got simpler! Try this recipe and enjoy fresh flavors whenever you like. Your kitchen will be full of delicious scents, and your taste buds will thank you. Happy baking!](https://recipetorch.com/wp-content/uploads/2025/07/3399704e-90e4-4091-88bf-4cb78dc442c6.webp)
Cherry Coconut Oatmeal Cups Delightful and Tasty Treat
Are you looking for a fun and tasty way to start your day? These Cherry Coconut Oatmeal Cups are a
Are you looking for a fun and tasty way to start your day? These Cherry Coconut Oatmeal Cups are a
![Chicken and Marinade Components - 2 boneless, skinless chicken breasts - 1 cup buttermilk - 1 teaspoon garlic powder - 1 teaspoon paprika - Salt and pepper, to taste These ingredients make the chicken tender and juicy. The buttermilk works as a great marinade. Garlic powder and paprika add depth to the flavor. Salt and pepper enhance everything. Salad Base Ingredients - 2 cups romaine lettuce, chopped - 1 cup cherry tomatoes, halved - 1/2 cup sliced cucumbers - 1/3 cup sliced dill pickles The salad base is fresh and crunchy. Romaine lettuce gives a nice texture. Cherry tomatoes add sweetness, while cucumbers bring coolness. Dill pickles contribute a tangy bite. Dressing and Toppings - 1/2 cup Caesar dressing - 1/4 cup grated Parmesan cheese - 1/4 cup croutons The Caesar dressing ties the salad together. Parmesan cheese adds richness. Croutons provide a lovely crunch. You can find the full recipe to create this tasty dish. Marinating the Chicken First, you need to make the marinade. In a medium bowl, whisk together the buttermilk, garlic powder, paprika, salt, and pepper. Make sure all the spices mix well. Then, place the chicken breasts in the bowl, covering them fully with the marinade. Cover the bowl with plastic wrap and refrigerate for at least one hour. This step is key to making the chicken tender and full of flavor. Cooking the Chicken After marinating, it’s time to cook the chicken. Preheat your grill or skillet to medium heat. Remove the chicken from the marinade and let the excess drip off. Grill or pan-sear the chicken for about 6-7 minutes on each side. You want it to be fully cooked and have nice grill marks. Once done, move the chicken to a plate and let it rest for a few minutes. This helps keep the juices inside. Letting the Chicken Rest Resting is important. Allow the chicken to sit for about five minutes after cooking. This step helps the juices settle. After resting, slice the chicken into strips. You want nice, even pieces that will sit beautifully on your salad. Mixing the Salad Base Now, let’s make the salad. In a large bowl, combine the chopped romaine lettuce, halved cherry tomatoes, sliced cucumbers, and dill pickles. Toss them gently. You want to mix everything evenly without crushing the veggies. Adding the Dressing Once your salad base is mixed, drizzle the Caesar dressing over it. Use a pair of tongs to toss the salad again. Make sure all the ingredients get coated with the dressing. This adds flavor and makes the salad exciting. Plating the Salad Now, it’s time to plate. Take the sliced chicken and arrange it on top of the salad mixture. Sprinkle the grated Parmesan cheese and croutons over the chicken and salad. This adds a burst of flavor and crunch. Serve the salad in large bowls or plates for a lovely presentation. Enjoy your vibrant and flavorful salad! Timing and Techniques Marinating the chicken is key to great flavor. I suggest marinating for at least one hour. If you have time, let it sit longer, up to overnight. This helps the chicken soak up all the flavors. Use a non-metal bowl for the marinade. Metal can react with the buttermilk. Make sure the chicken is fully submerged in the marinade for the best results. Flavor Enhancements Want to add a twist? Try adding a splash of pickle juice to the marinade. This boosts the tangy flavor. You can also mix in some herbs like dill or parsley for a fresh touch. Experiment with spices like cayenne pepper for heat. Just remember, balance is key. Ideal Pairings Pickle Ranch Chicken Caesar Salad is great on its own. But you can pair it with crusty bread or a light soup. For a fun twist, serve it with potato wedges. The crunch and flavor complement the salad well. A refreshing lemonade or iced tea also makes a great drink choice. Presentation Ideas Make your salad look as good as it tastes! Use large, shallow bowls for serving. Arrange the sliced chicken in a fan shape on top of the salad. This makes it look fancy. For extra flair, add a few sliced pickles on top. A sprinkle of extra Parmesan cheese and croutons adds crunch and style. Don't be shy with colors; fresh veggies make it pop! For more ideas, check out the Full Recipe. {{image_4}} You can make this salad lighter by using grilled turkey instead of chicken. Turkey has less fat but still tastes great. You can also use Greek yogurt instead of Caesar dressing. This swap cuts calories and adds protein. For a crunchier salad, try using fresh spinach instead of romaine. Spinach packs in more nutrients. If you want a meat-free meal, replace chicken with chickpeas. Chickpeas add protein and fiber. You can also try roasted tofu for a different texture. For a creamy dressing, use a vegan Caesar or tahini-based sauce. This keeps the salad tasty while being plant-based. To boost flavor, sprinkle some chili powder or cumin on your chicken. This adds a nice kick. Fresh herbs like basil or parsley can brighten the salad. Toss in some dill for a nice twist that complements the pickles. Feel free to switch up the dressing. A creamy ranch can add a twist while keeping that tangy flavor. For a zesty touch, try a lemon vinaigrette. This will wake up the flavors and keep the salad fresh. For more ideas, check out the full recipe. To keep your Pickle Ranch Chicken Caesar Salad fresh, you need to store it well. - Refrigeration Tips: Place leftovers in an airtight container. Make sure to separate the chicken from the salad. The chicken stays moist this way. The salad can wilt if mixed with the dressing. Store it in the fridge for up to three days. - Freezing Options: Freezing this salad is not the best idea. The veggies and dressing do not freeze well. But you can freeze the cooked chicken. Wrap it tightly in plastic wrap and foil. Store it in the freezer for up to three months. When it’s time to eat, you want everything to taste great. Here’s how to reheat properly. - Restoring Crunchiness to Croutons: Croutons lose their crunch when stored. To fix this, place them on a baking sheet. Heat them in the oven at 350°F for about 5 minutes. This will make them crispy again. - Keeping Chicken Moist: To reheat the chicken, use the microwave or oven. If using a microwave, cover the chicken with a damp paper towel. Heat it for 30 seconds at a time. If using an oven, wrap the chicken in foil. Heat it at 350°F until warm. This keeps the chicken moist and tasty. For the full recipe, check out the [Full Recipe]. Can I make this salad ahead of time? Yes, you can prepare parts of this salad in advance. Marinate the chicken and store it overnight. Chop the veggies and keep them in the fridge. Assemble the salad just before serving for the best taste and crunch. What can I serve with Pickle Ranch Chicken Caesar Salad? This salad pairs well with warm bread or garlic knots. You can also add a side of fruit or a light soup to complete your meal. A glass of iced tea or lemonade would be refreshing too. How do I adjust the recipe for more servings? To make more servings, simply double the ingredients. For example, use four chicken breasts and double the salad components. Make sure to adjust the dressing and cheese accordingly to keep the flavors balanced. You can check the Full Recipe for the original amounts. This blog post covered all you need for a tasty Pickle Ranch Chicken Caesar Salad. We explored essential ingredients, step-by-step cooking tips, and ways to serve and store your salad. You can customize it to fit your tastes and add unique flavors. Remember, this salad is simple to make and fun to modify. Enjoy your cooking, and don’t be afraid to experiment. Your kitchen can be a space for creativity and great meals.](https://recipetorch.com/wp-content/uploads/2025/07/b2b6502e-4218-49bb-a4fa-2cb8e57a2328.webp)
Looking for a fresh twist on a classic dish? My Pickle Ranch Chicken Caesar Salad combines tender chicken with crisp
Looking for a quick, healthy snack that fuels your day? Try Cherry Oatmeal Protein Bites! These tasty treats are packed
![- 2 boneless, skinless chicken breasts - 1 cup dill pickles, finely chopped - 1/2 cup ranch dressing - 1 cup quinoa, thoroughly rinsed and drained - 1 cup cherry tomatoes, halved - 1 cucumber, diced - 1 cup shredded carrots - 2 cups mixed greens (such as spinach and arugula) - 1/4 cup feta cheese, crumbled - Fresh dill, for garnish - Salt and pepper, to taste To make Pickle Ranch Chicken Buddha Bowls, you need fresh and simple ingredients. Start with the chicken breasts. They provide protein and flavor. Dill pickles add a tangy crunch, giving the dish a unique twist. The ranch dressing works as a creamy marinade, making the chicken taste even better. Next is quinoa, which serves as the hearty base. It’s packed with nutrients, making your meal filling and healthy. For fresh vegetables, you can use cherry tomatoes, cucumber, shredded carrots, and mixed greens. They add color, texture, and essential vitamins to the bowl. You can also enhance your dish with optional add-ons. Crumbled feta cheese offers a salty kick. Fresh dill adds a fragrant touch. Finally, salt and pepper let you adjust the taste to your liking. For the complete recipe, check the [Full Recipe]. To start, combine the dill pickles and ranch dressing in a bowl. I like to use a fork to mix them well. Then, take your chicken breasts and submerge them in this tasty mixture. Make sure the chicken is fully coated. Cover the bowl with plastic wrap and refrigerate for at least 30 minutes. This time allows the flavors to blend nicely. Next, let’s cook the quinoa. In a medium saucepan, bring the vegetable broth to a boil. I prefer broth for extra flavor, but water works too. Once the broth is boiling, stir in the rinsed quinoa. Reduce the heat to low, cover the pot, and let it simmer for 15 to 20 minutes. The quinoa is done when it absorbs all the liquid and looks fluffy. Fluff it with a fork and set it aside. Now, it's time to grill the chicken. Preheat your grill or grill pan to medium-high. Take the marinated chicken out of the fridge, letting excess dressing drip off. Grill the chicken breasts for about 6 to 7 minutes on each side. Use a meat thermometer to check if it’s safe to eat. The internal temperature should be 165°F (75°C). After grilling, let the chicken rest on a plate for a few minutes before slicing it into strips. Now, let’s build our Buddha bowls! Start with a generous scoop of cooked quinoa as the base in large, shallow bowls. Next, add a handful of mixed greens on top. Now, arrange the sliced grilled chicken. You can also add cherry tomatoes, diced cucumber, and shredded carrots in sections. This makes the bowl colorful and fun to eat. For the finishing touches, drizzle some ranch dressing over the assembled bowls if you like. Then, sprinkle crumbled feta cheese and fresh dill on top. This adds a burst of flavor and a nice look. Finally, season with salt and pepper to taste. Enjoy your Pickle Ranch Chicken Buddha Bowls for a fresh and satisfying meal. For the complete recipe, check out the [Full Recipe]. Marinating the chicken is key to great flavor. I suggest marinating for at least 30 minutes. However, for best results, let it sit overnight if you can. This allows the pickles and ranch to soak in well. For grilling, set your grill to medium-high heat. This range helps cook the chicken evenly without drying it out. Cook each side for about 6-7 minutes. Check that the chicken reaches 165°F (75°C) for safety. To get fluffy quinoa, rinse it well before cooking. This removes any bitter taste. When you cook it, use vegetable broth for more flavor. You can also use water or chicken broth if you prefer. Simmer the quinoa on low heat for about 15-20 minutes. Once it’s done, fluff it with a fork. This step gives it a light texture. Choosing the right bowls makes a big difference. Large, shallow bowls show off your ingredients well. They help create a beautiful display of colors. When arranging toppings, think of sections. Place each ingredient in its own area. This style makes the dish pop! Finish with fresh dill on top for a fragrant touch. It brings everything together nicely. {{image_4}} Want to switch up the protein? You can use grilled tofu or tempeh for a plant-based option. Both options soak up flavors well, making them perfect for this dish. If you crave something different, try shrimp or steak. Shrimp cooks quickly and adds a nice touch of sweetness. Steak gives a hearty flavor that pairs great with the ranch dressing. While ranch dressing is a star here, you can make it your own. Try a homemade ranch with fresh herbs for added flavor. Mix sour cream, yogurt, garlic, and herbs like parsley and chives. Or, explore other creamy dressings. A lemon-tahini dressing adds a nutty twist. A yogurt-based dressing can keep it light and zesty. Using seasonal vegetables adds freshness. In spring, try asparagus or snap peas. Summer calls for zucchini or bell peppers. In the fall, roasted sweet potatoes or Brussels sprouts make a great addition. For winter, add hearty greens like kale or roasted root veggies. Mixing in different vegetables keeps your Buddha bowl exciting and colorful. You can store assembled bowls in the fridge for up to three days. Make sure to cover each bowl tightly with plastic wrap or a lid. This keeps your ingredients fresh and prevents any odors from the fridge. It’s best to keep the dressing separate until you are ready to eat. This prevents sogginess and keeps everything crisp. When it comes to reheating quinoa, use a microwave-safe bowl. Add a splash of water to keep it moist. Heat it in short bursts of 30 seconds, stirring in between. For chicken, place it on a plate and cover it with a damp paper towel. This keeps it juicy. Warm the chicken for about 1-2 minutes until it's hot. Avoid overheating to keep the texture and flavor intact. Yes, you can prepare parts of this dish in advance. Store the marinated chicken in the fridge for up to 24 hours. Cooked quinoa can last for about 4-5 days in the fridge. Keep the veggies fresh by storing them separately. Assemble the Buddha bowls right before serving for the best taste. To make this dish healthier, you can use grilled chicken thighs instead of breasts for more flavor. Swap ranch dressing for yogurt-based dressings or a vinaigrette. You could also add more veggies, like bell peppers or spinach, for extra nutrients. Using less feta cheese or omitting it can cut calories too. These bowls pair well with a light salad or roasted veggies. You can also enjoy them with a refreshing drink, like iced tea or lemonade. If you're feeling adventurous, try a light soup as a starter for a complete meal. This article covered many ways to create delicious Buddha bowls. You learned about key ingredients, like chicken, quinoa, and fresh veggies. Next, I detailed how to marinate, cook, and assemble. Tips for perfecting the chicken and quinoa helped ensure great results. Finally, I shared variations, storage tips, and answers to common questions. Now, you can enjoy tasty, healthy meals any time. Remember, these bowls are versatile and easy to customize. Happy cooking!](https://recipetorch.com/wp-content/uploads/2025/07/0a9c5869-3d33-4d35-bfe5-e19ddd2af09f.webp)
Looking for a fresh and tasty meal idea? Try my Pickle Ranch Chicken Buddha Bowls! These bowls are packed with
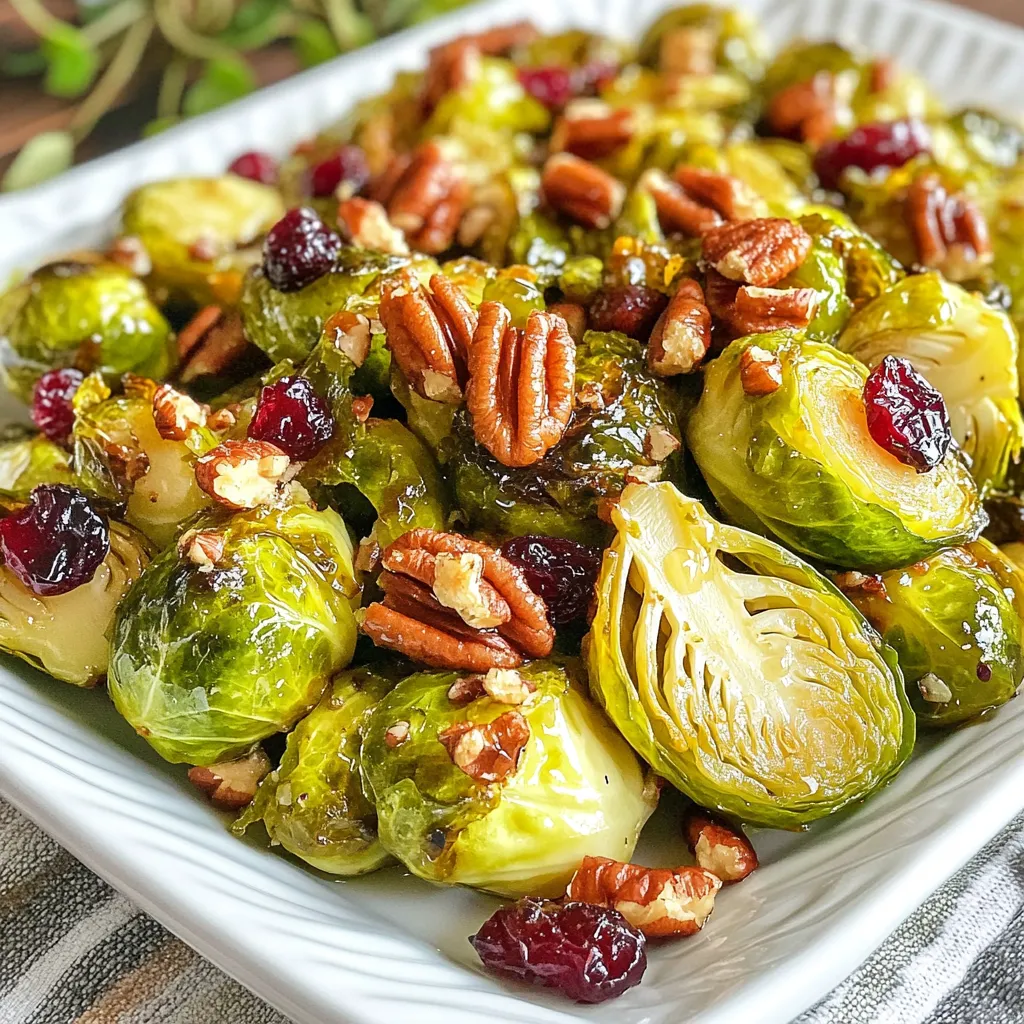
If you’re ready to elevate your vegetable game, try these Maple Dijon Brussels Sprouts. This flavorful, roasted dish combines the
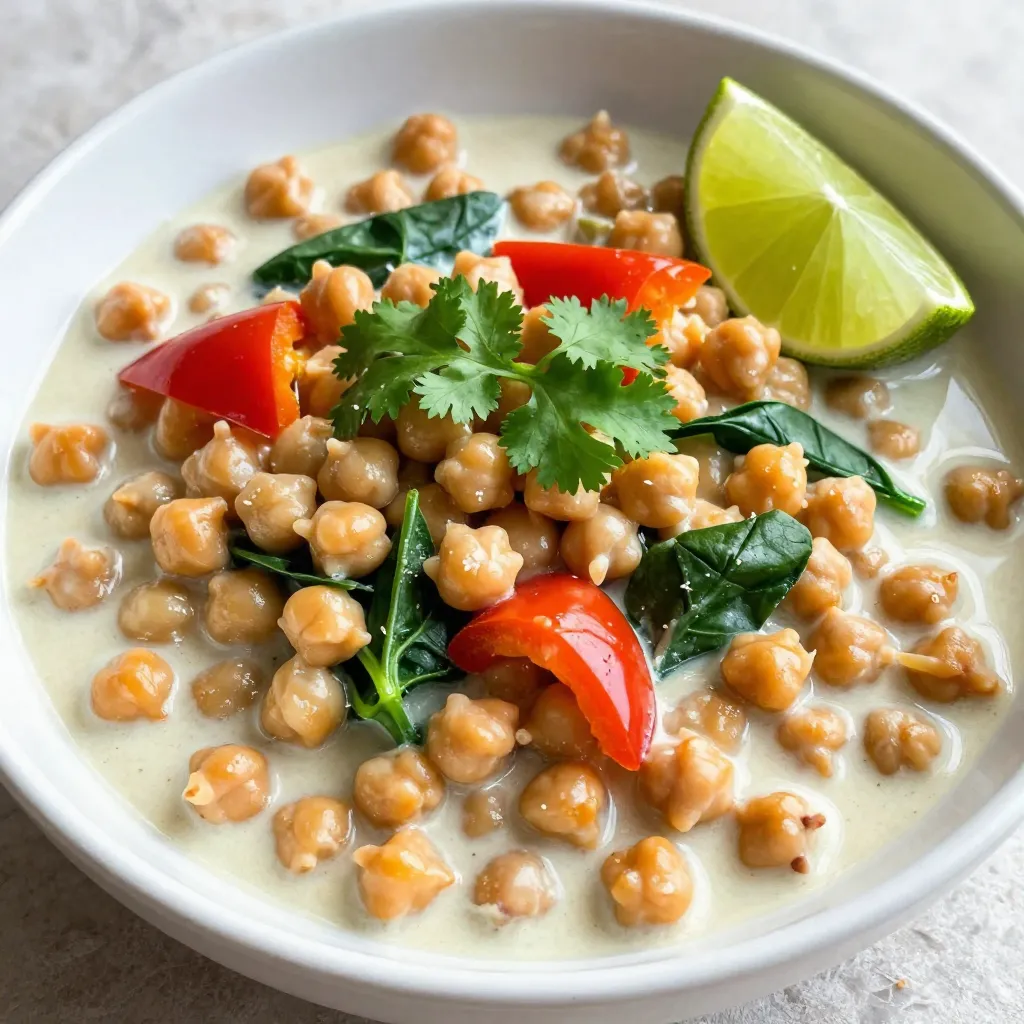
Looking for a quick, tasty meal? Coconut Curry Chickpeas are your answer! This dish packs vibrant flavors and creamy goodness,
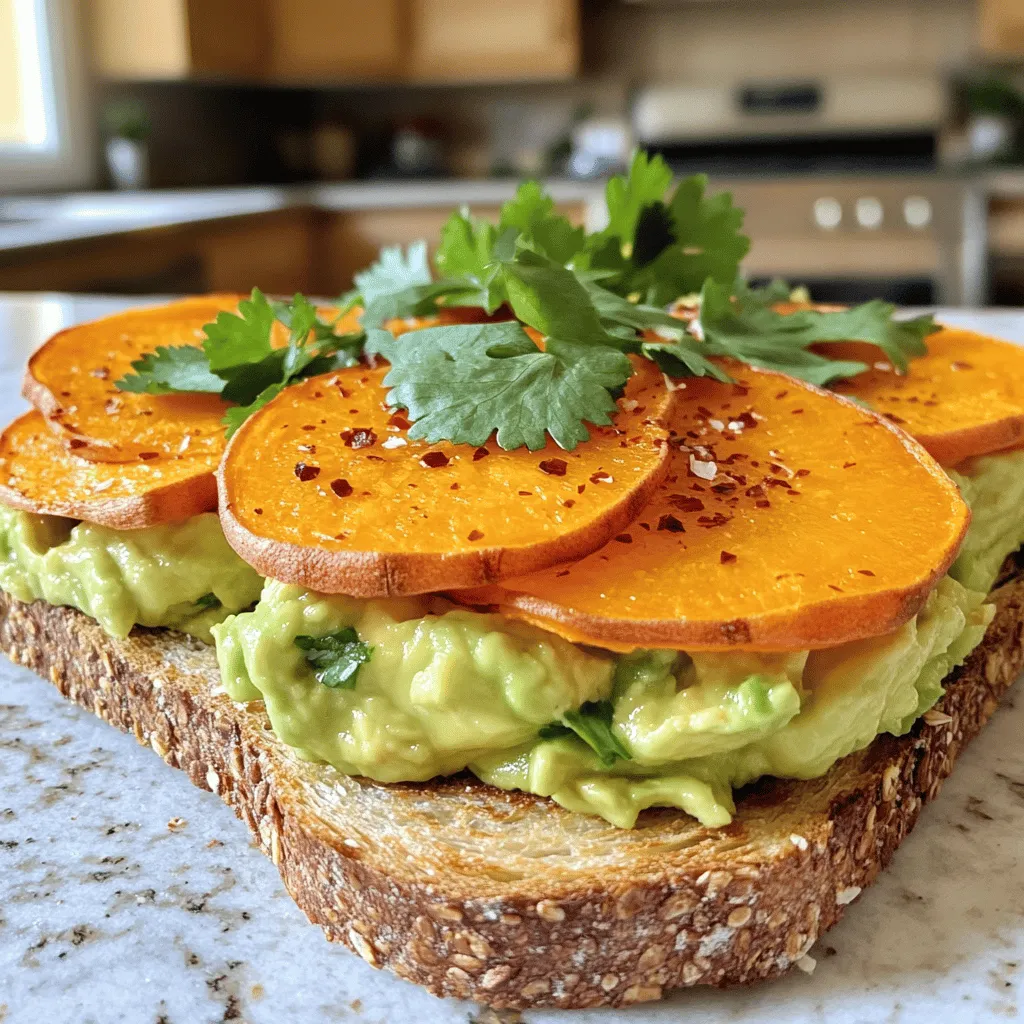
Looking for a tasty meal that’s easy to make? Sweet potato avocado toast is the perfect choice! This dish is
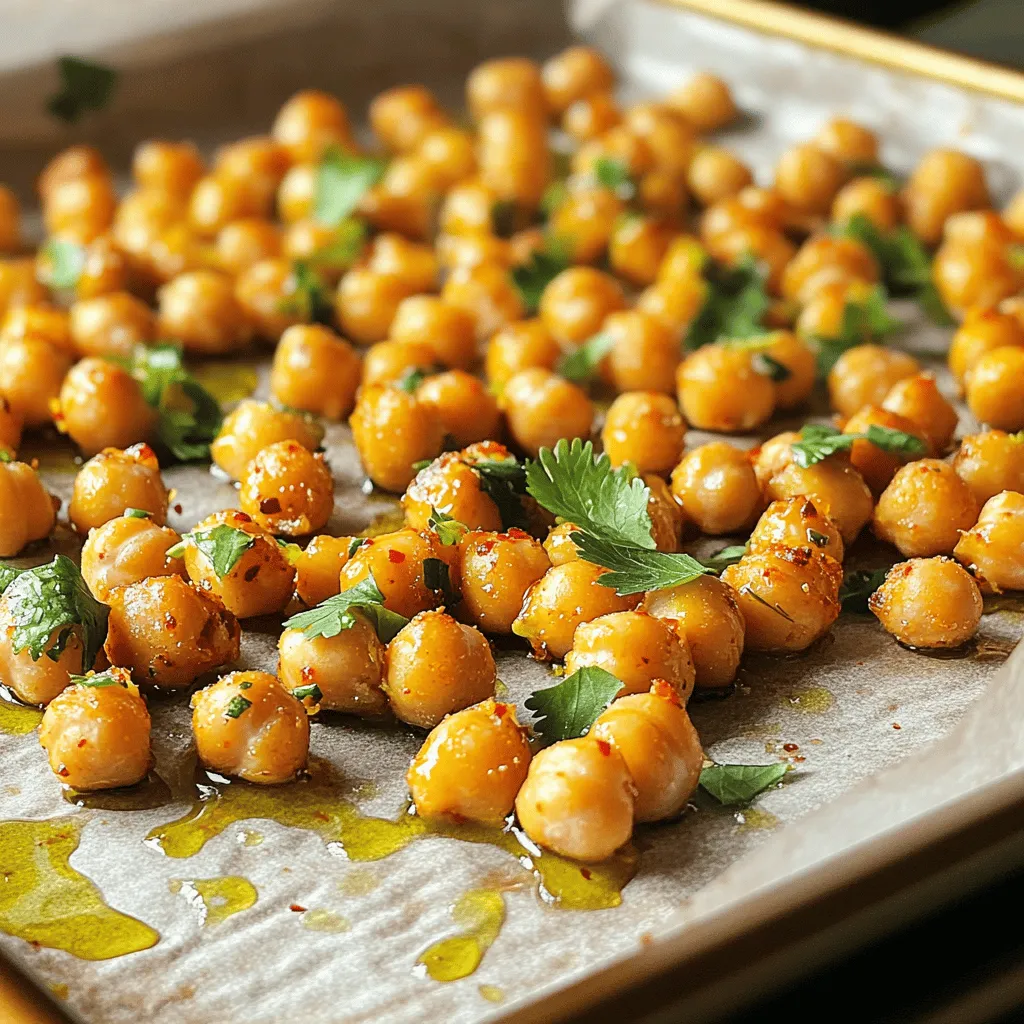
Looking for a snack that’s both crispy and packed with flavor? Look no further than Chili Lime Roasted Chickpeas! With
![- 1 cup rolled oats - 1 cup all-purpose flour - 1/2 cup packed brown sugar - 2 teaspoons baking powder - 1/2 teaspoon baking soda - 1/4 teaspoon salt - 1 teaspoon ground cinnamon - 2 ripe bananas, mashed - 1/2 cup Greek yogurt (or applesauce) - 1/4 cup honey or maple syrup - 1/4 cup vegetable oil or melted coconut oil - 1 teaspoon pure vanilla extract - 1 cup fresh strawberries, chopped - Optional: 1/2 cup chopped nuts For the perfect strawberry banana oat muffins, I recommend using fresh, ripe ingredients. The oats provide a hearty base. They add fiber and texture. The bananas must be very ripe for natural sweetness. They also make the muffins moist. Greek yogurt adds creaminess and protein. If you prefer, you can swap it with applesauce. It will still keep your muffins moist. Honey or maple syrup gives a lovely sweetness. Use the one you like more. You can also add chopped nuts for a crunch. Walnuts or pecans work great in this recipe. They add flavor and a nice bite. - Substituting Greek yogurt for applesauce - Using different sweeteners like agave syrup If you want a lighter option, use applesauce instead of Greek yogurt. This swap keeps the muffins tasty and moist. You can also try agave syrup as a sweetener. It has a lower glycemic index than regular sugar. - Muffin tin and liners - Mixing bowls and whisk - Measuring cups and spoons You will need a muffin tin lined with paper liners. This helps to remove the muffins easily after baking. A mixing bowl and whisk are essential for combining ingredients. Measuring cups and spoons ensure your ingredients are spot on. These tools make the process smooth and fun. Enjoy baking your muffins! 1. Preheat your oven to 350°F (175°C). This helps the muffins bake evenly. 2. Prepare your muffin tin by lining it with paper liners. You can also lightly grease it with cooking spray or oil. 3. In a large bowl, mix together the dry ingredients: rolled oats, all-purpose flour, brown sugar, baking powder, baking soda, salt, and cinnamon. Whisk them until they blend well. 4. In another bowl, mash the ripe bananas until smooth. Then, stir in the Greek yogurt or applesauce, honey or maple syrup, vegetable oil, and vanilla extract. Mix until smooth. 5. Pour the wet mixture into the bowl with dry ingredients. Use a spatula to fold them together gently. Don’t overmix; it's okay if some lumps remain. 6. Now, add the chopped strawberries and optional nuts to the batter. Fold them in carefully, so they distribute evenly without breaking apart. 7. Fill each muffin cup about two-thirds full with the batter. This gives the muffins space to rise. 8. Place the muffin tin in the preheated oven. Bake for 18 to 20 minutes. The muffins should be golden brown. 9. To check if they are done, insert a toothpick into the center of a muffin. If it comes out clean or with a few crumbs, your muffins are ready! 10. Let the muffins cool in the tin for about 5 minutes. After that, transfer them to a wire rack. This helps them cool completely and keeps them from getting soggy. To make your muffins fluffy, avoid overmixing the batter. When you mix wet and dry ingredients, stop when you see a few lumps. This keeps the muffins light. Use ripe bananas for the best sweetness and moisture. The riper they are, the better they taste. Add a dash of vanilla or almond extract for extra flavor. It makes the muffins smell amazing. Fresh strawberries taste best, but you can use frozen ones too. If using frozen, let them thaw first to avoid too much moisture. Baking times can change based on your oven type. Keep an eye on your muffins in the last few minutes. To store muffins, let them cool, then place them in an airtight container. This keeps them fresh for several days. If you want to save them longer, freeze them. Just thaw when you want a tasty treat. You can find the full recipe [Full Recipe]. {{image_4}} You can mix up your muffins by using different fruits. Here are two fun ideas: - Blueberry Banana Oat Muffins: Swap strawberries for blueberries. They add a sweet burst of flavor and pair well with bananas. - Apple Cinnamon Oat Muffins: Change it up by adding chopped apples and extra cinnamon. This option gives a cozy taste that feels like fall. If you have dietary needs, there are easy swaps for this recipe: - Gluten-free alternatives for flour: Try using almond flour or oat flour instead of all-purpose flour. Both give a great texture without gluten. - Vegan substitutes for yogurt and honey: Use almond yogurt or coconut yogurt in place of Greek yogurt. For honey, agave syrup works well and keeps it vegan-friendly. You can make your muffins even more exciting with a few extras: - Adding chocolate chips or spices: Toss in some dark chocolate chips for a sweet touch. You can also sprinkle in nutmeg or cardamom for warmth. - Introducing seeds like chia or flaxseed: Adding a tablespoon of chia or flaxseed boosts nutrition. They add fiber and healthy fats without changing the taste. For more details on how to bake these muffins, check out the Full Recipe. To keep your strawberry banana oat muffins fresh at room temperature, place them in an airtight container. This helps maintain moisture. You can also line the container with paper towels. This absorbs excess moisture, which keeps the muffins soft. Store them away from direct sunlight. They will stay good for about three days. If you want to save muffins for later, freezing is a great option. First, let them cool completely. Then, wrap each muffin tightly in plastic wrap. After that, place them in a freezer bag. Be sure to remove as much air as you can. This way, they can last for up to three months in the freezer. When you're ready to enjoy a muffin, reheating is easy. The best method is to use a microwave. Just place a muffin on a microwave-safe plate. Heat it for about 15 to 20 seconds. Check to see if it's warmed through. You can also use an oven. Preheat it to 350°F (175°C). Place the muffins on a baking sheet for about 5 to 10 minutes. This method gives a nice crisp outside. After reheating, serve them warm. You can add a pat of butter or a sprinkle of cinnamon for extra flavor. Muffins last different amounts of time based on how you store them. At room temperature, they last about three days. If you keep them in the fridge, they can last up to a week. In the freezer, as mentioned, they stay fresh for three months. Look for signs of spoilage. If you see mold or notice an off smell, it’s best to toss them out. A dry or hard texture also means they are past their prime. Enjoy your muffins while they are still fresh and tasty! For the full recipe, check out the details above. Yes, you can use whole wheat flour. It adds a nutty flavor and more fiber. You might need less liquid, as whole wheat absorbs more moisture. Start with the same amount, but check the batter. If it seems dry, add a little milk or water. Whole wheat flour makes your muffins heartier and more filling. You can add many fun ingredients! Consider mixing in: - Chopped nuts like walnuts or pecans for crunch. - Seeds such as sunflower or pumpkin seeds for extra nutrition. - Dried fruits like raisins or cranberries for sweetness. These add-ins boost flavor and texture, making your muffins even better. To help muffins rise, follow these steps: - Use fresh baking powder and baking soda; they lose power over time. - Don’t overmix the batter. A few lumps are okay; mixing too much makes them dense. - Fill muffin cups about two-thirds full. Too little or too much batter affects the rise. These tips will help you bake perfect, fluffy muffins every time. For the complete recipe, check the Full Recipe section. You now have a full guide to make delicious muffins. We covered essential ingredients, preparation steps, and clever tips to enhance flavor and texture. Remember, ripe bananas and careful mixing are key to success. Explore variations and dietary modifications to suit your needs. With proper storage, your muffins will stay fresh longer. Enjoy your baking journey and experiment with flavors. Muffins should be fun and tasty, so get creative! Happy baking, and enjoy every bite!](https://recipetorch.com/wp-content/uploads/2025/07/e474b864-4b00-4c39-b46d-f8b38b307736.webp)
Welcome to a world of flavor with my Strawberry Banana Oat Muffins! This easy recipe combines ripe bananas and fresh
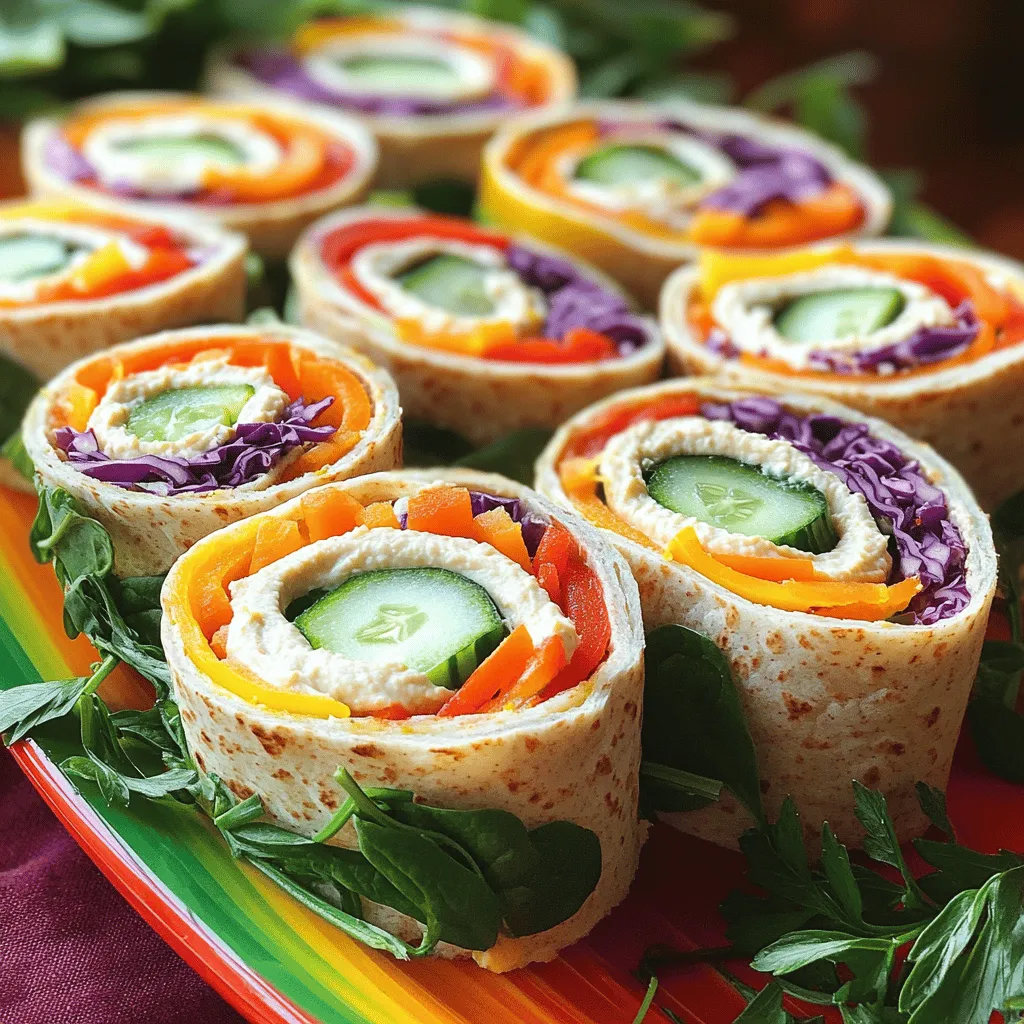
Looking for a fun and healthy snack? Rainbow Veggie Pinwheels are your answer! Bursting with color and flavor, these tasty
