Skip to content
DisclaimerTerms Of UseGDPR PolicyCookie Policy

recipetorch

  • Home
  • Drinks
  • Appetizers
  • Dinner
  • Dessert
  • About
  • Contact
  • Privacy Policy
DisclaimerTerms Of UseGDPR PolicyCookie Policy

Nicole

For these tasty muffins, gather the following items: - 1 ½ cups all-purpose flour - 1 teaspoon baking powder - ½ teaspoon baking soda - ½ teaspoon salt - 1 teaspoon ground cinnamon - ½ teaspoon ground nutmeg - ½ teaspoon ground ginger - ½ cup granulated sugar - ½ cup packed brown sugar - ½ cup vegetable oil - 1 cup canned pumpkin puree - 2 large eggs - 1 teaspoon vanilla extract - ½ cup chopped walnuts or pecans (optional) These ingredients create a rich, warm flavor. The pumpkin puree adds moisture and a lovely orange hue. The spices bring out that cozy fall feeling. You can make your muffins even better with some add-ins. Here are some fun options: - Chocolate chips - Dried cranberries - Sunflower seeds - Shredded coconut These add-ins can change the flavor and texture. Try mixing in different ingredients to find your favorite combination. The streusel topping adds a crunchy layer. You will need: - ½ cup all-purpose flour - ½ cup rolled oats - ¼ cup packed brown sugar - ¼ teaspoon ground cinnamon - 4 tablespoons cold butter, diced This topping gives a sweet crunch to each bite. It contrasts nicely with the soft muffin base. Don't skip this step; it's key to a perfect muffin. For the full recipe, check the earlier section. To start, heat your oven to 350°F (175°C). This temperature helps the muffins rise nicely. Line your muffin pan with paper liners or grease it well. Next, gather your dry ingredients. In a medium bowl, mix together 1 ½ cups of flour, 1 teaspoon of baking powder, ½ teaspoon of baking soda, ½ teaspoon of salt, 1 teaspoon of cinnamon, ½ teaspoon of nutmeg, and ½ teaspoon of ginger. Whisk them well and set them aside. Now, in a larger bowl, combine ½ cup of granulated sugar and ½ cup of brown sugar with ½ cup of vegetable oil. Mix until smooth. Add in 1 cup of canned pumpkin puree, 2 large eggs, and 1 teaspoon of vanilla extract. Whisk everything until it’s creamy and well blended. Gradually mix the dry ingredients into the wet mixture. Stir until just combined. Be careful not to overmix. If you like, fold in ½ cup of chopped walnuts or pecans for some extra crunch. For the streusel topping, grab a bowl and mix together ½ cup of flour, ½ cup of oats, ¼ cup of brown sugar, and ¼ teaspoon of cinnamon. This mix adds great flavor and texture. Cut in 4 tablespoons of cold butter into the mixture. Use a pastry cutter or fork to break it down until you get coarse crumbs. This should feel like sand between your fingers. Fill each muffin cup about ⅔ full with the batter. Make sure to leave space for the muffins to rise. Generously sprinkle the streusel topping over each muffin. This will create a delicious, crunchy layer on top. Bake your muffins in the preheated oven for 18 to 20 minutes. Check if they are done by inserting a toothpick into the center. It should come out clean. Once baked, cool the muffins in the pan for about 5 minutes. Then, transfer them to a wire rack to cool completely. You can find the full recipe for these delightful pumpkin streusel muffins in the main section. Enjoy your cozy fall treat! To get soft, fluffy muffins, mix well but don’t overdo it. Overmixing makes them tough. Use room temperature eggs and pumpkin puree. This helps the batter blend smoothly. Fill each muffin cup about two-thirds full. This allows room for the muffins to rise beautifully. You can adjust this recipe to fit your taste. Use whole wheat flour for more fiber. You can swap the granulated sugar for coconut sugar. It gives a nice flavor. If you like nuts, add chopped pecans or walnuts. For a dairy-free option, choose a plant-based oil. You can also use applesauce instead of oil for a lighter muffin. These muffins taste great warm or at room temperature. Dust them with powdered sugar for a pretty touch. Pair them with a warm drink like tea or coffee. You can also serve them with a dollop of cream cheese spread. They make a lovely breakfast or snack. For the full recipe, you can refer to the earlier section. {{image_4}} You can easily make these muffins gluten-free. Use a gluten-free all-purpose flour mix. Make sure it has a binder like xanthan gum. This helps hold the muffins together. The taste stays great, and the texture remains soft. To make vegan pumpkin muffins, swap eggs for flaxseed meal. Mix one tablespoon of flaxseed with three tablespoons of water. Let it sit for five minutes to thicken. Replace the oil with applesauce for moisture. This keeps the muffins light and fluffy without eggs or dairy. Want to add a twist? Toss in chocolate chips or dried fruit. Dark chocolate chips bring a rich taste. Dried cranberries or raisins add sweetness. About half a cup of either works well. Mix them into the batter before baking. This makes each bite extra special. For the full recipe, check the details above. To keep your Pumpkin Streusel Muffins fresh, store them in an airtight container. This helps keep moisture in and prevents the muffins from drying out. You can place parchment paper between layers to avoid sticking. Enjoy them within three days for the best taste. Want to save some for later? You can freeze these muffins! First, let them cool completely. Then, wrap each muffin in plastic wrap. Place them in a freezer bag or container. Make sure to label the bag with the date. They can last up to three months in the freezer. To enjoy your muffins warm, reheat them in the oven or microwave. For the oven, preheat to 350°F (175°C) and heat muffins for about 10 minutes. For the microwave, place a muffin on a plate and warm it for 15-20 seconds. Enjoy those cozy flavors again! For the full recipe, check out the detailed steps above. Yes, you can use fresh pumpkin. First, cook the pumpkin until soft. Then, mash it well. This adds a fresh taste. However, canned pumpkin gives a consistent flavor and texture. Both options work great. To check if the muffins are done, insert a toothpick in the center. If it comes out clean, they are ready. The tops should look golden brown. Also, they should spring back when lightly touched. You can use applesauce or mashed banana as egg replacements. Use 1/4 cup for each egg. This keeps the muffins moist and adds some sweetness. You can also use flaxseed meal mixed with water for a vegan option. Yes, you can make these gluten-free. Use a gluten-free flour blend instead of wheat flour. Check the blend for xanthan gum, as it helps with texture. The muffins will still taste great. Store leftover muffins in an airtight container. Keep them at room temperature for up to three days. For longer storage, place them in the fridge. They will last up to a week. Yes, you can freeze these muffins. Wrap each one in plastic wrap and place them in a freezer bag. They will stay fresh for about three months. Thaw them at room temperature before enjoying. You can add chocolate chips, dried fruit, or nuts. These add a fun twist to the muffins. Try cinnamon chips or a mix of spices for more flavor. Get creative with your additions! Baking takes about 18-20 minutes. Keep an eye on them as they bake. Ovens can vary, so check for doneness with a toothpick. Adjust the time if needed. For the full recipe, you can refer back to the earlier section. Enjoy baking these delightful Pumpkin Streusel Muffins! You now have all the steps to make delicious pumpkin streusel muffins. We covered main ingredients, how to prepare the batter, and making the topping. You learned tips for perfect texture and serving ideas. Variations like gluten-free and vegan options add fun twists to this recipe. Remember to store any leftovers properly to enjoy later. Get excited to bake these muffins and share them with friends and family! Happy baking!

Pumpkin Streusel Muffins Cozy Fall Delight Recipe

Fall is here, and it’s time for cozy flavors! You’ll love these Pumpkin Streusel Muffins. They are soft, tasty, and

This dish combines creamy feta with eggs and tomatoes. It is simple, tasty, and fun to make. You can bake it all in one dish, making cleanup easy. To make Viral Baked Feta Eggs, you will need: - 200g feta cheese, crumbled - 4 large eggs - 1 cup cherry tomatoes, halved - 2 tablespoons olive oil - 1 teaspoon dried oregano - 1 teaspoon red pepper flakes (optional) - Salt and freshly ground black pepper, to taste - Fresh basil leaves, for garnish - Crusty bread, for serving You can swap feta with goat cheese for a tangy flavor. If you don't have cherry tomatoes, use diced regular tomatoes. Olive oil can be replaced with avocado oil. For a dairy-free option, try a plant-based feta cheese. If you want less heat, skip the red pepper flakes. Gather your ingredients first. You will need: - 200g feta cheese, crumbled - 4 large eggs - 1 cup cherry tomatoes, halved - 2 tablespoons olive oil - 1 teaspoon dried oregano - 1 teaspoon red pepper flakes (optional) - Salt and freshly ground black pepper, to taste - Fresh basil leaves, for garnish - Crusty bread, for serving Make sure your feta cheese is crumbled well. This helps it melt and mix with the eggs. Halve all the cherry tomatoes. They add sweetness and color. It’s best to use fresh ingredients for great flavor. Preheat your oven to 375°F (190°C). This step is key to cooking your dish evenly. Take a medium-sized baking dish and place the crumbled feta in the center. This is where the magic happens! Surround the feta with the halved cherry tomatoes. Drizzle olive oil over everything. This adds richness and helps the cheese melt. Next, sprinkle dried oregano, red pepper flakes, salt, and pepper. Mix it gently to coat all ingredients. Now, use a spoon to make small wells in the feta and tomatoes. Carefully crack the eggs into these wells. Be gentle to keep the yolks intact. Place the dish in the oven and bake for 20-25 minutes. You want the whites set and the yolks slightly runny. Once baked, let the dish cool for one minute. This makes it easier to serve. Garnish with fresh basil leaves for added flavor and color. Serve with crusty bread. It's perfect for dipping into the creamy feta and runny eggs. Enjoy your meal hot for the best taste! For full details, check the Full Recipe. To get great eggs, know your oven. Each oven cooks a bit differently. I recommend checking them at 20 minutes. You want the whites firm but the yolks soft. This gives a nice creamy texture. If you like firmer yolks, cook for a few more minutes. For extra flavor, try adding garlic to the mix. Minced garlic adds a nice kick. You can also switch out cherry tomatoes for sun-dried tomatoes. They give a rich taste. Fresh herbs like thyme or parsley also work well. Don’t forget about lemon zest! It brightens the dish. One mistake is not preheating your oven. This can lead to uneven cooking. Another common error is overcooking the eggs. Watch them closely to get that perfect texture. Finally, don’t skip the salt and pepper. They enhance all the flavors. Try these tips for better baked feta eggs! For the complete process, check the Full Recipe. {{image_4}} You can change the feta cheese to suit your taste. Try goat cheese for a tangy kick. Cream cheese adds a rich, smooth texture. Mozzarella brings a gooey, melty vibe that kids love. Experiment with smoked cheese for a bold flavor twist. Each cheese gives a unique taste to your dish. Mix in your favorite veggies for added flavor and nutrition. Spinach and bell peppers work great. Mushrooms add an earthy touch, while zucchini keeps it fresh. You can also use spices like garlic powder or paprika. Fresh herbs, such as thyme or parsley, can brighten up the dish. Get creative and make it your own! While crusty bread is perfect for dipping, don't stop there. Pair with avocado slices for creaminess. A light salad adds crunch and freshness. You can serve it with roasted potatoes for a heartier meal. Toasted pita chips are also fun for scooping. Enjoy these options to mix up your breakfast! To store leftover baked feta eggs, let them cool first. Place the dish in an airtight container. Keep it in the fridge for up to three days. If you want to enjoy it later, cover it tightly to keep the flavors fresh. Reheat baked feta eggs in the oven or microwave. For the oven, set it to 350°F (175°C). Bake for about 10 minutes until warm. If using a microwave, place a portion on a plate. Heat for 1-2 minutes, checking often. Be careful not to overheat, as it may dry out the eggs. You can freeze baked feta eggs, but the texture may change. Let the dish cool completely. Cut it into portions and wrap each piece tightly in plastic wrap. Place the wrapped portions in a freezer bag. They can last up to a month. To reheat, thaw overnight in the fridge before following reheating instructions. For the complete recipe, check out the Full Recipe section. Yes, you can use goat cheese instead of feta. Goat cheese has a creamy texture and a tangy flavor. It melts nicely, just like feta. The taste will change, but it can still be tasty. If you love goat cheese, give it a try! You know the eggs are cooked when the whites are firm and set. The yolks should look slightly runny for the best taste. If you prefer firmer yolks, bake them a bit longer. Keep an eye on the dish while it bakes. It usually takes about 20-25 minutes. Yes, this recipe is great for meal prep! You can bake it and store leftovers in the fridge. Just cover the dish well. When you are ready to eat, reheat it in the oven or microwave. Enjoy it throughout the week for quick breakfasts! For the full recipe, check here: [Full Recipe]. This blog post covers everything you need to make the best dish. You learned about key ingredients and substitutes to fit your taste. I shared step-by-step instructions to guide you through the baking process. Useful tips help you avoid mistakes and enhance flavors. You also found variations to keep meals exciting and fun. Finally, I provided storage tips to preserve your leftovers. Enjoy your cooking journey and make this recipe your own!

Viral Baked Feta Eggs Easy and Tasty Breakfast Recipe

Looking for a delicious breakfast that’s quick and easy? Try my viral baked feta eggs! This recipe combines creamy feta

- 4 boneless, skinless chicken thighs - 2 cups baby potatoes, halved - 1 cup green beans, trimmed - 1/4 cup Dijon mustard - 1/4 cup honey - 2 tablespoons apple cider vinegar - 1 tablespoon olive oil - 1 teaspoon dried thyme - Salt and black pepper to taste - Baking sheet - Mixing bowl - Resealable plastic bag To make this dish, you need simple, fresh ingredients. The chicken thighs are juicy and tender. Baby potatoes add heartiness, while green beans bring crunch. The marinade combines flavors that dance on your tongue. Dijon mustard gives a sharp bite, while honey adds sweetness. Apple cider vinegar adds tang. Olive oil helps blend everything together. Dried thyme brings a hint of earthiness, rounding out the taste. Don't forget salt and pepper to enhance all these flavors. You'll also need a few tools. A baking sheet is key for even cooking. A mixing bowl helps you combine the marinade. A resealable plastic bag makes marinating easy. This setup ensures you get the best results with minimal fuss. For the full recipe, check the section above. - Preheat the oven to 400°F (200°C). - Prepare the baking sheet with parchment paper or cooking spray. First, I always ensure my oven is hot enough. Preheating is key to getting that nice, even cook. I like to line my baking sheet with parchment paper. This makes cleanup a breeze! If you don’t have parchment paper, a light coat of cooking spray works just fine. - Mix Dijon mustard, honey, apple cider vinegar, olive oil, dried thyme, salt, and pepper. Next, let’s whip up the marinade. In a medium bowl, I combine Dijon mustard and honey for sweetness. Then, I add apple cider vinegar for a little tang. A splash of olive oil gives it richness. Dried thyme adds a lovely herb flavor. Don't forget salt and pepper to taste! Whisk everything until it’s smooth. This marinade will make the chicken taste amazing. - Coat chicken thighs in the marinade and refrigerate. Now, it’s time to marinate the chicken. I place the thighs in a resealable bag or bowl. I pour the marinade over them, making sure each piece is well-coated. This step is crucial for flavor. I seal the bag or cover the bowl and pop it in the fridge. Let it sit for at least 30 minutes. If you have time, letting it marinate overnight gives the best flavor. - Arrange chicken and potatoes on the sheet pan, bake, then add green beans. After marinating, I take the chicken out of the fridge. I let the excess marinade drip off. I then place the chicken on one side of the baking sheet. In the same bowl, I add halved baby potatoes. I toss them in the leftover marinade and spread them on the other side of the sheet. I place the sheet pan in the preheated oven and bake for 20 minutes. After that, I carefully add the green beans. I toss them in the pan juices for extra flavor. I return the pan to the oven for another 15-20 minutes. The chicken should reach an internal temperature of 165°F (74°C), and potatoes should be fork-tender. For the full recipe, check out the details above. Enjoy this flavorful dish! For the best flavor, marinate the chicken for at least 30 minutes. This time allows the honey mustard mix to soak in. If you have more time, let it marinate overnight. This makes the chicken even tastier. You can adjust the seasoning by adding more honey for sweetness or more mustard for a tangy kick. This way, you can make it just how you like it. To check if the chicken is fully cooked, use a meat thermometer. The internal temperature should reach 165°F (74°C). This ensures the chicken is safe to eat. Oven temperatures can vary. If your oven runs hot or cold, check the chicken at 15 minutes. You may need to adjust the time to get perfect results. You can serve the meal directly from the sheet pan for a casual look. This saves on dishes and keeps everything warm. If you want a fancier touch, plate the chicken and veggies separately. Drizzle any sauce from the pan over the top. For extra color, add a sprinkle of fresh parsley or thyme. These small touches can make your dish look gourmet. For the complete recipe, check out the Full Recipe section. {{image_4}} If you want to change up the veggies, try adding carrots or bell peppers. They add great color and flavor. Cut the carrots into sticks and the bell peppers into strips. Toss them in the same marinade for a yummy twist. You can also use broccoli or zucchini. Both work well and cook at the same time. You can use chicken breasts or thighs with skin for this recipe. Just remember, skin-on chicken will add more flavor and crispiness. If you use breasts, check the cooking time. They may cook faster than thighs. Always ensure the chicken reaches 165°F (74°C) for safety. Get creative with your mustards and sweeteners! You can try whole grain mustard for extra texture. If you like a kick, add spicy brown mustard. For sweeteners, maple syrup or agave can replace honey. Each option will change the flavor, making it fun to experiment. Enjoy the journey of taste! For the full recipe, check out the [Full Recipe]. You can store leftover Sheet Pan Honey Mustard Chicken in the fridge. It lasts up to three days. Place it in an airtight container to keep it fresh. Make sure to let it cool before sealing. This helps maintain its great flavor. To freeze the leftovers, first, let them cool completely. Then, place them in a freezer-safe bag or container. Squeeze out as much air as possible to prevent freezer burn. Label the container with the date. The chicken can last up to three months in the freezer. Reheat the chicken and veggies in the oven for the best taste. Preheat your oven to 350°F (175°C). Place the chicken and vegetables on a baking sheet. Cover with foil to keep moisture in. Heat for about 15-20 minutes, or until warm. This keeps the flavors intact and the texture nice. You can also use a microwave if you're in a hurry. Just make sure to cover it to avoid drying out. Enjoy your delicious leftovers! Yes, you can use bone-in chicken. The cook time will change. Bone-in chicken takes longer to cook. You should bake it for an extra 10-15 minutes. Always check if it reaches 165°F (74°C) inside. Absolutely! To make this dish dairy-free, avoid any dairy products. The marinade does not include dairy. Just focus on the mustard and honey. They add great flavor without any milk. You can serve many sides with this dish. Here are some tasty options: - Rice or quinoa for a filling base. - A fresh green salad for crunch. - Roasted or steamed vegetables for extra color. - Garlic bread for a savory touch. Check the chicken's internal temperature. It must reach 165°F (74°C) to be safe. You can also look for clear juices when you cut into it. The meat should not be pink inside. These signs will ensure your chicken is fully cooked. This recipe helps you create a tasty sheet pan meal using chicken, potatoes, and green beans. I covered the key ingredients, marinade details, and easy cooking steps. You learned how to customize the dish with tips on flavors and presentation. Plus, I shared storage and reheating advice to keep meals fresh. Embrace your creativity in the kitchen. This dish is fun to make and enjoy. Don't hesitate to experiment with flavors and ingredients. Your meal can be simple yet delicious!

Sheet Pan Honey Mustard Chicken Flavorful and Easy Meal

Looking for a quick and tasty dinner idea? My Sheet Pan Honey Mustard Chicken recipe delivers flavor and ease all

- 1 cup creamy peanut butter - 1/2 cup honey or maple syrup - 1 1/2 cups rolled oats - 1/2 cup powdered sugar - 1 cup dark chocolate chips - 1 tablespoon coconut oil - 1/4 teaspoon sea salt - Optional: Chopped peanuts for garnish Using pure honey or maple syrup makes a big difference in taste. Pure honey is rich and smooth, while maple syrup adds a lovely, warm flavor. Choose organic options if you can for the best quality. High-quality dark chocolate impacts the flavor greatly. It gives your bars a rich taste that blends well with peanut butter. Look for chocolate with a high cocoa content for a deep, satisfying flavor. Rolled oats are key for texture. They provide a hearty, chewy base that balances the creaminess of the peanut butter. They also help hold everything together, making your bars easier to cut and eat. For the full recipe, check the main section. Enjoy making your delicious no-bake peanut butter chocolate bars! Start by mixing 1 cup of creamy peanut butter and 1/2 cup of honey or maple syrup in a large bowl. Use a whisk or spatula to combine them until smooth. This step is key for a rich flavor. Next, add 1 1/2 cups of rolled oats, 1/2 cup of powdered sugar, and 1/4 teaspoon of sea salt. Stir until all the dry ingredients blend well with the peanut butter mixture. You want a thick, sticky mix that holds together. Now it's time to prepare your baking dish. Line an 8x8 inch dish with parchment paper. Leave some paper hanging over the sides for easy removal later. This small step makes a big difference! Transfer the peanut butter mix into the dish, pressing it down firmly. Use a spatula to create a smooth, even layer. This base will hold all the delicious layers above. For the topping, add 1 cup of dark chocolate chips and 1 tablespoon of coconut oil to a microwave-safe bowl. Heat it in the microwave in 20-second bursts. Stir after each round until the chocolate is fully melted. Be careful not to overheat it; you want it silky, not burnt. If you notice it starting to clump, stop and stir until smooth. Once your chocolate is ready, drizzle it over the pressed peanut butter layer. Make sure to spread it evenly so every bite is rich and chocolatey. For extra crunch, sprinkle chopped peanuts on top. Gently press them into the melted chocolate for a delightful texture. After this, refrigerate the dish for at least 2 hours. Once set, lift the bars out using the parchment paper and cut into squares. For the full recipe, check the notes above. For the best results, chill your bars for at least two hours. This time helps them set and firm up nicely. If you want a smoother chocolate layer, melt the chocolate slowly. Use a microwave in short bursts to avoid burning. Stir well between each burst, and you’ll get a glossy finish. One common mistake is overmixing the peanut butter mixture. This can make your bars tough. Mix just until everything combines. Another mistake is not pressing the mixture firmly enough into the dish. A good press ensures the bars hold together well once set. To make your bars look great, serve them on a rustic wooden platter. This adds a warm touch. For a fancy look, drizzle some melted chocolate on top. A sprinkle of chopped peanuts can impress your guests and add crunch. Enjoy making these bars beautiful! {{image_4}} You can switch creamy peanut butter for almond butter. The taste will change, but it's still yummy. If you're looking for sweeteners, honey is great, but maple syrup works too. You can also use agave syrup for a vegan option. To boost flavor, try adding 1 teaspoon of vanilla extract. A pinch of sea salt can make the bars even tastier. You could also mix in chocolate chips or dried fruit for extra fun. Your bars can be unique each time! If you need a gluten-free option, use certified gluten-free oats. They work just as well in this recipe. For a vegan twist, swap honey for maple syrup. This change keeps the bars plant-based and just as delicious. To keep your no-bake peanut butter chocolate bars fresh, store them correctly. After cutting the bars, place them in a single layer. Use a container with a tight lid. This helps keep them from drying out. If you have a lot, stack them carefully with parchment paper in between. This avoids sticking. These tasty bars last about one week in the fridge. To extend their life, you can freeze them. Wrap each bar in plastic wrap or foil before placing them in an airtight container. They can stay in the freezer for up to three months. When you’re ready to eat them, thaw in the fridge overnight for best results. Check for changes in smell, color, or texture. If the bars smell off or look discolored, it's time to toss them. Also, be mindful of the ingredients you used. Some may spoil faster than others. Always check the dates on your peanut butter and chocolate to ensure freshness. Yes, you can use crunchy peanut butter. It gives your bars a fun texture. The small peanut pieces add a nice crunch. If you love that nutty bite, go for it! Just know that it may change the smoothness of the bars. Creamy peanut butter creates a smooth, rich flavor. Crunchy is great if you enjoy a little extra crunch. These bars take about 2 hours to set in the fridge. This time allows the chocolate to harden and the bars to firm up. It's important not to rush this step. If you cut them too soon, they may crumble. Patience is key! After cooling, the bars will hold their shape and be easy to slice. Absolutely! You can make these bars a few days in advance. Store them in the fridge to keep them fresh. They taste great after a day or two. Just make sure to cover them well, so they don’t dry out. You can also freeze them for longer storage. Just thaw them in the fridge before serving. To cut these bars easily, use a sharp knife. First, lift them out of the dish using the parchment paper. Place them on a cutting board. Dip the knife in warm water before cutting. This helps prevent sticking. Press down firmly and make clean cuts. This method keeps the bars from crumbling apart. Enjoy your perfect peanut butter chocolate bars! For the full recipe, check out the No-Bake Peanut Butter Chocolate Dream Bars. These no-bake peanut butter chocolate bars are easy and fun to make. Quality ingredients like creamy peanut butter and rich dark chocolate create great flavor and texture. Follow the steps closely for a smooth and tasty treat. Remember to chill the bars for the best results. Try different variations to make them your own and impress others. With proper storage, you can enjoy these bars for days. Keep an eye on freshness to make sure they stay delicious. Enjoy your homemade snacks!

No Bake Peanut Butter Chocolate Bars Easy Recipe

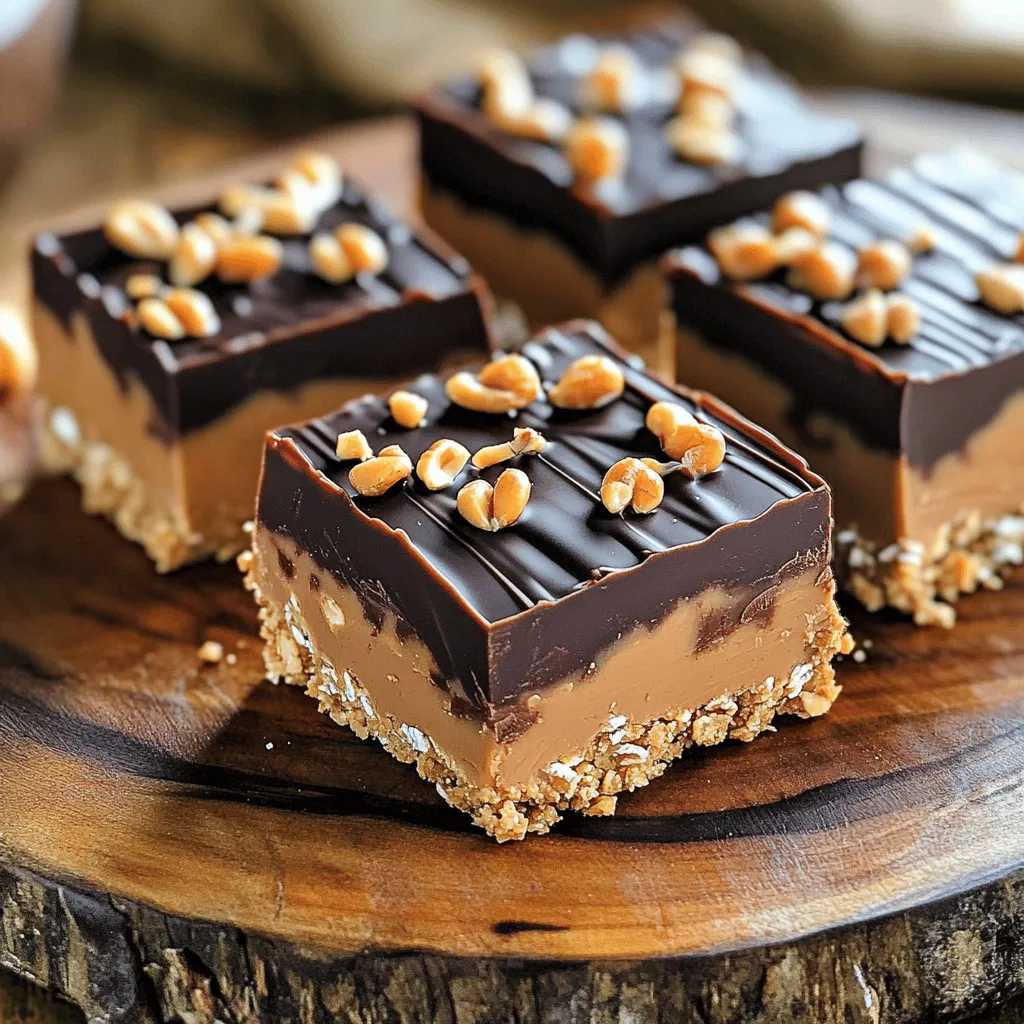
If you crave a sweet treat but want to skip the oven, this No Bake Peanut Butter Chocolate Bars recipe

To make teriyaki chicken lettuce cups, you will need: - 1 lb boneless, skinless chicken thighs, diced into bite-sized pieces - 3 tablespoons soy sauce (or low-sodium soy sauce for a lighter option) - 2 tablespoons honey for sweetness - 1 tablespoon rice vinegar for tang - 1 tablespoon sesame oil for richness - 2 cloves garlic, minced finely - 1 tablespoon fresh ginger, minced or grated - 1 bell pepper, diced (choose any color for a vibrant look) - 1 carrot, grated for added crunch - 1 green onion, sliced thinly for garnish - 1 head of butter or romaine lettuce, carefully separated into individual leaves - Sesame seeds for garnish, adding a nutty flavor Each of these ingredients brings its unique taste and texture to the dish. The chicken thighs provide a juicy base, while the soy sauce adds depth. Honey gives the meal a touch of sweetness, balancing the salty soy sauce. Garnishes can elevate your dish. Consider adding: - Thinly sliced cucumbers for freshness - Halved cherry tomatoes for color - Chopped cilantro for a fresh herb kick - Extra sesame seeds for crunch These add-ins can give your lettuce cups a beautiful look and extra flavor. If you have dietary needs, there are easy swaps: - Use tofu instead of chicken for a vegan option. - Swap soy sauce with tamari for a gluten-free choice. - Use agave nectar in place of honey for a vegan sweetener. - Replace sesame oil with olive oil if you prefer a different fat. These substitutions help tailor the recipe to fit your needs while keeping it delicious. {{ingredient_image_2}} To start, grab a medium mixing bowl. In the bowl, add 3 tablespoons of soy sauce, 2 tablespoons of honey, 1 tablespoon of rice vinegar, and 1 tablespoon of sesame oil. Next, mince 2 cloves of garlic and add them to the mix. Then, mince or grate 1 tablespoon of fresh ginger. Whisk all these ingredients together until they blend well. This marinade will give your chicken a great flavor. Now, take 1 pound of diced chicken thighs and place them in the marinade. Toss the chicken pieces to ensure they are evenly coated. Cover the bowl with plastic wrap. Let it sit at room temperature for at least 15 minutes. If you have time, refrigerate it for up to 1 hour. This will let the flavors soak into the chicken. Heat a large skillet over medium-high heat. Once hot, add the marinated chicken along with all the marinade from the bowl. Sauté the chicken for about 8 to 10 minutes. Stir occasionally until the chicken cooks through and starts to caramelize. This gives the chicken a lovely glaze. After the chicken is done, add 1 diced bell pepper and 1 grated carrot to the skillet. Stir for another 2 to 3 minutes, cooking until the veggies are just tender but still crunchy. Once everything is cooked, take the skillet off the heat. Sprinkle the warm chicken mixture with sliced green onions for a fresh taste. Now, grab a leaf of butter or romaine lettuce. Place a generous spoonful of the teriyaki chicken mixture in the center. Fold the lettuce leaf over the filling like a wrap. To finish, sprinkle sesame seeds on top for extra flavor and texture. Enjoy your fresh and flavorful treat! To get the best teriyaki flavor, balance is key. Use soy sauce and honey in equal parts. The soy sauce gives saltiness, while honey adds sweetness. Don't forget the rice vinegar for a touch of tang. Fresh garlic and ginger add a bright kick. Mix these well and let the chicken soak in this yummy marinade. The longer you marinate, the better the taste. Fifteen minutes works, but an hour is even better! For tender chicken, use boneless, skinless thighs. They stay juicy and cook well. Cut them into small pieces for even cooking. Sauté in a hot skillet for a nice caramelization. Stir often, but don’t crowd the pan. If you add too much chicken at once, it won't brown well. This step is crucial for flavor and texture. When it comes to serving, think vibrant colors. Use a large platter for the lettuce cups. Arrange them neatly. Add thinly sliced cucumbers or cherry tomatoes for a pop of color. You can also sprinkle sesame seeds on top for a nice touch. Serve with extra sauce on the side for dipping. This makes your dish look fun and inviting! Pro Tips Marinate Longer for Flavor: While 15 minutes will suffice, marinating the chicken for up to an hour allows the flavors to penetrate deeper, resulting in a more flavorful dish. Use Fresh Ingredients: Fresh garlic and ginger elevate the dish's flavor profile significantly, so try to use fresh rather than pre-minced varieties. Customize Your Veggies: Feel free to add other vegetables such as shredded cabbage or snap peas for extra crunch and nutrition, making this dish even more versatile. Perfect Your Lettuce Cups: Choose sturdy lettuce like butter or romaine to hold the filling well, ensuring each bite is packed with flavor without falling apart. {{image_4}} You can swap chicken for other proteins. Tofu works great for a plant-based meal. Choose firm tofu for the best texture. Just cube it and marinate like you would the chicken. Shrimp is another tasty choice. Cook shrimp for about 3-5 minutes until they turn pink. Both options keep the dish fresh and flavorful. For a vegetarian or vegan dish, use mushrooms or jackfruit. Both add texture and soak up flavors well. You can also mix in black beans for protein. They work well with teriyaki sauce. Add extra veggies like bell peppers and carrots for more color and crunch. These swaps make the dish just as satisfying without meat. You can play with flavors in teriyaki. For a spicy kick, add chili paste or sriracha to the marinade. This gives each bite a nice heat. Alternatively, mix in pineapple for a sweet twist. Use fresh pineapple chunks in the skillet. They caramelize nicely and add a tropical vibe. No matter the flavor, each version stays fresh and delicious. To keep your teriyaki chicken fresh, store it in airtight containers. Make sure it cools down first. Place any leftover chicken mixture in one container and the lettuce leaves in another. This helps keep the lettuce crisp. You can keep the chicken mixture in the fridge for up to three days. When you are ready to eat the leftovers, reheat the chicken in a skillet. Heat it over medium heat for about five to seven minutes. Stir often to avoid burning. Check that it is hot before serving. Avoid microwaving, as this can make the chicken tough. If you want to save the teriyaki chicken for later, freezing is a great option. Place the cooled chicken mixture in a freezer-safe bag or container. Remove as much air as possible to prevent freezer burn. The chicken can stay frozen for up to three months. Just thaw it in the fridge overnight before reheating. Avoid freezing the lettuce, as it does not thaw well. Yes, you can make Teriyaki Chicken Lettuce Cups ahead. Prepare the chicken and veggies in advance. Store them in separate containers in the fridge. When you are ready to serve, just assemble them in the lettuce cups. This keeps the lettuce crisp and fresh. You can serve these cups with a side of rice or noodles. A light salad pairs well too. For a fun twist, add some fresh fruit like pineapple or mango. These options balance the savory flavors of the chicken. Making teriyaki sauce is simple. Mix together: - 3 tablespoons soy sauce - 2 tablespoons honey - 1 tablespoon rice vinegar - 1 tablespoon sesame oil - 2 cloves minced garlic - 1 tablespoon minced ginger Blend these ingredients in a bowl. This sauce adds a sweet and tangy flavor to your chicken. Yes, Teriyaki Chicken Lettuce Cups can be gluten-free. Use gluten-free soy sauce to ensure it meets dietary needs. All other ingredients are naturally gluten-free, making this dish safe for those with gluten sensitivities. Teriyaki chicken lettuce cups are simple and fun to make. We covered the best ingredients, including substitutes for your needs. I shared step-by-step instructions to marinate, cook, and assemble your cups. Tips also helped you perfect the flavor and presentation. Remember, you can try different proteins or flavors. You can even store leftovers for later. Enjoy this dish while being creative in the kitchen!

Teriyaki Chicken Lettuce Cups Fresh and Flavorful Treat

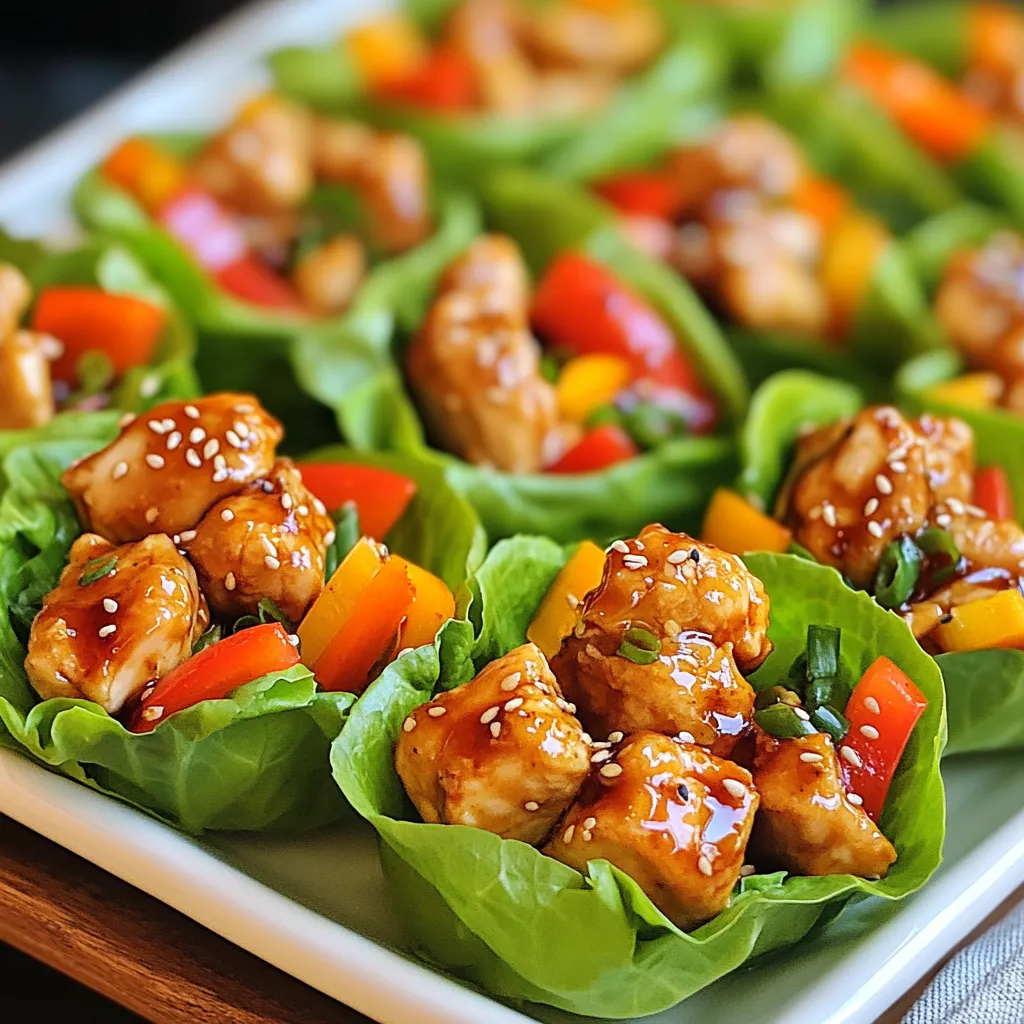
If you’re craving a fresh and tasty meal, try Teriyaki Chicken Lettuce Cups. They are simple to make and packed

- 2 cups rotini pasta, cooked - 2 cups cooked chicken, shredded - 1 cup dill pickles, finely chopped - 1 cup ranch dressing - 1 cup shredded sharp cheddar cheese - 1/2 cup cream cheese, softened - 1/2 cup sour cream - 1 teaspoon garlic powder - 1 teaspoon onion powder - 1/2 teaspoon freshly ground black pepper - 1/2 teaspoon sea salt - Cooking spray or olive oil The main ingredients really make this dish shine. The rotini pasta creates a fun twist, while the shredded chicken adds protein. Dill pickles lend a tangy crunch that surprises everyone. Ranch dressing brings creaminess and flavor, binding the dish together. Sharp cheddar cheese melts beautifully, making a tasty crust. Cream cheese and sour cream add richness to the mix. Seasonings like garlic and onion powder enhance the overall taste. - Sliced green onions - Additional shredded cheese Garnishes can boost the dish's appeal. Sliced green onions add a fresh look and a mild onion taste. Extra cheese on top not only looks great but gives more flavor. These little touches elevate your Pickle Ranch Chicken Pasta Bake from good to amazing. Don't skip them! - Preheat the oven and prepare the baking dish: Set your oven to 350°F (175°C). Grab a 9x13 inch baking dish and coat it lightly with cooking spray or olive oil. This helps keep the dish from sticking. - Cook the rotini pasta till al dente: Bring a large pot of salted water to a boil. Add 2 cups of rotini pasta. Follow the package instructions, usually about 8-10 minutes. Drain the pasta and let it cool for a moment. - Combine chicken, pickles, ranch dressing, cream cheese, and sour cream: In a big mixing bowl, add 2 cups of shredded chicken, 1 cup of finely chopped dill pickles, 1 cup of ranch dressing, 1/2 cup of softened cream cheese, and 1/2 cup of sour cream. Using a spatula, mix these ingredients. Aim for a creamy texture. - Fold in cooked pasta with seasonings: Once your chicken mixture is creamy, add the cooked pasta. Include 1 teaspoon of garlic powder, 1 teaspoon of onion powder, 1/2 teaspoon of black pepper, and 1/2 teaspoon of sea salt. Gently fold everything together to coat the pasta well. - Spread the mixture into the baking dish: Carefully pour the pasta mixture into your prepared baking dish. Use a spatula to spread it evenly across the dish. - Top with cheddar cheese and bake until golden: Sprinkle 1 cup of shredded sharp cheddar cheese over the pasta mixture. Place the baking dish in the oven. Bake for 25-30 minutes. The cheese should be bubbly and golden brown when done. For the full recipe, check out the complete guide. - Ensure pasta is al dente for best texture. This means it should be firm but not hard. - Use room temperature cream cheese for easier mixing. Cold cream cheese can clump and be hard to blend. - Additional spices to consider: paprika or dried herbs. These can add depth to your dish. - Mix in vegetables for extra nutrition. Think about adding spinach, bell peppers, or peas for color and health. - Pair with a side salad or garlic bread. This adds crunch and freshness to your meal. - Great for meal prep or potlucks. You can make it ahead and share with friends. To make this dish even more delightful, check out the Full Recipe for all the tasty details! {{image_4}} You can switch up the protein in this dish. Shredded turkey works great instead of chicken. It adds a nice twist. Rotisserie chicken is another easy choice. It saves time and still gives that tasty flavor. If you want to go even quicker, use canned chicken. Just drain it and mix it in. It’s fast and easy, perfect for busy nights. If you prefer a meatless meal, there are great options. You can use plant-based chicken for a similar texture. It tastes good and keeps the dish hearty. If you want to skip the meat completely, that's fine too. Just add more veggies! Toss in some fresh spinach or colorful bell peppers. They add flavor and extra nutrients. The pasta you choose can change the dish. While rotini is our favorite, you can try penne or fusilli. They hold the creamy sauce well. If you need gluten-free options, there are many available. Just look for gluten-free pasta at your store. It makes this dish friendly for everyone! After enjoying Pickle Ranch Chicken Pasta Bake, you may have some leftovers. To store the dish, let it cool to room temperature. Then, place it in an airtight container. This helps keep the meal fresh. Always refrigerate leftovers within two hours of serving. They will stay good for up to three days in the fridge. If you want to save some for later, freezing is a great option. First, let the pasta bake cool completely. Then, cut it into individual portions. Wrap each piece tightly in plastic wrap. Place the wrapped pieces in a freezer-safe bag or container. This method prevents freezer burn. To enjoy later, take out a portion and thaw it in the fridge overnight. Reheat it in the oven at 350°F until warm. The shelf life of the Pickle Ranch Chicken Pasta Bake is key for planning meals. In the fridge, the dish lasts about three days. In the freezer, it can last up to three months. Always check for any signs of spoilage before eating. Enjoy this dish knowing you can savor it multiple times! For the full recipe, check out the details above. Yes, you can prepare this dish a day before. Just mix all the ingredients and put them in the fridge. When you are ready, bake it. This helps the flavors blend even better. Yes, you can use low-fat cream cheese and ranch dressing. They work well and keep the dish tasty. This way, you can enjoy a lighter version of this comfort dish without losing flavor. You can use homemade ranch or other creamy dressings as alternatives. This adds a unique twist to the dish. Try different flavors to see what you like best! This blog post covered a simple and tasty dish that brings together rotini pasta, cooked chicken, and dill pickles. You learned how to mix these ingredients with ranch dressing and bake them to perfection. We explored cooking tips, variations, and storage options. Remember, you can customize this dish to suit your taste. Whether you choose different proteins or pasta shapes, the possibilities are endless. Enjoy your cooking and make it your own!

Pickle Ranch Chicken Pasta Bake Delightful Comfort Dish

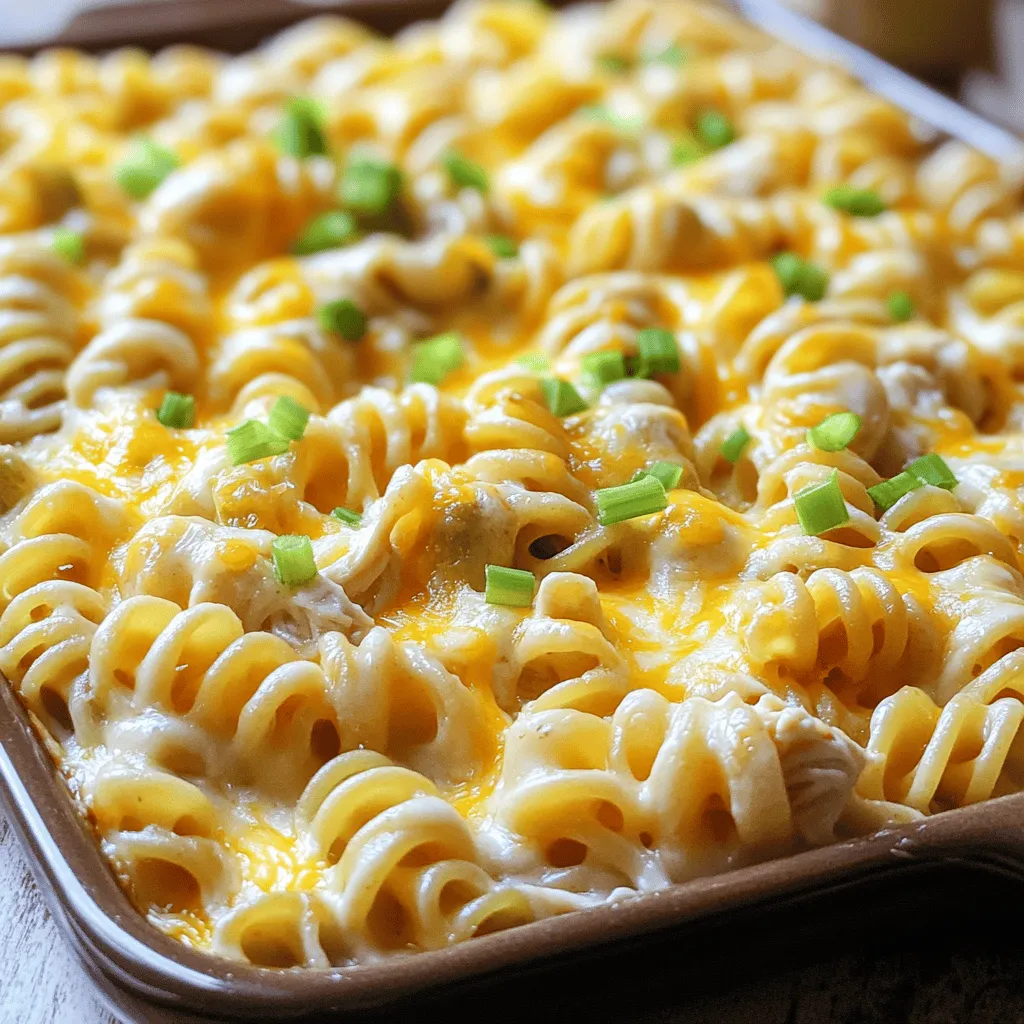
Craving a cozy, hearty meal? The Pickle Ranch Chicken Pasta Bake might become your new favorite dish! This easy recipe

To make Cherry Chocolate Chip Cookie Dough Bars, you need some basic ingredients. Here's what you'll need: - 1 cup unsalted butter, softened to room temperature - 1 cup packed brown sugar - ½ cup granulated sugar - 2 teaspoons pure vanilla extract - 2 large eggs, at room temperature - 2 ½ cups all-purpose flour - 1 teaspoon baking soda - ½ teaspoon fine sea salt - 1 cup semi-sweet chocolate chips - 1 cup maraschino cherries, well-drained and finely chopped - ½ cup pecans or walnuts, chopped (optional) These ingredients create a rich and sweet flavor that pairs well with the tartness of cherries. Using high-quality ingredients makes a big difference. Fresh butter and pure vanilla extract enhance the taste. Good chocolate chips melt perfectly and add richness. Maraschino cherries should be bright and flavorful. When your ingredients shine, your bars will too. Feel free to get creative! You can add different nuts like almonds or hazelnuts. Dried cherries or cranberries can replace maraschino cherries for a twist. If you want, substitute half the flour with almond flour for a nutty flavor. These options let you customize the bars to your liking. For the complete recipe, check out the Full Recipe. To start, grab your 9x13-inch baking pan. Line it with parchment paper. Make sure the paper hangs over the sides a bit. This will help you lift out the bars later. Preheat your oven to 350°F (175°C). This warm-up step is key for even baking. In a large bowl, place your softened butter. Add the brown sugar and granulated sugar. Use an electric mixer on medium speed. Beat until the mixture is light and fluffy. This should take about three minutes. Next, mix in the vanilla extract. Add the eggs one at a time. Make sure to mix well after each egg. This helps create a smooth batter. In another bowl, whisk together the flour, baking soda, and salt. Slowly add this dry mix to your wet ingredients. Stir gently until just combined. Don’t overmix! This is important to keep the bars soft and chewy. Now, fold in the chocolate chips, chopped maraschino cherries, and nuts if you want them. Spread the dough evenly in the pan. Place your pan in the preheated oven. Bake for 25 to 30 minutes. Look for golden edges and a toothpick test to check for doneness. Insert a toothpick in the center. If it comes out with a few moist crumbs, they are ready! Once baked, let the bars cool in the pan for about 15 minutes. Then, use the parchment paper to lift them out. Move them to a wire rack for full cooling. Once cool, slice them into squares and enjoy. For the full recipe, check the details above. To get the best texture in your Cherry Chocolate Chip Cookie Dough Bars, focus on your mixing. Cream the butter and sugars well. This step adds air, making your bars light and chewy. Don't overmix after adding the flour. Mix until just combined for a soft bite. Also, use room temperature ingredients. This helps everything blend smoothly. One common mistake is using cold butter. Always soften it first. Cold butter can lead to dense bars. Another mistake is overbaking. Check the bars a little early. They should be golden around the edges, but still soft in the middle. Lastly, drain the cherries well. Too much moisture can make the bars soggy. For extra flavor, try adding almond extract. It pairs well with cherries and chocolate. You can also mix in some spices like cinnamon or nutmeg for warmth. If you like a crunch, consider adding crushed pretzels. They add a salty balance to the sweet. You can find the Full Recipe for more ideas and tips. {{image_4}} You can change the nuts in your bars. Pecans and walnuts add a nice crunch. If you want a different taste, try almonds or hazelnuts. Simply chop them up and fold them into the dough. Each nut gives a unique flavor and texture. If cherries are not your favorite, you can swap them out. Diced strawberries or raspberries work well. They add a fruity burst without losing the cookie dough feel. Dried fruits like cranberries or apricots also fit nicely. Just make sure they are chopped small to mix well. You can make these bars gluten-free easily. Use a gluten-free flour blend instead of regular flour. For a dairy-free version, substitute the butter with coconut oil or a dairy-free spread. These changes will still keep your bars tasty and chewy. You won't miss out on flavor or texture. For the complete experience, check the Full Recipe above! To keep your Cherry Chocolate Chip Cookie Dough Bars fresh, store them in an airtight container. Place parchment paper between layers to prevent sticking. These bars stay fresh for up to five days at room temperature. If you want to keep them longer, consider freezing them. To freeze your bars, first, allow them to cool completely. Then, wrap them in plastic wrap and place them in a freezer bag. They can last up to three months in the freezer. When you want to enjoy them, pull them from the freezer. Leave them at room temperature for about an hour to thaw. For the best taste, reheat your bars before eating. Just pop them in the microwave for about 10-15 seconds. This will make them warm and gooey, enhancing the chocolate and cherry flavors. You can also use an oven at 350°F for about five minutes if you prefer. Enjoy the deliciousness! You can tell when the cookie bars are done by looking at the edges. They should turn golden brown. Insert a toothpick in the center. If it comes out with a few moist crumbs, they are ready. This means you have a soft and chewy texture inside. Yes, you can make these bars ahead of time. They stay fresh for several days. Just cover them well and keep them at room temperature. You can also make the dough and chill it in the fridge. Bake them later when you want a warm treat. If you want a different flavor, you can use fresh cherries instead. Just pit and chop them well. Dried cherries or cranberries also work. They add a nice chewiness and tartness to the bars. You can switch up the nuts or chocolate types. Use dark chocolate for a richer flavor. Add spices like cinnamon or nutmeg for warmth. You can also mix in different fruits to find your favorite combo. You can find the full recipe for Cherry Chocolate Chip Cookie Dough Bars in this article. It includes all the ingredients and easy steps to make them. In this blog post, we explored the tasty world of Cherry Chocolate Chip Cookie Dough Bars. We looked at key ingredients and why quality matters. The step-by-step guide helped you prepare and bake like a pro. You learned tips to avoid mistakes and ways to enhance flavor. We also discussed fun variations and storage tips. Enjoy experimenting with this recipe. Happy baking!

Cherry Chocolate Chip Cookie Dough Bars Delightful Treat

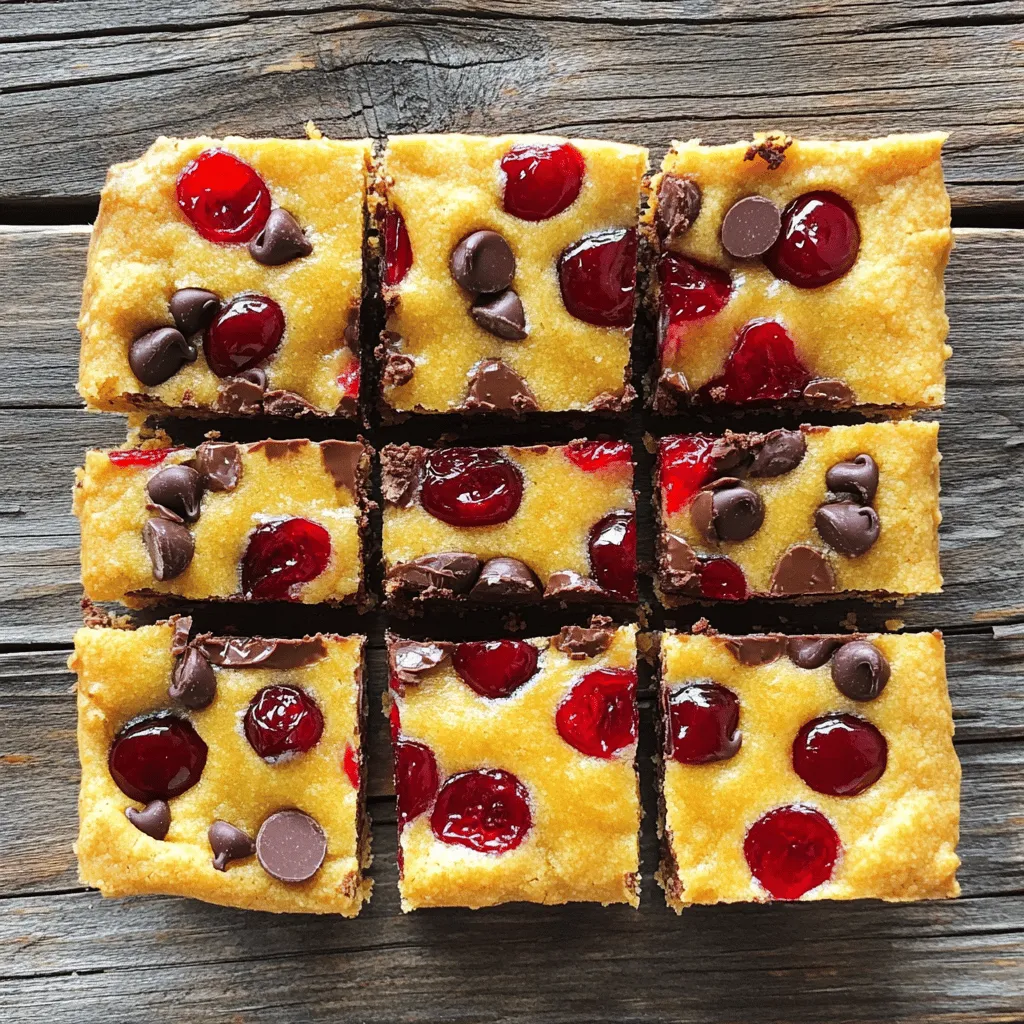
Are you craving a sweet treat that combines the rich flavors of cherry and chocolate? Look no further! In this

- 2 cups cooked chicken, shredded - 1/2 cup dill pickles, chopped - 1/4 cup red onion, finely chopped The main ingredients make this dish shine. Shredded chicken gives a hearty base. Dill pickles add tangy crunch. Red onion brings a touch of sweetness. Each bite bursts with flavor. You can use leftover chicken to save time. - 1/2 cup plain Greek yogurt - 1/4 cup ranch dressing - 1 teaspoon garlic powder - 1 teaspoon onion powder - 1/2 teaspoon dried dill - Salt and black pepper to taste The dressing is key to great taste. Greek yogurt adds creaminess and health benefits. Ranch dressing gives a classic flavor. Garlic powder and onion powder enhance depth. Dried dill ties everything together. Don't forget salt and pepper for balance. - 1 cup mixed salad greens (such as spinach, arugula, or mesclun) - Sliced tomatoes - Shredded cheese Optional garnishes make it even better. Salad greens add freshness and crunch. Sliced tomatoes bring color and juiciness. Shredded cheese offers richness and flavor. You can mix and match for your taste. Serve the pita pockets with your favorite sides. For the full recipe, check out the link. - In a large bowl, combine: - 2 cups cooked chicken, shredded - 1/2 cup dill pickles, chopped - 1/4 cup red onion, finely chopped - In another bowl, mix: - 1/2 cup plain Greek yogurt - 1/4 cup ranch dressing - 1 teaspoon garlic powder - 1 teaspoon onion powder - 1/2 teaspoon dried dill - Salt and black pepper to taste - Pour the ranch dressing into the chicken mix. Fold gently until the chicken is coated. Let it rest for 10 minutes to blend the flavors. - Carefully slice 4 whole wheat pita pockets in half. Do not cut all the way through; leave a pocket for stuffing. - Generously fill each pita with the chicken and pickle mixture. - Add a handful of mixed salad greens to each pocket for crunch. - Serve the pita pockets right away for a warm meal. - If you want a cold option, chill them in the fridge for up to one hour. For the full recipe, check the details above! Marinating boosts flavor and makes your chicken shine. Let it sit for at least 10 minutes. This gives time for the ranch dressing to soak in. Mix your ingredients well, but handle gently. You want to keep the chicken pieces nice and intact. Slicing pita pockets right makes a big difference. Cut them in half, but don’t go all the way. This creates a pocket for your tasty filling. To prevent tearing, be gentle when stuffing. Use a spoon or your hands to fill them slowly. A colorful plate catches the eye. Arrange your filled pita pockets on a bright platter. Add extra pickle slices and fresh herbs like dill or parsley around them. This adds a pop of color and looks inviting. Don’t forget to add some sliced tomatoes and cheese on top for a fun touch. {{image_4}} You can change the protein in this recipe easily. Try using turkey or tofu for a twist. Both options add a different flavor and texture. If you want a lighter meal, grilled shrimp works great too. For dressings, ranch is perfect, but you can explore other flavors. A garlic aioli or a spicy sriracha mayo can make it exciting. Greek yogurt can also take a backseat to avocado for a creamy, rich taste. Adding spices or herbs makes a huge difference. Try some smoked paprika for a hint of warmth. Fresh herbs like parsley or cilantro can lift the dish. You can even sprinkle in some chili flakes for a spicy kick. If you want vegan options, simply swap out the chicken with chickpeas. They bring a nice texture and absorb flavors well. Use a dairy-free yogurt with your dressing to keep it creamy. To make your meal complete, serve with tasty side dishes. Fresh fruit salad or crunchy carrot sticks can add color and freshness. You can also try a simple quinoa salad for a hearty touch. Dips can elevate your meal too. Pair with hummus or tzatziki for a refreshing bite. These dips complement the flavor of the pita pockets well and add more options for your palate. To keep your pickle ranch chicken pita pockets fresh, store them in the fridge. Place them in an airtight container. This way, they won’t dry out. They stay fresh for up to three days. After that, the flavors fade, and the texture may change. When reheating, you have a few good options. You can use a microwave, oven, or skillet. If you use a microwave, heat on medium power for about 30 seconds. Check if they are warm. If not, add more time in short bursts. For the oven, wrap them in foil and heat at 350°F for 10 minutes. This keeps them moist. In a skillet, heat over low flame for about five minutes, turning often. This helps maintain their texture and flavor. If you want to save some for later, freezing is a great choice. To freeze the filling, place it in a freezer-safe bag. Squeeze out as much air as you can. This helps prevent freezer burn. It can last for up to three months. When ready to use, thaw it overnight in the fridge. Reheat as mentioned before. You’ll enjoy a tasty meal again! The chicken mixture stays fresh for about three days in the fridge. It’s best to use it within this time for optimal taste and safety. Always store it in an airtight container to keep it fresh. Yes, using rotisserie chicken saves time and effort. It adds great flavor and tenderness to your pita pockets. Just shred the chicken and mix it with the other ingredients. You'll enjoy a tasty meal in no time! If you need a different option, try sour cream or a dairy-free yogurt. These alternatives work well and keep the mixture creamy. You can also use cottage cheese for a protein boost. Absolutely! These pita pockets are great for meal prep. You can make the chicken mixture ahead of time and store it in the fridge. Just fill the pitas right before serving to keep them fresh. Pickle Ranch Chicken Pita Pockets combine easy ingredients for a tasty meal. Start with shredded chicken, dill pickles, and red onion. Mix them with Greek yogurt and ranch dressing for a creamy delight. Don’t forget your optional garnishes! My tips on marinating and preparing pitas will help you impress guests. You can even swap ingredients for more variety. These pockets are great fresh, stored, or frozen. Try this fun recipe to spice up your meals with simple steps! Enjoy the crunch and flavor.

Pickle Ranch Chicken Pita Pockets Flavorful Delight

Get ready to sink your teeth into Pickle Ranch Chicken Pita Pockets, a flavorful delight that’s sure to impress! This

To make Cherry Almond Energy Bars, gather these core ingredients: - 1 cup pitted dried cherries - 1 cup almonds, roughly chopped - 1 cup rolled oats - 1/2 cup almond butter - 1/4 cup honey or maple syrup - 1/4 teaspoon sea salt - 1 teaspoon vanilla extract - 1/4 cup shredded coconut (optional) These ingredients blend together to create a chewy and tasty snack. The cherries give a sweet burst, while the almonds add a nice crunch. You can change things up with these options: - Nut Substitutes: Use walnuts or pecans instead of almonds. - Sweetener Substitutes: Try agave syrup or brown rice syrup in place of honey. - Extra Flavor: Add a pinch of cinnamon or nutmeg for warmth. - Add-Ins: Toss in some chocolate chips or seeds for extra fun. Feel free to mix and match based on your taste or what you have at home. Each bar offers great nutrition. Here’s a quick look at what each serving contains: - Calories: About 150 - Protein: 4 grams - Fat: 7 grams (mostly healthy fats) - Carbohydrates: 20 grams - Fiber: 3 grams These bars provide energy and keep you feeling full. They are perfect for a quick snack or a post-workout boost. Enjoy making them! For the full recipe, check out the detailed instructions provided. First, preheat your oven to 350°F (175°C). Grab an 8x8 inch baking dish. Line it with parchment paper, letting some paper hang over the edges. This extra paper helps lift the bars out later. In a large bowl, add your roughly chopped almonds, rolled oats, and pitted dried cherries. If you want, toss in some shredded coconut. Stir well to mix all the dry ingredients evenly. This step helps the flavors blend. Next, take another bowl and mix the almond butter, honey or maple syrup, sea salt, and vanilla extract. Blend until smooth. A spatula or whisk works great for this. Make sure your mixture is creamy and well combined. Now, pour the wet mixture over the dry ingredients. Stir well until every piece of dry mix is coated. This step gives you that perfect chewy texture in every bite. Scoop the mixture into your prepared baking dish. Press it down firmly with a spatula or your hands. This is key for the bars to hold together. Bake in the oven for 20-25 minutes. Look for a golden brown edge, which shows they’re done. After baking, remove the dish from the oven. Let it cool in the dish for at least 30 minutes. This cool-down time is important for the bars to set. Once cool, use the parchment paper to lift the bars out. Place them on a cutting board and slice into your desired shape. Enjoy your homemade Cherry Almond Energy Bars! For the full recipe, check the detailed instructions above. Store your energy bars in an airtight container. This keeps them fresh and tasty. You can also wrap each bar in parchment paper. This makes them easy to grab when you're on the go. For extra freshness, keep them in the fridge. They can last up to a week this way. To bake your energy bars just right, preheat your oven fully. This ensures even cooking. Line your baking dish with parchment paper. It helps you lift the bars out easily. Press the mixture firmly into the dish. A compact mix will hold together better after baking. Keep an eye on the edges as they turn golden brown. This is a sign they are ready. If your bars are too crumbly, you may not have pressed them enough. Try pressing harder next time. If they are too sticky, you might need to add more oats or nuts. Always check the baking time. Each oven is different. Adjust the time if needed. If your bars are too dry, add a bit more almond butter next time. This will help keep them moist. {{image_4}} You can change the flavor of your Cherry Almond Energy Bars easily. Adding chocolate makes them sweeter. Try using dark chocolate chips for a rich taste. You can also add spices like cinnamon or nutmeg. These spices can bring warmth and depth to the bars. A pinch of cayenne pepper can add a little heat for those who like bold flavors. If you want a vegan version, swap honey for maple syrup. It works well and keeps the bars sweet. For gluten-free options, use certified gluten-free oats. This way, anyone can enjoy the bars without worry. Always check labels on your ingredients to make sure they fit your dietary needs. You can switch out ingredients based on what you have. If you don’t have almonds, try walnuts or pecans. Both nuts add a nice crunch and flavor. Instead of almond butter, peanut butter works great too. It gives a different taste but still keeps the bars creamy. For a fruity twist, you can use dried apricots or cranberries instead of cherries. This gives the bars new flavors and makes them fun to eat. You can find the full recipe [here](#). You can store your Cherry Almond Energy Bars in an airtight container. Keep them at room temperature for up to one week. If you want to keep them fresh longer, place them in the fridge. They can last about two weeks in the fridge. For longer storage, freeze your bars. Wrap each bar in plastic wrap or foil. Place them in a freezer-safe bag or container. They will stay fresh for up to three months in the freezer. When you want one, let it thaw in the fridge overnight. Check for any signs of spoilage. If you see mold, or if the bars smell off, it's best to toss them. Also, if they feel too dry or too hard, they may have gone bad. Trust your senses; if something seems off, don’t eat it. You can use sunflower seed butter instead. It has a similar texture and taste. Peanut butter also works well. Just keep the same amount in the recipe. This swap keeps the bars creamy and binds well. Fresh cherries are juicy and tasty. However, they have more water. This can change the texture of the bars. If you want to use fresh cherries, reduce the other liquids in the recipe. You may also need to bake them a bit longer to set. These energy bars last about one week in the fridge. Store them in an airtight container. You can also freeze them for up to three months. Just wrap each bar well before freezing. This keeps them fresh and ready for a quick snack. Yes, they are a healthy snack! They have whole grains, nuts, and fruits. These ingredients provide energy and nutrients. The bars are low in added sugars too. They can help you stay full and satisfied. You can find them in many grocery stores. Look in the health food aisle. Some online retailers also sell them. If you want a homemade version, check out the Full Recipe for a simple way to make them at home. You learned how to make Cherry Almond Energy Bars from scratch. We covered the best ingredients and their health benefits. You also saw detailed steps for baking and storing them. These bars are not just tasty but also easy to customize. With a few tweaks, you can adapt them to different diets. Enjoy your homemade energy bars; they are a smart and healthy snack!

Cherry Almond Energy Bars Simple and Healthy Snack

Looking for a quick, healthy snack? Cherry Almond Energy Bars are your answer! These tasty bars pack a flavor punch

- 2 cups shredded rotisserie chicken - 1 cup dill pickles, finely chopped - 1 cup ranch dressing - 1 cup shredded cheddar cheese, divided - 1 cup frozen mixed vegetables (peas, carrots, corn) - 1 (32 oz) bag of frozen tater tots - 1 teaspoon garlic powder - 1/2 teaspoon onion powder - 1/2 teaspoon freshly ground black pepper - Fresh dill for garnish To create this Pickle Ranch Chicken Tater Tot Casserole, you need simple yet flavorful ingredients. I love using shredded rotisserie chicken because it saves time and adds great taste. Dill pickles bring a tangy crunch that works perfectly with ranch dressing. The ranch dressing is the star here, making each bite creamy and rich. Shredded cheddar cheese adds melty goodness, while frozen mixed vegetables sneak in some nutrition. Tater tots on top give a crispy finish that everyone loves. For seasonings, garlic powder, onion powder, and black pepper add depth to the dish. You can also add fresh dill for a pop of color and flavor. This combination is not only easy to find but also makes for a delightful meal. You can follow this recipe [Full Recipe] for detailed instructions. - Preheat oven to 400°F (200°C) - Grease casserole dish Start by preheating your oven to 400°F (200°C). This step is key for a great bake. While it heats, grab a 9x13-inch casserole dish and grease it lightly. You can use cooking spray or a little olive oil. This prevents sticking and makes serving easier. - Combine chicken, pickles, ranch dressing, and seasonings - Incorporate mixed vegetables and cheese In a large bowl, mix together 2 cups shredded rotisserie chicken, 1 cup finely chopped dill pickles, and 1 cup ranch dressing. Add 1 teaspoon garlic powder, 1/2 teaspoon onion powder, and 1/2 teaspoon black pepper. Stir well to coat everything. Then, gently fold in 1 cup frozen mixed vegetables and half of the cheese. This mix is where the magic begins! - Layer chicken mixture in the dish - Add tater tots on top Next, spread the chicken mixture evenly in the greased dish. Now, take 1 (32 oz) bag of frozen tater tots and layer them on top. Make sure they are in a single, even layer. This will create a crispy crown when baked. - Initial baking time of 25 minutes - Adding cheese and additional baking time Place the casserole in your preheated oven. Bake for 25 minutes, watching closely. You want the tater tots to be golden brown. After 25 minutes, remove the casserole and sprinkle the remaining cheese on top. Return it to the oven for an extra 5-7 minutes. This melts the cheese and gives you that bubbly, cheesy crust. The aroma will fill your kitchen with warmth and joy! For the full recipe, check the details provided above. - Spread the tater tots in a single layer on top of the chicken mixture. - Keep an eye on them while baking. You want them golden brown and crispy. - Add extra seasonings like paprika, cayenne, or Italian herbs for a twist. - Try different cheese types like Monterey Jack or pepper jack for more flavor. - Serve with a fresh side salad for a nice balance. - You can also pair it with garlic bread or crusty rolls. - For fun, use colorful plates or serve in small portions for a party vibe. This Pickle Ranch Chicken Tater Tot Casserole is a fun dish to share. Enjoy it with your loved ones! For the Full Recipe, check earlier in the article. {{image_4}} If you want a meat-free version, swap the chicken for black beans or chickpeas. Use about 2 cups of either option. You can also add extra veggies like bell peppers or zucchini for more flavor. Just keep the ranch dressing for that creamy taste. This way, you still get a tasty casserole without meat. To give your casserole a kick, add jalapeños or a splash of hot sauce. You can mix in 1/2 cup of diced jalapeños to the chicken mixture. If you like it extra hot, feel free to add more! This spicy addition makes each bite exciting. You can layer in different vegetables or meats for a twist. Try adding cooked bacon or sausage for a savory touch. You can also mix in veggies like spinach or mushrooms. This gives you a new flavor each time you make the casserole. Each variation allows you to explore new tastes! To keep your leftovers fresh, place the casserole in an airtight container. This helps prevent moisture loss and keeps flavors intact. Store it in the fridge for up to three days. If you plan to eat it later, make sure to cool it completely before sealing. This way, you avoid condensation that can make it soggy. When reheating, the goal is to keep the texture just right. You can use an oven or a microwave. If using the oven, preheat it to 350°F (175°C). Place the casserole in a dish and cover it with foil. Heat for about 20 minutes. For the microwave, cover the dish and heat in one-minute bursts until warm. This keeps the tater tots crispy and delicious. Freezing is a great way to save this yummy dish for later. First, let the casserole cool completely. Then, wrap it tightly in plastic wrap or foil. You can also use a freezer-safe container. It will stay good for up to three months. To thaw, move it to the fridge overnight before reheating. This way, you can enjoy the Pickle Ranch Chicken Tater Tot Casserole anytime! The casserole lasts about 3 to 4 days in the fridge. Store it in an airtight container. This keeps it fresh and tasty for your next meal. Yes, you can make this casserole ahead of time! To prepare, mix all the ingredients and layer them in the dish. Cover it tightly with plastic wrap. Keep it in the fridge for up to 24 hours before baking. You can use other dressings like blue cheese or Caesar. If you prefer homemade, mix sour cream with herbs and spices for a quick option. This gives you a nice flavor twist. Yes, you can use fresh chicken! Cook the chicken first until it reaches 165°F (75°C). Shred it before adding it to the casserole. Keep an eye on cooking time, as fresh chicken may take longer to bake. For the full recipe, check out the detailed instructions. This blog post covered a simple and tasty tater tot casserole. We discussed the main ingredients like rotisserie chicken, dill pickles, and tater tots. I shared step-by-step instructions for preparing and baking your casserole. You also learned tips for achieving the perfect texture and customizing flavors. Remember, you can easily modify this dish to fit your taste. Whether you try it spicy or vegetarian, this casserole makes meal time fun and delicious. Enjoy making this dish and impressing your family!

Pickle Ranch Chicken Tater Tot Casserole Delight

Get ready to savor a dish that’s both simple and scrumptious: Pickle Ranch Chicken Tater Tot Casserole! This casserole combines

Older posts
Newer posts
← Previous Page1 … Page31 Page32 Page33 … Page120 Next →

dsad

© 2026 recipetorch • Built with GeneratePress

Our Policies

  • Copyright Policy
  • Cookie Policy
  • GDPR Policy
  • Privacy Policy
  • Disclaimer
  • Terms Of Use

More Information

  • Home
  • About
  • Contact
  • Appetizers
  • Dessert
  • Dinner
  • Drinks
©2026, recipetorch About Back To Top