Skip to content
DisclaimerTerms Of UseGDPR PolicyCookie Policy

recipetorch

  • Home
  • Drinks
  • Appetizers
  • Dinner
  • Dessert
  • About
  • Contact
  • Privacy Policy
DisclaimerTerms Of UseGDPR PolicyCookie Policy

Nicole

- 200g ramen noodles - 4 cloves garlic, minced - 1-inch piece of fresh ginger, grated - 2 tablespoons sesame oil - 4 cups vegetable broth - 2 tablespoons soy sauce - 1 tablespoon miso paste - 1 cup broccoli florets - 1 medium carrot, julienned - 1 bell pepper, thinly sliced - 2 green onions, chopped - Sesame seeds Garlic ginger ramen noodles are a great choice for a quick meal. The ramen noodles give a nice chewy texture. The garlic and ginger add a punch of flavor. The broth is key to this dish. You need a good vegetable broth. This broth keeps the dish light and tasty. Soy sauce adds saltiness while miso gives it depth. For vegetables, I love using broccoli, carrots, and bell peppers. They add color and crunch. You can mix in any veggies you like. Don't forget the green onions and sesame seeds for garnish. They add a fresh touch. This recipe is simple and fun to make. You can follow the Full Recipe for step-by-step guidance. Enjoy your cooking adventure! To start, bring a large pot of water to a rolling boil. Carefully add the ramen noodles. Cook them according to the package instructions, which is usually about 3-4 minutes. Once cooked, drain the noodles thoroughly and set them aside. Next, heat 2 tablespoons of sesame oil in a large skillet or wok over medium heat. Add 4 cloves of minced garlic and a 1-inch piece of grated ginger to the skillet. Sauté them for about 1-2 minutes. Stir often until they become fragrant but do not let them brown. Now, pour in 4 cups of vegetable broth. Stir in 2 tablespoons of soy sauce and 1 tablespoon of miso paste. Mix it well until the miso dissolves completely. Add 1 cup of broccoli florets, 1 medium carrot julienned, and 1 thinly sliced bell pepper to the broth mixture. Let everything simmer gently for about 5-7 minutes. The vegetables should be tender but still crisp. Carefully add the cooked ramen noodles into the skillet with the broth and vegetables. Gently toss the noodles to coat them well with the broth. Make sure to distribute the vegetables evenly. Heat the mixture for an additional 2 minutes. Using ladles, portion the garlic ginger ramen noodles into individual bowls. Ensure each bowl has an equal amount of broth and vegetables. Finish your dish with a sprinkle of chopped green onions and sesame seeds on top for added flavor and crunch. For extra zing, serve the ramen hot with a lime wedge and a side of chili oil if you like a bit of spice. For the complete recipe, refer to the Full Recipe section. To get the best noodle texture, adjust the cooking time. Ramen noodles usually cook in 3-4 minutes. Start checking at 3 minutes. You want them firm but not hard. Overcooked noodles become mushy and lose their charm. Prevent stickiness by rinsing the cooked noodles with cold water. This stops the cooking process and washes away excess starch. Toss them in a bit of sesame oil after rinsing. This keeps them separate and adds flavor. For extra flavor, try adding fresh herbs like cilantro or basil. These herbs brighten the dish. You can also use spices like black pepper or red pepper flakes for a kick. Fresh ingredients are best for taste. However, dried herbs can work in a pinch. If you use dried herbs, remember they have a stronger flavor. Use less than fresh herbs to avoid overpowering the dish. To make your ramen even better, consider optional toppings. A lime wedge adds a nice zing. Just squeeze it over your noodles before eating. It complements the garlic and ginger flavors well. Chili oil is another great option for spice lovers. Drizzle it on top for a rich, spicy kick. You can also add sliced jalapeños or chili flakes if you want more heat. These small tweaks can elevate your garlic ginger ramen noodles into a comforting and delicious meal. For the full recipe, check out the earlier section. {{image_4}} You can easily make this dish vegan or vegetarian. One great way is to add tofu or edamame. Tofu absorbs flavors well and adds a nice texture. Simply cube firm tofu and sauté it with the garlic and ginger. For edamame, add them during the last few minutes of cooking. Both options boost protein and make the meal heartier. If you like heat, try a spicy version! You can add chili paste or chili flakes. Just mix a tablespoon of chili paste into the broth while it simmers. For flakes, sprinkle in a teaspoon or more to taste. This adds a nice kick to the garlic and ginger flavors. Think about adding leafy greens for more nutrition. Spinach or bok choy work great. Just toss them into the broth a few minutes before serving. You can also add protein sources like sliced chicken, shrimp, or even chickpeas. These add-ins not only enhance flavor but also make the dish more filling and healthy. For the complete recipe, check out the Full Recipe. To keep your garlic ginger ramen fresh, store it in an airtight container. Place the noodles and broth together. If you have extra veggies, add them too. Refrigerate this for up to three days. This helps maintain flavor and texture. When you reheat, use a pot on low heat. Add a splash of water or broth to keep the noodles moist. Stir gently to avoid breaking them. Heat until warm but not boiling. This keeps the noodles from getting mushy. You can freeze garlic ginger ramen for future meals. Use a freezer-safe container. Pack the noodles and broth separately. This prevents the noodles from becoming soggy. To thaw, place in the fridge overnight. Reheat on the stove as usual. Enjoy your meal later without losing flavor! For the full recipe, check the section above. Yes, you can use packaged ramen noodles. They are quick and easy. Fresh ramen noodles have a better texture and taste. Packaged noodles are often softer. If you want a chewy bite, go for fresh. Fresh noodles cook in about 3-4 minutes. Packaged noodles may take less time. Always check the cooking time on the package. You can make this dish gluten-free with rice noodles or zucchini noodles. Rice noodles are a great choice. They cook fast and soak up the broth well. Zucchini noodles add freshness and crunch. Look for gluten-free soy sauce to keep the flavors. Always read labels to ensure they are gluten-free. Garlic and ginger offer many health benefits. Garlic helps boost your immune system. It can lower blood pressure and cholesterol. Ginger aids digestion and can reduce nausea. Both add flavor and nutrition to your meals. They are low in calories and high in antioxidants. To increase protein, add tofu, chicken, or shrimp. Tofu is a great plant-based option. It absorbs flavors well and adds creaminess. Chicken can be shredded or diced and added for extra meatiness. Shrimp cooks quickly and pairs nicely with the broth. A side salad or steamed edamame works well. A simple cucumber salad adds freshness. You can also serve pickled vegetables for tang. These sides balance the meal and add different textures. Try serving with a light dipping sauce for added flavor. For the full recipe, check the earlier section. Enjoy making your garlic ginger ramen noodles! In summary, you learned how to make Garlic Ginger Ramen Noodles from scratch. We discussed the basic ingredients like ramen noodles, garlic, ginger, and vegetables for the broth. Step-by-step, I showed you how to prepare, sauté, combine, and serve the dish. You now know helpful tips for perfecting texture and adding flavors. Don’t forget the variations for more fun! This dish is simple, tasty, and healthy, making it a great meal option. Enjoy your cooking journey!

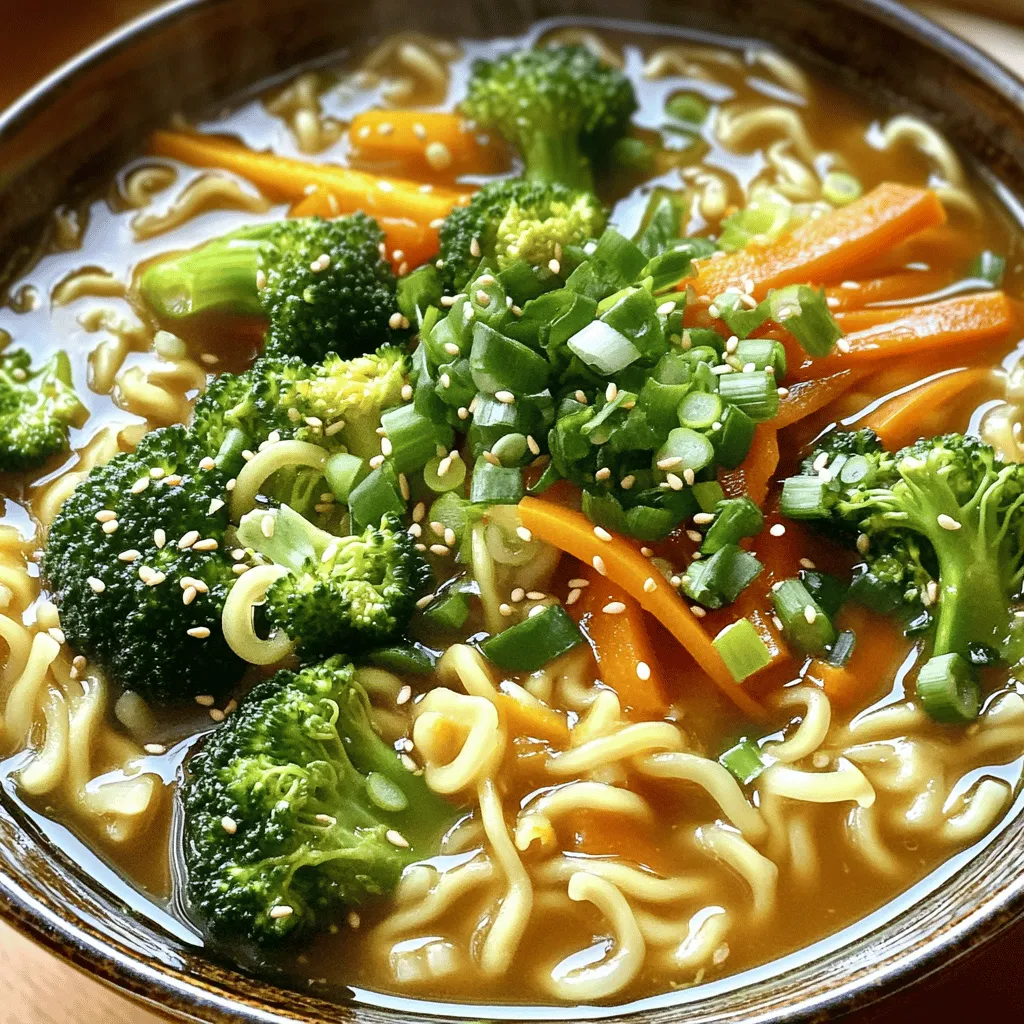
Garlic Ginger Ramen Noodles Flavorful and Nourishing Dish

Craving a warm and comforting meal? Garlic ginger ramen noodles offer bold flavors and essential nutrients. With simple steps and

To make spicy honey garlic chicken thighs, you will need: - 4 chicken thighs, bone-in and skin-on - 4 tablespoons honey - 3 cloves garlic, finely minced - 1 tablespoon soy sauce - 1 tablespoon apple cider vinegar - 1 teaspoon red pepper flakes (adjust according to preferred spice level) - 1 teaspoon smoked paprika - Salt and black pepper, to taste - 2 tablespoons olive oil These ingredients create a mix of sweet, spicy, and savory flavors. The chicken thighs are juicy and tender. For a finishing touch, you can add: - Fresh parsley, finely chopped - Sesame seeds These garnishes add color and a fresh taste to your meal. Serve your spicy honey garlic chicken thighs with: - Steamed rice - Roasted vegetables These sides balance the bold flavors of the chicken. For a fun twist, you might include lime or lemon wedges for a zesty kick! You can find the full recipe [here]. To start, you need to make the marinade. Grab a small bowl and whisk together the honey, minced garlic, soy sauce, apple cider vinegar, red pepper flakes, smoked paprika, salt, and black pepper. Mix until everything is smooth. This marinade brings the sweet and spicy flavor to the chicken. Next, take your chicken thighs and place them in a large resealable bag or a shallow dish. Pour the marinade over the chicken. Make sure each thigh is well coated. Seal the bag or cover the dish with plastic wrap. Let it sit in the fridge for at least 30 minutes. For a richer taste, marinate for up to 2 hours. Now it’s time to cook. Preheat your oven to 400°F (200°C). While it heats up, heat olive oil in a large, oven-safe skillet over medium-high heat. Once hot, add the chicken thighs skin-side down. Sear them for about 4-5 minutes. Look for that crispy, golden skin! After searing, flip the thighs skin-side up. Pour any leftover marinade over them. Move the skillet to the oven and bake for 25-30 minutes. Check that the chicken’s internal temperature reaches 165°F (74°C) to ensure it’s safe to eat. Once done, take the skillet out and let the chicken rest for 5 minutes. This helps keep the chicken juicy. Finally, garnish with chopped parsley and sesame seeds before serving. For the full recipe, please refer to the earlier section. Enjoy your meal! Marinating chicken is key for flavor. Use a mix of wet and dry ingredients. For this dish, I use honey, soy sauce, and spices. This mix makes the chicken juicy and tasty. Let the chicken soak in the marinade for at least 30 minutes. If you have more time, go for 2 hours. This really boosts the flavor. - Use a resealable bag: It helps coat the chicken evenly. - Massage the marinade: Gently rub it into the chicken for better flavor. - Always refrigerate: Keep the chicken cool while marinating to prevent bacteria. Crispy skin makes a big difference. Start by searing the chicken in a hot pan. This gives it a nice golden color. Here’s how to get that crunch: - Use bone-in, skin-on thighs: They hold moisture and flavor. - Preheat your pan: Use medium-high heat and add olive oil until it shimmers. - Do not rush the sear: Cook skin-side down for 4-5 minutes before flipping. Cooking chicken properly is very important. Undercooked chicken can be unsafe. Use a meat thermometer to check the internal temperature. Chicken should reach 165°F (74°C). Here are some tips: - Check the juices: They should run clear, not pink. - Let it rest: After cooking, let the chicken sit for 5 minutes. This helps the juices settle. - Follow the recipe: Stick to the cooking times for best results, as in the Full Recipe. {{image_4}} You can easily change the spice level of this dish. If you like it mild, reduce the red pepper flakes. Start with half a teaspoon. For extra heat, add more flakes or a dash of hot sauce. You can also try using fresh chili peppers for a fresh kick. Adjusting spice lets you create a flavor that fits your taste. Switching to skinless chicken thighs is a great way to cut fat. Skinless thighs still stay juicy and tender when cooked right. They soak up the honey garlic sauce well. Plus, you can enjoy the same great taste with fewer calories. This option is perfect for anyone looking for a lighter meal. There are many ways to change this recipe to fit your diet. If you're gluten-free, use tamari instead of soy sauce. You can also swap honey for maple syrup if you want a vegan option. Just make sure to check that your other ingredients are also vegan. These swaps help you enjoy Spicy Honey Garlic Chicken Thighs no matter your dietary needs. For the full recipe, check out the details above. To keep your spicy honey garlic chicken thighs fresh, store them in an airtight container. This helps lock in flavor and moisture. Let the chicken cool down to room temperature before placing it in the fridge. Make sure to use it within three to four days for the best taste. When you want to enjoy the leftovers, reheating them carefully is key. Preheat your oven to 350°F (175°C). Place the chicken in an oven-safe dish and cover it with foil. Heat for about 15-20 minutes, or until it's warmed through. This method helps keep the chicken juicy and tasty. You can also use a microwave. Just cover the chicken and heat it in short bursts, checking often to avoid drying it out. If you want to save some for later, freezing is a great option. First, let the chicken cool completely. Wrap each piece tightly in plastic wrap or foil, then place them in a freezer bag. Remove as much air as possible to prevent freezer burn. You can freeze them for up to three months. When you're ready to eat, thaw it in the fridge overnight before reheating. This keeps the flavor intact and gives you a quick meal. For the full recipe, check out the cooking instructions provided earlier. You can enjoy Spicy Honey Garlic Chicken Thighs with many sides. Here are some great options: - Steamed rice - Roasted vegetables - Mashed potatoes - Quinoa salad - Garlic bread These sides balance the spicy and sweet flavors of the chicken. They also add more texture and taste to your meal. Yes, you can use boneless chicken thighs. They cook faster than bone-in thighs. Just cut the cooking time by about 10 minutes. Ensure the internal temperature reaches 165°F (74°C) for safe eating. Boneless thighs will still soak up the marinade and stay juicy. For the best flavor, marinate the chicken for at least 30 minutes. You can marinate it for up to 2 hours for a richer taste. If you have more time, marinating overnight is great too. This allows the flavors to soak deeply into the chicken. Check out the Full Recipe for more details! This blog post covered everything you need for Spicy Honey Garlic Chicken Thighs. You learned about the key ingredients, how to prepare and marinate, and cooking steps. We looked at tips for crisp skin and safe cooking. Variations let you adjust spice and make healthier choices. Storage tips help keep leftovers tasty. Try this recipe, and share it with friends. Cooking can be fun and tasty! Enjoy your meal!

Spicy Honey Garlic Chicken Thighs Flavorful and Easy

Get ready to spice up your dinner with my easy recipe for Spicy Honey Garlic Chicken Thighs! This dish packs

- 12 oz fresh cheese tortellini - 1 cup cherry tomatoes, halved - 1 cup fresh mozzarella pearls - 2 cups baby spinach - ½ cup basil pesto - ½ cup Greek yogurt - 1 tablespoon olive oil - Salt and pepper to taste - Optional: ¼ cup pine nuts, toasted - Optional: Fresh basil leaves for garnish When making this creamy pesto tortellini salad, you need fresh cheese tortellini as the base. You can find this at most grocery stores. The tortellini gives a nice bite and pairs well with other fresh ingredients. Next, you will want cherry tomatoes. Their sweet and juicy flavor adds brightness to the dish. Fresh mozzarella pearls make it creamy and fun. Baby spinach adds color and nutrition. For the creamy dressing, you will use basil pesto and Greek yogurt. This combo gives rich taste without being too heavy. Don’t forget the optional ingredients! A drizzle of olive oil enhances the flavor. You can add salt and pepper to taste. If you like a bit of crunch, toasted pine nuts are a great choice. Fresh basil leaves can make your salad look beautiful and add a burst of flavor. For the full recipe and details, check [Full Recipe]. - Bring a large pot of salted water to a boil. - Cook tortellini according to package instructions (3-4 minutes). - Drain and rinse under cold water. Cooking tortellini is quick and easy. Start by boiling salted water in a large pot. The salt adds flavor to the pasta. Once the water is bubbling, add the tortellini. Cook them for about 3 to 4 minutes. They should be tender but still firm. After cooking, drain them in a colander. Rinse the tortellini under cold water. This stops the cooking and cools them down fast. - Blend basil pesto with Greek yogurt until smooth. - Combine dressing with cooled tortellini. For the dressing, mix basil pesto with Greek yogurt. Use a whisk or spoon to blend until smooth. This mix gives a creamy texture and rich flavor. Once the dressing is ready, fold it into the cooled tortellini. This coats the pasta evenly and adds a burst of flavor. - Add cherry tomatoes, mozzarella pearls, and baby spinach. - Drizzle with olive oil and season with salt and pepper. - Gently toss to coat evenly. Now, it's time to add more tasty ingredients. Toss in halved cherry tomatoes, fresh mozzarella pearls, and baby spinach. These add color and crunch to the dish. Drizzle a little olive oil over the salad. Season it with salt and pepper to taste. Then, gently mix everything together. This ensures each bite is flavorful and fresh. For the complete recipe, check the Full Recipe. You can switch up the pesto for different flavors. Try sun-dried tomato pesto or spinach pesto. Both add a unique twist to the dish. For pasta, if you don’t have tortellini, use shapes like farfalle or rotini. These options still work well with the creamy dressing. Present your salad in a bright bowl to make it pop. A colorful serving bowl adds visual appeal. You can also plate it individually for a nice touch. For added protein, pair the salad with grilled chicken or shrimp. This makes the meal more filling and satisfying. To boost the taste, add fresh herbs like parsley or basil. You can also sprinkle some red pepper flakes for a bit of heat. Chilling the salad is key for flavor. Let it sit in the fridge for at least 30 minutes. This helps the flavors blend and enhances the overall taste. For the full recipe, check out the complete guide. {{image_4}} Adding your favorite ingredients can make the creamy pesto tortellini salad even better. Here are some great ideas. - Roasted bell peppers: These add a sweet taste and nice color. - Artichoke hearts: They bring a unique flavor and texture to the dish. These veggies not only boost taste but also add more nutrients. You can roast the bell peppers in the oven or grill them for extra flavor. - Adding chicken or shrimp: Cooked chicken or shrimp can make this salad heartier. - Vegetarian options like chickpeas: Chickpeas add protein while keeping it meat-free. Simply toss in your protein choice after mixing the salad. This keeps prep simple and quick. - Gluten-free pasta options: Use gluten-free tortellini for those avoiding gluten. - Vegan alternatives (tofu, vegan pesto): Swap Greek yogurt with tofu and use vegan pesto. These changes help you enjoy this dish, no matter your diet. You can find gluten-free and vegan ingredients at most grocery stores. Feel free to explore these variations and create your perfect version of this creamy pesto tortellini salad. For the full recipe, check out the earlier section. To keep your creamy pesto tortellini salad fresh, store it in an airtight container. This method keeps the flavors intact and prevents moisture loss. It will stay fresh in the fridge for about three to four days. Remember to check for any signs of spoilage, such as off smells or changes in texture. Freezing this salad is not ideal due to the creamy dressing. However, if you want to freeze it, do the following: first, prepare the tortellini and veggies as usual. Then, store them in a freezer-safe container without the dressing. This helps avoid a watery texture. When ready to enjoy, thaw it overnight in the fridge. For reheating, warm the tortellini gently in a pan, then mix with fresh dressing. When serving chilled, let the salad sit at room temperature for about 15 minutes. This helps enhance the flavors. To refresh the texture, add a drizzle of olive oil or a squeeze of lemon juice. Mixing in some fresh basil or extra pesto can also boost the taste after storage. Enjoy your vibrant salad with a burst of flavor! You can easily prepare this salad ahead of time. Cook the tortellini and cool it completely. Mix the dressing with the tortellini and other ingredients. Cover the bowl and store it in the fridge. This way, the salad will stay fresh for up to three days. Just give it a gentle toss before serving to mix everything well. Yes, you can use store-bought pesto. It saves time and still gives great flavor. Look for a good quality pesto that has fresh ingredients. This choice makes your Creamy Pesto Tortellini Salad quick and easy. Serve the salad chilled for the best taste. You can use a large serving bowl or individual plates. Garnish with fresh basil leaves and toasted pine nuts if you like. This adds a nice touch and makes it look inviting. Absolutely! This salad is perfect for meal prep. It keeps well in the fridge, making it a great choice for lunches or quick dinners. Just remember to store it in airtight containers. This way, you can enjoy it throughout the week. For a dairy-free version, you can use cashew cream or coconut yogurt. Both options will keep the creamy texture. You can also try using a dairy-free sour cream. These substitutes work well and make the salad just as delicious. For the full recipe, check out the details above! This blog post explored how to make a tasty Creamy Pesto Tortellini Salad. We covered the main ingredients you need and how to prepare them step-by-step. You learned about serving tips, ingredient swaps, and variations to suit your taste. Remember to store leftovers well for future meals. Enjoying this salad can bring fresh flavor to your table. Try different add-ins or proteins to keep it exciting each time. Embrace your creativity, and enjoy every bite!

Creamy Pesto Tortellini Salad Fresh and Flavorful Dish

Craving a dish that bursts with fresh flavors and creamy goodness? Look no further! This Creamy Pesto Tortellini Salad combines

- 1 pound chicken breast, cubed - 1 medium pineapple, cubed - Red and green bell peppers, cubed - Red onion, wedged - Teriyaki sauce - Honey - Sesame oil - Garlic powder - Ground ginger - Seasoning (salt and pepper) - Wooden skewers (soaked) - Grill or grill pan When you gather the ingredients for your Teriyaki Chicken Pineapple Kabobs, make sure they are fresh. The chicken should be juicy, and the pineapple ripe. This makes a big difference in taste. You want to cut the chicken and veggies into even pieces. This helps them cook at the same time. You can use a sharp knife for this. The red and green bell peppers add color and crunch. The red onion gives a sweet flavor that pairs well with the rest. For the marinade, the teriyaki sauce brings a nice sweet and salty taste. Mixing it with honey gives it extra sweetness. Sesame oil adds a nutty flavor, while garlic powder and ground ginger add warmth and spice. Don't forget to season with salt and pepper. Now, let’s talk about equipment. You will need wooden skewers. Soak them in water for at least 30 minutes. This keeps them from burning on the grill. A grill or grill pan is best to cook these kabobs. The heat helps create those beautiful grill marks and caramelizes the pineapple. For the full recipe, check out the detailed instructions later in the article. Start by making the marinade. In a mixing bowl, whisk together the teriyaki sauce, honey, sesame oil, garlic powder, ground ginger, and a pinch of salt and pepper. Mix it well until combined. This creates a flavorful base for your chicken. Next, add the chicken breast cubes to the marinade. Make sure each piece is coated well. Cover the bowl with plastic wrap and place it in the fridge. Let it marinate for at least 30 minutes. For a stronger flavor, you can marinate it overnight. While the chicken marinates, soak your wooden skewers in water for at least 30 minutes. This step prevents them from burning on the grill. The soaked skewers will hold up well during cooking. Once your skewers are ready, thread the marinated chicken, pineapple cubes, red and green bell pepper pieces, and red onion wedges onto the skewers. Alternate the ingredients for a colorful look. This not only enhances the visual appeal but also balances the flavors. Now, it's time to grill. Preheat your grill or grill pan over medium heat. Allow it to reach a steady temperature before adding the kabobs. Place the assembled kabobs on the grill. Cook them for about 10-12 minutes. Turn them every few minutes to ensure even cooking. The chicken should reach an internal temperature of 165°F. You'll see lovely grill marks on the chicken and caramelization on the pineapple. After grilling, take the kabobs off the grill and let them rest for a few minutes. This helps keep the chicken juicy. Serve the kabobs hot with any leftover teriyaki sauce on the side for dipping. Enjoy your flavorful grilling delight! For the complete recipe, check the [Full Recipe]. For the best flavor, marinate the chicken for at least 30 minutes. If you have time, let it sit overnight. This longer soak really boosts the taste. Use a mix of teriyaki sauce, honey, sesame oil, garlic powder, and ground ginger. Each ingredient adds depth and richness. To enhance flavors, consider adding a splash of lime juice. This adds a nice tang that brightens the dish. You can also mix in crushed red pepper flakes for a touch of heat. Always taste the marinade before adding the chicken. Adjust salt and pepper to your liking. Set your grill to medium heat. This temperature ensures the chicken cooks evenly without burning. If it’s too hot, the outside will char, while the inside remains raw. When grilling, turn the kabobs every few minutes. This helps them cook evenly on all sides. Look for an internal chicken temperature of 165°F. You want nice grill marks, showing that the kabobs are done. The pineapple should caramelize and become sweet. For a beautiful presentation, use a large platter. Arrange the kabobs in a circle or line. Garnish with fresh cilantro or parsley for color. Serve with extra teriyaki sauce on the side for dipping. Lime wedges also add a fresh touch. Pair these kabobs with rice or a crisp salad. A side of grilled corn or steamed vegetables works well too. Enjoy the tropical vibe these kabobs bring! For the full recipe, check out the Tropical Teriyaki Chicken Pineapple Kabobs. {{image_4}} You can change things up with your kabobs. Instead of chicken, try shrimp or tofu. Both options soak up flavors well. This makes them tasty and fun. For veggies, use zucchini or mushrooms. They add a different texture. You can mix and match your favorite ingredients to find what you love best. To kick up the flavor, think about spicy teriyaki. Adding chili flakes or sriracha gives your kabobs a nice heat. You can also add fresh herbs like cilantro or basil for brightness. A squeeze of lime or lemon juice can make all the flavors pop. These small changes can really change your dish. While grilling is great, you can also bake your kabobs in the oven. Just preheat to 400°F and place them on a baking sheet. Bake for 15-20 minutes, flipping halfway through. If you prefer stovetop grilling, use a grill pan. Cook the kabobs over medium heat for about 10-12 minutes. This way, you can enjoy the flavor all year long, regardless of the weather. For the full recipe, check out the details above. To keep your kabobs fresh, store them in the fridge. Place the leftovers in an airtight container. They will last for up to three days. If you want to save them longer, freezing is a great option. Wrap each kabob tightly in plastic wrap or aluminum foil. Then, place them in a freezer-safe bag. They will stay good for up to three months in the freezer. When you're ready to enjoy the kabobs again, reheat them carefully. The best method is to use an oven. Preheat the oven to 350°F (175°C). Place the kabobs on a baking sheet. Cover them with foil to keep them moist. Heat for about 10-15 minutes. This will help keep the flavors and texture intact. Avoid using a microwave if possible. Microwaving can overcook the chicken and make it tough. If you're short on time, use a skillet on low heat. This method also helps to keep the kabobs flavorful and juicy. Enjoy your tasty Teriyaki Chicken Pineapple Kabobs! For the complete recipe, check out the Full Recipe. For the best flavor, marinate the chicken for at least 30 minutes. If you have more time, letting it sit overnight works wonders. This longer marinating time allows the flavors to soak into the chicken, making it extra tasty. Yes, you can! Prepare the kabobs a few hours ahead of time. Just keep them in the fridge until you're ready to grill. Another option is to marinate the chicken the night before. This saves time on busy days and keeps the flavors strong. Many sides go great with teriyaki chicken pineapple kabobs. Some popular choices include: - Steamed rice - Grilled corn on the cob - Fresh salad - Vegetable stir-fry - Garlic bread These sides add color and flavor to your meal. You can mix and match to find your favorite pairings. For more ideas, check out the Full Recipe for more suggestions! This post covered all you need to know about making Teriyaki Chicken Pineapple Kabobs. You learned about the key ingredients, how to prepare the marinade, and grilling techniques. Remember to choose fresh, vibrant veggies and let the chicken marinate well for the best flavor. Try different proteins and veggies to keep meals exciting. Kabobs are easy to make and perfect for any gathering. Enjoy grilling and sharing this tasty dish with family and friends!

Teriyaki Chicken Pineapple Kabobs Flavorful Grilling Delight

Get ready to fire up your grill for a taste of summer with Teriyaki Chicken Pineapple Kabobs! These delightful skewers

To make the best strawberry cheesecake dip, you will need: - 8 ounces cream cheese, softened - 1/2 cup powdered sugar - 1 teaspoon vanilla extract - 1/4 cup sour cream - 1 cup fresh strawberries, hulled and diced - 1/2 cup whipped cream (store-bought or homemade) - Graham cracker crumbs for garnish - Extra fresh strawberries for serving Each serving of this delightful dip contains: - Calories: 190 - Protein: 2g - Fat: 11g - Carbohydrates: 20g - Sugars: 12g Choosing the right ingredients makes a big difference. Here are some tips: - Selecting ripe strawberries: Look for bright red strawberries with a sweet scent. Avoid those with white spots or soft spots. Freshness is key! - Best cream cheese options: Use full-fat cream cheese for a rich and smooth texture. Low-fat versions may not whip as well. - Organic vs. regular ingredients: Organic strawberries often taste better and have fewer pesticides. If possible, choose organic for the best flavor. To make the strawberry cheesecake dip, start by gathering your ingredients. You will need cream cheese, powdered sugar, vanilla extract, sour cream, fresh strawberries, and whipped cream. 1. Place 8 ounces of softened cream cheese in a medium mixing bowl. 2. Beat the cream cheese with an electric mixer on medium speed for 1-2 minutes. This makes it smooth and creamy. 3. Gradually add 1/2 cup of powdered sugar and 1 teaspoon of vanilla extract. Mix on low speed until well blended. 4. Pour in 1/4 cup of sour cream. Mix again until everything is fluffy and smooth. 5. Take 1 cup of diced fresh strawberries and gently fold them into the mixture with a spatula. This adds flavor. 6. If using whipped cream, fold in 1/2 cup. Do this gently to keep the dip light and airy. 7. Transfer the dip to a nice serving bowl. Sprinkle some graham cracker crumbs on top for a tasty finish. 8. Serve with extra strawberries and graham crackers for dipping. To avoid lumps in your dip, make sure your cream cheese is softened at room temperature. This makes mixing easier. - Beat the cream cheese well at the start. - Mix on low speed after adding other ingredients to keep it smooth. - When folding in whipped cream and strawberries, use a gentle downward motion. This helps keep the dip light and fluffy. This strawberry cheesecake dip pairs well with many tasty options. Here are some ideas: - Use graham crackers for a crunchy dipper. - Fresh fruit, like apple slices or banana pieces, adds a nice touch. - Pretzels offer a sweet and salty contrast. - For fun, serve it with mini cookies for a delightful treat. Explore these options to find your favorite! To make your strawberry cheesecake dip, gather these tools: - Mixing bowls - Electric mixer - Spatula - Serving bowl These tools help you mix and serve with ease. A good electric mixer speeds up the blending process. A spatula ensures you scrape every bit from the bowl, leaving no waste. Avoid these common pitfalls for the best dip: - Overmixing: Mixing too much can make the dip thick. Stop when it’s creamy. - Using cold ingredients: Cold cream cheese does not blend well. Always soften it first. - Not folding properly: Gently fold in strawberries and whipped cream. This keeps the dip fluffy. By avoiding these mistakes, your dip will be smooth and delicious. You can make your dip even better with these tips: - Adding extracts: Try almond or lemon extract to create a twist. - Citrus zest: A bit of lemon or orange zest brightens the flavor. - Spices: A pinch of cinnamon or nutmeg adds warmth and depth. These small changes can elevate your dip to new heights. Feel free to experiment and find your favorite blend! {{image_4}} You can make this dip even more fun. Try adding chocolate chips for a sweet twist. Mini chocolate chips work best for a fun crunch. You can also mix in other fruits like blueberries or raspberries. This adds color and flavor. If you want a unique taste, add a splash of almond or coconut extract. Each variation brings a new surprise to your dip. Serving ideas can make your dip even more exciting. You can layer the dip in small dessert cups for a fancy touch. This lets guests dig in without making a mess. You can also swap out dippers. Try pretzel sticks, apple slices, or graham crackers. Each option offers a fun way to enjoy the dip. You can make this dip fit different diets too. To make it vegan, swap cream cheese for a plant-based option. Use coconut cream instead of sour cream for a creamy texture. For a gluten-free version, just use gluten-free graham crackers. These small changes help everyone enjoy this delightful treat, no matter their dietary needs. To keep your strawberry cheesecake dip fresh, use an airtight container. This helps prevent it from drying out. Place the container in the fridge. The dip stays good for about 3 to 5 days. If you notice any changes in smell or texture, it’s best to toss it out. Reheating is not needed for this dip. It tastes best cold. If you prefer it slightly warmer, let it sit at room temperature for a few minutes before serving. Stir gently to restore its creamy texture. Yes, you can freeze strawberry cheesecake dip! Use a freezer-safe container. Leave some space at the top for expansion. When ready to eat, move it to the fridge overnight to thaw. Stir well before serving to get the right texture back. Enjoy this delightful creamy treat even after freezing! For the full recipe, check out the details above. Strawberry cheesecake dip is a sweet and creamy treat. It combines cream cheese, strawberries, and whipped cream. People love it for its rich flavor and easy preparation. You can enjoy it with graham crackers or fresh fruit. It is perfect for parties or casual get-togethers. Everyone loves to scoop it up for a burst of flavor. Strawberry cheesecake dip can last about 3 to 5 days in the fridge. Store it in an airtight container to keep it fresh. Make sure to cover it well, so it doesn't absorb other smells. Before serving, check for any changes in smell or texture. If it seems off, it is best to discard it. Yes, you can make strawberry cheesecake dip ahead of time. Prepare it a day before your event for the best taste. This allows the flavors to meld together nicely. Keep it covered in the fridge until you are ready to serve. Just give it a quick stir before serving to bring back its creamy texture. You now know how to make a delicious Strawberry Cheesecake Dip. We covered the ingredients needed, tips for selection, and step-by-step preparation. We also explored common mistakes to avoid and ways to customize the recipe. Remember, choose fresh ingredients for the best flavor. This dip is perfect for gatherings or a sweet snack. You can even make it ahead of time. Enjoy your tasty treat and impress your friends!

Strawberry Cheesecake Dip Delightful Creamy Treat

Get ready to indulge your sweet tooth with a creamy, fruity delight! This Strawberry Cheesecake Dip is the perfect treat

For this chili, you need three types of beans. They add great texture and flavor. Use: - 1 can (15 oz) kidney beans, drained and rinsed - 1 can (15 oz) black beans, drained and rinsed - 1 can (15 oz) pinto beans, drained and rinsed These beans are not just tasty. They are also packed with protein and fiber. This makes the dish filling and healthy. Next, let's talk about the veggies. They bring freshness and color to the chili. You will need: - 1 tablespoon olive oil - 1 medium onion, finely chopped - 2 cloves of garlic, minced - 1 bell pepper (choose either red or green), diced - 2 celery stalks, diced - 2 medium carrots, peeled and diced These vegetables create a wonderful base. The onion and garlic add a rich aroma. The bell pepper, celery, and carrots provide crunch and sweetness. Now, for the spices. They are the heart of this chili. You will want: - 1 can (28 oz) crushed tomatoes - 2 tablespoons tomato paste - 2 cups vegetable broth - 1 tablespoon chili powder - 1 teaspoon ground cumin - 1 teaspoon smoked paprika - 1/2 teaspoon cayenne pepper (optional, for added heat) - Salt and freshly ground black pepper to taste - Fresh cilantro, roughly chopped, for garnish These spices work together to create a rich flavor. The chili powder adds warmth, while cumin and smoked paprika give depth. Adjust the cayenne for your spice level. For the full recipe, check the details above. Enjoy your cooking! Start by gathering all your ingredients. You will need three types of beans: kidney, black, and pinto. You will also need an onion, garlic, bell pepper, celery, and carrots. Make sure to chop the onion finely and dice the other veggies. This helps them cook evenly. Rinse the beans under cool water to remove any extra salt or liquid. 1. Heat one tablespoon of olive oil in a large pot over medium heat. 2. Add the chopped onion and sauté for 3-4 minutes. Wait until the onion looks soft. 3. Next, mix in the garlic, bell pepper, celery, and carrots. Stir for about 5-7 minutes. All the veggies should be tender. 4. Pour in the crushed tomatoes, tomato paste, and vegetable broth. Stir everything well. 5. Now, add the rinsed kidney beans, black beans, and pinto beans. Mix gently but well. 6. Season with chili powder, ground cumin, smoked paprika, cayenne pepper, salt, and pepper. Stir to blend the spices. 7. Raise the heat slightly. Let the chili simmer until it bubbles. Once it simmers, lower the heat and cover the pot. 8. Let it cook for 30-35 minutes. Stir it occasionally to prevent sticking. 9. After cooking, taste the chili. Adjust the spices if needed. You want it to be just right. Serve the chili warm in bowls. I love adding fresh cilantro on top for a pop of color. You can also pair it with warm cornbread or crunchy tortilla chips. For a special touch, add a dollop of sour cream or slices of creamy avocado. This not only adds flavor but makes the dish look great too. You can find the full recipe [here](#). You can make your chili as spicy as you want. Start with the base spices like chili powder. If you like it hot, add cayenne pepper. Taste as you go, and don’t be shy. You can always add more spice later. If it gets too spicy, add some extra beans or a bit of sugar to balance it out. To boost the flavor, try adding fresh herbs like cilantro or parsley. A splash of lime juice can brighten the dish too. You might also experiment with different spices, like oregano or coriander. The more you play with flavors, the better your chili will be! Presentation is key to a great meal. Serve your chili in colorful bowls to make it pop. Add a sprinkle of cilantro on top for color. If you want to impress, pair it with warm cornbread or crispy tortilla chips. You can add a dollop of sour cream or slices of avocado for extra flair. Check out the Full Recipe for more serving ideas! {{image_4}} You can change up the beans in your chili. Use any canned beans you like. Great options are chickpeas or lentils. These will add new flavors and textures. Just remember to drain and rinse them first. Each type of bean brings its own taste. This makes your chili unique every time you make it. Feel free to toss in more vegetables. Zucchini, corn, or spinach work well. You can also add mushrooms for a nice umami kick. More veggies boost nutrients and make the chili heartier. Just chop them into small pieces. Add them when you cook the other vegetables. This way, they will soften and blend in nicely. If you want a meatier taste, try meat alternatives. Crumbled tempeh or tofu adds protein. You can also use jackfruit for a pulled texture. These options bring a different flavor to the dish. Just cook them along with the onions and garlic. This helps them absorb all the tasty spices. After cooking your chili, let it cool down. Then, transfer it to an airtight container. It will stay fresh in the fridge for about 3 to 5 days. Make sure to store it promptly to keep flavors intact. When ready to eat, simply scoop out what you need. To freeze your chili, use a freezer-safe container. Leave some space at the top because it will expand. It can last in the freezer for up to 3 months. When you want to enjoy it, thaw it in the fridge overnight before reheating. Reheat your chili on the stove over medium heat. Stir it often to make sure it heats evenly. You can also use a microwave for quick reheating. Place it in a microwave-safe bowl and cover it. Heat it in short bursts, stirring in between. This keeps it from drying out. If it seems too thick after storage, add a bit of water or broth to reach your desired consistency. For the best flavor, enjoy it warm with fresh toppings from the Full Recipe. You can use kidney beans, black beans, and pinto beans. They each add a unique taste and texture. You can also mix in other beans like cannellini or chickpeas. This allows for fun and tasty variations. Each bean provides protein and fiber, making the chili hearty. Yes, you can make it ahead of time. In fact, it tastes better the next day! The flavors blend and deepen overnight. Just store it in the fridge in an airtight container. Reheat it on the stove or in the microwave before serving. Yes, it is very healthy! This chili is packed with plant-based protein and fiber. The beans help keep you full and satisfied. Plus, it's low in fat and loaded with vitamins from the vegetables. You can enjoy it guilt-free, knowing it’s good for you. Absolutely! Freezing is a great way to save leftovers. Allow it to cool completely, then pour it into freezer-safe bags or containers. It can last up to three months. When you’re ready to eat, thaw it in the fridge and reheat on the stove. I recommend chili powder, ground cumin, and smoked paprika. These spices give the chili its rich flavor. You can also add cayenne pepper for heat. Adjust the spice levels to fit your taste. Don’t be afraid to experiment with other spices too! If you want more heat, add extra cayenne pepper or chili powder. You can also include fresh jalapeños or hot sauce. Start with a little and taste as you go. This way, you can find the perfect heat level for you. This chili pairs well with cornbread or tortilla chips. You can also serve it over rice or quinoa. Topping it with avocado or sour cream adds creaminess. Fresh cilantro gives a nice burst of flavor. Enjoy it however you like! Yes, this recipe is already vegan! All the ingredients are plant-based. Just ensure any toppings you use, like sour cream, are also vegan options. You can use cashew cream or dairy-free yogurt as a substitute. Yes, you can add meat if you prefer. Ground turkey or beef works well. Cook the meat first, then follow the recipe as usual. Just keep in mind that this will change the flavor and texture. You learned about making Vegetarian Three Bean Chili. We covered required beans, vegetables, and spices. I gave you steps for cooking and serving. You now have tips to adjust spices and boost flavor. Plus, there are ideas for variations and storage. This chili is easy and healthy. It fits any meal plan. Enjoy sharing it with friends and family. Now it’s time to make your own delicious chili!

Vegetarian Three Bean Chili Flavorful and Easy Recipe

Are you ready to spice up your dinner with a hearty Vegetarian Three Bean Chili? This easy recipe bursts with

- 1 lb ground beef - 1 medium onion, finely diced - 2 cloves garlic, minced - 1 bell pepper, diced - 1 can (15 oz) kidney beans, rinsed and drained - 1 can (15 oz) black beans, rinsed and drained - 1 can (28 oz) crushed tomatoes - 2 tablespoons chili powder - 1 tablespoon ground cumin - 1 teaspoon smoked paprika - 1 teaspoon salt - ½ teaspoon black pepper - Optional toppings: shredded cheese, sour cream, chopped green onions, sliced avocado To make a great beef chili, start with quality ingredients. Using fresh ground beef gives the best flavor. I love to add a medium onion, finely diced, to build a solid base. The garlic adds depth, while the diced bell pepper offers sweetness. Next, canned ingredients bring convenience and taste. Kidney beans and black beans add protein and texture. Crushed tomatoes bind everything together and form a rich sauce. Spices are key to great flavor. Chili powder gives heat and warmth. Ground cumin adds earthiness, while smoked paprika offers a hint of smoke. Salt and black pepper balance the dish. Don't forget the toppings! Shredded cheese and sour cream add creaminess. Fresh chopped green onions and sliced avocado bring brightness and crunch. For the full recipe, check out the [Full Recipe]. - Set to 'Sauté' function and heat olive oil. - Sauté onions and bell pepper for 3-4 minutes. Start by turning on your Instant Pot. Choose the 'Sauté' setting, and let it heat up. When the oil shimmers, add the diced onion and bell pepper. Cook them until they soften and smell great. - Add minced garlic and ground beef. - Brown the meat for 5-6 minutes. Next, toss in the minced garlic and ground beef. Use a spatula to break the beef apart. Cook it for about 5-6 minutes until it's browned and no longer pink. This step adds deep flavor to your chili. - Drain excess grease if necessary. - Incorporate spices and combine well. If there's too much grease, carefully drain it off. Now, sprinkle the chili powder, cumin, smoked paprika, salt, and black pepper into the pot. Stir everything together so the beef gets coated in those tasty spices. - Add canned ingredients and beef broth. - Secure lid, set to 'Sealing,' and cook on 'Manual' for 15 minutes. Pour in the crushed tomatoes, kidney beans, black beans, and beef broth. Mix well until all ingredients combine. Secure the lid on the Instant Pot, making sure the steam release valve is set to 'Sealing.' Then, select 'Manual' and set it for 15 minutes. - Allow a 10-minute natural release before venting. Once the 15 minutes are up, let the pot sit for 10 minutes to release pressure naturally. After that, carefully switch the valve to 'Venting' to let out any remaining steam. Don’t forget to taste your chili! Adjust seasoning if needed. For the full recipe, check out the details above. Enjoy your hearty chili! To make your beef chili shine, adjust the seasoning to fit your taste. After cooking, taste the chili. If it needs more salt or spice, add a pinch. I often add a bit more chili powder for extra kick. A natural pressure release is key for deep flavor. After the cooking time, let the Instant Pot sit for ten minutes. This slow release keeps the flavors rich and helps the chili thicken. You’ll notice a big difference in taste! For serving, choose vibrant bowls. The colors of the chili pop against bright dishes. Top each bowl with shredded cheese and a dollop of sour cream. Fresh green onions add a nice crunch. Slices of avocado not only look good but also add creaminess. I like to use deep bowls to hold all the toppings. This way, every bite is a mix of flavors. A well-presented dish makes a meal feel special. Enjoy your hearty chili with flair! {{image_4}} You can easily change the meat in this beef chili. Try using ground turkey or chicken instead of beef. This swap reduces fat and gives a lighter taste. Adding more vegetables is another great way to mix things up. You can toss in corn or diced zucchini. These add color, sweetness, and nutrition to your dish. Want to spice things up? You can add different spices or a dash of hot sauce for heat. A little cayenne pepper or jalapeño can make it bold and exciting. Another fun idea is to experiment with sauces. Try adding BBQ or soy sauce. This will give your chili a unique twist and deepen the flavor. If you're looking for a gluten-free option, this chili is easy to adapt. Just ensure your spices and broth are gluten-free. You can also make it low-carb. Simply skip the beans and add more veggies instead. For a full experience, check out the Full Recipe to see how these variations fit in! Store your beef chili in an airtight container. This keeps it fresh and tasty. You can keep it in the fridge for about 3 to 4 days. Make sure to let the chili cool down before sealing it. This helps to avoid moisture build-up. You can freeze the chili for longer storage. Place the cooled chili in a freezer-safe container. Leave some space at the top for expansion. It can last for up to 3 months in the freezer. When you want to eat it, thaw the chili in the fridge overnight. You can reheat it in the microwave or on the stove. If using the stove, heat it on low and stir often. Add a splash of water or broth if it seems too thick. This keeps it smooth and delicious. For the full recipe, check out the recipe section above. Beef chili lasts about 3 to 4 days in the fridge. Store it in an airtight container. This keeps it fresh and safe to eat. Make sure to cool the chili before placing it in the fridge. If you want it to last longer, consider freezing it. Yes, you can make chili without beans. Just skip the beans in the recipe. You can add more meat or vegetables instead. Some great options are corn, bell peppers, or zucchini. This keeps the chili hearty and tasty. You can serve beef chili with many side dishes. Here are some ideas: - Cornbread - Rice - Tortilla chips - A fresh green salad - Avocado slices These sides can balance the rich flavors of the chili. You can double the recipe in the Instant Pot. Just make sure not to fill it beyond the max line. You may need to adjust the cooking time. Try adding about 5 more minutes. This ensures everything cooks well. In this blog post, we explored how to make beef chili in an Instant Pot. We covered essential ingredients, cooking steps, and helpful tips. Remember, adjusting spices can enhance flavor, and presentation matters too. You can swap beef for turkey or add extra veggies for variety. Store your chili properly to enjoy it later. With these insights, you now have a reliable recipe for a comforting meal. Enjoy your cooking and the satisfaction it brings!

Instant Pot Beef Chili Flavorful and Hearty Meal

Craving a warm, hearty meal? Look no further than this Instant Pot Beef Chili! With tender beef, savory beans, and

- 1.5 lbs boneless, skinless chicken breasts - 1 can (15 oz) white beans, drained and rinsed - 1 can (4 oz) diced green chilies - 1 can (15 oz) corn, drained - 1 small onion, finely chopped - 2 cloves garlic, minced - 1 cup low-sodium chicken broth The main ingredients create a great base for this dish. The boneless chicken offers lean protein. White beans add fiber and texture. Diced green chilies give it a mild heat. Corn adds sweetness and crunch. Onion and garlic boost flavor. Chicken broth ties it all together. - 1 tsp ground cumin - 1 tsp paprika - 1 tsp dried oregano - 1/2 tsp salt - 1/2 tsp black pepper Spices make this dish pop. Ground cumin brings warmth. Paprika adds a slight smokiness. Oregano adds depth. Salt and pepper enhance the flavors. Adjust these to your taste if you want a bolder flavor. - 1 cup sour cream - 1/2 cup cream cheese, softened - Fresh cilantro for garnish Creamy additions give this chili its rich texture. Sour cream adds tanginess. Cream cheese makes it super creamy. Fresh cilantro brightens the dish and adds color. These toppings elevate your bowl of chili to a whole new level. For the full recipe, check out the detailed instructions to make this comforting dish! - Place chicken breasts in slow cooker - Ensure even distribution of chicken To start, I place the boneless, skinless chicken breasts evenly at the bottom of my slow cooker. This step is key. It helps the chicken cook well and soak up all the flavors. When the chicken is spread out, it cooks evenly, leading to a great taste in every bite. - Combine beans, chilies, corn, onion, garlic, and broth - Stir in spices thoroughly Next, I grab a mixing bowl. I combine the drained white beans, diced green chilies, drained corn, finely chopped onion, minced garlic, and chicken broth. After that, I stir in the spices: ground cumin, paprika, dried oregano, salt, and black pepper. Mixing these ingredients well is crucial. It ensures each spoonful is packed with flavor. - Pour mixture over chicken and cover - Choose low (6 hours) or high (3 hours) setting Then, I pour the flavorful mixture over the chicken in the slow cooker. I make sure the chicken gets coated nicely. After that, I cover the slow cooker with its lid. This is where the magic happens! I choose the cooking time: low for 6 hours or high for 3 hours. Either way, my chili will turn out delicious. - Remove chicken from slow cooker - Shred using two forks When cooking time is up, I carefully lift the chicken out of the slow cooker using tongs. I then shred the chicken into bite-sized pieces using two forks. This step brings the dish together, making it easy to eat. - Return shredded chicken to slow cooker - Mix in sour cream and cream cheese - Cook an additional 15 minutes on low Finally, I return the shredded chicken back into the slow cooker. I mix in the sour cream and softened cream cheese, stirring until everything is creamy and smooth. This makes the chili rich and comforting. I cover the slow cooker one last time and let it cook on low for an additional 15 minutes. This step melds all the flavors beautifully. If you're curious about the full details, check out the Full Recipe! - Place the chicken breasts evenly in the slow cooker. This helps them cook well. - Use low heat for longer cooking times, about six hours. High heat cooks in three hours. This gives the flavors time to blend. - Add spices like chili powder or coriander for more depth. - Squeeze some lime juice to brighten the dish. This adds a nice acidic touch. - Serve the chili in warm bowls for a cozy feel. - Top with fresh cilantro and a dollop of sour cream. - Pair with crispy tortilla chips or fluffy rice on the side. This adds texture and balance. For a full recipe, refer to the Slow Cooker Creamy Green Chili Chicken. {{image_4}} If you want to switch things up, try using turkey instead of chicken. Ground turkey works well and keeps the dish light. You can also use shredded rotisserie chicken for a quick option. For beans, chickpeas or black beans can add a nice twist. If you prefer a different flavor, swap the white beans for pinto beans. When it comes to peppers, feel free to use red or yellow bell peppers instead of green. They add a sweet touch and a pop of color. To change the heat, think about what you like. If you want it spicier, add chopped jalapeños or a pinch of cayenne pepper. Start with a small amount and taste as you go. You can always add more, but it’s hard to take it out if it gets too hot! For a milder flavor, leave out the spicy ingredients. You can also balance out the heat with a dash of lime juice or a bit of sugar. If you want to make this dish dairy-free, use coconut cream instead of sour cream and cream cheese. This keeps the dish creamy while adding a hint of sweetness. For a veggie-based option, replace the chicken with diced zucchini or mushrooms. You can add more beans or corn to fill out the meal. These swaps create a delicious meal that everyone can enjoy. Check out the Full Recipe for more ideas! After you enjoy your Slow Cooker White Chicken Chili, let it cool down. Store any leftovers in the fridge. Use airtight containers to keep it fresh. I recommend glass or BPA-free plastic containers. This helps prevent spills and keeps flavors intact. If you want to save some for later, freezing is a great option. First, let the chili cool completely. Then, portion it into freezer-safe bags or containers. Squeeze out as much air as possible before sealing. This helps prevent freezer burn. When you're ready to eat, thaw it in the fridge overnight. Reheat on the stove or in the microwave until hot. In the fridge, your chili stays fresh for about 3 to 4 days. In the freezer, it can last up to 3 months. Just make sure to label your containers with the date. This way, you’ll know when it’s time to enjoy it again. You can add heat by including jalapeños or cayenne pepper. Try adding a chopped jalapeño when mixing the other ingredients. If you like it really hot, use more cayenne. Adjust the heat to your taste! Yes, you can use frozen chicken. Just add an extra hour to the cooking time on low. This helps ensure the chicken cooks thoroughly and stays juicy. I suggest serving it with tortilla chips or a fresh salad. You could also try cornbread or rice for a nice balance. These sides complement the chili's flavors well. If your chili is watery, you can mix in a bit of cornstarch. Mix one tablespoon of cornstarch with cold water before adding it to the slow cooker. Let it cook for a few more minutes to thicken. Yes, you can make this chili on the stovetop! Just cook the chicken in a pot first, then add the other ingredients. Let it simmer for about 30 minutes, stirring often. This method is quick and still tasty. Yes, you can make this dish gluten-free. Just check the labels on your beans, broth, and seasonings. Many brands offer gluten-free options, making it easy to enjoy this chili without worry. This blog post covered how to make delicious slow cooker white chicken chili. You learned about the key ingredients, cooking steps, and tips to enhance flavor. I shared how to customize the dish for your taste and dietary needs. Remember, this recipe is flexible and fun to make. You can serve it with rice or tortilla chips for a complete meal. Enjoy making this hearty dish that is sure to please everyone. Happy cooking!

Slow Cooker White Chicken Chili Simple and Comforting Dish

If you’re searching for a simple and heartwarming meal, try my Slow Cooker White Chicken Chili. This dish combines tender

- Chicken: I prefer using boneless, skinless chicken breast for this soup. It cooks evenly and stays tender. You can also use chicken thighs. They add more flavor and richness, but they take a bit longer to cook. - Broth: Low-sodium chicken broth is vital. It allows you to control the saltiness of your soup. A good broth enhances all the flavors without overwhelming them. - Gnocchi: I recommend using fresh gnocchi when possible. It cooks quickly and has a lovely texture. Shelf-stable gnocchi works too, but it may need a little more time to cook. - Vegetables: Adding carrots and spinach boosts the flavor. You can also try adding peas or mushrooms for extra depth. These veggies add color and nutrients to your meal. - Seasonings: Dried thyme and oregano are my go-to herbs. They add warmth and aroma. For a twist, try adding a pinch of red pepper flakes or fresh basil for a pop of flavor. For the Full Recipe, check out the detailed steps to make this satisfying dish at home. To start, heat olive oil in a large pot over medium heat. Once hot, add chopped onion, diced carrots, and celery. Sauté the vegetables for about 5-6 minutes. You want them soft and the onion should be translucent. Next, add minced garlic, dried thyme, and oregano to the pot. Stir for about a minute. This will release the great smells of the herbs and garlic. Now, add the cubed chicken. Season it with salt and pepper. Cook the chicken for about 7-8 minutes. Stir often to get a nice golden crust on all sides. Once the chicken is browned, pour in the chicken broth. Bring this mix to a boil. When it boils, lower the heat to medium-low. Let it simmer for about 10 minutes. This step helps the flavors blend well. Now, it's time to add the potato gnocchi. Cook them for another 3-4 minutes. You'll know they're done when they float to the surface. Lower the heat to a gentle simmer. Stir in the heavy cream and chopped spinach. Let the soup cook for another 2-3 minutes. This will make the soup rich and creamy. Finally, taste the soup. Adjust salt and pepper as needed. Serve your creamy chicken gnocchi hot. Don't forget to garnish with grated Parmesan cheese for that extra touch of flavor. For the full recipe, click here. - Overcooking chicken: I often see people overcook chicken. To keep it tender, cook it just until it’s no longer pink inside. This usually takes 7-8 minutes. If you cook it longer, the chicken becomes dry. - Adding gnocchi too early: Gnocchi cooks fast. If you add it too soon, it can become mushy. Wait until your soup is almost ready. Once the broth is boiling, toss in the gnocchi. They will float to the top when done. - Deepening flavor profile: To add umami, consider adding mushrooms or soy sauce. These ingredients boost the taste without overpowering the dish. A little goes a long way, so start small and taste as you go. - Recommended cheeses for garnishing: For a delicious finish, use freshly grated Parmesan cheese. It adds a lovely salty note. You can also try Pecorino Romano for a sharper flavor. Just sprinkle it on top right before serving. - Best pots and pans for making soup: A large pot or Dutch oven works best for this soup. They hold heat well and allow for even cooking. Avoid using thin pots, as they can burn the soup. - Tools to streamline the cooking process: A good knife helps with chopping vegetables quickly. A wooden spoon is great for stirring. A ladle makes serving easy. These simple tools make your cooking experience smoother. For the full recipe, check out the Creamy Chicken Gnocchi Delight! {{image_4}} For a lighter chicken gnocchi soup, you can swap out the heavy cream. Use half-and-half or even yogurt. This change keeps the soup creamy but cuts down on calories. You can also choose low-sodium chicken broth. This option helps control your salt intake while still giving great flavor. If you want a vegetarian version, leave out the chicken. Replace it with mushrooms or chickpeas for protein. Use vegetable broth instead of chicken broth. This keeps the soup hearty and satisfying. Don't be afraid to get creative! You can add different proteins, like shrimp or sausage. Each option brings a unique flavor to your soup. Cook shrimp until pink, and sauté sausage until browned. Another fun idea is to play with herbs and spices. Try adding fresh basil for a sweet touch or a pinch of red pepper flakes for warmth. These small changes can really make your soup stand out. For the full recipe, check out the creamy chicken gnocchi delight. To keep your chicken gnocchi soup fresh, use airtight containers. Glass or plastic containers work well. Fill them up, leaving a bit of space at the top. This helps the soup stay fresh and tasty. Store it in the fridge for up to three days. If you want to save it longer, freezing is a great option. Pour the cooled soup into freezer-safe bags or containers. Make sure to remove as much air as possible. This prevents freezer burn. You can freeze it for up to three months without losing flavor. When reheating, avoid the microwave if you can. Instead, use a pot on the stove. Heat it on low, stirring often. This keeps the cream from curdling and helps the soup heat evenly. If the soup looks thick after reheating, add a splash of chicken broth or water. This brings back its nice creamy texture. To refresh the flavors, add fresh herbs like parsley or a sprinkle of Parmesan. This will make it taste just as good as when you first made it. Enjoy! Chicken gnocchi soup stays fresh for about three to four days in the fridge. Make sure to store it in a tight container. This helps keep it safe and tasty. If you want to keep it longer, consider freezing it. Yes, you can make chicken gnocchi soup ahead of time. Prepare the soup and let it cool before storing. You can keep it in the fridge for up to four days. When you are ready to eat, just reheat it on the stove. Add a splash of broth or cream to bring back its creamy texture. Chicken gnocchi soup pairs well with crusty bread or a fresh salad. A side of garlic bread adds a delicious touch. You can also serve it with a light green salad dressed in lemon vinaigrette. These sides enhance the meal and add more flavor to your dining experience. You can create a tasty chicken gnocchi soup easily. We covered key ingredients, from chicken options to broth types. Remember, the right cooking technique affects flavor. Avoid common mistakes, like overcooking chicken or adding gnocchi too early. You can also adapt the recipe for healthier options or personal twists. Store leftovers correctly and reheat them to keep the soup delicious. Enjoy your cooking journey. Your soup can warm the heart and bring joy to the table.

Satisfying Chicken Gnocchi Soup Easy Comfort Meal

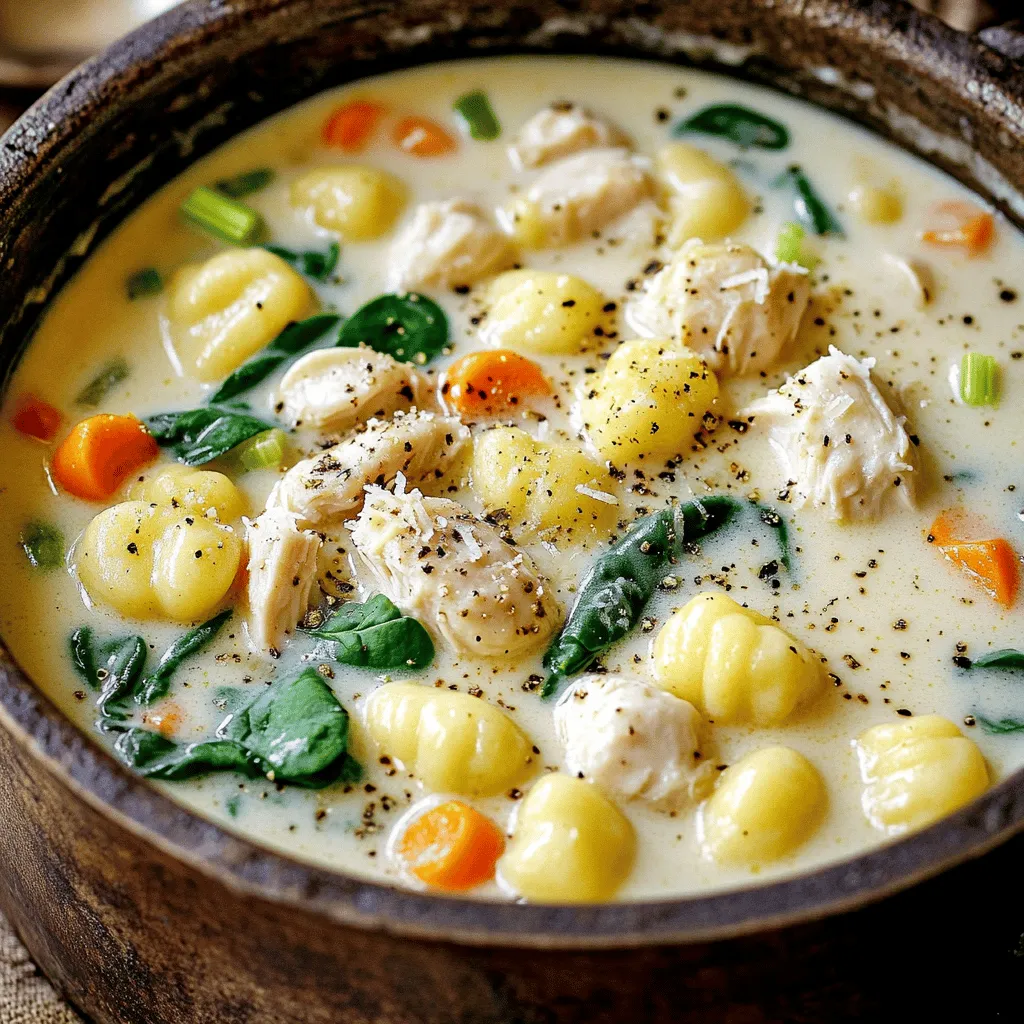
Looking for the ultimate comfort meal? You’ve hit the jackpot with Chicken Gnocchi Soup. This dish is warm, creamy, and

To make Creamy Wild Rice Mushroom Soup, you'll need the following ingredients: - 1 cup wild rice, thoroughly rinsed - 4 cups vegetable broth - 2 tablespoons extra virgin olive oil - 1 medium onion, finely chopped - 3 cloves garlic, minced - 8 ounces cremini mushrooms, thinly sliced - 1 cup carrots, diced into small pieces - 1 cup celery, diced - 1 teaspoon dried thyme - 1/2 teaspoon smoked paprika - Sea salt and freshly cracked black pepper to taste - 1 cup heavy cream (or substitute with coconut milk for a lighter option) - 2 tablespoons fresh parsley, finely chopped (for garnish) These ingredients blend well to create a rich and hearty flavor. Using fresh ingredients is best for this soup. Fresh vegetables add more flavor and nutrients. They also have better texture. Fresh herbs, like parsley, enhance the taste as well. Dried herbs can work, but they lack the punch of fresh ones. If you use dried thyme, the flavor may be less intense. You can use them if fresh is not available. Just remember to reduce the amount since dried herbs are stronger. You can make some easy swaps if you're missing an ingredient. Here are a few ideas: - Wild rice: You can use brown rice or quinoa. Adjust the cooking time as needed. - Vegetable broth: Chicken broth is a good alternative if you don’t have veggie broth. - Heavy cream: Coconut milk works well for a lighter option. It gives a nice, creamy texture. - Cremini mushrooms: You can swap these for button mushrooms or shiitake mushrooms for a different flavor. These substitutions keep the soup tasty and comforting. Feel free to mix and match based on what you have at home. For the full recipe, check out the earlier section. Start by heating the olive oil in a large pot over medium heat. You want it shimmering but not smoking. Add the finely chopped onion and minced garlic. Sauté them for 3-4 minutes. You will know they are ready when the onion looks translucent and smells great. Next, add the sliced cremini mushrooms to the pot. Stir them well and cook for 5-7 minutes. The mushrooms will become soft and release their moisture. This step builds a deep flavor base for your soup. After the mushrooms, toss in the diced carrots and celery, along with dried thyme and smoked paprika. Stir continuously for about 3 minutes. This lets the vegetables soften and mix together nicely. Now it’s time to add the vegetable broth and rinsed wild rice. Carefully pour them into the pot. Bring the mixture to a rolling boil. Then, lower the heat to a gentle simmer. Cover the pot with a lid and let it cook for about 45 minutes. The wild rice should be fully cooked and tender. Once it's done, stir in the heavy cream or coconut milk. Season with sea salt and freshly cracked black pepper. Let the soup simmer for another 10 minutes. This helps all the flavors blend together beautifully. You can find the complete directions in the Full Recipe. To get the right texture in your creamy wild rice mushroom soup, focus on cooking time. The wild rice should be tender but not mushy. Stir the soup gently as it simmers. This helps keep the rice intact. If you want a thicker soup, blend a small portion of it. This adds creaminess and maintains some texture. Flavor is key to a great soup. Use fresh herbs like thyme for a bright touch. You can also add a splash of lemon juice at the end. This brightens the flavors and adds depth. If you like heat, a pinch of red pepper flakes works well. Consider adding a splash of soy sauce for a savory boost. Always taste and adjust the seasoning to your liking. Having the right tools makes cooking easier. A large pot is essential for this soup. A wooden spoon is great for stirring without scratching the pot. Use a sharp knife for chopping vegetables. A cutting board is also a must. If you plan to blend part of the soup, a hand blender is handy. For the full recipe, check the detailed steps to ensure success. {{image_4}} To make this soup vegan, swap heavy cream for coconut milk. Coconut milk gives a rich taste while keeping it dairy-free. Use vegetable broth for the base. This option is creamy and full of flavor. You can also skip the cream altogether and add more veggies for a lighter soup. Want extra protein? Add cooked lentils or chickpeas. These options blend well with the soup's flavors. They also add a nice texture. For a non-vegan choice, shredded chicken or turkey works great too. Simply stir in your choice during the last few minutes of cooking. Feel free to get creative! Instead of cremini mushrooms, use shiitake or portobello. Each type brings a unique flavor. You can also switch wild rice for brown rice or quinoa. Just adjust the cooking time. Add greens like spinach or kale for a nutrient boost. These swaps keep the dish fresh and exciting! For the complete recipe, check out the Full Recipe section. After making your creamy wild rice mushroom soup, let it cool down. Once cool, transfer it to an airtight container. Store it in the fridge for up to three days. Make sure to cover it well to keep the flavors fresh. You can freeze this soup to enjoy later. Pour the cooled soup into freezer-safe containers. Leave some space at the top since the soup will expand when frozen. It can last for about three months in the freezer. To reheat, thaw it overnight in the fridge. Heat it in a pot on low, stirring often, until warm. When stored properly, the soup lasts in the fridge for about three days. If frozen, it can last up to three months. Always check for any changes in smell or texture before eating. If it looks or smells off, it's best to toss it. Enjoy the rich flavors while they last! Yes, you can use other types of rice. Brown rice works well, but it takes longer to cook. White rice cooks faster, but it may become mushy. Keep in mind that wild rice adds a unique flavor and texture. If you swap, adjust the cooking time based on the rice type. This soup lasts about 3 to 5 days in the fridge. Store it in an airtight container for best results. Make sure to let it cool before sealing. If the soup thickens, just add a little broth when reheating. This keeps it creamy and delicious. You can serve this soup with warm crusty bread or a fresh side salad. Grilled cheese sandwiches pair nicely for a cozy meal. You might also enjoy it with a light pasta dish. These sides will complement the rich flavors of the soup well. For the full recipe, check out the Creamy Wild Rice Mushroom Soup section above! In this blog post, we explored how to make a delicious creamy wild rice mushroom soup. We went over the key ingredients and where to find the best ones. I shared step-by-step instructions for cooking and texture tips to enhance your soup. We also discussed how to store it for later use. Don’t forget, you can tweak this recipe to fit your needs, whether you want vegan options or extra protein. Enjoy making a dish that warms the heart and pleases the taste buds!

Creamy Wild Rice Mushroom Soup Hearty and Delicious Mix

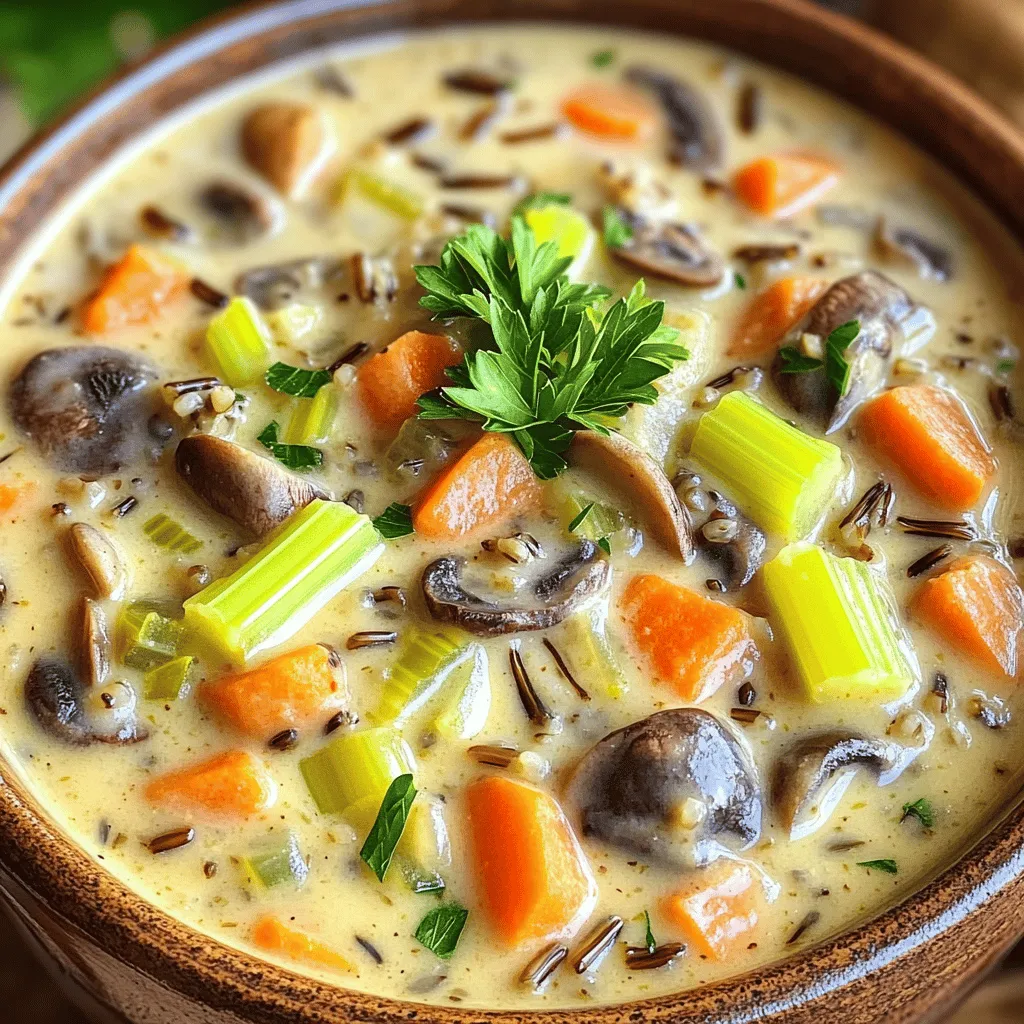
If you’re craving a warm and cozy dish, look no further! This Creamy Wild Rice Mushroom Soup is hearty, filling,

Older posts
Newer posts
← Previous Page1 … Page25 Page26 Page27 … Page120 Next →

dsad

© 2026 recipetorch • Built with GeneratePress

Our Policies

  • Copyright Policy
  • Cookie Policy
  • GDPR Policy
  • Privacy Policy
  • Disclaimer
  • Terms Of Use

More Information

  • Home
  • About
  • Contact
  • Appetizers
  • Dessert
  • Dinner
  • Drinks
©2026, recipetorch About Back To Top