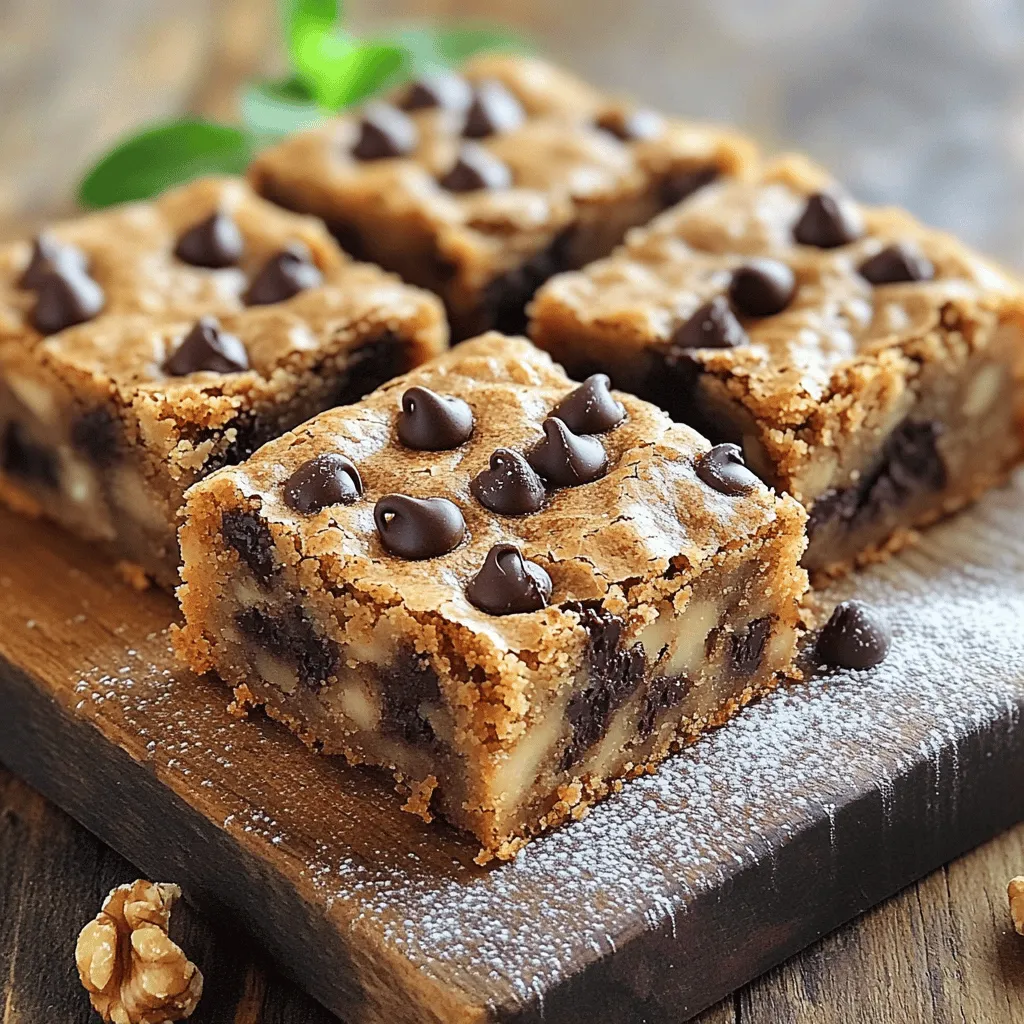
Almond Butter Chocolate Chip Blondies Simple Delight
Are you ready to indulge in a treat that’s both simple and delicious? Almond Butter Chocolate Chip Blondies are the
Are you ready to indulge in a treat that’s both simple and delicious? Almond Butter Chocolate Chip Blondies are the

Get ready to indulge in a rich and creamy dish that will elevate any meal: Cheesy Scalloped Potatoes! With layers
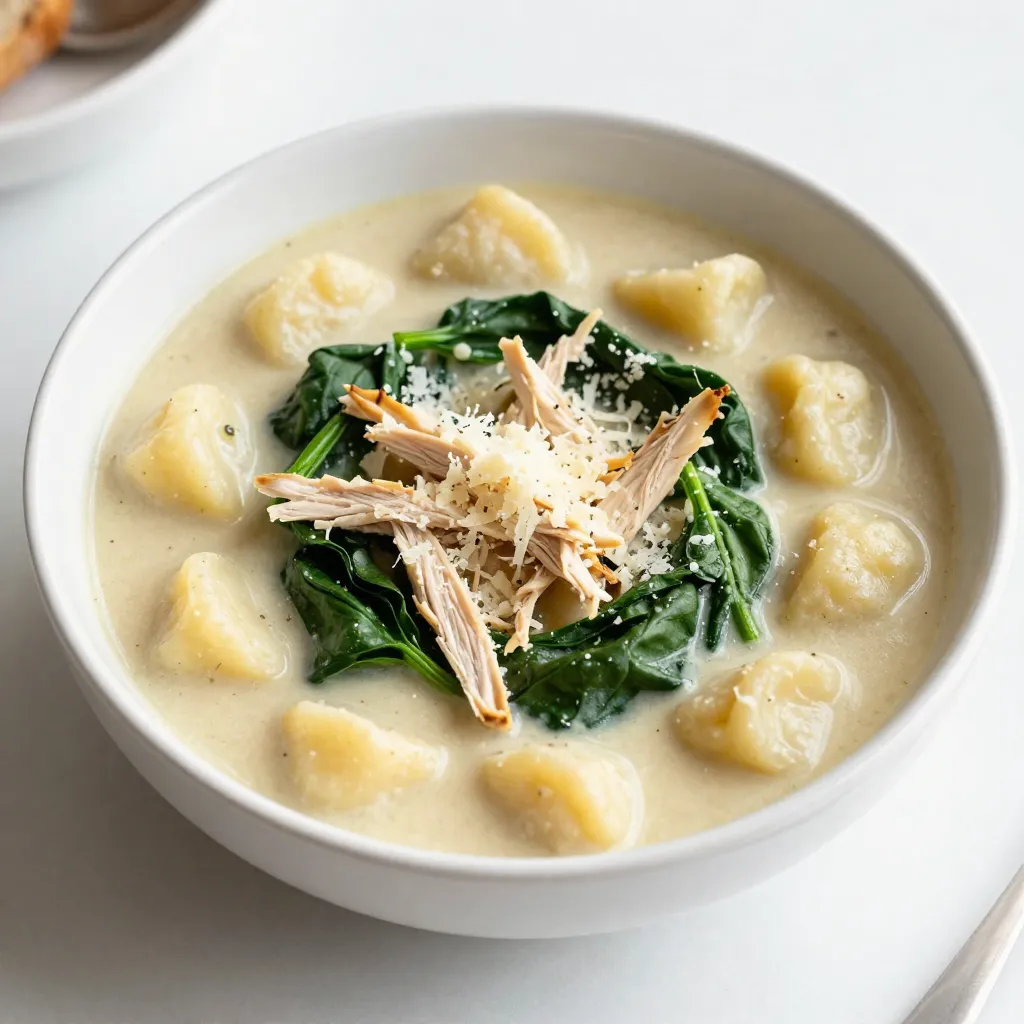
Are you ready for a warm and creamy bowl of comfort? My Creamy Garlic Chicken Gnocchi Soup is both easy

If you crave a cookie that hits the sweet spot, you’ve come to the right place! My Chewy Gingersnap Cookies

Are you ready to make dinner easy and delicious? In this post, I’ll show you how to create Honey Mustard

Welcome to the world of Almond Butter Banana Muffins! These soft and fluffy treats are perfect for breakfast or a

Looking for a fresh and tasty dish? My Greek Orzo Salad is packed with flavor and easy to make. It’s
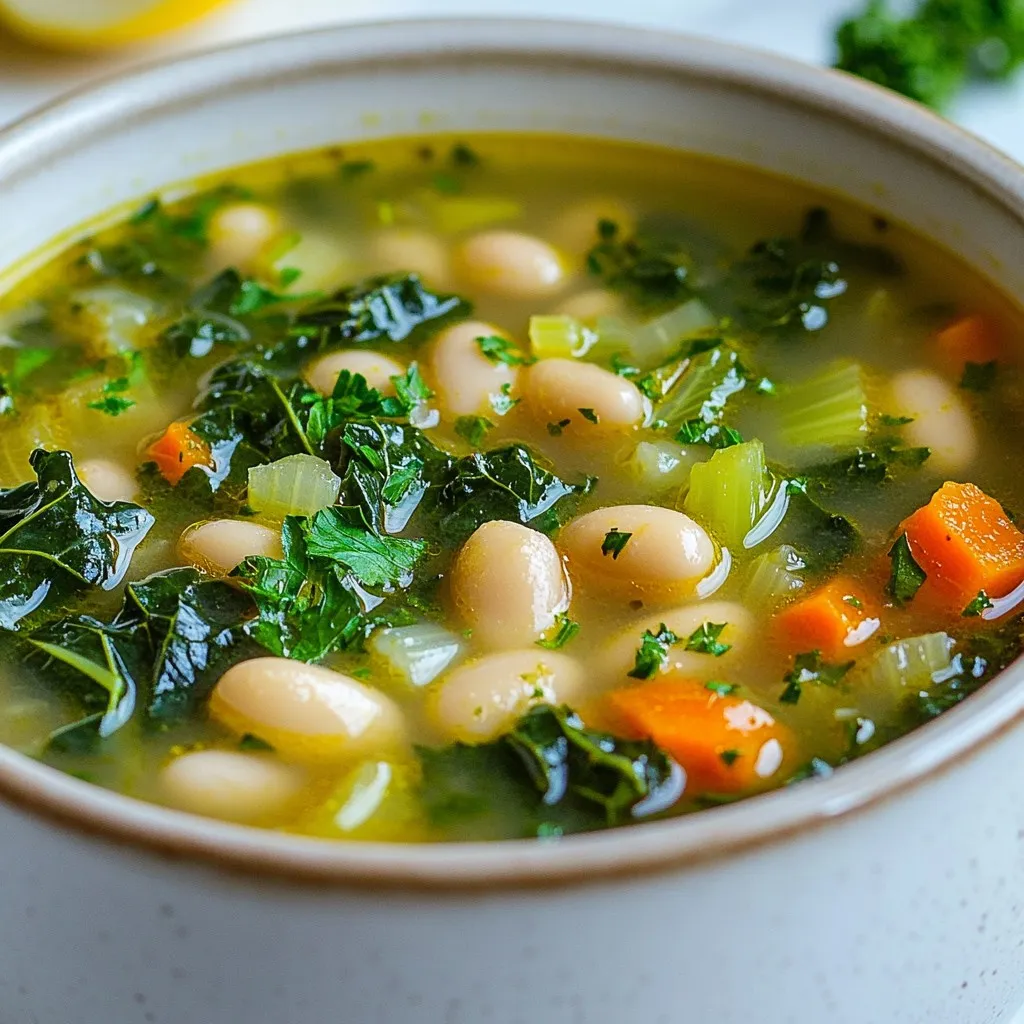
If you’re looking for a meal that warms the soul, try Tuscan White Bean Kale Soup. This hearty dish combines

If you’re ready to elevate your comfort food game, cheesy garlic mashed cauliflower is a must-try! This creamy side dish
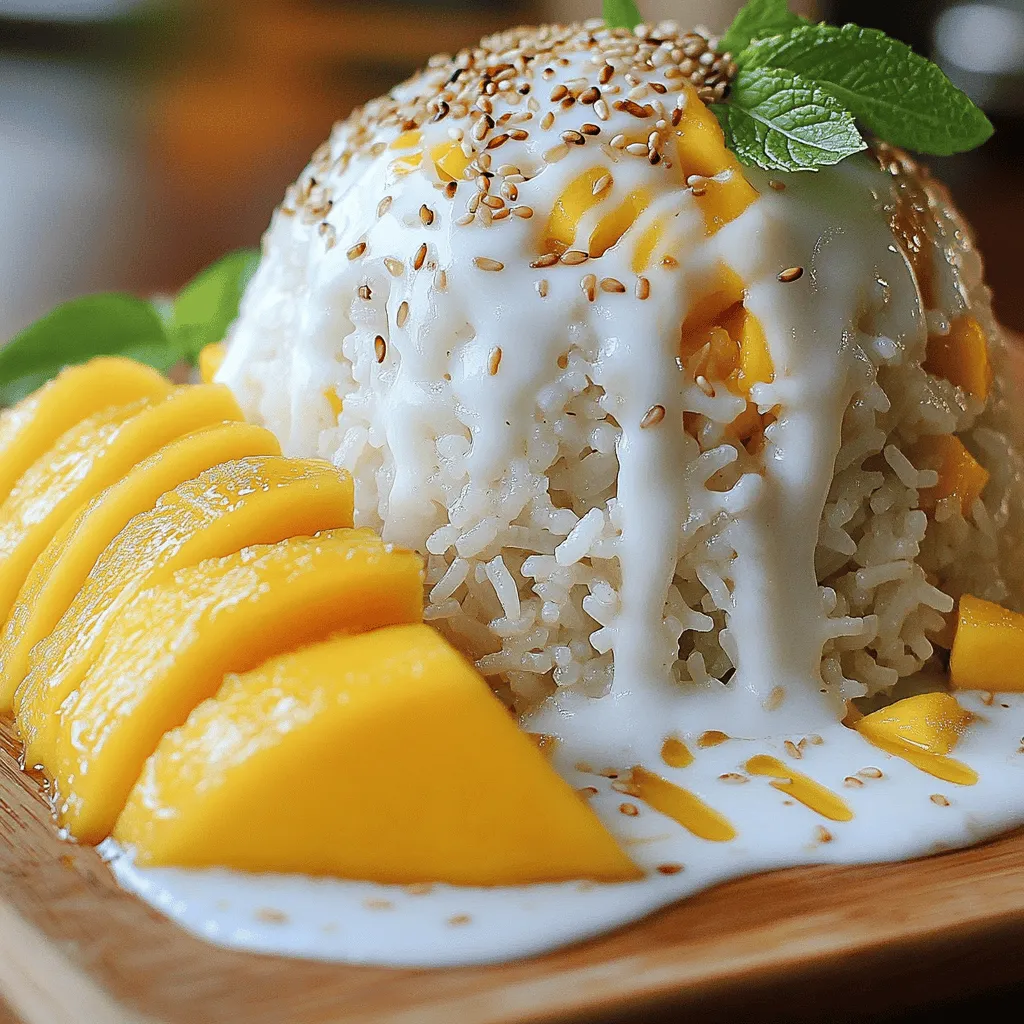
Thai Mango Sticky Rice is a sweet treat you don’t want to miss. This delightful dessert combines soft, sticky rice
