Skip to content
DisclaimerTerms Of UseGDPR PolicyCookie Policy

recipetorch

  • Home
  • Drinks
  • Appetizers
  • Dinner
  • Dessert
  • About
  • Contact
  • Privacy Policy
DisclaimerTerms Of UseGDPR PolicyCookie Policy

Nicole

- 4 bone-in, skin-on chicken thighs - 1 pound baby potatoes, halved - 2 cups broccoli florets - 1 large lemon, zested and juiced - 4 cloves fresh garlic, minced - 2 tablespoons extra virgin olive oil - 1 tablespoon fresh rosemary, finely chopped - 1 tablespoon fresh thyme, finely chopped - Salt and freshly ground black pepper, to taste - Lemon slices, for garnish If you want to switch things up, use different herbs. Try dried herbs if you don't have fresh ones. For the chicken, boneless thighs work, but keep an eye on cooking time. You can also use chicken breasts for a leaner option. Instead of broccoli, use green beans or asparagus for a nice crunch. If you can't find baby potatoes, any small potato will do. Just cut them into similar sizes for even cooking. This meal is well-balanced. Each serving offers protein from chicken, fiber from veggies, and healthy fats from olive oil. Here’s a rough breakdown per serving: - Calories: 450 - Protein: 30g - Carbohydrates: 35g - Fat: 20g - Fiber: 6g This dish not only tastes great but also gives you nutrients to keep you feeling good. {{ingredient_image_2}} Start by preheating your oven to 425°F (220°C). This heat will cook the chicken evenly. While the oven warms up, get your ingredients ready. Gather the chicken, baby potatoes, and broccoli. Halve the baby potatoes and rinse the broccoli florets. Having everything prepped makes cooking easier. In a mixing bowl, combine the olive oil, lemon juice, lemon zest, and minced garlic. Add the chopped rosemary and thyme. Sprinkle in salt and pepper. Whisk until mixed well. Next, add the chicken thighs. Make sure they get coated in the marinade. Let them sit for at least 15 minutes. This marinating time lets the flavors soak in. Now, it's time to roast! Take a large sheet pan and place the halved potatoes in a single layer. Drizzle a bit of olive oil and add salt and pepper. Toss the potatoes so they are covered. Place the marinated chicken thighs in the middle of the pan. Scatter the broccoli around the chicken and potatoes. Drizzle with olive oil and season with salt and pepper. Slide the sheet pan into the oven and roast for 25-30 minutes. Check that the chicken reaches an internal temperature of 165°F (74°C). The potatoes should be fork-tender. For a crispier finish, switch your oven to broil for 2-3 minutes. Keep a close watch to avoid burning. Once done, take the pan out and let it rest for about 5 minutes. This helps keep the chicken juicy. Finally, garnish with lemon slices and extra herbs for a bright touch. Serve warm and enjoy your meal! To get perfectly cooked chicken, check the internal temperature. Use a meat thermometer to see if it’s 165°F (74°C). This is key for juicy chicken. If you don’t have a thermometer, check that the juices run clear when you cut into the chicken. The potatoes should be fork-tender, and the broccoli should be bright green and tender. For a flavor boost, use fresh herbs. Rosemary and thyme add great taste. You can also add crushed red pepper for a bit of heat. When marinating, let the chicken sit for at least 15 minutes. For more flavor, try marinating longer, even overnight. This will really let the lemon and herbs soak in. Don’t forget to season the vegetables too! A sprinkle of salt and pepper goes a long way. If you have leftover marinade, store it in the fridge for up to three days. You can use it for other proteins or veggies. For leftover chicken, let it cool, then store it in an airtight container. It can last in the fridge for up to four days. Reheat in the oven or microwave, but avoid overcooking. This keeps the chicken tasty and moist. Pro Tips Marination Time: Let the chicken marinate for at least 30 minutes or up to overnight for maximum flavor absorption. Vegetable Variations: Feel free to swap out the broccoli for other vegetables like asparagus or bell peppers for a different flavor profile. Checking Doneness: Always use a meat thermometer to ensure your chicken is cooked to the safe internal temperature of 165°F (74°C). Serving Suggestions: Pair this dish with a light salad or crusty bread to soak up the delicious juices. {{image_4}} You can mix and match vegetables to suit your taste. Carrots add sweetness and color. Bell peppers bring crunch and a slight sweetness. Zucchini cooks fast and adds a nice texture. Green beans offer a fresh snap. Just chop them into similar sizes for even cooking. Feel free to get creative and use what you have on hand. Chicken thighs work great in this dish, but you can swap them for chicken breasts. If you want a twist, try salmon. Salmon cooks quickly and pairs well with lemon. Just adjust cooking time to about 15-20 minutes. Make sure the internal temperature hits 145°F (63°C). This change brings a new flavor and keeps it fresh. Spices can change the whole dish. If you want heat, add red pepper flakes to the marinade. For a smoky flavor, try smoked paprika. You can also add a pinch of cumin for warmth. Fresh herbs like parsley or dill can brighten the taste. Experiment a bit, and find what makes your taste buds dance. After you enjoy your Lemon Herb Chicken, store leftovers in an airtight container. This keeps the chicken and veggies fresh. You can keep them in the fridge for up to three days. If you want to eat them later, consider freezing for longer storage. To reheat, use an oven or a microwave. For the oven, preheat it to 350°F (175°C). Place the chicken and veggies on a baking sheet. Cover them with foil to keep moisture. Bake for about 15-20 minutes until warmed through. In the microwave, heat in short bursts. Check every minute to avoid drying out the food. You can freeze the Lemon Herb Chicken meal for up to three months. Wrap the chicken and veggies tightly in plastic wrap, then place them in a freezer bag. When ready to eat, thaw overnight in the fridge. Reheat as mentioned to enjoy the dish again. Yes, you can use boneless chicken thighs. They cook faster and still stay juicy. Just adjust the cooking time. Check them around 20 minutes into roasting. Boneless thighs are great for easy eating. The chicken is done when it reaches 165°F (74°C). Use a meat thermometer to check. Insert the thermometer into the thickest part of the chicken. If the juices run clear, it’s also a good sign. Always let the chicken rest for 5 minutes before serving. This helps keep it juicy. Several sides go well with lemon herb chicken. Here are some great options: - Steamed green beans - Quinoa salad - Rice pilaf - Roasted carrots - Mixed greens salad These sides complement the bright flavors of the chicken and add color to your plate. Enjoy experimenting with different combinations! This blog post covers all you need to know about making lemon herb chicken. We talked about the ingredients, step-by-step cooking, and tips for best results. You learned how to store leftovers and variations to try. With this knowledge, you can cook a tasty meal with ease. Enjoy experimenting with flavors and textures. Cooking should be fun, so don’t be scared to try new things. Happy cooking as you make delicious meals that impress everyone!

Lemon Herb Chicken Sheet Pan Dinner Flavor Boost

Looking to spice up your dinner routine? The Lemon Herb Chicken Sheet Pan Dinner is here to excite your taste

- 4 boneless, skinless chicken breasts - 1 cup grated Parmesan cheese - 1 cup panko breadcrumbs - 2 large eggs - 1 teaspoon garlic powder - 1 teaspoon onion powder - 1 teaspoon dried Italian herbs (or oregano) - Salt and pepper to taste - 1/4 cup all-purpose flour - Olive oil, for frying - Fresh parsley, finely chopped (for garnish) You can swap the Parmesan cheese with Pecorino for a stronger flavor. Instead of panko, regular breadcrumbs work, but they will be less crunchy. If you want a lighter option, use egg whites only for breading. You can also use almond flour for a gluten-free version. To save time, prep your ingredients before cooking. Pound the chicken breasts to even thickness and store them in the fridge. Mix the cheese and breadcrumbs ahead of time and keep them in an airtight container. You can also crack the eggs and whisk them in a bowl, then cover it with plastic wrap. This way, when you’re ready to cook, everything is set for quick assembly. {{ingredient_image_2}} Start by setting up your breading station. You need three shallow dishes. In the first dish, add 1/4 cup of all-purpose flour. Sprinkle in a pinch of salt and pepper. In the second dish, crack two large eggs and beat them well. In the third dish, mix 1 cup of grated Parmesan cheese, 1 cup of panko breadcrumbs, 1 teaspoon of garlic powder, 1 teaspoon of onion powder, 1 teaspoon of dried Italian herbs, and a little salt and pepper. This setup makes breading easy and fun! Next, take your chicken breasts. Place each one between two sheets of plastic wrap. Use a meat mallet or a rolling pin to pound them gently. You want the chicken to be about 1/2 inch thick. This step helps the chicken cook evenly. Plus, it keeps the meat nice and tender. Now, let’s bread the chicken. First, coat each piece in the seasoned flour. Make sure to cover both sides. Shake off any extra flour. Next, dip the chicken into the beaten eggs. Ensure both sides are coated well so the crust sticks. Finally, press the chicken into the Parmesan-breadcrumb mixture. Cover both sides completely. This creates a crispy outer layer that you will love! Grab a large skillet and pour in enough olive oil to cover the bottom. You want about 1/4 inch of oil. Heat the skillet over medium heat until the oil shimmers. Carefully place the breaded chicken cutlets in the skillet. Make sure not to overcrowd the pan. Fry each cutlet for about 4-5 minutes on each side. You want them golden brown and cooked through, reaching an internal temperature of 165°F. Once done, place the cutlets on a plate lined with paper towels. This step helps absorb any extra oil. Let them rest for a few minutes before serving. To get that amazing crunch, use panko breadcrumbs. They are larger and crispier than regular breadcrumbs. Make sure to press the chicken well into the breadcrumb mix. This helps the coating stick better. Fry the chicken in hot oil, around 350°F. This temperature gives you a golden crust without burning the meat. One common mistake is overcrowding the pan. This lowers the oil temperature and can lead to soggy chicken. Fry in batches if needed. Another mistake is not seasoning enough. Make sure you season each layer: the flour, egg, and breadcrumbs. This adds depth of flavor. Lastly, don’t skip resting the chicken after frying. This helps keep it juicy inside. Garnishing adds a lovely touch to your dish. Chop fresh parsley and sprinkle it on top of the cutlets. This adds color and a fresh taste. You can also drizzle a bit of olive oil or squeeze lemon juice over them for extra flavor. Serve on a nice platter with a side of roasted veggies or salad. This makes your meal look inviting and tasty. Pro Tips Even Thickness: Ensure that chicken breasts are pounded to an even thickness for uniform cooking and tenderness. Chill Before Frying: Let the breaded chicken sit in the refrigerator for about 15 minutes before frying. This helps the coating adhere better. Oil Temperature: Make sure the oil is hot enough before adding chicken. A shimmering surface indicates it's ready; too cool oil can lead to soggy cutlets. Resting Time: Allow the cooked cutlets to rest for a few minutes after frying. This helps retain moisture and enhances flavor. {{image_4}} You can switch up the flavor by using different cheeses. Try using mozzarella for a gooey, stretchy bite. You can also add some sharp cheddar for a rich taste. Mixing cheeses can make your chicken even tastier. Just replace part of the Parmesan with your favorite cheese. Baking your chicken cutlets is a great way to make them healthier. Instead of frying, place the breaded cutlets on a baking sheet. Spray a light coat of olive oil on top for a crispy finish. Bake them at 400°F for about 20 minutes. This keeps the flavor but cuts down on oil. Adding spices can really take your chicken to the next level. Try adding smoked paprika for a smoky touch. A pinch of cayenne can give it some heat. You can also add fresh herbs like basil or thyme. These little tweaks can create new flavors in your dish. After you enjoy your Parmesan crusted chicken cutlets, store leftovers in an airtight container. Keep them in the fridge for up to three days. Make sure the cutlets are cool before sealing. This helps keep them fresh and tasty. To reheat, use an oven for best results. Preheat it to 350°F (175°C). Place the chicken cutlets on a baking sheet and cover them with foil. Heat for about 10-15 minutes. This method keeps the crust crispy. You can also use a skillet. Heat a bit of olive oil over medium heat and cook for 3-4 minutes on each side. If you have extra cutlets, freezing is a great option. First, let the chicken cool completely. Wrap each cutlet in plastic wrap, then place them in a freezer bag. Remove as much air as possible. They can stay in the freezer for up to three months. When you're ready to eat, thaw them in the fridge overnight before reheating. You can check the chicken with a meat thermometer. The internal temperature should reach 165°F. If you do not have a thermometer, cut into the thickest part of the chicken. The meat should be white, not pink. Juices should run clear, not red. Yes, you can prepare the cutlets ahead of time. Bread the chicken cutlets and store them in the fridge for a few hours. This helps the coating stick better when you cook them. You can also freeze the breaded cutlets for longer storage. Just remember to cook them from frozen, adding a few extra minutes to the cooking time. Many sides go great with these cutlets. Here are some ideas: - Roasted vegetables, like carrots or broccoli - A crisp salad with mixed greens and vinaigrette - Mashed potatoes or creamy polenta - Pasta with marinara or garlic sauce Using panko breadcrumbs gives the cutlets extra crunch. They are lighter and airier than regular breadcrumbs. However, if you don't have panko, you can use regular breadcrumbs. Just know the texture may not be as crispy. In this blog post, we covered the best ingredients for chicken cutlets and tips for preparing them. You learned how to set up a solid breading station, pound chicken breasts, and achieve the perfect crunch. We also explored fun variations and storage tips. Remember, great chicken cutlets can turn any meal into a delight. Follow these steps, avoid common mistakes, and enjoy a crispy, tasty dish anytime. You can impress your friends and family with ease. Happy cooking!

Parmesan Crusted Chicken Cutlets Quick and Tasty Meal

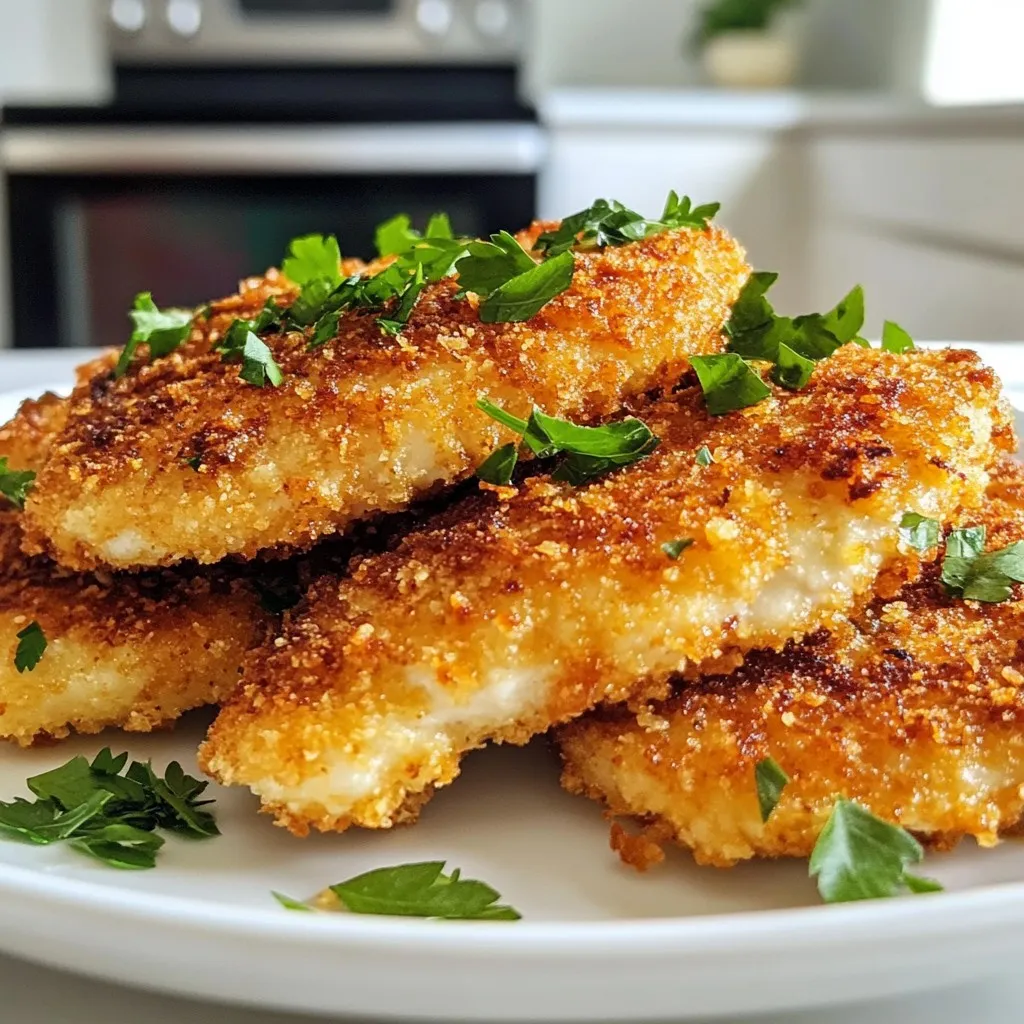
If you want a quick and tasty meal, look no further than Parmesan Crusted Chicken Cutlets! This dish combines juicy

To make the Chocolate Peanut Butter Banana Smoothie, gather these items: - 2 ripe bananas, frozen (sliced before freezing for easier blending) - 2 tablespoons creamy peanut butter (or crunchy, for added texture) - 1 cup unsweetened almond milk (or your preferred milk alternative) - 2 tablespoons unsweetened cocoa powder - 1 tablespoon honey or maple syrup (optional, adjust to taste for extra sweetness) - 1/2 teaspoon pure vanilla extract - A pinch of sea salt - Ice cubes (optional, for a thicker and chillier texture) If you need different measurements, here are some conversions: - 2 tablespoons = 1 ounce - 1 cup = 8 fluid ounces - 1 tablespoon = 3 teaspoons These conversions help in scaling the recipe up or down as needed. You can swap some ingredients if needed: - Bananas: Use 1 cup of unsweetened applesauce for a different flavor. - Peanut Butter: Almond butter or sunflower seed butter works too. - Milk: Any milk alternative, like soy or oat milk, is great. - Cocoa Powder: Carob powder can replace cocoa for a unique taste. - Sweetener: Use agave nectar or stevia if you want a low-calorie option. Feel free to mix and match these ingredients to suit your taste or dietary needs! {{ingredient_image_2}} To make a great smoothie, you need good ingredients. Start with ripe bananas. They should be frozen before use. Slice the bananas into smaller pieces before freezing. This makes blending much easier. Use creamy peanut butter for smoothness or crunchy for some texture. You can choose unsweetened almond milk or any milk you like. In a sturdy blender, add the frozen banana slices. Next, spoon in the peanut butter. Pour in the almond milk and add cocoa powder. If you like sweetness, add honey or maple syrup. Don’t forget the vanilla extract and a pinch of sea salt. Blend everything on high speed. Watch as the mix turns smooth and creamy. If your smoothie is too thick, you can fix it. Slowly add a little more almond milk while blending. Keep blending until it reaches your desired thickness. For a cooler, frosty drink, toss in some ice cubes. Blend it again until the ice is gone. Taste your smoothie. If it needs more sweetness, add more honey or maple syrup. Blend again to mix it well. To get a smooth and creamy blend, use frozen bananas. I suggest slicing them before freezing. This helps them blend easily. If the smoothie is too thick, add a splash more almond milk. Blend again until you reach the right texture. Taste your smoothie before serving. If you find it needs more sweetness, add honey or maple syrup. Start with a small amount. You can always add more if you like. Remember, the ripeness of your bananas also affects the sweetness. Store your ripe bananas in the freezer for the best results. You can keep almond milk in your fridge for a long time. If you have leftover smoothie, store it in an airtight container. It will stay fresh for one day in the fridge. Just give it a good stir before enjoying it again. Pro Tips Frozen Bananas are Key: Using frozen bananas not only makes the smoothie creamier but also eliminates the need for ice, keeping the flavors more concentrated. Nut Butter Variations: Experiment with different nut butters like almond or cashew for unique flavor profiles and added nutritional benefits. Sweetness Control: Adjust the sweetness by starting with less honey or maple syrup and adding more as needed, ensuring you achieve your preferred taste. Boost with Add-ins: For extra nutrition, consider adding a scoop of protein powder, spinach, or chia seeds to enhance the health benefits without altering the flavor significantly. {{image_4}} You can easily change up the flavors in your chocolate peanut butter banana smoothie. Here are some fun ideas: - Protein Powder: Add a scoop of your favorite protein powder. This gives your smoothie an extra boost. - Chia Seeds: Toss in a tablespoon of chia seeds for added fiber and omega-3s. - Spinach: A handful of fresh spinach blends well. It adds nutrients without changing the taste. - Coconut: Add shredded coconut for a tropical twist. It gives a nice texture and flavor. Experiment with these options to find your favorite mix! This smoothie is easy to adapt to fit your diet. Here’s how: - Vegan: Use almond milk or any plant-based milk. Skip honey and use maple syrup instead. - Low-Sugar: Use unsweetened cocoa powder and skip the sweeteners. The bananas add natural sweetness. - Nut-Free: Swap peanut butter for sunflower seed butter. This keeps it nut-free and still tasty. These changes make the smoothie fit your needs without losing flavor. Seasonal fruits can give your smoothie a fresh twist. Try these swaps: - Summer: Use fresh strawberries or blueberries. They add a burst of color and flavor. - Fall: Add pumpkin puree and a sprinkle of cinnamon for a cozy autumn vibe. - Winter: Use frozen cherries or a mix of frozen berries. They keep the smoothie cold and yummy. Switching ingredients with the seasons keeps your smoothie exciting and delicious! This smoothie packs a punch with its key ingredients. Each one brings its own special benefits. - Bananas: They give you potassium and vitamins. This helps your heart and muscles. - Peanut Butter: It's high in protein and healthy fats. This keeps you full longer. - Almond Milk: Low in calories and dairy-free. It is also a good source of vitamins. - Cocoa Powder: Rich in iron and magnesium. It adds flavor and health benefits. - Honey or Maple Syrup: These natural sweeteners can offer some vitamins. This smoothie is great for energy. The mix of protein and healthy fats helps you feel full. Bananas give you quick energy. Peanut butter keeps you satisfied longer. When you drink this smoothie, you get a nice balance. You won’t feel hungry right away. This makes it a perfect snack or meal replacement. Cocoa powder is a star in this recipe. It has antioxidants that help fight free radicals. These free radicals can speed up aging and cause illness. Using unsweetened cocoa gives you all the benefits without extra sugar. This makes your smoothie tasty and healthy. Enjoy it knowing you are treating your body well! Yes, you can use fresh bananas. However, frozen bananas make the smoothie creamier and colder. If you use fresh ones, add ice cubes for that chill. Frozen bananas also give a thicker texture. To make this smoothie dairy-free, use almond milk or another plant-based milk. Soy, oat, or coconut milk all work well. Just make sure to choose unsweetened versions for a healthy option. This way, you still enjoy a creamy taste without dairy. You can add many fun ingredients! Try adding spinach for a healthy boost. A scoop of protein powder can help fuel your day. You could also mix in chia seeds for extra texture. If you love spice, a dash of cinnamon adds warmth. In this post, we covered how to make a delicious smoothie. We explored the best ingredients, their measurements, and substitutions. I shared tips on blending and achieving the right consistency. You learned tricks for creaminess and sweetness, along with storage tips. We also discussed variations for different diets and flavors. Lastly, the health benefits highlight the nutrients and energy boosts. Now, go make your smoothie! Enjoy the tasty flavors and great health it brings.

Chocolate Peanut Butter Banana Smoothie Delightful Blend

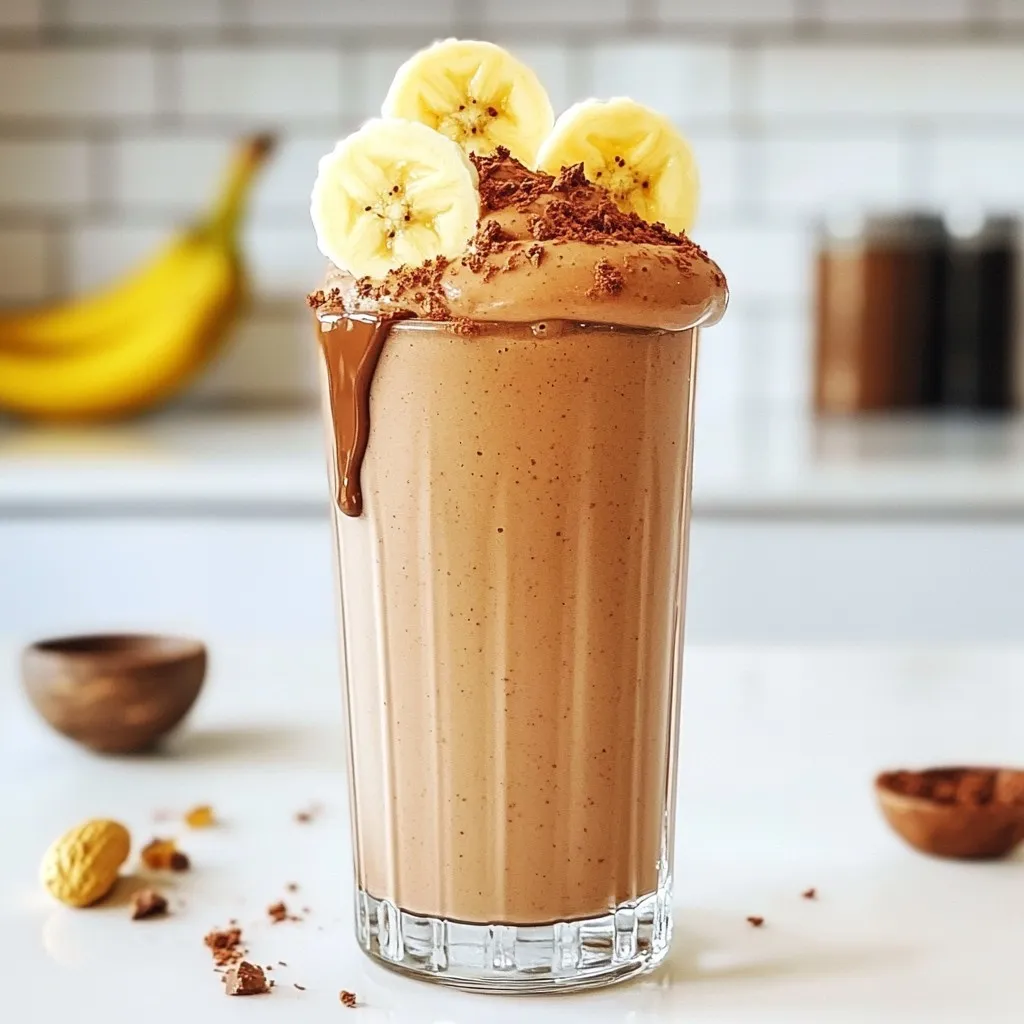
Are you ready to sip on a tasty treat that packs a nutritious punch? The Chocolate Peanut Butter Banana Smoothie

To create a rich and creamy salted caramel hot chocolate, gather the following ingredients: - 2 cups whole milk - 1/2 cup heavy cream - 1/2 cup semi-sweet chocolate chips - 1/4 cup salted caramel sauce (plus extra for drizzling) - 1 teaspoon pure vanilla extract - A pinch of flaky sea salt - Whipped cream (for topping) - Optional: Dark chocolate shavings (for garnish) Each ingredient plays a key role in crafting this cozy drink. Whole milk and heavy cream give a smooth and creamy base. Semi-sweet chocolate chips add depth and richness. Salted caramel sauce brings a sweet and salty twist that makes this drink special. Pure vanilla extract enhances the flavor, while flaky sea salt adds a delightful contrast. Topping with whipped cream creates a fluffy finish. Dark chocolate shavings are a fun touch for extra flavor and looks. Gather these ingredients, and you are on your way to a delightful treat. This hot chocolate is not just a drink; it’s a warm hug in a mug! {{ingredient_image_2}} 1. Heating the milk and cream Start by taking a medium saucepan. Pour in 2 cups of whole milk and 1/2 cup of heavy cream. Set the heat to medium. Warm the mixture gently, stirring often. You want it hot but not boiling. 2. Incorporating chocolate and caramel When the milk and cream are warm, it’s time to add flavor. Gradually whisk in 1/2 cup of semi-sweet chocolate chips and 1/4 cup of salted caramel sauce. Keep whisking until everything melts together. The mix should look creamy and smooth. 3. Adding flavorings Next, stir in 1 teaspoon of pure vanilla extract. Add a pinch of flaky sea salt for that perfect salty touch. Mix well to ensure all flavors blend evenly. 1. Pouring into mugs Carefully remove the saucepan from the heat. Pour the hot chocolate into two mugs or heatproof cups. Make sure to share equally, so both cups are filled with this rich drink. 2. Topping with whipped cream and caramel Now, it’s time for the fun part! Top each mug with a fluffy layer of whipped cream. Then, drizzle extra salted caramel sauce on top. This adds a sweet, sticky finish that is simply delightful. 3. Adding decorative garnishes For a fancy touch, sprinkle dark chocolate shavings over the whipped cream. This adds both beauty and extra chocolate flavor. Your salted caramel hot chocolate is now ready to enjoy! To make the best salted caramel hot chocolate, focus on the consistency. You want it creamy, not too thick or thin. Start with whole milk and heavy cream for that rich texture. Heat them gently together, stirring often. You should see steam rising, but don’t let it boil. Using high-quality chocolate is key. I like semi-sweet chocolate chips for a nice balance of sweetness and richness. They melt well and blend smoothly into the drink. Always whisk them in gradually for the best results. You can add fun flavors to your hot chocolate. Try a dash of peppermint extract for a minty twist. A sprinkle of cinnamon can add warmth, too. For toppings, think beyond whipped cream. Drizzle more salted caramel sauce on top for that extra sweetness. Dark chocolate shavings add a nice crunch and look great. You can even use crushed nuts for texture and flavor. Pro Tips Use Quality Chocolate: Opt for high-quality semi-sweet chocolate chips for a richer flavor in your hot chocolate. Control the Sweetness: Adjust the amount of salted caramel sauce based on your sweetness preference; less for a more intense chocolate flavor. Whip Your Cream: For an extra fluffy topping, whip the cream until soft peaks form before adding it to your hot chocolate. Garnish Creatively: Experiment with garnishes like crushed nuts, marshmallows, or a sprinkle of cinnamon for added texture and flavor. {{image_4}} You can enjoy a vegan version of salted caramel hot chocolate. First, swap whole milk and heavy cream with your favorite plant-based milk. Almond milk, coconut milk, or oat milk work well. Each adds a unique flavor and texture. Next, choose vegan chocolate options. Look for semi-sweet chocolate chips that are dairy-free. Many brands offer these, so you can find one that suits your taste. Check the label to ensure they are vegan-friendly. If you want to cut back on sugar, you can easily make this drink healthier. Start by swapping regular caramel sauce with a sugar-free version. You can find these in stores or make your own. For sweetening, choose natural sweeteners like maple syrup or stevia. These alternatives can help you enjoy the flavor without the extra sugar. Adjust the amount based on your taste, and remember that a little goes a long way. By making these small changes, you can still enjoy a rich and cozy drink while meeting your dietary needs. To store your salted caramel hot chocolate, let it cool first. Pour the drink into an airtight container. You can keep it in the fridge for up to three days. If you want to enjoy it later, note that the flavors will still be great. Just remember to give it a good shake before using it. When you're ready to enjoy your leftover hot chocolate, pour it into a saucepan. Heat it over low heat. Stir it gently as it warms. This helps keep the texture smooth and creamy. If you find it too thick, you can add a splash of milk. This will bring it back to the right consistency. Enjoy your cozy treat! You can use whole milk or coconut milk. Both options will still give you a rich flavor. If you want a thicker drink, add a bit of butter to the milk. This will help mimic the creaminess of heavy cream. Yes, you can! Prepare it as normal, then let it cool. Store it in the fridge for up to three days. When you want to enjoy it, just reheat it gently on the stove. Stir well to mix everything before serving. You can find premade salted caramel hot chocolate at most grocery stores. Look for it in the drink mix aisle or near the coffee section. Some cafes also offer it as a seasonal drink, especially in winter. This blog post covered how to make a rich salted caramel hot chocolate. I shared ingredients like whole milk, chocolate chips, and whipped cream to create a delicious drink. You learned step-by-step instructions for preparing and serving it, plus tips to get the best flavor. We also talked about interesting variations for vegan or low-sugar options. In the end, you can enjoy hot chocolate in many ways, perfect for any occasion. Try these tips and make your own delightful version!

Salted Caramel Hot Chocolate Irresistible Cozy Treat

Cozy up with a mug of Salted Caramel Hot Chocolate, the perfect treat for chilly days. This drink combines rich

- 1 lb chicken breast, cut into bite-sized pieces - 1/2 cup cornstarch - 1/4 cup all-purpose flour - 2 large eggs, lightly beaten - 1 cup vegetable oil (for frying) - 1/2 cup fresh orange juice - 1/4 cup low-sodium soy sauce - 1/4 cup honey - 2 tablespoons rice vinegar - 1 teaspoon fresh ginger, minced - 2 cloves garlic, minced - 1 tablespoon sesame oil - 1 tablespoon cornstarch mixed with 2 tablespoons water (for thickening the sauce) - Chopped green onions (for garnish) - Sesame seeds (for garnish) For this recipe, I use chicken breast. It cooks fast and stays juicy. The cornstarch and flour help create a crisp coating. Eggs help the dry mix stick to the chicken. The sauce is the star of this dish. Fresh orange juice gives it a bright flavor. Honey adds sweetness, and soy sauce adds saltiness. Rice vinegar brings a nice tang. Ginger and garlic give the sauce depth. The sesame oil adds a rich, nutty taste. I like to garnish with green onions and sesame seeds. They add color and crunch. This simple list of ingredients makes sticky orange chicken bites a fun dish for everyone! {{ingredient_image_2}} First, gather your ingredients for the breading. You need cornstarch and all-purpose flour. In a medium bowl, whisk together 1/2 cup of cornstarch and 1/4 cup of flour. This mix gives the chicken a nice crunch. In a separate bowl, beat two large eggs until well mixed. Set both bowls aside for dipping the chicken. Take a piece of chicken and dip it into the eggs. Make sure to let any extra egg drip off. Then, roll the chicken in the cornstarch and flour mix. Ensure that each piece is well coated. This step is key for a crispy texture. Now it’s time to fry the chicken. Heat 1 cup of vegetable oil in a large skillet over medium-high heat. Wait until the oil shimmers before adding the chicken. Fry the chicken pieces in small batches for about 4-5 minutes. They should turn a golden brown. Use a slotted spoon to remove the chicken and let it drain on paper towels. While the chicken is frying, let’s make the orange sauce. In a medium saucepan, mix together 1/2 cup of fresh orange juice, 1/4 cup of low-sodium soy sauce, and 1/4 cup of honey. Add 2 tablespoons of rice vinegar, 1 teaspoon of minced ginger, 2 minced garlic cloves, and 1 tablespoon of sesame oil. Heat this mixture over medium heat until it simmers gently. To thicken the sauce, stir in 1 tablespoon of cornstarch mixed with 2 tablespoons of water. Keep stirring until the sauce thickens, which takes about 2-3 minutes. Once it reaches the right consistency, remove it from the heat. Now, add the fried chicken bites to the saucepan with the orange sauce. Gently toss the chicken until it is well coated. The sauce should stick nicely, making the chicken look glossy and delicious. Plate the sticky orange chicken bites right away. For a beautiful touch, garnish with chopped green onions and a sprinkle of sesame seeds. For extra flavor, serve lime wedges on the side. Enjoy your meal! To get crispy chicken, start with dry pieces. Pat the chicken with paper towels. The coating sticks better when it's dry. Use a mix of cornstarch and flour for the breading. This blend gives a nice crunch. Fry in hot oil, about 350°F. If the oil isn’t hot enough, the chicken absorbs too much oil and gets soggy. Fry in small batches to keep the oil temperature steady. A good sauce has sweet, salty, and tangy notes. Use fresh orange juice for sweetness. Honey adds more sweetness, but be careful not to overpower it. The soy sauce brings saltiness. Add rice vinegar for a tangy kick. Ginger and garlic add depth. Taste the sauce as you cook. Adjust the flavors to your liking. If it’s too sweet, add more vinegar. If it’s too salty, a bit more orange juice can help. One mistake is not coating the chicken well. Make sure each piece is fully covered with the breading mix. Another error is not letting the chicken rest after frying. This helps it stay crispy. Avoid cooking too many pieces at once. This lowers the oil temperature. Finally, don’t rush the sauce. Let it simmer and thicken properly for the best texture. Pro Tips Use Fresh Ingredients: Always opt for fresh orange juice and ginger to enhance the flavor of the sauce significantly. Control the Oil Temperature: Ensure the oil is hot enough before frying the chicken to achieve a crispy texture. A temperature of around 350°F (175°C) is ideal. Coat Evenly: Make sure each piece of chicken is well-coated in the flour and cornstarch mixture to ensure a crispy exterior. Garnish for Flavor: Don’t skip the green onions and sesame seeds! They add a delightful crunch and additional flavor to the dish. {{image_4}} You can swap chicken for other meats. Try shrimp or pork for a tasty twist. Both cook quickly and absorb the sauce well. For beef, choose tender cuts like sirloin. Just cut them into bite-sized pieces. Adjust cooking times as needed. Shrimp may need only 3-4 minutes, while pork or beef will take longer. For a vegan version, use tofu or tempeh. These options soak up flavors well and add texture. Press tofu to remove extra moisture before cooking. Cut it into cubes and fry until golden. You could also use cauliflower florets for a veggie-packed choice. Coat them just like the chicken for the same crunch. You can tweak the sauce to fit your taste. For a spicier kick, add red pepper flakes or sriracha. If you want it sweeter, increase the honey or add maple syrup. For a tangy twist, try adding lime juice or zest. Each change can make a unique dish while keeping that sticky goodness. To store leftovers, wait until the chicken cools. Place it in an airtight container. It will keep in the fridge for 3 days. If you want to keep it longer, freezing is a great option. To reheat, use an oven for the best texture. Preheat your oven to 350°F (175°C). Place the chicken on a baking sheet and bake for 10-15 minutes. This keeps it crispy. You can also use a microwave. Heat in short bursts, checking often. For freezing, let the chicken cool completely. Then, place it in a freezer-safe bag. Remove as much air as possible. It can stay fresh for up to 3 months. When ready to eat, thaw overnight in the fridge. Reheat as mentioned above for best results. To make the chicken less oily, try these steps: - Use a smaller amount of oil for frying. - Ensure the oil is hot enough before adding chicken pieces. - Drain the fried chicken on paper towels to absorb excess oil. These tips help keep your bites crispy and reduce oiliness. Yes, you can use store-bought orange juice. However, fresh orange juice has a brighter flavor and more freshness. If you use store-bought juice, pick one without added sugars for a better taste. Pairing side dishes with sticky orange chicken bites can enhance your meal. Here are some great options: - Steamed jasmine rice - Fried rice with vegetables - Roasted broccoli or green beans - A fresh cucumber salad These sides add balance and color to your plate. To make the sauce spicier, consider these ideas: - Add red pepper flakes or chili paste to the sauce. - Incorporate minced fresh chili peppers. - Use a spicy soy sauce or add sriracha. Start with a small amount, then adjust to your taste. Yes, you can bake the chicken bites instead of frying them. Follow these steps for baking: 1. Preheat your oven to 400°F (200°C). 2. Arrange the coated chicken on a baking sheet. 3. Spray lightly with cooking oil. 4. Bake for about 20-25 minutes, turning halfway. Baking gives you a healthier option while still keeping the bites tasty. This blog post explored making delicious sticky orange chicken bites. We covered key ingredients like chicken, breading, and sauce. I shared step-by-step instructions, tips for crispy chicken, and fun variations. You can even find storage and reheating tips for leftovers. Enjoy this dish with sides you love. Remember, cooking is fun and rewarding. Now, you can create your own tasty orange chicken at home!

Sticky Orange Chicken Bites Flavorful and Easy Recipe

If you’re craving a sweet and zesty treat, you’ll love my Sticky Orange Chicken Bites! This simple recipe packs bold

For this cobbler, you need fresh fruit. I use: - 2 cups fresh blackberries - 2 cups fresh peaches, peeled and sliced thinly Using ripe peaches and juicy blackberries gives the best flavor. The sweetness of the peaches pairs well with the tartness of the blackberries. You can also mix in other fruits if you like. Sugar helps sweeten the fruit. You will need: - 1 cup granulated sugar, divided - 2 tablespoons cornstarch Divide the sugar into two parts. Add half to the fruit mix for sweetness. Use cornstarch to thicken the juice from the fruit. This helps keep the filling from being too runny. These items are key for the batter. Gather: - 1 cup all-purpose flour - 1 tablespoon baking powder - ½ teaspoon salt - ½ cup unsalted butter, melted - 1 cup milk, at room temperature - 1 teaspoon ground cinnamon The flour and baking powder give the cobbler its height. Salt adds flavor, while melted butter and milk create a nice batter. Cinnamon adds warmth to the dish, making it smell and taste wonderful. {{ingredient_image_2}} Start by setting your oven to 350°F (175°C). This is the perfect temperature for baking. While the oven heats, grab a 9x13 inch baking dish. Coat it well with butter or cooking spray. This helps the cobbler come out easily later. Next, take out a medium bowl. Add 2 cups of fresh blackberries and 2 cups of thinly sliced peaches. Sprinkle in half a cup of granulated sugar. This sugar helps bring out the fruit's sweetness. Then, mix in 2 tablespoons of cornstarch, 1 teaspoon of vanilla extract, and 1 teaspoon of fresh lemon juice. Gently toss everything together with a spatula until the fruit is coated. Spread this fruit mixture evenly into the prepared baking dish. In a large mixing bowl, combine 1 cup of all-purpose flour, 1 tablespoon of baking powder, ½ teaspoon of salt, and the remaining ½ cup of sugar. Adding 1 teaspoon of ground cinnamon gives it a warm flavor. Mix these dry ingredients well. Make a well in the center and pour in ½ cup of melted butter and 1 cup of milk. Stir with a wooden spoon until just mixed. The batter should be slightly lumpy, which is fine. Now, it's time to put everything together. Use a spoon or spatula to dollop the batter evenly over the fruit. It's important to keep the layers separate. Do not stir the batter into the fruit. This way, you keep the lovely layers intact. Place your baking dish in the oven and bake for 45-50 minutes. You'll know it's done when the top turns golden brown. To test, insert a toothpick into the center. If it comes out clean, your cobbler is ready. Once baked, let it cool for 5-10 minutes before serving. When you pick fruits for your cobbler, go for the best. Choose ripe blackberries that are dark and plump. Look for peaches that are soft but not mushy. They should smell sweet and fragrant. Fresh fruits make a big difference in taste. A common mistake is overmixing the batter. This can make your cobbler tough. Mix just until the dry and wet ingredients come together. Also, don’t stir the batter into the fruit. This keeps the layers nice and separate. Another mistake is not letting it cool before serving. A few minutes help the flavors set. Serve your cobbler warm for the best experience. Add a scoop of vanilla ice cream on top. The cold ice cream melts into the warm cobbler, creating a nice contrast. Drizzle some syrup from the cobbler around the plate for a pretty touch. Garnish with fresh blackberries or peach slices for color. Enjoy every bite! Pro Tips Use Ripe Fruits: Ensure that your peaches are ripe for maximum sweetness and flavor in the cobbler. Underripe peaches may not provide the best taste experience. Mix Gently: When combining the batter ingredients, mix just until combined to keep your cobbler light and fluffy. Overmixing can result in a dense texture. Check for Doneness: Use a toothpick to test the center of the cobbler; it should come out clean when fully baked. A golden brown top is also a good indicator that it’s ready. Serve Warm: For the best flavor and texture, serve the cobbler warm with a scoop of vanilla ice cream. The heat from the cobbler will slightly melt the ice cream, creating a delightful contrast. {{image_4}} You can mix and match fruits for your cobbler. Try using blueberries, strawberries, or raspberries. Each fruit brings a unique flavor. If you love tartness, add some cranberries. For a sweeter dish, use ripe mangoes or pears. This way, you can create your own twist on the classic recipe. For gluten-free lovers, swap the all-purpose flour with a gluten-free blend. Ensure the blend has xanthan gum for good texture. Another option is to use almond flour or coconut flour. Both will change the taste but still offer a delicious result. Adjust the baking time if needed, as gluten-free flours can behave differently. Add a touch of spice for a flavor boost. Ground nutmeg or cardamom can elevate the taste. A splash of almond extract can add richness. For a citrusy kick, try orange zest or lemon zest. You can even mix in a bit of bourbon or rum for depth. These small changes can make your cobbler truly special. After you enjoy your blackberry peach cobbler, you may have some left. To store it, let it cool completely. Then, cover the dish with plastic wrap or foil. You can also transfer it to an airtight container. It will stay fresh for up to 3 days in the fridge. When you're ready to eat leftovers, it's easy to reheat. Preheat your oven to 350°F (175°C). Place the cobbler in a baking dish. Heat it for about 15-20 minutes. You want it warm throughout. If you prefer, you can microwave individual servings. Just heat for 30 seconds to 1 minute. Want to save the cobbler for a later day? You can freeze it! First, let it cool completely. Cut it into portions and wrap each piece in plastic wrap. Place the wrapped pieces in a freezer bag. It can last up to 3 months in the freezer. To enjoy, thaw it overnight in the fridge and reheat as before. Yes, you can use frozen fruit. Just make sure to thaw it first. Drain any excess liquid before mixing it with sugar and cornstarch. This helps keep your cobbler from getting too soggy. The cobbler is done when the top turns golden brown. You can also use a toothpick. If it comes out clean from the center, your cobbler is ready. Serve the cobbler warm for the best taste. A scoop of vanilla ice cream on top makes it extra special. Drizzle some syrup from the cobbler around the plate for a nice touch. Yes, you can prepare the fruit filling ahead. Just keep it in the fridge until you’re ready to bake. This saves time and helps with flavor. Store leftovers in an airtight container. Keep it in the fridge for up to three days. You can reheat it in the oven or microwave. Absolutely! Cinnamon is great, but nutmeg or ginger can also add a nice touch. Just be careful not to overpower the fruit. Yes, this recipe doubles well. Just use a larger baking dish and adjust the baking time as needed. Check for doneness with the toothpick test. Yes! You can mix in other fruits like apples or pears. Just ensure the total amount of fruit stays the same for best results. In this post, we explored how to make a delicious blackberry peach cobbler. We covered key ingredients like fresh fruit and baking essentials. I shared detailed steps, from prepping your oven to baking time. You learned tips for choosing fruit and avoiding mistakes. We also discussed variations for different tastes and how to store your leftovers. Baking can be fun and rewarding. Now, go ahead and create your own perfect cobbler!

Blackberry Peach Cobbler Flavorful and Easy Recipe

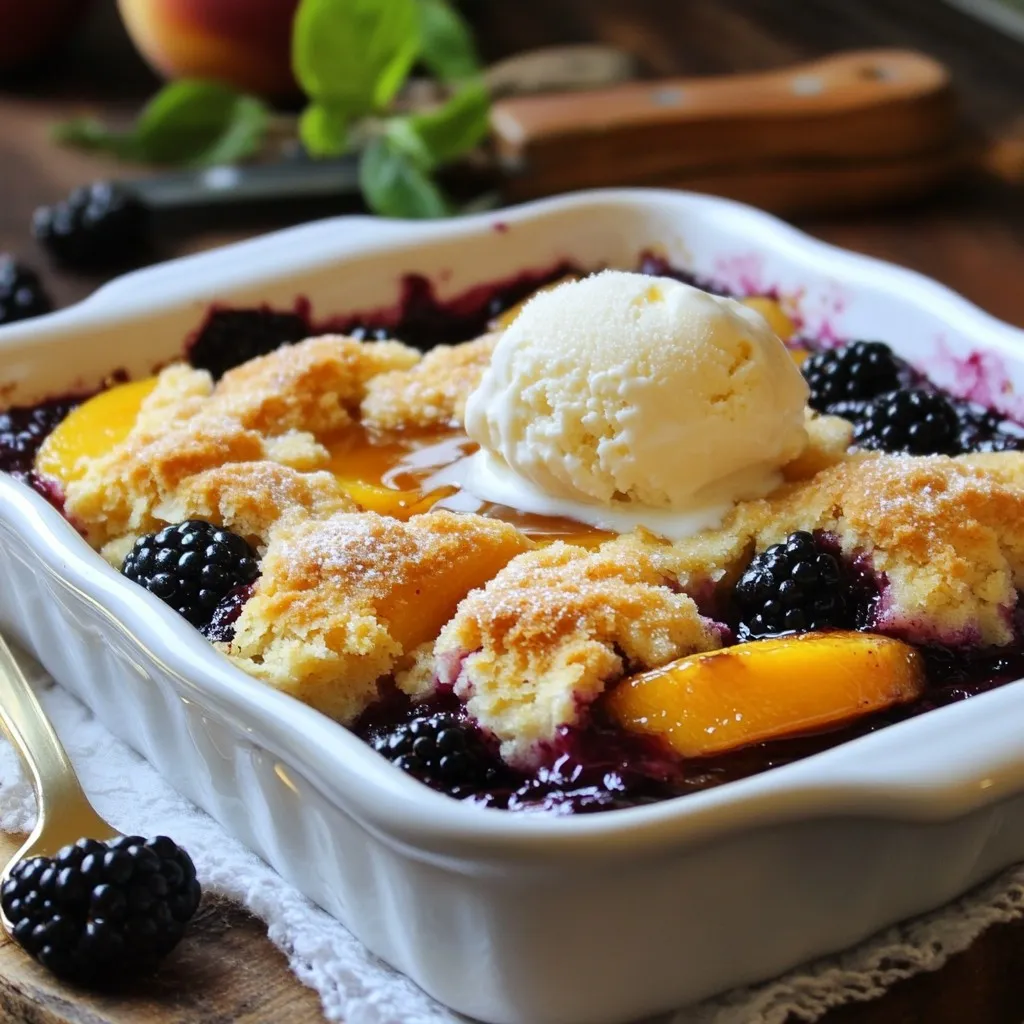
Are you ready to dive into a world of flavors with my Blackberry Peach Cobbler recipe? This dish combines juicy

- 1 lb ground chicken - 1/2 cup breadcrumbs - 1/4 cup grated Parmesan cheese - 1/4 cup finely chopped fresh parsley - 1 large egg - 2 cloves garlic, minced - 1 teaspoon fresh ginger, grated - Salt and black pepper to taste - 1 cup pineapple chunks (either fresh or canned) - 1 bell pepper (red or yellow), diced into small pieces - 1/2 cup granulated sugar - 1/2 cup ketchup - 1/4 cup apple cider vinegar - 1 tablespoon soy sauce (or coconut aminos for a lighter alternative) - 1 tablespoon cornstarch (mixed with 2 tablespoons cold water for thickening the sauce) You can swap ground chicken for ground turkey. Use gluten-free breadcrumbs if needed. For a dairy-free option, skip the Parmesan cheese or use a vegan alternative. Instead of fresh parsley, try fresh cilantro for a different flavor. If you want a spicy kick, add red pepper flakes to the sauce. For a fruity twist, consider adding chopped mango with the pineapple. Each serving contains about 350 calories. You will find around 22 grams of protein, which helps build muscles. The meal also has 27 grams of carbs and 15 grams of fat. It offers a good source of vitamins and minerals from the bell pepper and pineapple. This dish can fit into many diets, making it a great family meal choice. {{ingredient_image_2}} To start, preheat your oven to 400°F (200°C). Then, grab a large mixing bowl. In it, combine 1 pound of ground chicken with 1/2 cup of breadcrumbs, 1/4 cup of grated Parmesan cheese, and 1/4 cup of finely chopped fresh parsley. Next, add in 1 large egg, 2 minced garlic cloves, and 1 teaspoon of grated fresh ginger. Don’t forget to season with salt and black pepper. Mix everything well until fully combined. Now, use your hands to shape the mixture into small meatballs. Aim for each one to be about 1 inch in diameter. Once shaped, place them on a lined baking sheet, leaving some space between each meatball. Bake these in your preheated oven for around 20 minutes. You want them to be cooked through and golden brown on the outside. While the meatballs bake, let’s prepare the sweet and sour sauce. In a medium saucepan, combine 1 cup of pineapple chunks, 1 diced bell pepper, 1/2 cup of granulated sugar, 1/2 cup of ketchup, 1/4 cup of apple cider vinegar, and 1 tablespoon of soy sauce. Set the pan over medium heat and let it simmer gently. Stir occasionally for about 5 minutes. After that, mix 1 tablespoon of cornstarch with 2 tablespoons of cold water. Stir this mixture into the sauce to thicken it. Cook for another 2-3 minutes, until the sauce reaches your desired thickness. Once the meatballs are done, add them to the saucepan. Toss them gently in the sauce until they are fully coated. Serve the sweet and sour chicken meatballs warm over rice or noodles, and enjoy! To get the best texture for your meatballs, start with ground chicken. The meat should be fresh, not frozen. Mix it gently with breadcrumbs, Parmesan, and parsley. Avoid overmixing, as that can make them tough. Use your hands to form small meatballs, about one inch wide. Make sure they are even in size for even baking. For a smooth sauce, mix pineapple, bell pepper, sugar, ketchup, and vinegar in a saucepan. Heat it over medium until it simmers. Stir it often to prevent sticking. When the sauce simmers, add the cornstarch mixture slowly. This will help thicken your sauce. Cook for a few more minutes until it looks glossy and thick. Serve your sweet and sour meatballs warm. Add them to a platter or individual bowls. A bed of rice or noodles makes a great base. Drizzle extra sauce over the meatballs for more flavor. Garnish with fresh parsley for a pop of color. This dish not only tastes great but also looks beautiful on the table! Pro Tips Use Fresh Ingredients: Fresh chicken and vegetables enhance the flavor and texture of the meatballs. Opt for fresh pineapple for a burst of natural sweetness. Don't Overmix: When combining the meatball ingredients, mix just until combined. Overmixing can lead to tough meatballs. Adjust the Sauce: Feel free to tweak the sweetness or acidity of the sauce by adjusting the sugar or vinegar to match your taste preference. Pair with Rice: Serving the meatballs over rice or noodles not only makes for a complete meal but also helps soak up the delicious sauce. {{image_4}} You can change the ground chicken to fit your taste. Try ground turkey for a lighter meal. Ground beef adds a rich flavor, while ground pork offers a nice twist. If you want a plant-based option, use lentils or chickpeas. Just mash them up and mix with the same ingredients. To make this dish gluten-free, swap breadcrumbs for gluten-free oats or crushed nuts. You can also use ground flaxseed as a binder. For a low-carb version, use cauliflower rice instead of regular rice. This keeps the meal light and healthy while still being filling. You can change the flavor to match your cravings. Add chili flakes for a spicy kick. If you love sweet dishes, mix in mango or peaches for a fruity twist. For an Asian flair, use sesame oil instead of soy sauce. Each option brings a new taste that keeps your family excited at dinner. To store leftover sweet and sour chicken meatballs, place them in an airtight container. Make sure they cool down before you seal the container. This helps keep them fresh. You can keep them in the fridge for up to three days. Freezing is a great option for longer storage. First, let the meatballs and sauce cool completely. Then, place them in freezer-safe bags or containers. Remove as much air as possible. You can freeze them for up to three months. When you're ready to eat, thaw them in the fridge overnight. To reheat meatballs, you have a few options. The best way is in the oven. Preheat your oven to 350°F (175°C). Place the meatballs in a baking dish with a little sauce on top. Cover with foil and heat for about 15-20 minutes. You can also use the microwave. Heat them in short bursts, stirring in between, until hot. Enjoy them warm over rice or noodles! Yes, you can make these meatballs ahead of time. Prepare them and bake as usual. Let them cool, then place them in a container. Store in the fridge for up to three days. When you’re ready to eat, just heat them up with the sauce. This makes for an easy family meal on busy nights. The best way to serve sweet and sour chicken meatballs is warm. Place them on a platter or in individual bowls. They taste great over rice or noodles. You can also add extra sauce on top for more flavor. Garnish with parsley for a pop of color. This makes the dish look appealing and adds a fresh touch. Absolutely! You can use any sauce you like. If you prefer a spicy kick, try a sweet chili sauce. For a tangy twist, use BBQ sauce. You can also mix in some honey or teriyaki sauce for different flavors. Experiment with what you enjoy most. This recipe is flexible to fit your taste buds. This blog post covered how to make delicious Sweet and Sour Chicken Meatballs. We shared ingredients, step-by-step instructions, and helpful tips. You learned how to customize flavors and make healthy swaps. Storing and reheating leftovers is simple too. In the end, enjoy these meatballs however you like. They’re easy to make and fun to share. Cooking should feel good and bring smiles to your table. Happy cooking!

Sweet & Sour Chicken Meatballs Easy Family Meal

Looking for a fun and tasty family meal? Sweet & Sour Chicken Meatballs are the answer! With juicy meatballs drenched

To make loaded nacho potato skins, you need some key ingredients. Here’s a list of what you will need: - 4 large russet potatoes - 1 cup shredded cheddar cheese - 1 cup black beans, rinsed and drained - 1 cup cherry tomatoes, diced - 1 fresh jalapeño, sliced (adjust amount to taste) - 1/2 cup sour cream - 1/4 cup fresh cilantro, chopped - 1 tablespoon olive oil - 1 teaspoon garlic powder - 1 teaspoon ground cumin - Salt and pepper to taste These ingredients create a tasty and satisfying snack. The russet potatoes provide a nice base, while the cheese and beans make it rich. You can customize your potato skins with fun toppings. Here are some ideas to try: - Sliced green onions for a fresh crunch - Avocado or guacamole for creaminess - Salsa for added flavor - Extra cheese for cheese lovers - Crushed tortilla chips for extra texture Feel free to mix and match to suit your taste! Here's a quick look at the nutrition of this dish: - Calories: Approximately 280 per serving - Protein: 10g - Carbohydrates: 30g - Fat: 14g - Fiber: 6g This dish offers a good balance of nutrients. It’s a filling snack that you can enjoy without guilt. {{ingredient_image_2}} First, preheat your oven to 400°F (200°C). Then, wash the russet potatoes well. Scrub them to remove dirt, then dry them off. Next, use a fork to poke 6-8 holes in each potato. This helps steam escape while they bake. Lightly coat each potato with olive oil, then sprinkle with salt. Place the potatoes on a baking sheet and roast them for 45 to 60 minutes. They should be soft when done. Once the potatoes are baked, take them out of the oven. Let them cool for about 10 minutes. Carefully cut each potato in half, lengthwise. Use a spoon to scoop out some flesh, leaving the skin sturdy. You can save the scooped potato for later or mash it for another dish. In a mixing bowl, combine the shredded cheddar cheese, black beans, diced cherry tomatoes, garlic powder, and ground cumin. Add sliced jalapeños as per your taste. Season this mixture with salt and pepper, then mix everything well until it's combined. This filling is packed with flavor and will make the nacho potato skins extra tasty! Now, fill each potato skin with the cheese and bean mixture. Make sure to fill them generously. Place the filled potato skins back in the oven. Bake for an additional 10-15 minutes. You want the cheese to melt and bubble, getting a bit golden on top. Once done, take the potato skins out of the oven. Let them rest for a few minutes. Top each one with a dollop of sour cream and some chopped cilantro. This adds a fresh touch. Serve the loaded nacho potato skins on a big platter. You can also include small bowls of extra sour cream and cilantro for guests to add more if they wish. Enjoy your tasty snack! To get that perfect crispy skin, start with russet potatoes. They have a starchy inside and a nice skin. Poke holes in the potatoes to let steam escape. Coat them lightly in olive oil and sprinkle salt on top. This step helps the skin crisp up nicely. Bake at 400°F for 45 to 60 minutes. Check them with a fork; they should feel soft inside. Let them cool slightly before cutting. One common mistake is not poking holes in the potatoes. This can cause them to burst in the oven. Another mistake is overcooking or undercooking them. Make sure to monitor the baking time closely. Avoid overloading the skins with toppings, as they may not hold up. Lastly, don’t forget to season the filling. A bit of salt and pepper makes a big difference in taste. You’ll need a few key tools to make these loaded nacho potato skins. A good baking sheet is essential for even cooking. Use a fork to poke holes in the potatoes. A sharp knife will help cut them in half easily. A mixing bowl is necessary for combining your filling. Lastly, a spoon is useful for scooping out the potato flesh. Having these tools will make your cooking experience smoother and more enjoyable. Pro Tips Use Fresh Ingredients: Fresh ingredients enhance the flavor of your potato skins. Opt for ripe cherry tomatoes and fresh cilantro for the best taste. Perfectly Cooked Potatoes: Ensure that your potatoes are fork-tender before removing them from the oven. This will make it easier to scoop out the flesh without damaging the skins. Customize the Toppings: Feel free to customize your toppings! Add diced avocado, olives, or even crumbled bacon for additional flavors and textures. Serve Immediately: For the best experience, serve the loaded potato skins immediately after baking while the cheese is melted and gooey. {{image_4}} You can easily make loaded nacho potato skins vegetarian. Swap out the black beans for more veggies. Consider adding corn, diced bell peppers, or sautéed mushrooms. These options not only add flavor but also extra color. You can also use plant-based cheese if you want to keep it dairy-free. This way, everyone can enjoy this tasty snack. If you love heat, try using different peppers. You can add serrano peppers or even habaneros for a fiery kick. Slice them thin and mix into the filling. For a milder option, use sweet bell peppers. You can also roast the peppers for a smoky flavor. Adjust the spice level to suit your taste buds! Cheese is a key part of loaded nacho potato skins. If you want to change things up, try different cheeses. Monterey Jack gives a nice melt and flavor. For a sharper bite, use feta or blue cheese. Vegan cheese can also work if you're avoiding dairy. Experiment with combinations to find your favorite mix! To store your leftover loaded nacho potato skins, let them cool first. Place them in an airtight container. You can keep them in the fridge for up to three days. Make sure to separate layers with parchment paper. This helps prevent sticking. When you're ready to enjoy your leftovers, preheat the oven to 350°F (175°C). Place the potato skins on a baking sheet. Heat them for about 10-15 minutes. This will warm them up and keep them crispy. If you want, you can also use a microwave. Just heat them for 1-2 minutes, but know they might get soft. For meal prep, you can freeze the filled potato skins. After cooling, wrap each one tightly in plastic wrap. Then, place them in a freezer bag. They can last up to three months in the freezer. When you want to eat them, thaw them in the fridge overnight before reheating. This way, you can have a tasty snack ready anytime! Yes, you can prepare them in advance. Bake the potatoes and scoop them out. Then, make the filling and store it in the fridge. When you are ready to eat, fill the skins and bake them. This keeps them fresh and tasty. If you don't have black beans, try pinto beans or kidney beans. Chickpeas also work well. These beans add protein and fiber, just like black beans do. You can even use cooked quinoa for a different twist. Yes, this recipe is naturally gluten-free. All the ingredients, like potatoes and cheese, do not contain gluten. Just make sure to check the labels on your cheese and sour cream for any added ingredients. Enjoy this snack worry-free! You learned how to make loaded nacho potato skins with key ingredients and steps. I shared tips for a perfect bake, common errors to avoid, and equipment choices. You can also explore fun variations like vegetarian and spicy options. Plus, I covered how to store and reheat leftovers. Now, it's time to enjoy your tasty snacks, impress your friends, and get creative in the kitchen. Happy cooking!

Loaded Nacho Potato Skins Delightful and Flavorful Snack

If you’re looking for a snack that packs a punch, you’ve found it! Loaded Nacho Potato Skins are the ultimate

- 1 lb (450g) Brussels sprouts, halved - 3 tablespoons extra virgin olive oil - 2 tablespoons pure honey - 1-2 tablespoons Sriracha sauce (adjust to taste) - 1 teaspoon garlic powder - 1/2 teaspoon fine sea salt - 1/4 teaspoon freshly ground black pepper - 2 tablespoons sesame seeds (optional) - 2 green onions, finely chopped (for garnish) Sriracha honey glazed Brussels sprouts offer a tasty balance of flavors. The Brussels sprouts provide fiber and vitamins C and K. Olive oil adds healthy fats. Honey gives energy from natural sugars. Sriracha adds a spicy kick, while garlic powder contributes flavor. Each serving is packed with nutrients. If you want to switch things up, try these swaps: - Use maple syrup instead of honey for a vegan option. - Replace Sriracha with chili paste for a different heat. - Use coconut oil in place of olive oil for a tropical taste. - Add in other veggies like cauliflower or carrots for more color and nutrition. These swaps keep the dish fresh and exciting. Enjoy experimenting! {{ingredient_image_2}} Start by preheating your oven to 400°F (200°C). This step helps the Brussels sprouts caramelize well. A hot oven makes them crispy on the outside and tender inside. In a large mixing bowl, combine the halved Brussels sprouts with: - 3 tablespoons extra virgin olive oil - 2 tablespoons pure honey - 1-2 tablespoons Sriracha sauce - 1 teaspoon garlic powder - 1/2 teaspoon fine sea salt - 1/4 teaspoon freshly ground black pepper Use a spatula to toss everything together. Make sure every sprout gets coated in that delicious mix. The sweet and spicy blend is what makes this dish special. Prepare a baking sheet by lining it with parchment paper. This helps with easy cleanup later. Spread the coated Brussels sprouts on the sheet in a single layer. Leave space between each sprout for even roasting. Now, place the baking sheet in the oven. Roast for 20-25 minutes. Halfway through, take a spatula and toss the sprouts again. They should turn golden brown and be tender when done. If you want extra flavor, add sesame seeds during the last 5 minutes of roasting. This gives a nice crunch. Once they are done, take them out of the oven. Before you serve, sprinkle finely chopped green onions on top. This adds a fresh touch and bright color. You can also drizzle extra honey for a sweet finish. Enjoy this flavor explosion! Choose Brussels sprouts that feel firm and heavy. Look for bright green leaves. Avoid any with yellow or brown spots. Fresh sprouts are tight and compact. If you can, buy them on the stalk. They last longer and taste better. Sriracha can be spicy, but you control the heat. Start with one tablespoon if you prefer mild heat. Taste the mixture before adding more. Remember, the honey balances the heat. If you love spicy food, add two tablespoons or more. You can also try different hot sauces if you want to mix it up. You will need a few basic tools: - A mixing bowl to combine ingredients - A spatula to toss the sprouts - A baking sheet lined with parchment paper - An oven to roast the sprouts Having these tools ready will make cooking fun and easy. Enjoy your time in the kitchen! Pro Tips Choose Fresh Brussels Sprouts: Look for sprouts that are firm and compact, with vibrant green color. Avoid any that are yellowing or have blemishes for the best flavor. Adjusting Spice Level: If you're unsure about the heat, start with 1 tablespoon of Sriracha, then taste and add more if desired. You can always increase the spice, but it's hard to tone it down! Use High-Quality Honey: Opt for a high-quality, pure honey for the best flavor. It will enhance the sweetness and overall taste of the dish. Experiment with Add-Ins: Consider adding ingredients like bacon bits or nuts for additional flavor and texture. These can elevate your Brussels sprouts to the next level! {{image_4}} You can boost flavors by adding other veggies. Carrots, bell peppers, or broccoli work well. Simply chop them to a similar size as the Brussels sprouts. Toss them in the same mix of olive oil, honey, and Sriracha. Roast everything together for a colorful and tasty dish. If Sriracha is too spicy, try different sauces. Sweet chili sauce gives a mild heat with sweetness. For less spice, use barbecue sauce. Adjust the amounts based on your taste. You can even mix sauces for a unique twist. To make this dish vegan, swap honey for maple syrup or agave nectar. Both options keep the sweet flavor. This change keeps the dish plant-based while still being delicious. If you want a richer taste, add a splash of soy sauce. This adds depth without losing the essence of the dish. To keep your Sriracha honey glazed Brussels sprouts fresh, let them cool first. Once cool, place them in an airtight container. Store them in the fridge. They’ll last up to 3 days, but they’re best eaten sooner. When you’re ready to enjoy leftovers, preheat your oven to 350°F (175°C). Spread the Brussels sprouts on a baking sheet. Heat them for about 10-15 minutes until warm. This helps restore their crispy texture. You can also microwave them, but they may lose some crunch. If you want to freeze these sprouts, do it before cooking. Blanch them in boiling water for 2 minutes. Then cool them in ice water. Drain and place them in a freezer-safe bag. They’ll keep well for up to 3 months. To use, thaw in the fridge overnight before cooking. Yes, you can make these Brussels sprouts in an air fryer. Set your air fryer to 375°F (190°C). Toss the halved sprouts in the same mix of honey, Sriracha, and spices. Cook for about 15-20 minutes, shaking the basket halfway through. This method gives you crispy, caramelized sprouts without using the oven. Leftovers can last about 3 to 5 days in the fridge. Place the cooled Brussels sprouts in an airtight container. To enjoy them later, reheat them in the oven or air fryer for the best texture. You can also use a microwave, but they may become softer. These Brussels sprouts pair well with many dishes. Serve them alongside grilled chicken, roasted pork, or even tofu for a tasty vegetarian option. They also complement rice dishes or quinoa bowls. Add them to a salad for extra crunch and flavor. Yes, Brussels sprouts are quite healthy. They are high in fiber, vitamins C and K, and antioxidants. Eating them can support digestion and boost your immune system. Plus, they are low in calories, making them a great choice for any meal. This post shows you how to make Sriracha Honey Glazed Brussels Sprouts. You learned what ingredients to use and how to prepare them. We covered nutritional facts and some swaps for ingredients. You now know handy tips for fresh sprouts and cooking tools. Try adding other veggies or using different sauces for fun twists. Enjoy your delicious sprouts and share them with friends!

Sriracha Honey Glazed Brussels Sprouts Flavor Explosion

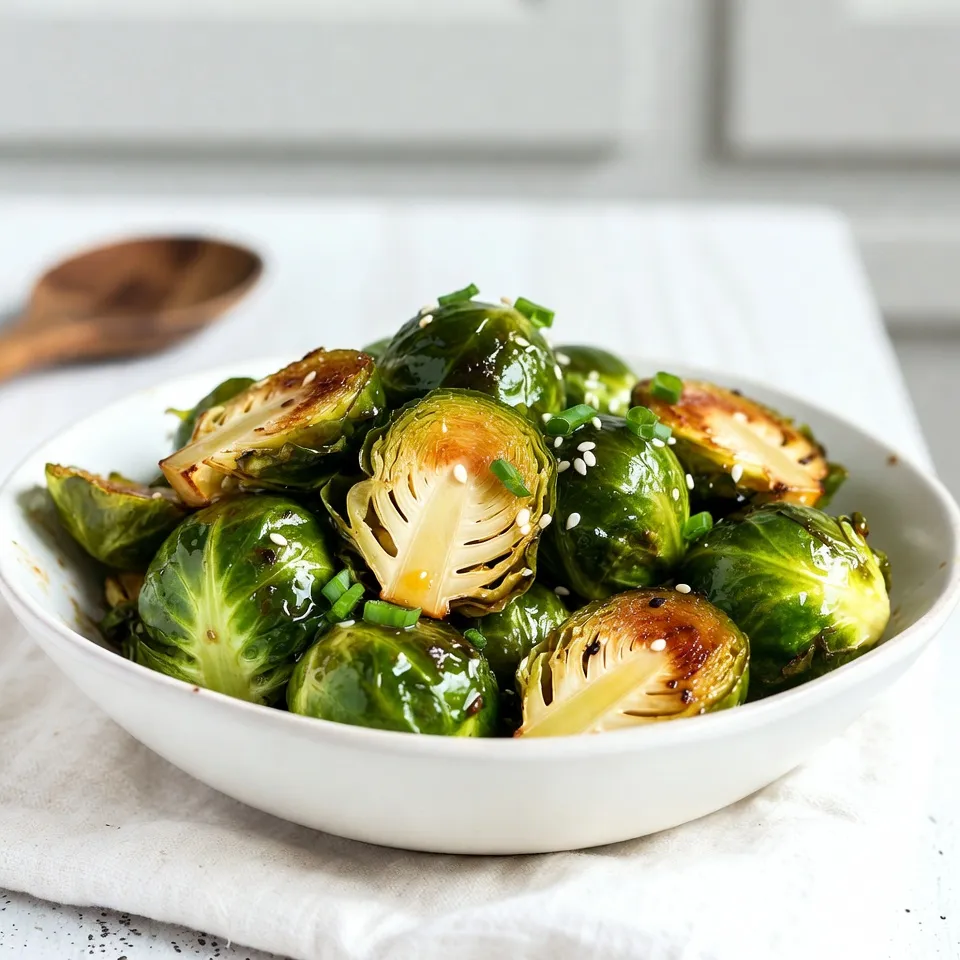
Are you ready to transform your Brussels sprouts into a taste sensation? My Sriracha Honey Glazed Brussels Sprouts bring bold

To make Cheesy Spinach Stuffed Chicken, gather the following ingredients: - 4 boneless, skinless chicken breasts - 2 cups fresh spinach, chopped - 1 cup cream cheese, softened to room temperature - 1 cup shredded mozzarella cheese - 1/2 cup grated Parmesan cheese - 2 cloves garlic, minced - 1 teaspoon onion powder - 1/2 teaspoon red pepper flakes (optional for heat) - Salt and pepper to taste - 2 tablespoons olive oil, divided - Fresh herbs (like parsley or basil) for garnish These ingredients come together to create a tasty dish. The chicken serves as a tender canvas for the rich and creamy filling. Fresh spinach adds a healthy touch, while the cheeses provide a delightful melt-in-your-mouth experience. Garlic and onion powder enhance the flavors, making each bite a joy. You can choose to add red pepper flakes for a bit of spice if you like. Using high-quality ingredients makes a big difference in flavor. Always try to source fresh spinach and good-quality cheese. This ensures your dish stands out. Enjoy preparing these ingredients, as they will lead to a meal you'll want to share with family and friends. {{ingredient_image_2}} Set your oven to 375°F (190°C). Preheating is key for even cooking. A hot oven helps the chicken cook well and stay juicy. In a bowl, mix together chopped spinach, cream cheese, mozzarella, and Parmesan. Add minced garlic, onion powder, and red pepper flakes if you like heat. Season with salt and pepper to taste. Mix until creamy and smooth. Take each chicken breast and place it on a cutting board. Butterfly it by slicing it horizontally, but do not cut all the way through. This creates a pocket to hold the filling. Fill each chicken pocket with the spinach and cheese mix. Be generous! If needed, use toothpicks or kitchen twine to close the pocket. This keeps the filling inside while cooking. Sprinkle salt and pepper on the outside of each stuffed chicken breast. Drizzle olive oil for flavor. Heat an oven-safe skillet over medium-high heat. Add the chicken and sear for 3-4 minutes on each side. You're looking for a nice golden brown crust. After searing, transfer the skillet to the preheated oven. Bake for 20-25 minutes. The chicken should reach an internal temperature of 165°F (75°C) to be safe to eat. Let the chicken rest for a few minutes after baking. This keeps it juicy. Remove any toothpicks or twine. Before serving, sprinkle fresh herbs on top for color and taste. To get the best filling, mix your ingredients well. You want a creamy blend. Start with softened cream cheese. Then, add the chopped spinach, mozzarella, and Parmesan. Mix in minced garlic and onion powder. If you like heat, toss in red pepper flakes. Always season with salt and pepper. The right texture makes a big difference. It should hold together but still be spreadable. To keep your chicken moist, don’t overcook it. Use a meat thermometer for accuracy. Chicken is done at 165°F (75°C). Also, let it rest after baking. This helps the juices settle back in. Searing the chicken first adds flavor and locks in moisture. Remember to drizzle olive oil before cooking. This small step helps a lot. You can change how you cook this dish. Try grilling the stuffed chicken for a smoky flavor. Just be careful not to let the filling spill out. Air frying is another option. It cooks fast and makes the chicken crispy. Set your air fryer to 375°F (190°C) and cook for about 20 minutes. These methods can add fun twists to your meal! Pro Tips Use Fresh Spinach: Always opt for fresh spinach for the best flavor and texture in your stuffing. It will enhance the overall taste of the dish. Butterfly Carefully: When butterflying the chicken, take your time to ensure the pocket is deep enough to hold the filling without breaking through the other side. Secure the Filling: If you're worried about the filling leaking out, use toothpicks or kitchen twine to secure the openings after stuffing the chicken breasts. Let it Rest: Allow the chicken to rest for a few minutes after baking. This step is crucial for keeping the chicken juicy and tender. {{image_4}} You can use many types of cheese for your filling. For a creamier texture, try using ricotta or goat cheese. If you want a sharper taste, consider cheddar or blue cheese. For those who prefer vegan options, use cashew cheese or tofu cream cheese. These substitutes keep the dish creamy while being plant-based. While spinach is great, you can swap it for other leafy greens. Kale, Swiss chard, or collard greens work well. These greens add unique flavors and nutrients. Just remember to chop them finely for easy stuffing. Adding herbs and spices can really enhance the taste. Consider using basil, thyme, or oregano for a fresh twist. If you enjoy heat, add cayenne pepper or smoked paprika. These spices can make your dish pop and keep it exciting. To keep your cheesy spinach stuffed chicken fresh, place leftovers in an airtight container. Refrigerate them right away to prevent bacteria. The stuffed chicken lasts for 3-4 days in the fridge. Before eating, check for any off smells or colors to ensure it's still good. You can freeze stuffed chicken for later. First, let the chicken cool completely. Wrap each piece tightly in plastic wrap, then place them in a freezer-safe bag. This helps prevent freezer burn. The chicken can stay in the freezer for up to 3 months. For reheating, move the chicken to the fridge to thaw overnight. If you need it faster, thaw it in cold water for about an hour. Always reheat the chicken to an internal temperature of 165°F (75°C) before serving. Enjoy that cheesy goodness again! Yes, you can prep the Cheesy Spinach Stuffed Chicken ahead. Here’s how: - Prepare the filling: Mix the spinach, cream cheese, and cheeses in advance. - Stuff the chicken: Fill the chicken breasts and secure them. - Store: Wrap each breast tightly in plastic wrap. Place them in the fridge. - Cook later: You can bake them the next day. Just add a few extra minutes to the bake time. Pairing sides enhances your meal. Here are some great options: - Garlic bread: A classic choice that everyone loves. - Roasted veggies: Carrots, zucchini, or bell peppers add color and flavor. - Simple salad: A fresh green salad with light dressing complements the dish. - Mashed potatoes: Creamy potatoes balance the flavors nicely. Check the internal temperature for safety. Use a meat thermometer to ensure the chicken reaches: - 165°F (75°C): This is the safe cooking temperature for chicken. - Juices run clear: If you cut into the chicken, the juices should not be pink. Yes, frozen spinach works well too. Here’s what to consider: - Thaw and drain: Make sure to thaw it fully and squeeze out extra water. - Flavor adjustment: Frozen spinach may have a milder taste, so adjust seasoning as needed. - Same filling process: Use it the same way as fresh in your filling mix. This blog post guides you through making cheesy spinach stuffed chicken. You learned about the needed ingredients, step-by-step instructions, and useful tips to ensure success. Remember to preheat your oven and secure your chicken well. Feel free to experiment with different cheeses and greens for variety. Follow proper storage methods to enjoy leftovers later. With these tips, your dish will impress every time. Happy cooking!

Cheesy Spinach Stuffed Chicken Delightful and Easy Meal

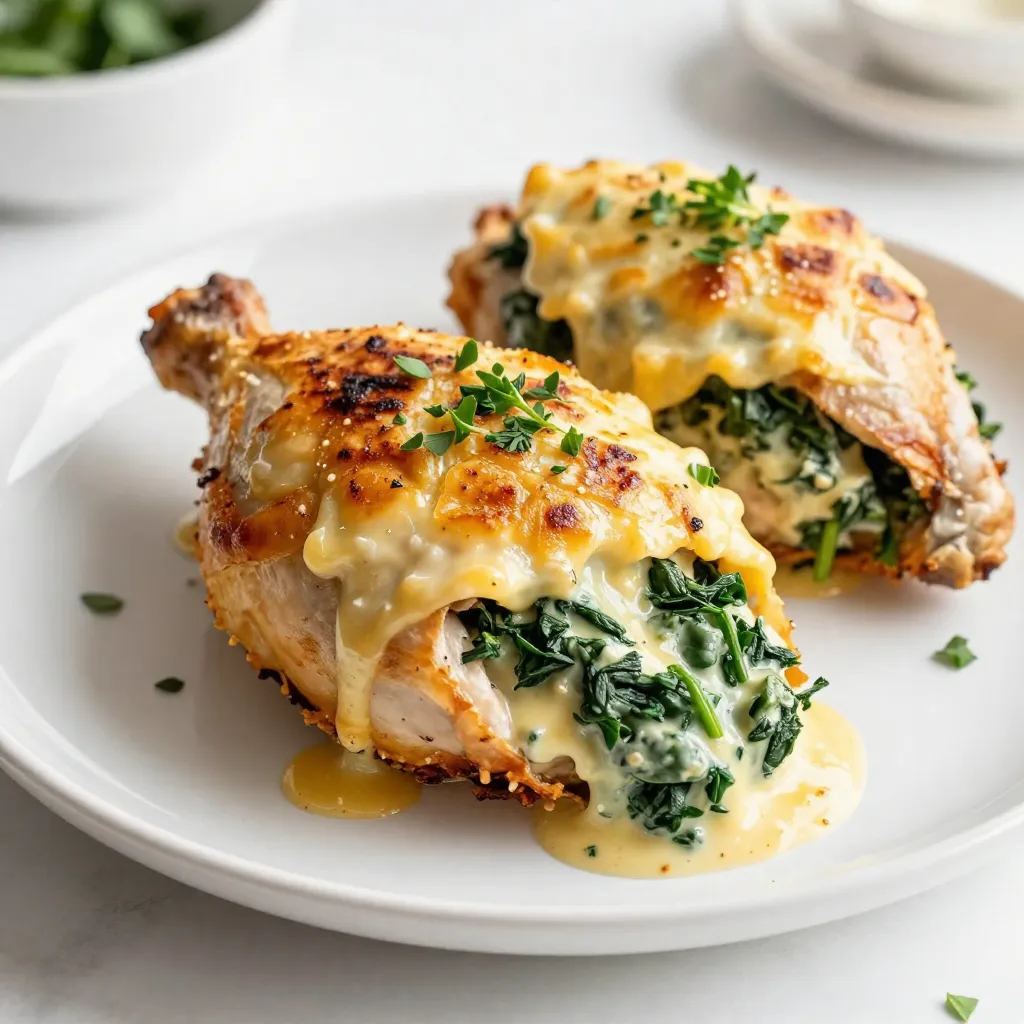
Looking for a simple yet flavorful meal? Cheesy Spinach Stuffed Chicken is the perfect dish! This recipe combines juicy chicken

Older posts
Newer posts
← Previous Page1 Page2 Page3 … Page120 Next →

dsad

© 2026 recipetorch • Built with GeneratePress

Our Policies

  • Copyright Policy
  • Cookie Policy
  • GDPR Policy
  • Privacy Policy
  • Disclaimer
  • Terms Of Use

More Information

  • Home
  • About
  • Contact
  • Appetizers
  • Dessert
  • Dinner
  • Drinks
©2026, recipetorch About Back To Top