Skip to content
DisclaimerTerms Of UseGDPR PolicyCookie Policy

recipetorch

  • Home
  • Drinks
  • Appetizers
  • Dinner
  • Dessert
  • About
  • Contact
  • Privacy Policy
DisclaimerTerms Of UseGDPR PolicyCookie Policy

Nicole

- 2 boneless, skinless chicken breasts - 1 cup button mushrooms, sliced thinly - 1 cup heavy cream - 2 tablespoons balsamic vinegar - 3 cloves garlic, minced - 1 tablespoon olive oil - 1 tablespoon butter - Salt and freshly ground black pepper to taste - Fresh parsley, chopped (for garnish) When cooking, precise measurements help. Use a standard measuring cup for liquids. For dry items, like mushrooms or salt, use a dry measuring cup. A tablespoon is equal to three teaspoons. This makes cooking easier and more accurate. Fresh herbs add bright flavor and color. They work great in this dish. If you use dried herbs, use less since they are stronger. For example, if a recipe calls for one tablespoon of fresh parsley, use about one teaspoon of dried parsley. Fresh herbs also look nice as a garnish. Always choose what you like best to enhance your meal. {{ingredient_image_2}} First, season the chicken breasts with salt and black pepper. This step builds flavor. Heat olive oil and butter in a large skillet over medium heat. Once hot, add the chicken. Sear each side until golden brown, about 5-7 minutes. Check that the chicken is cooked through. Remove them from the skillet and set aside on a plate. In the same skillet, add the sliced mushrooms. Sauté them for 3-4 minutes. Stir occasionally until they become tender. Next, add the minced garlic. Cook for about 1 minute. The garlic should smell fragrant and start to brown slightly. Pour in the balsamic vinegar carefully. Use a wooden spoon to scrape any bits from the bottom. This adds flavor. Let it simmer for 1-2 minutes to reduce. Now, reduce the heat to low and stir in the heavy cream. Mix well until it becomes a rich sauce. Return the chicken to the skillet and coat it in the sauce. Let it simmer for 5-7 minutes until the chicken reaches 165°F. Taste and adjust salt and pepper if needed. Lastly, garnish with chopped parsley for a fresh touch. To cook chicken just right, start with good seasoning. Use salt and pepper on both sides. Heat olive oil and butter in your skillet until hot. Place the chicken in the skillet and let it sear. Cook for 5-7 minutes on each side. Your chicken should be golden brown and reach an internal temperature of 165°F. Always let it rest for a few minutes before slicing. This keeps it juicy. To make your dish pop, use balsamic vinegar wisely. It adds a sweet and tangy touch. Don't forget fresh parsley for garnish. It brightens up the plate. You can also try adding a pinch of red pepper flakes for a hint of heat. If you love garlic, add more than the recipe suggests. Each tweak can create a new taste experience. One mistake is not seasoning enough. Salt boosts the flavor of chicken and sauce. Another error is overcooking the chicken. It can turn dry and tough. Avoid washing the skillet after cooking chicken; the browned bits add flavor to your sauce. Lastly, don't skip the resting time. It allows juices to redistribute, giving you a moist bite. Pro Tips Use Fresh Ingredients: Always opt for fresh mushrooms and garlic for the best flavor. Fresh ingredients enhance the taste and aroma of the dish significantly. Don’t Overcook the Chicken: To keep the chicken tender and juicy, avoid overcooking it. Use a meat thermometer to ensure it reaches an internal temperature of 165°F. Enhance the Sauce: For added depth, consider incorporating a splash of white wine or a teaspoon of Dijon mustard into the sauce while it simmers. Garnish for Flavor: Fresh parsley not only adds color but also a fresh flavor. Consider adding a sprinkle of grated Parmesan cheese for a savory finish. {{image_4}} You can switch the chicken for other proteins. Try using turkey breasts, pork chops, or even shrimp. Each choice offers a unique taste. Turkey breasts work well since they cook similarly to chicken. Pork chops add a nice savory flavor. Shrimp cooks fast, so add it last to keep it tender. For a vegetarian twist, use hearty mushrooms as the star. Replace chicken with portobello mushrooms for a meaty texture. You can also use eggplant or zucchini slices. The creamy sauce pairs nicely with these veggies. This option stays rich and satisfying without meat. You can adjust flavors to make this dish your own. Try adding a splash of white wine for depth. Fresh herbs like thyme or rosemary can enhance the taste. A dash of red pepper flakes adds heat if you like spice. Mix in sun-dried tomatoes for a sweet and tangy kick. These small changes can take your meal to the next level. To keep your creamy balsamic mushroom chicken fresh, store it in an airtight container. Let the dish cool completely before sealing it. This helps prevent moisture build-up and keeps the chicken juicy. Proper storage will help maintain its creamy texture and rich flavor. Place the container in the fridge for up to three days. Avoid leaving it out at room temperature for more than two hours, as this can cause food safety issues. When you’re ready to enjoy leftovers, reheat gently. Use a skillet over low heat to warm the chicken. Add a splash of cream or broth to keep the sauce smooth. Stir often to prevent sticking and ensure even heating. You can also use the microwave, but heat in short bursts. Check every 30 seconds until heated through. This method keeps the chicken tender and the sauce creamy. If you want to freeze the chicken, do so before reheating. Place it in a freezer-safe container and ensure it's airtight. This way, the flavors stay intact. It can be frozen for up to three months. To thaw, move it to the fridge overnight. Reheat it slowly in a skillet, adding a bit of cream if needed. This will help bring back its original taste and texture. Yes, you can make creamy balsamic mushroom chicken ahead of time. Cook the dish fully and let it cool. Store it in an airtight container in the fridge for up to three days. When you are ready to serve, gently reheat it in a skillet over low heat. This way, the flavors will still shine. You can serve this dish with many sides. Here are some great options: - Mashed potatoes - Cooked pasta - Rice - Steamed or sautéed vegetables - A fresh green salad These sides will complement the creamy sauce and add more color to your plate. To make creamy balsamic mushroom chicken dairy-free, use coconut cream instead of heavy cream. You can also try using almond milk or cashew cream for a lighter sauce. Just be sure to add a bit of cornstarch to thicken the sauce. This way, you still enjoy the rich flavors without dairy. This blog post covered key ingredients and tips to make creamy balsamic mushroom chicken. You learned how to prepare chicken, cook mushrooms, and create a tasty sauce. I shared ways to store and reheat leftovers, along with common mistakes to avoid. You now have fun variations to try, such as alternative proteins and vegetarian options. Remember, small changes can boost flavor. Enjoy cooking and make it your own!

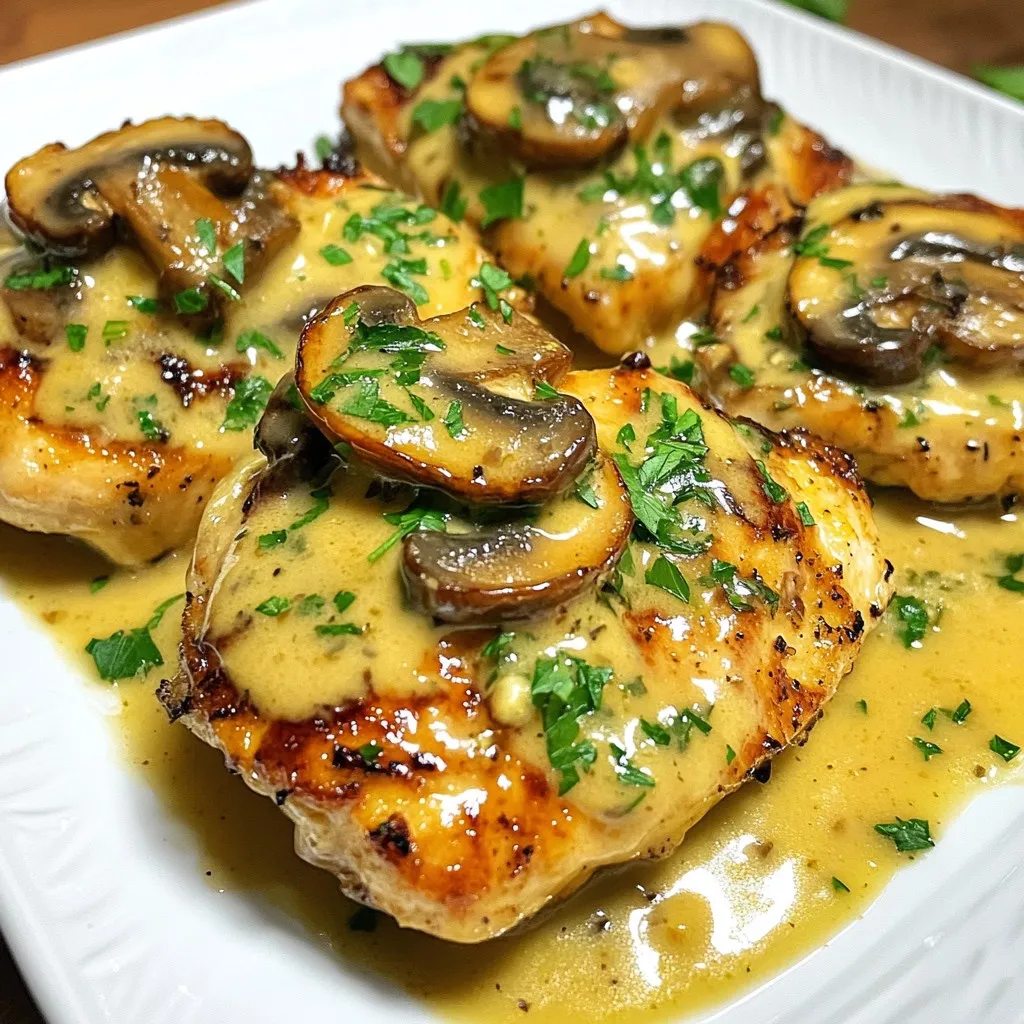
Creamy Balsamic Mushroom Chicken Tasty Dinner Idea

Are you ready to wow your dinner guests or treat yourself to a cozy meal? My Creamy Balsamic Mushroom Chicken

- 2 cups cottage cheese - 1 cup mixed berries (strawberries, blueberries, raspberries) - 1/4 cup honey or maple syrup (to sweeten as desired) Cottage cheese is the star of this recipe. It gives a creamy base and packs protein. Mixed berries bring bright flavors and color. You can use any berries you love. Honey or maple syrup adds the right amount of sweetness. - 1 teaspoon pure vanilla extract - 1 tablespoon fresh lemon juice - A pinch of sea salt Vanilla extract gives warmth and depth. Lemon juice adds a fresh zing that balances the sweet. A pinch of sea salt boosts all the flavors. - Fresh berries - Granola - Nuts Toppings make this dish fun. Fresh berries add color and taste. Granola gives a nice crunch. Nuts add protein and a lovely texture. You can mix and match your favorites! To make this ice cream, start by blending the cottage cheese and berries. Place 2 cups of cottage cheese in a blender. Next, add 1 cup of mixed berries, like strawberries, blueberries, and raspberries. This mix gives great flavor. Then, add 1/4 cup of honey or maple syrup for sweetness. You can adjust this to your taste. Also, add 1 teaspoon of pure vanilla extract and 1 tablespoon of fresh lemon juice. Finally, sprinkle in a pinch of sea salt. Blend all these ingredients on high speed until it is smooth and creamy. You may need to scrape down the sides a few times. The texture should be like soft serve ice cream. Once blended, transfer the mixture to an airtight container. Make sure it seals well to keep the ice cream fresh. Place the container in the freezer for about 1-2 hours. To get the best texture, stir the ice cream every 30 minutes during the first hour. This helps break up ice crystals and keeps it creamy. When the ice cream is ready, scoop it into bowls or cones. You can use an ice cream scoop for nice, round servings. For a fun touch, garnish your ice cream with optional toppings. Fresh berries add color, while granola gives a nice crunch. You can also sprinkle on your favorite nuts for extra flavor. Enjoy your homemade Cottage Cheese Berry Ice Cream Protein! To get your ice cream creamy, blend well. The blending time matters a lot. Blend until smooth, like soft serve. If it’s too thick, add a splash of milk. During freezing, stir every 30 minutes for the first hour. This helps break up ice crystals. It makes your ice cream silky. You can change how sweet your ice cream is. If you want more sweetness, add more honey or maple syrup. Taste as you go. This lets you control the flavor. You can also try other sweeteners like agave or stevia. They work well if you prefer something different. Make your ice cream look nice when serving. Use bowls or cones and add a scoop. Top with extra berries or a sprinkle of granola. Nuts also add crunch and flavor. You can serve it with a slice of cake or cookies for fun. Enjoy mixing and matching! {{image_4}} You can change up the berries in your ice cream. Use seasonal fruits like strawberries, blueberries, or blackberries. These local berries bring fresh flavors to the dish. You can also mix in some raspberries for a tart twist. If you want to be more adventurous, try adding peaches or mangoes for a fun summer vibe. This can make your ice cream unique and tasty. Want to make your ice cream even better? Consider adding chocolate or nut butter. Peanut butter pairs well with berries, giving a rich taste. You can also swirl in some melted dark chocolate for a decadent touch. Another idea is to infuse flavors like mint or coconut. A splash of coconut milk can add creaminess and a tropical feel. Just a little goes a long way! If you follow a vegan diet, you can still enjoy this treat. Simply swap cottage cheese for silken tofu or a vegan yogurt. These options will give you a similar creamy texture. For gluten-free options, this recipe is naturally gluten-free. Just check the labels on any sweeteners or toppings you use. You can enjoy this ice cream without worries! To keep your Cottage Cheese Berry Ice Cream fresh, store it in an airtight container. This helps maintain its creamy texture. I recommend freezing it for about 1-2 hours. Stir the mixture every 30 minutes during the first hour. This will ensure it stays smooth and easy to scoop. - Best freezing duration: 1-2 hours for best texture. - Containers: Use an airtight container to prevent ice crystals. When you want to enjoy your ice cream, take it out of the freezer. Let it sit at room temperature for about 10-15 minutes. This makes it easier to scoop. If you leave it out too long, it may become too soft. Store any leftover ice cream in the freezer for up to two weeks. - How to thaw: Sit at room temperature for 10-15 minutes. - Shelf life: Best if eaten within two weeks. If your ice cream gets hard in the freezer, you can refresh it. Just blend it again briefly to smooth it out. Another fun idea is using this ice cream in smoothies. It adds protein and flavor. You can also layer it in desserts or enjoy it on its own. - Tips for refreshing texture: Blend briefly to restore creaminess. - Repurposing ideas: Use in smoothies or layer in desserts. This ice cream packs a protein punch! Each serving has about 14 grams of protein. The cottage cheese is the star here, giving you that great protein boost. With 2 cups of cottage cheese in the recipe, you can feel good about this treat. The mixed berries add flavor and nutrients but are lower in protein. So, enjoy this creamy delight while knowing it helps fuel your day! Yes, you can use Greek yogurt! It will change the texture and taste a bit. Greek yogurt is creamier and tangier than cottage cheese. This swap can make the ice cream taste a little lighter. If you like the taste of yogurt, go for it! Just keep in mind that the protein content may vary. Greek yogurt still offers good protein but may not be as high as cottage cheese. Freezing the ice cream takes about 1-2 hours. The first hour is key for texture. Stir the mixture every 30 minutes during this time. This helps keep it creamy and smooth. After the first hour, let it freeze without stirring. This gives you that perfect scoopable ice cream! If you want it firmer, leave it in longer. Just remember to let it sit out for a few minutes before serving. This post covered how to make a tasty cottage cheese ice cream. We explored the main ingredients, like mixed berries and sweeteners. I shared preparation steps and freezing methods to create the best texture. You can customize it with various toppings and flavors. Remember to adjust sweetness to your taste. With these tips, you can make a delicious treat that fits your needs. Enjoy your homemade ice cream and let your creativity shine!

Cottage Cheese Berry Ice Cream Protein Delight

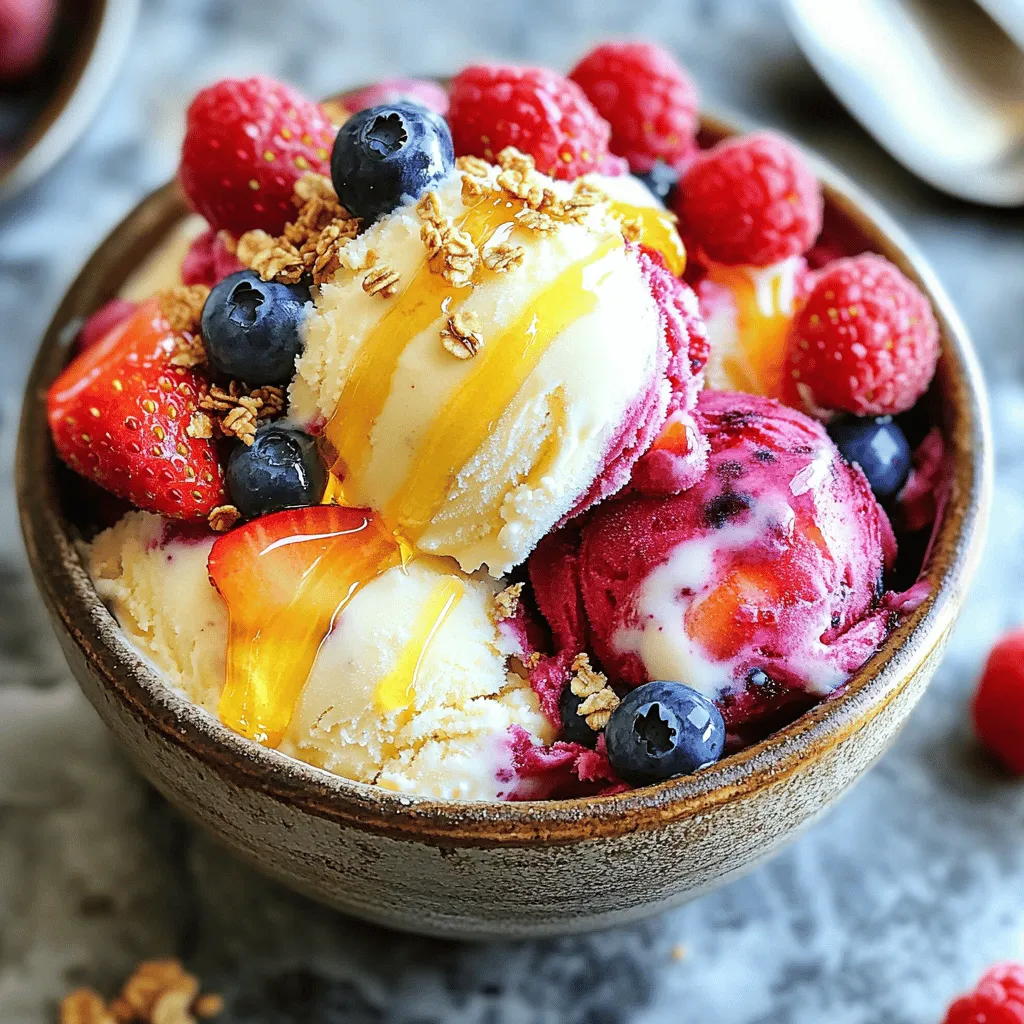
Are you ready to whip up a tasty, protein-packed treat? In this article, I’ll show you how to make Cottage

To make this creamy roasted red pepper pasta, gather these items: - 12 oz pasta (farfalle or penne work wonderfully) - 2 large, ripe red bell peppers - 1 small onion, finely chopped - 3 cloves garlic, minced - 1 cup vegetable broth - 1 cup heavy cream (or a non-dairy alternative for a vegan option) - 1 teaspoon smoked paprika - 1 teaspoon dried Italian herbs (like basil and oregano) - Salt and freshly cracked pepper, to taste - 2 tablespoons extra virgin olive oil If you need to swap ingredients, consider these options: - Use whole wheat pasta for added fiber. - Swap red bell peppers with yellow or orange for a different flavor. - Replace heavy cream with coconut milk for a dairy-free choice. - Use vegetable stock instead of broth for a lighter taste. - Garlic powder can stand in for fresh garlic if needed. For a delightful touch, try these garnishes: - Fresh basil leaves add color and aroma. - Grated Parmesan cheese or a vegan alternative enhances richness. - A drizzle of olive oil gives a shiny finish. - Crushed red pepper flakes can add a spicy kick. To start, preheat your oven to 425°F (220°C). This heat helps roast the peppers well. Cut the red bell peppers in half. Remove the seeds and stems. Place the halves cut-side down on a baking sheet. Drizzle one tablespoon of olive oil over them. Make sure they are well coated. Roast these in the oven for about 20-25 minutes. You want the skins to get charred and blistered. While the peppers roast, heat one tablespoon of olive oil in a large pot. Use medium heat for this step. Add the finely chopped onion and minced garlic to the pot. Sauté them until the onion turns translucent. This should take about 3-4 minutes. The smell will be amazing as they cook! When the peppers are done, let them cool for a minute. Carefully peel off the charred skins. Place the roasted peppers into a blender. Add the sautéed onions and garlic, vegetable broth, and heavy cream. Also, include smoked paprika, dried Italian herbs, and a pinch of salt and pepper. Blend until everything is smooth and creamy. This sauce is the heart of your pasta dish. Pour your vibrant sauce back into the pot. Bring it to a gentle simmer over medium heat. Stir occasionally to let the flavors mix well. Now, add the uncooked pasta to the pot. Make sure it's fully submerged in the sauce. Cover the pot and cook for about 12-15 minutes. Stir it now and then. The pasta should become al dente and soak up most of the sauce. If it gets too thick, you can add a bit of water or more vegetable broth. After cooking, taste the pasta. Adjust with more salt or pepper if needed. Serve your creamy pasta hot, topped with fresh basil and some grated cheese. Roasting bell peppers brings out their natural sweetness. Here’s how to do it right: - Choose ripe peppers: Look for bright red, firm peppers without blemishes. - Cut them evenly: Halve the peppers lengthwise and remove seeds and stems. - Use enough oil: Drizzle them with olive oil. This helps the skin blister. - Roast at high heat: Set your oven to 425°F (220°C) and roast for 20-25 minutes. - Watch for charring: The skin should be charred and blistered. This adds smoky flavor. Let them cool slightly before peeling off the skins. This step is key for a smooth sauce. Choosing the right pasta makes a big difference. Here are my top picks: - Farfalle: The bow-tie shape holds sauce well. - Penne: The tubes trap the creamy sauce inside. - Fusilli: The spirals catch every bit of flavor. Feel free to experiment with your favorite pasta. Just keep in mind the cooking time. You can customize how creamy your dish is. Here are some tips: - Use heavy cream for richness: This makes the sauce very smooth. - Try non-dairy milk: Almond or oat milk can work well for a lighter version. - Add more broth: If the sauce is too thick, a splash of vegetable broth helps. Taste as you go. Adjust the creaminess to suit your preference. Enjoy the process! {{image_4}} You can easily make this creamy pasta vegan. Swap heavy cream for a non-dairy option. Use coconut cream or cashew cream for a rich taste. You can also use almond milk, but it will be lighter. Look for vegan cheese to sprinkle on top. This small change keeps the dish creamy and delicious. Want to add protein? Chicken, shrimp, or tofu are great choices. For chicken, cook bite-sized pieces in the pot until golden. Shrimp cooks quickly, just add it in the last few minutes. If using tofu, try firm tofu. Sauté it until crispy for the best texture. Each protein option adds flavor and makes the dish heartier. To boost flavor, add spices and fresh herbs. Try a pinch of red pepper flakes for heat. Fresh basil, parsley, or thyme can brighten the dish. You can also mix in sun-dried tomatoes or olives for a twist. These additions create new taste experiences without much effort. Experimenting is fun and helps you find your favorite flavor! To keep your leftover creamy roasted red pepper pasta fresh, store it in an airtight container. Make sure to let the pasta cool to room temperature before sealing it. This helps prevent condensation and keeps the pasta from getting soggy. The pasta will stay good in the fridge for up to three days. When you’re ready to enjoy your leftovers, reheat the pasta gently. Place it in a pot over low heat. Add a splash of water or vegetable broth to help loosen the sauce. Stir often until it’s warmed through. You can also use the microwave. Heat in short bursts, stirring in between. This keeps the pasta creamy and tasty. If you want to save the pasta for later, you can freeze it. Divide the cooled pasta into portions and place them in freezer-safe bags or containers. Remove as much air as possible before sealing. It’s best to use frozen pasta within two months. To reheat frozen pasta, thaw it overnight in the fridge. Then follow the reheating tips above for a perfect meal. Yes, you can make this dish ahead of time. Cook the pasta and sauce, then cool them. Store them separately in the fridge. When ready to serve, just reheat both parts together. This saves time and keeps the flavors fresh. Creamy roasted red pepper pasta pairs well with many sides. Consider serving it with: - A crisp green salad - Garlic bread for a crunchy bite - Grilled vegetables for added flavor - Roasted chicken or shrimp for protein These options enhance your meal and make it more satisfying. Absolutely! This pasta is perfect for meal prep. The sauce and pasta hold well in the fridge for a few days. Just divide into containers. You can easily grab a meal for lunch or dinner. It makes busy days easier and tastier. To adjust the spice level, you have a few options. If you like it mild, skip the paprika. For some heat, add red pepper flakes or diced jalapeños. Start with a small amount, then taste and add more if needed. You control the spice! This blog post covered making creamy roasted red pepper pasta. We explored essential ingredients, tasty substitutes, and optional garnishes. The step-by-step guide detailed how to prep peppers, sauté onions, make the sauce, and cook pasta. Tips helped you roast peppers well and choose the best pasta. We shared variations for vegan options and adding protein. Plus, we discussed storage and reheating to keep it fresh. You now have all the tools to make a delicious dish your friends and family will love. Enjoy creating your pasta masterpiece!

Creamy Roasted Red Pepper Pasta One Pot Delight

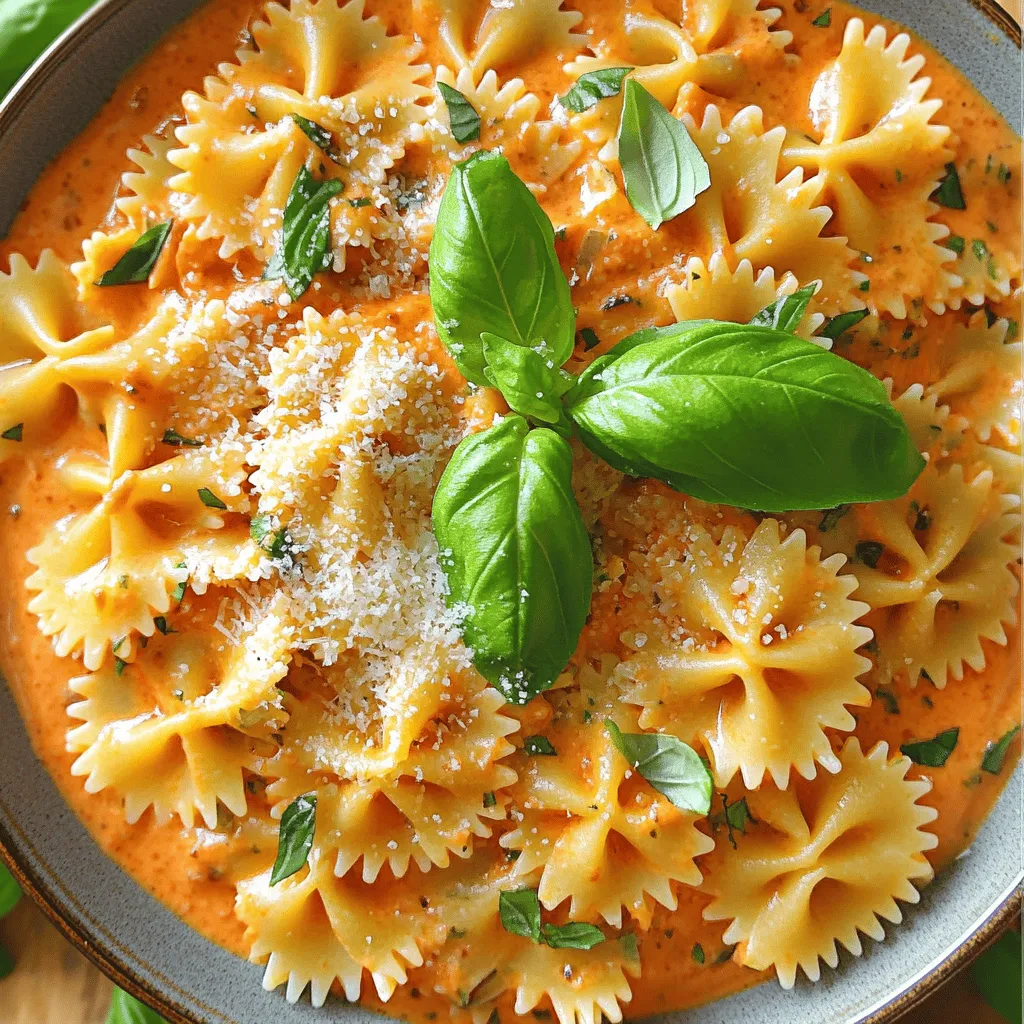
Are you ready to elevate your pasta game? In this Creamy Roasted Red Pepper Pasta One Pot Delight, you’ll find

- 6 bone-in, skin-on chicken thighs - 1/2 cup honey - 4 cloves garlic, finely minced - 2 tablespoons low sodium soy sauce - 1 tablespoon apple cider vinegar - 1 teaspoon sesame oil - 1/2 teaspoon crushed red pepper flakes - 2 tablespoons freshly chopped green onions - 1 tablespoon sesame seeds When I make honey garlic chicken thighs, I love starting with fresh ingredients. The chicken thighs keep the dish juicy and flavorful. Honey gives it a sweet touch, while garlic adds depth. For the marinade, I mix soy sauce, apple cider vinegar, and sesame oil. This blend brings a nice balance of sweet and salty. If you like a bit of heat, crushed red pepper flakes add a nice kick. Garnishing with green onions and sesame seeds brings color and crunch. These optional ingredients make the dish look fancy without extra work. You can always adjust the recipe to suit your taste. Enjoy! {{ingredient_image_2}} 1. Preheat your oven to 375°F (190°C). This step is key for even cooking. 2. In a medium bowl, whisk together the following for the marinade: - 1/2 cup honey - 4 cloves garlic, finely minced - 2 tablespoons low sodium soy sauce - 1 tablespoon apple cider vinegar - 1 teaspoon sesame oil - 1 teaspoon freshly grated ginger - 1/2 teaspoon freshly ground black pepper - 1/2 teaspoon crushed red pepper flakes (optional) Mix until smooth. This marinade adds rich flavor to the chicken. 1. Arrange 6 bone-in, skin-on chicken thighs skin-side up in a large, oven-safe skillet or baking dish. Keep them in a single layer for best results. 2. Pour the honey garlic marinade evenly over the chicken thighs. Use a spoon to coat each piece well. 3. Bake in the preheated oven for 30-35 minutes. Check that the chicken reaches an internal temperature of 165°F (74°C) to ensure it’s safe to eat. 1. For a nice caramelization, broil the chicken for 2-3 minutes. Watch closely to prevent burning. 2. Once done, take the chicken out and let it rest for 5 minutes. This helps keep the juices inside, making it juicy and tender. 3. Finally, garnish the chicken with freshly chopped green onions and a sprinkle of sesame seeds before serving. This adds color and a nice crunch. To ensure even cooking, space the chicken thighs out. Place them skin-side up in a single layer. This helps the heat reach every part of the chicken. Preheat your oven to 375°F (190°C) before baking. This way, the chicken cooks evenly from the start. Checking the internal temperature is key. Use a meat thermometer and aim for 165°F (74°C). This ensures your chicken is safe to eat. You can switch up the marinade ingredients for new flavors. Try using maple syrup instead of honey for a deeper sweetness. You can also swap in tamari if you need a gluten-free option for soy sauce. For added flavor, consider herbs and spices. Fresh thyme or rosemary can add great depth. A splash of lime juice can also brighten the dish. Pair the honey garlic chicken thighs with steamed jasmine rice. The rice will soak up the tasty sauce. You can also serve it with sautéed vegetables, like green beans or broccoli. For a beautiful presentation, place the chicken on a large platter. Drizzle extra sauce over the chicken. Garnish with green onions and sesame seeds for color and crunch. Pro Tips Use Fresh Ingredients: Fresh garlic and ginger will provide a richer flavor compared to dried versions. Always opt for fresh whenever possible for the best taste. Marinate for Extra Flavor: For an even deeper flavor, consider marinating the chicken thighs in the honey garlic mixture for at least an hour or overnight in the refrigerator. Check for Doneness: Use a meat thermometer to ensure the chicken reaches an internal temperature of 165°F (74°C) for safe consumption and juicy results. Rest Before Serving: Let the chicken rest for about 5 minutes after cooking. This allows the juices to redistribute, making the meat more tender and flavorful. {{image_4}} You can easily swap chicken thighs for chicken breasts. Chicken breasts cook faster and are leaner. Just reduce the cooking time by 10-15 minutes. You want the internal temperature to reach 165°F (74°C). If you want a vegetarian option, try using tofu. Firm tofu works best. Press out excess water, then cut it into cubes. Marinate it like you would the chicken. Bake at the same temperature for about 25-30 minutes. To add a fresh twist, try adding citrus like lemon or lime. The zest brightens the dish. You can also toss in fresh herbs like cilantro or parsley. These herbs add a nice touch. For those who like heat, add extra peppers. You can use jalapeños or even red chili flakes. Adjust the amount based on your spice preference. This adds a fun kick to the meal. If you want to use a slow cooker, this works great too. Simply add the marinated chicken to the slow cooker. Cook on low for 6-8 hours or high for 3-4 hours. This method makes the chicken super tender. Grilling is another fun option. Preheat your grill and oil the grates to prevent sticking. Grill the chicken thighs for about 6-8 minutes per side. This method gives a lovely smoky flavor while keeping the chicken juicy. After enjoying your honey garlic chicken thighs, store leftovers in the fridge. Place them in an airtight container. This keeps the chicken fresh and safe. You can refrigerate them for up to three days. If you want to save the sauce, put it in a separate container. This helps the chicken maintain its texture and flavor. Freezing is a great option if you have extra chicken thighs. Let the cooked chicken cool completely before freezing. Wrap each thigh in plastic wrap, then place them in a freezer bag. Remove as much air as possible to prevent freezer burn. You can freeze them for up to three months. When you want to enjoy them, thaw them in the fridge overnight. This keeps the chicken juicy and tasty. Reheating your honey garlic chicken thighs is simple. The best method is to use an oven. Preheat it to 350°F (175°C). Place the chicken in an oven-safe dish. Cover it with foil to keep it moist. Heat for about 15-20 minutes, or until hot. You can also use a microwave if you’re in a hurry. Place the chicken on a microwave-safe plate. Cover it with a damp paper towel to help it stay juicy. Heat in short bursts until warm. Enjoy your delicious meal! How long to cook chicken thighs? You should cook chicken thighs for about 30 to 35 minutes. This time ensures they are juicy and flavorful. Always check the internal temperature for safety. What temperature should chicken thighs be cooked to? Cook chicken thighs to an internal temperature of 165°F (74°C). This temperature makes sure the chicken is safe to eat. Can I use different sweeteners? Yes, you can use other sweeteners like maple syrup or agave. These options will still give a nice sweetness to your dish. Is there a substitute for soy sauce? If you need a soy sauce substitute, try tamari for a gluten-free option. You can also use coconut aminos for a sweeter taste. Can I double the recipe? You can easily double the recipe. Just make sure you have enough space in your oven. Use a larger pan to fit all the chicken. What to serve with honey garlic chicken thighs? Serve honey garlic chicken thighs with steamed rice or sautéed veggies. These sides soak up the tasty sauce and make the meal complete. This blog post covered how to prepare delicious honey garlic chicken thighs. We discussed key ingredients, including chicken, honey, and garlic. I shared step-by-step instructions for easy cooking, plus tips to enhance flavor and serve well. I also provided variations for different proteins and storage tips to keep your meals fresh. In summary, this recipe is versatile and simple. It’s great for busy nights or meal prep. Enjoy making this dish, and share it with those you love.

Honey Garlic Chicken Thighs Flavorful Weeknight Meal

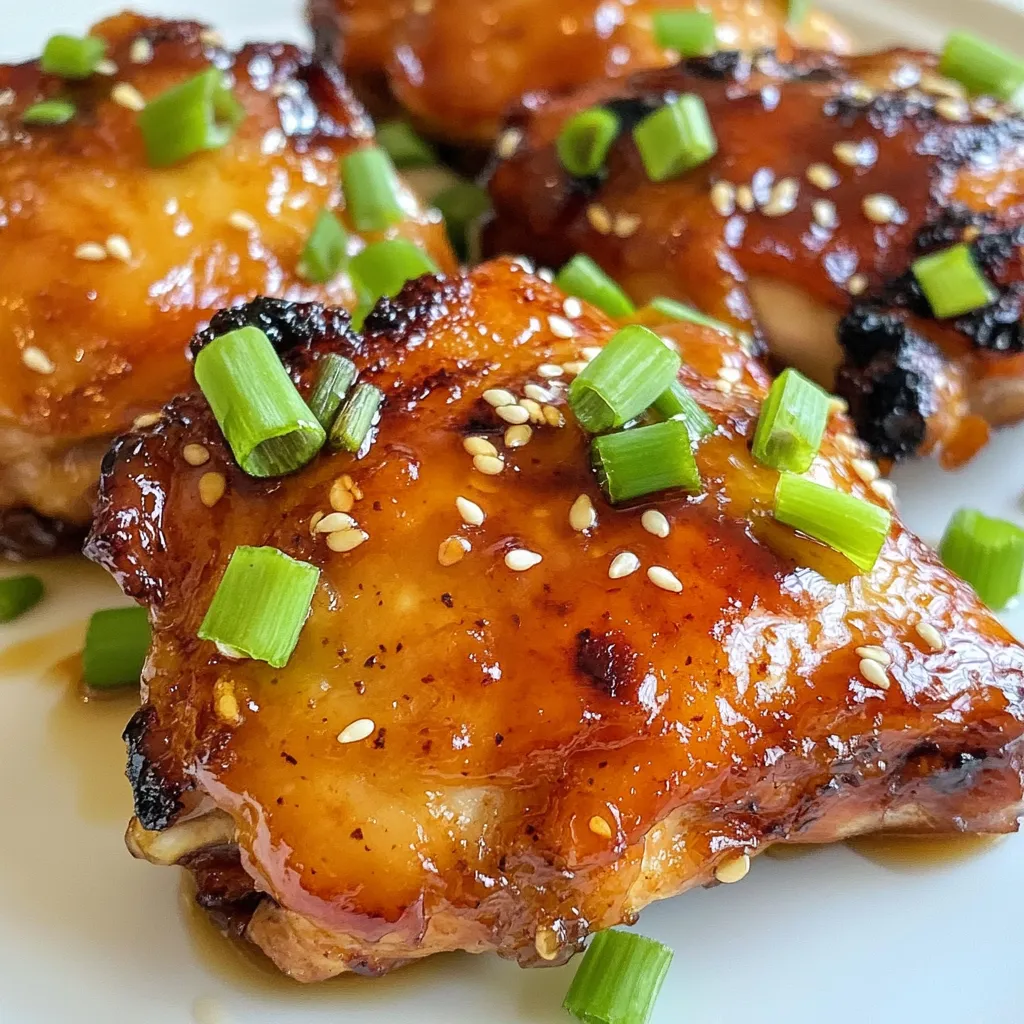
Looking for a quick, tasty meal? Honey Garlic Chicken Thighs are your answer! This dish mixes sweet honey and rich

- 1 can (15 oz) chickpeas, thoroughly drained and rinsed - 1 cup cherry tomatoes, halved - 1 cucumber, diced into bite-sized pieces - 1/2 red onion, finely chopped for a flavorful bite - 1/2 bell pepper, diced - 1/4 cup Kalamata olives, pitted and sliced - 1/4 cup feta cheese, crumbled (optional) I love using chickpeas as the base for this salad. They are rich in protein and fiber. The cherry tomatoes add sweetness and color. Diced cucumber adds a nice crunch, while red onion gives a bold flavor. Bell pepper makes it bright and fresh. Kalamata olives bring a tangy bite. Feta cheese, if you choose, adds creaminess and depth. - 3 tablespoons extra virgin olive oil - 2 tablespoons fresh lemon juice - 1 teaspoon dried oregano - Salt and freshly ground black pepper The dressing is simple but full of flavor. Extra virgin olive oil adds richness. Fresh lemon juice brightens the salad. Dried oregano gives it that Mediterranean flair. Season with salt and pepper to taste. This dressing pulls the whole salad together. - Fresh parsley, finely chopped Adding fresh parsley as a garnish makes the dish pop. It adds color and an herbal aroma that enhances the salad. Just sprinkle it on top right before serving. It makes your salad look beautiful and fresh. {{ingredient_image_2}} To start, you need to rinse and drain the chickpeas. Open the can and pour the chickpeas into a colander. Rinse them under cold water for about 30 seconds. This step removes excess sodium and helps improve flavor. Next, chop your vegetables. Grab some cherry tomatoes and slice them in half. Dice the cucumber into bite-sized pieces for easy eating. For the onion, finely chop half of a red onion. Lastly, take your bell pepper and dice it as well. You can choose any color for a vibrant look. Now, it’s time to mix the salad. In a large bowl, combine the rinsed chickpeas with the halved cherry tomatoes, diced cucumber, chopped red onion, and bell pepper. Stir gently to mix all the colors and flavors together. Next, fold in the sliced Kalamata olives. If you love feta cheese, sprinkle the crumbled feta on top. Make sure you distribute everything evenly so each bite is full of flavor. For the dressing, grab a small bowl. Whisk together three tablespoons of extra virgin olive oil and two tablespoons of fresh lemon juice. Add in one teaspoon of dried oregano, along with salt and pepper to taste. Whisk until everything blends well. This dressing brightens the salad and adds richness. Drizzle the dressing over your colorful salad mix. Now, gently toss the salad to coat all the ingredients. Ensure every piece gets a bit of that tasty dressing. This helps meld the flavors together nicely. After tossing, taste the salad. Adjust the seasoning if needed. You can add more salt, pepper, or lemon juice for extra flavor. Let the salad sit for about 15 minutes. This waiting time allows the flavors to blend beautifully. Just before serving, garnish the salad with freshly chopped parsley. This adds a lovely pop of color and a fresh aroma. Enjoy your Mediterranean Chickpea Salad! To keep your Mediterranean chickpea salad fresh, store it in an airtight container. This helps lock in flavor and keeps ingredients crisp. You can keep it in the fridge for up to three days. However, for the best taste, enjoy it within 24 hours. Serve this salad in a large, shallow bowl for a family-style meal. For a fancy touch, use individual plates. Pair it with grilled chicken, pita bread, or roasted vegetables to make a complete meal. This adds protein and makes it heartier. To boost flavor, consider adding spices like cumin or smoked paprika. Fresh herbs like basil or mint also brighten the dish. Adjust the acidity by adding more lemon juice if you want it zesty. Taste and season with salt and pepper as you go for the best results. Pro Tips Chickpea Choice: Opt for low-sodium canned chickpeas or dry chickpeas that you soak and cook for better control over salt levels. Fresh Herbs: Experiment with fresh herbs like mint or dill in addition to parsley for a unique flavor twist. Chill Time: For an even more refreshing salad, let it chill in the fridge for 30 minutes before serving. Serving Suggestions: This salad pairs wonderfully with grilled meats or as a filling for pita bread for a wholesome meal. {{image_4}} You can change the feta cheese in this salad. Try using goat cheese for a tangy twist. If you want a nutty flavor, try crumbled tofu. For a creamy touch without cheese, use avocado. Feel free to mix in different vegetables too. Bell peppers come in many colors. Each adds a unique flavor. You could also add radishes for a crunchy bite. Carrots or zucchini can add sweetness and texture. If you want to make this salad heartier, add protein. Grilled chicken is a great option. It adds a nice smoky flavor. Shrimp is another tasty choice. Just sauté them until pink and toss them in. Quinoa is perfect for a plant-based boost. Cook it, cool it, and add it to the salad. This will give extra protein and a nutty taste. To make a vegan version, skip the feta cheese. Instead, use nutritional yeast. It gives a cheesy flavor without dairy. You can also add more nuts or seeds. Sunflower seeds or walnuts add crunch and healthy fats. This way, everyone can enjoy the salad. Each serving of Mediterranean Chickpea Salad has about 200 calories. This makes it a light yet filling dish. The calories mainly come from chickpeas and olive oil, which bring good nutrition. This salad is rich in protein, healthy fats, and carbs. Here’s a closer look: - Protein: Chickpeas offer about 7 grams of protein per serving, helping with muscle growth and repair. - Fats: The olive oil gives around 10 grams of healthy fats, which are good for heart health. - Carbohydrates: You get about 25 grams of carbs from the veggies and chickpeas, providing energy. Chickpeas are a great source of fiber. This helps with digestion and keeps you full. The fresh vegetables add vitamins and minerals. For example: - Tomatoes provide vitamin C and antioxidants. - Cucumbers help with hydration due to their high water content. - Red onions have anti-inflammatory properties. Eating this salad can support your overall health while keeping your meals vibrant and tasty! You can make this salad a day before. Prepare the salad without the dressing. Store it in an airtight container in the fridge. Just before serving, add the dressing and toss. This keeps the veggies crisp and fresh. If you want to prep even more, chop the veggies in advance. Place them in separate containers. Mix everything together when you are ready to eat. You can change the dressing for variety. Try balsamic vinaigrette for a sweet twist. A tahini-based dressing adds creaminess. You can also mix yogurt with herbs for a creamy taste. Experiment with flavors to find your favorite. Each dressing gives a new look to the salad. Yes, canned chickpeas work great in this salad. They save time and are easy to use. Just rinse them well to remove excess sodium. Dried chickpeas take longer to prepare but have a firmer texture. If you prefer that bite, soak and cook them before using. Both options are delicious and nutritious. Yes, Mediterranean Chickpea Salad is gluten-free. Chickpeas are naturally gluten-free and a good source of protein. All the veggies and the dressing are also gluten-free. This makes it a great choice for those with gluten intolerance. Always check labels for packaged ingredients to be sure. Enjoy this fresh dish without worry! This Mediterranean Chickpea Salad is easy to make and packed with flavor. We covered fresh ingredients like chickpeas, tomatoes, cucumbers, and feta cheese. I shared tips on preparing and mixing your salad with a simple dressing. You’ll find storage tips and ways to enhance the taste. This salad is not just healthy; it can fit various diets. Try it with your favorite proteins or as a refreshing vegan option. Enjoy making a dish that nourishes both body and mind!

Mediterranean Chickpea Salad Fresh and Flavorful Dish

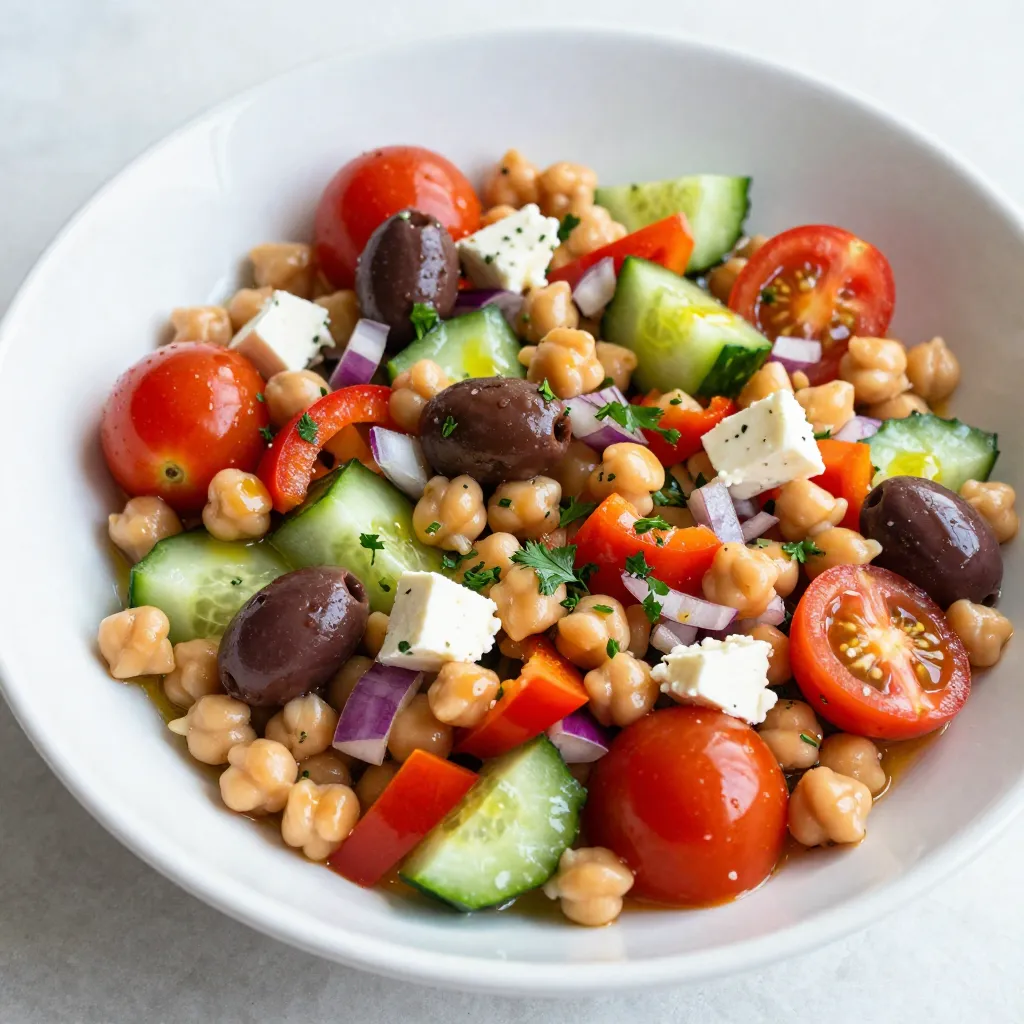
Looking for a bright and tasty dish? My Mediterranean Chickpea Salad is just what you need! Packed with fresh veggies

- 1 pound ground chicken - 1/2 cup breadcrumbs - 1/4 cup finely chopped green onions - 1/4 cup grated Parmesan cheese - 2 cloves garlic, minced - 1 large egg The main ingredients create a tasty base for your meatballs. Ground chicken keeps them light and juicy. Breadcrumbs add texture, while Parmesan gives a nice, cheesy flavor. Green onions bring a bit of freshness, and garlic adds depth. - 1 teaspoon onion powder - 1 teaspoon smoked paprika - 1 teaspoon salt - 1/2 teaspoon black pepper - 1/2 cup buffalo sauce (plus extra for tossing) - 1/4 cup blue cheese crumbles (optional) Seasonings make your meatballs pop with flavor. Onion powder gives a savory taste, while smoked paprika adds a hint of smokiness. Salt and black pepper balance the dish. Buffalo sauce gives a spicy kick, and blue cheese crumbles add creaminess if you choose. - Fresh celery sticks - Dipping sauces Serve your meatballs with fresh celery sticks for crunch. Dipping sauces like ranch or extra buffalo sauce enhance the flavor. These simple sides make your snack even better! - Preheat your oven to 400°F (200°C). This step is crucial for that crispy finish. - Line a baking sheet with parchment paper. It helps with easy cleanup and prevents sticking. - In a large bowl, combine the ground chicken, breadcrumbs, and chopped green onions. - Add grated Parmesan cheese, egg, minced garlic, onion powder, smoked paprika, salt, and black pepper. - Mix everything well with a spoon or your hands until it feels consistent. The right texture should be moist but not too wet. - Now, scoop out portions of the mixture. Roll them into balls about 1 to 1.5 inches wide. - You should get around 20 meatballs. Place them on the lined baking sheet, making sure they have space between them. - Bake in the preheated oven for 20-25 minutes. They should turn golden brown and reach 165°F (74°C) inside. To get crispy buffalo chicken meatballs, start with the right baking method. Bake them at 400°F (200°C). This high heat helps achieve that golden, crispy finish we all love. Spacing is key. Make sure the meatballs are not touching each other on the baking sheet. This allows hot air to circulate around each meatball. If they are too close, they will steam instead of crisp. Want to boost the flavor? Consider adding extra seasonings. You can try a pinch of cayenne pepper for heat or a touch of garlic powder for depth. Experiment with smoked paprika to give your meatballs a unique twist. Breadcrumb choice matters too. Regular breadcrumbs work well, but panko breadcrumbs add extra crunch. If you want a different taste, try using Italian-seasoned breadcrumbs. They can add extra flavor without much effort. When it comes to serving, fresh celery sticks are a must. They add a nice crunch and balance the spicy heat of the buffalo sauce. For gatherings, present your meatballs on a large platter. Drizzle extra buffalo sauce over them for a mouthwatering look. If you like, sprinkle blue cheese crumbles on top. This adds flavor and makes your dish look fancy. {{image_4}} You can swap ground chicken for ground turkey or beef. Turkey makes a great, lean choice. Beef will give a richer flavor. If you need a gluten-free option, use gluten-free breadcrumbs. They work well without changing the taste much. Hot sauce is key for flavor, but you can try different brands. Each brand has its own kick. Look for ones that suit your taste. You can also make your own buffalo sauce. Mix melted butter with hot sauce for a simple homemade version. While blue cheese crumbles are a classic topping, you can try other cheeses. Feta or goat cheese adds a nice twist. Fresh herbs like parsley or cilantro can brighten the dish. Just sprinkle some on for extra flavor and a pop of color. You should cool the meatballs before storing them. Place them in a shallow container. Cover them tightly with a lid or plastic wrap. Refrigerate the meatballs for up to four days. To reheat the meatballs, preheat your oven to 350°F (175°C). Place the meatballs on a baking sheet. Heat them for about 10 to 15 minutes. You can also microwave them for 1 to 2 minutes. You can freeze both raw and cooked meatballs. For raw meatballs, place them on a baking sheet and freeze until solid. Then, transfer them to a freezer bag. They last up to three months in the freezer. For cooked meatballs, let them cool completely. Store them in an airtight container. They can freeze for up to three months too. To thaw, place them in the fridge overnight or use the microwave. Crispy buffalo chicken meatballs fit well into meal plans. You can add them to salads, wraps, or pasta dishes. They make a great snack or main dish. Pair them with veggies, rice, or mashed potatoes for a complete meal. Enjoy the flavors while saving time in the kitchen! You can serve these tasty meatballs with several sides. Here are some popular choices: - Fresh celery sticks: They add a crunchy texture and pair well with buffalo sauce. - Carrot sticks: These offer a sweet flavor to balance the heat. - Blue cheese dressing: A classic dip that complements the bold buffalo flavor. - Ranch dressing: Many enjoy this creamy dip with buffalo dishes. - Potato wedges: These crispy treats make a filling side. - Salad: A light, fresh salad can balance the richness of the meatballs. Yes, you can prepare these meatballs ahead of time. Here are some storage tips: - Refrigeration: Store cooked meatballs in an airtight container in the fridge for up to 3 days. - Freezing: Freeze cooked meatballs for up to 3 months. Place them in a single layer on a baking sheet. Once frozen, transfer to a freezer bag. - Reheating: To reheat, bake from frozen at 350°F (175°C) for 15-20 minutes or until heated through. To check if your meatballs are done, look for these signs: - Internal temperature: The meatballs should reach 165°F (74°C) when checked with a meat thermometer. - Color: They should be golden brown on the outside and no longer pink in the center. - Firmness: Press gently; they should feel firm but spring back slightly. Yes, grilling adds a unique flavor. Here’s how to grill them: - Preheat the grill: Set it to medium heat. - Form meatballs: Make the meatballs as you would for baking. - Use skewers: Thread meatballs onto skewers for easy handling. - Grill time: Cook for about 10-12 minutes, turning frequently. Check the internal temperature to ensure they reach 165°F (74°C). - Coat with sauce: Toss the meatballs in buffalo sauce after grilling for extra flavor. This article covered how to make Crispy Buffalo Chicken Meatballs. We discussed the main ingredients, seasonings, and serving ideas. We also detailed step-by-step instructions, plus tips for achieving the best texture. Variations for ingredient swaps and sauce options were included. In summary, you can easily create delicious meatballs with flexible options. Try different spices and sauces to make them your own. Enjoy experimenting and impress your friends with this tasty dish!

Crispy Buffalo Chicken Meatballs Flavorful Snack Idea

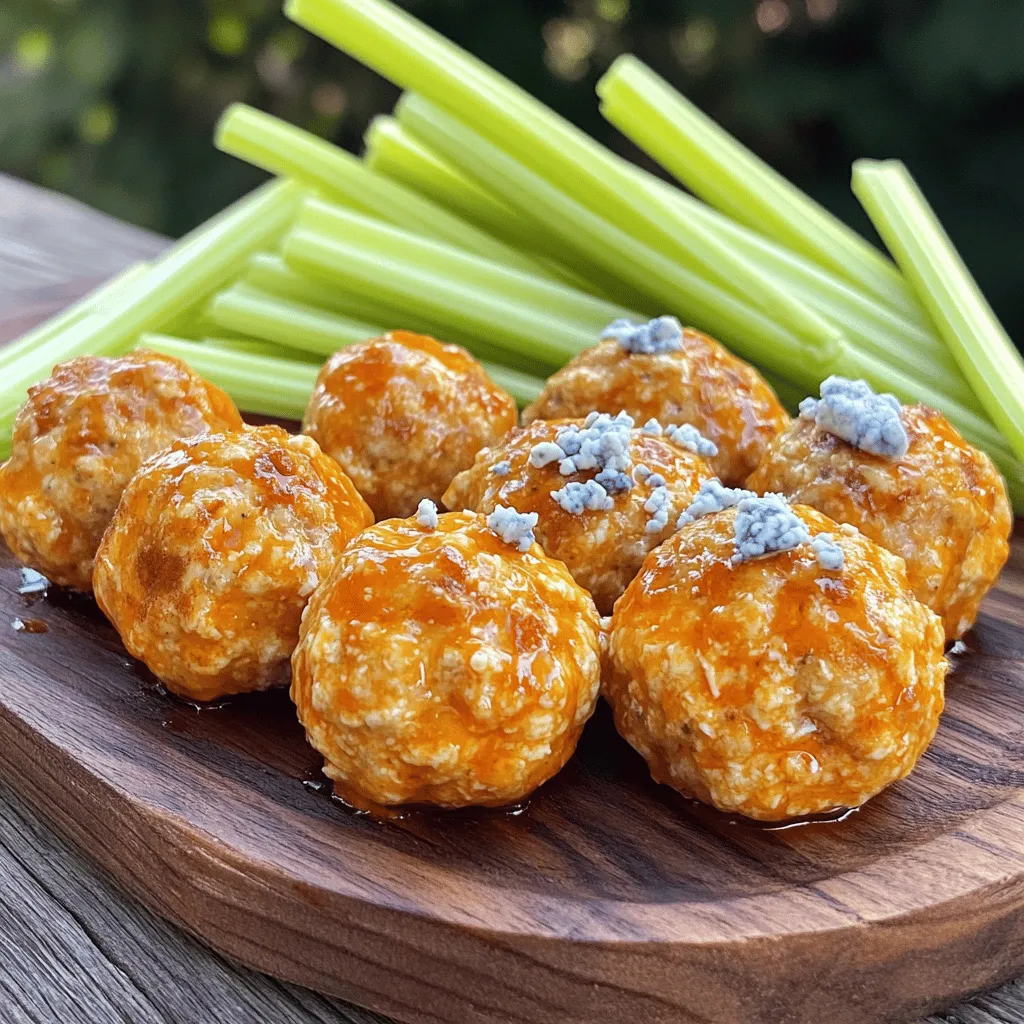
Looking for a tasty snack that packs a punch? Crispy Buffalo Chicken Meatballs are your answer! These meatballs are easy

To create your Pumpkin Cream Cheese Brownies, gather the following ingredients: - 1 cup all-purpose flour - 1/2 teaspoon baking powder - 1/2 teaspoon baking soda - 1/4 teaspoon salt - 1/2 cup unsweetened cocoa powder - 1 cup granulated sugar - 1/2 cup packed brown sugar - 1/2 cup vegetable oil - 2 large eggs - 1 teaspoon vanilla extract - 1 cup pumpkin puree - 1 teaspoon ground cinnamon - 1/2 teaspoon ground nutmeg - 1/4 teaspoon ground cloves - 8 oz cream cheese - 1/4 cup powdered sugar - 1/2 teaspoon vanilla extract (for cream cheese mixture) These ingredients blend together to create a rich and creamy dessert. The pumpkin puree adds moisture and flavor. The cocoa powder gives the brownies a deep chocolate taste. Using two types of sugar gives you both sweetness and depth. The spices like cinnamon, nutmeg, and cloves bring warmth to the dish. The cream cheese layer adds a smooth, tangy contrast. Make sure you use pure pumpkin puree, not pumpkin pie filling. This ensures the right texture and flavor. With all these ingredients ready, you can create a dessert that is both tasty and visually appealing. - Preheat the oven and prepare the baking pan: Start by preheating your oven to 350°F (175°C). Take a 9x9-inch baking pan and grease it lightly or line it with parchment paper. This makes it easy to remove the brownies later. - Whisk dry ingredients together: In a medium bowl, combine 1 cup of all-purpose flour, 1/2 teaspoon baking powder, 1/2 teaspoon baking soda, 1/4 teaspoon salt, and 1/2 cup unsweetened cocoa powder. Whisk these ingredients well until they blend together nicely. Set this dry mix aside. - Mix wet ingredients and incorporate eggs and vanilla: In a large mixing bowl, add 1 cup granulated sugar, 1/2 cup packed brown sugar, and 1/2 cup vegetable oil. Mix them until smooth. Now, add 2 large eggs one at a time, mixing well after each. Finally, stir in 1 teaspoon vanilla extract and 1 cup pumpkin puree until the mix is creamy. - Combine dry ingredients with wet mixture: Gradually add the dry mix to the wet mixture. Fold them together gently until just combined. Be careful not to overmix. Finally, fold in 1 teaspoon ground cinnamon, 1/2 teaspoon ground nutmeg, and 1/4 teaspoon ground cloves for warm spice flavors. - Blend cream cheese layer separately: In another bowl, take 8 oz of softened cream cheese. Add 1/4 cup powdered sugar and 1/2 teaspoon vanilla extract. Blend these ingredients until you achieve a creamy and smooth mixture. - Layer the brownie batter and cream cheese mixture: Pour half of the brownie batter into the prepared pan. Spread it evenly. Next, dollop spoonfuls of the cream cheese mixture over this layer. Pour the rest of the brownie batter on top. Use a knife to gently swirl the cream cheese mix to create a marbled effect. - Bake and check for doneness: Place the pan in your preheated oven. Bake for about 30-35 minutes. To check if they are done, insert a toothpick into the center. It should come out with a few moist crumbs but not wet batter. To make perfect pumpkin cream cheese brownies, mixing well is key. Start by blending your dry ingredients in one bowl. This includes flour, baking powder, baking soda, salt, and cocoa powder. Whisk them until they are well combined. Next, mix your wet ingredients in a large bowl. Combine both granulated and brown sugars with vegetable oil. Make sure this mixture becomes smooth before adding eggs. Add them one at a time and stir well. Then, add vanilla and pumpkin puree. This creates a rich, creamy base. When you add the dry mix to the wet mix, do it slowly. Fold the ingredients together gently. Overmixing can make the brownies tough. You want a soft and moist texture. Only mix until the dry ingredients disappear. Once your brownies cool, cut them into squares. For a nice touch, place them on a pretty platter. You can dust the top with powdered sugar. A sprinkle of cinnamon adds a festive look. To make your dessert even better, serve with a dollop of whipped cream or a scoop of vanilla ice cream. The creaminess pairs so well with the rich brownie flavor. You can also add a drizzle of caramel sauce for extra sweetness. Enjoy your delicious creation! {{image_4}} You can make your Pumpkin Cream Cheese Brownies even more fun by adding nuts or chocolate chips. - Nuts: Chopped walnuts or pecans add crunch and flavor. Stir in about 1/2 cup of your choice to the brownie batter. - Chocolate Chips: Try adding 1/2 cup of semi-sweet or dark chocolate chips. They melt and create a rich, gooey surprise in every bite. You can also play with spices or other flavorings. - Alternative Spices: Instead of cinnamon, nutmeg, and cloves, try ginger or allspice for a new twist. - Extracts: A splash of almond or orange extract can brighten the flavors. If you need to make dietary changes, there are great options. - Gluten-Free Flour: Substitute all-purpose flour with a gluten-free blend. Look for one that measures cup-for-cup. - Vegan Substitutes: Use flax eggs (1 tablespoon ground flaxseed mixed with 3 tablespoons water per egg) instead of regular eggs. For cream cheese, use a vegan cream cheese. These swaps keep the brownies tasty while meeting dietary needs. These variations let everyone enjoy this delicious treat! To keep your pumpkin cream cheese brownies fresh, store them properly. Here are some best practices: - Room Temperature: Place brownies in an airtight container. They stay fresh for 3-4 days at room temperature. This keeps them soft and tasty. - Refrigerator: If you prefer, you can store them in the fridge. They last about a week this way. Just make sure to keep them in an airtight container. The chill can make them a bit firmer, but they still taste great. If you want to save your brownies for later, freezing is a great option. Here’s how to do it: - Freezing Brownies: Cut the brownies into squares. Wrap each piece in plastic wrap. Then, place them in a freezer-safe bag. They can last for up to three months. - Thawing Instructions: To enjoy your frozen brownies, take them out of the freezer. Let them sit in the fridge for several hours or overnight. You can also warm them in the microwave for 10-15 seconds. This brings back their delicious, fudgy texture! You can use either canned pumpkin puree or fresh pumpkin. Canned pumpkin is easy and saves time. Just make sure it is pure pumpkin and not pie filling. If using fresh pumpkin, cook and mash it until smooth. These brownies last about 3 to 5 days when stored in an airtight container. Keep them at room temperature for the best taste. If you want them to last longer, refrigerate them. They can last up to a week in the fridge. You can use melted coconut oil or unsweetened applesauce instead of vegetable oil. Both options add moisture and flavor. If you want a lighter taste, use canola oil as another substitute. Yes, you can make these brownies in advance. Bake them a day or two before you plan to serve them. Just store them properly. For the best texture, let them cool completely before cutting and storing. This blog outlined how to make delicious pumpkin cream cheese brownies. We covered the ingredients, step-by-step instructions, and tips for perfect results. You learned about storage options and tasty variations, too. In cooking, practice makes perfect. Enjoy these brownies warm or cold, and share them with friends. You can also try different flavors and see what you like best. Happy baking, and let's create sweet memories!

Pumpkin Cream Cheese Brownies Irresistible Dessert Dish

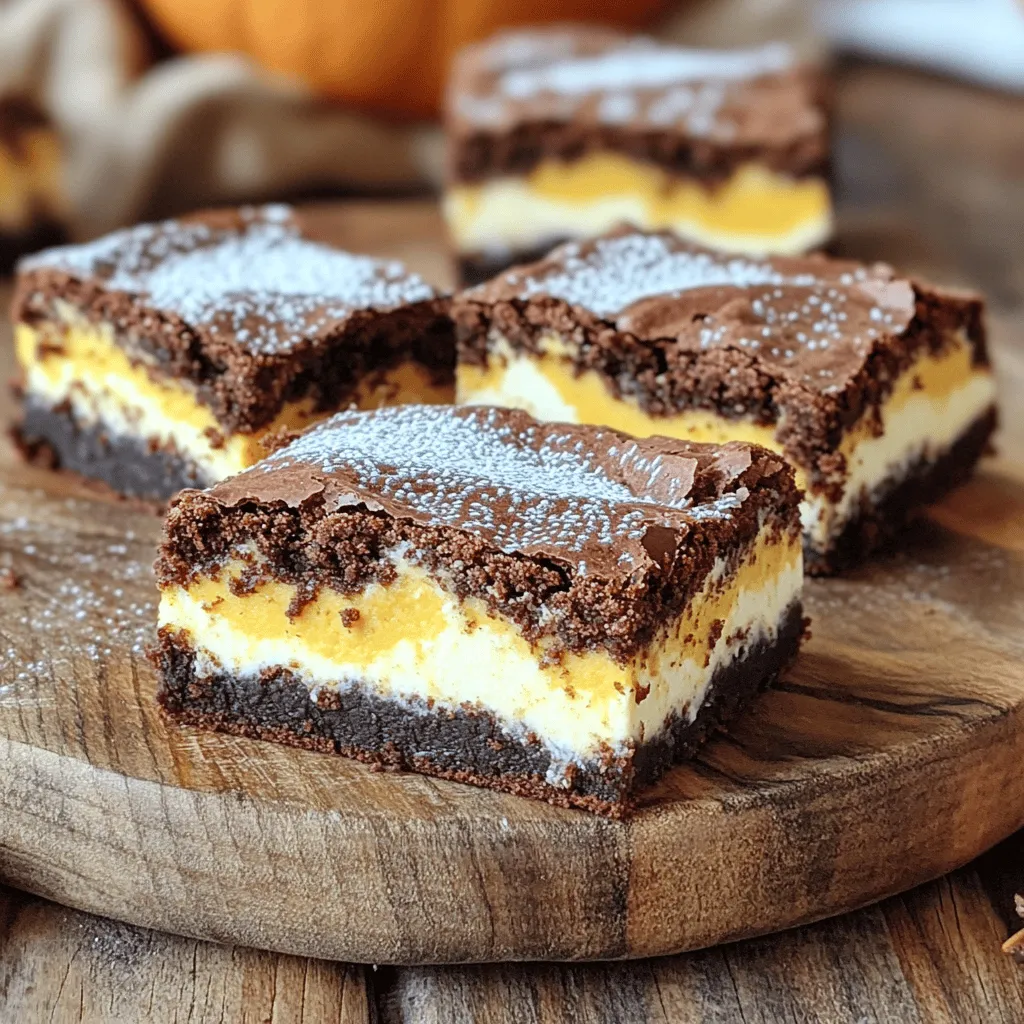
If you love pumpkin treats, you must try these Pumpkin Cream Cheese Brownies! This dessert combines rich chocolate flavors with

- 2 medium apples (Granny Smith or Honeycrisp) - ½ cup unsweetened applesauce - 2 large eggs - 2 cups all-purpose flour - 1 cup granulated sugar - 1 tablespoon baking powder - 1 teaspoon ground cinnamon - ½ teaspoon ground nutmeg - ½ teaspoon salt - ½ cup whole milk - 2 tablespoons unsalted butter, melted - Vegetable oil (for frying) - ½ cup additional granulated sugar (for coating) - 1 tablespoon ground cinnamon (for coating) I love using fresh apples in my donuts. Granny Smith or Honeycrisp work great because they are tart and sweet. Start by peeling and grating the apples. This gives the donuts a nice texture and flavor. Next, you need applesauce. This adds moisture and helps keep the donuts soft. The two eggs will bind everything together. Make sure they are large eggs for the right consistency. Now, let's talk about the dry ingredients. You will need all-purpose flour, granulated sugar, baking powder, ground cinnamon, nutmeg, and salt. These create the light and fluffy base for the donuts. Finally, for cooking, use whole milk and melted butter for richness. You will also need vegetable oil for frying. The oil must be hot to create that perfect crispy outside. Don't forget the cinnamon-sugar coating! You will mix extra sugar with ground cinnamon for a sweet finish. This makes each bite a tasty treat! - First, combine the grated apples, flour, sugar, baking powder, cinnamon, nutmeg, and salt in a large bowl. Make sure to mix them well. This adds flavor and texture. - Next, in another bowl, whisk together the applesauce, eggs, milk, and melted butter. This creates a smooth, wet mixture that helps bind everything. - Slowly pour the wet mix into the dry mix. Stir gently with a spatula until just combined. It’s okay if there are small lumps. Overmixing can lead to tough donuts. - Now, heat vegetable oil in a deep pot or fryer to 350°F (175°C). This is the perfect temperature for frying. To check if it’s ready, drop in a small spoonful of batter. It should sizzle and float. - Carefully drop spoonfuls of the batter into the hot oil. Make small donut shapes. Don’t overcrowd the pot, as this helps them cook evenly. - Fry the donuts for about 2-3 minutes on each side. Look for a golden brown color. This means they are cooked through. Use a slotted spoon to remove them and place them on paper towels to drain the oil. - While the donuts are frying, mix the additional sugar and cinnamon in a shallow bowl. This will be your sweet coating. - Roll the warm donuts in the cinnamon-sugar mixture right after frying. Make sure each donut is fully coated for that sweet crunch. - Allow the donuts to cool slightly before serving. This helps them set and makes them easier to eat. To get the best donut texture, avoid overmixing the batter. When mixing wet and dry ingredients, do it gently. A few lumps are okay. This will keep the donuts light and airy. Using a thermometer for the oil temperature is key. Heat your oil to 350°F (175°C). If the oil is too hot, the outside will burn. If it's too cool, the donuts will soak up oil. Serve these donuts warm with fresh apple slices. The tartness of the apples pairs well with the sweet donuts. You can also drizzle them with caramel sauce. This adds a rich flavor and a fun touch for dipping. You can make healthier swaps in this recipe. Substitute applesauce for butter to cut calories and fat. This keeps the donuts moist and delicious. Using whole wheat flour is another great option. It adds fiber and nutrients. Your donuts will still taste amazing while being a bit more wholesome. {{image_4}} You can easily change the flavor of your donuts. For a fun twist, add nutmeg. Just a half teaspoon gives a warm, cozy taste. It pairs well with apples. Another idea is to mix in chocolate chips. They melt when cooked and add a sweet surprise. If you want to try something new, consider a glaze. A maple glaze adds a sweet, rich flavor. It’s simple to make. Just mix maple syrup with powdered sugar. For a lighter taste, go for vanilla icing. A simple blend of powdered sugar and milk gives a nice finish. Want a healthier option? You can bake the donuts instead of frying them. Preheat your oven to 350°F. Use a donut pan for fun shapes. Another great method is using an air fryer. It cooks the donuts fast and keeps them crispy without all the oil. You can keep your cinnamon sugar apple donuts at room temperature. Place them in an airtight container. This keeps them fresh for a few days. For longer storage, refrigerate your donuts. They will stay good for up to 3 days. If you want to keep them even longer, freeze them. They can last in the freezer for up to 2 months. Just make sure to wrap them well to avoid freezer burn. When you're ready to enjoy your donuts again, warm them in the microwave. Heat them for a few seconds until they feel warm. If you want a crispy texture, re-crisp them in the oven. Preheat your oven to 350°F (175°C) and bake for about 5 minutes. This will bring back that fresh taste and texture. Yes, you can! Some apples work better than others. Granny Smith apples are tart and hold their shape well. Honeycrisp apples give a nice sweetness and crunch. Other good options include Fuji and Gala. Each type adds its own flavor. Just avoid very soft apples like Red Delicious. They won’t give the right texture. To make fluffy donuts, follow a few simple tips. First, don't overmix your batter. Mix just until the dry and wet ingredients combine. This helps keep air in the batter. Second, make sure your oil is hot enough. It should be 350°F (175°C). If the oil is too cool, the donuts will soak up grease and become heavy. Finally, fry small batches so they cook evenly. If your donut batter is too thick, don’t worry! You can add a little more liquid. Start with a tablespoon of milk. Gently stir it in until the batter reaches a better consistency. If it stays too thick, add more milk slowly. Just be careful not to make it too runny. You want it to hold its shape when you drop it in the oil. This blog post covered how to make delicious apple donuts. We discussed fresh and dry ingredients, along with cooking essentials. I shared step-by-step instructions for batter preparation, frying, and coating. You learned valuable tips for texture, presentation, and healthier options. Variations let you customize flavor and cooking methods. Store your treats properly to enjoy them longer. Remember, making donuts can be fun and rewarding. Enjoy your baking adventure and savor each bite!

Cinnamon Sugar Apple Donuts Tasty Sweet Treats

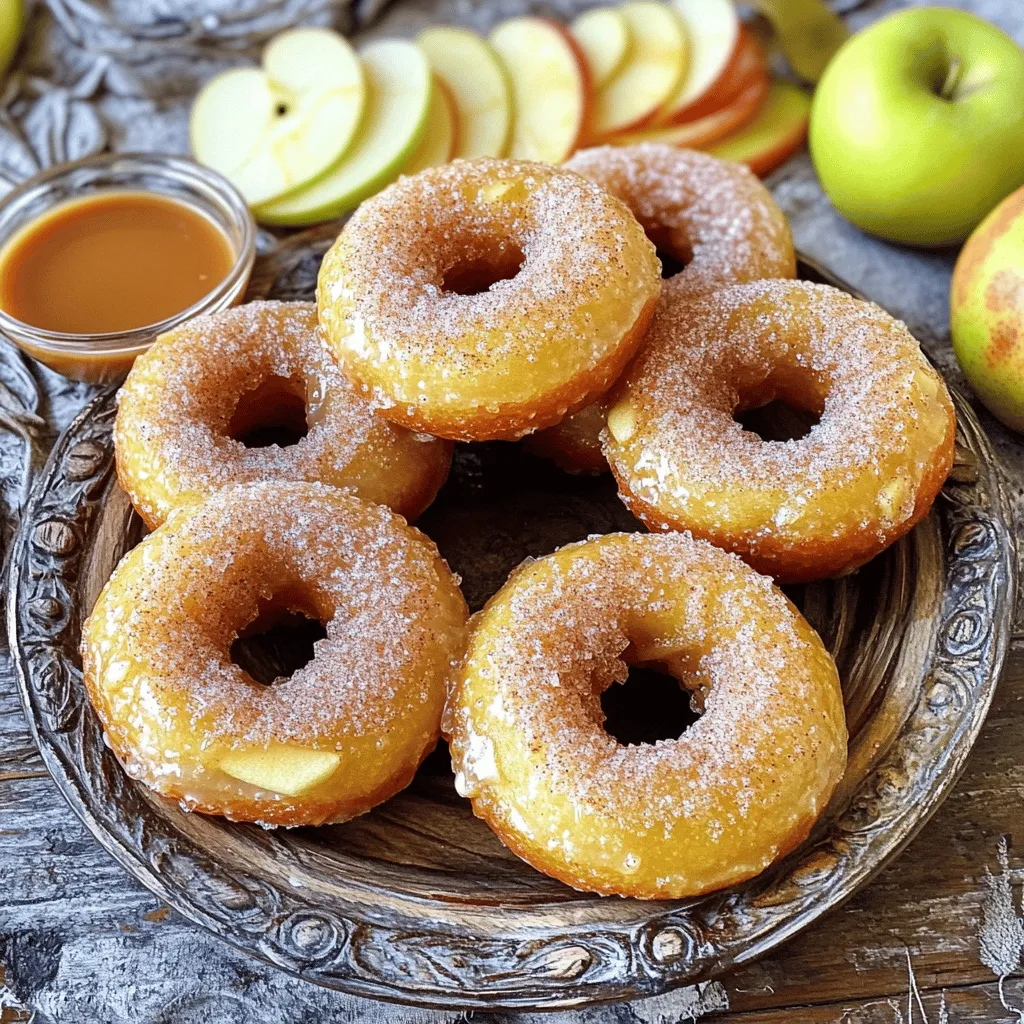
Are you ready to treat yourself to something delicious? These Cinnamon Sugar Apple Donuts are the perfect blend of sweet

To make No-Bake Pumpkin Spice Protein Balls, gather these simple ingredients: - 1 cup rolled oats - 1/2 cup pumpkin puree - 1/2 cup almond butter (or peanut butter) - 1/4 cup honey (or maple syrup) - 1 scoop vanilla protein powder - 1 teaspoon pumpkin pie spice - 1/2 teaspoon ground cinnamon - 1/4 teaspoon salt - Optional: 1/4 cup mini chocolate chips - Optional: 1/4 cup chopped nuts or seeds Using quality ingredients makes a big difference. Rolled oats provide a hearty base. Pumpkin puree adds flavor and moisture. Almond butter or peanut butter gives a creamy texture. Honey or maple syrup sweetens the mix naturally. The protein powder boosts the energy level. Pumpkin pie spice and cinnamon give warmth and zest. Salt enhances all the flavors. Optional chocolate chips or nuts add fun textures and tastes. When you combine these ingredients, you create a tasty snack. These protein balls are perfect for busy days. They are great before or after workouts. Plus, they satisfy your sweet tooth without guilt. Enjoy making them! In a large bowl, mix 1 cup of rolled oats with 1/2 cup pumpkin puree. Add 1/2 cup almond butter and 1/4 cup honey. Use a spatula to blend. Keep mixing until the mixture is smooth and creamy. This step gives the protein balls a strong base. Now, sprinkle in 1 scoop of vanilla protein powder, 1 teaspoon pumpkin pie spice, 1/2 teaspoon ground cinnamon, and 1/4 teaspoon salt. Stir the mixture well. Make sure everything is combined. This adds flavor and nutrition to your protein balls. If you want some extra fun, fold in 1/4 cup mini chocolate chips or 1/4 cup chopped nuts or seeds. These add texture and a little sweetness. Mix gently so they spread evenly throughout the mixture. Take about 1 tablespoon of the mixture and roll it into a ball. Use your hands to shape it well. Repeat until you form around 15-20 balls. The size is up to you, but this gives a great snack portion. Place the protein balls on a tray lined with parchment paper. Refrigerate them for at least 30 minutes. Chilling helps them firm up, making them easier to eat and hold. After they set, transfer the protein balls to an airtight container. These can stay fresh in the fridge for up to a week. Enjoy them as a quick snack anytime you need a boost! Mixing is key to great protein balls. Start with a large bowl. Add the rolled oats, pumpkin puree, almond butter, and honey. Use a spatula or wooden spoon. Mix well until everything is creamy. Make sure there are no dry oats left. This step is vital for a smooth texture. When adding dry ingredients, like protein powder and spices, sprinkle them evenly. This helps them blend in better. Stir until all the ingredients are combined. If you want to add chocolate chips or nuts, do it gently. This keeps the mix from getting too mushy. To roll the perfect balls, wet your hands slightly. This helps the mixture not stick. Take about one tablespoon of the mix. Roll it between your palms. Keep the balls compact but not too tight. Aim for a size similar to a golf ball. This size is easy to eat and perfect for snacking. If they don’t look round, that’s okay. Just reshape them a bit. It's all part of the fun! To make these protein balls vegan, switch honey for maple syrup. This keeps the sweetness but makes it plant-based. For gluten-free options, ensure your oats are marked gluten-free. Most rolled oats are naturally gluten-free, but it's good to check. You can also change the nut butter. Use sunflower seed butter if you need nut-free options. These simple swaps keep the flavors tasty and your snack diet-friendly. Enjoy these protein balls without worrying about dietary needs! {{image_4}} You can easily change the flavor of your protein balls. Instead of almond butter, use peanut butter for a stronger taste. If you like coconut, try coconut butter. It adds a sweet flavor. You can also use different spices. Swap pumpkin pie spice for chai spice or even vanilla extract for a fresh twist. For those with nut allergies, I have great news! You can make these protein balls nut-free. Just replace almond butter with sunflower seed butter. It tastes delicious and is safe for nut-free diets. Always check labels to ensure your ingredients are nut-free. Add-ins can make your protein balls even better. You might try mixing in seeds, like chia or flaxseeds, for a healthy crunch. Dried fruits like cranberries or raisins can add natural sweetness. You can also use mini chocolate chips for a fun treat. Experiment with different combinations to find your favorite blend! To keep your no-bake pumpkin spice protein balls fresh, use an airtight container. This helps prevent moisture and keeps them tasty. Line the bottom of the container with parchment paper. This makes it easy to remove the balls later. Store them in a single layer if possible. This way, they won’t stick together. These protein balls can last up to one week in the fridge. If you want a quick snack, grab one whenever you feel hungry. Just remember to check for any signs of spoilage. If they look or smell off, it’s best to toss them. If you need to keep them longer, freezing works great. Place the protein balls in a single layer on a tray. Freeze them for about an hour. Once set, transfer them to a freezer-safe bag or container. They can last for up to three months in the freezer. When you're ready to eat, just thaw them in the fridge overnight. Enjoy your tasty snack whenever you want! Yes, you can use quick oats. Quick oats are thinner and cook faster. They will mix well, but the texture may be softer. Rolled oats provide a chewier bite. If you like that texture, stick with rolled oats. To cut down on sugar, reduce the honey or maple syrup. You can replace it with unsweetened applesauce or mashed banana. These options add moisture without too much sweetness. You can also use a sugar substitute like stevia for a lower-calorie choice. These protein balls are great for many occasions. You can serve them at parties, picnics, or as a quick breakfast. They also work well as a post-workout snack. Kids love them too, so they fit well in lunchboxes. Yes, you can. For example, use sweet potato puree or applesauce. Both options give a similar texture and moisture. Each will change the flavor a bit, but they will still taste great. You now know how to make tasty protein balls with simple ingredients. We covered the steps for mixing, forming, and storing them. You also learned tips for perfect balls and ways to make this recipe your own. Remember, you can try different flavors and adjust ingredients for dietary needs. These protein balls are great for snacks or quick meals. Enjoy making them and sharing with friends!

No-Bake Pumpkin Spice Protein Balls Simple and Tasty

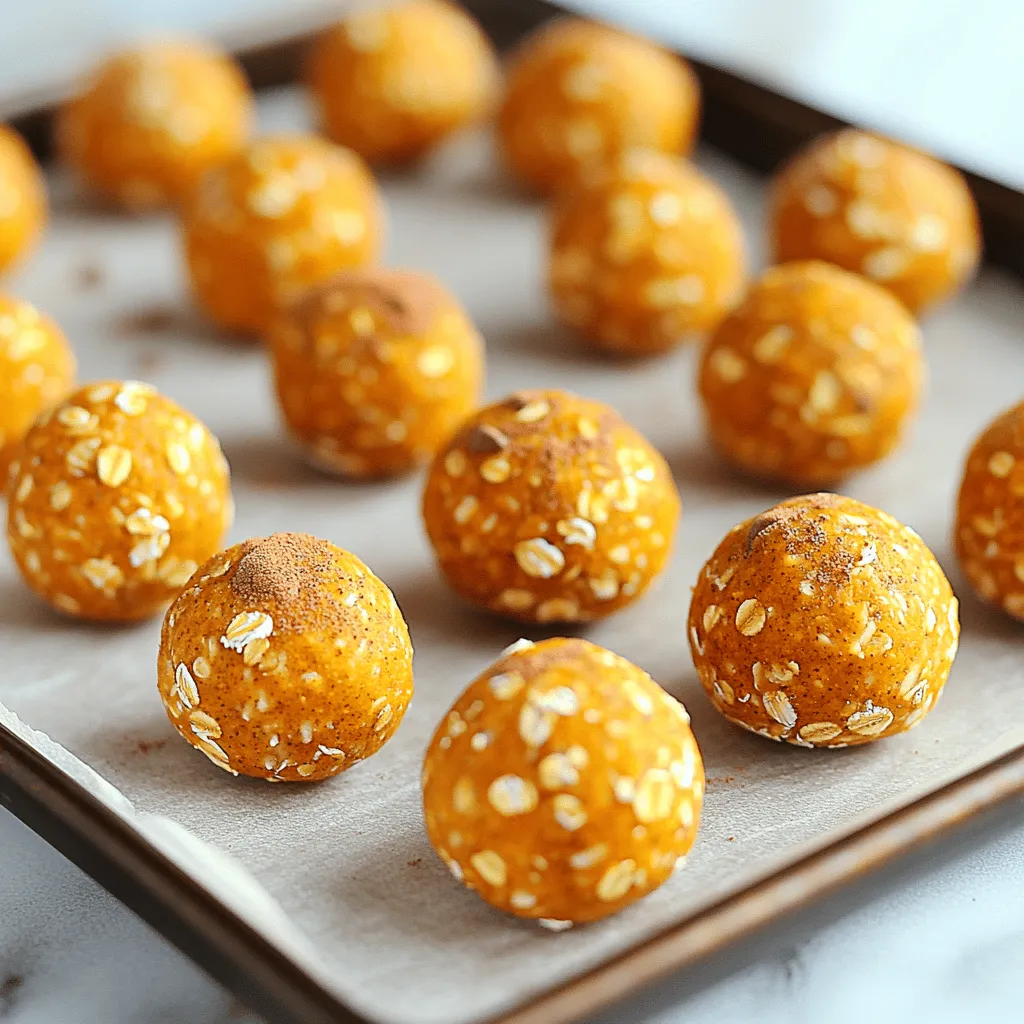
Are you ready for a tasty treat that’s both simple and healthy? These No-Bake Pumpkin Spice Protein Balls pack a

- 1 medium butternut squash, peeled and cut into 1-inch cubes - 4 cloves of garlic, finely minced - 2 tablespoons extra virgin olive oil - 1 cup freshly grated Parmesan cheese - 1 teaspoon dried thyme - 1 teaspoon sea salt - 1/2 teaspoon freshly ground black pepper - 1 tablespoon balsamic glaze (optional, for drizzling) - Fresh parsley, finely chopped (for garnish) If you want to switch things up, try these alternatives: - Cheese: Use feta or goat cheese for a tangy spin. - Oil: Substitute olive oil with avocado oil for a different flavor. - Herbs: Try rosemary or sage instead of thyme for a unique taste. - Sweetness: Add a pinch of brown sugar to enhance the flavor. Butternut squash is not only tasty but also good for you. Here are some benefits: - Rich in Vitamins: It has lots of Vitamin A, which helps your eyes. - High in Fiber: This helps with digestion and keeps you full. - Low in Calories: Great for those watching their weight. - Antioxidants: It has antioxidants that fight free radicals in your body. - Versatile: You can use it in many dishes, from soups to salads. Enjoy the tasty flavors and good health that roasted garlic Parmesan butternut squash brings! Start by preheating your oven to 400°F (200°C). This step is key for getting that perfect roast. Make sure your oven reaches the right temperature before you put the squash in. In a large bowl, combine the butternut squash cubes, minced garlic, olive oil, thyme, sea salt, and black pepper. Use your hands or a spatula to mix well. You want the squash pieces to be nicely coated with oil and seasonings. Next, spread the seasoned squash in a single layer on a baking sheet lined with parchment paper. Avoid overcrowding the squash. This ensures it roasts evenly and gets that nice golden color. Place the baking sheet in your preheated oven. Roast the squash for about 25-30 minutes. Halfway through, flip the pieces with a spatula. They should become tender and golden brown when done. When the squash is ready, take the baking sheet out of the oven. Sprinkle the grated Parmesan cheese over the squash. Make sure to spread it evenly for a great cheesy flavor. Put the baking sheet back in the oven for another 5-7 minutes. You want the cheese to melt and turn golden. Once done, drizzle balsamic glaze on top if you like. Finally, add a sprinkle of fresh parsley for color before serving. Enjoy your dish warm! To get the best roast, you need a hot oven. Preheat it to 400°F (200°C). This heat helps the squash cook evenly and caramelize well. Cut your butternut squash into 1-inch cubes. This size allows them to cook perfectly. They will be tender in the center and crispy on the outside. Flip the squash halfway through cooking. This step makes sure every piece gets golden brown. When you spread the squash on the baking sheet, give them space. Overcrowding can lead to steaming instead of roasting. If the squash pieces are too close, they will not brown well. Use two baking sheets if needed. This way, the heat can reach every piece. You want each cube to be its own little flavor bomb! Seasoning is key to a tasty dish. Use fresh garlic for a strong flavor. The olive oil helps the spices stick and makes the squash crisp. Don’t forget thyme, sea salt, and black pepper. They add depth to your dish. If you like, drizzle balsamic glaze on top at the end. It gives a sweet and tangy touch to the savory squash. {{image_4}} You can make this dish vegan easily. Instead of Parmesan cheese, use nutritional yeast. It gives a cheesy flavor. You can also try vegan cheese. It melts well and adds creaminess. Just follow the same steps in the recipe. You will still enjoy a great taste, and it is plant-based! Feel free to mix in other veggies. Carrots, Brussels sprouts, or sweet potatoes work great. Cut them to the same size as the butternut squash. This way, they roast evenly. Just toss them with the same garlic and olive oil mix. Each veggie brings its own flavor, making the dish even better. You can boost the taste with more spices. Try adding smoked paprika for a smoky flavor. A pinch of cayenne pepper adds heat, too. For herbs, rosemary or sage pairs well with squash. Mix and match to find your favorite combos. Don’t be afraid to experiment! Each change makes the dish unique. Once you finish your meal, let the roasted butternut squash cool down. Place any leftovers in an airtight container. Refrigerate them for up to three days. This way, you keep the flavors fresh and tasty. When you're ready to enjoy the leftovers, preheat your oven to 350°F (175°C). Spread the squash on a baking sheet. Heat for about 15-20 minutes. This method helps to keep the squash crispy on the outside and warm inside. If you prefer, you can use a microwave. Just heat for 1-2 minutes, but the texture may change. If you want to save the squash for later, freezing works well. First, let the squash cool completely. Spread it out on a baking sheet in a single layer. Freeze for about an hour. Once frozen, transfer the pieces to a freezer bag. Remove as much air as you can. You can keep it in the freezer for up to three months. When you’re ready to eat, thaw it in the fridge overnight before reheating. The best way to cut butternut squash starts with proper tools. Use a sharp knife and a sturdy cutting board. First, cut off both ends of the squash. This helps it stand steady. Next, peel the skin using a vegetable peeler. After peeling, cut the squash in half lengthwise. Remove the seeds with a spoon. Finally, cut each half into 1-inch cubes. This size helps it cook evenly. Yes, you can use pre-cut butternut squash. It saves time and effort. Many grocery stores offer pre-cut squash in the produce section. Just ensure that it is fresh and not overly soft. Pre-cut squash is a great option when you want a quick meal. You can skip the peeling and cutting steps, making cooking easier. Roasted garlic parmesan butternut squash pairs well with many dishes. Here are a few ideas: - Grilled chicken: The flavors complement each other nicely. - Quinoa or rice: These grains add a nice texture and balance. - Leafy greens: A salad with spinach or arugula adds freshness. - Pasta: Toss with your favorite pasta for a hearty meal. - Steak or pork: The richness works well with meats. Get creative and mix and match your favorite dishes! In this article, we explored butternut squash from ingredients to storage tips. We covered how to choose the right ingredients and shared step-by-step instructions for roasting. I provided ways to mix flavors and suggestions for variations, like a vegan option. Remember, roasting enhances taste and texture. Enjoy experimenting with this healthy and versatile squash. It can bring joy to your meals! Keep sharing your cooking adventures.

Roasted Garlic Parmesan Butternut Squash Delight

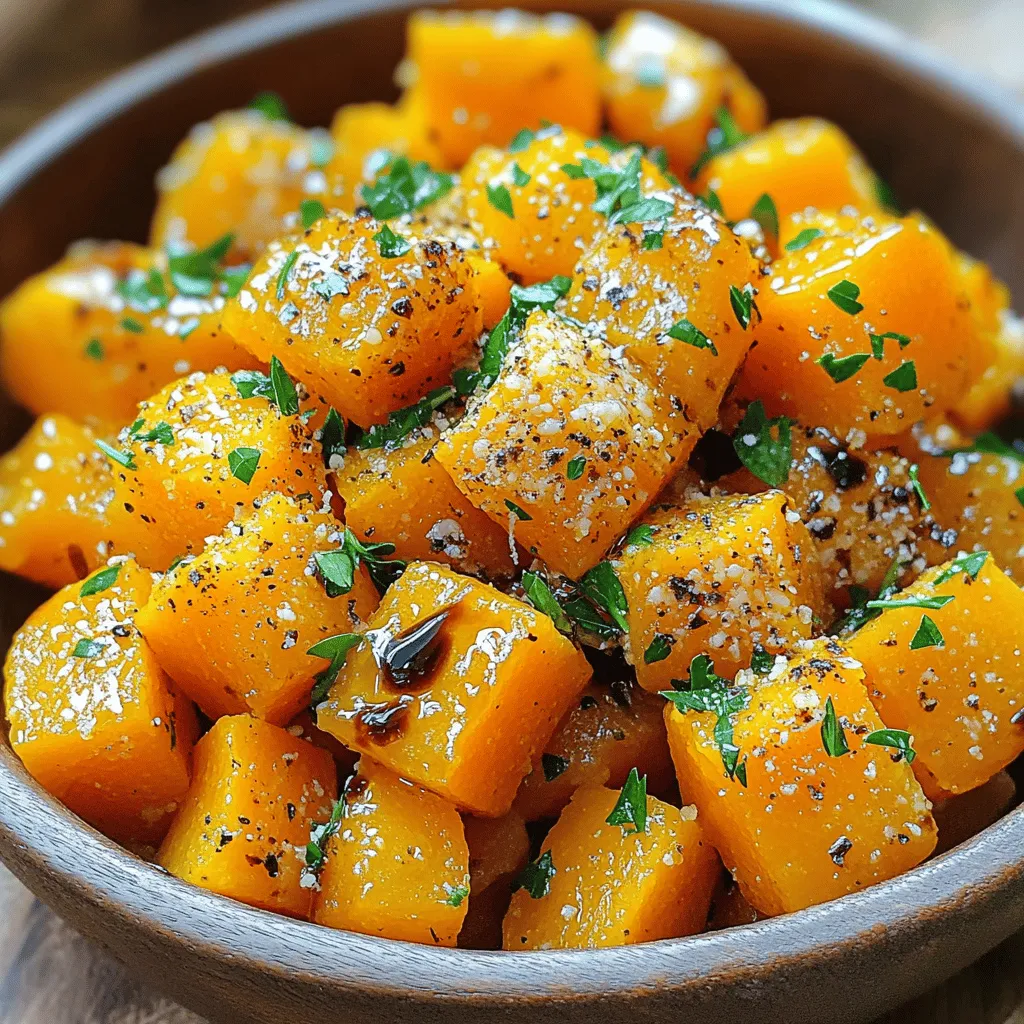
Welcome to my kitchen, where I’m excited to share a recipe that turns simple butternut squash into a creamy, cheesy

Older posts
Newer posts
← Previous Page1 … Page15 Page16 Page17 … Page120 Next →

dsad

© 2026 recipetorch • Built with GeneratePress

Our Policies

  • Copyright Policy
  • Cookie Policy
  • GDPR Policy
  • Privacy Policy
  • Disclaimer
  • Terms Of Use

More Information

  • Home
  • About
  • Contact
  • Appetizers
  • Dessert
  • Dinner
  • Drinks
©2026, recipetorch About Back To Top