Skip to content
DisclaimerTerms Of UseGDPR PolicyCookie Policy

recipetorch

  • Home
  • Drinks
  • Appetizers
  • Dinner
  • Dessert
  • About
  • Contact
  • Privacy Policy
DisclaimerTerms Of UseGDPR PolicyCookie Policy

Nicole

To make Firecracker Chicken Meatballs, you will need the following ingredients: - 1 pound ground chicken - 1/2 cup breadcrumbs - 1/4 cup green onions, finely chopped - 1/4 cup fresh cilantro, chopped - 2 cloves garlic, minced - 1 tablespoon fresh ginger, grated - 1 tablespoon soy sauce - 1 tablespoon sriracha (adjust according to your spice tolerance) - 1 teaspoon sesame oil - 1/2 teaspoon salt - 1/4 teaspoon black pepper - 1/4 cup sweet chili sauce (for glazing) - Chopped peanuts and sesame seeds (for garnish) - Extra green onions (for garnish) You can easily swap ingredients based on your taste or what you have. Here are some ideas: - For ground chicken, try ground turkey or pork. - Use panko instead of regular breadcrumbs for extra crunch. - If you lack fresh herbs, dried herbs can work in a pinch. - Replace sriracha with any hot sauce you prefer. - If you want a gluten-free option, choose gluten-free soy sauce. To ensure your meatballs taste great, keep these tips in mind: - Use fresh herbs for the best flavor. - Choose high-quality ground chicken. Look for lean meat with some fat for juiciness. - Keep your ingredients cold until you mix them. This helps maintain texture. - Store your fresh ingredients in the fridge until you're ready to cook. - Check your spices for freshness to maximize flavor. By following these tips and using quality ingredients, you ensure your Firecracker Chicken Meatballs will impress everyone! {{ingredient_image_2}} To make the meatball mixture, take a large bowl. Add 1 pound of ground chicken. Next, mix in 1/2 cup of breadcrumbs. Then, add 1/4 cup of finely chopped green onions and 1/4 cup of chopped cilantro. Now, include 2 minced garlic cloves and 1 tablespoon of grated ginger. Pour in 1 tablespoon of soy sauce and 1 tablespoon of sriracha for heat. Add 1 teaspoon of sesame oil, 1/2 teaspoon of salt, and 1/4 teaspoon of black pepper. Use your hands or a spoon to mix it all together. Be gentle! Overmixing can make the meatballs hard. You want a soft, tender mixture. First, preheat your oven to 400°F (200°C). While the oven heats, line a baking sheet with parchment paper. This helps the meatballs not stick. Now, wet your hands slightly. This stops the chicken mixture from sticking. Roll the mixture into 1.5-inch meatballs. Place them on the baking sheet, giving them space. Bake the meatballs for 18 to 20 minutes. They should be fully cooked when they reach 165°F (74°C). Five minutes before the meatballs are done, drizzle 1/4 cup of sweet chili sauce over them. This makes a tasty glaze. Let the sauce caramelize while the meatballs bake. When the meatballs are ready, take them out of the oven. Let them cool for a couple of minutes. Serve them warm on a platter. For a fun finish, garnish with chopped peanuts, sesame seeds, and extra green onions. This adds color and crunch to your dish! To get the best texture, mix the meat gently. Overmixing makes them tough. Use your hands or a spoon to combine the ingredients well. Keep the meatballs about 1.5 inches wide for even cooking. This size helps them cook through without drying out. If you want more heat, add more sriracha. Start with a small amount and taste as you go. If you prefer a milder flavor, cut back on the sriracha or skip it altogether. Remember, the sweet chili sauce adds sweetness and some spice, balancing the flavors nicely. For a beautiful display, use a large platter. Drizzle any leftover sweet chili sauce over the meatballs. Then, sprinkle chopped peanuts, sesame seeds, and extra green onions on top. Adding fresh cilantro sprigs can give a pop of color. This not only looks great but adds flavor too! Pro Tips Mix Gently: Be careful not to overmix the meatball mixture. This keeps them tender and juicy. Adjust Spice Level: Feel free to modify the amount of sriracha based on your personal spice tolerance. Glazing Technique: Drizzle the sweet chili sauce during the last few minutes of baking for a perfectly caramelized finish. Serve Fresh: For the best texture and flavor, serve the meatballs warm right after baking. {{image_4}} You can spice up your Firecracker Chicken Meatballs with various sauces. Here are some fun ideas: - Teriyaki Sauce: Add a sweet and savory taste. Just drizzle it on after baking. - Buffalo Sauce: For a spicy kick, toss the meatballs in buffalo sauce. It adds heat and flavor. - Honey Garlic Sauce: This sauce gives a sweet and sticky glaze. It balances the spice well. Each sauce changes the dish's flavor and keeps your meals exciting. Want to boost the nutrition? Add veggies right into the meatballs! Here are some options: - Finely Chopped Bell Peppers: They add sweetness and color. - Grated Zucchini: This keeps the meatballs moist and adds fiber. - Shredded Carrots: They add crunch and natural sweetness. Mix these into your meatball mixture. It’s a simple way to get more veggies in your meals. If you want to switch up the protein, you have choices! Here are some alternatives: - Ground Turkey: This is leaner and still very tasty. It gives a lighter option. - Ground Pork: It adds a rich flavor. Perfect for meatball fans. - Plant-Based Ground Meat: Great for a meatless meal. Look for options made from pea protein or soy. These substitutions keep the dish flavorful while meeting different dietary needs. To keep your Firecracker Chicken Meatballs fresh, place them in an airtight container. Let the meatballs cool completely before storing. This helps prevent excess moisture, which can make them soggy. You can store them in the fridge for up to three days. If you want to keep them longer, freezing is a great option. When it's time to enjoy the leftovers, reheating is key. You can use an oven or a microwave. For the oven, preheat it to 350°F (175°C). Place the meatballs on a baking sheet and cover them with foil. Heat for about 10-15 minutes until warm. If using the microwave, place the meatballs on a microwave-safe plate. Heat in 30-second intervals until hot, about 2-3 minutes total. To freeze the meatballs, first, let them cool. Arrange them in a single layer on a baking sheet and freeze for about an hour. Once frozen, transfer them to a freezer-safe bag. Squeeze out as much air as possible before sealing. They can stay frozen for up to three months. When you’re ready to eat, thaw them in the fridge overnight before reheating. Enjoy those spicy, tasty bites anytime! Firecracker Chicken Meatballs last for about 3 to 4 days in the fridge. Store them in an airtight container. Make sure they cool completely before putting them away. This helps keep them fresh longer. If you want to save them for later, consider freezing them. Yes, you can bake the meatballs instead of frying them. Baking is a healthier option and it’s easy. Just preheat your oven to 400°F (200°C) and follow the baking steps. Baking gives a nice texture and allows the flavors to blend well. You can even glaze them with sweet chili sauce while baking. You can serve Firecracker Chicken Meatballs with many sides. Here are some great ideas: - Steamed rice or jasmine rice - Noodles tossed in sesame oil - Fresh green salad with a light dressing - Roasted vegetables for a crunchy bite - A side of dipping sauce for extra flavor Feel free to mix and match! Enjoy the fun and flavor of your meal. In this blog post, I covered the essential steps to make delicious Firecracker Chicken Meatballs. We explored the key ingredients, helpful tips for freshness, and step-by-step baking instructions. I shared variations to mix things up and storage tips to keep your meatballs tasty. These meatballs are great for any meal. You can adjust the spice, add veggies, and even change proteins. Enjoy making these flavorful bites!

Firecracker Chicken Meatballs Flavorful Quick Recipe

Get ready to spice up your dinner with Firecracker Chicken Meatballs! This quick recipe packs bold flavors and is easy

- 1 pound ground beef or lamb - 1/2 cup seasoned breadcrumbs - 1/4 cup crumbled feta cheese - 1/4 cup fresh parsley - 1/4 cup red onion - 2 cloves garlic - 1 large egg - 1 tablespoon dried oregano - 1 teaspoon salt - 1/2 teaspoon black pepper - 1 can diced tomatoes - 1 teaspoon olive oil - Additional garnish: crumbled feta and parsley To make One Skillet Greek Meatballs, you need simple yet tasty ingredients. First, choose between ground beef or lamb. Both give a rich flavor. Next, add seasoned breadcrumbs for a nice texture. Crumbled feta cheese brings a unique taste. Fresh parsley adds a bright touch. Diced red onion and minced garlic give the meatballs a savory depth. The egg helps bind everything together, ensuring your meatballs hold their shape. Dried oregano gives that classic Greek flavor. Salt and black pepper enhance the overall taste. A can of diced tomatoes adds moisture and a delicious sauce. Finally, a splash of olive oil helps cook the meatballs perfectly. With these ingredients, you can create a dish that is hearty and satisfying. Each bite bursts with flavor. As you cook, feel free to adjust the ingredients to match your taste. Want more herbs? Go for it! Prefer leaner meat? Use ground turkey instead. The goal is to make this dish your own. {{ingredient_image_2}} To start, grab a large mixing bowl. Combine 1 pound of ground beef or lamb with 1/2 cup of seasoned breadcrumbs. Next, add 1/4 cup of crumbled feta cheese for a creamy bite. Then, toss in 1/4 cup of finely chopped fresh parsley and 1/4 cup of diced red onion. For flavor, include 2 cloves of minced garlic and 1 tablespoon of dried oregano. Add 1 teaspoon of salt and 1/2 teaspoon of black pepper to season it all. Finally, mix in 1 large beaten egg to bind everything together. Use your hands or a spoon to blend well until it’s all mixed up. Now it’s time to cook! Heat 1 teaspoon of olive oil in a large skillet over medium heat. Once the oil is shimmering, carefully add the meatballs. Place them in a single layer, giving them space to brown. Let them cook for about 5 minutes. Turn them occasionally to brown all sides evenly. You want them golden and delicious. After browning, it’s time for the sauce. Pour in a can of diced tomatoes, juices included. Gently stir to coat each meatball in tomato goodness. Bring the mixture to a gentle simmer. Reduce the heat to low and cover the skillet. Let the meatballs simmer for 15 to 20 minutes. This helps them cook through and soak up the flavors. Aim for an internal temperature of 160°F. Before serving, taste the sauce. Adjust with more salt or pepper if needed. When ready, serve hot, garnished with extra feta and parsley for a fresh touch. To shape perfect meatballs, start with clean hands. Use a scoop or your hands to take a portion of the meat mixture. Roll it gently into a ball about 1 inch wide. This size helps them cook evenly. Do not pack them too tightly, or they may become tough. Aim for a smooth surface. This can help them brown well. For even browning, preheat your skillet with olive oil. Wait until the oil shimmers. Place the meatballs in a single layer. Avoid overcrowding the pan. This lets heat circulate well. Turn the meatballs gently every few minutes. This ensures each side gets that nice golden color. If you need to, cook in batches for the best results. Taste is key in cooking. After mixing the meatball mixture, taste a small piece. If it needs more flavor, add extra salt, pepper, or oregano. You can also mix in more crumbled feta for a salty kick. When the meatballs simmer in the sauce, check the flavor again. Adjust with more salt or pepper if needed. Pro Tips Use Fresh Herbs: Fresh parsley adds a vibrant flavor to the meatballs. Consider adding other herbs like mint for a unique twist. Customize Your Meat: You can mix ground beef and lamb for a richer flavor, or substitute with ground turkey for a leaner option. Don’t Skip the Browning: Browning the meatballs in olive oil creates a delicious crust and enhances the overall flavor of the dish. Perfect Sauce Consistency: If the sauce becomes too thick while simmering, add a splash of water or broth to adjust the consistency. {{image_4}} You can swap ground beef or lamb for ground turkey or chicken. This change makes the dish lighter. I like turkey for its mild taste. It absorbs the flavors of herbs and spices well. Chicken is also a great choice. Both options stay juicy when cooked right. Just remember to check the cooking time. Ground turkey or chicken may need a minute or two longer. For a meat-free version, try making vegetarian meatballs. Use lentils or chickpeas as your base. These ingredients provide protein and fiber. Add breadcrumbs, feta, and spices just like in the original recipe. You can also mix in grated zucchini or carrots for more texture. These meatballs are tasty and filling. Perfect for anyone wanting a plant-based meal. Want to boost nutrition? Add more vegetables to your meatball mix. Bell peppers, spinach, or mushrooms work great. Simply chop them finely and mix them in. They add flavor and moisture. Plus, you sneak in more vitamins for a healthy meal. Adjust the breadcrumbs as needed to keep the mixture balanced. Enjoy the extra crunch and color in your dish! You can store leftover meatballs in the fridge. Place them in an airtight container. They will stay fresh for up to three days. When you want to eat them, just take them out. Freezing is a great option, too. Lay meatballs on a baking sheet. Freeze them until solid, about an hour. After that, place them in a freezer bag. They can last up to three months. This way, you have a quick meal ready anytime. To reheat, use a skillet or the oven. If using a skillet, add a splash of water or sauce. Heat on low until warm. If using the oven, set it to 350°F. Bake for about 15 minutes. This keeps them juicy and flavorful. Enjoy your easy and tasty meal! You will cook the meatballs in a skillet for about 5 minutes. This helps them brown nicely. Then, add the diced tomatoes and cover the skillet. Simmer the meatballs for another 15 to 20 minutes. This ensures they cook through and reach 160°F (70°C). Yes, you can make this recipe ahead of time. Prepare the meatballs and store them in the fridge. They will stay fresh for up to two days. You can also freeze them for up to three months. Just thaw them in the fridge before cooking. Greek meatballs pair well with many sides. Here are some tasty options: - Rice or quinoa for a healthy base - Greek salad with cucumbers and tomatoes - Pita bread for dipping in sauce - Roasted vegetables for added flavor - Tzatziki sauce to cool down the meal These sides will complement the meatballs and enhance your dining experience. Enjoy your meal! This blog post covered making tasty Greek meatballs. You learned about the key ingredients, step-by-step cooking, and helpful tips. I also shared variations like using turkey or extra veggies. Storing and reheating leftovers was another key point. Try this recipe next time you cook. It offers great flavor and easy steps. Enjoying these meatballs can bring joy to your meals.

One Skillet Greek Meatballs Flavorful Dinner Delight

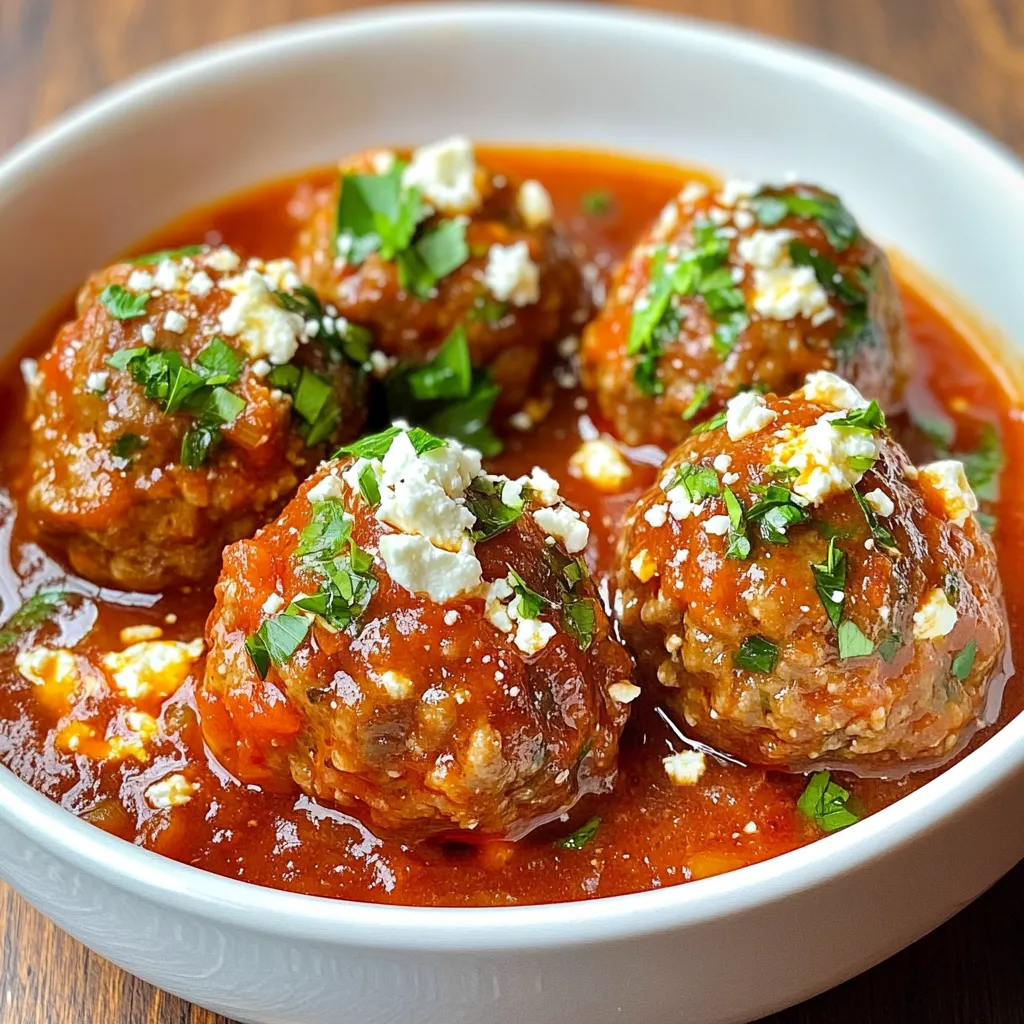
Are you ready to impress your taste buds with a delicious dinner? My One Skillet Greek Meatballs bring a burst

To make a delicious creamy sun-dried tomato salmon, start by gathering your ingredients. Here’s what you need: - Salmon Fillets - 4 salmon fillets (6 oz each) - Cream and Dairy Components - 1 cup heavy cream - Aromatics and Seasoning - 3 cloves garlic, minced - 1/2 cup sun-dried tomatoes, finely chopped - 1 tablespoon olive oil - 1 teaspoon Italian seasoning - Salt and black pepper to taste - Vegetables - 1/2 cup fresh spinach, chopped - Fresh basil leaves for garnish Having these ingredients ready will make cooking smooth and fun. Each part brings its own flavor. The salmon is rich and tender, while the sun-dried tomatoes add a sweet touch. The garlic gives a nice aroma, and the spinach adds color and nutrients. Don't forget the heavy cream, which creates that lovely creamy sauce! {{ingredient_image_2}} Start by seasoning each salmon fillet with salt, black pepper, and Italian seasoning. Make sure to coat both sides well. Let them sit for a few minutes to soak up the flavors. This step is key for taste. Heat olive oil in a large skillet over medium-high heat. Wait until the oil shimmers. Then, place the salmon fillets in the skillet, skin-side down. Cook for about 4-5 minutes on each side. The salmon should turn golden brown and flake easily with a fork. Once done, take the salmon out and set it aside on a plate. In the same skillet, lower the heat to medium. Add minced garlic and sauté for about 1 minute. Watch for the garlic to turn fragrant and slightly golden. Avoid burning it, as burnt garlic can ruin the sauce. Now, stir in the finely chopped sun-dried tomatoes. Cook them for an additional 2 minutes. This will help bring out their natural sweetness. Next, gradually pour in the heavy cream, stirring well. Bring the sauce to a gentle simmer. Finally, add the chopped spinach and mix until it wilts. The sauce will thicken slightly. Gently return the seared salmon fillets to the skillet. Spoon the creamy sauce over each piece. Let it simmer together for 2-3 minutes. This step helps all the flavors blend beautifully. Carefully plate the salmon fillets along with the rich creamy sauce. Finish the dish with fresh basil leaves on top. This adds a pop of color and fresh flavor to your meal. To cook salmon just right, here are my best tips: - Choose Fresh Fillets: Look for bright color and no strong smell. - Season Well: Use salt, black pepper, and Italian seasoning generously. - Preheat the Pan: Make sure the skillet is hot before adding the salmon. - Don’t Overcrowd the Pan: Give each fillet space to cook evenly. - Watch the Time: Cook for 4-5 minutes per side. The salmon should flake easily. You can change this recipe to fit your taste. Consider these options: - Add Lemon Zest: Brighten your dish with fresh lemon zest. - Use Different Herbs: Try dill or thyme for a new flavor. - Incorporate Cheese: A sprinkle of parmesan can add richness. - Mix in Other Veggies: Peas or mushrooms can offer a nice twist. Having the right tools makes cooking easier. Here’s what you need: - Large Skillet: For searing and making the sauce. - Fish Spatula: To flip the salmon without breaking it. - Sharp Knife: For chopping garlic and sun-dried tomatoes easily. - Measuring Cups and Spoons: Get the right amounts for your sauce. - Serving Plates: To present your delicious meal beautifully. Pro Tips Perfectly Cooked Salmon: To achieve the ideal doneness, cook salmon until it reaches an internal temperature of 145°F. This ensures it remains moist and flaky. Enhancing Flavor: For an extra layer of flavor, consider adding a splash of white wine to the sauce after sautéing the garlic and before adding the cream. Choosing Sun-Dried Tomatoes: Opt for sun-dried tomatoes packed in oil for a richer flavor, or use dry ones but soak them in warm water for 15 minutes before chopping. Spinach Tips: If you want to add more nutrients, consider mixing in other leafy greens like kale or arugula, which will also add a nice texture to the dish. {{image_4}} You can easily swap some ingredients to fit your taste. For the heavy cream, use half-and-half or coconut cream for a lighter alternative. If you want a kick, add a pinch of red pepper flakes. Instead of sun-dried tomatoes, you could use roasted red peppers for a different flavor. If you don’t have fresh spinach, try baby kale or arugula. They will taste great too! If salmon isn't your thing, you can use chicken breast or shrimp. For chicken, cook it until it reaches a safe internal temperature of 165°F. Shrimp cooks fast, so add it towards the end of the sauce cooking time. Tofu is a great plant-based option. Just ensure it’s pressed and cut into cubes to absorb the flavors well. This creamy sun-dried tomato salmon pairs well with many sides. Serve it over pasta for a hearty meal or with rice for a lighter option. Pair it with roasted vegetables, like asparagus or zucchini, to add color and crunch. A fresh salad with lemon vinaigrette is perfect for a refreshing contrast. Don't forget some crusty bread to soak up that delicious sauce! To store leftover salmon, let it cool first. Place it in an airtight container. Cover it tightly to keep it fresh. You can store it in the fridge for up to three days. Always label the container with the date. This way, you won’t forget how long it has been there. When reheating salmon, do it gently. Preheat your oven to 275°F (135°C). Place the salmon on a baking sheet. Cover it with foil to keep it moist. Heat for about 15 minutes or until warm. You can also use the microwave, but do it in short bursts. This prevents the salmon from drying out. If you want to freeze salmon, wrap each piece tightly in plastic wrap. Then, place it in a freezer bag. Remove as much air as possible. Frozen salmon can last for up to three months. To thaw, move it to the fridge overnight. You can also put it in cold water for quicker thawing. Just be sure to cook it right after thawing. You can use half-and-half or coconut milk. Both will give a creamy texture. If you want a lighter option, use Greek yogurt or sour cream. Just mix with a little milk for a smooth consistency. Cooked salmon lasts about three to four days in the fridge. Make sure to store it in an airtight container. This keeps it fresh and safe to eat later. Yes, you can prepare the creamy sauce ahead. Just cook the salmon fresh when ready to serve. This keeps the salmon flaky and tasty. I love serving this dish with steamed rice or pasta. Roasted veggies or a fresh salad also pair nicely. You can add garlic bread for a full meal experience. This blog post shared a simple, tasty salmon recipe. You learned about key ingredients, step-by-step cooking, and smart tips. We discussed how to store leftovers and served up answers to common questions. Cooking salmon can be fun and rewarding. Experiment with flavors and enjoy your meals. Remember, practice makes perfect, so don’t hold back. Dive in and make your next dish a delicious success!

Creamy Sun-Dried Tomato Salmon Flavorful Dinner Delight

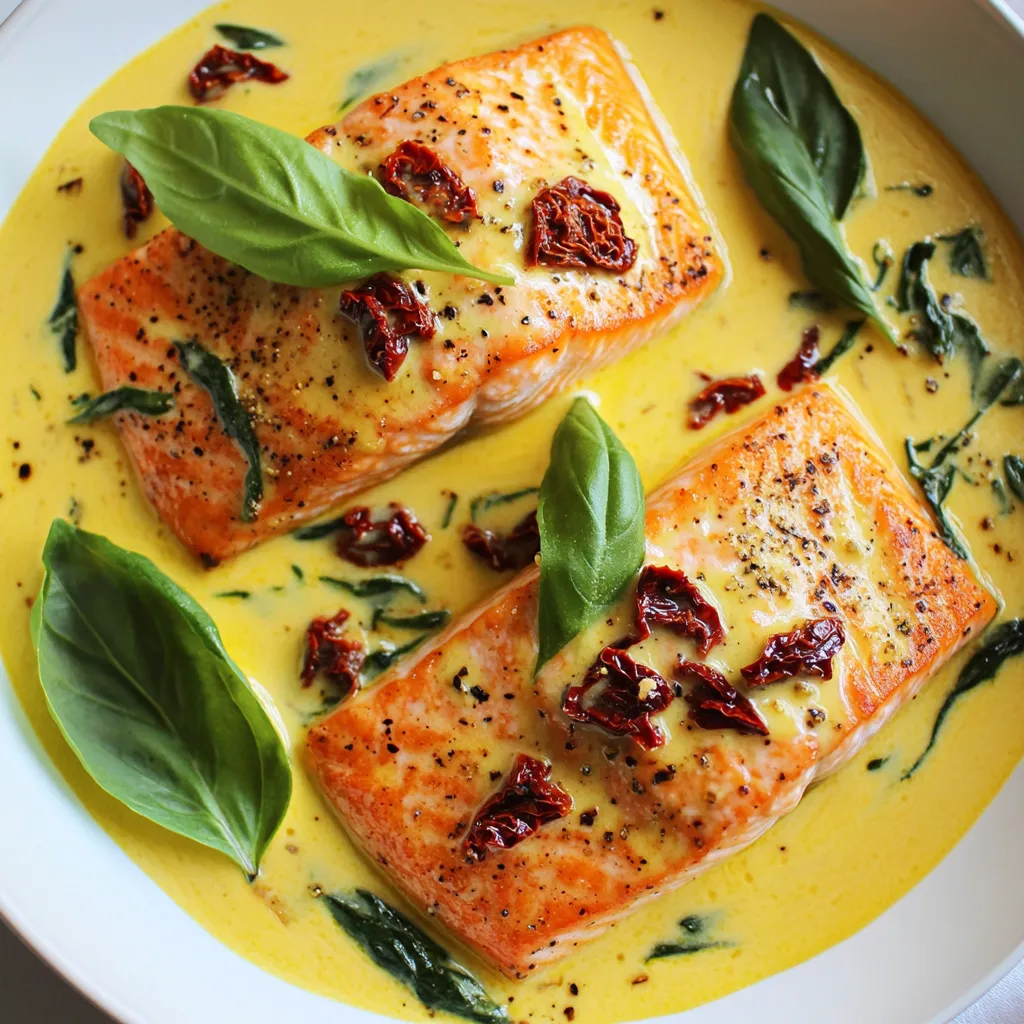
Are you ready to elevate your dinner game? My Creamy Sun-Dried Tomato Salmon offers a burst of flavor that’s hard

- 4 boneless, skinless chicken breasts - 1 cup fresh spinach, finely chopped - 1 cup ricotta cheese - 1/2 cup grated Parmesan cheese - 1/2 cup shredded mozzarella cheese - 2 cloves garlic, minced - 1 teaspoon dried oregano - 1 teaspoon salt - 1/2 teaspoon freshly ground black pepper - 1 tablespoon olive oil - 1 cup marinara sauce (for serving) - Fresh basil leaves, for garnish Using precise measurements can make a big difference. Here’s a quick breakdown: - Chicken breasts: 4 pieces, about 6 ounces each - Spinach: 1 cup, finely chopped, packed down - Ricotta cheese: 1 cup, whole milk for creaminess - Parmesan cheese: 1/2 cup, freshly grated for best flavor - Mozzarella cheese: 1/2 cup, shredded for melting - Garlic: 2 cloves, minced finely for even flavor - Oregano: 1 teaspoon, dried for a stronger taste - Salt: 1 teaspoon, adjust if needed - Black pepper: 1/2 teaspoon, freshly ground for zest - Olive oil: 1 tablespoon for searing - Marinara sauce: 1 cup, your favorite jarred or homemade - Fresh basil: A few leaves for garnish Sometimes, you may need to swap ingredients. Here are some ideas: - Use frozen spinach if fresh isn’t available. Just thaw and squeeze out water. - Swap ricotta with cottage cheese for a lighter option. - Try feta cheese instead of Parmesan for a tangy twist. - Use fresh herbs like thyme or parsley instead of oregano. - If you prefer a lighter cheese, use low-fat mozzarella. - Replace marinara with pesto for a different sauce flavor. These changes can help you make this dish your own while keeping it delicious! {{ingredient_image_2}} Start by preheating your oven to 375°F (190°C). This step is key. A hot oven helps the chicken cook evenly. In a medium bowl, combine the filling ingredients. Mix together 1 cup of chopped spinach, 1 cup of ricotta cheese, and 1/2 cup of grated Parmesan cheese. Add 1/2 cup of shredded mozzarella cheese, 2 minced garlic cloves, 1 teaspoon of dried oregano, 1 teaspoon of salt, and 1/2 teaspoon of black pepper. Stir the mixture until it's smooth and creamy. Take 4 boneless, skinless chicken breasts and place them on a cutting board. Carefully cut a pocket into each breast. Make sure you do not slice all the way through. Next, generously fill each pocket with your creamy spinach mixture. If the filling spills out, use toothpicks to hold it in. In a large, oven-safe skillet, heat 1 tablespoon of olive oil over medium heat. Once hot, add the stuffed chicken breasts. Sear each side for 3-4 minutes. This gives the chicken a lovely golden-brown crust. After searing, place the skillet in your preheated oven. Bake the chicken for 20-25 minutes. The internal temperature should reach 165°F (75°C). This ensures the chicken is safe to eat. Once baked, take the skillet out of the oven. Let the chicken rest for about 5 minutes. This helps the juices stay in. Serve the stuffed chicken breasts with marinara sauce on top. Finish with fresh basil leaves for a splash of color and flavor. You can also sprinkle extra Parmesan cheese on top and serve with garlic bread or a light salad. Enjoy! To get the best stuffing, make sure you chop the spinach finely. This helps it mix well with the ricotta and other cheeses. Don't overfill the chicken. If you do, the filling may spill out while cooking. Use a toothpick to secure the chicken opening if needed. This keeps that creamy goodness inside. To keep your chicken moist, always sear it before baking. This step locks in flavor and moisture. After baking, let the chicken rest for about five minutes. This resting time helps the juices settle, making every bite more tender and juicy. You can boost the flavor by adding fresh herbs. Try mixing in basil or parsley into the stuffing. A pinch of red pepper flakes gives a nice kick. Also, drizzle some extra olive oil over the chicken before baking. This adds richness and helps with browning. Pro Tips Use Fresh Ingredients: Whenever possible, choose fresh spinach and high-quality cheeses for a richer flavor and better texture in your filling. Don’t Overstuff: While it may be tempting to add more filling, overstuffing can lead to a mess during cooking. Aim for a generous but manageable amount. Check for Doneness: Use a meat thermometer to ensure the chicken reaches an internal temperature of 165°F (75°C) for safe consumption and optimal juiciness. Rest Your Chicken: Allow the stuffed chicken breasts to rest for a few minutes after baking. This helps retain moisture and enhances the overall flavor. {{image_4}} You can change up the cheese in this dish. Instead of ricotta, try goat cheese. It adds a tangy flavor. Cream cheese can also work for a richer taste. If you want more depth, mix in some feta. Each cheese gives a unique flavor twist. Add more veggies to your filling for extra taste and nutrition. Chopped mushrooms bring a nice earthy note. Sun-dried tomatoes can add a touch of sweetness. Artichoke hearts make the dish feel gourmet. Just make sure to chop everything finely for easy stuffing. If you like heat, consider adding red pepper flakes to your filling. This adds a nice kick. You might also use pepper jack cheese for a spicier cheese option. Serve with a spicy marinara sauce for more heat. Adjust the spice level to fit your taste. To keep your spinach ricotta stuffed chicken breasts fresh, store them in an airtight container. If they are whole, wrap them tightly in plastic wrap. Place them in the fridge for up to three days. Ensure the chicken is cooled before you store it. This helps it stay moist and tasty. If you have leftovers, do not let them sit out for long. Always refrigerate after serving. When you're ready to enjoy your leftovers, reheating is simple. Preheat your oven to 350°F (175°C). Place the chicken in an oven-safe dish. Cover it with foil to keep it moist. Bake for about 15 to 20 minutes, or until it is warmed through. You can also reheat in the microwave. Use a microwave-safe plate and cover it with a damp paper towel. Heat in 1-minute intervals until hot. If you want to freeze your stuffed chicken, do it before baking. Wrap each stuffed chicken breast in plastic wrap, then place them in a freezer bag. Press out as much air as you can to prevent freezer burn. You can freeze them for up to three months. When ready to cook, thaw the chicken in the fridge overnight. Then, bake as directed in your recipe. This way, you can enjoy a tasty meal at any time! Cook stuffed chicken breasts for about 20-25 minutes in the oven at 375°F (190°C). Use a meat thermometer to check the internal temperature. It should reach 165°F (75°C) to ensure it's safe to eat. Cooking times may vary based on the size of the chicken breasts. Yes, you can use frozen spinach. Just make sure to thaw it and drain excess water. Frozen spinach is a great time-saver and works well in this recipe. It still provides the same flavor and nutrients as fresh spinach. You can serve these stuffed chicken breasts with a variety of sides. Here are some ideas: - Garlic bread - A light salad - Steamed vegetables - Pasta with marinara sauce These sides complement the rich flavors of the chicken and add balance to your meal. To check if the chicken is cooked through, use a meat thermometer. Insert it into the thickest part of the chicken. If it reads 165°F (75°C), the chicken is done. If you don't have a thermometer, you can cut into the chicken. The juices should run clear, and the meat should be opaque and white throughout. In this article, we covered the essential ingredients and straightforward steps for making stuffed chicken breasts. We explored ingredient measurements, substitutions, and helpful tips for juicy results. Variations allow you to mix in different flavors while storage info ensures your dish stays fresh. Remember, you can easily adapt this recipe to fit your taste. With practice, your stuffed chicken will impress everyone at dinner. Enjoy your cooking journey!

Spinach Ricotta Stuffed Chicken Breasts Flavorful Delight

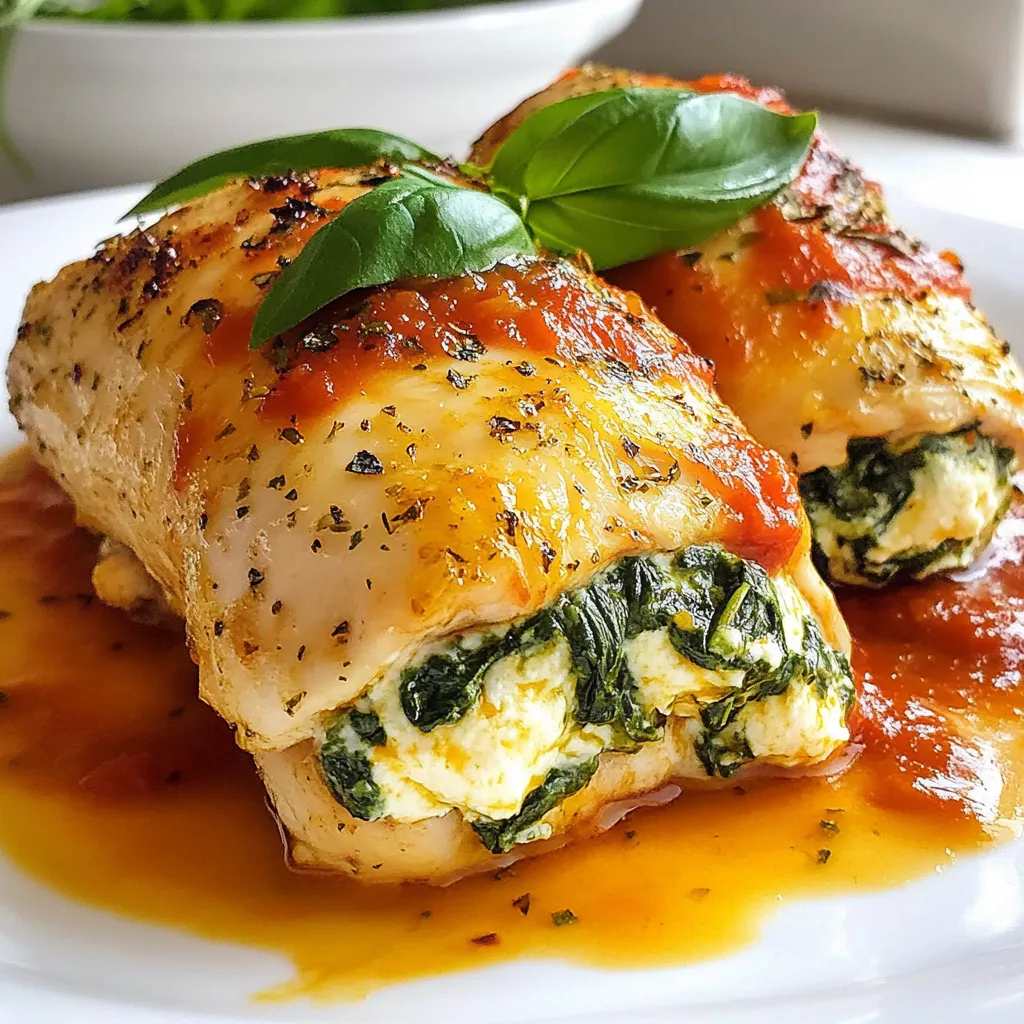
Are you ready to elevate your dinner game? Spinach Ricotta Stuffed Chicken Breasts offer a burst of flavor and nutrition

- 1 can (15 oz) chickpeas, thoroughly drained and rinsed - 1 large roasted red pepper - 2 tablespoons tahini - 2 tablespoons high-quality olive oil - 2 tablespoons freshly squeezed lemon juice - 1 garlic clove, finely minced - 1 teaspoon ground cumin - Salt and freshly cracked black pepper, to taste - 2-3 tablespoons cold water - Paprika and freshly chopped parsley for garnish Each serving contains about: - Calories: 120 - Protein: 4g - Carbohydrates: 10g - Dietary Fiber: 3g - Fat: 8g - Sugars: 1g This hummus fits well in many diets. It’s rich in fiber and protein. - Chickpeas: They are the base of the hummus. They add creaminess and protein. - Roasted Red Pepper: This ingredient gives the hummus a sweet, smoky flavor and bright color. - Tahini: This sesame paste adds a nutty taste and smooth texture. - Olive Oil: It adds richness and helps blend the hummus. - Lemon Juice: This ingredient brightens the flavor and adds acidity. - Garlic: Minced garlic gives a punch of flavor and aroma. - Cumin: This spice adds warmth and depth to the dip. - Salt and Pepper: These seasonings enhance all the flavors in the hummus. - Cold Water: Adding water helps achieve the desired smoothness. - Paprika and Parsley: These are for garnish. They add color and a hint of freshness. Together, these ingredients create a delicious and healthy dip. You can enjoy it with pita, veggies, or on a sandwich. {{ingredient_image_2}} To make roasted red pepper hummus, gather your ingredients first. You need: - 1 can (15 oz) chickpeas, drained and rinsed - 1 large roasted red pepper - 2 tablespoons tahini - 2 tablespoons olive oil - 2 tablespoons lemon juice - 1 garlic clove, minced - 1 teaspoon ground cumin - Salt and black pepper - 2-3 tablespoons cold water - Paprika and parsley for garnish Start with a clean kitchen and all your tools ready. A food processor is key for a smooth dip. Place the chickpeas in the food processor. Add the roasted red pepper, tahini, olive oil, lemon juice, minced garlic, and ground cumin. Turn the processor on high speed. Blend until smooth and creamy. You may need to scrape the bowl's sides with a spatula. If the hummus is thick, add water one tablespoon at a time. Blend again until you reach your desired texture. Season with salt and black pepper to taste. Blend once more to mix in the flavors. Transfer your hummus to a serving bowl. Use the back of a spoon to make a small well in the center. Drizzle olive oil into the well for added richness. Dust the top with paprika and sprinkle chopped parsley for color. Serve your hummus with warm pita bread and fresh veggies like carrot sticks and cucumber slices. Create a colorful platter for a fun and inviting experience. To get the best texture for your roasted red pepper hummus, start with the chickpeas. Use a can of chickpeas, rinse, and drain them well. This helps remove extra salt. When blending, if the hummus is too thick, add water slowly. Use one tablespoon at a time until you like the smoothness. It should be creamy but not runny. You can boost flavors by using fresh ingredients. Fresh lemon juice adds brightness. A minced garlic clove gives a nice kick. Adjust salt and pepper to your taste. For extra depth, try adding a pinch of smoked paprika or a dash of cayenne pepper. These spices will make each bite pop with flavor. Having the right tools makes the process easier. Use a good food processor to blend the hummus smoothly. A spatula helps scrape the sides of the bowl. A measuring spoon is handy for accurate ingredient amounts. For serving, a nice bowl and some pita bread or fresh veggies are perfect for dipping. Pro Tips Use Fresh Ingredients: For the best flavor, opt for fresh lemon juice and high-quality olive oil. These ingredients can significantly enhance the taste of your hummus. Adjust Smoothness: If you prefer a creamier texture, keep adding cold water gradually while blending until you reach your desired consistency. Experiment with Flavors: Feel free to add spices like smoked paprika or even a pinch of cayenne for a spicy kick, or incorporate herbs like cilantro for a fresh twist. Chill Before Serving: For the best flavor, refrigerate your hummus for at least 30 minutes before serving. This allows the flavors to meld beautifully. {{image_4}} You can spice up your roasted red pepper hummus easily. Try adding paprika for warmth. A pinch of cayenne pepper adds heat. Fresh herbs like basil or cilantro can brighten it up. Mixing in smoked paprika gives a nice smoky flavor. Experiment with spices to find your favorite blend. Don't have tahini? Use sunflower seed butter instead. This makes it nut-free. You can swap the olive oil for avocado oil if you want a different taste. For a creamier texture, add Greek yogurt. You can also use different beans like black beans for a twist. Serve your hummus with warm pita bread for a classic touch. Add fresh veggies like carrots, cucumbers, or bell peppers for crunch. You can also spread hummus on sandwiches or wraps. For a fun party bite, use it as a dip for chips or crackers. Present it in a bowl, drizzled with olive oil and topped with herbs for color. To keep your roasted red pepper hummus fresh, store it in an airtight container. Glass jars work well for this. Make sure to cover the hummus with a layer of olive oil before sealing. This helps lock in flavor and moisture. If you have leftovers, try to keep them in the fridge right away. Roasted red pepper hummus lasts about 4 to 7 days in the fridge. If you notice any change in smell or color, it's best to toss it. Always check for freshness before eating. You can freeze hummus for up to 3 months. First, spoon it into a freezer-safe container. Leave some space at the top, as it will expand when frozen. To thaw, place it in the fridge overnight. Stir well before serving to bring back the creamy texture. Roasted red pepper hummus is a creamy dip made from chickpeas and roasted red peppers. It has a rich, smoky flavor that adds excitement to any meal. This dip is perfect for snacking, spreading, or serving at parties. The blend of tahini, olive oil, and spices enhances the taste, making it a favorite among many. Yes, you can make hummus without tahini. If you skip it, the dip will still taste good. You can replace tahini with Greek yogurt for creaminess. You can also add a bit more olive oil to keep it smooth. The flavor will change, but it will still be a tasty dip. To make your hummus spicier, add a pinch of cayenne pepper or red pepper flakes. You can also blend in a small amount of fresh jalapeño for a kick. Start with a little spice and taste as you go. This way, you can control the heat level to your liking. Roasted red pepper hummus pairs well with many foods. Here are some great options: - Warm pita bread - Fresh veggie sticks like carrots and cucumbers - Crackers or chips - Grilled meats or fish - Sandwiches and wraps These pairings make for a fun and tasty spread. Yes, you can use dried chickpeas instead of canned. If you choose dried ones, soak them overnight. Then, cook them until soft before making hummus. This method takes more time, but it can give a fresher taste. Just remember, canned chickpeas save time and are very convenient! We explored the key ingredients of roasted red pepper hummus, noting their nutrition and importance. I shared easy steps to prepare and blend your hummus for perfect texture. We discussed tips to enhance flavor and offered creative serving suggestions. Lastly, we covered storage methods and answered common questions. Roasted red pepper hummus is simple to make and enjoy. Try making your own for a tasty, healthy snack!

Roasted Red Pepper Hummus Simple and Flavorful Dip

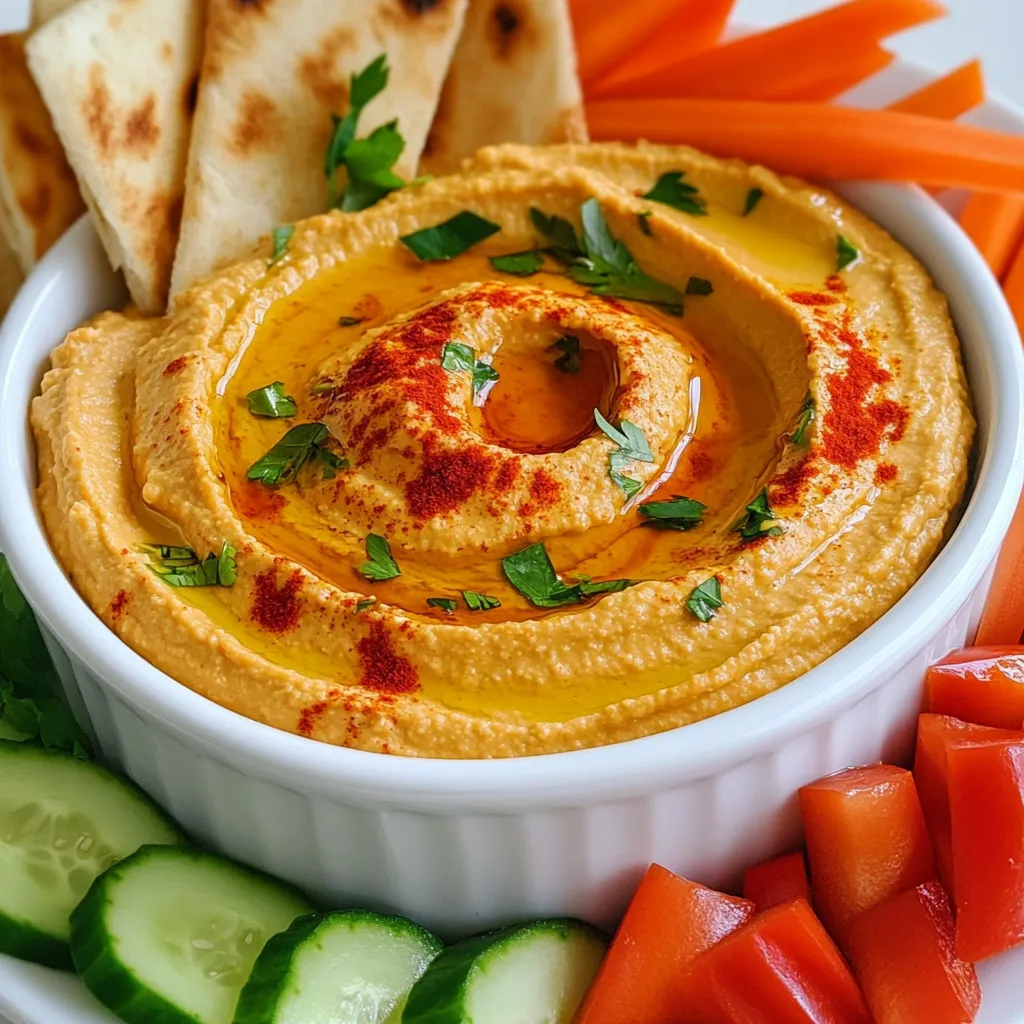
Looking for a simple and tasty dip? Roasted red pepper hummus is your answer! This vibrant blend packs in flavor

- 4 boneless, skinless chicken breasts - Sea salt and freshly ground black pepper - 3 tablespoons extra virgin olive oil - Juice of 2 fresh lemons - Zest of 1 lemon - 3 cloves garlic, finely minced - 1 teaspoon dried oregano - 1 teaspoon dried thyme - 2 medium zucchinis, sliced into half-moons - 1 red bell pepper, sliced into strips - 1 cup cherry tomatoes, halved For the Lemon Herb Chicken, you need fresh chicken breasts. They add great taste and stay juicy. You also need some sea salt and black pepper to season the chicken. The marinade is key. It includes olive oil, fresh lemon juice, and lemon zest. The garlic adds a nice kick. Oregano and thyme give it that classic herb flavor. Don’t forget the veggies! Zucchini, red bell pepper, and cherry tomatoes roast nicely. They soak up the marinade and taste amazing alongside the chicken. Gather these ingredients, and you are ready to make a tasty one-pan meal. Enjoy the vibrant flavors and fresh colors on your plate! {{ingredient_image_2}} First, preheat your oven to 425°F (220°C). This heat will make the chicken juicy and the veggies tender. For easy cleanup, line a large baking sheet with parchment paper. This step keeps the pan clean and helps the food cook evenly. In a small bowl, mix together 3 tablespoons of extra virgin olive oil, the juice of 2 fresh lemons, and the zest of 1 lemon. Add 3 cloves of minced garlic, 1 teaspoon of dried oregano, and 1 teaspoon of dried thyme. Then, sprinkle in some sea salt and black pepper to taste. Whisk it all together until well combined. This marinade will add lots of flavor to your meal. Next, take your 4 boneless, skinless chicken breasts and pat them dry with paper towels. This helps them brown better. Place the chicken on one side of the baking sheet. Drizzle half of your marinade over the chicken, making sure each piece is well coated. In a separate bowl, combine 2 sliced zucchinis, 1 sliced red bell pepper, and 1 cup of halved cherry tomatoes. Pour the remaining marinade over the veggies and toss gently to coat them evenly. Spread the veggies on the other side of the baking sheet in a single layer. Now, place the baking sheet in the preheated oven. Roast for about 25-30 minutes. You want the chicken to reach an internal temperature of 165°F (75°C). The vegetables should be tender and lightly caramelized. Once done, take the sheet pan out and let it rest for 5 minutes. This waiting time allows the juices to settle, making each bite more flavorful. Finish off by sprinkling freshly chopped parsley over the dish for a fresh touch. Slice the chicken and enjoy it with the roasted veggies! To get the best flavor from your chicken, use a good marinade. Start by mixing olive oil, lemon juice, zest, garlic, oregano, and thyme. This blend adds taste and moisture. Let the chicken soak in the marinade for at least 30 minutes. If you can, marinate it overnight. This helps the chicken soak up the flavors deeply. Roasting is simple but needs care. First, preheat your oven to 425°F (220°C). This high heat makes the chicken golden and the veggies crispy. Spread the chicken and vegetables out on the sheet pan. Don’t crowd them. Leave space for air to flow. This helps everything cook evenly. Check the chicken’s internal temperature after 25 minutes. It should reach 165°F (75°C). Serving is key to a great meal. Use warm plates to keep food hot. Arrange the chicken slices on top of the colorful veggies. This makes the dish pop. Add a sprinkle of fresh parsley for color. You can also add lemon wedges on the side. This adds a fresh touch and looks lovely on the table. Pro Tips Marinate for Extra Flavor: Allow the chicken to marinate for at least 30 minutes or even overnight in the fridge for deeper flavor absorption. Use Seasonal Vegetables: Feel free to swap in your favorite seasonal vegetables for a personalized touch; options like asparagus or broccoli work beautifully. Check for Doneness: Always use a meat thermometer to ensure your chicken reaches an internal temperature of 165°F (75°C) for safety and optimal juiciness. Make it a Complete Meal: Serve with a side of quinoa or brown rice to turn this dish into a wholesome, balanced meal. {{image_4}} You can change the veggies in this dish for fun. Try using broccoli, asparagus, or carrots. Each option brings a new flavor and texture. Just remember to cut them into similar sizes. This way, they cook evenly with the chicken. Feel free to switch up the herbs too. Instead of oregano and thyme, use rosemary or basil. If you enjoy a spicy kick, add red pepper flakes. You can even use fresh herbs if you have them. Just chop them finely and mix them into the marinade. If you want a low-carb meal, skip the tomatoes and bell peppers. Add more zucchini or cauliflower instead. This keeps the dish light and healthy. Use chicken thighs for added flavor and fat. They are juicy and perfect for a keto diet. After enjoying your Lemon Herb Chicken, store any leftovers in an airtight container. This helps keep the chicken moist and the veggies fresh. Let the dish cool to room temperature before sealing it. You can keep it in the fridge for up to three days. If you want to save it longer, freezing is a great option. To reheat, use your oven for best results. Preheat the oven to 350°F (175°C). Place the chicken and veggies on a baking sheet. Cover them with foil to keep moisture in. Heat for about 15-20 minutes or until warm. You can also use a microwave, but this may make the chicken less juicy. If you plan to freeze your Lemon Herb Chicken, slice the chicken first. This allows it to thaw and heat evenly. Use freezer-safe bags or containers. Remove as much air as possible to prevent freezer burn. It can last up to three months in the freezer. When ready to enjoy, thaw in the fridge overnight before reheating. Cook the chicken for 25-30 minutes at 425°F (220°C). Use a meat thermometer to check. The chicken should reach an internal temperature of 165°F (75°C) to be safe to eat. The time may vary based on thickness, so check it to avoid overcooking. Enjoy juicy chicken every time with this simple timing. Yes, you can use bone-in chicken for this recipe. Just know it may need more time to cook. Bone-in pieces usually require an extra 10-15 minutes compared to boneless breasts. Ensure the internal temperature still reaches 165°F (75°C). The bone adds flavor and moisture, making it a tasty option. Lemon Herb Chicken pairs well with many sides. Here are some ideas: - Rice or quinoa for a hearty base - A fresh garden salad for crunch - Garlic bread for a warm touch - Roasted potatoes for added flavor - Steamed green beans for a healthy option These sides will balance the meal and enhance the lemon and herb flavors. Feel free to mix and match! This blog post covered the key steps to make Lemon Herb Chicken. You learned about the main ingredients, how to create a tasty marinade, and the best veggies to pair. I shared tips to boost flavor, perfect roasting methods, and great serving ideas. Cooking should be fun and tasty. Use these tips to try your own twists. Enjoy your meal prep and share this delicious dish with friends and family!

Lemon Herb Chicken Sheet Pan Flavorful One-Pan Meal

Looking for a simple yet tasty dinner? The Lemon Herb Chicken Sheet Pan is your answer! This one-pan meal is

Newer posts
← Previous Page1 … Page119 Page120

dsad

© 2026 recipetorch • Built with GeneratePress

Our Policies

  • Copyright Policy
  • Cookie Policy
  • GDPR Policy
  • Privacy Policy
  • Disclaimer
  • Terms Of Use

More Information

  • Home
  • About
  • Contact
  • Appetizers
  • Dessert
  • Dinner
  • Drinks
©2026, recipetorch About Back To Top