Skip to content
DisclaimerTerms Of UseGDPR PolicyCookie Policy

recipetorch

  • Home
  • Drinks
  • Appetizers
  • Dinner
  • Dessert
  • About
  • Contact
  • Privacy Policy
DisclaimerTerms Of UseGDPR PolicyCookie Policy

Nicole

- 1 cup rolled oats - 1 cup coconut milk - 1/2 cup Greek yogurt - 1 cup fresh strawberries - 2 tablespoons shredded coconut - 1 tablespoon honey or maple syrup - 1/2 teaspoon vanilla extract - A pinch of salt You need simple ingredients to make Strawberry Coconut Overnight Oats. Each ingredient adds flavor and texture. Rolled oats are the base. They soak up flavors and become soft overnight. Coconut milk gives a creamy texture. You can use canned or carton coconut milk. Greek yogurt adds protein and tanginess. Fresh strawberries bring sweetness and freshness. Shredded coconut adds a delightful crunch. Honey or maple syrup is optional for sweetness. A dash of vanilla extract enhances the taste. Lastly, a pinch of salt balances all the flavors. - Extra strawberries - Shredded coconut - Mint leaves Toppings elevate your dish. You can add extra strawberries for more fruitiness. Shredded coconut adds even more texture. Fresh mint leaves can bring a refreshing touch. Feel free to get creative with your toppings! Each choice makes your breakfast feel special and bright. {{ingredient_image_2}} Start by taking a medium bowl. Add 1 cup of rolled oats. Next, pour in 1 cup of coconut milk. Then, add 1/2 cup of Greek yogurt. If you like some sweetness, mix in 1 tablespoon of honey or maple syrup. Now, add 1/2 teaspoon of pure vanilla extract and a pinch of salt. Stir everything well until the oats are fully coated. Now it’s time for the strawberries. Take 1 cup of fresh strawberries and slice them. Gently fold the sliced strawberries into the oat mixture. Make sure they spread evenly. This way, you get strawberry goodness in every bite. Grab two mason jars or airtight containers. Divide the oat mixture into the jars. As you fill them, press down a bit to make it compact. Finally, sprinkle 2 tablespoons of shredded coconut on top of each jar. This adds a nice crunch! Seal each jar tightly. Place them in the fridge overnight. If you’re in a hurry, let them sit for at least 4 hours. This waiting time lets the oats soak up the coconut milk and become soft. When you wake up, take the jars out of the fridge. Give the oats a good stir. If you want them creamier, add a splash of coconut milk. For a lovely finish, top with extra sliced strawberries and a sprinkle of shredded coconut. Enjoy your tasty breakfast! To get the perfect creamy texture, adjust the amount of coconut milk. If you like it thicker, add less milk. For a thinner mix, just add more. Let your oats sit longer for the best absorption. A full night in the fridge works wonders! You can play with different sweeteners. Try maple syrup for a unique taste. You might also want to use flavored yogurt. Coconut-flavored yogurt adds a tropical vibe that fits perfectly with the dish. Serve your oats in mason jars for a cute look. You can also use stylish bowls for a more elegant touch. Add mint leaves on top for a pop of color and freshness. This simple garnish makes your breakfast feel special. Pro Tips Use Quality Ingredients: Opt for fresh, ripe strawberries for the best flavor. The quality of your ingredients directly impacts the taste of your overnight oats. Experiment with Flavors: Feel free to mix in different fruits or nuts according to your preference. Bananas, blueberries, or almonds can elevate the dish to a whole new level. Make It Vegan: Substitute Greek yogurt with a plant-based yogurt alternative to make this recipe fully vegan while still enjoying the creamy texture. Prep in Batches: Double or triple the recipe and store in multiple jars for an easy grab-and-go breakfast throughout the week. {{image_4}} You can switch out strawberries for other fruits. Blueberries add a nice pop of color and flavor. Bananas bring a creamy sweetness. If you want a tropical twist, try mango or pineapple. These fruits mix well with coconut and oats. If you prefer non-dairy, you have options. Almond milk or oat milk can replace coconut milk. They provide a light flavor, making your oats smooth. For yogurt, use non-dairy varieties. Coconut yogurt keeps that tropical vibe while being vegan. Boost the nutrition of your oats easily. Chia seeds or flaxseeds add fiber and omega-3s. They help you feel full longer. You can also mix in nuts or seeds for crunch. Almonds or pumpkin seeds add nice texture and flavor. You should eat your strawberry coconut overnight oats within 3 days. This keeps them fresh and tasty. To help with flavor and texture, always keep the jars sealed. If you open them, the oats may dry out or lose their yummy taste. You can freeze your overnight oats for longer storage. They will stay good for up to 2 months. When you're ready to enjoy them, just thaw the jars in the refrigerator overnight. This makes sure they stay smooth and delicious when you eat them! Yes, you can make these overnight oats the night before. You can even prepare them for multiple days ahead. Simply store them in the fridge, and they will stay fresh. This makes breakfast easy and quick. You can use quick oats, but they may change the texture. Quick oats absorb liquid faster, so the oats may be softer. If you prefer a chewier bite, stick with rolled oats. To adjust the sweetness, change the amount of honey or use a different sweetener. You can use less honey for a less sweet taste or more for a sweeter dish. Try maple syrup or a sugar substitute if you like. Serve these overnight oats chilled for a quick breakfast. You can also enjoy them as a snack. Top with extra strawberries and coconut for added flavor and a nice look. You now have a simple guide to making delicious overnight oats. We covered the key ingredients, step-by-step instructions, and tips for the perfect texture and flavor. Feel free to try different fruits and toppings to suit your taste. Remember to adjust the sweetness and enjoy your creation within three days. Whether you store them in the fridge or freeze for later, these oats are a great choice. So, grab your ingredients and make your mornings easier and tastier!

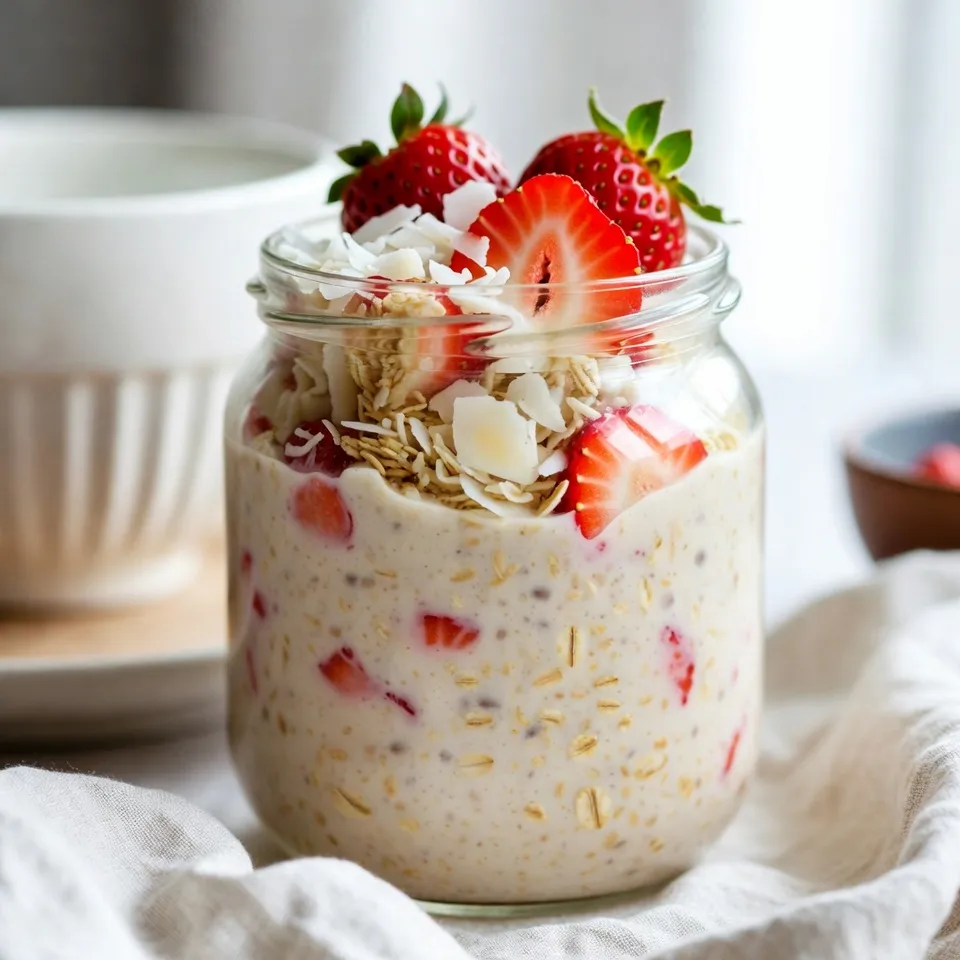
Strawberry Coconut Overnight Oats Easy Breakfast Delight

Start your day deliciously with Strawberry Coconut Overnight Oats! This easy breakfast is packed with fresh flavors and creamy textures.

- 2 cans of young green jackfruit in brine or water, drained and rinsed - 1 tablespoon of olive oil - 1 medium onion, finely chopped - 3 cloves of garlic, minced - 1 teaspoon of smoked paprika - 1 teaspoon of ground cumin - 1/2 teaspoon of cayenne pepper (adjust for spice) - 1 cup of BBQ sauce (your choice) - Salt and pepper to taste - 4 whole grain sandwich buns To make these BBQ jackfruit sandwiches, you need young green jackfruit. It’s not sweet and has a meaty texture. You can find this in cans at most supermarkets. The other key ingredients are olive oil, onion, garlic, and spices. These add flavor and depth to the dish. - Coleslaw (for serving) - Pickles (for garnish) Coleslaw adds crunch and creaminess. The pickles bring a nice tang. You can customize your toppings to fit your taste. You can use any BBQ sauce you like. Some popular options include: - Sweet and smoky BBQ sauce - Spicy chipotle BBQ sauce - Homemade BBQ sauce Choose a sauce that matches your flavor preferences. A good BBQ sauce makes the jackfruit rich and tasty. {{ingredient_image_2}} Start by draining and rinsing the jackfruit. Open two cans of young green jackfruit. Use a sharp knife to cut the jackfruit into smaller chunks. Remove any hard pieces and seeds. Next, shred the jackfruit using your fingers or forks. You want it to look like pulled meat. Set the shredded jackfruit aside for later. Grab a large frying pan and heat a tablespoon of olive oil over medium heat. Add one finely chopped medium onion. Sauté it for about five minutes until the onion turns soft and see-through. Then, add three minced garlic cloves. Stir and cook for one more minute. This step makes the base of your dish smell amazing. Now it's time for the jackfruit! Add the shredded jackfruit to the pan with the onions and garlic. Sprinkle in a teaspoon of smoked paprika and a teaspoon of ground cumin. If you like heat, add half a teaspoon of cayenne pepper. Stir well to coat the jackfruit in spices. Cook this mixture for about ten minutes. Stir it every few minutes until the jackfruit is tender and starts to brown. Next, pour in one cup of your favorite BBQ sauce. Mix it well with the jackfruit. Let it simmer gently. Lower the heat and cover the pan. Cook for another 15 to 20 minutes. Stir occasionally. Taste and add salt and pepper as needed. If it looks too thick, add a splash of water to thin it out. To get the best texture, use young green jackfruit. Make sure you drain and rinse it well. Cut it into small chunks. Remove any hard core and seeds. Shred the jackfruit with your hands or forks. This gives it a pulled meat look. Cook it well in your pan. The flavors will blend nicely, and it will get tender. Spice levels can change how you enjoy your sandwich. Start with the cayenne pepper. Use half a teaspoon for a mild kick. You can always add more if you like it spicy. Taste the jackfruit mixture while cooking. If it needs more heat, add a pinch of cayenne. You can also try adding hot sauce or chili powder to mix things up. Toasting your buns makes a big difference. It adds crunch and warmth. You can toast them in a toaster or a skillet. If using a skillet, heat it on medium and lightly coat it with oil. Toast the buns until they are golden brown. This step helps prevent sogginess from the BBQ sauce. Enjoy that perfect bite with each sandwich! Pro Tips Choosing the Right Jackfruit: Use young green jackfruit packed in brine or water for the best texture. Avoid ripe jackfruit as it has a sweet flavor and mushy texture, which won't work for savory dishes. Customize Your BBQ Sauce: Feel free to experiment with different BBQ sauces to find your perfect flavor. You can also mix in spices or hot sauce to elevate the taste even further! Perfectly Toasted Buns: Toast the sandwich buns until golden brown to add a delightful crunch and enhance the overall flavor of the sandwich. Make Ahead: The jackfruit filling can be made ahead of time and stored in the refrigerator for up to 3 days. Reheat before serving for a quick meal option! {{image_4}} You can switch up the BBQ sauce to change the taste. Try a spicy sauce for more heat. A tangy vinegar-based sauce adds a nice twist. You can also use a sweet sauce with honey or maple for a fun flavor. Each sauce brings out a different side of the jackfruit. Experiment to find your favorite! You can make your BBQ jackfruit sandwiches even better by adding veggies. Try adding bell peppers, corn, or sautéed mushrooms. These will add texture and flavor. For those who want more protein, consider adding tofu, tempeh, or beans. These options make the meal heartier without losing that great taste. If you need gluten-free options, don’t worry! Many stores sell gluten-free buns. You can also use lettuce wraps for a fresh twist. They add a nice crunch and keep things light. With these choices, everyone can enjoy BBQ jackfruit sandwiches! If you have leftover jackfruit filling, store it in an airtight container. Let it cool down first. Place it in the fridge. It will stay fresh for up to four days. If you notice any change in smell or color, it’s best to toss it out. To reheat your sandwiches, I suggest using the oven. Preheat it to 350°F (175°C). Wrap each sandwich in foil to keep it moist. Heat for about 10-15 minutes. You can also use a skillet. Heat it over medium heat and toast each side for three to five minutes. This method keeps the bread crispy. Freezing is a great option for meal prep. For the best results, freeze the jackfruit filling on its own. Use a freezer-safe bag or container. It can last up to three months. When ready to eat, thaw in the fridge overnight. Reheat it on the stove or in the microwave. You can also freeze assembled sandwiches, but the bread may get soggy. To avoid this, freeze the filling separately and assemble when ready to eat. Jackfruit is a large tropical fruit. It grows on trees in warm climates. Young green jackfruit has a meaty texture. This makes it a popular choice for vegan dishes. You can use jackfruit to make pulled "pork" sandwiches, tacos, and curries. When cooked, it absorbs flavors well. This makes it perfect for BBQ sauces and spices. Yes, you can make BBQ jackfruit sandwiches ahead of time. Prepare the jackfruit filling and store it in the fridge. You can keep it for up to three days. When you're ready to eat, reheat the filling on the stove. Toast the buns just before serving for the best taste. This saves time and lets you enjoy the meal later. BBQ jackfruit sandwiches go well with many sides. Here are some great options: - Coleslaw for crunch - Sweet potato fries for sweetness - Potato salad for creaminess - Grilled corn for a smoky taste - Pickles for a tangy kick These sides add color and flavor, making your meal even better! In this blog post, we explored how to make delicious BBQ jackfruit sandwiches. We covered key ingredients, step-by-step instructions, and helpful tips for the best texture. I shared fun variations and easy storage methods. BBQ jackfruit sandwiches are tasty and versatile. They offer a satisfying meal for everyone. Enjoy experimenting with flavors and making this dish your own. Trust me, you won't be disappointed!

BBQ Jackfruit Sandwiches Quick and Flavorful Recipe

If you’re craving a delicious plant-based meal, BBQ jackfruit sandwiches are the answer! This quick and flavorful recipe packs a

I use 1 cup of fresh spinach leaves. Spinach adds nutrients and a lovely green color. It’s rich in vitamins A and C. This leafy green also offers iron and fiber. You won’t taste it much, but you’ll feel great! I prefer 1/2 cup of frozen mixed berries. This mix usually includes blueberries, raspberries, and strawberries. Berries are sweet and full of antioxidants. They also help to balance the smoothie’s flavor. Plus, using frozen berries keeps your drink cool and refreshing. I add 1 ripe banana to the mix. Bananas add creaminess and natural sweetness. They also provide potassium and energy. Make sure it's ripe for the best flavor! I use 1/2 cup of Greek yogurt. It gives a creamy texture and adds protein. If you want a dairy-free option, choose a plant-based yogurt. Both options work well and keep the smoothie smooth. For the liquid, I add 1 cup of almond milk. You can use any milk you like. Almond milk is light and nutty. It adds a nice touch without overpowering the flavors. I sometimes add 1 tablespoon of honey or maple syrup. This is optional, but it boosts sweetness. Taste your smoothie first! You may not need extra sugar if your fruits are sweet enough. For an extra health kick, I sprinkle in 1 tablespoon of chia seeds. These tiny seeds are full of fiber and omega-3 fatty acids. They help make the smoothie more filling. Plus, they add a fun texture! {{ingredient_image_2}} Start by rinsing the fresh spinach leaves under cold water. This helps remove dirt or grit. After washing, pat the leaves dry with a clean kitchen towel. This step ensures your smoothie won’t be watery. In a blender, add the spinach, frozen mixed berries, and a ripe banana. Peel and chop the banana first for easier blending. Next, add Greek yogurt and almond milk. Blend on high until everything is smooth. If you like your smoothie sweeter, add honey or maple syrup now. Blend again briefly. If the smoothie is too thick, pour in a bit more almond milk. Blend until you reach your desired consistency. Once blended, taste your smoothie to check the flavor. If it needs more sweetness, add more honey or syrup and blend briefly. Pour the smoothie into two glasses. For a nice touch, garnish with whole berries or chia seeds on top. Enjoy! To make a great smoothie, pick ripe and tasty berries. Blueberries, raspberries, and strawberries work best together. You can use fresh or frozen berries. Frozen berries give your smoothie a nice chill. If you want a sweeter taste, choose ripe strawberries. They add a lovely flavor. Sweetness is key for a perfect smoothie. Taste your smoothie before serving. If it needs more sweetness, add honey or maple syrup. Start with a small amount, like a teaspoon. Blend it again and taste. You can always add more, but you can't take it out! If you want a dairy-free option, switch Greek yogurt for a non-dairy yogurt. Coconut or almond yogurt is a great choice. For milk, use almond milk, coconut milk, or oat milk. These choices still give a creamy texture without dairy. Blend your smoothie on high speed. This helps mix everything well. If it feels too thick, add more almond milk. Blend again until smooth. You want it creamy and easy to drink. Don’t rush this step; a good blend makes all the difference! Pro Tips Choose Quality Ingredients: Fresh and high-quality spinach and berries will significantly enhance the flavor and nutritional value of your smoothie. Adjusting Thickness: If your smoothie is too thick, gradually add more almond milk until you reach your desired consistency. Freeze Your Banana: For a creamier texture, freeze your ripe banana beforehand. This will make your smoothie colder and thicker. Experiment with Flavors: Don’t hesitate to try different fruits or add-ins like protein powder or nut butter for a unique twist on your smoothie. {{image_4}} You can switch up the greens in this smoothie. Kale or Swiss chard works well. Both add great nutrients and taste. Just make sure to wash them well. You might want to use less kale, as it has a strong flavor. Spinach is mild, so it blends nicely. Almond milk is my go-to, but you can try other types. Coconut milk gives a creamy texture. Soy milk is a good choice for protein. You could even use oat milk for a nut-free option. Each one brings a unique flavor and texture. Want to make your smoothie more filling? Add protein powder or nut butter. A scoop of vanilla protein powder adds flavor and boosts protein. Almond or peanut butter gives healthy fats. Just a tablespoon is enough to make a difference. Fruits change with the seasons, and so can your smoothie! In summer, fresh peaches or cherries can be delightful. In winter, try frozen mango or pomegranate seeds for a burst of flavor. This keeps your smoothie fresh and exciting all year round. To keep your Triple Berry Spinach Smoothie fresh, store it in the fridge. Use a sealed jar or container. This keeps air out and helps maintain flavor. Enjoy it within one day for the best taste. If you can, give it a good shake before drinking. This ensures all the ingredients mix well again. You can freeze parts of your smoothie for later. Freeze your mixed berries or banana slices. Place them in a freezer bag, and squeeze out all the air. This way, they stay fresh and ready to blend. You can also freeze spinach leaves. Just wash and dry them first, then freeze in small portions. This helps you make a quick smoothie anytime. If your smoothie has been in the fridge, it might separate. Just pour it back into the blender. Add a splash of almond milk to help it blend smoothly again. Blend until it’s creamy and well mixed. This step brings back the fresh taste. If you need to, add a bit more sweetener to brighten the flavor. To make a smoothie thicker, add more frozen fruit. You can also use less liquid. For a thinner smoothie, pour in extra almond milk or water. Blend again to mix. This way, you can control the texture based on your taste. Yes, you can use fresh berries instead of frozen ones. However, frozen berries help make the smoothie cold and thick. If you use fresh berries, add ice cubes to keep it cool. This adds a nice chill to your drink. Spinach is rich in vitamins A, C, and K. It also contains iron and calcium. Berries are packed with antioxidants and fiber. Eating them may help boost your immune system. Together, they make a power-packed drink for your health. A smoothie can last up to 24 hours in the fridge. If you want it to stay fresh, store it in an airtight container. Give it a good shake before drinking. The texture may change, but it will still taste good! This blog post covered how to make a healthy and tasty smoothie. We explored key ingredients like fresh spinach and mixed berries. You learned step-by-step instructions for blending these together. I shared tips on how to customize sweetness and texture. We also looked at fun variations and easy storage methods. In the end, smoothies are a great way to add nutrition to your diet. Enjoy experimenting with different flavors and ingredients. Make each smoothie your own!

Triple Berry Spinach Smoothie Healthy and Refreshing Drink

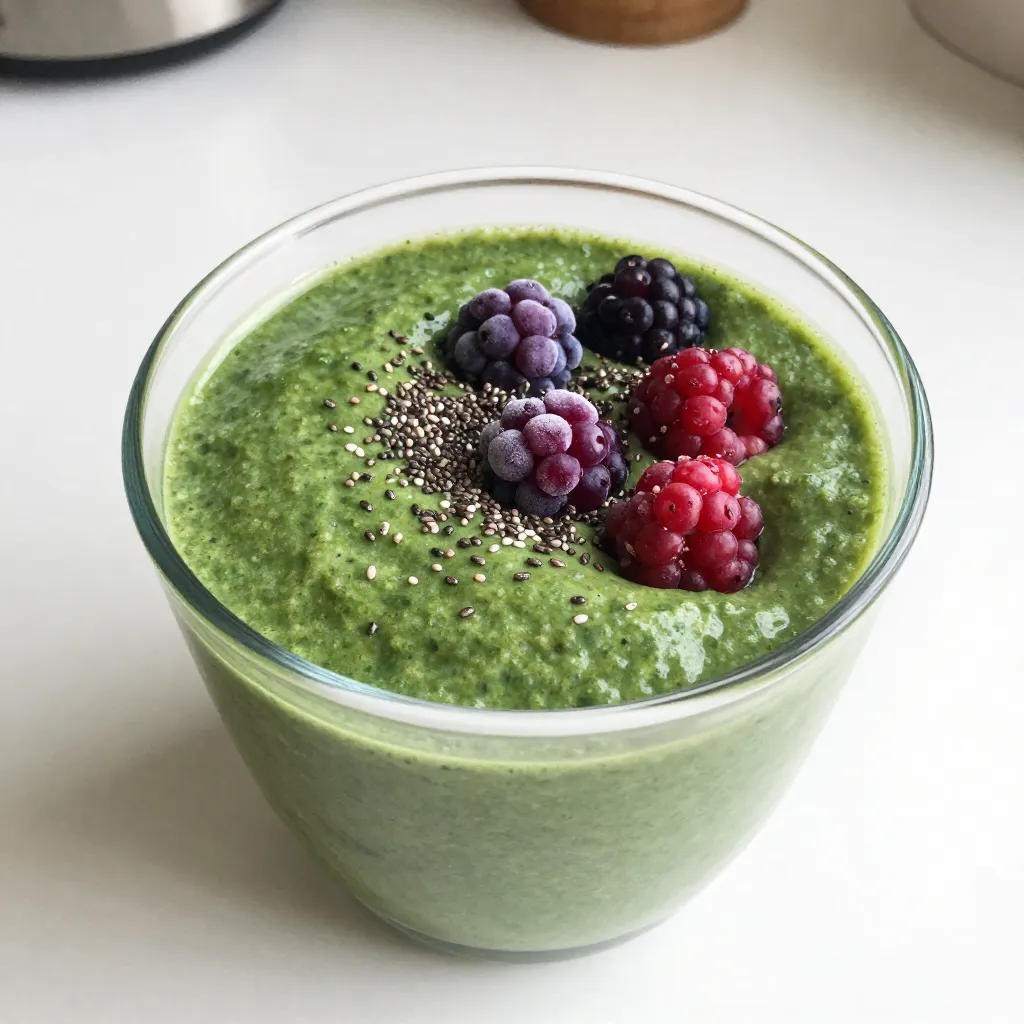
Are you ready to blend up something healthy and delicious? The Triple Berry Spinach Smoothie is your perfect partner for

- 1 cup all-purpose flour - 1/2 cup granulated sugar - 1/2 cup packed brown sugar - 1 teaspoon baking powder - 1/2 teaspoon baking soda - 1/2 teaspoon salt - 1 tablespoon pumpkin spice mix - 1/2 cup unsweetened pumpkin puree - 1/4 cup brewed coffee, cooled - 1/4 cup vegetable oil - 2 large eggs - 1 teaspoon vanilla extract - For the Frosting: - 1/2 cup cream cheese, softened - 1/4 cup unsalted butter, softened - 1 cup powdered sugar - Additional pumpkin spice for garnish Using high-quality ingredients makes a big difference. Fresh spices bring out the best flavor. Use pure pumpkin puree, not pumpkin pie filling. Good quality coffee enhances the latte flavor. Always check the dates on your baking items. Fresh eggs will help the cupcakes rise well. You can swap all-purpose flour with gluten-free flour for a gluten-free option. If you need a sugar alternative, try coconut sugar. For a dairy-free version, use vegan cream cheese and margarine. You can replace brewed coffee with strong brewed tea if you want a different flavor. If pumpkin spice is not available, mix cinnamon, nutmeg, and cloves in equal parts. {{ingredient_image_2}} First, preheat your oven to 350°F (175°C). This heat is key for a great bake. While the oven warms, line a 12-cup muffin tin with paper liners. This keeps the cupcakes from sticking and makes for easy cleanup. In a large mixing bowl, add these dry ingredients: - 1 cup all-purpose flour - 1/2 cup granulated sugar - 1/2 cup packed brown sugar - 1 teaspoon baking powder - 1/2 teaspoon baking soda - 1/2 teaspoon salt - 1 tablespoon pumpkin spice mix Whisk them together well until they blend fully. This step adds air and helps the cupcakes rise. In a separate bowl, combine the following wet ingredients: - 1/2 cup unsweetened pumpkin puree - 1/4 cup brewed coffee, cooled to room temperature - 1/4 cup vegetable oil - 2 large eggs - 1 teaspoon vanilla extract Whisk these until the mixture is smooth. This will add moisture and flavor to your cupcakes. Now, gently pour the wet mixture into the bowl with the dry ingredients. Use a spatula to fold the mixtures together. Do this carefully; you want to keep some lumps. Over-mixing can make the cupcakes tough. Once mixed, fill each muffin cup about two-thirds full with the batter. Place the muffin tin in your preheated oven. Bake for 20-25 minutes. Check for doneness by inserting a toothpick into the center of a cupcake. If it comes out clean, they are ready. Let them cool in the pan for about 5 minutes, then move them to a wire rack to cool completely. While the cupcakes cool, prepare the frosting. In a mixing bowl, beat together these ingredients: - 1/2 cup cream cheese, softened - 1/4 cup unsalted butter, softened - 1 cup powdered sugar Mix until creamy and smooth. Once the cupcakes are cool, frost each one generously with the cream cheese frosting. For a special touch, sprinkle a bit of pumpkin spice on top as a garnish. Enjoy your delightful fall treat! To keep your cupcakes moist, use fresh ingredients. Old flour or expired baking powder can ruin the texture. Measure your flour correctly. Spoon it into the cup and level it off. Don't pack it down. Adding pumpkin puree helps too. It adds moisture and flavor. Use brewed coffee at room temperature. This helps blend the flavors well. One common mistake is over-mixing the batter. Mix just until wet and dry ingredients combine. A few lumps are okay. Another mistake is not checking your oven temperature. Use an oven thermometer to ensure it is accurate. Baking too long can dry out your cupcakes. Always check for doneness with a toothpick around 20 minutes. Let your cupcakes cool in the pan for five minutes. This helps them set before moving them. After that, transfer them to a wire rack. It allows air to circulate around them. Wait until they cool completely before frosting. Use a piping bag for neat frosting. Sprinkle extra pumpkin spice on top for a lovely finish. Pro Tips Use Fresh Spices: Ensure your pumpkin spice mix is fresh for maximum flavor. Ground spices can lose potency over time, so consider grinding your own for a more vibrant taste. Test for Doneness: Instead of just relying on the baking time, use a toothpick to check for doneness. If it comes out clean, your cupcakes are ready to come out of the oven! Cool Completely: Allow your cupcakes to cool completely before frosting them. This prevents the frosting from melting and ensures a beautiful finish. Experiment with Toppings: Feel free to get creative with toppings! Consider adding caramel drizzle, chocolate chips, or even crushed nuts for added texture and flavor. {{image_4}} You can make these cupcakes even better by adding chocolate or nuts. Mix in 1/2 cup of chocolate chips for a sweet twist. The chocolate pairs well with the pumpkin spice. If you prefer nuts, add 1/2 cup of chopped walnuts or pecans. This adds a nice crunch and flavor. Mix these into your batter right before you fill the muffin cups. To make dairy-free or vegan pumpkin spice latte cupcakes, swap a few ingredients. Use almond or oat milk instead of regular milk. Replace the eggs with flaxseed meal. Mix 1 tablespoon of flaxseed with 2.5 tablespoons of water. Let it sit for five minutes until it thickens. You can also use dairy-free cream cheese for the frosting. These changes keep the flavor rich and delicious. You can change the flavor of your cupcakes easily. To add a maple flavor, use maple syrup instead of sugar. This gives a nice sweetness and a warm taste. For a caramel twist, drizzle caramel sauce over the frosting. You can also mix caramel into the batter. These flavors make each bite special. Feel free to get creative with your favorite flavors! Store your pumpkin spice latte cupcakes at room temperature. Place them in an airtight container. This keeps them fresh and moist. Cupcakes can stay good for up to three days. If your kitchen is warm, try to eat them sooner. If your cupcakes are frosted, you should refrigerate them. Put the cupcakes in a sealed container. This helps the frosting stay firm and fresh. They will last about five days in the fridge. Just remember to let them sit out for a few minutes before eating. This will bring back their soft texture. You can freeze cupcakes if you want to save some for later. Wrap each cupcake in plastic wrap. Then place them in a freezer bag. They can stay good for up to three months in the freezer. To thaw, take them out and leave them at room temperature. This keeps them tasty and moist. You can use applesauce as a substitute for pumpkin puree. It keeps the cupcakes moist and adds a subtle sweetness. Mashed bananas also work well, but they change the flavor a bit. If you need a lighter option, try using sweet potato puree. This gives a nice texture and taste too. These cupcakes last about three days at room temperature. Store them in an airtight container to keep them fresh. If you refrigerate them, they can last up to a week. Just note that cold storage can dry them out, so enjoy them as soon as you can. Yes, you can use a chocolate frosting for a rich twist. A maple buttercream also pairs well with the pumpkin spice flavor. If you want something lighter, a whipped cream topping is a great choice. Get creative and find what you love best! Serve these cupcakes warm or at room temperature. They taste best after they cool down completely. You can also add a dollop of whipped cream on top for extra flair. Enjoy them with a hot drink for the perfect fall treat! You learned how to make delicious cupcakes with our easy steps and tips. We covered key ingredients, quality notes, and useful substitutions. The step-by-step guide ensures perfect baking every time. Don't forget the tips to keep your cupcakes moist and tasty. You can even try fun variations like chocolate or vegan options! Lastly, storing your cupcakes right helps maintain their flavor. Now you can bake and enjoy cupcakes that impress everyone. Happy baking!

Pumpkin Spice Latte Cupcakes Delightful Fall Treat

Are you ready to enjoy the taste of fall with a sweet twist? These Pumpkin Spice Latte Cupcakes are perfect

- 1 large head of cauliflower, broken into bite-sized florets - 4 tablespoons extra virgin olive oil - 6 cloves garlic, finely minced - 1 tablespoon fresh rosemary, finely chopped - 1 tablespoon fresh thyme leaves, stripped from the stem - 1 teaspoon smoked paprika for a touch of warmth - Sea salt and freshly ground black pepper, to taste - Zest of 1 lemon for brightness - 2 tablespoons freshly squeezed lemon juice - Fresh parsley, roughly chopped, for garnish To make this dish, start with a large head of cauliflower. Break it into small, bite-sized florets. This size cooks evenly, giving you a tender, tasty bite. Next, grab some extra virgin olive oil. This oil adds richness and helps the flavors stick. For seasoning, we will use garlic, rosemary, and thyme. Mince the garlic finely and chop the rosemary. Strip the thyme leaves from their stems. We add smoked paprika for warmth. Sea salt and black pepper bring out the flavors. For a bright finish, we use lemon zest and juice. Finally, fresh parsley adds a nice touch and color. Each ingredient plays a role. Together, they create a flavorful side dish that everyone will love. {{ingredient_image_2}} 1. Preheat your oven to 425°F (220°C). This high heat helps the cauliflower get nice and crispy. 2. Line a large baking sheet with parchment paper. This makes cleaning up easy later. 3. In a large bowl, add the cauliflower florets. They should be in bite-sized pieces. 4. Pour in the extra virgin olive oil. This oil adds flavor and helps the herbs stick. 5. Add the minced garlic, chopped rosemary, thyme leaves, smoked paprika, sea salt, and black pepper. 6. Use your hands or a spatula to toss the cauliflower well. Make sure each piece is coated with oil and spices. 1. Spread the cauliflower evenly on the baking sheet. Make sure they are in a single layer for even cooking. 2. Place the baking sheet in the oven and set a timer for 25 to 30 minutes. 3. Halfway through roasting, flip the florets. This helps them cook evenly and get golden brown. 1. Once the cauliflower is roasted, take it out of the oven. It should be tender and slightly charred. 2. Immediately drizzle the lemon juice over the hot cauliflower. This adds a nice tang. 3. Sprinkle the lemon zest on top. The zest brightens the dish with fresh flavor. 4. Gently toss the cauliflower to mix in the lemon juice and zest. 5. Finish by garnishing with chopped parsley. This adds color and a fresh taste. To ensure even roasting, spread the florets on the baking sheet. Leave space between each piece. This helps the hot air circulate and cook them evenly. Flip the florets halfway through cooking. This step helps get that nice golden color all around. For adjustments on doneness, check the cauliflower after 25 minutes. If you like it softer, leave it in for a few more minutes. Roasting time can vary based on your oven. Trust your eyes and taste buds to guide you. To boost flavor, consider adding a pinch of chili flakes. This will add a bit of heat. You can also try mixing in some grated Parmesan cheese for a cheesy twist. To vary the garlic intensity, use fewer cloves if you prefer a milder taste. If you love garlic, feel free to add more! Just remember, fresh garlic packs a punch. Always taste as you go to find your perfect balance. Pro Tips Choose Fresh Cauliflower: Always select a cauliflower head that is firm, with tightly packed florets and vibrant green leaves for the best flavor and texture. Enhance Flavor with Marinade: For deeper flavor, let the cauliflower marinate in the olive oil and herbs for at least 15 minutes before roasting. Experiment with Spices: Feel free to customize the spice blend by adding cumin, turmeric, or chili powder for a unique twist on the roasted cauliflower. Perfect Roasting Technique: Make sure to roast in a single layer and avoid overcrowding the pan to ensure even cooking and a crispy exterior. {{image_4}} You can change the flavor by using different vegetables. Try Brussels sprouts or carrots instead of cauliflower. Each veggie brings its own taste. You can also mix a few different ones for fun. For herbs, you can swap rosemary and thyme for basil or oregano. These herbs add a lovely twist. Don’t be afraid to try spices too. Adding cumin or chili powder can give it a nice kick. This recipe is great for anyone. It is vegan since it uses no animal products. You can also make it gluten-free easily. Check your spices to ensure they are gluten-free. All the ingredients are safe for those diets. Garlic herb roasted cauliflower pairs well with many main dishes. It goes great with grilled chicken or fish. You can also serve it with pasta for a hearty meal. For a creative touch, serve it on a big platter. Let everyone take what they want. Drizzle more olive oil on top for shine. You can also sprinkle some extra herbs for a fresh look. After making garlic herb roasted cauliflower, let it cool first. Place leftovers in an airtight container. This will keep them fresh. Stored this way, the dish lasts about three to five days in the fridge. Make sure to label the container with the date. This helps you track how long it has been stored. To reheat, the oven is best. Preheat it to 350°F (175°C). Spread the cauliflower on a baking sheet. Heat for about 10-15 minutes. This keeps the texture crispy. You can also use a microwave if you’re in a hurry. Just use a microwave-safe dish. Heat for one to two minutes. Cover it with a damp paper towel. This keeps some moisture in, so it won't dry out. Can I use frozen cauliflower? Yes, you can use frozen cauliflower. It is not my first choice, but it works. Just make sure to thaw and drain it well. Excess water can make it soggy. Roasting time may need to be adjusted since frozen florets can cook faster. How to make cauliflower crispy when roasting? To make cauliflower crispy, start with dry florets. Toss them with olive oil and seasonings. Spread them on the baking sheet in a single layer. Avoid overcrowding. This allows hot air to circulate and promotes crispiness. Flip the florets halfway through cooking for even browning. What to do if the cauliflower is overcooked? If you overcook the cauliflower, it can become mushy. You can mash it and turn it into a creamy side dish or soup. Add some broth and blend it for a smooth texture. This way, you won’t waste any food. How to avoid soggy florets? To avoid soggy florets, ensure they are completely dry before tossing. Use high heat for roasting, around 425°F (220°C). Spread them out on the baking sheet for even cooking. Flipping them once helps keep the texture firm and crispy. This guide shows you how to roast cauliflower perfectly. We covered key ingredients, step-by-step instructions, and helpful tips. You learned about variations for different diets and storage practices. Roasting gets you a tasty side dish or snack. Use fresh herbs and adjust flavors to fit your taste. Remember, you can get creative with this recipe. Now, enjoy your flavorful cauliflower, whether you serve it warm or save it for later. Cooking should be fun, so explore and find what works for you!

Garlic Herb Roasted Cauliflower Flavorful Side Dish

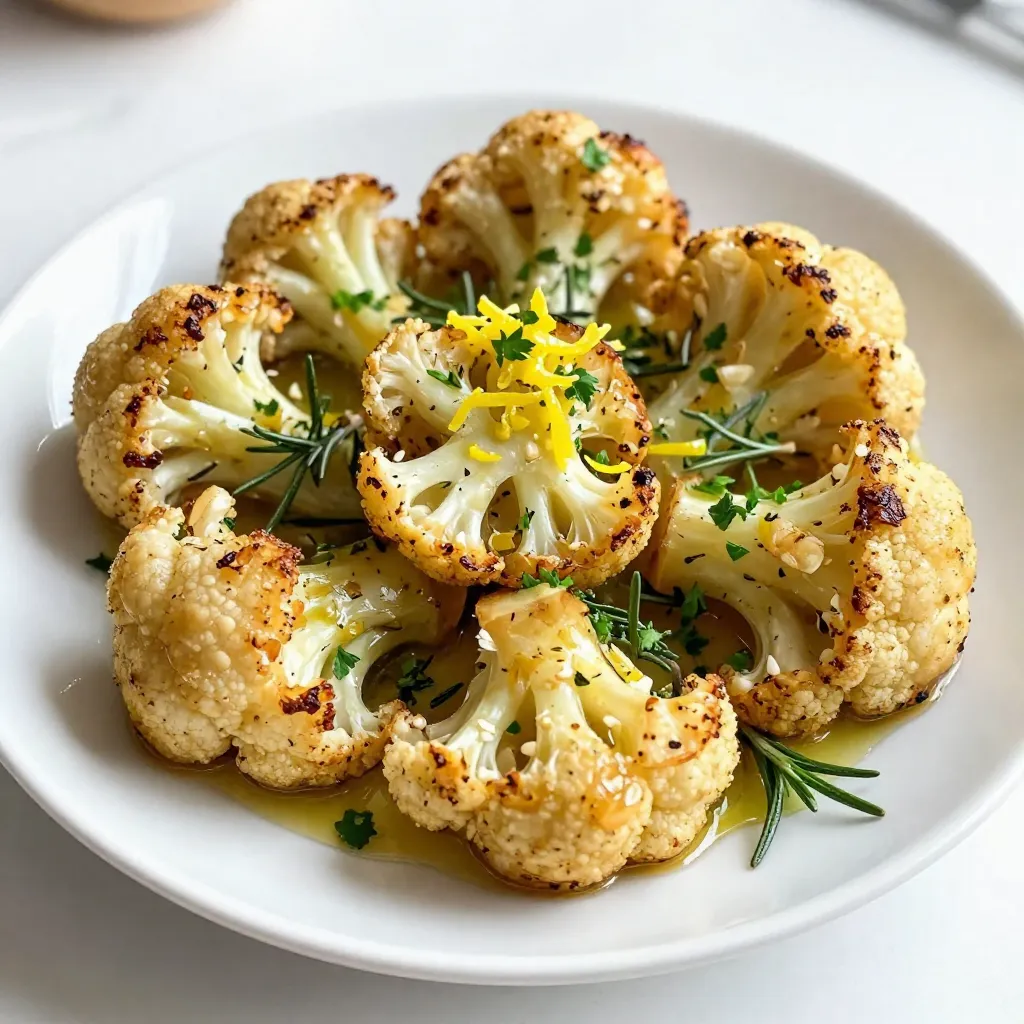
Looking for a tasty side dish that’s both easy and packed with flavor? Look no further than Garlic Herb Roasted

For these tacos, you need: - 1 medium head of cauliflower, cut into bite-sized florets - 8 small corn tortillas - 1 ripe avocado, sliced - 1 cup red cabbage, finely shredded - 1/4 cup fresh cilantro, roughly chopped These ingredients create a great base for the tacos. The cauliflower gives a nice texture. The corn tortillas add warmth and flavor. You will also need: - 2 tablespoons extra virgin olive oil - 1 teaspoon smoked paprika - 1 teaspoon ground cumin - 1/2 teaspoon garlic powder - 1/2 teaspoon onion powder - Salt and freshly ground black pepper to taste These seasonings add depth to the dish. Olive oil helps the spices stick to the cauliflower. Smoked paprika brings a subtle smokiness. Cumin adds a warm, earthy flavor. Don’t forget these finishing touches: - Lime wedges, for serving - Optional: Your favorite hot sauce for an extra kick Lime wedges bring brightness to the tacos. A drizzle of hot sauce can spice things up. These toppings make each bite fresh and exciting! {{ingredient_image_2}} Start by preheating your oven to 425°F (220°C). This heat is perfect for roasting. While the oven warms, grab your medium head of cauliflower. Cut it into bite-sized florets. This size helps them cook evenly. In a large bowl, mix the florets with two tablespoons of extra virgin olive oil. Add one teaspoon of smoked paprika, one teaspoon of ground cumin, half a teaspoon of garlic powder, and half a teaspoon of onion powder. Sprinkle in salt and black pepper. Toss everything well to coat. Now, arrange the seasoned cauliflower on a baking sheet. Make sure the pieces have space. This helps them roast well. Place the baking sheet in your preheated oven. Roast for 25 to 30 minutes. Halfway through, give the cauliflower a good toss. This step ensures even cooking and a nice golden brown color. While the cauliflower roasts, heat your corn tortillas. Use a dry skillet over medium heat. Warm each tortilla for about 30 seconds on each side. They should be warm and flexible. Once the cauliflower is ready, take it out and let it cool for a few minutes. To build your tacos, place a scoop of roasted cauliflower on each tortilla. Top with a few slices of ripe avocado, a handful of finely shredded red cabbage, and some fresh cilantro. Serve with lime wedges on the side. If you want some heat, drizzle your favorite hot sauce on top. Enjoy your tasty tacos! To get perfect roasted cauliflower, preheat your oven to 425°F (220°C). Cut the cauliflower into bite-sized florets. This helps them roast evenly. Toss the florets with olive oil, smoked paprika, cumin, garlic powder, onion powder, salt, and pepper. Make sure each floret gets coated well. Spread them out on a baking sheet. Leave space between florets for air to circulate. Roast for 25-30 minutes. Halfway through, toss the florets for even browning. You want them golden brown and tender. To heat corn tortillas, use a dry skillet over medium heat. Place one tortilla in the skillet for about 30 seconds. Flip it and heat the other side for another 30 seconds. The tortilla should be warm and flexible. This step makes it easier to fold and adds a nice flavor. You can wrap the warm tortillas in a clean towel to keep them warm while you heat the rest. Arrange the tacos on a colorful platter. Start with a warm tortilla, then add roasted cauliflower. Layer on avocado slices and shredded red cabbage. Top with fresh cilantro for a pop of color. Serve lime wedges on the side for a zesty squeeze. If you enjoy spice, drizzle your favorite hot sauce over the tacos. This adds a fun kick! A vibrant display makes the meal more inviting and fun to eat. Pro Tips Use Fresh Ingredients: Opt for the freshest cauliflower and vegetables to enhance the flavor and texture of your tacos. Customize Your Spices: Feel free to experiment with different spices or herbs to suit your taste, such as chili powder for extra heat. Keep Tortillas Warm: Wrap warmed tortillas in a clean kitchen towel after cooking to keep them soft and pliable until serving. Presentation Matters: Serve your tacos on a colorful platter and garnish with additional cilantro and lime for an appealing presentation. {{image_4}} Roasted cauliflower tacos fit well into vegan and gluten-free diets. The main ingredient, cauliflower, is naturally gluten-free. You can enjoy these tacos without any worries. Use corn tortillas, which are also gluten-free. Just check the package to be sure. For a vegan twist, skip the cheese and focus on fresh toppings. Avocado adds creaminess, while cilantro gives a burst of flavor. You can mix and match fillings in your tacos. Try adding black beans for protein. Grilled peppers and corn also work great. If you want more crunch, consider adding radishes or jicama. You can even use quinoa or lentils for a hearty bite. The key is to keep it colorful and tasty. Toppings make tacos fun and unique. If you are dairy-free, skip the cheese and add extra avocado. You can swap red cabbage with shredded carrots for a sweeter touch. If you want more heat, consider jalapeños or spicy salsa. For a fresh taste, add diced tomatoes or mango salsa. Each topping can change the flavor and feel of your tacos, so get creative! To keep your leftover tacos fresh, store them in a sealed container. Place the roasted cauliflower, avocado, and toppings in separate containers. This prevents sogginess and keeps flavors bright. Make sure to refrigerate them within two hours of cooking. They stay fresh for up to three days. To reheat, preheat your oven to 350°F (175°C). Place the cauliflower on a baking sheet. Heat for about 10 minutes, until warm. For tortillas, wrap them in foil and warm them in the oven for a few minutes. This keeps them soft and pliable. You can also reheat in a skillet over low heat for a quick option. You can freeze the roasted cauliflower for later use. Allow it to cool completely before freezing. Store it in an airtight container or a resealable bag. It can last up to three months in the freezer. When ready to use, thaw overnight in the fridge and reheat it before assembling your tacos. Yes, you can make these tacos ahead of time. Roasted cauliflower holds well in the fridge. Store it in an airtight container for up to three days. Just reheat it before serving. You can also prepare the toppings in advance. Slice the avocado and shred the cabbage ahead of time. This saves you time on busy days. You can use many different veggies to spice things up. Bell peppers, zucchini, and mushrooms work great. You can also try sweet potatoes or butternut squash. Just chop them into bite-sized pieces and roast them like the cauliflower. This keeps the cooking process simple and delicious. Yes, these tacos are perfect for meal prep. The roasted cauliflower stays tasty for days. You can pack the tortillas and toppings separately. This helps keep everything fresh. Just assemble your tacos when you’re ready to eat. It makes for a quick lunch or dinner option. To add heat to your tacos, try a few options. You can mix in some chili powder with the cauliflower. This adds a warm kick. Another option is to drizzle your favorite hot sauce on top. You could even add sliced jalapeños for extra spice. Adjust the heat to match your taste. In this article, we explored how to make tasty roasted cauliflower tacos. We covered key ingredients, seasonings, and toppings to enhance flavor. You learned a step-by-step guide for preparing and roasting the cauliflower. Tips for perfecting your roast and heating tortillas ensured your tacos are top-notch. We even shared fun variations and storage tips. Roasted cauliflower tacos are not just good for you; they taste great too. Enjoy making them your own!

Roasted Cauliflower Tacos Flavorful and Simple Dish

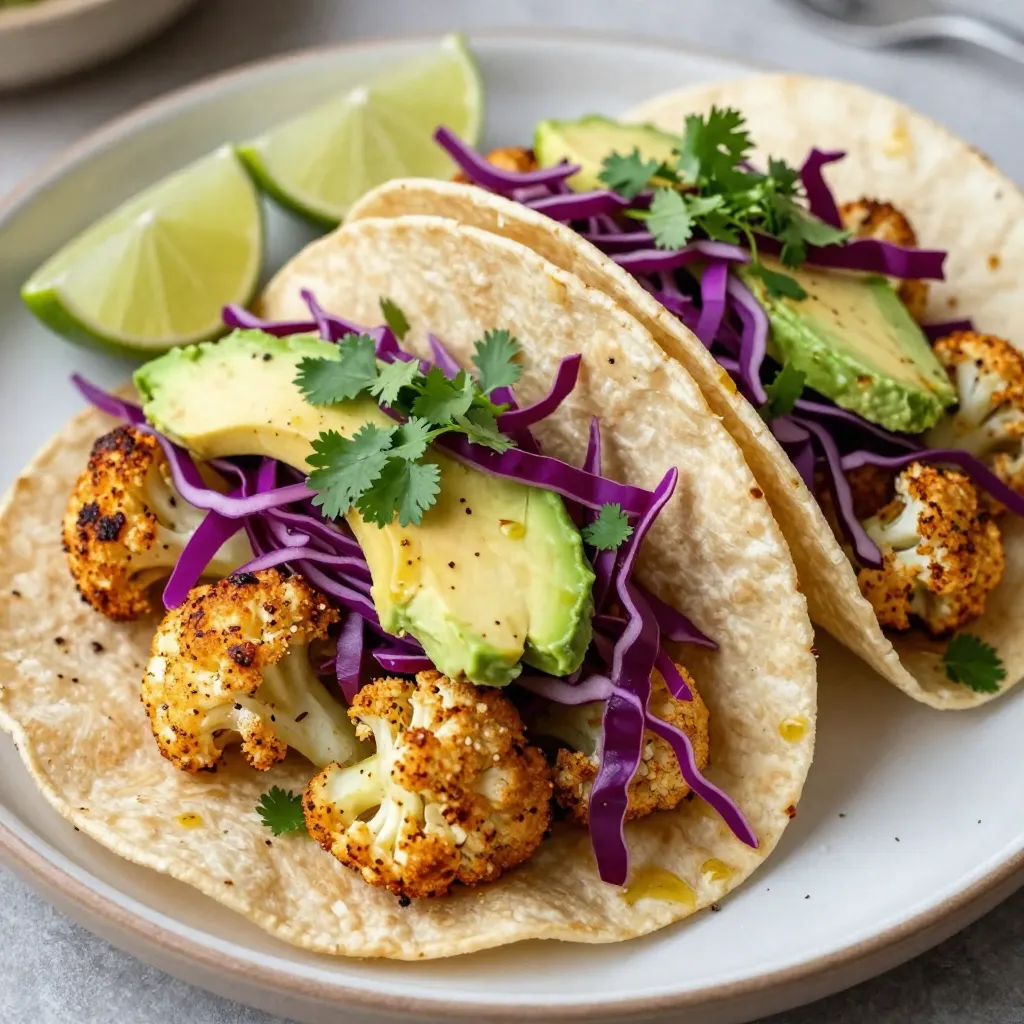
If you’re seeking a tasty and easy meal, look no further than roasted cauliflower tacos. These colorful tacos are packed

To make tasty honey mustard chicken skewers, you need simple, fresh items. Here’s what you will need: - 1 pound chicken breast, cut into 1-inch cubes - 1/3 cup honey - 1/4 cup Dijon mustard - 2 tablespoons olive oil - 2 tablespoons soy sauce - 2 garlic cloves, minced - 1 teaspoon smoked paprika - Salt and black pepper, to taste - Wooden or metal skewers (if using wooden skewers, soak them in water for 30 minutes to prevent burning) The marinade gives the chicken its sweet and tangy flavor. You mix the honey, Dijon mustard, olive oil, soy sauce, minced garlic, smoked paprika, salt, and pepper. Whisk them together until smooth. This blend makes the chicken juicy and full of flavor. Letting the chicken soak in this mix helps it absorb the taste. For a lovely finish, you can add some fresh parsley on top of the skewers. The green color makes them look nice and adds a hint of freshness. You can also serve the skewers with a small bowl of extra honey mustard dip. This way, you get to dip each piece and enjoy even more flavor. Serve them on a platter for a fun meal that impresses everyone. {{ingredient_image_2}} To start, gather your ingredients. In a medium bowl, mix together 1/3 cup of honey and 1/4 cup of Dijon mustard. Add 2 tablespoons of olive oil and 2 tablespoons of soy sauce. Mince 2 garlic cloves and toss them in. Then, sprinkle in 1 teaspoon of smoked paprika, along with a pinch of salt and black pepper. Use a whisk to blend everything well. This mixture gives the chicken a sweet and tangy flavor. Next, take 1 pound of chicken breast cut into 1-inch cubes. Add the chicken to the bowl with your marinade. Make sure each piece gets a good coat of the sauce. Cover the bowl with plastic wrap and put it in the fridge. Let the chicken marinate for at least 30 minutes. For even better flavor, you can let it sit for up to 2 hours. While the chicken is marinating, preheat your grill or grill pan to medium-high heat. This step is key for a nice sear. After marinating, take the chicken out of the fridge. Thread the cubes onto your skewers, leaving a little space between each piece. This helps them cook evenly. Place the skewers on the hot grill and cook for about 10 to 12 minutes. Turn them often for even cooking and great grill marks. Make sure the chicken reaches 165°F (75°C). Once grilled, take the skewers off the heat and let them rest for a few minutes. This allows the juices to spread throughout the chicken. For a lovely touch, sprinkle some freshly chopped parsley over the skewers. Serve them on a platter, and add a bowl of extra honey mustard dip. This adds fun and flavor to your meal. Use the right amount of marinade. For one pound of chicken, one cup is perfect. Ensure each piece gets coated well. I like to cover the bowl tightly and chill it. Marinate for at least 30 minutes. If you have time, go for two hours for extra flavor. Preheat your grill to medium-high heat. This step is key for a good sear. Place the skewers on the grill and cook for about 10-12 minutes. Turn them often to cook evenly. Use a meat thermometer to check for doneness. The chicken should reach 165°F to be safe to eat. Don’t overcrowd the skewers. Leave some space between chicken pieces. This allows heat to circulate and cook them evenly. Always soak wooden skewers for 30 minutes to prevent burning. Lastly, let the skewers rest after grilling. This keeps the chicken juicy and tender. Pro Tips Marinate Longer for Flavor: For the most flavorful chicken skewers, consider marinating the chicken for up to 2 hours. This allows the flavors to penetrate deeper, resulting in a more delicious dish. Use a Meat Thermometer: To ensure your chicken is cooked perfectly, use a meat thermometer to check the internal temperature. It should reach 165°F (75°C) for safe consumption. Experiment with Vegetables: Add some color and variety to your skewers by including vegetables such as bell peppers, onions, or zucchini. Simply cut them into similar-sized pieces and alternate them with the chicken on the skewers. Rest Before Serving: Allow the skewers to rest for a few minutes after grilling. This helps the juices redistribute throughout the chicken, ensuring every bite is juicy and tender. {{image_4}} You can switch out chicken for other proteins. Try using shrimp, pork, or tofu. Shrimp cooks fast and absorbs flavors well. Pork adds a nice richness, while tofu is great for a vegetarian option. Adjust cooking times based on the protein. Shrimp cooks in about 5-7 minutes, while pork may take a bit longer. To add more flavor, mix in spices. Consider adding cayenne for heat or lemon zest for brightness. You can also experiment with herbs like thyme or rosemary. For a sweet twist, add a splash of orange juice. You can even use spicy mustard instead of Dijon. These changes will make the skewers unique and exciting. Serving styles can change the dish's vibe. For a casual meal, serve skewers on a platter with dipping sauce. For a fancy dinner, arrange them on a plate with fresh greens. You can also create a fun build-your-own skewers bar. Provide extra toppings like diced veggies, cheese, or pickles. This way, everyone can customize their meal. After enjoying your honey mustard chicken skewers, you will likely have some leftovers. To store them properly, let the skewers cool down to room temperature. Next, wrap them tightly in plastic wrap or place them in an airtight container. This will keep them fresh. Store the skewers in the fridge for up to three days. When you're ready to enjoy the leftover skewers, you can reheat them easily. Preheat your oven to 350°F (175°C). Place the skewers on a baking sheet and cover them with foil. Heat for about 10-15 minutes. This will warm them through without drying them out. You can also use a microwave, but be careful not to overcook them. If you want to save your skewers for later, freezing is a great option. First, cool the skewers completely. Then, wrap each skewer individually in plastic wrap. Place them in a freezer-safe bag or container. They can stay in the freezer for up to three months. When you're ready to eat, thaw them in the fridge overnight and reheat as mentioned above. You should marinate the chicken for at least 30 minutes. This time lets the flavors blend well. If you want a stronger taste, marinate it for up to 2 hours. This longer time helps the chicken soak up more honey and mustard flavor. Yes, you can use a grill pan. Just make sure it’s hot enough before adding the skewers. A grill pan gives nice grill marks and a smoky flavor. It is a great option for indoor cooking. Some tasty side dishes include: - Garlic bread - Grilled vegetables - Quinoa salad - Coleslaw These sides add balance and flavor to your meal. Yes, this recipe is great for meal prep. You can make the skewers ahead of time and store them. Cooked skewers last well in the fridge for up to 4 days. Just reheat before eating for a quick meal. You can make the marinade a day before. Store it in the fridge until ready to use. This saves time and lets the flavors develop even more. Just mix it with the chicken when you are ready to cook. Honey mustard chicken skewers offer a simple yet tasty meal. We covered essential ingredients, marinade steps, and grilling techniques. You learned how to avoid common mistakes and try different proteins. Storing and reheating leftovers ensures no food goes to waste. Incorporating your ideas can make this dish even better. Enjoy making this recipe, share it with friends, and have fun on your cooking adventures!

Honey Mustard Chicken Skewers Juicy and Flavorful Delight

Are you ready to savor a dish that balances sweet and tangy flavors? Honey Mustard Chicken Skewers offer a juicy

- 1 ½ cups chocolate sandwich cookies, crushed (plus extra for topping) - ½ cup unsalted butter, melted - 16 oz cream cheese, softened to room temperature - ¾ cup granulated sugar - ½ cup sour cream - 2 large eggs, at room temperature - 2 teaspoons vanilla extract - 1 cup mini chocolate chips The star of this dessert is the chocolate sandwich cookies. Use good-quality ones for the best flavor. Crushing them creates a perfect crust. You need melted unsalted butter to help bind the crust. Cream cheese gives the cheesecake its rich and creamy base. Make sure it is soft to blend easily. Granulated sugar adds sweetness, while sour cream adds a slight tang. Two large eggs help set the filling. Use room temperature eggs for even mixing. Vanilla extract boosts the overall flavor. Mini chocolate chips add fun bursts of chocolate throughout the bars. You can add extra crushed cookies on top for a nice touch. This makes the bars even more delightful! {{ingredient_image_2}} 1. Preheat oven and prepare baking pan: Start by setting your oven to 325°F (160°C). Grab an 8x8 inch baking pan. Line it with parchment paper, leaving some paper hanging over the edges. This will help you lift the bars out later. 2. Combining crust ingredients: In a medium bowl, mix 1 ½ cups of crushed chocolate sandwich cookies with ½ cup of melted unsalted butter. Stir until it looks like wet sand. 3. Baking the crust: Press the cookie mixture firmly into the bottom of the prepared pan. Bake it for about 10 minutes. Let it cool slightly while you work on the filling. 1. Mixing cream cheese and sugar: Take 16 oz of softened cream cheese and place it in a large mixing bowl. Use an electric mixer to beat it until smooth. Gradually add ¾ cup of granulated sugar while mixing until well combined. 2. Adding sour cream, eggs, and vanilla: Next, add ½ cup of sour cream, 2 large eggs, and 2 teaspoons of vanilla extract. Beat this mixture on medium speed until it is smooth. 3. Folding in chocolate chips: Gently fold in 1 cup of mini chocolate chips. Make sure they are evenly spread throughout the mix without overmixing. 1. Pouring filling over crust: Carefully pour the cheesecake filling over the cooled crust. Use a spatula to smooth the top. 2. Baking time and checking doneness: Bake in the preheated oven for 30-35 minutes. The edges should be set, but the center should still jiggle slightly. 3. Cooling and refrigeration: After baking, let the cheesecake bars cool at room temperature. Then, place them in the fridge for at least 4 hours or overnight for the best texture. Once chilled, lift the bars out using the parchment paper and cut them into squares to serve. - Overmixing the cheesecake batter: Mix until smooth, but don’t overdo it. Overmixing can add air, causing cracks. - Not properly cooling before cutting: Let the cheesecake cool fully in the fridge. This keeps the texture creamy and prevents crumbling. - Tips for achieving a creamy consistency: Use room temperature cream cheese for easy mixing. This helps avoid lumps. Beat just until smooth and creamy. - Adjusting sweetness to personal preference: Taste the batter before baking. If it’s too sweet, add a pinch of salt. This balances the flavors nicely. - Serving suggestions and garnishes: Serve on a decorative platter for a stunning look. Add a dollop of whipped cream on each bar. Sprinkle extra mini chocolate chips on top. - Creative ways to decorate for parties: Use fresh berries or mint leaves for a pop of color. You can even drizzle chocolate sauce on the plate for extra flair. Pro Tips Use Room Temperature Ingredients: Allow your cream cheese and eggs to come to room temperature before mixing. This helps create a smooth and creamy texture without lumps. Don’t Overmix the Batter: When incorporating the mini chocolate chips, fold gently to avoid overmixing, which can result in a dense cheesecake. Keep an Eye on Baking Time: The cheesecake bars should have a slight jiggle in the center when done. Overbaking can lead to a dry texture, so check a few minutes before the suggested time. Chill for Optimal Flavor: Refrigerating the cheesecake bars for at least 4 hours (or overnight) allows the flavors to meld and enhances the overall taste and texture. {{image_4}} You can change the flavor of your cheesecake bars by using different cookies for the crust. Try using vanilla cookies or even a mix of chocolate and vanilla cookies. This adds a fun twist. You can also mix in fruits like crushed strawberries or blueberries into the cheesecake batter. This gives a fresh taste and bright color. If you need gluten-free options, use gluten-free chocolate cookies for the crust. Many brands offer tasty choices that work well. For a dairy-free adaptation, try using dairy-free cream cheese and sour cream. These swaps keep your dessert creamy without the dairy. These cheesecake bars taste great with sauces or ice cream. A drizzle of chocolate or caramel sauce adds sweetness. You can also serve them at parties or family gatherings. They look nice on a platter and please any crowd. - Refrigerating leftovers: Keep your cheesecake bars in an airtight container. They stay fresh for up to five days in the fridge. This keeps the bars moist and tasty. If you want, you can also cover them with plastic wrap for extra protection. - Freezing cheesecake bars: To freeze, first let them cool completely. Cut them into squares and wrap each piece in plastic wrap. Place wrapped bars in a freezer bag. They can last up to three months in the freezer. Just remember to label the bag with the date. - How long can you keep them in the fridge?: You can keep these cheesecake bars in the fridge for about five days. After that, they may start to lose their flavor and texture. Always check for freshness before eating. - Signs that the cheesecake bars have spoiled: Look for any changes in smell or color. If they smell sour or look dry, it's time to toss them. You want to enjoy every bite of your cookies and cream cheesecake bars! You can use mascarpone cheese as a substitute for cream cheese. It has a similar texture. Another option is Greek yogurt. It will make your bars lighter and tangy. Just remember, the flavor will change a bit. Yes, you can make these cheesecake bars in advance. They taste better after chilling in the fridge. I suggest making them a day ahead. This allows the flavors to blend well. Just store them in an airtight container. Check the edges of the cheesecake bars. They should be set, while the center has a slight jiggle. This means they are done but still creamy. Overbaking can make them dry, so keep an eye on them. Yes, you can use regular chocolate cookies. However, the texture may be different. Sandwich cookies have cream filling that adds moisture. If you use regular cookies, add a bit of melted butter to the crust. This helps keep it together. This blog post covered the tasty recipe for cheesecake bars. We discussed main ingredients, step-by-step instructions, and tips for success. You learned how to avoid common mistakes and make fun variations. Plus, we shared storage tips to keep leftovers fresh. Try these cheesecake bars for your next event or treat. They are simple and sure to impress! With a bit of practice, your cheesecake bars will shine in taste and look. Enjoy baking!

Cookies and Cream Cheesecake Bars Delightful Dessert

If you love dessert that combines rich creaminess and crunchy bits, you’re in the right place! My Cookies and Cream

To make the cranberry breakfast loaf, gather these key ingredients: - 2 cups all-purpose flour - 1 teaspoon baking powder - 1 teaspoon baking soda - 1/2 teaspoon salt - 1 teaspoon ground cinnamon - 1/2 cup unsalted butter, softened - 1 cup granulated sugar - 2 large eggs, at room temperature - 1 teaspoon vanilla extract - 1 cup buttermilk, at room temperature - 1 1/2 cups fresh cranberries or thawed frozen cranberries You can enhance the flavor with these optional ingredients: - 1/2 cup chopped walnuts - 1/4 cup grated orange zest Adding walnuts gives a nice crunch. The orange zest adds a bright taste. If you have allergies, consider these substitutions: - Use gluten-free flour instead of all-purpose flour for a gluten-free loaf. - Replace butter with coconut oil for a dairy-free option. - Use flax eggs in place of regular eggs for a vegan version. These swaps keep the loaf tasty while catering to dietary needs. {{ingredient_image_2}} First, preheat your oven to 350°F (175°C). This step is key for even baking. Next, take a 9x5-inch loaf pan and grease it with butter. You can also line it with parchment paper. This makes it easier to remove the loaf later. In a medium bowl, measure out the dry ingredients. You will need 2 cups of all-purpose flour, 1 teaspoon of baking powder, 1 teaspoon of baking soda, 1/2 teaspoon of salt, and 1 teaspoon of ground cinnamon. Whisk them together until they are well mixed. Set this bowl aside for later. Now, grab a large bowl and add 1/2 cup of softened unsalted butter and 1 cup of granulated sugar. Use an electric mixer to beat them together. Mix until the mixture looks light and fluffy, about 2-3 minutes. This step adds air and helps the loaf rise. Add 2 large eggs to the butter-sugar mix, one at a time. Be sure to mix well after each addition. Then, stir in 1 teaspoon of vanilla extract. Next, take your dry ingredient mix and add it to the wet mix, alternating with 1 cup of room temperature buttermilk. Start and end with the dry ingredients. Mix gently until just combined to keep the loaf light. Now it’s time to add some flavor! Fold in 1 1/2 cups of fresh cranberries and 1/2 cup of chopped walnuts, if you want. Also, add 1/4 cup of grated orange zest. Gently mix until all the ingredients are evenly distributed. This will add a great taste and texture to your loaf. Pour the batter into your prepared loaf pan. Use a spatula to smooth the top. Bake it in your preheated oven for 55-60 minutes. Check if it’s done by inserting a toothpick into the center. If it comes out clean, the loaf is ready. If the top browns too much, cover it loosely with aluminum foil for the last 10-15 minutes. Once done, cool the loaf in the pan for about 10 minutes, then transfer it to a wire rack to cool completely. This helps it slice better later. To get a soft and moist loaf, avoid overmixing the batter. Mix the dry and wet ingredients just until combined. This keeps the loaf light. Also, make sure your butter is soft. It should be at room temperature. This helps it blend well with sugar, adding air for a fluffy texture. One big mistake is not measuring ingredients correctly. Use a kitchen scale or measuring cups for precision. Another common error is opening the oven too soon. This can cause the loaf to sink. Wait until the minimum baking time before checking for doneness. Lastly, don’t skip the cooling step. Letting the loaf cool in the pan helps it firm up. To check if your loaf is ready, insert a toothpick into the center. If it comes out clean, the loaf is done. If it has batter on it, bake for a few more minutes. The top should be golden brown and feel firm to the touch. If it browns too fast, cover it loosely with foil. This helps to avoid burning while the inside cooks fully. Pro Tips Use Room Temperature Ingredients: Ensure your butter, eggs, and buttermilk are at room temperature. This helps create a smoother batter and better texture in the finished loaf. Don't Overmix the Batter: Gently fold the dry ingredients into the wet ingredients to avoid overmixing, which can lead to a dense loaf. Experiment with Add-Ins: Feel free to customize the loaf by adding different nuts, chocolate chips, or spices like nutmeg for a unique flavor twist. Storage Tips: Store any leftover loaf in an airtight container at room temperature for up to 3 days, or freeze it for longer storage. Just make sure to slice it before freezing for easy serving! {{image_4}} You can easily add a burst of flavor to your loaf by including orange zest. This adds a bright, citrus touch that pairs well with cranberries. Use about 1/4 cup of grated orange zest. If you want more orange flavor, mix in some fresh orange juice. Replace a bit of the buttermilk with orange juice for a nice twist. This change makes your loaf taste fresh and vibrant! If you need a nut-free loaf, just leave out the walnuts. You can swap them for seeds like pumpkin or sunflower seeds. These add crunch without nuts. Another option is to add extra fruit like raisins or chopped apples. They keep the loaf moist and tasty while making it safe for those with nut allergies. To make this loaf gluten-free, use a gluten-free all-purpose flour blend. Make sure it has xanthan gum, which helps with texture. You can also add an extra egg for moisture. This keeps the loaf fluffy and soft. Remember to check that your baking powder and other ingredients are gluten-free. To keep your leftover cranberry breakfast loaf fresh, wrap it tightly in plastic wrap. You can also place it in an airtight container. Store it at room temperature for up to three days. If you want it to last longer, consider refrigerating it. In the fridge, it can last for about a week. If you want to save your loaf for later, freezing is a great option. First, let the loaf cool completely. Then, wrap it tightly in plastic wrap. After that, wrap it again in aluminum foil or place it in a freezer-safe bag. This helps prevent freezer burn. You can freeze it for up to three months. When you are ready to enjoy your loaf again, remove it from the freezer. Let it thaw overnight in the fridge. You can reheat slices in the microwave for about 20-30 seconds. If you prefer the oven, preheat it to 350°F (175°C), and warm the slices for about 10 minutes. This will help revive the loaf’s soft texture. Enjoy the fresh flavor just like it was baked! Yes, you can use frozen cranberries. Just thaw them before mixing into the batter. They still taste great and add that tartness we love. I often use frozen ones when fresh cranberries are out of season. They work well in this recipe. The loaf lasts about 3-4 days at room temperature. Make sure to wrap it well to keep it fresh. If you want it to last longer, store it in the fridge. It can stay good for up to a week when chilled. Absolutely! You can add fruits like blueberries or chopped apples. Nuts like pecans or almonds also work well. Be creative! Just keep the total amount around 2 cups so the loaf bakes evenly. I love serving it with a cup of coffee or tea. You can also add a dollop of cream cheese or butter on top for extra flavor. A drizzle of honey or a sprinkle of powdered sugar makes it even better! This blog covered all you need to make a delicious cranberry breakfast loaf. We explored key ingredients, step-by-step instructions, and clever tips for perfect results. You can even try fun variations or store your loaf to enjoy later. Baking can be simple and rewarding. Now, you have the tools to impress your friends and family with your skills. Happy baking!

Cranberry Breakfast Loaf Fresh and Flavorful Recipe

Start your day with something special! In this Cranberry Breakfast Loaf post, I’ll share a fresh and flavorful recipe that

- 2 boneless, skinless chicken breasts, diced into bite-sized pieces - 1 tablespoon sesame oil - 1/4 cup low sodium soy sauce - 2 tablespoons honey - 1 tablespoon rice vinegar - 1 teaspoon fresh ginger, finely minced - 2 cloves garlic, finely minced - 1/2 cup green bell pepper, finely chopped - 1/2 cup carrot, grated - 1/4 cup green onions, sliced (plus extra for garnish) - 1 tablespoon toasted sesame seeds (plus extra for garnish) - 1 head of butter or romaine lettuce, leaves carefully separated - Salt and freshly ground black pepper, to taste To make these wraps, start with your chicken. You want them diced small for easy eating. The sesame oil adds a great flavor. For the teriyaki sauce, mix soy sauce, honey, rice vinegar, minced ginger, and garlic. This sauce is key for that sweet and salty kick. Next, gather your veggies. Green bell pepper and carrot add color and crunch. Don't forget the green onions and sesame seeds for garnish. These not only taste great but also make the dish look pretty. Finally, you'll need fresh lettuce leaves. Butter or romaine works well. They hold everything together and make for a fun wrap. The mix of flavors and textures in these Teriyaki Chicken Lettuce Wraps is truly delightful! {{ingredient_image_2}} Start by heating the sesame oil in a large skillet over medium heat. The oil will get hot quickly. Once it’s hot, add the diced chicken breasts. Cook them for about 5 to 7 minutes. Stir often to brown all sides. Make sure there is no pink left in the center. This means the chicken is fully cooked. While the chicken cooks, grab a mixing bowl. Here, you will make the teriyaki sauce. Whisk together the low sodium soy sauce, honey, rice vinegar, minced ginger, and minced garlic. Mix until everything is well combined. This sauce is what makes the chicken so tasty! When the chicken is cooked, pour the teriyaki sauce over it. Stir well to coat every piece of chicken. Allow this mix to simmer for 3 to 4 minutes. This helps thicken the sauce a bit. Next, add the chopped green bell pepper and grated carrot. Cook for another 2 to 3 minutes. You want the veggies to be tender but still crisp. Finally, season with salt and black pepper to taste. Turn off the heat and gently fold in the sliced green onions and toasted sesame seeds. Now, you are ready to assemble! Take a lettuce leaf and spoon in the teriyaki chicken mixture. Fold it up like a wrap, and enjoy! To make the best teriyaki chicken, start with fresh chicken breasts. Dice them evenly for quick cooking. Use a hot skillet to sear the chicken. This gives it a nice brown color. Cook it until there is no pink left inside. This usually takes about 5-7 minutes. When making the sauce, whisk the soy sauce, honey, rice vinegar, minced ginger, and garlic well. This ensures every bite is full of flavor. Simmer the chicken in the sauce for 3-4 minutes. This helps thicken it and blend the flavors perfectly. Presentation matters. For a beautiful display, arrange the filled lettuce wraps on a big platter. Sprinkle some sesame seeds on top for a nice crunch. Add sliced green onions as a bright garnish. You can also serve extra teriyaki sauce on the side. This adds fun for dipping and keeps things exciting. One mistake is overcooking the chicken. This can make it dry and chewy. Always check that it’s cooked through but still juicy. Another mistake is not seasoning the mixture. A pinch of salt and black pepper can enhance the taste. Lastly, avoid filling the lettuce too much. This can cause the wraps to tear. Keep it simple and enjoy each bite! Pro Tips Use Fresh Ingredients: Fresh vegetables and herbs will enhance the flavor of your teriyaki chicken wraps, making them more vibrant and delicious. Customize Your Veggies: Feel free to substitute or add your favorite vegetables like cucumbers or shredded cabbage for additional crunch and flavor. Make It Spicy: Add a dash of red pepper flakes or a drizzle of sriracha to the teriyaki sauce if you prefer a spicier kick to your wraps. Choose the Right Lettuce: Butter lettuce is ideal for wraps, but you can also use iceberg for a crunchier texture or romaine for a sturdier option. {{image_4}} You can swap chicken for other proteins. Try diced tofu for a lighter meal. Ground turkey also works well. It cooks quickly and absorbs flavors. Shrimp is another tasty choice. Just stir-fry until it's pink and cooked through. To make this dish vegetarian, use tempeh or seitan. Both mimic the texture of chicken. For a vegan option, replace honey with maple syrup or agave. Ensure that soy sauce is vegan. You can add more veggies like mushrooms or zucchini for extra texture. Spice up your teriyaki chicken with a dash of sriracha. This adds heat and depth. You can also include fresh herbs like cilantro or basil. These herbs bring freshness to the wraps. Another idea is to sprinkle in some lime juice for a zesty kick. Don't forget to experiment with different nuts like cashews for crunch! To store leftovers, let the teriyaki chicken cool. Place it in an airtight container. You can keep it in the fridge for up to three days. Keep the lettuce leaves separate to stay fresh. This helps prevent sogginess. When you are ready to eat, reheat the chicken. You can use a microwave or a skillet. If using a microwave, heat for 1-2 minutes. Stir halfway to heat evenly. If using a skillet, cook on low heat until warm. Add a splash of water if it seems dry. To freeze, place the cooled chicken in a freezer bag. Squeeze out as much air as possible. It can stay frozen for up to three months. Thaw it in the fridge overnight before reheating. Avoid freezing the lettuce; it will become limp. Yes, you can use other types of lettuce. Iceberg and romaine are great options. They both add crunch and freshness. You can also try cabbage leaves for a different taste. Each lettuce adds its own flavor and texture. To make this dish gluten-free, swap regular soy sauce for gluten-free soy sauce or tamari. Be sure to check the honey and sesame oil labels. Most brands are gluten-free, but it’s good to confirm. This small change keeps the taste while making it safe for everyone. Teriyaki Chicken Lettuce Wraps pair well with several sides. Serve them with steamed rice or quinoa for a filling meal. A light salad can add freshness and crunch. You might also enjoy some sliced cucumbers or edamame on the side. These options balance the flavors and enhance your meal. This blog post guided you through making Teriyaki Chicken Lettuce Wraps. We covered essential ingredients, including chicken, sauce, and veggies. You learned the steps to cook the chicken, prepare the sauce, and combine it all. I shared tips to perfect your dish and avoid common mistakes. We explored variations like using different proteins and vegan options. Proper storage tips ensure your leftovers stay fresh. Now, you can enjoy this delicious meal anytime! Embrace your cooking journey and create your own tasty twists.

Teriyaki Chicken Lettuce Wraps Quick and Tasty Meal

Looking for a quick and tasty meal? Teriyaki Chicken Lettuce Wraps are your answer! These wraps pack flavor, fun, and

Older posts
Newer posts
← Previous Page1 … Page115 Page116 Page117 … Page120 Next →

dsad

© 2026 recipetorch • Built with GeneratePress

Our Policies

  • Copyright Policy
  • Cookie Policy
  • GDPR Policy
  • Privacy Policy
  • Disclaimer
  • Terms Of Use

More Information

  • Home
  • About
  • Contact
  • Appetizers
  • Dessert
  • Dinner
  • Drinks
©2026, recipetorch About Back To Top