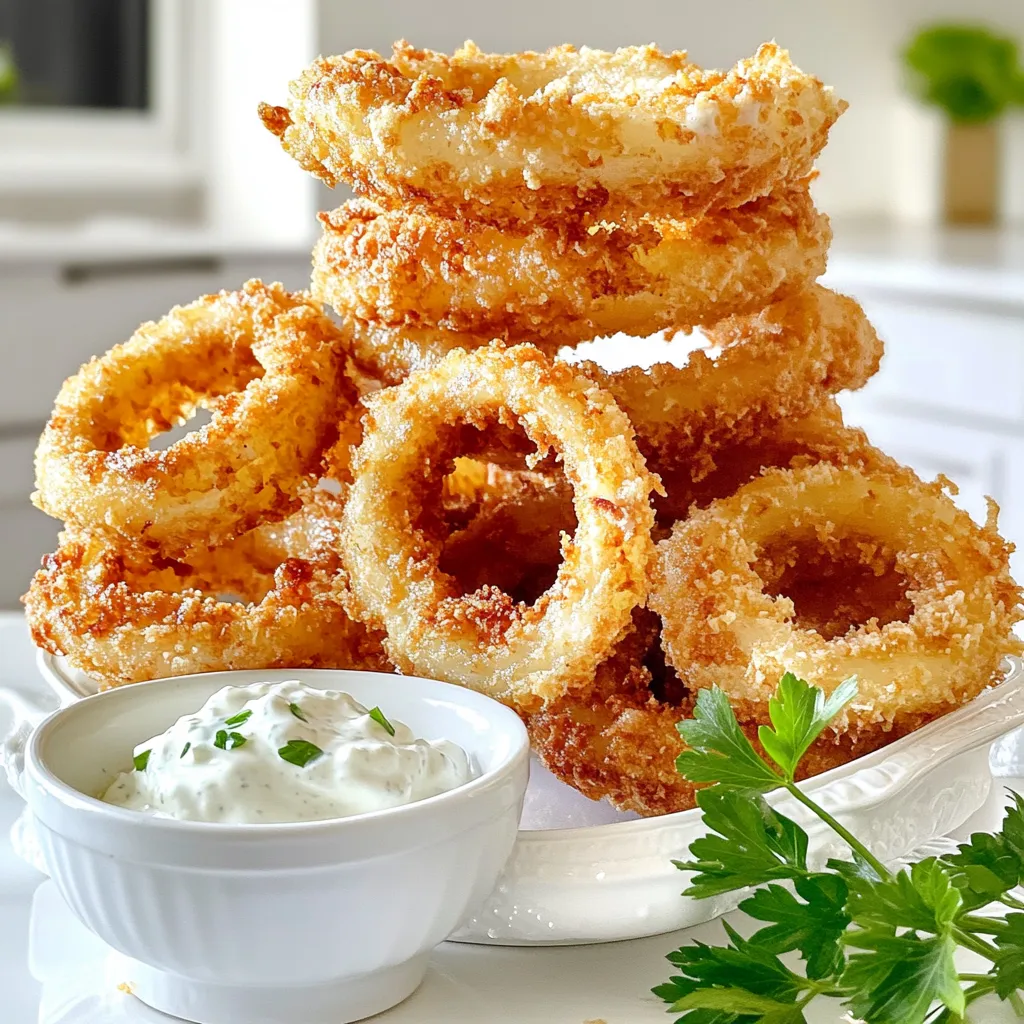
Craving a crunchy snack that’s easy and delicious? Let me show you how to make Air Fryer Onion Rings with Garlic Dip Delight. This recipe features crispy onion rings paired with a creamy garlic dip, all cooked to perfection without the oil! You’ll love the simple steps and fresh flavors. Get ready to impress your friends and family with this fun twist on a classic treat! Let’s dive in!
Ingredients
Onion Rings
– 2 large onions
– 1 cup all-purpose flour
– 2 large eggs, beaten
– 1 cup panko breadcrumbs
– 1 teaspoon garlic powder
– 1 teaspoon paprika
– Salt and pepper to taste
– Cooking spray
Garlic Dip
– ½ cup Greek yogurt
– 1 tablespoon mayonnaise
– 2 cloves garlic, finely minced
– 1 teaspoon fresh lemon juice
– Salt to taste
I love making onion rings at home. They are crispy, tasty, and easy to prepare. You need two large onions for this recipe. Slice them into ¼-inch thick rings. This width gives you the right balance of crunch and softness.
For the coating, gather some simple ingredients. You will need all-purpose flour, eggs, and panko breadcrumbs. The panko breadcrumbs create a great crunch. You can add garlic powder and paprika for flavor. Don’t forget to sprinkle salt and pepper in the flour.
For the garlic dip, mix Greek yogurt and mayonnaise. This gives the dip a nice creamy texture. Mince two cloves of garlic and add them to the mix. A touch of fresh lemon juice brightens the flavor. Finally, add salt to taste.
Having these ingredients ready will set you up for a fun cooking session. Enjoy the process and get ready to indulge in some crispy delights!
Step-by-Step Instructions
Preparing the Air Fryer
– Preheat air fryer to 375°F (190°C)
– Warm up for 5 minutes
First, you need to get your air fryer ready. Preheating it to 375°F helps the onion rings cook evenly. Let it warm up for about 5 minutes. This step is key to achieving that perfect crunch.
Making the Onion Rings
– Peel and slice onions into ¼-inch thick rings
– Set up the breading station
Next, grab two large onions. Peel them carefully, then slice them into ¼-inch thick rings. Make sure each ring is separate. Now, it’s time to set up your breading station. You’ll need three bowls for this.
1. In the first bowl, mix flour with a pinch of salt and pepper.
2. In the second bowl, beat the two eggs until smooth.
3. In the third bowl, combine panko breadcrumbs with garlic powder, paprika, and a little salt. Mix them well.
Breading and Cooking
– Coat onion rings in flour, beaten egg, and breadcrumb mixture
– Arrange in air fryer and spray with cooking spray
– Cook for 10-12 minutes, flipping halfway
Now comes the fun part! Take each onion ring and coat it in flour. Make sure it’s fully covered. Next, dip it into the beaten egg, letting any extra drip off. Finally, coat it with the breadcrumb mix. Press the crumbs on gently to make them stick.
Place the coated onion rings in a single layer in the air fryer basket. To make them crispy, lightly spray the tops with cooking spray. Cook the onion rings for about 10-12 minutes. Flip them halfway through. They should turn a lovely golden brown and be super crispy!
While they cook, you can prepare the garlic dip. This simple dip will elevate your onion rings to a new level. Just mix Greek yogurt, mayonnaise, minced garlic, lemon juice, and salt in a bowl. Stir it all together.
Once the onion rings are done, take them out, and let them cool a bit. You’re ready to enjoy a crunchy treat with a zesty dip!
Tips & Tricks
Achieving Maximum Crispiness
To get the best crunch, I always use panko breadcrumbs. They add a nice texture. Before cooking, lightly spray the onion rings with oil. This helps them crisp up nicely in the air fryer.
Breading Techniques
Make sure to coat the onion rings evenly in flour and breadcrumbs. This ensures every bite is crunchy. When you press the crumbs onto the rings, do it firmly. This helps the coating stick well and stay on during cooking.
Perfect Serving Suggestions
For a beautiful presentation, arrange the crispy onion rings on a bright platter. Place the zesty garlic dip in a small bowl at the center. To make it look even better, garnish with fresh parsley or chives. You can also pair these rings with other dips like spicy mayo or ranch. They complement the flavors really well!

Variations
Flavor Additions
You can easily customize your onion rings. Adding spices can change the taste. Try cayenne for a spicy kick. You might also add herbs like oregano or thyme for a fresh flavor. Mixing in cheese with the breadcrumbs works wonders too. Parmesan or cheddar adds a rich taste. The cheese melts and creates a tasty crust.
Alternative Dipping Sauces
Don’t stop at the garlic dip! Spicy mayo is a great option. Just mix mayo with hot sauce for heat. Ranch dressing is another fan favorite. It’s creamy and pairs well with the crunchiness. You could also use yogurt as a base. Mix it with herbs or spices for a twist. These sauces can make your meal even more fun!
Storage Info
Refrigeration
To keep your onion rings fresh, store them in airtight containers. This helps maintain their taste and texture. You can stack them in layers, but add parchment paper between layers to prevent sticking. Properly stored, these onion rings will last for up to 2 days in the fridge.
Reheating Techniques
The best way to reheat onion rings is in the air fryer. Set the air fryer to 350°F (175°C). Place the onion rings in a single layer. Heat them for about 5 minutes. This method will help restore their crispy texture.
To keep them crispy, avoid using the microwave. The microwave can make them soggy. Instead, using the air fryer is a smart choice. For extra crunch, lightly spray the onion rings with cooking spray before reheating.
FAQs
Can I use other types of onions?
Yes, you can use different onions. Sweet onions work well for a milder taste. Red onions add color and a bit of zing. Yellow onions are great for that classic flavor. Just slice them into rings the same way. Each type brings its unique taste, so feel free to experiment!
How do I make these onion rings gluten-free?
To make gluten-free onion rings, swap the all-purpose flour for a gluten-free flour blend. You can also use gluten-free breadcrumbs instead of panko. Make sure all your ingredients are certified gluten-free. This way, you can enjoy the same crispy goodness without the gluten!
What can I serve with air fryer onion rings?
Air fryer onion rings pair great with various dips. Try serving them with ketchup, ranch, or spicy mayo. They also work well as a side for burgers or sandwiches. You can even serve them as a fun snack for game day. The options are endless!
Can I prepare onion rings in advance?
Yes, you can prepare onion rings ahead of time. After breading, place them on a tray and cover with plastic wrap. Store them in the fridge for a few hours. Just remember to cook them right before serving for the best crunch!
Making air fryer onion rings is simple and fun. We covered the ingredients, step-by-step, tips, and variations. You can enjoy crispy rings with garlic dip or other sauces. Remember, using panko makes them extra crunchy. Store leftovers correctly to keep them fresh. Try adding your twist with spices or cheese to make them special. Enjoy experimenting with flavors and pairings. You’ll impress your friends and family with your tasty creations. Now, get cooking and savor every bite!