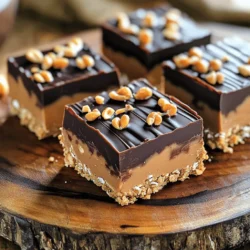
If you crave a sweet treat but want to skip the oven, this No Bake Peanut Butter Chocolate Bars recipe is for you! With just a few simple ingredients, you can whip up a delicious snack that’s both chewy and rich. I’ll guide you through the easy steps to make these bars and share tips for achieving the perfect texture and flavor. Get ready to impress your friends with this delightful, no-cook dessert!
Ingredients
List of Ingredients
– 1 cup creamy peanut butter
– 1/2 cup honey or maple syrup
– 1 1/2 cups rolled oats
– 1/2 cup powdered sugar
– 1 cup dark chocolate chips
– 1 tablespoon coconut oil
– 1/4 teaspoon sea salt
– Optional: Chopped peanuts for garnish
Importance of Quality Ingredients
Using pure honey or maple syrup makes a big difference in taste. Pure honey is rich and smooth, while maple syrup adds a lovely, warm flavor. Choose organic options if you can for the best quality.
High-quality dark chocolate impacts the flavor greatly. It gives your bars a rich taste that blends well with peanut butter. Look for chocolate with a high cocoa content for a deep, satisfying flavor.
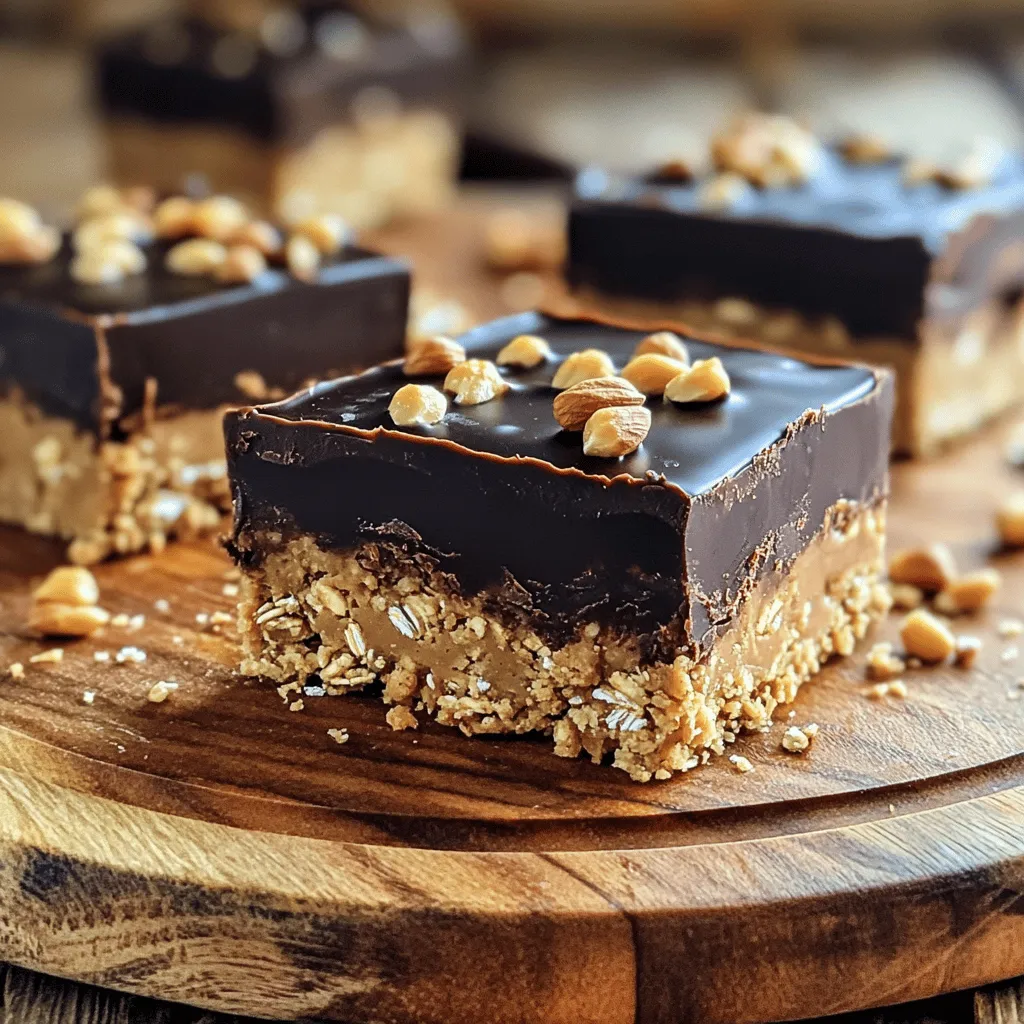
Rolled oats are key for texture. They provide a hearty, chewy base that balances the creaminess of the peanut butter. They also help hold everything together, making your bars easier to cut and eat.Enjoy making your delicious no-bake peanut butter chocolate bars!
Step-by-Step Instructions
Preparation Process
Start by mixing 1 cup of creamy peanut butter and 1/2 cup of honey or maple syrup in a large bowl. Use a whisk or spatula to combine them until smooth. This step is key for a rich flavor. Next, add 1 1/2 cups of rolled oats, 1/2 cup of powdered sugar, and 1/4 teaspoon of sea salt. Stir until all the dry ingredients blend well with the peanut butter mixture. You want a thick, sticky mix that holds together.
Creating the Base
Now it’s time to prepare your baking dish. Line an 8×8 inch dish with parchment paper. Leave some paper hanging over the sides for easy removal later. This small step makes a big difference! Transfer the peanut butter mix into the dish, pressing it down firmly. Use a spatula to create a smooth, even layer. This base will hold all the delicious layers above.
Melting the Chocolate
For the topping, add 1 cup of dark chocolate chips and 1 tablespoon of coconut oil to a microwave-safe bowl. Heat it in the microwave in 20-second bursts. Stir after each round until the chocolate is fully melted. Be careful not to overheat it; you want it silky, not burnt. If you notice it starting to clump, stop and stir until smooth.
Final Assembly
Once your chocolate is ready, drizzle it over the pressed peanut butter layer. Make sure to spread it evenly so every bite is rich and chocolatey. For extra crunch, sprinkle chopped peanuts on top. Gently press them into the melted chocolate for a delightful texture. After this, refrigerate the dish for at least 2 hours. Once set, lift the bars out using the parchment paper and cut into squares.
Tips & Tricks
Perfecting Your Bars
For the best results, chill your bars for at least two hours. This time helps them set and firm up nicely. If you want a smoother chocolate layer, melt the chocolate slowly. Use a microwave in short bursts to avoid burning. Stir well between each burst, and you’ll get a glossy finish.
Common Mistakes to Avoid
One common mistake is overmixing the peanut butter mixture. This can make your bars tough. Mix just until everything combines. Another mistake is not pressing the mixture firmly enough into the dish. A good press ensures the bars hold together well once set.
Presentation Suggestions
To make your bars look great, serve them on a rustic wooden platter. This adds a warm touch. For a fancy look, drizzle some melted chocolate on top. A sprinkle of chopped peanuts can impress your guests and add crunch. Enjoy making these bars beautiful!
Variations
Ingredient Substitutions
You can switch creamy peanut butter for almond butter. The taste will change, but it’s still yummy. If you’re looking for sweeteners, honey is great, but maple syrup works too. You can also use agave syrup for a vegan option.
Flavor Enhancements
To boost flavor, try adding 1 teaspoon of vanilla extract. A pinch of sea salt can make the bars even tastier. You could also mix in chocolate chips or dried fruit for extra fun. Your bars can be unique each time!
Dietary Variations
If you need a gluten-free option, use certified gluten-free oats. They work just as well in this recipe. For a vegan twist, swap honey for maple syrup. This change keeps the bars plant-based and just as delicious.
Storage Info
Proper Storage Techniques
To keep your no-bake peanut butter chocolate bars fresh, store them correctly. After cutting the bars, place them in a single layer. Use a container with a tight lid. This helps keep them from drying out. If you have a lot, stack them carefully with parchment paper in between. This avoids sticking.
Shelf Life
These tasty bars last about one week in the fridge. To extend their life, you can freeze them. Wrap each bar in plastic wrap or foil before placing them in an airtight container. They can stay in the freezer for up to three months. When you’re ready to eat them, thaw in the fridge overnight for best results.
Signs of Spoilage
Check for changes in smell, color, or texture. If the bars smell off or look discolored, it’s time to toss them. Also, be mindful of the ingredients you used. Some may spoil faster than others. Always check the dates on your peanut butter and chocolate to ensure freshness.
FAQs
Can you use crunchy peanut butter instead of creamy?
Yes, you can use crunchy peanut butter. It gives your bars a fun texture. The small peanut pieces add a nice crunch. If you love that nutty bite, go for it! Just know that it may change the smoothness of the bars. Creamy peanut butter creates a smooth, rich flavor. Crunchy is great if you enjoy a little extra crunch.
How long do no-bake peanut butter chocolate bars take to set?
These bars take about 2 hours to set in the fridge. This time allows the chocolate to harden and the bars to firm up. It’s important not to rush this step. If you cut them too soon, they may crumble. Patience is key! After cooling, the bars will hold their shape and be easy to slice.
Can I make these bars ahead of time?
Absolutely! You can make these bars a few days in advance. Store them in the fridge to keep them fresh. They taste great after a day or two. Just make sure to cover them well, so they don’t dry out. You can also freeze them for longer storage. Just thaw them in the fridge before serving.
What is the best way to cut the bars?
To cut these bars easily, use a sharp knife. First, lift them out of the dish using the parchment paper. Place them on a cutting board. Dip the knife in warm water before cutting. This helps prevent sticking. Press down firmly and make clean cuts. This method keeps the bars from crumbling apart. Enjoy your perfect peanut butter chocolate bars!
These no-bake peanut butter chocolate bars are easy and fun to make. Quality ingredients like creamy peanut butter and rich dark chocolate create great flavor and texture. Follow the steps closely for a smooth and tasty treat. Remember to chill the bars for the best results. Try different variations to make them your own and impress others. With proper storage, you can enjoy these bars for days. Keep an eye on freshness to make sure they stay delicious. Enjoy your homemade snacks!