![To make delicious pumpkin chocolate chip muffins, you need the right ingredients. Here’s what you will need: - 1 cup canned pumpkin puree - 1/2 cup packed brown sugar - 1/4 cup granulated sugar - 1/3 cup vegetable oil - 2 large eggs - 1 teaspoon pure vanilla extract - 1 1/2 cups all-purpose flour - 1 teaspoon baking soda - 1/2 teaspoon baking powder - 1/2 teaspoon fine salt - 1 teaspoon ground cinnamon - 1/2 teaspoon ground nutmeg - 1/4 teaspoon ground ginger - 1 cup semi-sweet chocolate chips - Optional: 1/2 cup chopped walnuts or pecans Using quality ingredients makes a big difference in taste. The pumpkin puree brings moisture and flavor. The sugars add sweetness and help with browning. The spices give your muffins a warm, cozy taste. I often choose semi-sweet chocolate chips for their rich flavor. If you want a crunch, add chopped nuts. They pair well with the soft muffin texture. For the best results, measure your ingredients accurately. Fresh spices also enhance the flavors. You can find the full recipe [here]. Each ingredient plays a part in making your muffins irresistible! First, set your oven to 350°F (175°C). This temperature helps the muffins rise just right. While the oven heats, prepare your muffin tin. You can line each cup with paper liners or spray them lightly with cooking oil. This step keeps the muffins from sticking. In a large bowl, combine the canned pumpkin puree, brown sugar, granulated sugar, vegetable oil, eggs, and vanilla extract. Whisk these ingredients together until smooth. Make sure there are no lumps. A well-mixed blend ensures your muffins are rich and moist. In another bowl, sift the all-purpose flour, baking soda, baking powder, salt, cinnamon, nutmeg, and ginger. Sifting helps incorporate air into the flour. This aeration makes your muffins light and fluffy. Mix the dry ingredients well to ensure even flavor throughout. Gradually add the dry mix to the wet mixture. Stir gently with a spatula. It’s key not to overmix, as this can lead to dense muffins. Just mix until combined. A few flour streaks are okay. Spoon the batter into your prepared muffin cups. Fill each cup about two-thirds full. This fill level allows the muffins to rise without spilling over. Place the muffin tin in the oven. Bake for 18 to 22 minutes. To check if they are ready, insert a toothpick into the center of a muffin. It should come out clean or with a few moist crumbs. After baking, take the muffin tin out of the oven. Let the muffins cool in the pan for about 5 minutes. Then, transfer them to a wire rack to cool completely. This step helps keep their texture. For serving, you can try dusting them with powdered sugar or adding a scoop of whipped cream cheese. Enjoy the flavors! To get a fluffy texture, start with room temperature ingredients. Cold eggs or pumpkin can lead to dense muffins. Make sure to mix gently. Overmixing can harm the texture. Blend just until you see no dry flour. Adding spices can elevate your muffins. Think about using allspice or cloves for warmth. I also like to use high-quality chocolate. Choose chocolate with at least 60% cocoa for a rich flavor. Higher quality chocolate melts better, making every bite special. Serve your muffins warm on a nice plate. A rustic wooden platter adds charm. Dust a bit of powdered sugar on top for style. You can also add a dollop of whipped cream cheese. This creates a lovely pairing with the spiced muffins. {{image_4}} You can make these muffins healthier with a few simple swaps. First, consider using whole wheat flour instead of all-purpose flour. Whole wheat flour adds fiber and nutrients, making your muffins more filling. You can also reduce the sugars. Try using just 1/4 cup of brown sugar instead of 1/2 cup. This change still keeps them sweet but cuts down on extra sugar. To change up the flavor, think about adding fruits or nuts. Chopped apples or pears work well and add moisture. If you want a crunch, add walnuts or pecans. You can also explore different types of chocolate. Try dark chocolate chips for a richer taste or even white chocolate for a sweeter twist. These small changes can make a big difference in your muffins! Make your muffins festive by adding seasonal spices. For fall, you can mix in some cloves or allspice for a warm flavor. During the holidays, consider adding cranberries or even a cream cheese filling. These additions not only make your muffins stand out but also add fun flavors that match the season. You can find the full recipe for these delicious muffins and more ideas to try! To keep your pumpkin chocolate chip muffins fresh, store them in an airtight container. Place a paper towel inside to absorb any moisture. This helps keep the muffins soft. Store them at room temperature for the best flavor and texture. Freezing muffins is easy. First, let them cool completely. Then, wrap each muffin in plastic wrap. Place the wrapped muffins in a freezer bag or container. Squeeze out as much air as possible before sealing. To thaw, simply leave them in the fridge overnight. To reheat, microwave for about 15-20 seconds or place in a warm oven for a few minutes. At room temperature, these muffins last about 3 to 5 days. If you notice any mold or a dry texture, it’s time to toss them. Always check for signs of spoilage. Fresh muffins should smell great and taste sweet and moist. Enjoy them while they're at their best! To make gluten-free pumpkin chocolate chip muffins, you can use gluten-free flour. I recommend a blend that includes rice flour, tapioca flour, and almond flour for the best results. You can also add a teaspoon of xanthan gum to help with texture. This works well in the recipe without changing the taste much. Yes, you can use fresh pumpkin! To prepare fresh pumpkin, start by cutting a small pumpkin in half. Remove the seeds and strings. Roast the halves cut-side down in a baking dish at 400°F for about 45 minutes. Once soft, scoop out the flesh and puree it until smooth. This fresh puree adds a lovely flavor to your muffins. If you want to swap out chocolate chips, try using dried fruit like cranberries or raisins. You could also use white chocolate chips for a different taste. Chopped nuts like walnuts or pecans add a nice crunch, too. These options can make your muffins unique while still being delicious. Absolutely! To make mini muffins, fill each cup about halfway. Bake them at the same temperature, but check for doneness around 12 to 15 minutes. A toothpick inserted should come out clean. Mini muffins are perfect for snacks or parties! Yes, these muffins freeze well! To freeze, let them cool completely. Place them in an airtight container or freezer bag. They can last up to three months in the freezer. Just remember to label the container with the date for easy tracking. The best way to reheat muffins is in the oven. Preheat it to 350°F and place the muffins on a baking sheet. Heat for about 5 to 10 minutes until warm. This keeps the muffins moist and brings back their fresh-baked flavor. Enjoy them with a pat of butter or cream cheese! This blog post covered how to make delicious pumpkin muffins from scratch. We discussed key ingredients, step-by-step instructions, and tips to enhance flavor and texture. You learned about various storage methods to keep your muffins fresh, along with options for healthier variations. With these simple recipes and ideas, you can enjoy tasty treats all year. Don’t hesitate to experiment and make these muffins your own. Happy baking!](https://recipetorch.com/wp-content/uploads/2025/07/243228be-46c5-46ed-a0fc-ef599cd80a37-768x768.webp)
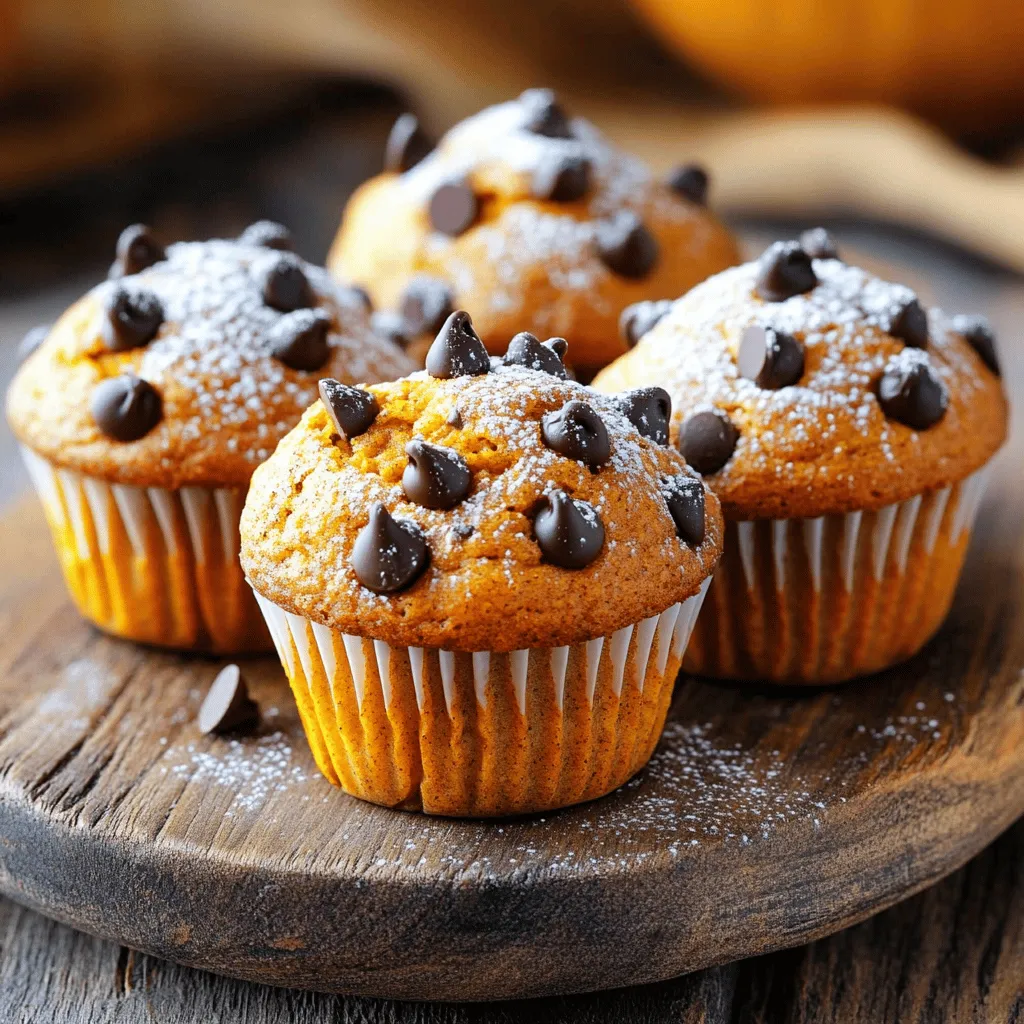
When the leaves change and the air gets crisp, I crave something warm and cozy. That’s where Pumpkin Chocolate Chip Muffins come in. These treats are the perfect mix of sweet pumpkin and rich chocolate. They’re easy to make and will fill your kitchen with delicious smells. Let’s dive into the simple steps and tips to bake your own batch of these irresistible muffins!
Ingredients
To make delicious pumpkin chocolate chip muffins, you need the right ingredients. Here’s what you will need:
– 1 cup canned pumpkin puree
– 1/2 cup packed brown sugar
– 1/4 cup granulated sugar
– 1/3 cup vegetable oil
– 2 large eggs
– 1 teaspoon pure vanilla extract
– 1 1/2 cups all-purpose flour
– 1 teaspoon baking soda
– 1/2 teaspoon baking powder
– 1/2 teaspoon fine salt
– 1 teaspoon ground cinnamon
– 1/2 teaspoon ground nutmeg
– 1/4 teaspoon ground ginger
– 1 cup semi-sweet chocolate chips
– Optional: 1/2 cup chopped walnuts or pecans
Using quality ingredients makes a big difference in taste. The pumpkin puree brings moisture and flavor. The sugars add sweetness and help with browning. The spices give your muffins a warm, cozy taste.
I often choose semi-sweet chocolate chips for their rich flavor. If you want a crunch, add chopped nuts. They pair well with the soft muffin texture.
For the best results, measure your ingredients accurately. Fresh spices also enhance the flavors.Each ingredient plays a part in making your muffins irresistible!
Step-by-Step Instructions
Preheat the Oven
First, set your oven to 350°F (175°C). This temperature helps the muffins rise just right. While the oven heats, prepare your muffin tin. You can line each cup with paper liners or spray them lightly with cooking oil. This step keeps the muffins from sticking.
Mix Wet Ingredients
In a large bowl, combine the canned pumpkin puree, brown sugar, granulated sugar, vegetable oil, eggs, and vanilla extract. Whisk these ingredients together until smooth. Make sure there are no lumps. A well-mixed blend ensures your muffins are rich and moist.
Combine Dry Ingredients
In another bowl, sift the all-purpose flour, baking soda, baking powder, salt, cinnamon, nutmeg, and ginger. Sifting helps incorporate air into the flour. This aeration makes your muffins light and fluffy. Mix the dry ingredients well to ensure even flavor throughout.
Incorporate Dry and Wet Mixtures
Gradually add the dry mix to the wet mixture. Stir gently with a spatula. It’s key not to overmix, as this can lead to dense muffins. Just mix until combined. A few flour streaks are okay.
Fill Muffin Cups
Spoon the batter into your prepared muffin cups. Fill each cup about two-thirds full. This fill level allows the muffins to rise without spilling over.
Bake to Perfection
Place the muffin tin in the oven. Bake for 18 to 22 minutes. To check if they are ready, insert a toothpick into the center of a muffin. It should come out clean or with a few moist crumbs.
Cool and Serve
After baking, take the muffin tin out of the oven. Let the muffins cool in the pan for about 5 minutes. Then, transfer them to a wire rack to cool completely. This step helps keep their texture. For serving, you can try dusting them with powdered sugar or adding a scoop of whipped cream cheese. Enjoy the flavors!
Tips & Tricks
Achieving the Best Texture
To get a fluffy texture, start with room temperature ingredients. Cold eggs or pumpkin can lead to dense muffins. Make sure to mix gently. Overmixing can harm the texture. Blend just until you see no dry flour.
Enhancing Flavor
Adding spices can elevate your muffins. Think about using allspice or cloves for warmth. I also like to use high-quality chocolate. Choose chocolate with at least 60% cocoa for a rich flavor. Higher quality chocolate melts better, making every bite special.
Presentation Tips
Serve your muffins warm on a nice plate. A rustic wooden platter adds charm. Dust a bit of powdered sugar on top for style. You can also add a dollop of whipped cream cheese. This creates a lovely pairing with the spiced muffins.
Variations
Healthier Alternatives
You can make these muffins healthier with a few simple swaps. First, consider using whole wheat flour instead of all-purpose flour. Whole wheat flour adds fiber and nutrients, making your muffins more filling. You can also reduce the sugars. Try using just 1/4 cup of brown sugar instead of 1/2 cup. This change still keeps them sweet but cuts down on extra sugar.
Flavor Variations
To change up the flavor, think about adding fruits or nuts. Chopped apples or pears work well and add moisture. If you want a crunch, add walnuts or pecans. You can also explore different types of chocolate. Try dark chocolate chips for a richer taste or even white chocolate for a sweeter twist. These small changes can make a big difference in your muffins!
Seasonal Twists
Make your muffins festive by adding seasonal spices. For fall, you can mix in some cloves or allspice for a warm flavor. During the holidays, consider adding cranberries or even a cream cheese filling. These additions not only make your muffins stand out but also add fun flavors that match the season.
Storage Info
Best Storage Practices
To keep your pumpkin chocolate chip muffins fresh, store them in an airtight container. Place a paper towel inside to absorb any moisture. This helps keep the muffins soft. Store them at room temperature for the best flavor and texture.
Freezing Instructions
Freezing muffins is easy. First, let them cool completely. Then, wrap each muffin in plastic wrap. Place the wrapped muffins in a freezer bag or container. Squeeze out as much air as possible before sealing. To thaw, simply leave them in the fridge overnight. To reheat, microwave for about 15-20 seconds or place in a warm oven for a few minutes.
Shelf Life
At room temperature, these muffins last about 3 to 5 days. If you notice any mold or a dry texture, it’s time to toss them. Always check for signs of spoilage. Fresh muffins should smell great and taste sweet and moist. Enjoy them while they’re at their best!
FAQs
How can I make these muffins gluten-free?
To make gluten-free pumpkin chocolate chip muffins, you can use gluten-free flour. I recommend a blend that includes rice flour, tapioca flour, and almond flour for the best results. You can also add a teaspoon of xanthan gum to help with texture. This works well in the recipe without changing the taste much.
Can I use fresh pumpkin instead of canned?
Yes, you can use fresh pumpkin! To prepare fresh pumpkin, start by cutting a small pumpkin in half. Remove the seeds and strings. Roast the halves cut-side down in a baking dish at 400°F for about 45 minutes. Once soft, scoop out the flesh and puree it until smooth. This fresh puree adds a lovely flavor to your muffins.
What can I substitute for chocolate chips?
If you want to swap out chocolate chips, try using dried fruit like cranberries or raisins. You could also use white chocolate chips for a different taste. Chopped nuts like walnuts or pecans add a nice crunch, too. These options can make your muffins unique while still being delicious.
Can I make a mini version of these muffins?
Absolutely! To make mini muffins, fill each cup about halfway. Bake them at the same temperature, but check for doneness around 12 to 15 minutes. A toothpick inserted should come out clean. Mini muffins are perfect for snacks or parties!
Are these muffins suitable for freezing?
Yes, these muffins freeze well! To freeze, let them cool completely. Place them in an airtight container or freezer bag. They can last up to three months in the freezer. Just remember to label the container with the date for easy tracking.
What is the best way to reheat leftover muffins?
The best way to reheat muffins is in the oven. Preheat it to 350°F and place the muffins on a baking sheet. Heat for about 5 to 10 minutes until warm. This keeps the muffins moist and brings back their fresh-baked flavor. Enjoy them with a pat of butter or cream cheese!
This blog post covered how to make delicious pumpkin muffins from scratch. We discussed key ingredients, step-by-step instructions, and tips to enhance flavor and texture. You learned about various storage methods to keep your muffins fresh, along with options for healthier variations.
With these simple recipes and ideas, you can enjoy tasty treats all year. Don’t hesitate to experiment and make these muffins your own. Happy baking!
![To make delicious pumpkin chocolate chip muffins, you need the right ingredients. Here’s what you will need: - 1 cup canned pumpkin puree - 1/2 cup packed brown sugar - 1/4 cup granulated sugar - 1/3 cup vegetable oil - 2 large eggs - 1 teaspoon pure vanilla extract - 1 1/2 cups all-purpose flour - 1 teaspoon baking soda - 1/2 teaspoon baking powder - 1/2 teaspoon fine salt - 1 teaspoon ground cinnamon - 1/2 teaspoon ground nutmeg - 1/4 teaspoon ground ginger - 1 cup semi-sweet chocolate chips - Optional: 1/2 cup chopped walnuts or pecans Using quality ingredients makes a big difference in taste. The pumpkin puree brings moisture and flavor. The sugars add sweetness and help with browning. The spices give your muffins a warm, cozy taste. I often choose semi-sweet chocolate chips for their rich flavor. If you want a crunch, add chopped nuts. They pair well with the soft muffin texture. For the best results, measure your ingredients accurately. Fresh spices also enhance the flavors. You can find the full recipe [here]. Each ingredient plays a part in making your muffins irresistible! First, set your oven to 350°F (175°C). This temperature helps the muffins rise just right. While the oven heats, prepare your muffin tin. You can line each cup with paper liners or spray them lightly with cooking oil. This step keeps the muffins from sticking. In a large bowl, combine the canned pumpkin puree, brown sugar, granulated sugar, vegetable oil, eggs, and vanilla extract. Whisk these ingredients together until smooth. Make sure there are no lumps. A well-mixed blend ensures your muffins are rich and moist. In another bowl, sift the all-purpose flour, baking soda, baking powder, salt, cinnamon, nutmeg, and ginger. Sifting helps incorporate air into the flour. This aeration makes your muffins light and fluffy. Mix the dry ingredients well to ensure even flavor throughout. Gradually add the dry mix to the wet mixture. Stir gently with a spatula. It’s key not to overmix, as this can lead to dense muffins. Just mix until combined. A few flour streaks are okay. Spoon the batter into your prepared muffin cups. Fill each cup about two-thirds full. This fill level allows the muffins to rise without spilling over. Place the muffin tin in the oven. Bake for 18 to 22 minutes. To check if they are ready, insert a toothpick into the center of a muffin. It should come out clean or with a few moist crumbs. After baking, take the muffin tin out of the oven. Let the muffins cool in the pan for about 5 minutes. Then, transfer them to a wire rack to cool completely. This step helps keep their texture. For serving, you can try dusting them with powdered sugar or adding a scoop of whipped cream cheese. Enjoy the flavors! To get a fluffy texture, start with room temperature ingredients. Cold eggs or pumpkin can lead to dense muffins. Make sure to mix gently. Overmixing can harm the texture. Blend just until you see no dry flour. Adding spices can elevate your muffins. Think about using allspice or cloves for warmth. I also like to use high-quality chocolate. Choose chocolate with at least 60% cocoa for a rich flavor. Higher quality chocolate melts better, making every bite special. Serve your muffins warm on a nice plate. A rustic wooden platter adds charm. Dust a bit of powdered sugar on top for style. You can also add a dollop of whipped cream cheese. This creates a lovely pairing with the spiced muffins. {{image_4}} You can make these muffins healthier with a few simple swaps. First, consider using whole wheat flour instead of all-purpose flour. Whole wheat flour adds fiber and nutrients, making your muffins more filling. You can also reduce the sugars. Try using just 1/4 cup of brown sugar instead of 1/2 cup. This change still keeps them sweet but cuts down on extra sugar. To change up the flavor, think about adding fruits or nuts. Chopped apples or pears work well and add moisture. If you want a crunch, add walnuts or pecans. You can also explore different types of chocolate. Try dark chocolate chips for a richer taste or even white chocolate for a sweeter twist. These small changes can make a big difference in your muffins! Make your muffins festive by adding seasonal spices. For fall, you can mix in some cloves or allspice for a warm flavor. During the holidays, consider adding cranberries or even a cream cheese filling. These additions not only make your muffins stand out but also add fun flavors that match the season. You can find the full recipe for these delicious muffins and more ideas to try! To keep your pumpkin chocolate chip muffins fresh, store them in an airtight container. Place a paper towel inside to absorb any moisture. This helps keep the muffins soft. Store them at room temperature for the best flavor and texture. Freezing muffins is easy. First, let them cool completely. Then, wrap each muffin in plastic wrap. Place the wrapped muffins in a freezer bag or container. Squeeze out as much air as possible before sealing. To thaw, simply leave them in the fridge overnight. To reheat, microwave for about 15-20 seconds or place in a warm oven for a few minutes. At room temperature, these muffins last about 3 to 5 days. If you notice any mold or a dry texture, it’s time to toss them. Always check for signs of spoilage. Fresh muffins should smell great and taste sweet and moist. Enjoy them while they're at their best! To make gluten-free pumpkin chocolate chip muffins, you can use gluten-free flour. I recommend a blend that includes rice flour, tapioca flour, and almond flour for the best results. You can also add a teaspoon of xanthan gum to help with texture. This works well in the recipe without changing the taste much. Yes, you can use fresh pumpkin! To prepare fresh pumpkin, start by cutting a small pumpkin in half. Remove the seeds and strings. Roast the halves cut-side down in a baking dish at 400°F for about 45 minutes. Once soft, scoop out the flesh and puree it until smooth. This fresh puree adds a lovely flavor to your muffins. If you want to swap out chocolate chips, try using dried fruit like cranberries or raisins. You could also use white chocolate chips for a different taste. Chopped nuts like walnuts or pecans add a nice crunch, too. These options can make your muffins unique while still being delicious. Absolutely! To make mini muffins, fill each cup about halfway. Bake them at the same temperature, but check for doneness around 12 to 15 minutes. A toothpick inserted should come out clean. Mini muffins are perfect for snacks or parties! Yes, these muffins freeze well! To freeze, let them cool completely. Place them in an airtight container or freezer bag. They can last up to three months in the freezer. Just remember to label the container with the date for easy tracking. The best way to reheat muffins is in the oven. Preheat it to 350°F and place the muffins on a baking sheet. Heat for about 5 to 10 minutes until warm. This keeps the muffins moist and brings back their fresh-baked flavor. Enjoy them with a pat of butter or cream cheese! This blog post covered how to make delicious pumpkin muffins from scratch. We discussed key ingredients, step-by-step instructions, and tips to enhance flavor and texture. You learned about various storage methods to keep your muffins fresh, along with options for healthier variations. With these simple recipes and ideas, you can enjoy tasty treats all year. Don’t hesitate to experiment and make these muffins your own. Happy baking!](https://recipetorch.com/wp-content/uploads/2025/07/243228be-46c5-46ed-a0fc-ef599cd80a37-250x250.webp)
