![To make these tasty no-bake s'mores bars, gather the following items: - 1 ½ cups graham cracker crumbs - ½ cup unsweetened cocoa powder - ½ cup powdered sugar - ½ cup unsalted butter, melted - 2 cups mini marshmallows - 1 cup semisweet chocolate chips - ½ cup creamy peanut butter - 1 teaspoon vanilla extract - A pinch of salt You can easily swap some ingredients if you need to. For graham cracker crumbs, use crushed cookies like digestive biscuits for a similar flavor. If you prefer a richer taste, try dark cocoa powder instead of unsweetened cocoa powder. You can use margarine if you don't have unsalted butter. For a nut-free version, skip the peanut butter. Instead, use sunbutter or almond butter if you are not allergic. If you want a different flavor, try flavored chocolate chips, like mint or caramel. For graham crackers, I like Honey Maid or Nabisco. They have a nice crunch and flavor. When it comes to chocolate chips, Ghirardelli or Nestlé are great choices. Their chips melt smoothly and taste amazing. For peanut butter, Jif or Skippy work well for this recipe. These ingredient choices help make your no-bake s'mores bars both simple and delicious. For detailed steps on making this treat, check the Full Recipe. 1. Mix Dry Ingredients: First, grab a large mixing bowl. Add 1 ½ cups of graham cracker crumbs, ½ cup of unsweetened cocoa powder, and ½ cup of powdered sugar. Use a whisk or fork to mix them well. This should take about 2 minutes. Make sure there are no clumps. 2. Incorporate Butter: Next, take ½ cup of melted unsalted butter. Pour it into the dry mix slowly. Use a spatula to fold it in. Keep mixing until it looks like wet sand. This step should take around 3 minutes. 3. Form the Base: Now, transfer the mixture into a greased 8x8 inch baking dish. Use the back of a spatula or your hands to press it down firmly. Aim for an even layer. This should take about 2 minutes. 4. Melt Chocolate and Peanut Butter: In a microwave-safe bowl, combine 1 cup of semisweet chocolate chips and ½ cup of creamy peanut butter. Heat this in the microwave for 30 seconds at a time. Stir after each round. This should take about 1-2 minutes. 5. Flavor the Chocolate: After melting, stir in 1 teaspoon of vanilla extract and a pinch of salt. Mix until smooth for the best taste. This part takes about 1 minute. 6. Layer the Chocolate Mixture: Pour the melted chocolate-peanut butter mix over the pressed graham cracker base. Use a spatula to spread it out evenly. 7. Add Marshmallows: Sprinkle 2 cups of mini marshmallows on top. Press them down gently into the chocolate layer. 8. Refrigerate to Set: Place the baking dish in the fridge. Let the bars chill for at least 2 hours. This helps the chocolate set properly. 9. Cut and Serve: After 2 hours, check if the bars are firm. If they are, remove them from the dish. You can use parchment paper edges to help lift them out. Cut into 16 equal squares and serve. To properly set the bars, make sure they are in the fridge for at least 2 hours. This allows the chocolate to firm up and makes cutting easier. When you’re ready to cut the bars, use a sharp knife. If you want neat cuts, dip the knife in hot water first. Wipe it clean between cuts for the best results. For serving, arrange the bars on a nice platter. Drizzle some melted chocolate over the top for that extra touch. You can also garnish with whole graham crackers or toasted marshmallows. This makes your dessert look fancy and fun! For the full recipe details, check out [Full Recipe]. Making No-Bake S'mores Bars can be fun, but some errors can spoil your treat. Here are some common mistakes: - Using too much butter: This can make the base too greasy. Stick to the ½ cup. - Not pressing the base firmly: If you don’t press it down, the bars may crumble when cut. Use a spatula or your hands to make it compact. - Skipping the refrigeration step: These bars need time to set. Skipping this step can lead to a gooey mess. Chill for at least 2 hours. If you run into issues, don’t worry. If the base crumbles, try adding a bit more melted butter and mix it well. If the chocolate layer is too thick, you can melt it again with a little butter to make it smoother. To get the best texture in your No-Bake S'mores Bars, follow these expert tips: - Use fresh ingredients: This includes your graham crackers, chocolate, and marshmallows. Fresh ingredients yield better flavor and texture. - Melt chocolate carefully: Heat it slowly in the microwave. Stir often to avoid burning. This step makes a huge difference in how the chocolate mixes with the peanut butter. - Layer evenly: When you pour the chocolate mixture over the base, spread it out evenly. This ensures every bite has a good balance of flavors. For storage, keep the bars in an airtight container in the fridge. This helps them stay fresh for up to a week. If you want to keep them longer, consider freezing them. Just wrap them tightly in plastic wrap before placing them in a freezer-safe container. {{image_4}} You can mix and match flavors for your no-bake s'mores bars. Here are some ideas: - Chocolate Types: Try using dark chocolate for a rich taste. Milk chocolate is sweeter and creamier. White chocolate adds a fun twist. Each type changes the flavor and texture. - Alternative Toppings: Nuts like almonds or pecans give a nice crunch. Fruits like sliced bananas or strawberries add freshness. Flavored marshmallows, such as chocolate or caramel, can enhance the taste. Experimenting with these options makes your bars unique and exciting! If you need to make dietary changes, here are some simple swaps: - Gluten-Free Options: Use gluten-free graham crackers or ground oats instead of regular crumbs. This keeps the bars tasty for everyone. - Vegan Substitutes: Replace the butter with coconut oil. Use dairy-free chocolate chips and marshmallows. Peanut butter is already vegan, making it a great choice for this recipe. These adjustments help you enjoy delicious no-bake s'mores bars while meeting your dietary needs! For the full recipe, check it out [here](#). To keep your No-Bake S'mores Bars fresh, refrigerate them. Use an airtight container to prevent drying out. You can also cover them with plastic wrap. This will keep the bars moist and tasty. These bars stay fresh in the fridge for about a week. For the best flavor, try to eat them within four days. If you want to enjoy these bars later, freezing works well. Start by cutting the bars into squares. Wrap each square in plastic wrap tightly. Then, place them in a freezer-safe bag or container. You can freeze them for up to three months without losing taste. When you’re ready to eat, take a square out and let it thaw in the fridge. This usually takes a few hours. For a quicker option, you can leave it at room temperature for about 30 minutes. Enjoy your tasty treat! No-Bake S'mores Bars are a fun dessert that combines the flavors of s'mores without needing an oven. These bars have a base made of graham crackers, cocoa, and butter. I mix melted chocolate and peanut butter for a creamy layer. Topped with mini marshmallows, they give you that classic campfire taste in a quick, easy form. You can enjoy them chilled, making them perfect for hot days. Yes, you can substitute some ingredients! Here are a few ideas: - Graham cracker crumbs: Use crushed cookies like Oreos for a chocolate twist. - Cocoa powder: Try carob powder for a different flavor. - Creamy peanut butter: Almond or cashew butter works well too. - Mini marshmallows: Use larger marshmallows, but cut them down to size. Substitutions may change the taste or texture, but they can also add fun variety. These bars can last about a week when stored properly. Keep them in an airtight container in the fridge. This helps maintain their texture and flavor. If you notice any moisture, place a paper towel inside the container to absorb it. This can help keep your bars fresh longer. Absolutely! You can make No-Bake S'mores Bars one to two days before your event. After making them, let them chill in the fridge. This allows the layers to set nicely. If you prepare them the night before, they will be ready to serve the next day. Just cut and place them on a platter when it's time to enjoy! For the full recipe, check out the detailed steps above. In this blog post, we explored how to make delicious no-bake s'mores bars. We covered the key ingredients, detailed steps, and tips to avoid common mistakes. You learned about variations and how to store and freeze your bars. For best results, follow each step carefully and experiment with flavors. Enjoy loving these treats with family and friends! Happy cooking!](https://recipetorch.com/wp-content/uploads/2025/06/c06ae8b6-7658-4ee8-869a-7730bbaa2810-768x768.webp)
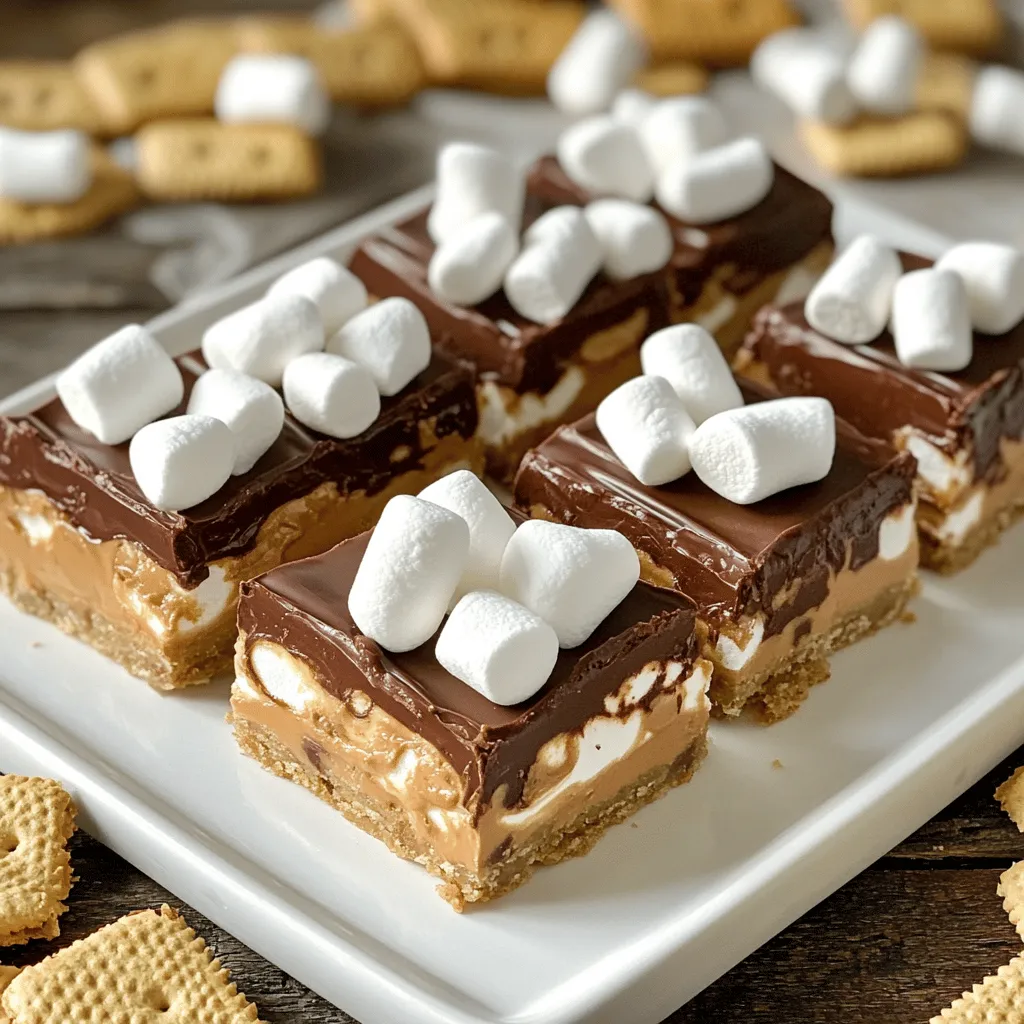
Craving a sweet treat but want to skip the oven? I’ve got you covered with these mouth-watering No-Bake S’mores Bars! This simple recipe combines graham crackers, chocolate, and marshmallows for a delightful dessert your family will love. Perfect for summer or any time you want a sweet bite without the fuss, these bars are quick and easy to make. Let’s dive into the ingredients and get started on your new favorite dessert!
Ingredients
Complete List of Ingredients
To make these tasty no-bake s’mores bars, gather the following items:
– 1 ½ cups graham cracker crumbs
– ½ cup unsweetened cocoa powder
– ½ cup powdered sugar
– ½ cup unsalted butter, melted
– 2 cups mini marshmallows
– 1 cup semisweet chocolate chips
– ½ cup creamy peanut butter
– 1 teaspoon vanilla extract
– A pinch of salt
Ingredient Substitutions
You can easily swap some ingredients if you need to. For graham cracker crumbs, use crushed cookies like digestive biscuits for a similar flavor. If you prefer a richer taste, try dark cocoa powder instead of unsweetened cocoa powder. You can use margarine if you don’t have unsalted butter.
For a nut-free version, skip the peanut butter. Instead, use sunbutter or almond butter if you are not allergic. If you want a different flavor, try flavored chocolate chips, like mint or caramel.
Recommended Brands
For graham crackers, I like Honey Maid or Nabisco. They have a nice crunch and flavor. When it comes to chocolate chips, Ghirardelli or Nestlé are great choices. Their chips melt smoothly and taste amazing. For peanut butter, Jif or Skippy work well for this recipe.
These ingredient choices help make your no-bake s’mores bars both simple and delicious.
Step-by-Step Instructions
Preparation Process
1. Mix Dry Ingredients: First, grab a large mixing bowl. Add 1 ½ cups of graham cracker crumbs, ½ cup of unsweetened cocoa powder, and ½ cup of powdered sugar. Use a whisk or fork to mix them well. This should take about 2 minutes. Make sure there are no clumps.
2. Incorporate Butter: Next, take ½ cup of melted unsalted butter. Pour it into the dry mix slowly. Use a spatula to fold it in. Keep mixing until it looks like wet sand. This step should take around 3 minutes.
3. Form the Base: Now, transfer the mixture into a greased 8×8 inch baking dish. Use the back of a spatula or your hands to press it down firmly. Aim for an even layer. This should take about 2 minutes.
4. Melt Chocolate and Peanut Butter: In a microwave-safe bowl, combine 1 cup of semisweet chocolate chips and ½ cup of creamy peanut butter. Heat this in the microwave for 30 seconds at a time. Stir after each round. This should take about 1-2 minutes.
5. Flavor the Chocolate: After melting, stir in 1 teaspoon of vanilla extract and a pinch of salt. Mix until smooth for the best taste. This part takes about 1 minute.
6. Layer the Chocolate Mixture: Pour the melted chocolate-peanut butter mix over the pressed graham cracker base. Use a spatula to spread it out evenly.
7. Add Marshmallows: Sprinkle 2 cups of mini marshmallows on top. Press them down gently into the chocolate layer.
8. Refrigerate to Set: Place the baking dish in the fridge. Let the bars chill for at least 2 hours. This helps the chocolate set properly.
9. Cut and Serve: After 2 hours, check if the bars are firm. If they are, remove them from the dish. You can use parchment paper edges to help lift them out. Cut into 16 equal squares and serve.
Setting and Serving
To properly set the bars, make sure they are in the fridge for at least 2 hours. This allows the chocolate to firm up and makes cutting easier.
When you’re ready to cut the bars, use a sharp knife. If you want neat cuts, dip the knife in hot water first. Wipe it clean between cuts for the best results.
For serving, arrange the bars on a nice platter. Drizzle some melted chocolate over the top for that extra touch. You can also garnish with whole graham crackers or toasted marshmallows. This makes your dessert look fancy and fun!
Tips & Tricks
Common Mistakes to Avoid
Making No-Bake S’mores Bars can be fun, but some errors can spoil your treat. Here are some common mistakes:
– Using too much butter: This can make the base too greasy. Stick to the ½ cup.
– Not pressing the base firmly: If you don’t press it down, the bars may crumble when cut. Use a spatula or your hands to make it compact.
– Skipping the refrigeration step: These bars need time to set. Skipping this step can lead to a gooey mess. Chill for at least 2 hours.
If you run into issues, don’t worry. If the base crumbles, try adding a bit more melted butter and mix it well. If the chocolate layer is too thick, you can melt it again with a little butter to make it smoother.
Expert Tips for Perfecting the Recipe
To get the best texture in your No-Bake S’mores Bars, follow these expert tips:
– Use fresh ingredients: This includes your graham crackers, chocolate, and marshmallows. Fresh ingredients yield better flavor and texture.
– Melt chocolate carefully: Heat it slowly in the microwave. Stir often to avoid burning. This step makes a huge difference in how the chocolate mixes with the peanut butter.
– Layer evenly: When you pour the chocolate mixture over the base, spread it out evenly. This ensures every bite has a good balance of flavors.
For storage, keep the bars in an airtight container in the fridge. This helps them stay fresh for up to a week. If you want to keep them longer, consider freezing them. Just wrap them tightly in plastic wrap before placing them in a freezer-safe container.
Variations
Flavor Combinations
You can mix and match flavors for your no-bake s’mores bars. Here are some ideas:
– Chocolate Types: Try using dark chocolate for a rich taste. Milk chocolate is sweeter and creamier. White chocolate adds a fun twist. Each type changes the flavor and texture.
– Alternative Toppings: Nuts like almonds or pecans give a nice crunch. Fruits like sliced bananas or strawberries add freshness. Flavored marshmallows, such as chocolate or caramel, can enhance the taste.
Experimenting with these options makes your bars unique and exciting!
Dietary Adjustments
If you need to make dietary changes, here are some simple swaps:
– Gluten-Free Options: Use gluten-free graham crackers or ground oats instead of regular crumbs. This keeps the bars tasty for everyone.
– Vegan Substitutes: Replace the butter with coconut oil. Use dairy-free chocolate chips and marshmallows. Peanut butter is already vegan, making it a great choice for this recipe.
These adjustments help you enjoy delicious no-bake s’mores bars while meeting your dietary needs!
Storage Info
How to Store No-Bake S’mores Bars
To keep your No-Bake S’mores Bars fresh, refrigerate them. Use an airtight container to prevent drying out. You can also cover them with plastic wrap. This will keep the bars moist and tasty. These bars stay fresh in the fridge for about a week. For the best flavor, try to eat them within four days.
Freezing Instructions
If you want to enjoy these bars later, freezing works well. Start by cutting the bars into squares. Wrap each square in plastic wrap tightly. Then, place them in a freezer-safe bag or container. You can freeze them for up to three months without losing taste.
When you’re ready to eat, take a square out and let it thaw in the fridge. This usually takes a few hours. For a quicker option, you can leave it at room temperature for about 30 minutes. Enjoy your tasty treat!
FAQs
What are No-Bake S’mores Bars?
No-Bake S’mores Bars are a fun dessert that combines the flavors of s’mores without needing an oven. These bars have a base made of graham crackers, cocoa, and butter. I mix melted chocolate and peanut butter for a creamy layer. Topped with mini marshmallows, they give you that classic campfire taste in a quick, easy form. You can enjoy them chilled, making them perfect for hot days.
Can I substitute ingredients in this recipe?
Yes, you can substitute some ingredients! Here are a few ideas:
– Graham cracker crumbs: Use crushed cookies like Oreos for a chocolate twist.
– Cocoa powder: Try carob powder for a different flavor.
– Creamy peanut butter: Almond or cashew butter works well too.
– Mini marshmallows: Use larger marshmallows, but cut them down to size.
Substitutions may change the taste or texture, but they can also add fun variety.
How long do No-Bake S’mores Bars last?
These bars can last about a week when stored properly. Keep them in an airtight container in the fridge. This helps maintain their texture and flavor. If you notice any moisture, place a paper towel inside the container to absorb it. This can help keep your bars fresh longer.
Can I make these bars ahead of time?
Absolutely! You can make No-Bake S’mores Bars one to two days before your event. After making them, let them chill in the fridge. This allows the layers to set nicely. If you prepare them the night before, they will be ready to serve the next day. Just cut and place them on a platter when it’s time to enjoy!
In this blog post, we explored how to make delicious no-bake s’mores bars. We covered the key ingredients, detailed steps, and tips to avoid common mistakes. You learned about variations and how to store and freeze your bars.
For best results, follow each step carefully and experiment with flavors. Enjoy loving these treats with family and friends! Happy cooking!
![To make these tasty no-bake s'mores bars, gather the following items: - 1 ½ cups graham cracker crumbs - ½ cup unsweetened cocoa powder - ½ cup powdered sugar - ½ cup unsalted butter, melted - 2 cups mini marshmallows - 1 cup semisweet chocolate chips - ½ cup creamy peanut butter - 1 teaspoon vanilla extract - A pinch of salt You can easily swap some ingredients if you need to. For graham cracker crumbs, use crushed cookies like digestive biscuits for a similar flavor. If you prefer a richer taste, try dark cocoa powder instead of unsweetened cocoa powder. You can use margarine if you don't have unsalted butter. For a nut-free version, skip the peanut butter. Instead, use sunbutter or almond butter if you are not allergic. If you want a different flavor, try flavored chocolate chips, like mint or caramel. For graham crackers, I like Honey Maid or Nabisco. They have a nice crunch and flavor. When it comes to chocolate chips, Ghirardelli or Nestlé are great choices. Their chips melt smoothly and taste amazing. For peanut butter, Jif or Skippy work well for this recipe. These ingredient choices help make your no-bake s'mores bars both simple and delicious. For detailed steps on making this treat, check the Full Recipe. 1. Mix Dry Ingredients: First, grab a large mixing bowl. Add 1 ½ cups of graham cracker crumbs, ½ cup of unsweetened cocoa powder, and ½ cup of powdered sugar. Use a whisk or fork to mix them well. This should take about 2 minutes. Make sure there are no clumps. 2. Incorporate Butter: Next, take ½ cup of melted unsalted butter. Pour it into the dry mix slowly. Use a spatula to fold it in. Keep mixing until it looks like wet sand. This step should take around 3 minutes. 3. Form the Base: Now, transfer the mixture into a greased 8x8 inch baking dish. Use the back of a spatula or your hands to press it down firmly. Aim for an even layer. This should take about 2 minutes. 4. Melt Chocolate and Peanut Butter: In a microwave-safe bowl, combine 1 cup of semisweet chocolate chips and ½ cup of creamy peanut butter. Heat this in the microwave for 30 seconds at a time. Stir after each round. This should take about 1-2 minutes. 5. Flavor the Chocolate: After melting, stir in 1 teaspoon of vanilla extract and a pinch of salt. Mix until smooth for the best taste. This part takes about 1 minute. 6. Layer the Chocolate Mixture: Pour the melted chocolate-peanut butter mix over the pressed graham cracker base. Use a spatula to spread it out evenly. 7. Add Marshmallows: Sprinkle 2 cups of mini marshmallows on top. Press them down gently into the chocolate layer. 8. Refrigerate to Set: Place the baking dish in the fridge. Let the bars chill for at least 2 hours. This helps the chocolate set properly. 9. Cut and Serve: After 2 hours, check if the bars are firm. If they are, remove them from the dish. You can use parchment paper edges to help lift them out. Cut into 16 equal squares and serve. To properly set the bars, make sure they are in the fridge for at least 2 hours. This allows the chocolate to firm up and makes cutting easier. When you’re ready to cut the bars, use a sharp knife. If you want neat cuts, dip the knife in hot water first. Wipe it clean between cuts for the best results. For serving, arrange the bars on a nice platter. Drizzle some melted chocolate over the top for that extra touch. You can also garnish with whole graham crackers or toasted marshmallows. This makes your dessert look fancy and fun! For the full recipe details, check out [Full Recipe]. Making No-Bake S'mores Bars can be fun, but some errors can spoil your treat. Here are some common mistakes: - Using too much butter: This can make the base too greasy. Stick to the ½ cup. - Not pressing the base firmly: If you don’t press it down, the bars may crumble when cut. Use a spatula or your hands to make it compact. - Skipping the refrigeration step: These bars need time to set. Skipping this step can lead to a gooey mess. Chill for at least 2 hours. If you run into issues, don’t worry. If the base crumbles, try adding a bit more melted butter and mix it well. If the chocolate layer is too thick, you can melt it again with a little butter to make it smoother. To get the best texture in your No-Bake S'mores Bars, follow these expert tips: - Use fresh ingredients: This includes your graham crackers, chocolate, and marshmallows. Fresh ingredients yield better flavor and texture. - Melt chocolate carefully: Heat it slowly in the microwave. Stir often to avoid burning. This step makes a huge difference in how the chocolate mixes with the peanut butter. - Layer evenly: When you pour the chocolate mixture over the base, spread it out evenly. This ensures every bite has a good balance of flavors. For storage, keep the bars in an airtight container in the fridge. This helps them stay fresh for up to a week. If you want to keep them longer, consider freezing them. Just wrap them tightly in plastic wrap before placing them in a freezer-safe container. {{image_4}} You can mix and match flavors for your no-bake s'mores bars. Here are some ideas: - Chocolate Types: Try using dark chocolate for a rich taste. Milk chocolate is sweeter and creamier. White chocolate adds a fun twist. Each type changes the flavor and texture. - Alternative Toppings: Nuts like almonds or pecans give a nice crunch. Fruits like sliced bananas or strawberries add freshness. Flavored marshmallows, such as chocolate or caramel, can enhance the taste. Experimenting with these options makes your bars unique and exciting! If you need to make dietary changes, here are some simple swaps: - Gluten-Free Options: Use gluten-free graham crackers or ground oats instead of regular crumbs. This keeps the bars tasty for everyone. - Vegan Substitutes: Replace the butter with coconut oil. Use dairy-free chocolate chips and marshmallows. Peanut butter is already vegan, making it a great choice for this recipe. These adjustments help you enjoy delicious no-bake s'mores bars while meeting your dietary needs! For the full recipe, check it out [here](#). To keep your No-Bake S'mores Bars fresh, refrigerate them. Use an airtight container to prevent drying out. You can also cover them with plastic wrap. This will keep the bars moist and tasty. These bars stay fresh in the fridge for about a week. For the best flavor, try to eat them within four days. If you want to enjoy these bars later, freezing works well. Start by cutting the bars into squares. Wrap each square in plastic wrap tightly. Then, place them in a freezer-safe bag or container. You can freeze them for up to three months without losing taste. When you’re ready to eat, take a square out and let it thaw in the fridge. This usually takes a few hours. For a quicker option, you can leave it at room temperature for about 30 minutes. Enjoy your tasty treat! No-Bake S'mores Bars are a fun dessert that combines the flavors of s'mores without needing an oven. These bars have a base made of graham crackers, cocoa, and butter. I mix melted chocolate and peanut butter for a creamy layer. Topped with mini marshmallows, they give you that classic campfire taste in a quick, easy form. You can enjoy them chilled, making them perfect for hot days. Yes, you can substitute some ingredients! Here are a few ideas: - Graham cracker crumbs: Use crushed cookies like Oreos for a chocolate twist. - Cocoa powder: Try carob powder for a different flavor. - Creamy peanut butter: Almond or cashew butter works well too. - Mini marshmallows: Use larger marshmallows, but cut them down to size. Substitutions may change the taste or texture, but they can also add fun variety. These bars can last about a week when stored properly. Keep them in an airtight container in the fridge. This helps maintain their texture and flavor. If you notice any moisture, place a paper towel inside the container to absorb it. This can help keep your bars fresh longer. Absolutely! You can make No-Bake S'mores Bars one to two days before your event. After making them, let them chill in the fridge. This allows the layers to set nicely. If you prepare them the night before, they will be ready to serve the next day. Just cut and place them on a platter when it's time to enjoy! For the full recipe, check out the detailed steps above. In this blog post, we explored how to make delicious no-bake s'mores bars. We covered the key ingredients, detailed steps, and tips to avoid common mistakes. You learned about variations and how to store and freeze your bars. For best results, follow each step carefully and experiment with flavors. Enjoy loving these treats with family and friends! Happy cooking!](https://recipetorch.com/wp-content/uploads/2025/06/c06ae8b6-7658-4ee8-869a-7730bbaa2810-250x250.webp)
